
HubSpot Task
What's on this page
Qtip: If you’re interested in purchasing this extension, check it out on the XM Marketplace!
About the HubSpot Task
You can create or update deals and contacts in HubSpot based on events in Qualtrics. That way you can integrate your Qualtrics Experience Management systems with incoming sales opportunities. For example, a Qualtrics survey where respondents fill out contact information can create new contacts in HubSpot, and a survey you send to interested parties upon the close of a deal can create a deal in HubSpot as soon as the response is submitted.
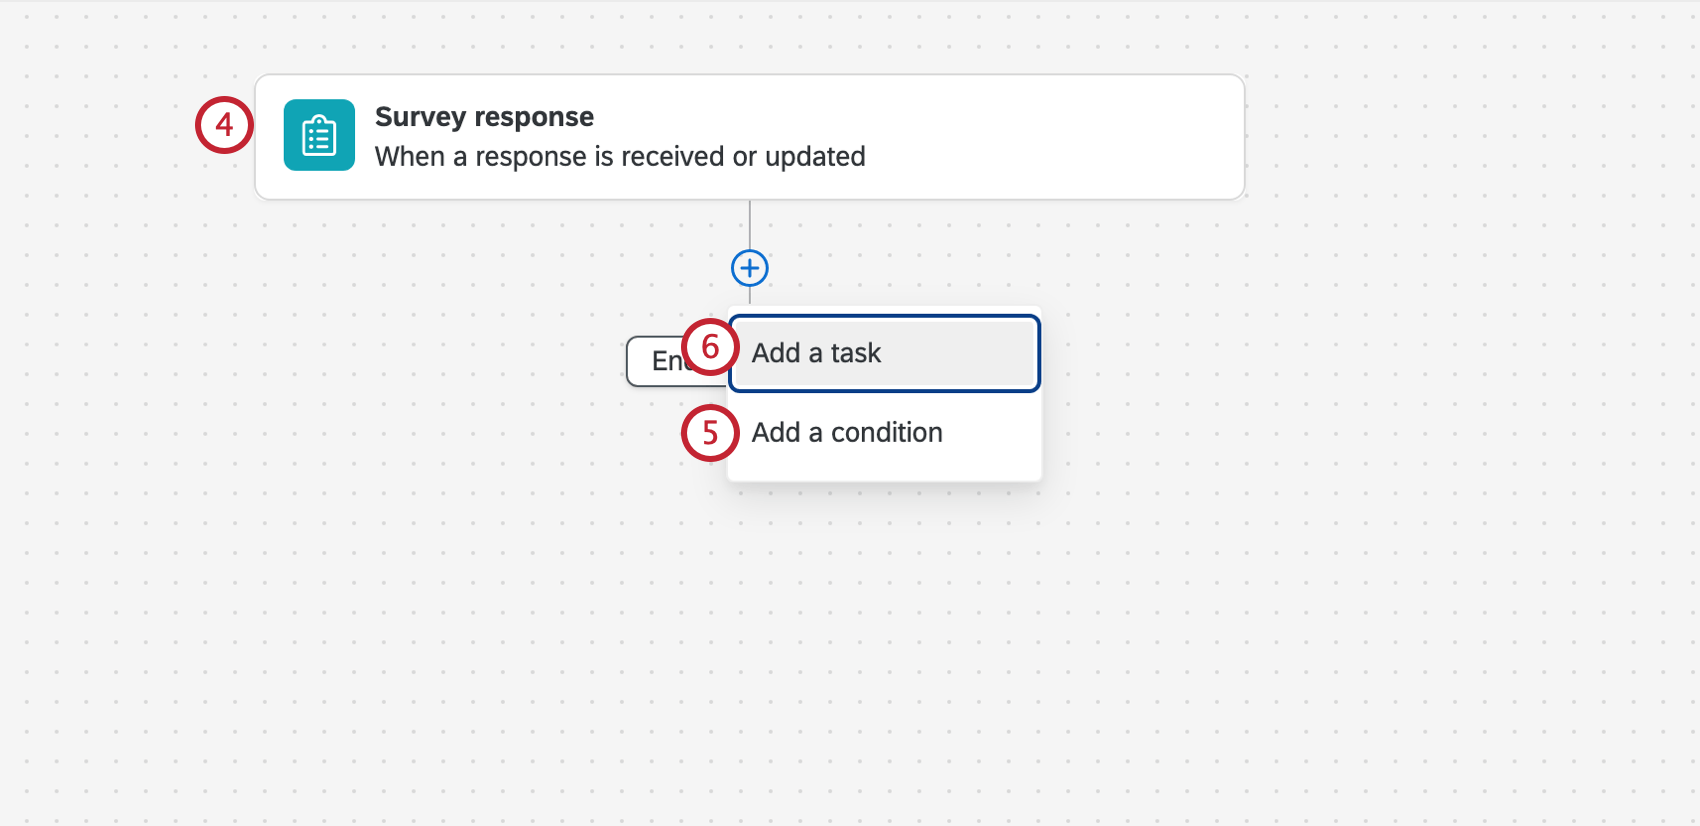
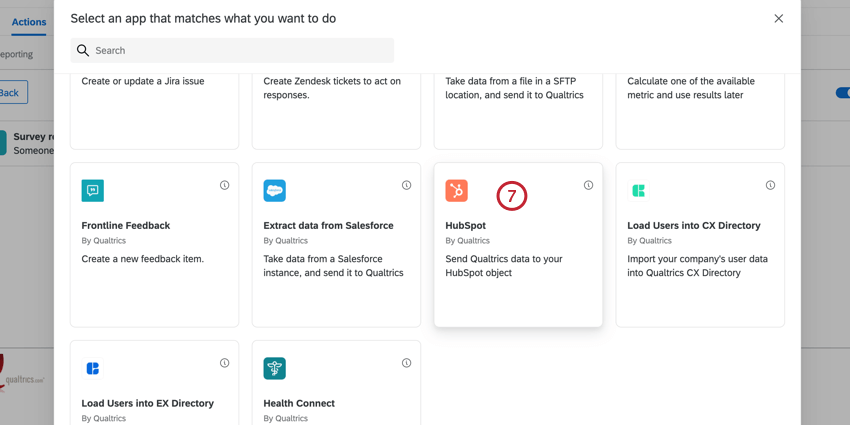
Setting Up a HubSpot Task
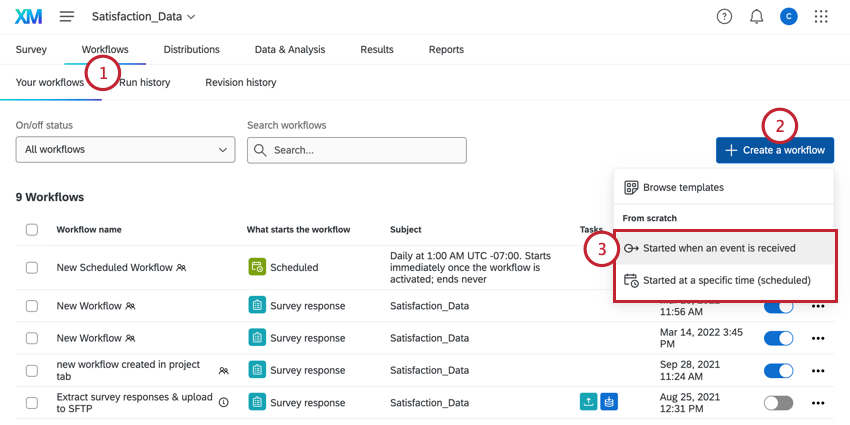
Qtip: This is most helpful if you don’t want a HubSpot ticket created or updated for every single response that is submitted to the survey.
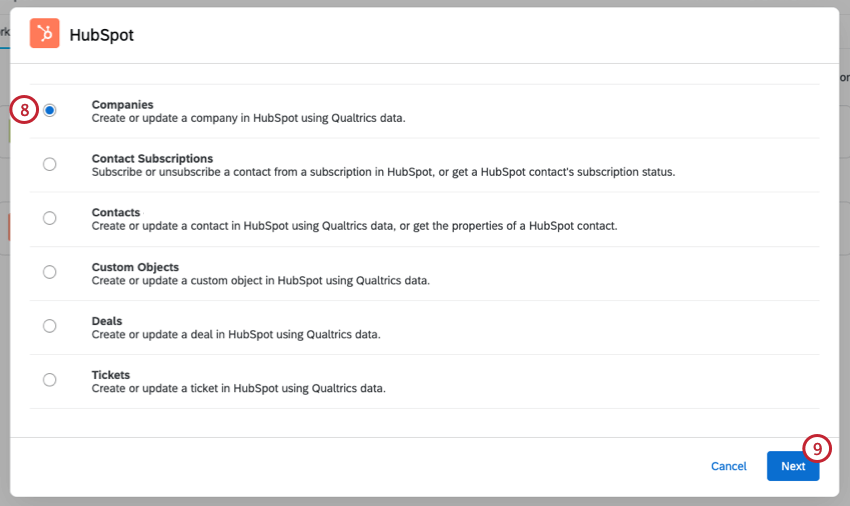
- Companies
- Contact Subscriptions
- Contacts
- Custom Objects
- Deals
- Tickets
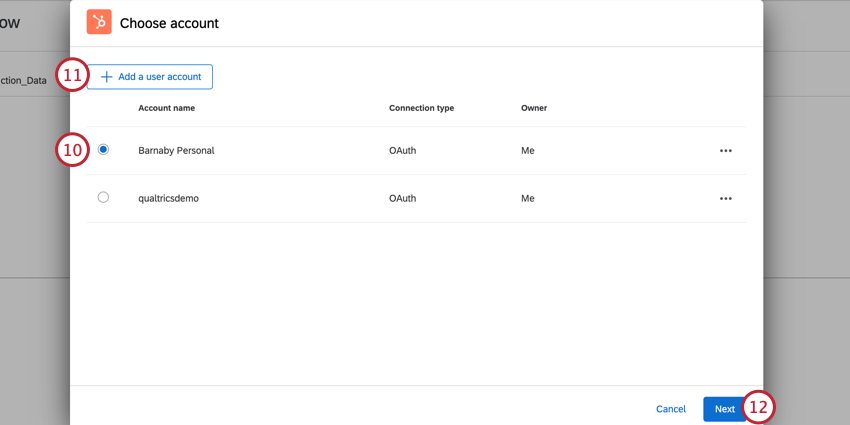
Qtip: Here, you will see any HubSpot accounts your Brand Administrator has configured in your license’s Extensions. Additionally, you will see any personal HubSpot accounts you’ve previously connected to your Qualtrics account.
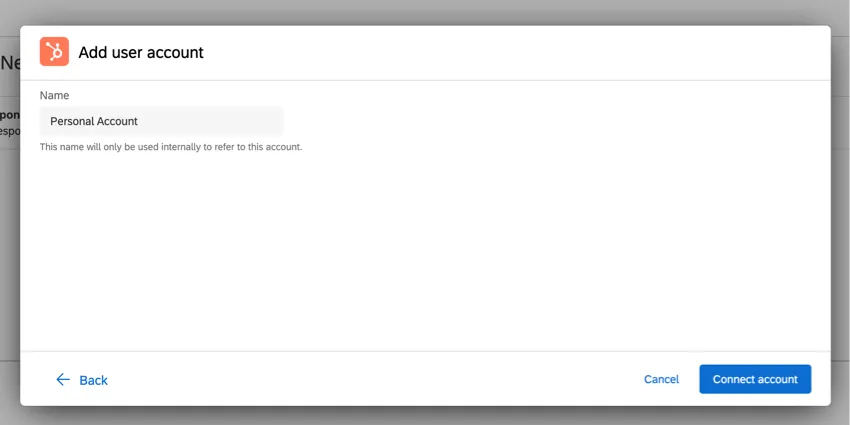
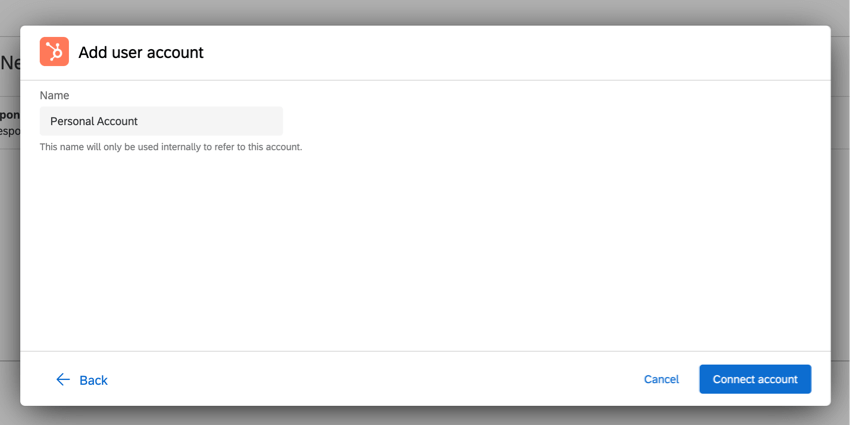
Qtip: When adding a new account, you need to give your account a name. Make sure to pick a name that is easily identifiable.
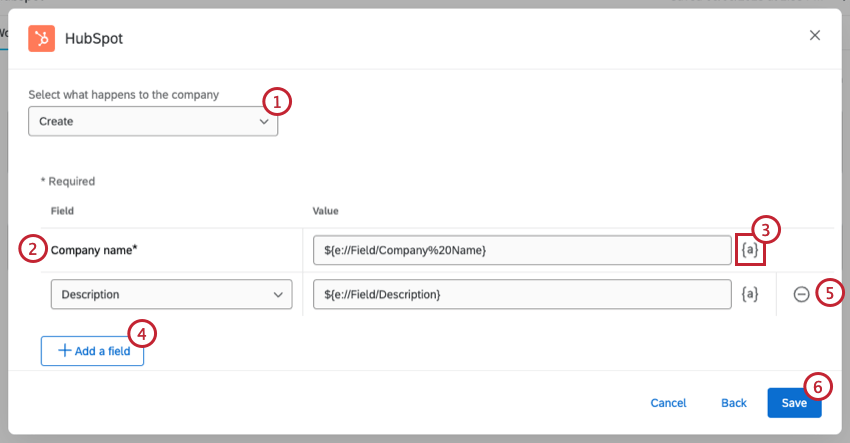
Companies
The Companies task allows you to create a new company or update an existing company in HubSpot using Qualtrics data.

Qtip: Having trouble finding a company’s ID? Contact HubSpot’s support team for additional assistance.
Example: You have an embedded data field for zip code and pass this information into the HubSpot task.
- Company: The name of the company.
- Company description: A description of the company.
- Street address: The company’s street address. Do not include city, state, or zip code.
- City: The city of the company’s address.
- State/Region: The state or region of the company’s address
- Zip code: The zip code of the company’s address
- Country: The company’s country
- HubSpot Owner ID: Unique ID of who should be the owner of the deal in HubSpot.
- Additional field value: This option can be used to specify the key and value of an additional HubSpot field that you may want to populate from Qualtrics data. This can be any field that is in a deal object, but not provided as an option above. This can be a field that HubSpot provides as a default field, or a custom field you created.
Contact Subscriptions
The Contact Subscriptions task allows you to subscribe or unsubscribe a contact from a subscription in HubSpot, or get a HubSpot contact’s subscription status.
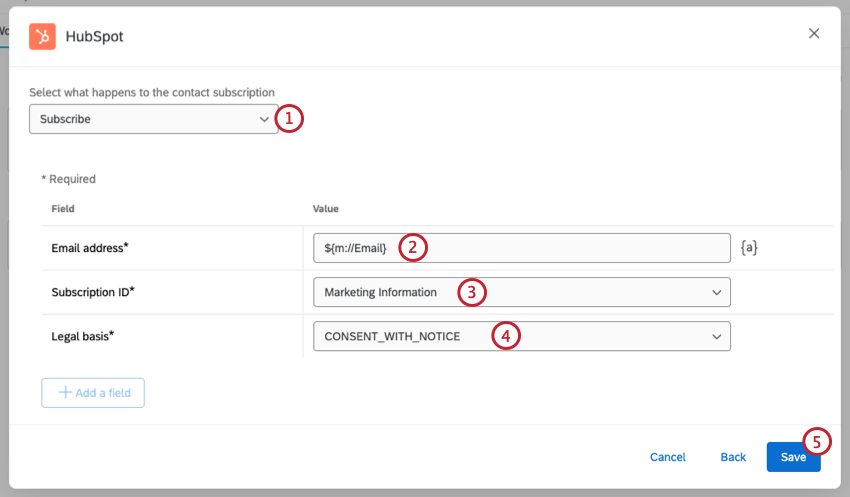
Qtip: Contact fields can have any value, and you can specify the value by typing it directly in the box. You can also click the {a} icon to insert piped text as your field value. Piped text is great for when the value may be dynamic based on survey responses provided.
Contacts
The Contacts task allows you to create a new contact or update an existing contact in HubSpot using Qualtrics data, or get the properties of a HubSpot contact.
Creating a Contact
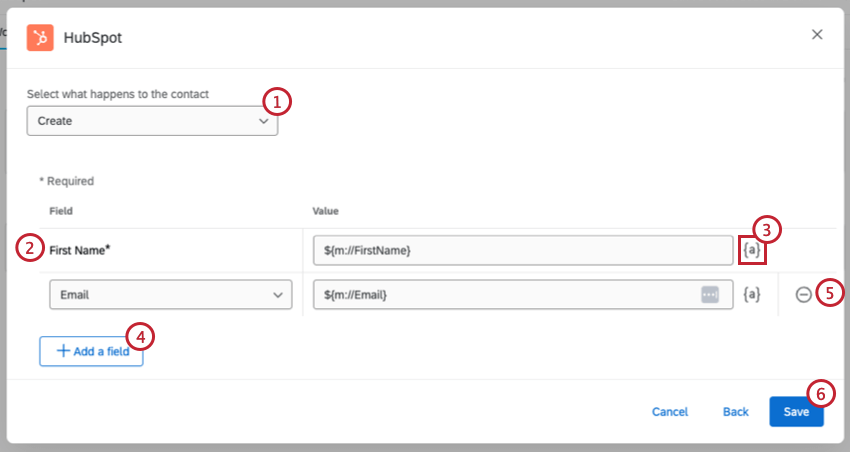
Example: You have a survey for new customers to fill out, and you pass their contact information over from their survey response.
- Email: The contact’s email address.
- Last Name: The contact’s last name.
- Website: The contact’s website. Please type a full URL.
- Company: The company the contact works for.
- Phone Number: The contact’s phone number.
- Address: The contact’s street address. Do not include city, state, or zip code.
- City: The city where the contact lives.
- State: The state where the contact lives.
- Zip Code: The contact’s zip code.
- HubSpot Owner ID: The Unique ID of who should be the owner of the deal in HubSpot.
- Additional field value: This option can be used to specify the key and value of an additional HubSpot field that you may want to populate from Qualtrics data. This can be any field that is in a deal object, but not provided as an option above. This can be a field that HubSpot provides as a default field, or a custom field you created.
Updating a Contact
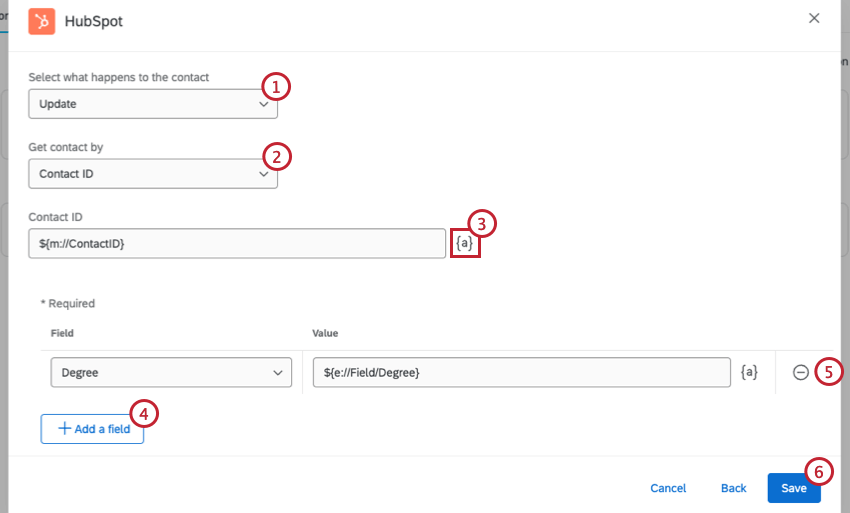
Example: You have a yearly survey for customers to fill out, and you pass their updated contact information over from their survey response.
Qtip: Having trouble finding a contact’s ID? Contact HubSpot’s support team for additional assistance.
- Email: The contact’s email address.
- First Name: The contact’s first name.
- Last Name: The contact’s last name.
- Website: The contact’s website. Please type a full URL.
- Company: The company the contact works for.
- Phone Number: The contact’s phone number.
- Address: The contact’s street address. Do not include city, state, or zip code.
- City: The city where the contact lives.
- State: The state where the contact lives.
- Zip Code: The contact’s zip code.
- HubSpot Owner ID: Unique ID of who should be owner of the deal in HubSpot.
- Additional field value: This option can be used to specify the key and value of an additional HubSpot field that you may want to populate from Qualtrics data. This can be any field that is in a deal object, but not provided as an option above. This can be a field that HubSpot provides as a default field, or a custom field you created.
Getting the Properties of a Contact
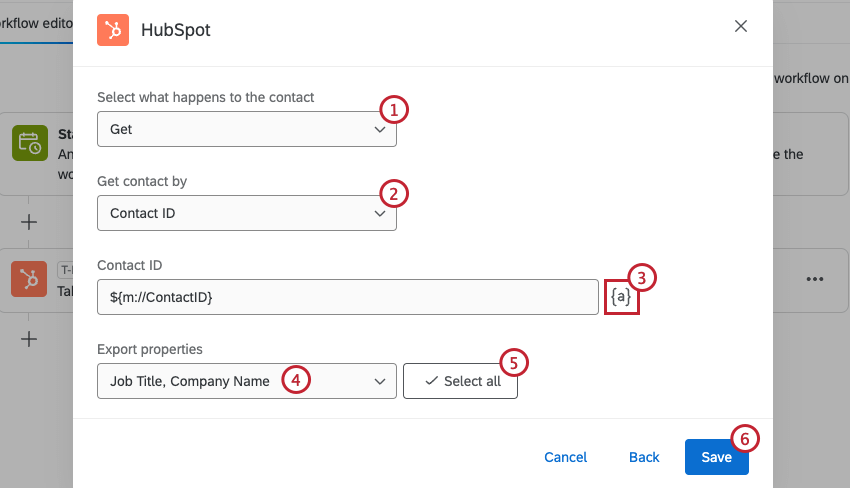
Qtip: Having trouble finding a contact’s ID? Contact HubSpot’s support team for additional assistance.
Custom Objects
The Custom Objects task allows you to create a new custom object or update an existing custom object in HubSpot using Qualtrics data.
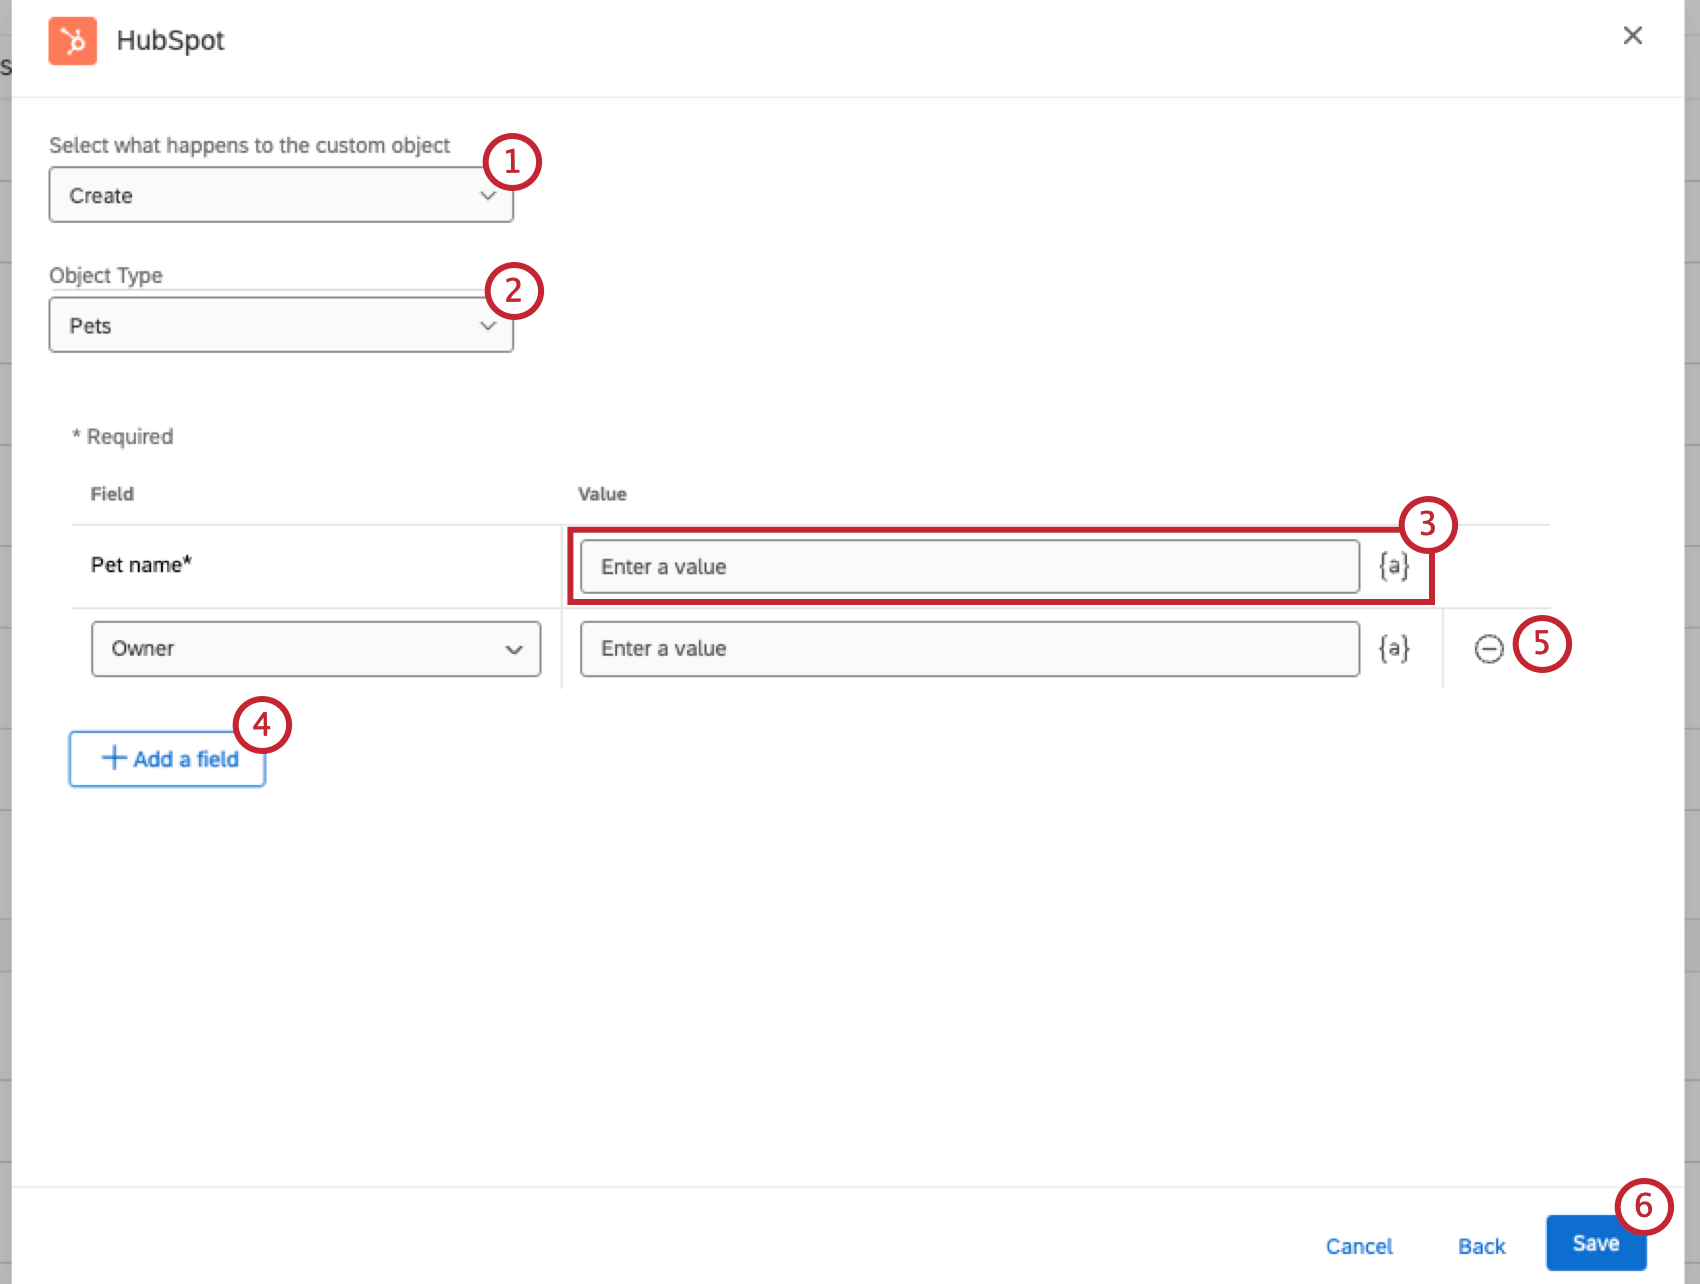
When finished, click Save.
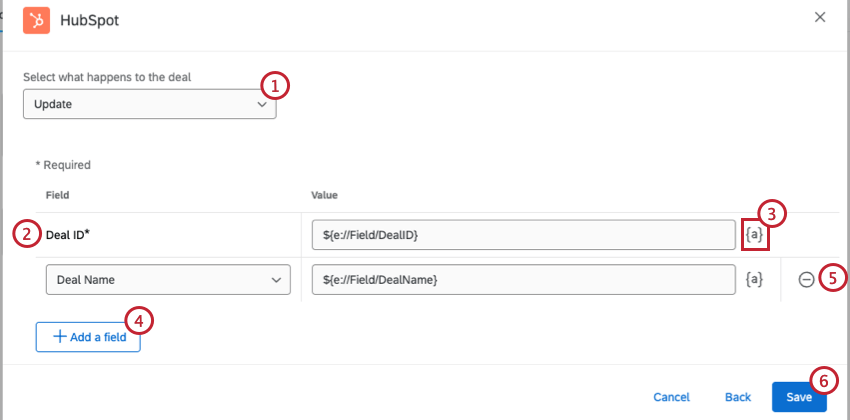
Deals
The Deals task allows you to create a new deal or update an existing deal in HubSpot using Qualtrics data.
Example: You have an embedded data field called “HubSpotOwner” and use branch logic in your survey to assign an owner for the deal.
- HubSpot Owner ID: Unique ID of who should be owner of the deal in HubSpot.
- Deal Stage: The current state of the deal. Options include “Closed lost,” “Contract Sent,” “Appointment scheduled,” “Decision Maker Bought-In,” “Qualified to buy,” and “Closed won.”
- Pipeline: Set up a pipeline to predict revenue. For different deals, you can have different pipelines. Deal pipelines can be used to predict revenue and identify roadblocks in your selling process. Deal stages are the steps in your pipeline that signify to your sales team that an opportunity is moving toward the point of closing. Keeping track of your deals progress in your deal pipeline gives you a more detailed picture of your projected revenue for a given time.
- Amount: The amount the deal is valued at. Numbers only, no commas or symbols.
- Deal Type: The type of deal. Options include “newbusiness” and “existingbusiness.”
- Additional field value: This option can be used to specify the key and value of an additional HubSpot field that you may want to populate from Qualtrics data. This can be any field that is in a deal object, but not provided as an option above. This can be a field that HubSpot provides as a default field, or a custom field you created.
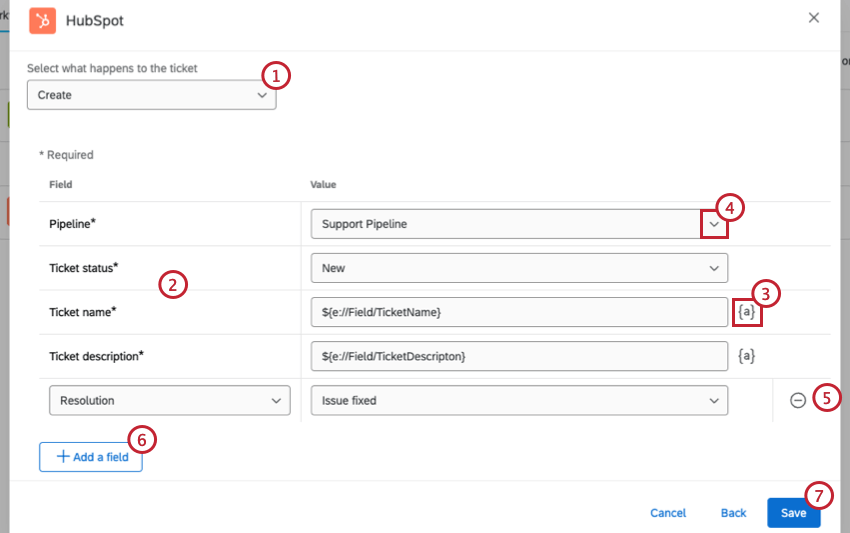
Tickets
The Tickets task allows you to create a new ticket or update an existing ticket in HubSpot using Qualtrics data.
- Ticket ID: The ticket’s ID as it appears in HubSpot. This field is required when updating an existing ticket. Qtip: Having trouble finding a ticket’s ID? Contact HubSpot’s support team for additional assistance.

- Pipeline: The pipeline that contains this ticket, found in your HubSpot account. This field is required when creating a new ticket.
- Ticket status: The pipeline stage that contains this ticket. This field is required when creating a new ticket.
- Ticket name: A short summary of the ticket. This field is required when creating a new ticket.
- Ticket description: The ticket’s description. This field is required when creating a new ticket.
Example: You have an NPS question in your survey and want to include the respondent’s NPS group in the Ticket Content.
- HubSpot Owner ID: Unique ID of who should be owner of the deal in HubSpot.
- Additional field value: This option can be used to specify the key and value of an additional HubSpot field that you may want to populate from Qualtrics data. This can be any field that is in a deal object, but not provided as an option above. This can be a field that HubSpot provides as a default field, or a custom field you created.
FAQs
Do I have access to all extensions available through the Workflows templates?
Do I have access to all extensions available through the Workflows templates?
Is there a link to all Workflows events and tasks?
Is there a link to all Workflows events and tasks?
What are Workflows templates?
What are Workflows templates?
What are workflows? / Where are actions?
What are workflows? / Where are actions?
There are no changes to workflow functionality as part of this update.
How can I tell the difference between first party and third party extensions? Where do I go for support for either kind?
How can I tell the difference between first party and third party extensions? Where do I go for support for either kind?
How do I add or remove an extension from my Qualtrics account?
How do I add or remove an extension from my Qualtrics account?
That's great! Thank you for your feedback!
Thank you for your feedback!