
Projects Management (Studio)
What's on this page
About Managing Projects in Studio
On the Projects page in Studio, you can manage project attributes, including filtering and sorting project attributes, setting report defaults for project attributes, and viewing a project attribute’s dependencies. You can also manage project category models, including filtering and sorting project category models, setting report defaults for category models, and viewing project model dependencies.
Projects Page Overview
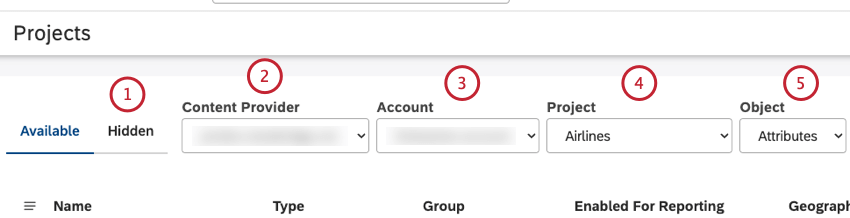
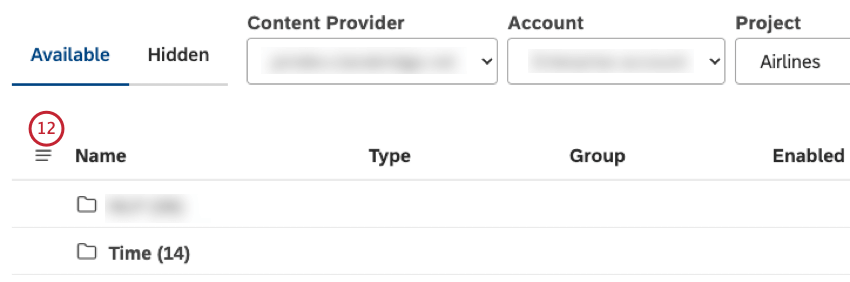
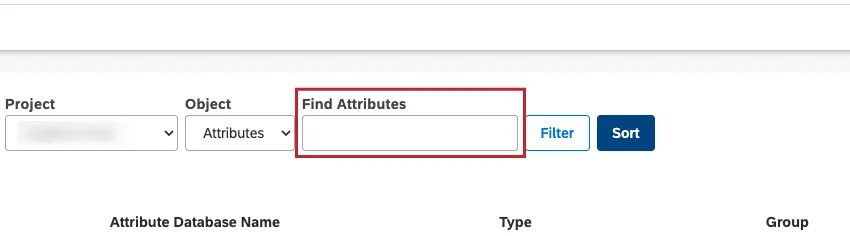
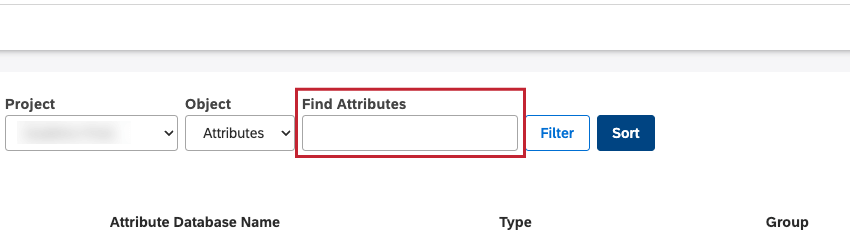
The Projects page provides a quick overview of attributes and category models available in your content provider’s projects. On the Projects page you can:
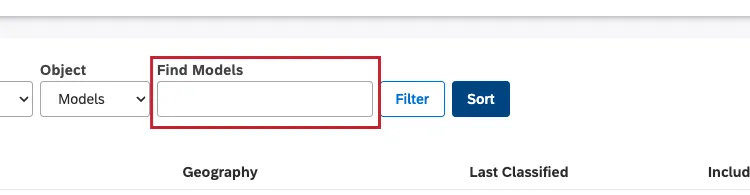
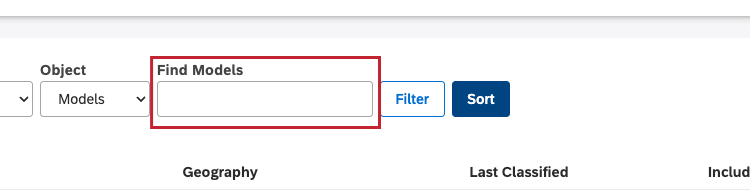
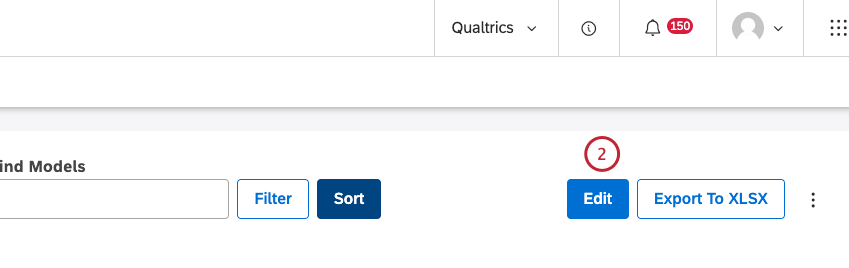
Qtip: Find project category models by name by entering the name of the category model into the Find Models box.

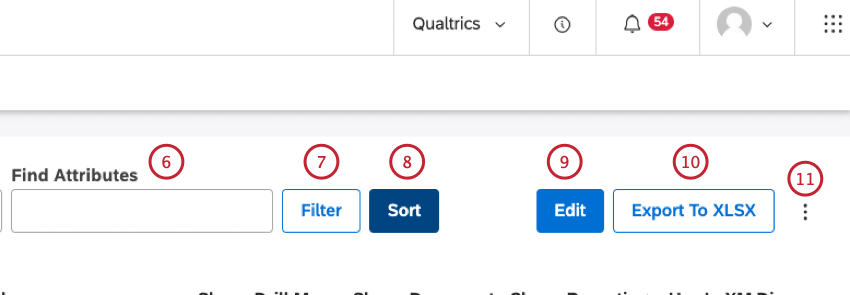
- Filter attributes by source, name, type, or group.
- Filter category models by name and other parameters.
Qtip: This requires advanced permissions.
Qtip: Filters, search queries, and sorting also apply to export.
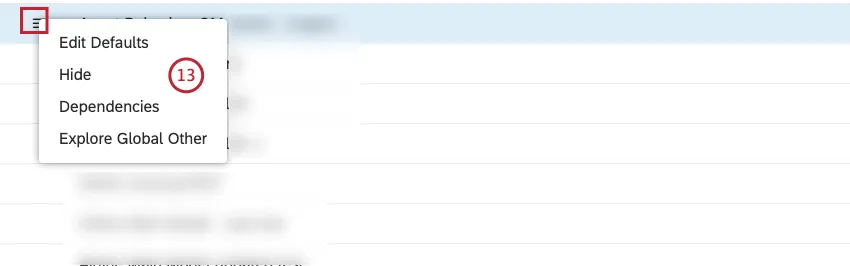
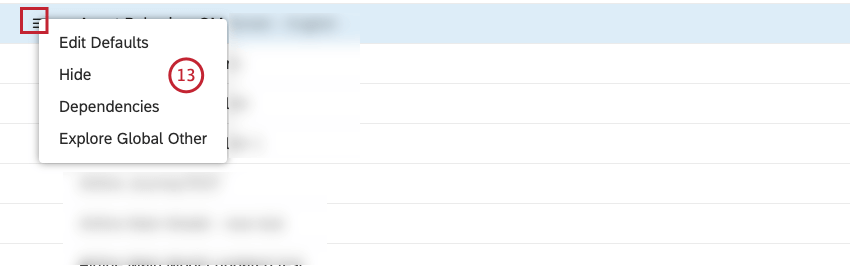
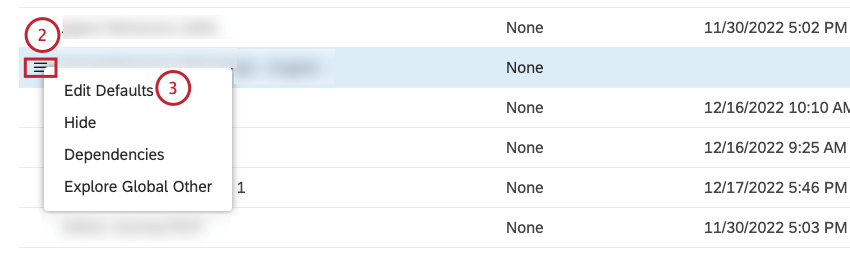
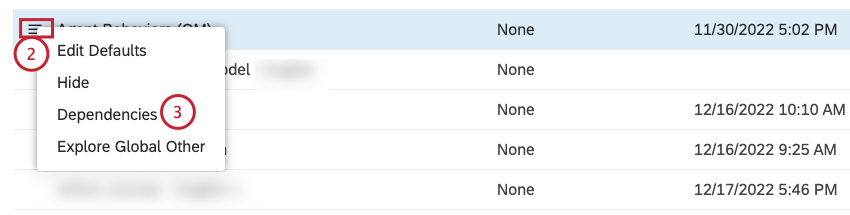
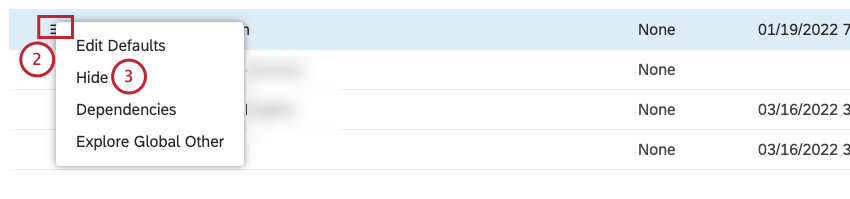
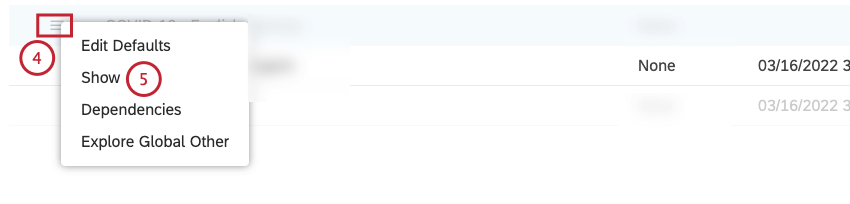
- Edit Defaults: Define attribute’s or category model’s reporting defaults.
- Hide/Show: Hide or unhide attributes or category models.
- Dependencies: See which dashboards, filters, or metrics in Studio use this attribute or category model.
- Explore Global Other: Explore data that was not categorized into any topics of the category model to analyze uncaptured ideas, topics, words, and new themes.
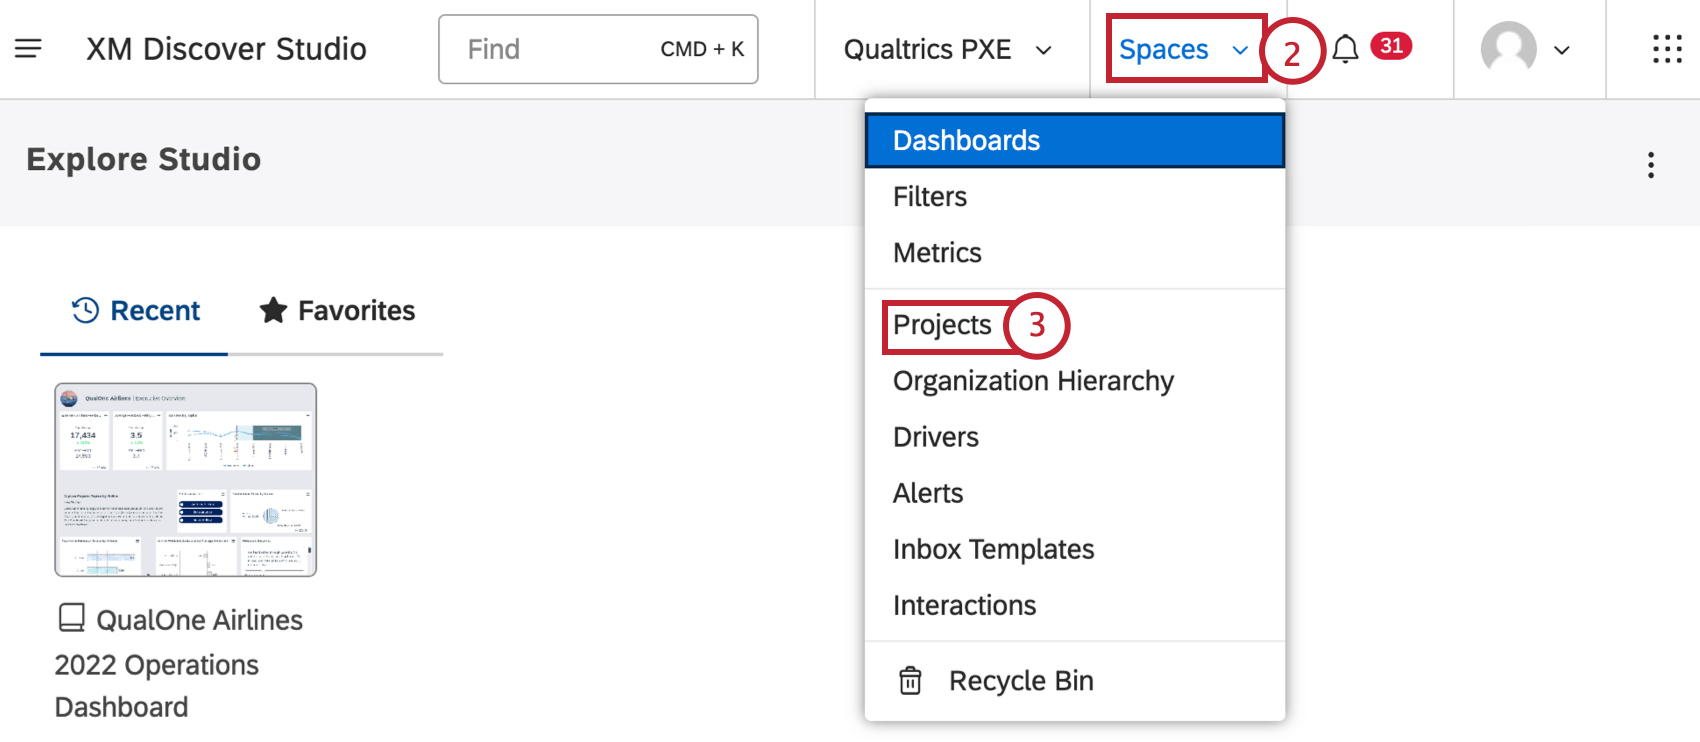
Accessing Project Attributes and Project Category Models
Qtip: To access the Projects page, you need to be linked to a content provider. Additionally, a Manage Projects permission is required to perform certain tasks in this section.
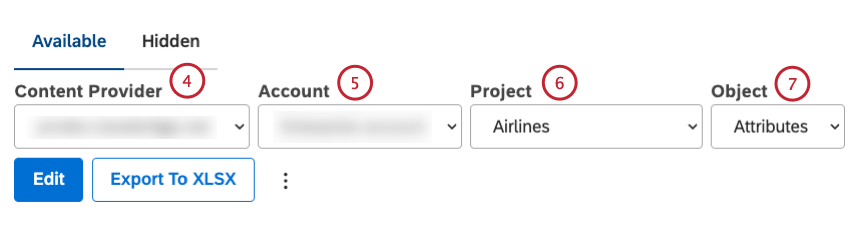
Qtip: You only need to select these if you are a member of more than one.
Qtip: Alternatively, you can search for an attribute by entering the name of the attribute into the Find Attributes or Find Models box.

Managing Project Attributes
For information on managing project attributes, see Managing Project Attributes.
Managing Project Category Models
For information on managing project category models, see Managing Project Category Models.
Setting Reporting Defaults for Attributes or Category Models
Qtip: A Manage Projects permission is required to perform this action.
You can define default reporting settings for:
- Specific category models
- Custom text and numeric attributes
- NLP attributes
- Metrics attributes
These settings are applied by default whenever you group data by a model’s topics, by an attribute, or use the attribute as a calculation. These defaults are shared with all users of your Master Account.
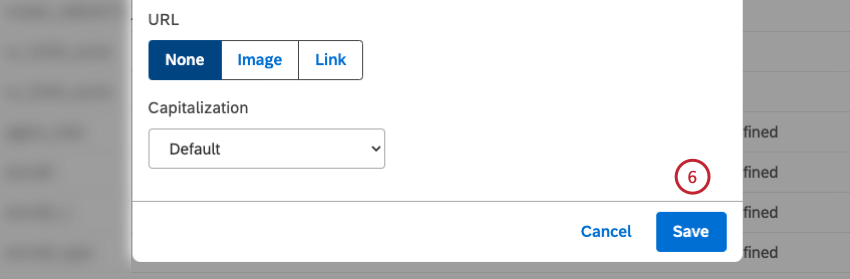
Qtip: For the selected category model’s topics, define your preferred defaults in the category model’s default settings window.
Qtip: For text attributes, you can only define the grouping defaults in the Grouping tab. For numeric attributes, you can use the Grouping and Calculation tabs to switch between grouping and calculation defaults.
Qtip: Calculation settings are available for numeric attributes only. Default settings are not available for date attributes.
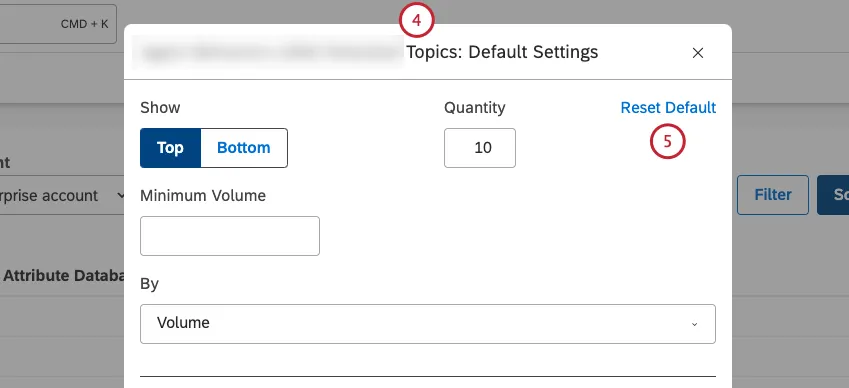

For more information on grouping settings, see Grouping Settings. For more information on calculation settings, see Calculation Settings.
Viewing Attribute or Category Model Dependencies
You can view which dashboards, filters, and metrics use the selected attribute or category model. This is useful to consider when editing or deleting dashboards, filters, or metrics in Studio.
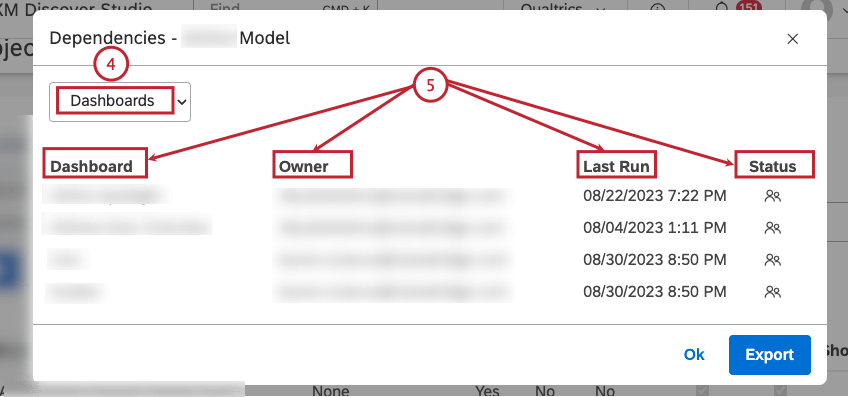
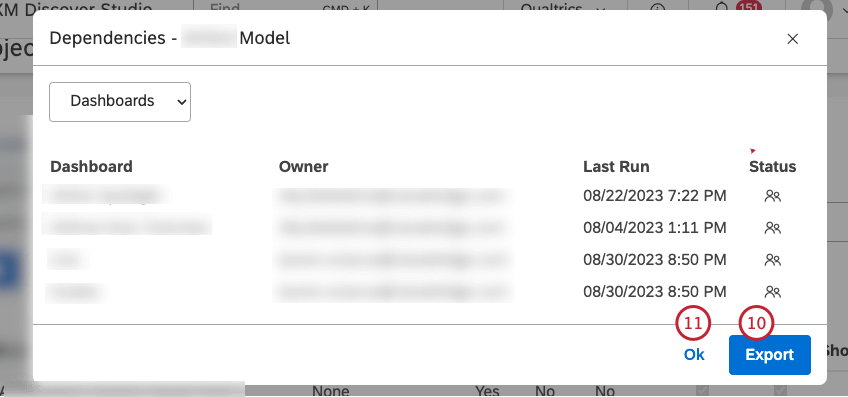
- Dashboard: The name of the dashboard.
- Owner: The user who owns the dashboard.
- Last Run: The last time the dashboard was viewed in Studio, emailed as a PDF, or refreshed.
- Status: The status of the dashboard (Private, Shared, or Public).
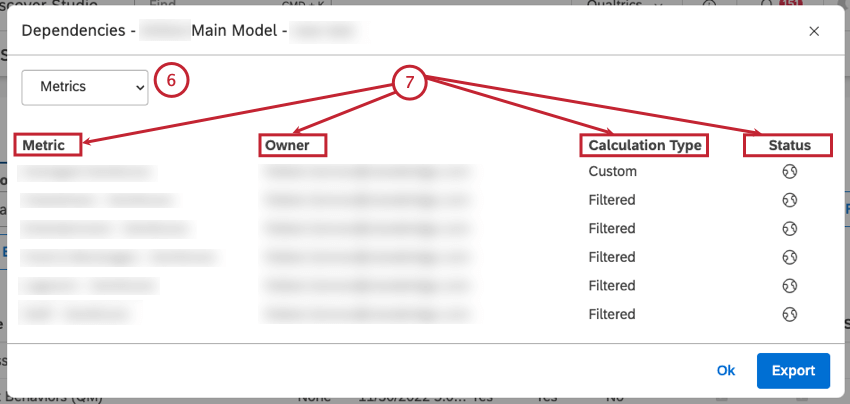
- Metric: The name of the metric.
- Owner: The user who owns the metric.
- Calculation Type: The type of the metric.
- Status: The status of the metric (Private, Shared, or Public).
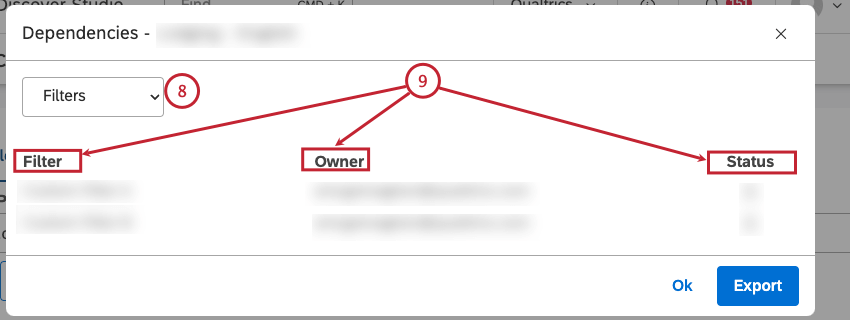
- Filter: The name of the filter.
- Owner: The user who owns the filter.
- Status: The status of the filter (Private, Shared, or Public). Qtip: The dependencies are shown only for Studio filters.

Hiding Attributes or Models
If you don’t want certain attributes or category models to appear when you set up Studio’s widgets, filters, and metrics, you can hide them. Hidden attributes and category models do not appear in the following selections:
- Widget properties (including grouping and filtering options)
- Dashboard filter options
- Metrics
- Filters
- Drilling options
- Document Explorer
- Project category models overview (including export), unless you choose to show hidden objects
Hiding an attribute or a category model only affects its visibility in model-related selections for the current user and has no impact on other Studio users. Hiding an attribute or a category model does not affect widgets, filters, or metrics that use it already.
Marking an Attribute or a Category Model as Hidden and Not Hidden
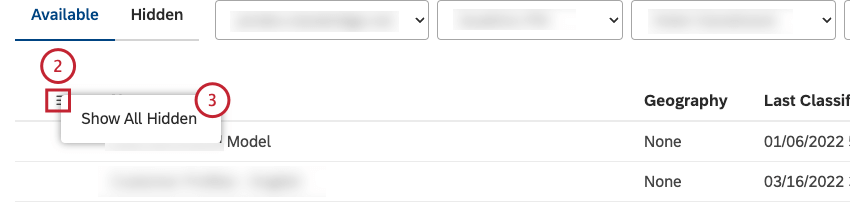
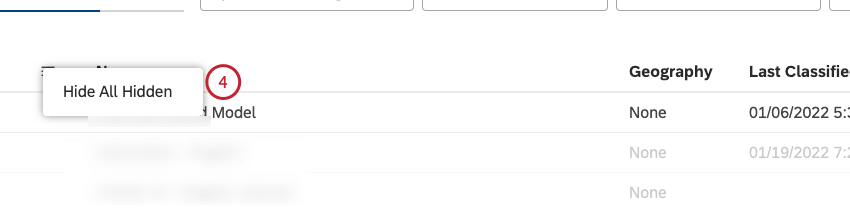
Turning Hidden Attributes or Category Models Visibility On or Off
Excluding Attributes or Category Models From Content
Qtip: This action requires the Manage Projects permission and Administrator data access to the corresponding project.
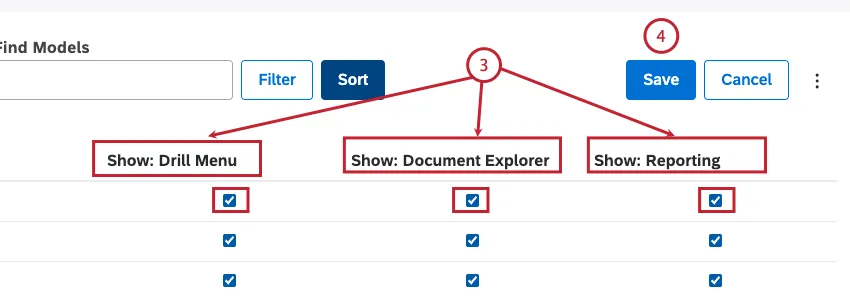
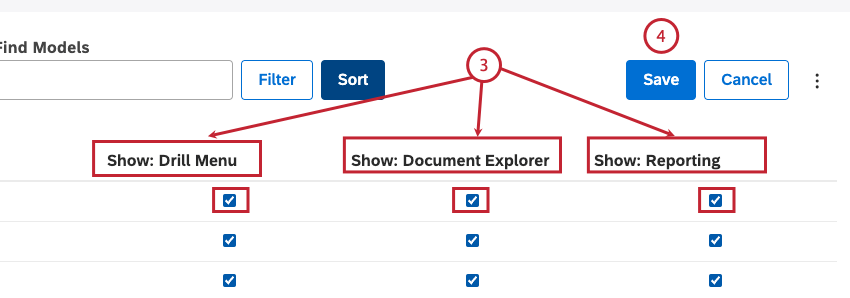
You can exclude selected attributes and category models from being displayed in drill menus, dashboards, and document explorer.
Qtip: Unlike hiding an attribute or a category model, excluding it from drilling, document explorer, or reporting affects its visibility for all users, not just yourself.
Attention: Hiding certain attributes can cause unexpected behavior in document explorer. We do not recommend hiding CB Conversation Duration.
- You can exclude selected attributes or category models from being displayed in the drill menu when drilling in View mode. This does not affect drilling in Edit mode. Deselect the checkbox under the Show: Drill Menu column that corresponds to the attribute or the category model you wish to exclude from drilling.
- Deselect the checkbox under the Show: Document Explorer column that corresponds to the attribute or the category model you wish to exclude from drilling. The attribute or the category model will also be excluded from the document explorer export. This enables sensitive data to be hidden only in document explorer and does not impact report widgets, drilling, and other areas.
- You can exclude selected attributes or category models from reporting across widgets, filters, and metrics definitions. This enables you to enforce standardization in reporting as it applies to all users in your account. Deselect the checkbox under the Show: Reporting column that corresponds to the attribute or the category model you wish to exclude from drilling.
Viewing Attributes or Category Models Hidden via Group Access
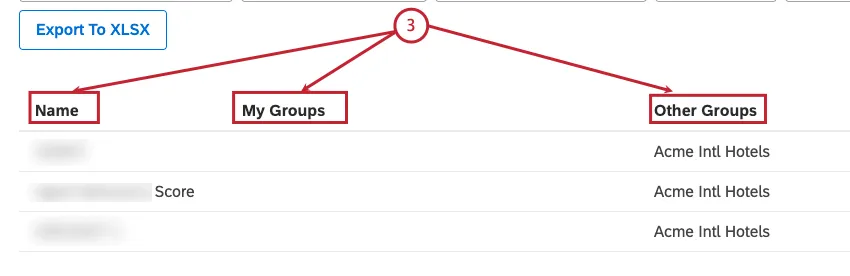
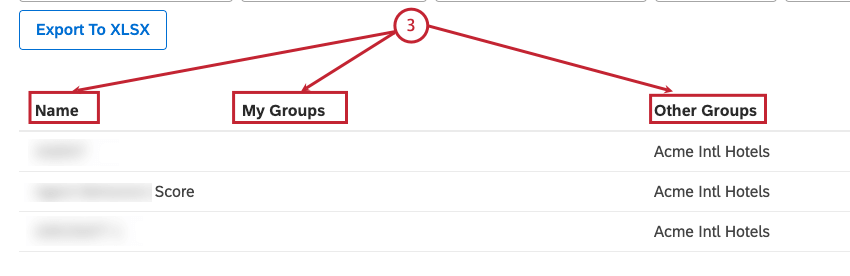
You can view all attributes and category models hidden from users of a certain group on the Projects page. This can help you understand why you or other users can no longer view certain attributes or category models. For more information on how to unhide attributes or category models via group access, see Hiding Attributes and Models via Group Access.

- Name: The name of the filter.
- My Groups: The name of the group of which you are a member that prevents access to the attribute or category model.
- Other Groups: The name of the group of which you are a member that prevents access to the attribute or category model.
That's great! Thank you for your feedback!
Thank you for your feedback!