Loading...
Skip to article
  • Qualtrics Platform
    Qualtrics Platform
  • Customer Journey Optimizer
    Customer Journey Optimizer
  • XM Discover
    XM Discover
  • Qualtrics Social Connect
    Qualtrics Social Connect

Integrating with Amazon Web Services


Was this helpful?


This site is protected by reCAPTCHA and the Google Privacy Policy and Terms of Service apply.

The feedback you submit here is used only to help improve this page.

That’s great! Thank you for your feedback!

Thank you for your feedback!


About Integrating with Amazon Web Services

Amazon Web Services (AWS) is a commonly used cloud computing platform. One of AWS’ services, Amazon EventBridge, can be used as an integration point between AWS and Qualtrics.

Based on events in Amazon EventBridge, you can trigger a Qualtrics workflow to then trigger other tasks, such as sending a survey, a thank you email, or a reward for completing a survey.

Attention: Custom coding features are provided as-is and require programming knowledge to implement. Qualtrics Support does not offer assistance or consultation on custom coding. You can always try asking our community of dedicated users instead. If you’d like to know more about our custom coding services, please contact your Qualtrics Account Executive.

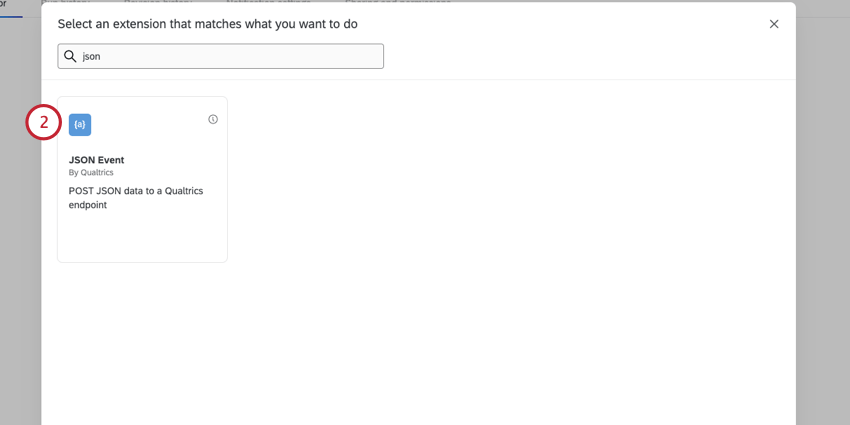
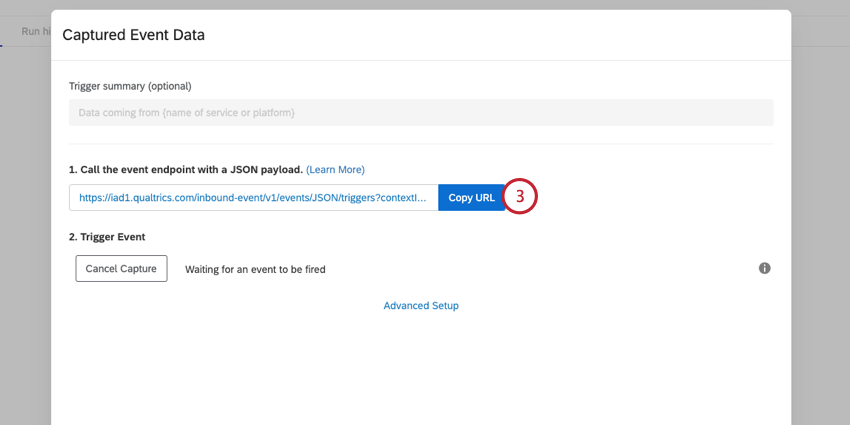
Step 1: Setting up a JSON Event

  1. In Qualtrics, create a new event-based workflow.
  2. For your event, choose the JSON Event.selecting the json event in a qualtrics workflow
  3. Click Copy URL. Save this URL somewhere so you can reference it later.clicking copy URL in the json event

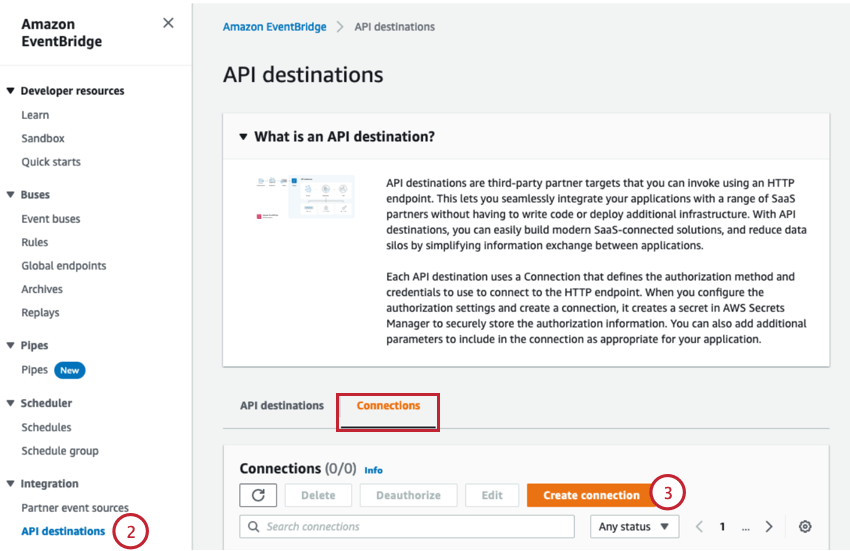
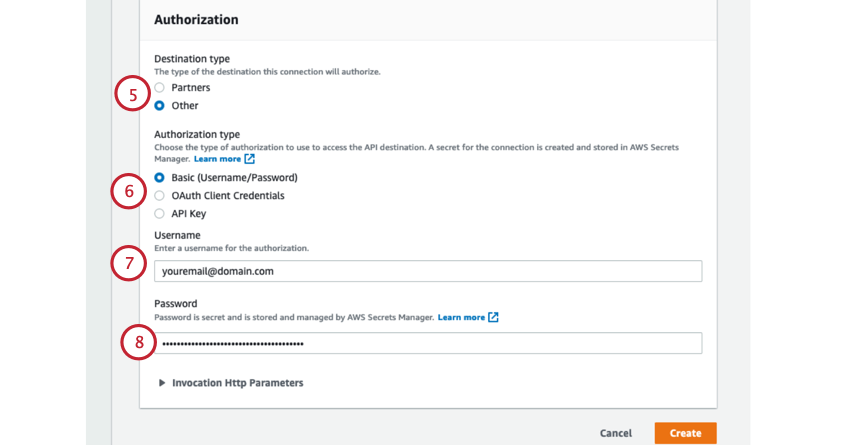
Step 2: Creating a Connection in EventBridge

The next step is to create a connection in EventBridge so that data can be passed between AWS and Qualtrics.
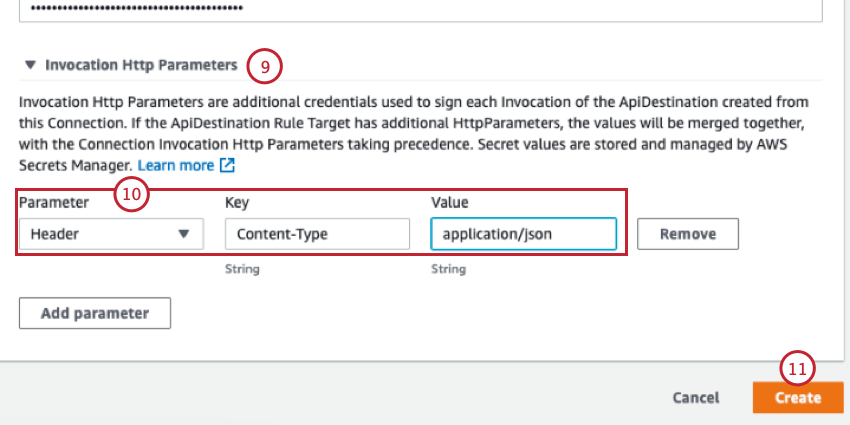
  1. In a new tab, log in to Amazon Web Services and navigate to the Amazon Eventbridge console.
  2. Navigate to the API destinations.creating a new connection in eventbridge
  3. In the Connections tab, click Create connection.
  4. Enter a Connection name so you know what this connection is used for.giving the connection a name
  5. Choose Other for the Destination type.configuring the authorization for the connection
  6. For the Authorization type, choose Basic.
  7. For the Username, enter your Qualtrics username.
  8. For the Password, enter your Qualtrics account API Key.
  9. Click on the Invocation Http Parameters to expand them.configuring the connection parameters
  10. Configure the following fields:
    • Parameter: Header
    • Key: Content-Type
    • Value: application/json
  11. Click Create.
  12. In the Connections window, validate that your connection is Authorized.

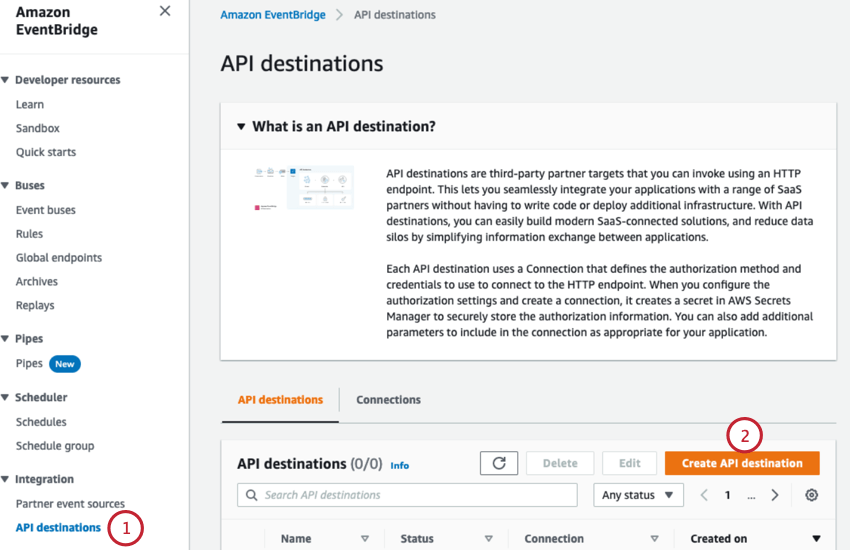
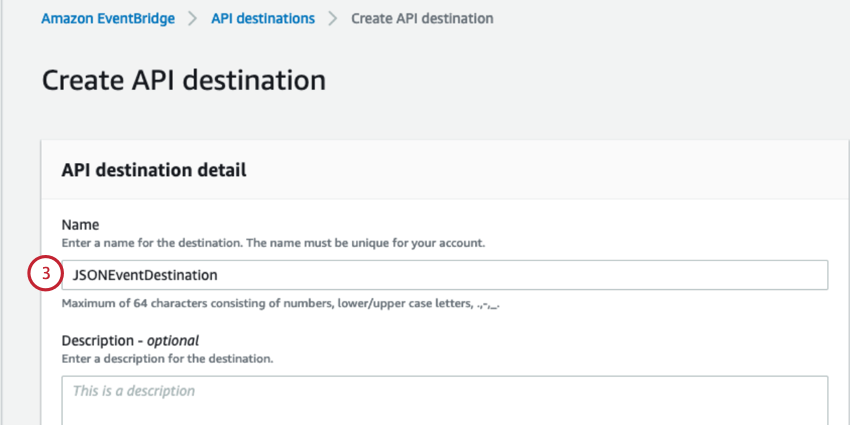
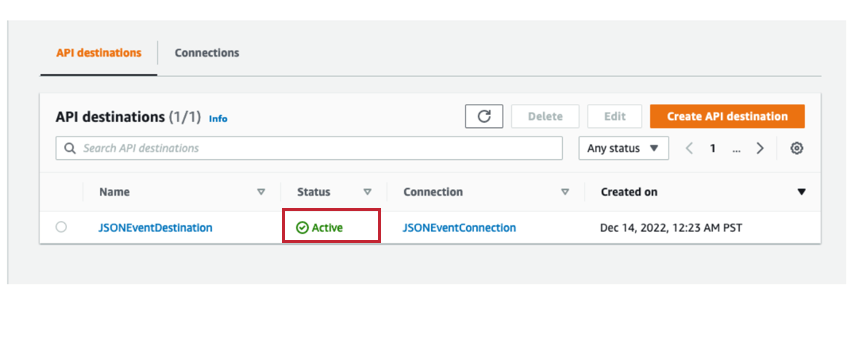
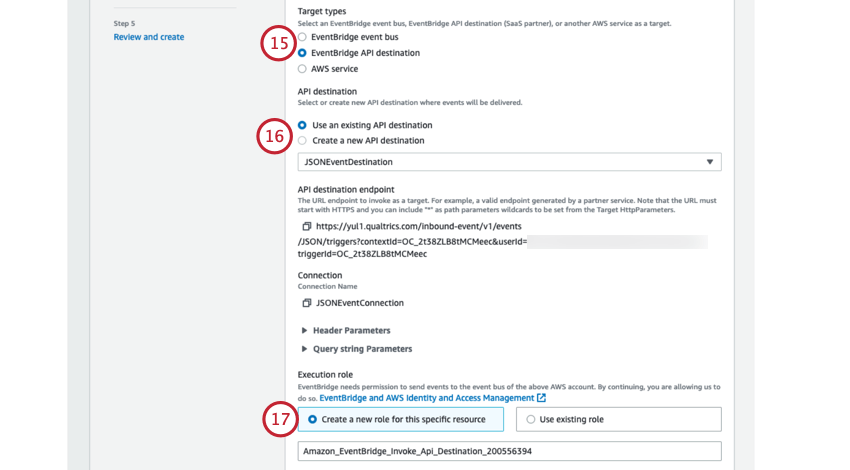
Step 3: Creating an API Destination in EventBridge

Next, you’ll create an API destination in EventBridge which controls where data is sent. In this case, the API destination is the JSON event URL you copied in Step 1.

  1. In EventBridge, go to API destinations.creating a new destination in eventbridge
  2. In the API destinations tab, click Create API destination.
  3. Enter a Name so you know what this API destination is used for.giving the api destination a name
  4. For the API destination endpoint, paste the JSON event URL that you copied in step 1.configuring the api destination
  5. For the HTTP method, select POST.
  6. If desired, enter an Invocation rate limit per second. This controls the maximum number of times the endpoint can be called per second.
    Qtip: Qualtrics supports up to 3000 transactions per minute (50 per second sustained).
  7. For the Connection, select Use an existing connection.
  8. Using the dropdown menu, choose the connection you created in step 2.
  9. Click Create.
  10. In the API destinations window, check that your API destination is Active.viewing an active destination

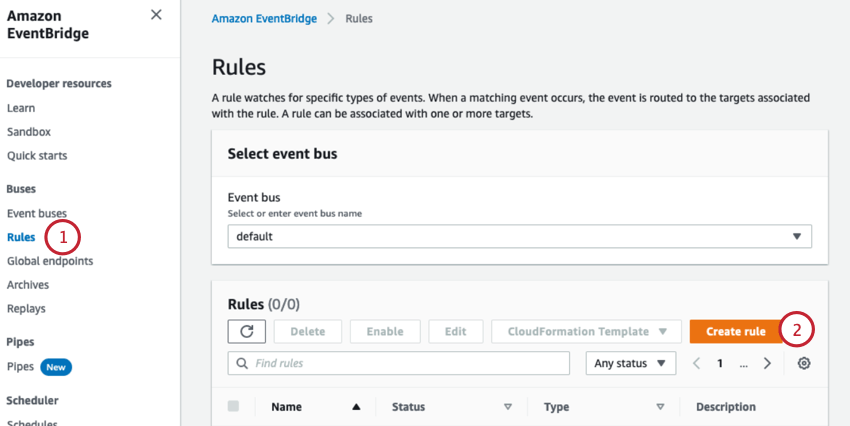
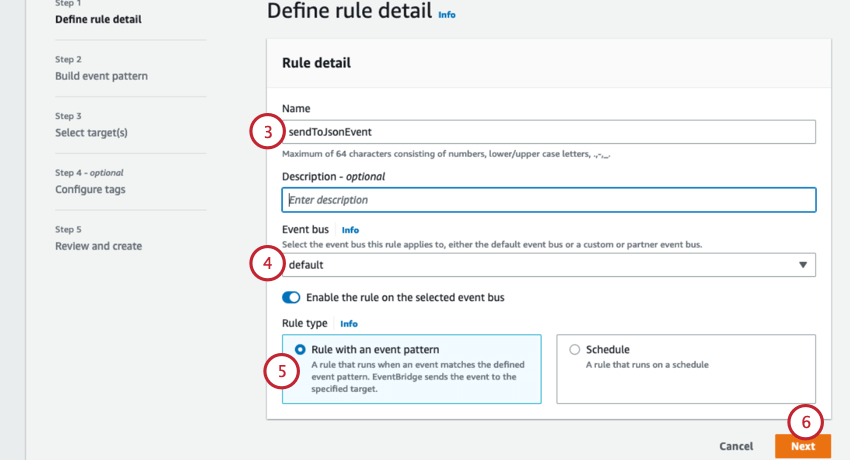
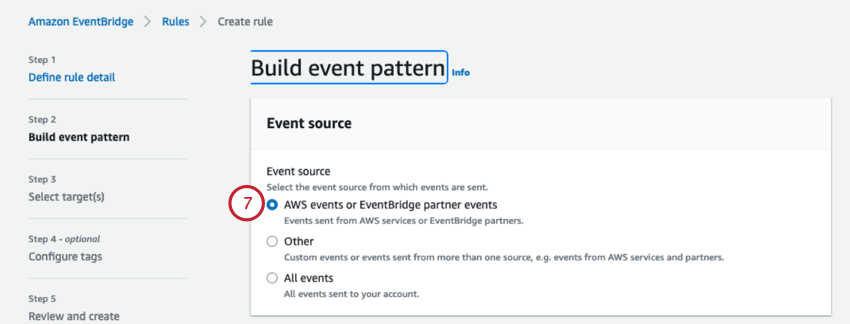
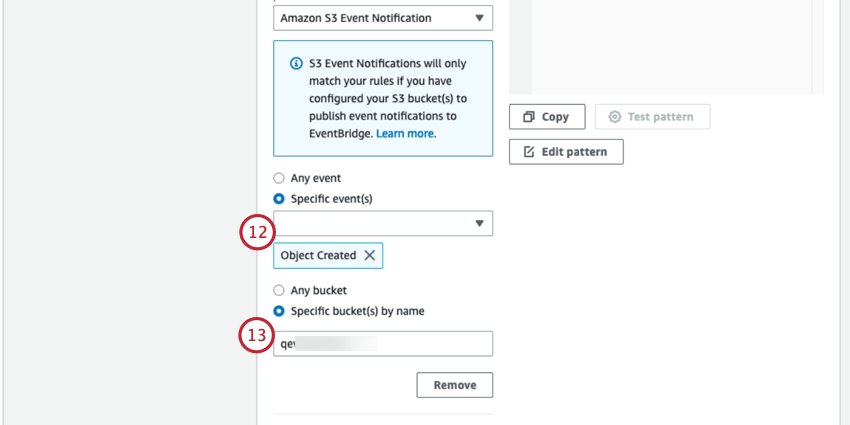
Step 4: Creating an EventBridge Rule

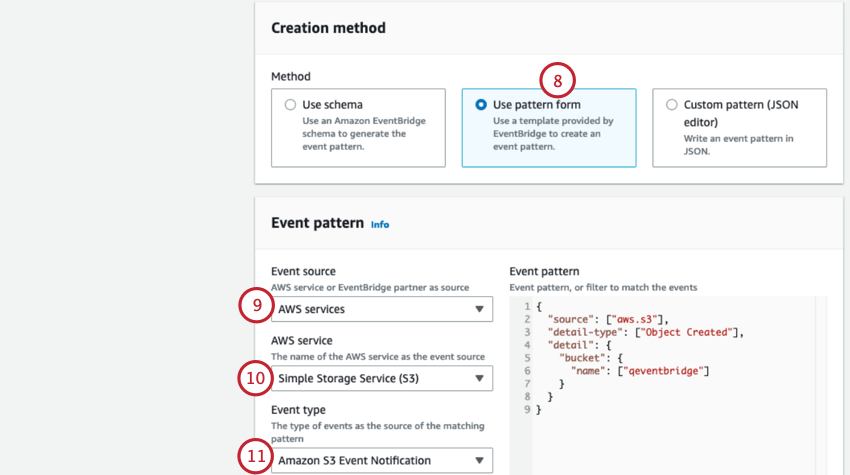
Rules in EventBridge are used to filter for specific events and patterns. The rules you create will be unique to your organization and use case. For this section, we’ll use the example of creating a rule to filter for new object creation in S3.

  1. In EventBridge, navigate to the Rules section.creating a new rule in eventbridge
  2. Click Create rule.
  3. Give your rule a descriptive Name.giving the rule a name and choosing a source
  4. For the Event bus, choose default.
    Qtip: S3 event notifications can only be sent to the default EventBridge bus.
  5. For the Rule type, choose Rule with an event pattern.
  6. Click Next.
  7. For the Event source, choose AWS events or EventBridge partner events.choosing an event source
    Qtip: Visit this AWS support page for examples of events you can send to EventBridge. For the example on this page, we assume an object is dropped into an S3 bucket to be picked up and processed inside Qualtrics.
  8. Select Use pattern form for the Creation method.setting up the event pattern
  9. For the Event source, choose AWS services.
  10. Choose Simple Storage Service (S3) as your AWS service.
  11. Select Amazon S3 Event Notification for the Event Type.
  12. Enable Specific event(s) and choose the Object Created event.choosing specific events and buckets
  13. Enable Specific bucket(s) by name and enter your S3 bucket name.
  14. Click Next.
  15. Choose EventBridge API destination for the Target type.choosing the api destination
  16. For the API destination, choose Use an existing API destination and then use the dropdown to select the API destination you created in step 3.
  17. For the Execution role, either create a new role or use an existing one.
  18. Follow the instructions in the Rules editor to review and finish setting up the rule.

Step 5: Update S3 Bucket Settings

Follow the instructions on this AWS support page to update your S3 bucket to push events to EventBridge.

Step 6: Completing the Workflow

Your AWS and Qualtrics instances are now connected! Once an object is uploaded into S3, an event will be sent to EventBridge, which will then deliver the event into the JSON event in your Qualtrics workflow, starting the workflow. You’ll have full access to the S3 event in the JSON event’s body.an example of the resulting json payload

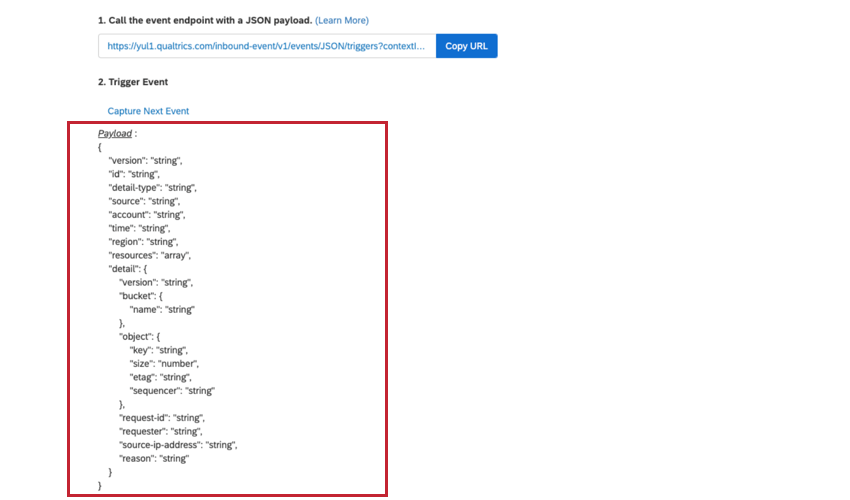
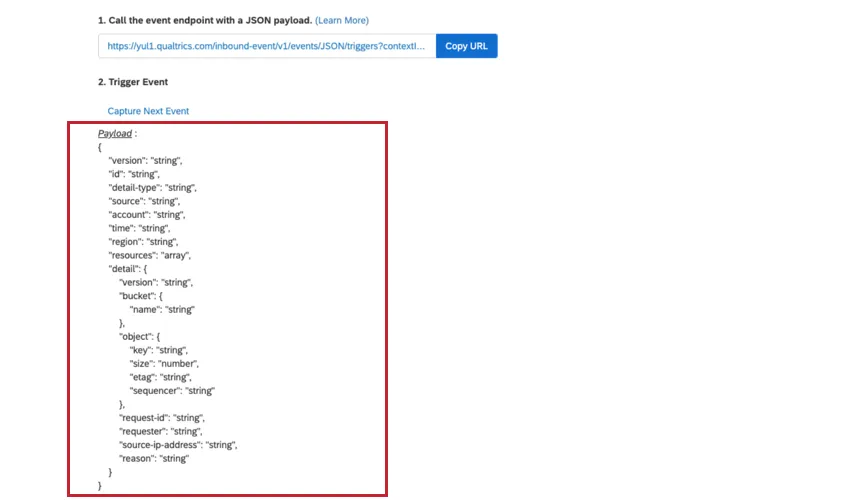
You can then add tasks that will fire as a result of your workflow. See Defining Tasks for more information.