
Load Into a Data Set Task
What's on this page
Qtip: The functionality described on this page is in preview and is not yet available to all users. Qualtrics may, in its sole discretion and without liability, change the timing of any product feature rollout, change the functionality for any in preview or in development product feature, or choose not to release a product feature or functionality for any reason or for no reason.
About the Load into a Data Set Task
The Load into a Data Set task allows you to take data that’s been previously imported by a data extractor task, and save that data into a Qualtrics dataset. You can use this task to add new data records or update existing ones.
Qtip: For information on general limits that apply to ETL workflows, see Workflow Limits. For any task-specific limits, refer to the information on this page.
Qtip: For more information on using data loading and extracting tasks, see using Workflows tasks to build ETL workflows.
Common Uses for This Task
The Load into a Data Set task can be used for creating datasets that can be used in the Merge task. This allows you to merge your new dataset with existing datasets in Qualtrics.
Available Dataset Schemas
Customer Care: This schema allows you to load data from third-party sources into Qualtrics. The following fields are required for this schema:
- OwnerId: The ID of the employee who owns the case.
- ExternalSystemId: The ID from the external system.
- Status: The status of the case, such as New, Closed, or Escalated.
- CreatedDate: The date the case was created.
- LastModifiedDate: The date the case was last updated.
Qtip: In addition to the required fields, custom fields can also be added.
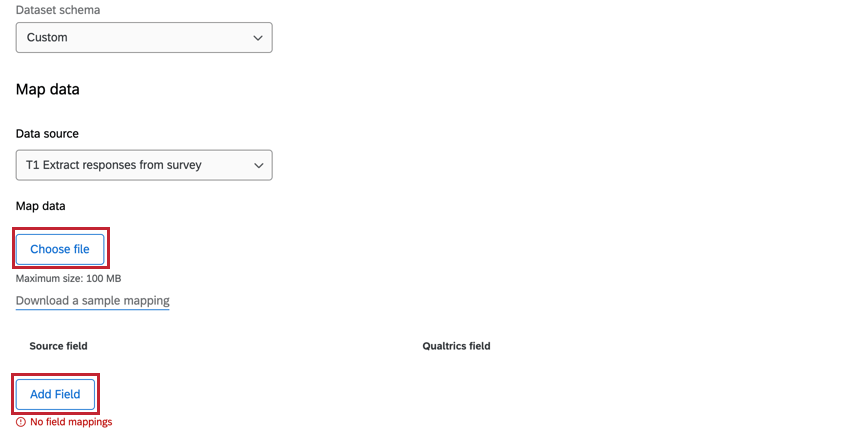
Custom: This option allows you define your own data schema. You can either upload a file with your mappings by clicking Choose file, or add them manually using the Add Field button.

Creating a Load into a Data Set Task
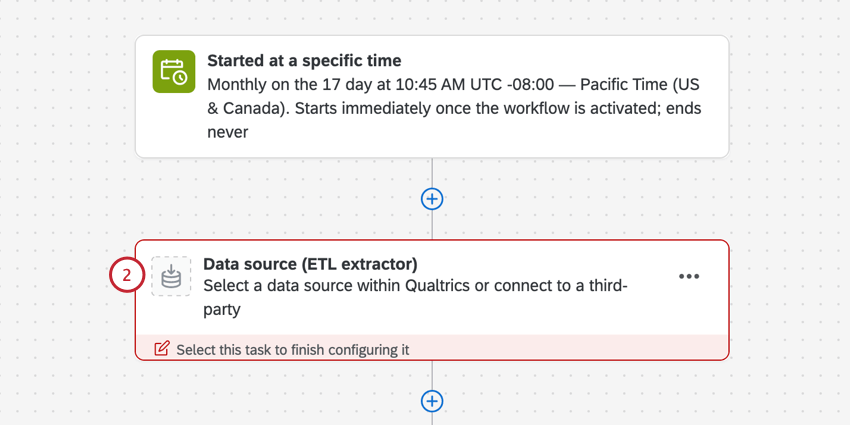
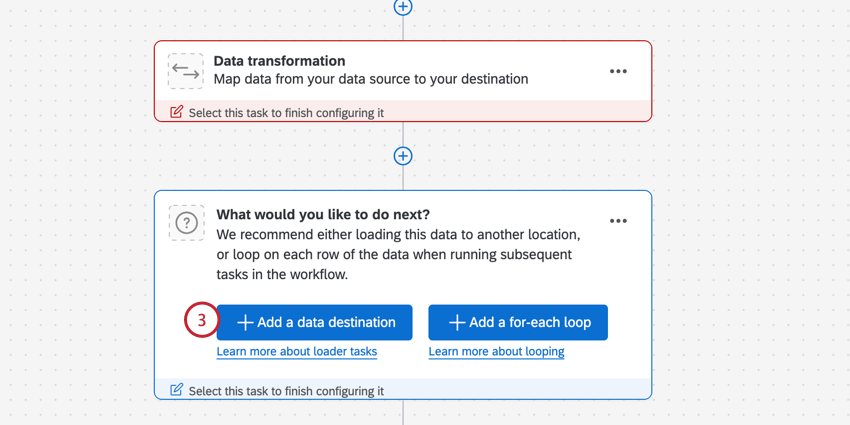
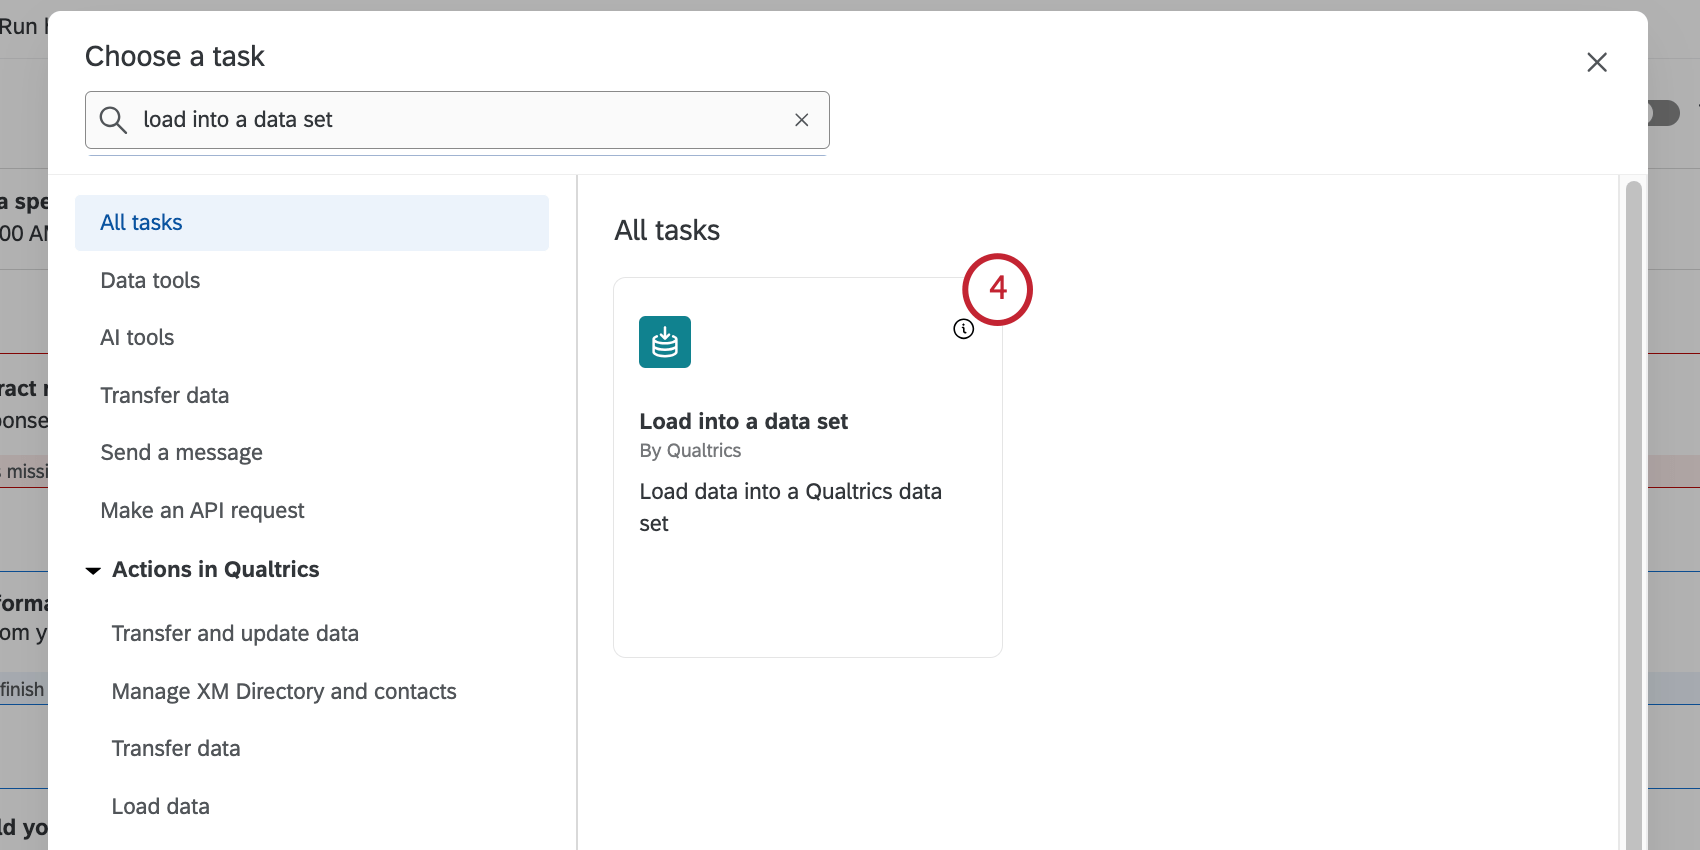
To use this feature, you’ll first create a new scheduled workflow with a data extractor task. Then you’ll add the Load Into a Data Set task and configure it with your chosen schema. Finally, you’ll complete your workflow by mapping each field in your dataset.
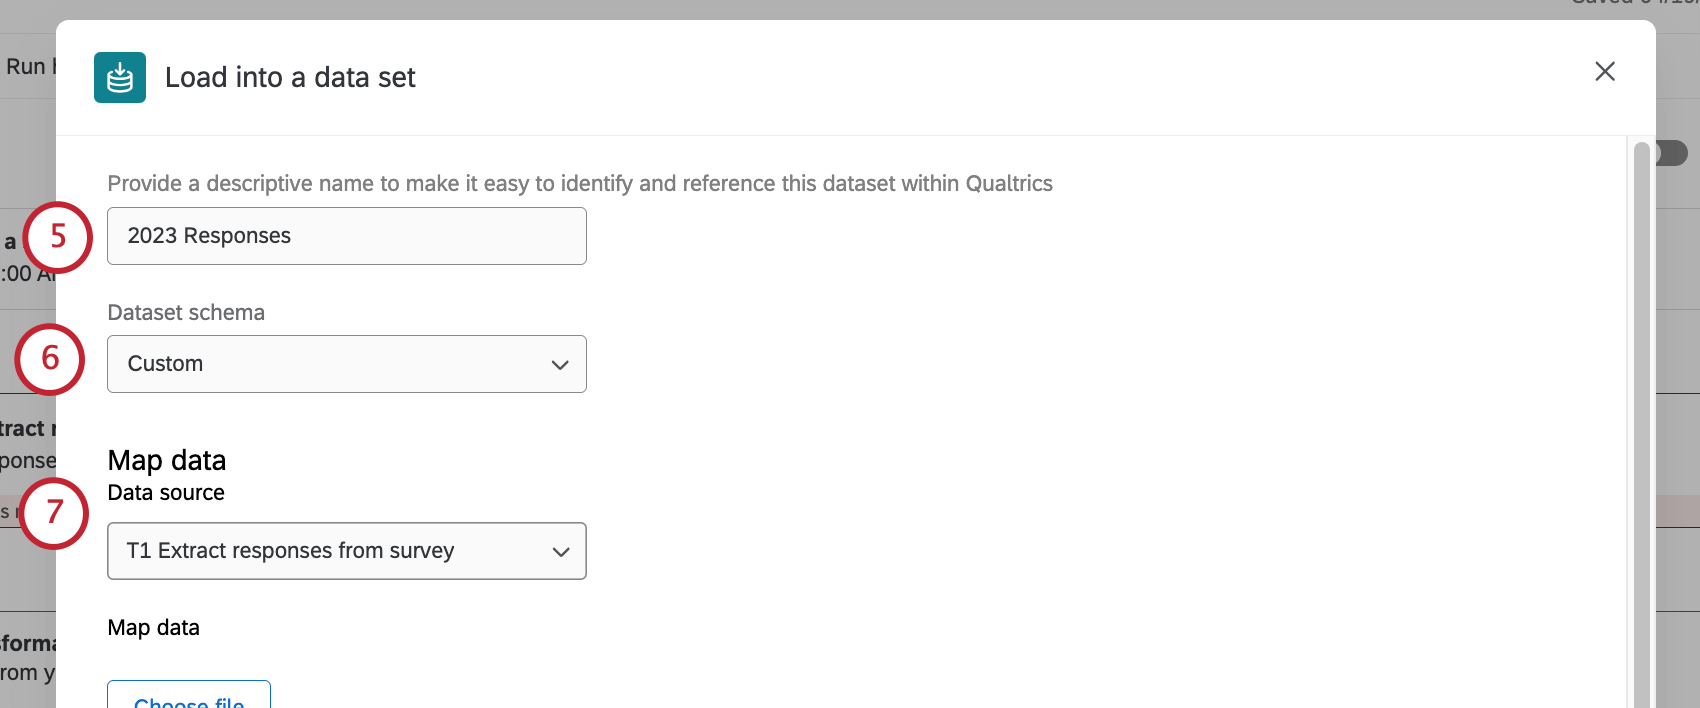
- Customer Care: This schema allows you to load data from third-party sources into Qualtrics. See Available Dataset Schemas for the fields available in this schema.
- Custom: This option allows you to define your own data schema. See Available Dataset Schemas for more information about creating your schema.
Example: If you previously set up an Extract data from SFTP files task, select the SFTP connection from the dropdown. If you previously set up an Extract data from Salesforce task, select the object you configured from the dropdown.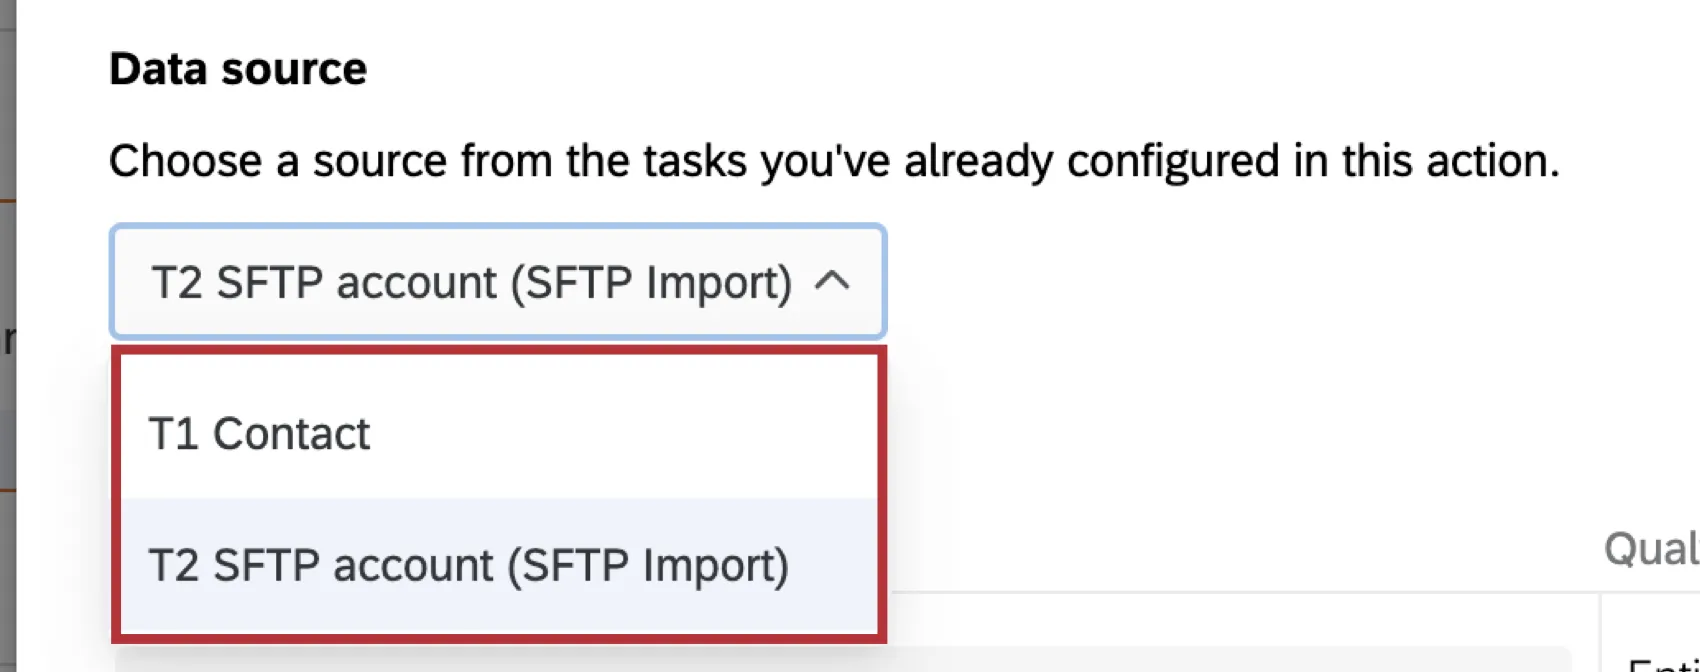
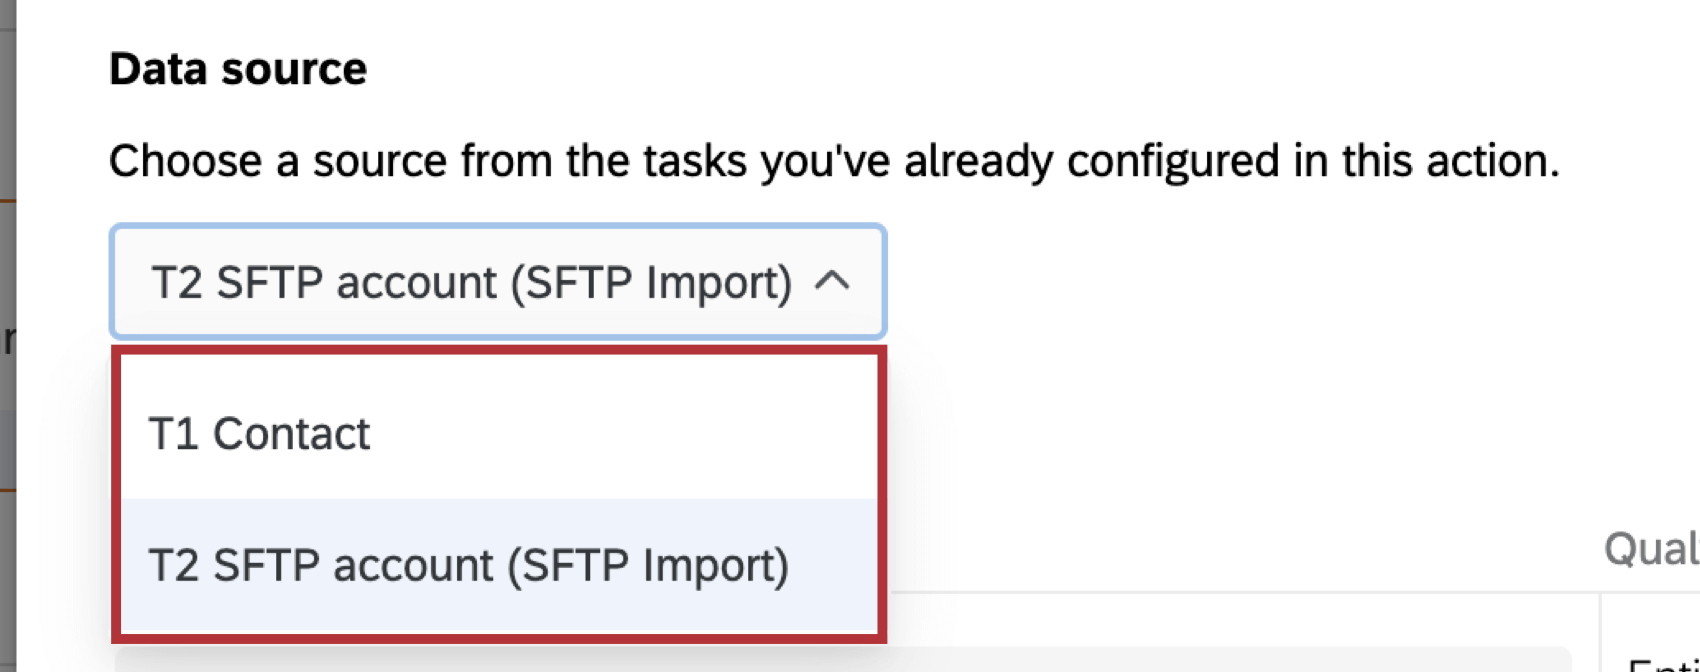
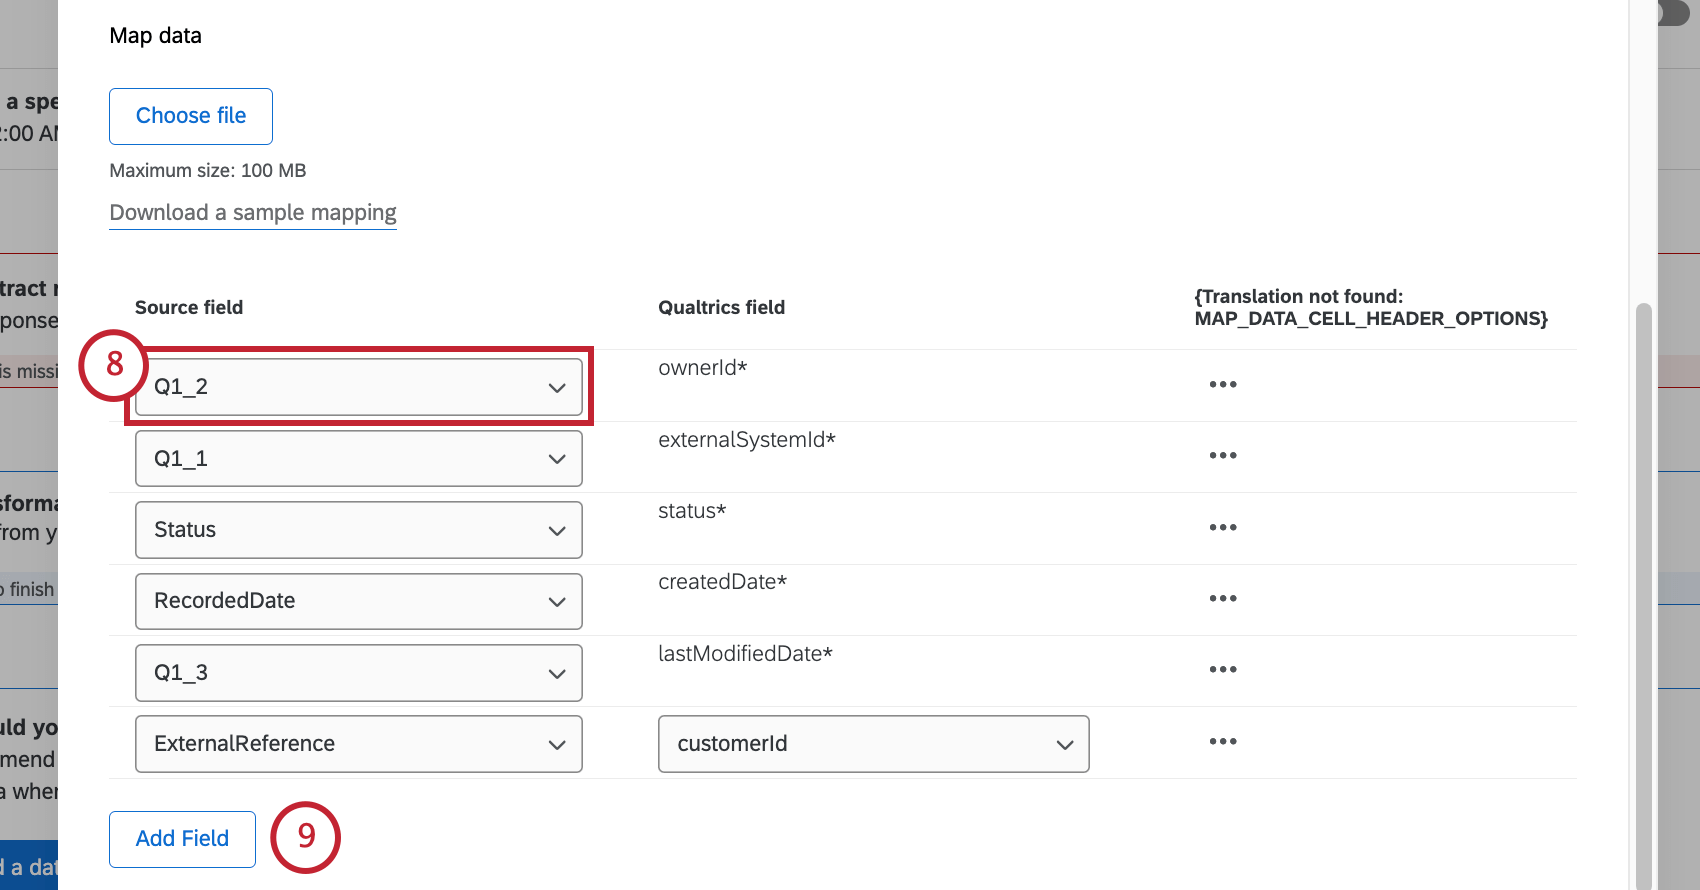
Attention: The required fields for each source vary based on the dataset schema you selected in step 6. See Available Dataset Schemas for more.
Qtip: You can also map individual field values. See Mapping Field Values for more information. This support page is for another task, but the functionality is the same.
Qtip: If you want to delete an additional field you added, click the 3 dots, then select Delete row.
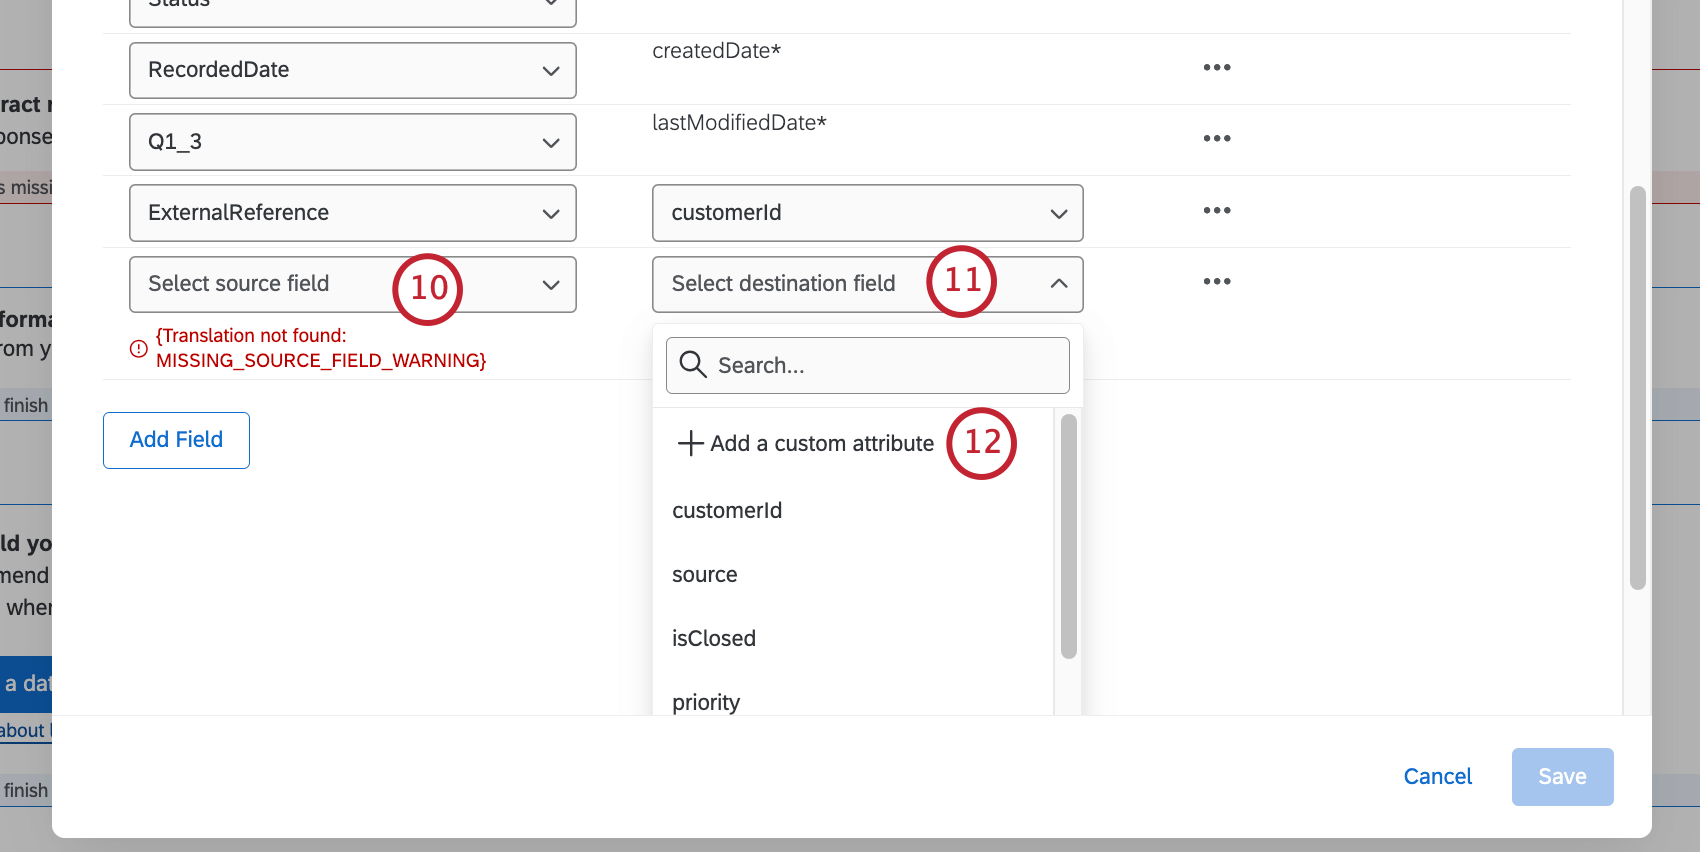
Attention: This optional attribute will be added to this Qualtrics dataset, and you will be unable to modify or delete it without contacting support. The new field(s) will not be picked up by Qualtrics for 24 hours after the change is made.
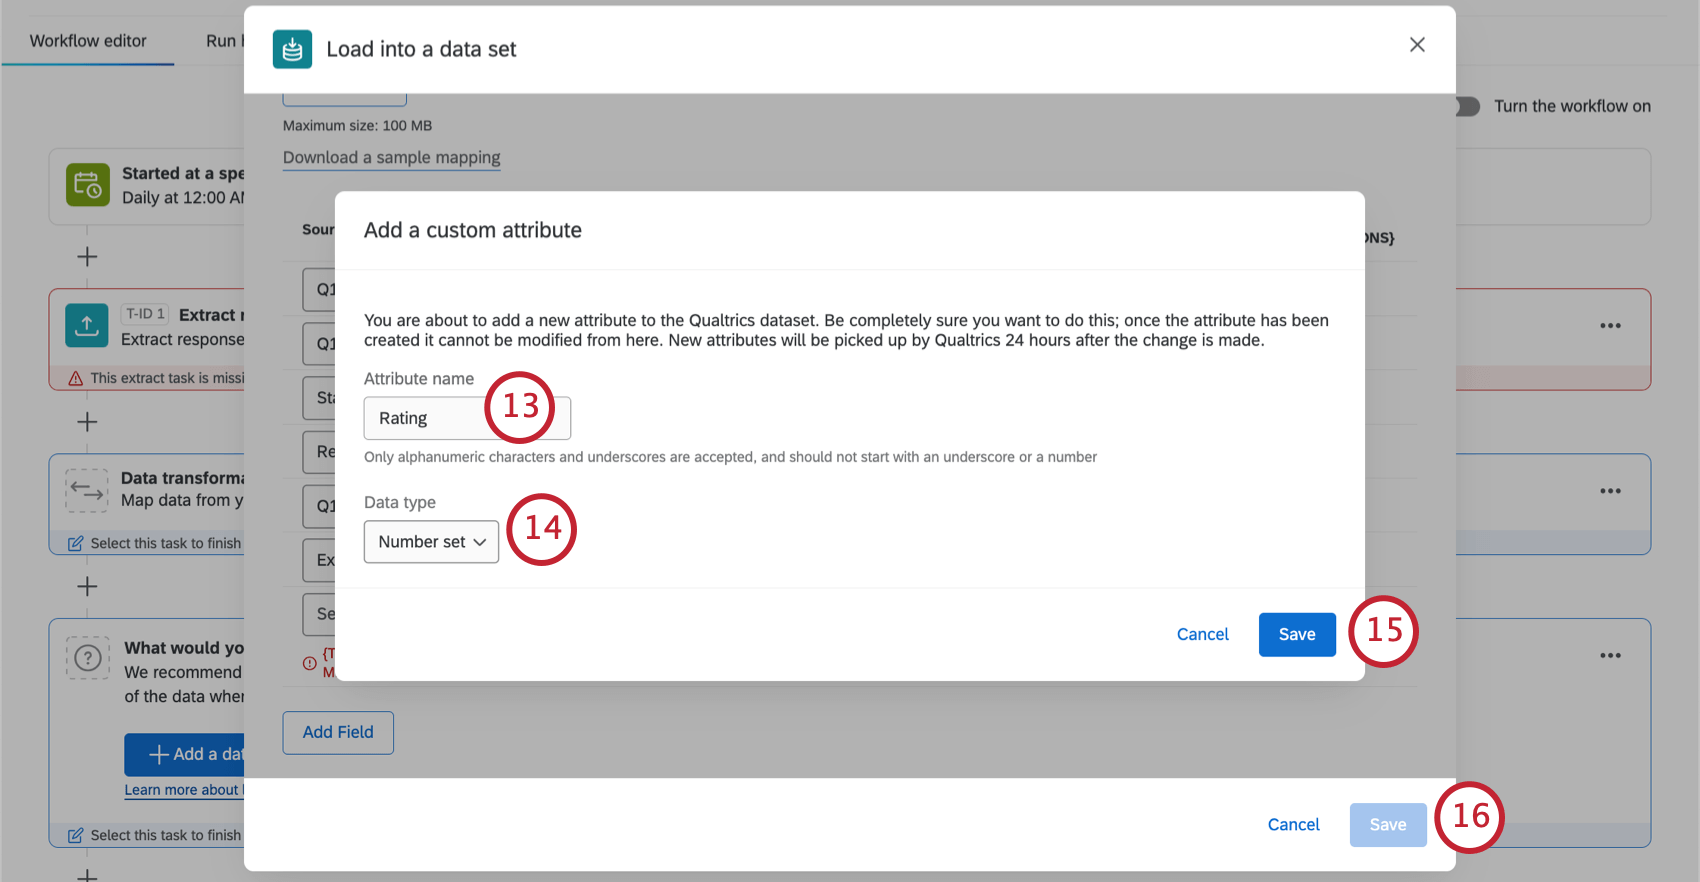
Qtip: Only alphanumeric characters and underscores are accepted, and should not start with an underscore or a number.
Attention: If you are using a date field, it must be formatted as a Unix Timestamp.
Qtip: All required fields must have a source field mapped to them before you can click Save.
That's great! Thank you for your feedback!
Thank you for your feedback!