
Voice Project
What's on this page
About Voice Projects
Voice projects are designed to fulfill your omnichannel listening needs for voice data. You can create voice tasks to extract call recordings from voice providers like Genesys and NICE CXone, then store that data in your project for further analysis. You can also import voice data from your voice provider using a file. While the entire, end-to-end program setup can be found on Omnichannel Listening Management, this page focuses more on how to create and navigate your voice project.
Qtip: Voice tasks define how to manage audio recordings, specifying their location, format, data processing methods, transcription tools, language, and handling of sensitive information before delivering the final transcript. They are not the same as tasks found in workflows.
Attention: The setup of a Voice Project is conducted by the Qualtrics Implementations team. If you have questions about your implementation or if this feature is available for your license, please reach out to your Qualtrics account team.
Creating a Voice Project
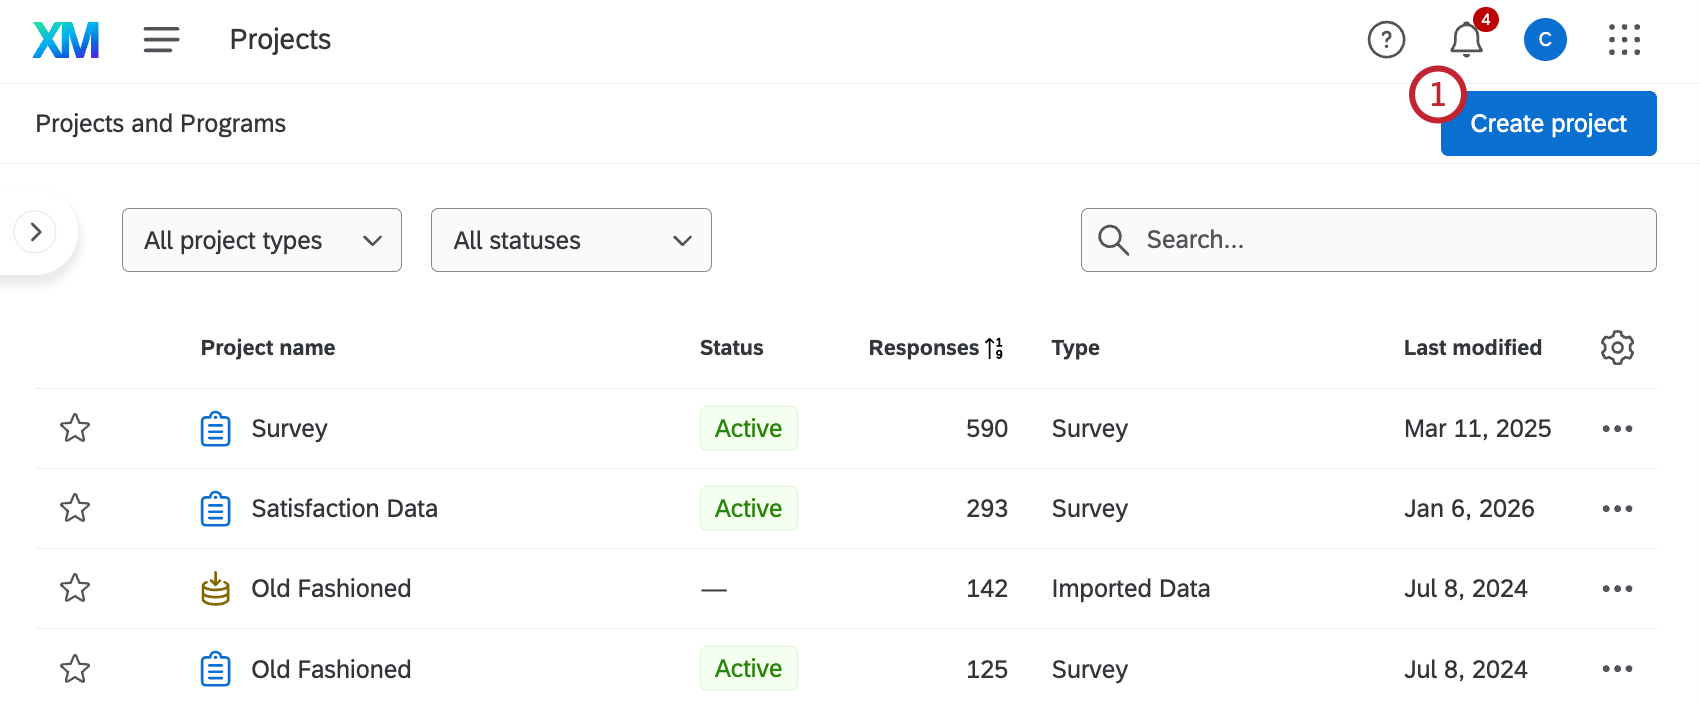
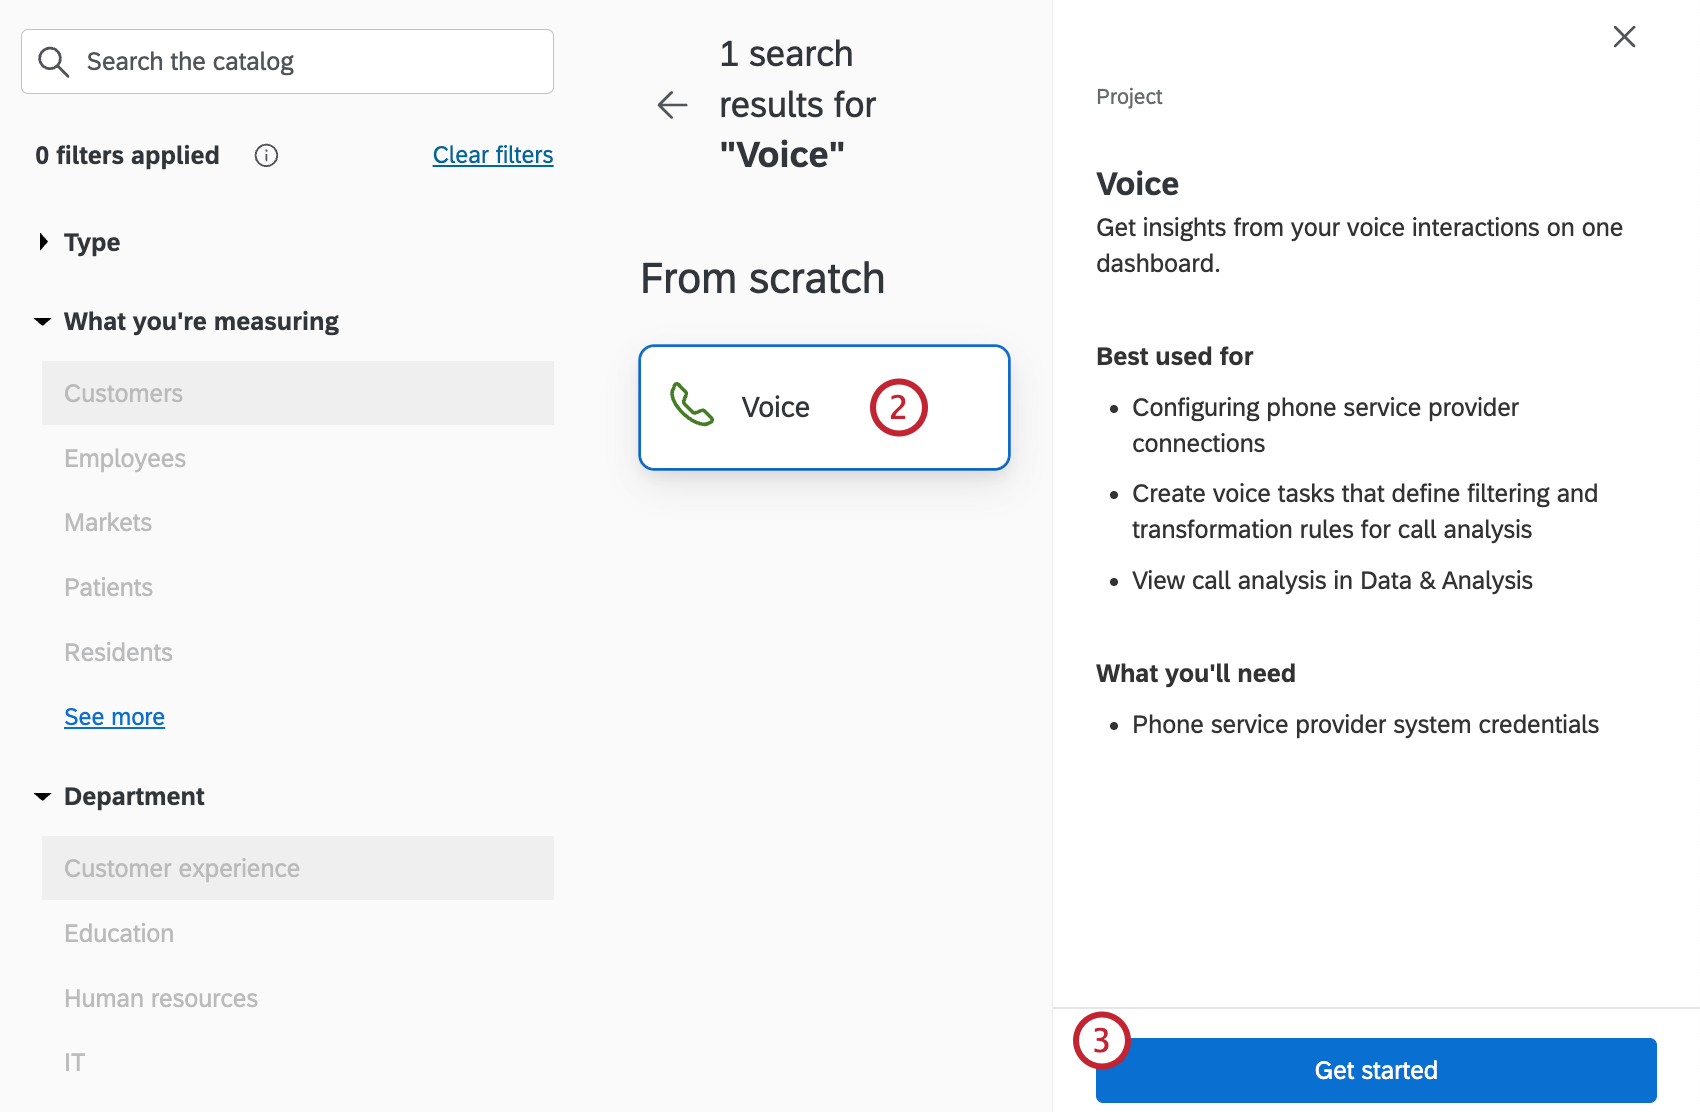
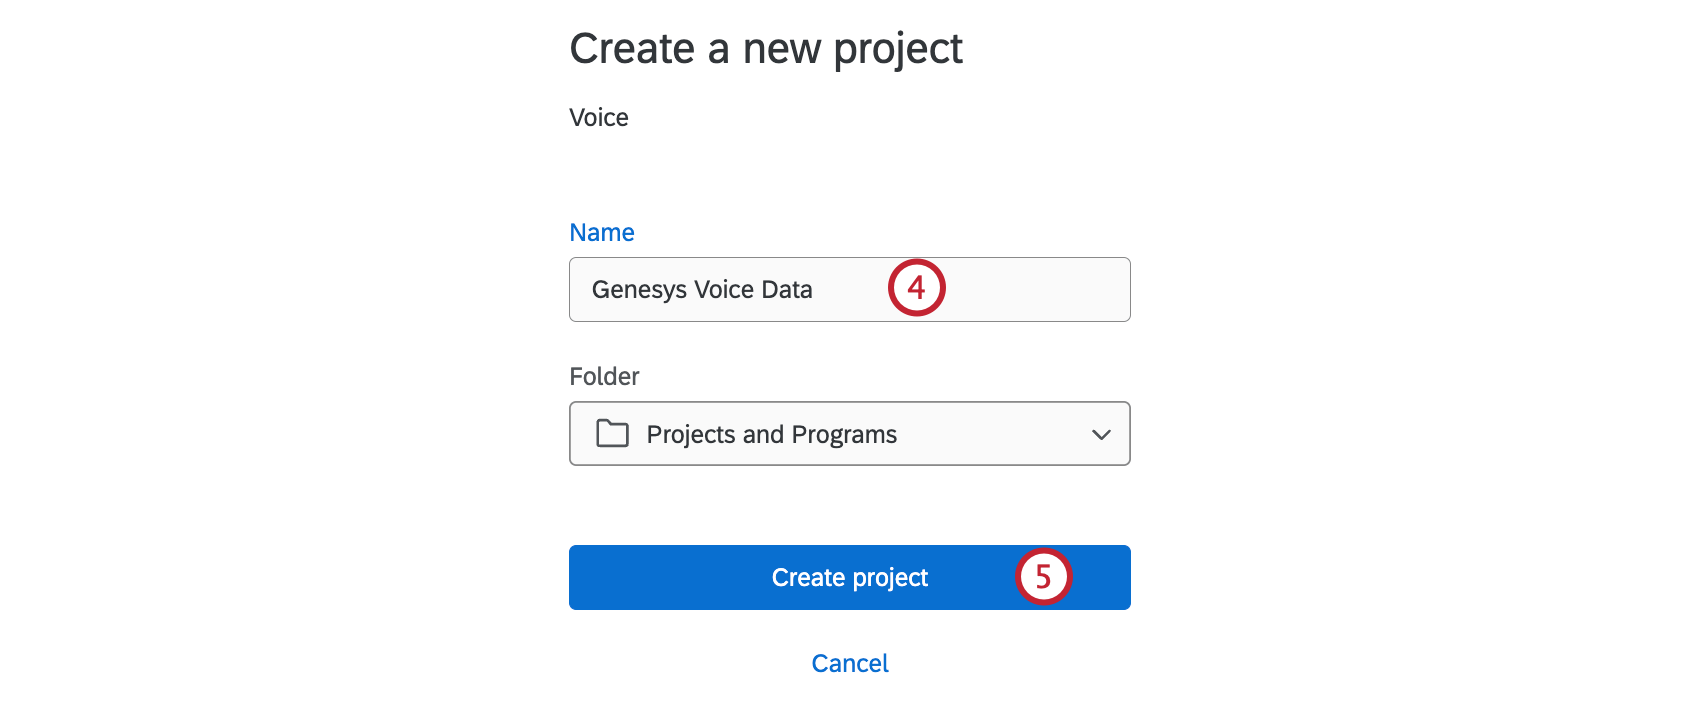
You can create a Voice project by going to the Catalog and searching for the project type by name.
Configuring a Voice Task: Connecting a Voice Provider
After creating your voice project, you can connect your voice provider to Qualtrics so call data can be imported. You’ll then be taken through the steps to configure a voice task.
This section covers how to import data directly from your voice provider. For instructions on importing a file of voice data, see Configuring a Voice Task: Importing via Files.
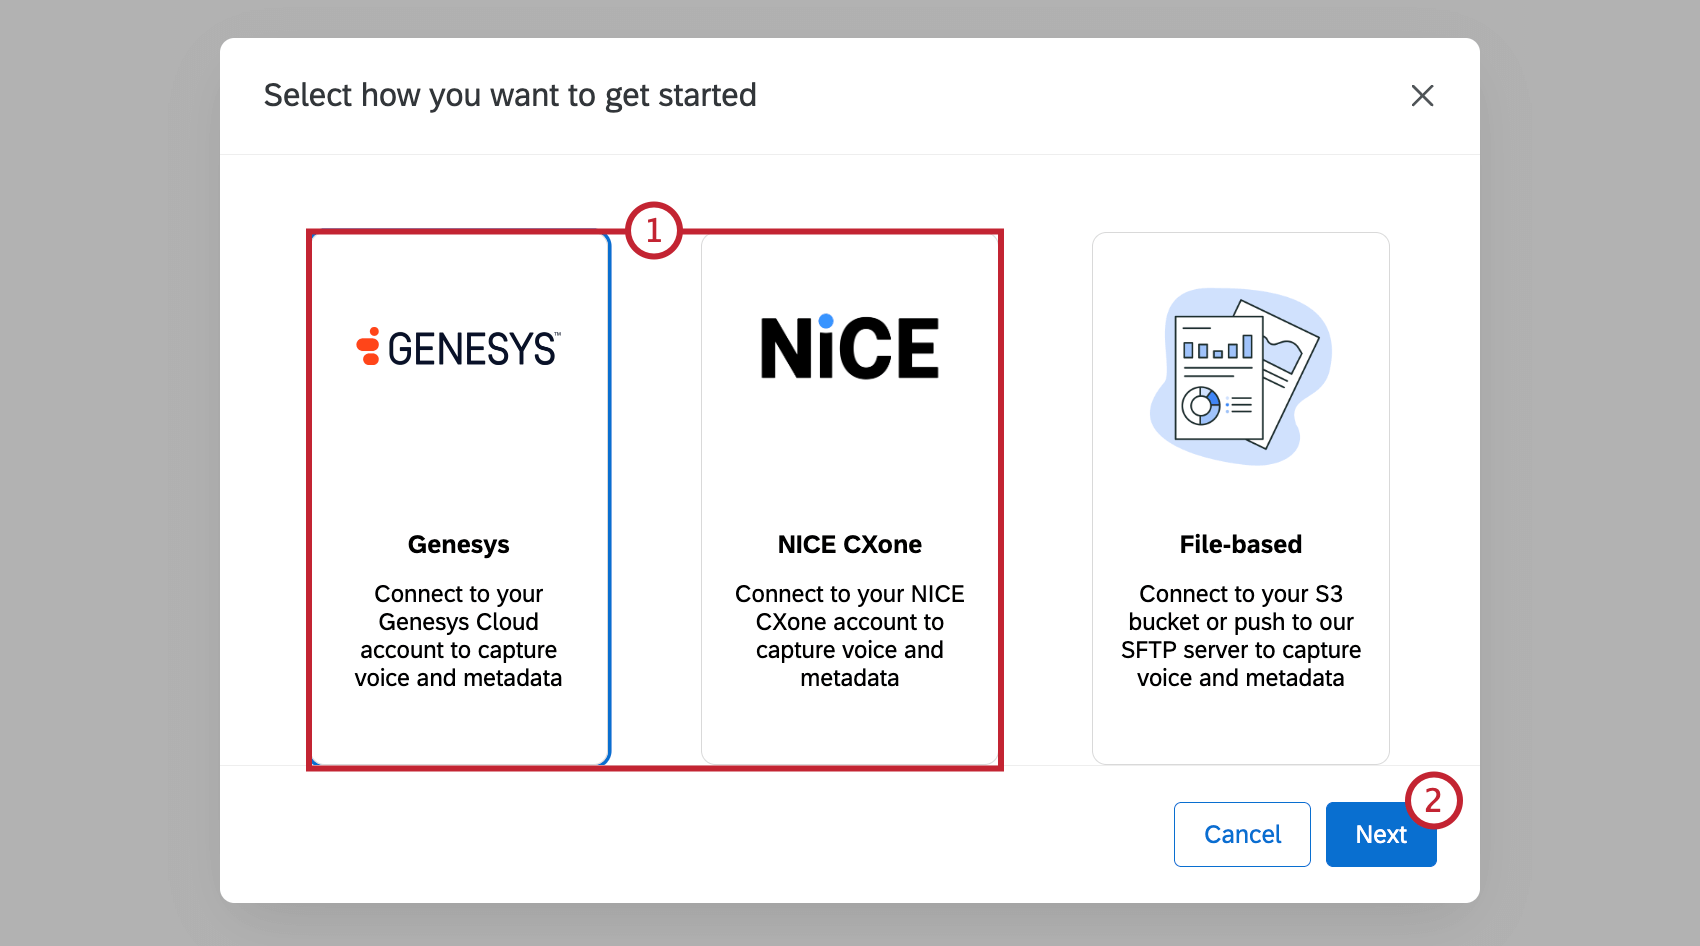
- Genesys: Capture voice and metadata from Genesys Cloud.
- NICE CXone: Capture voice and metadata from NICE CXone.
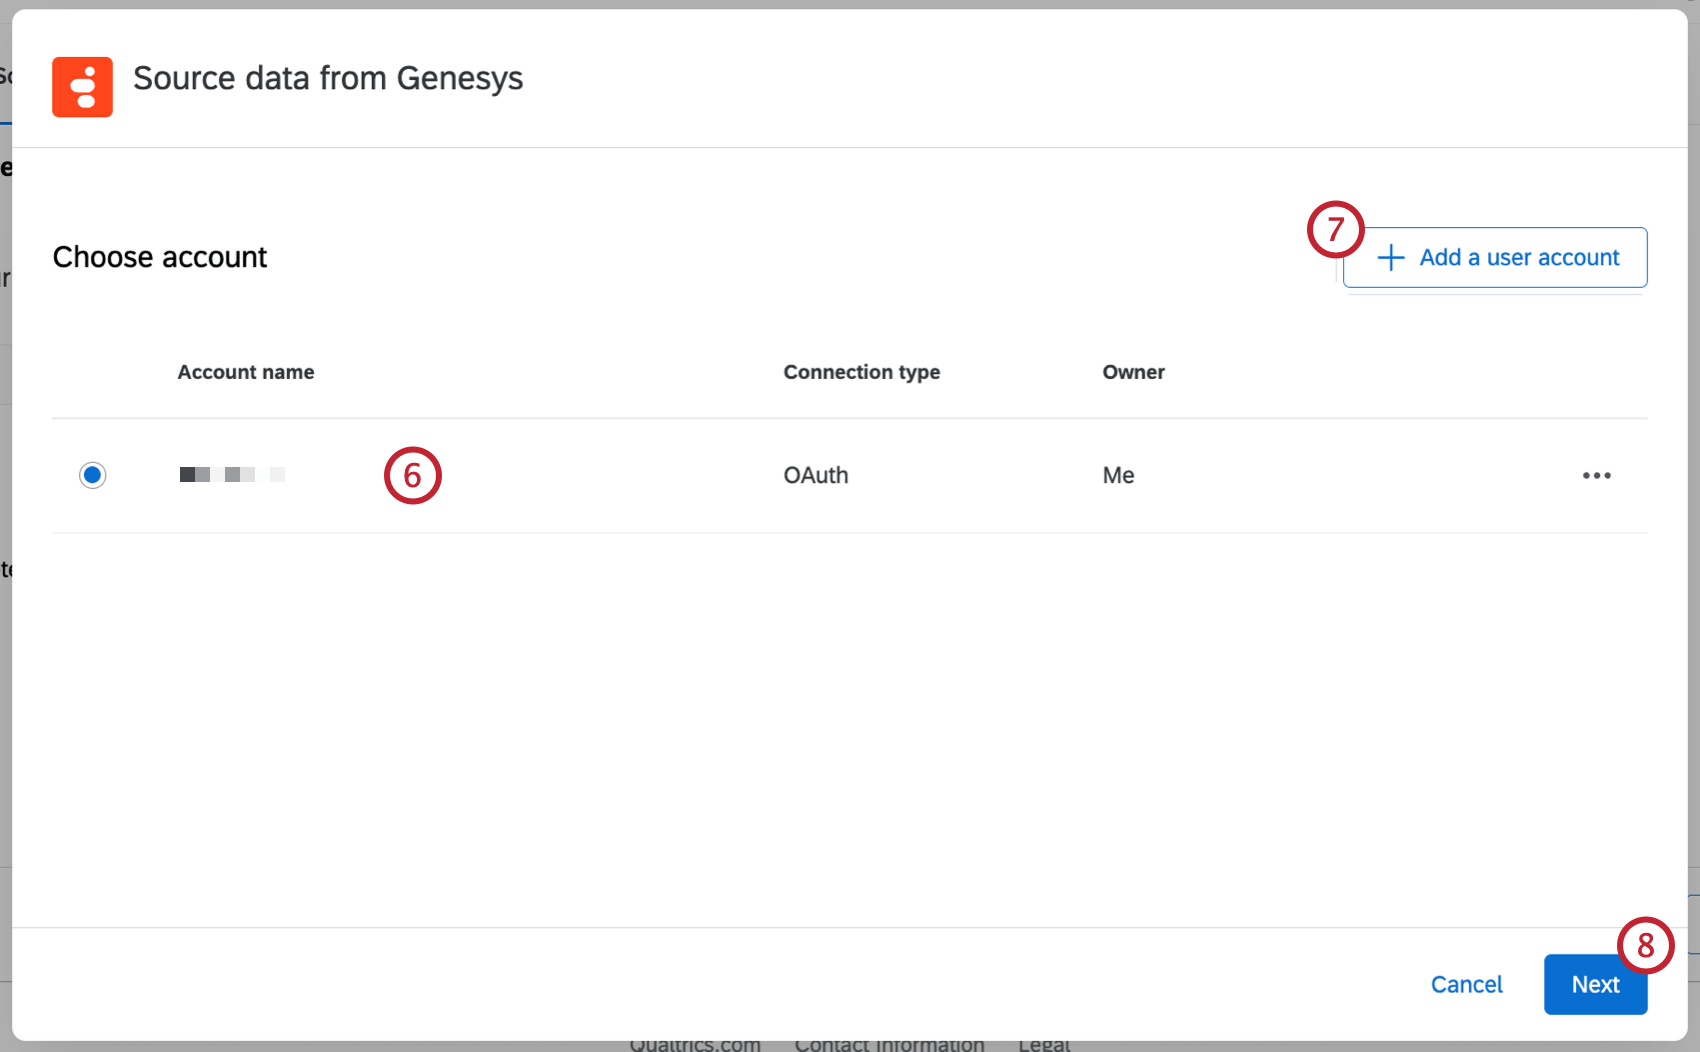
Qtip: Any accounts you’ve previously connected as well as accounts set up by Brand Administrators will be available here.
Qtip: After clicking Add a user account, give the account a name and enter the account credentials, then click Connect account. After clicking Connect account, login with your provider credentials.
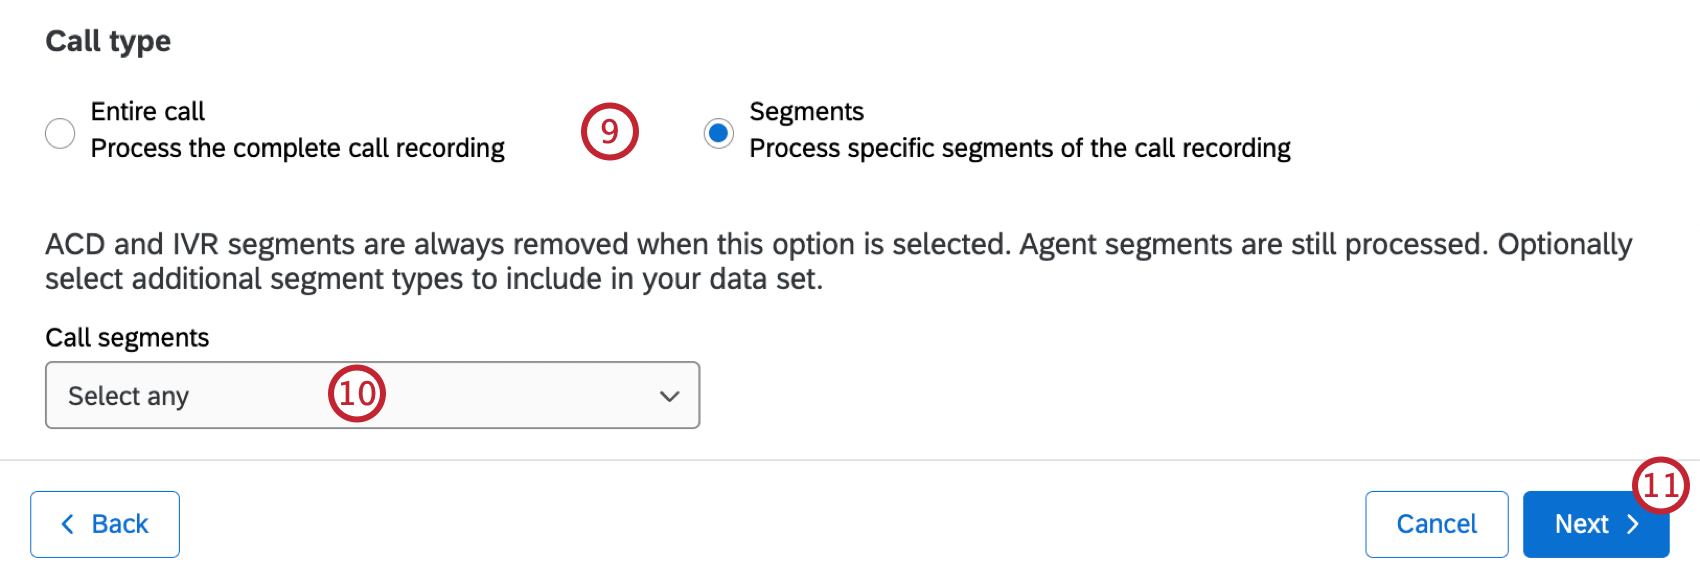
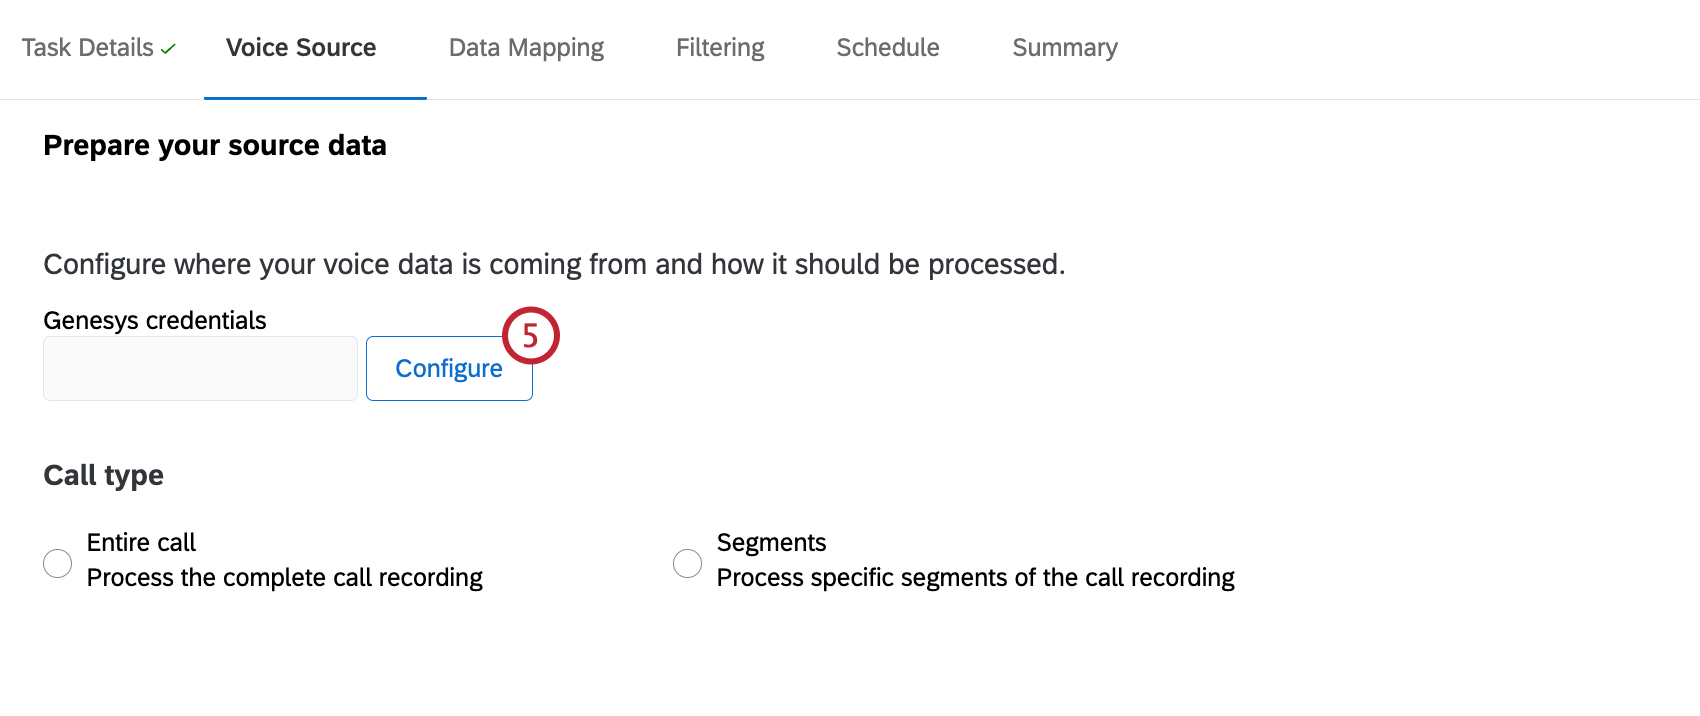
- Entire call: Process the complete call recording with all segments included. This option is recommended.
- Segments: Process only agent to customer segments of the call recording. Any other segments will need to be selected.
Qtip: Agent segments will be automatically processed, but ACD and IVR segments will be removed.
Qtip: You can add additional conditions if needed. See Conditions and Condition Sets for more information.
Qtip: Scheduled tasks will only be enabled after an initial manual run has been completed. To run a task manually, go to the Voice tab and select Run task now. See Viewing and Managing Voice Tasks for more information.
Configuring a Voice Task: Importing via Files
After creating your voice project, you can connect an AWS S3 bucket or push to a Qualtrics SFTP (Secure File Transfer Protocol) server so call data can be imported. You’ll then be taken through the steps to configure a voice task.
The following information must be provided to Qualtrics to import via files:
- SFTP: A public SSH key. Encrypted SSH keys are not supported.
- S3: The ARN, Region, and Bucket Name intended for bucket access.
Using the file-based import method requires that you have 2 files:
- Audio File: The raw voice recording.
- Metadata File: The structured data associated with the recording.
See File Requirements for more information on what kind of files can be imported.
This section covers how to import a file of voice data. For instructions on importing data directly from your voice provider, see Configuring a Voice Task: Connecting a Voice Provider.
Qtip: Audio and metadata files are retained for 45 days after they are imported.
Select File-based as your voice data source.
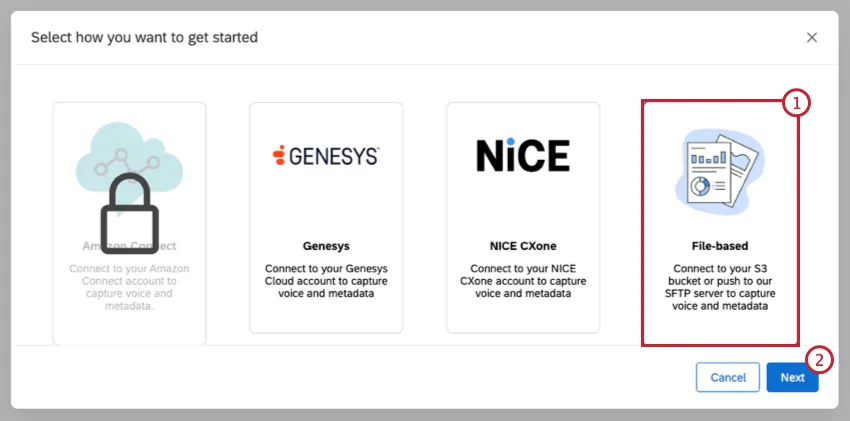
Click Next.
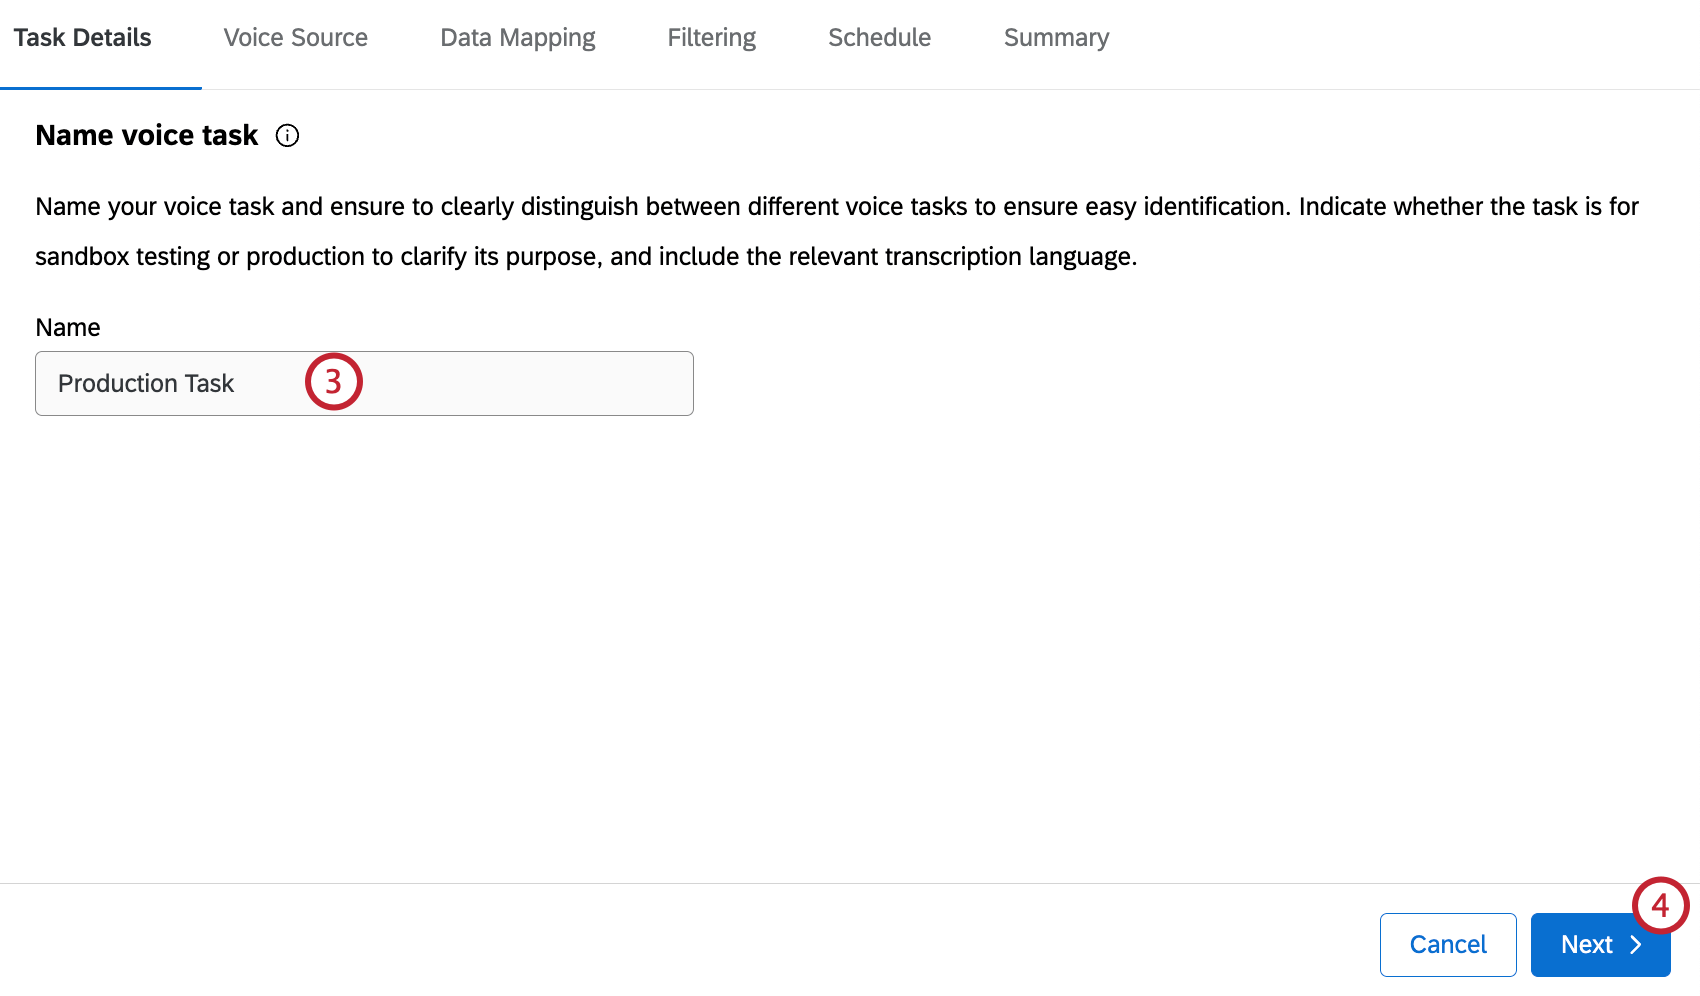
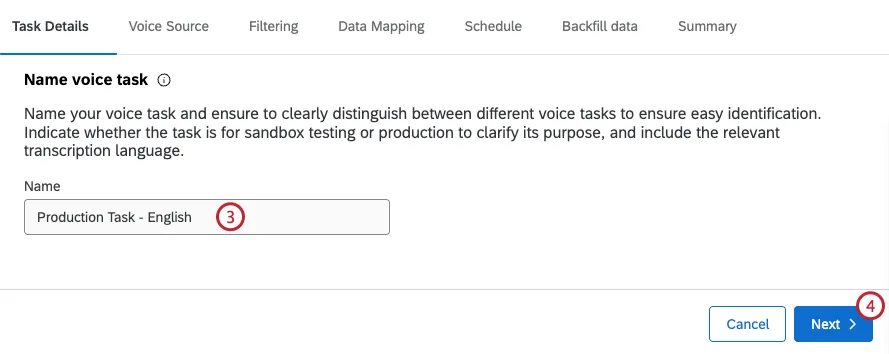
Enter a name for your voice task.
Click Next.
Select the Data delivery method that will be used to import your data. You can choose from the following:
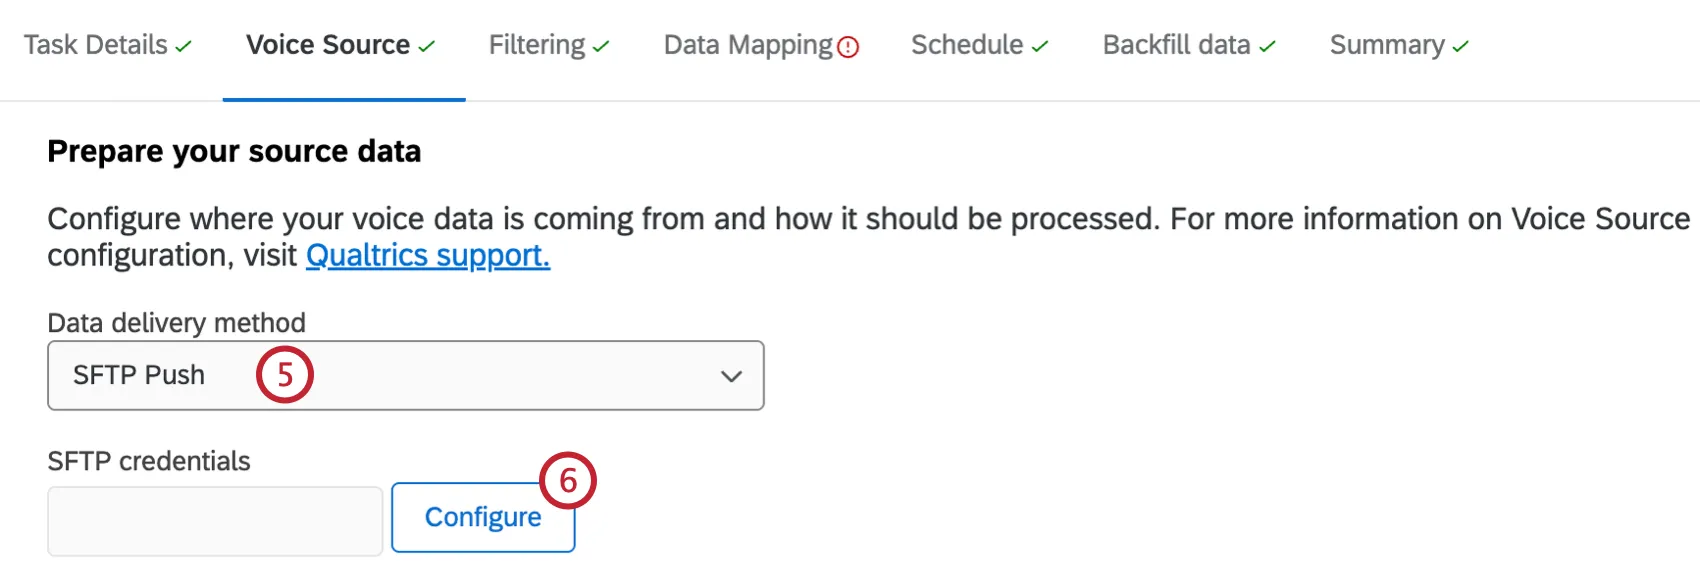
- SFTP Push: Data is pushed to Qualtrics from your SFTP server.
- S3 Pull: Data is pulled from your AWS S3 Bucket. If you select this option you will have to enter your S3 bucket name.
Select Configure to add and verify your S3 or SFTP credentials.
Select the voice provider account to import data from.
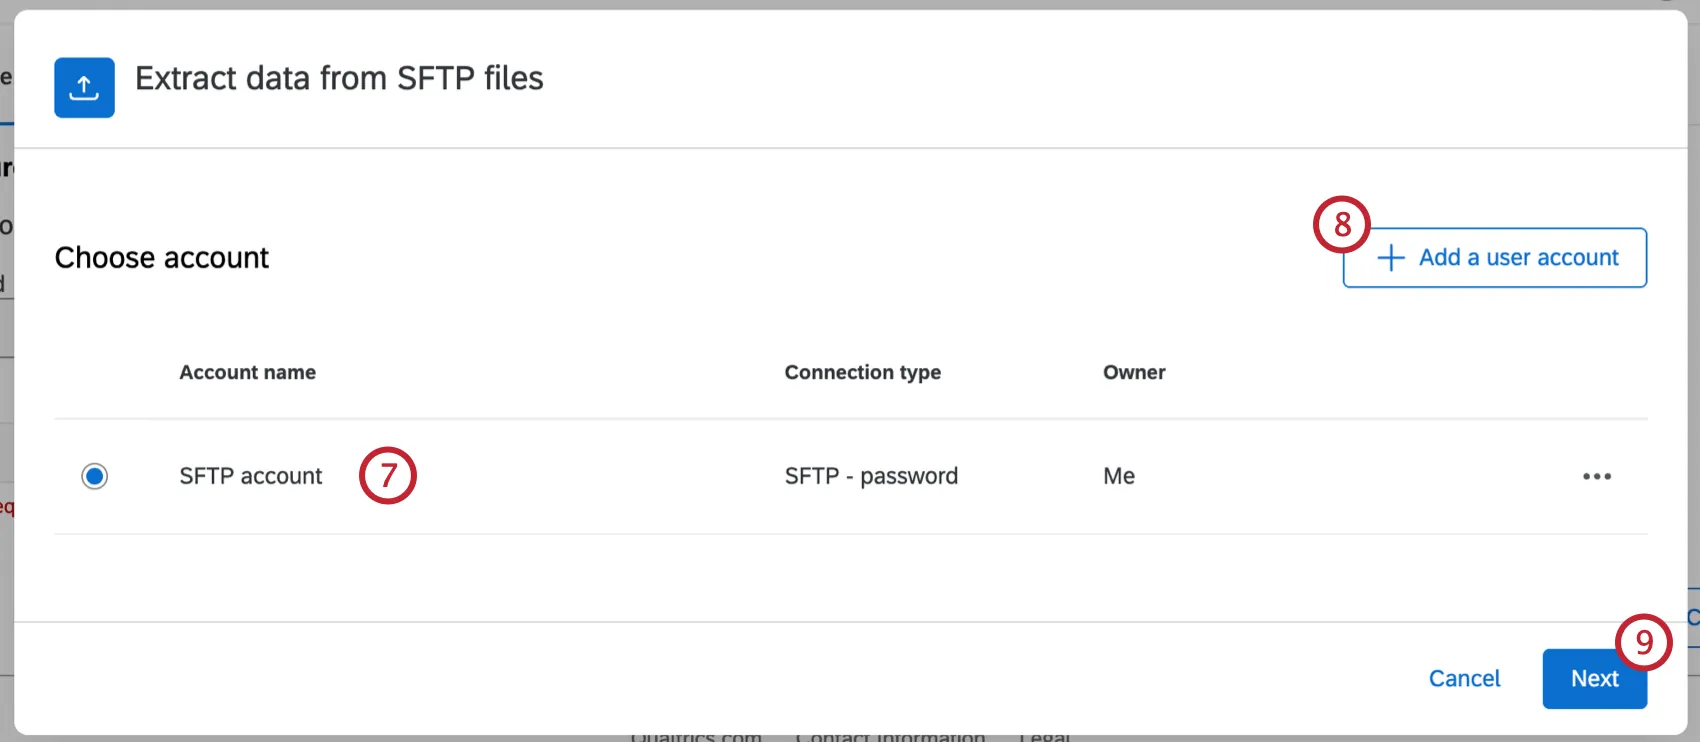
Qtip: Any accounts you’ve previously connected as well as accounts set up by Brand Administrators will be available here.
If you’d like to add a new account, click Add a user account.
Qtip: After clicking Add a user account, give the account a name and enter the account credentials, then click Connect account. After clicking Connect account, login with your provider credentials.
Click Next.
Enter the Join Key that will connect your audio and metadata. If you want to just use the metadata file name, check Use metadata file name as join key.

Qtip: This requires that the audio file name is explicitly listed as a value within your metadata file.
Enter the location of your audio files. All files must be in a designated folder (SFTP) or prefix (S3) to separate them from system root files. Audio and metadata files can be in the same location.
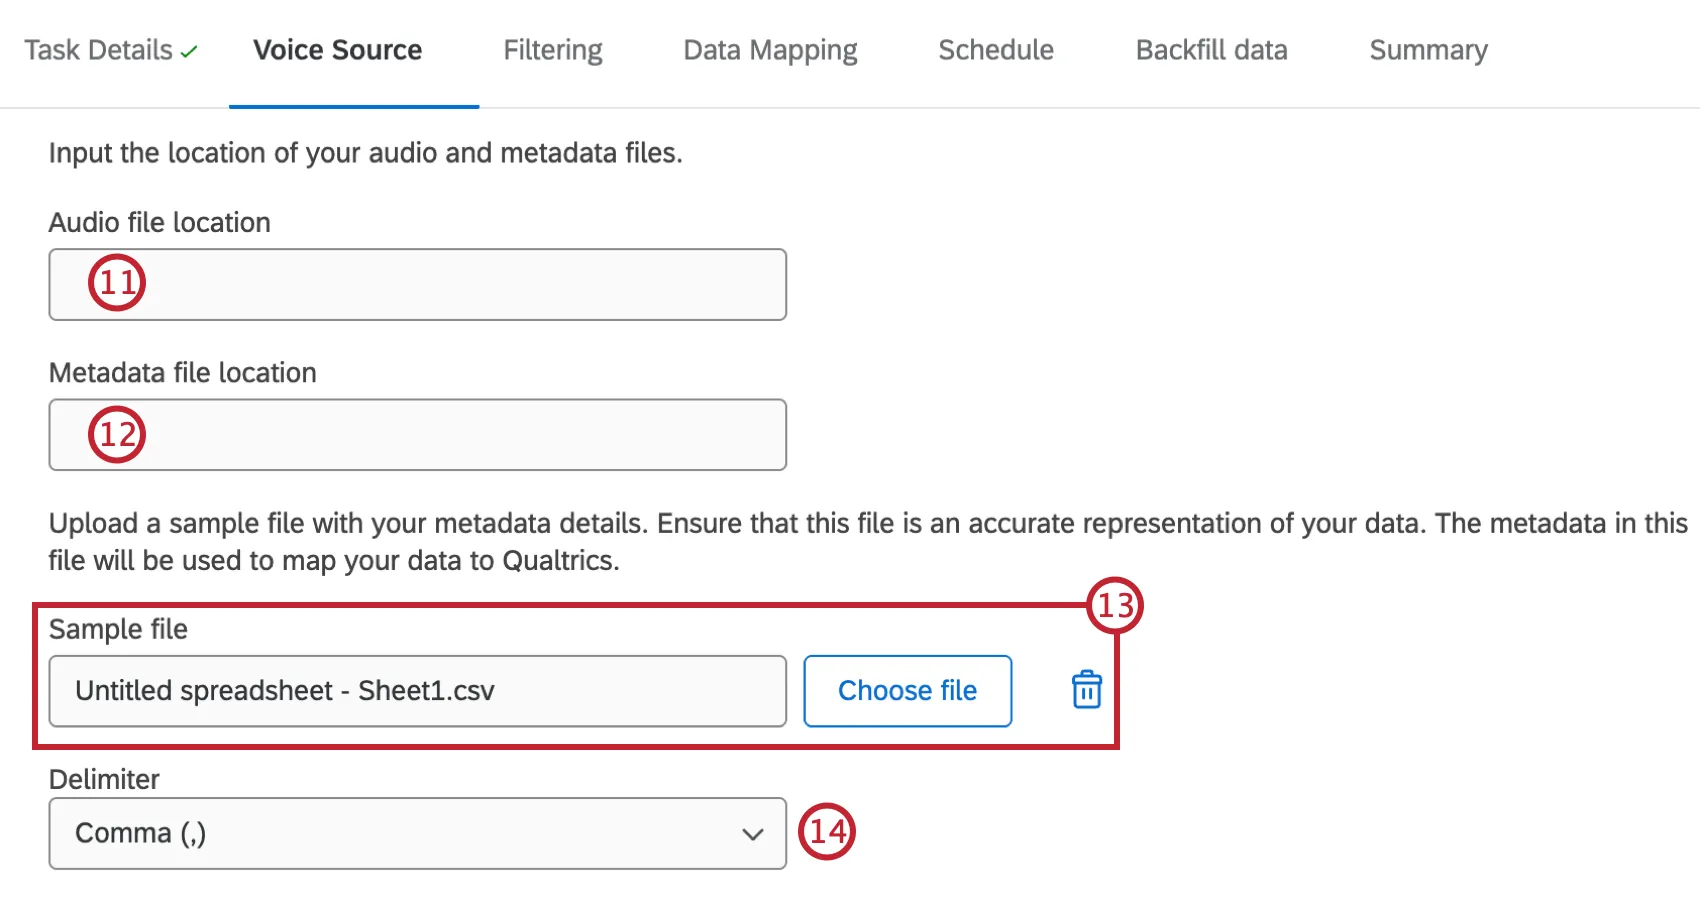
Enter the location of your metadata files.
Select a sample file that contains your metadata. This file will be used to map your data to Qualtrics. Click Choose file to upload a sample file, or enter the direct file path.
Qtip: The file you choose here must have the exact same metadata you will be sending to Qualtrics. Only headers are necessary when uploading a CSV.
Qtip: Click the trash icon to remove an uploaded file.
If you uploaded a CSV file, select the delimiter.
If you selected Use metadata file name as join key in Step 10, select the format of your audio files.
The agent’s channel will be set to left by default. If you need to change this, reach out to Qualtrics support.

Select the voice source for your file. You can choose from an existing voice vendor, or select “Other”.
If you selected “Other” for the voice source, enter the name of your voice vendor.
If desired, check Enable PGP Encryption. If you chose to enable PGP encryption, click Download Public Key. For more information, see the PGP Encryption support page.
Click Next.
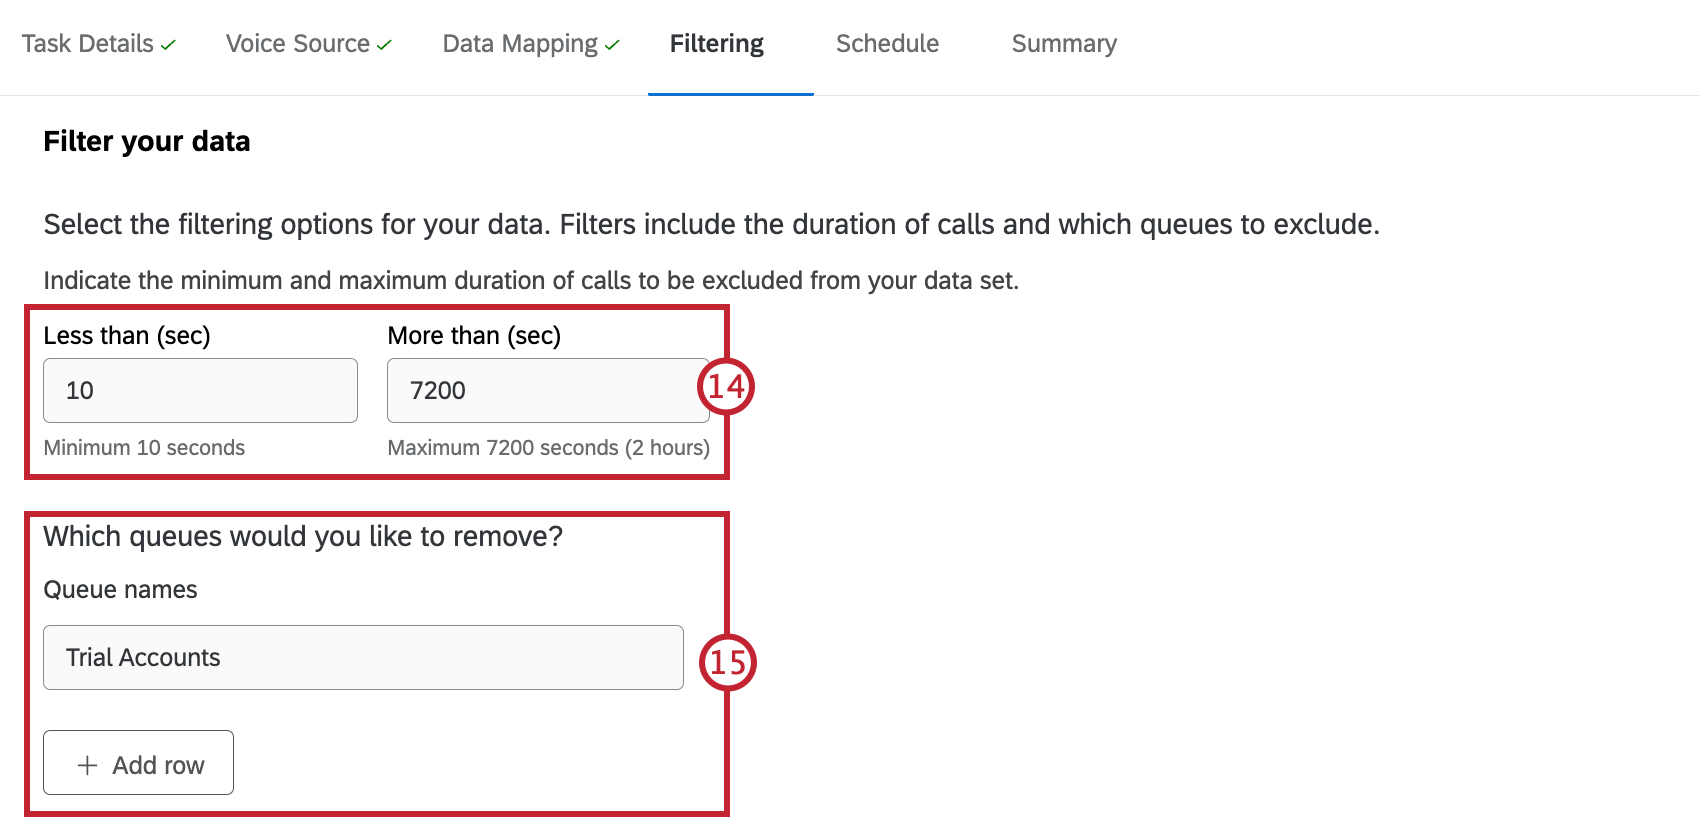
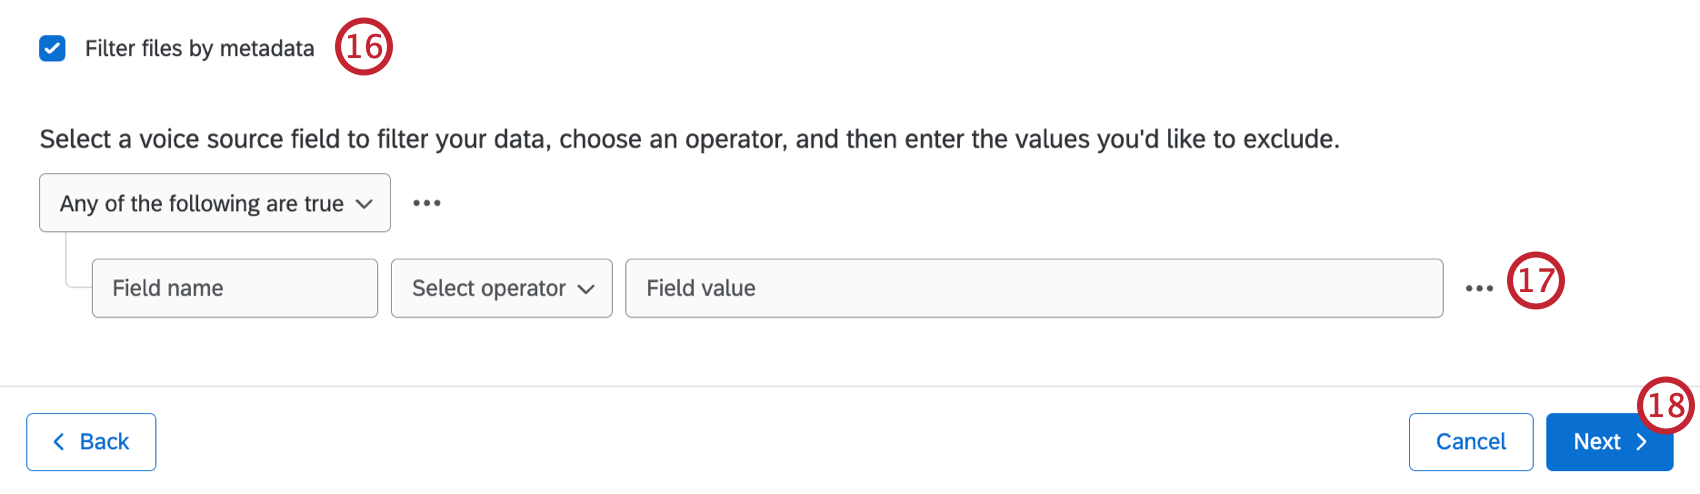
If you want to filter your data by specific metadata fields, configure your filter. Only data that meets the filter criteria will be included. Adding a filter is optional.
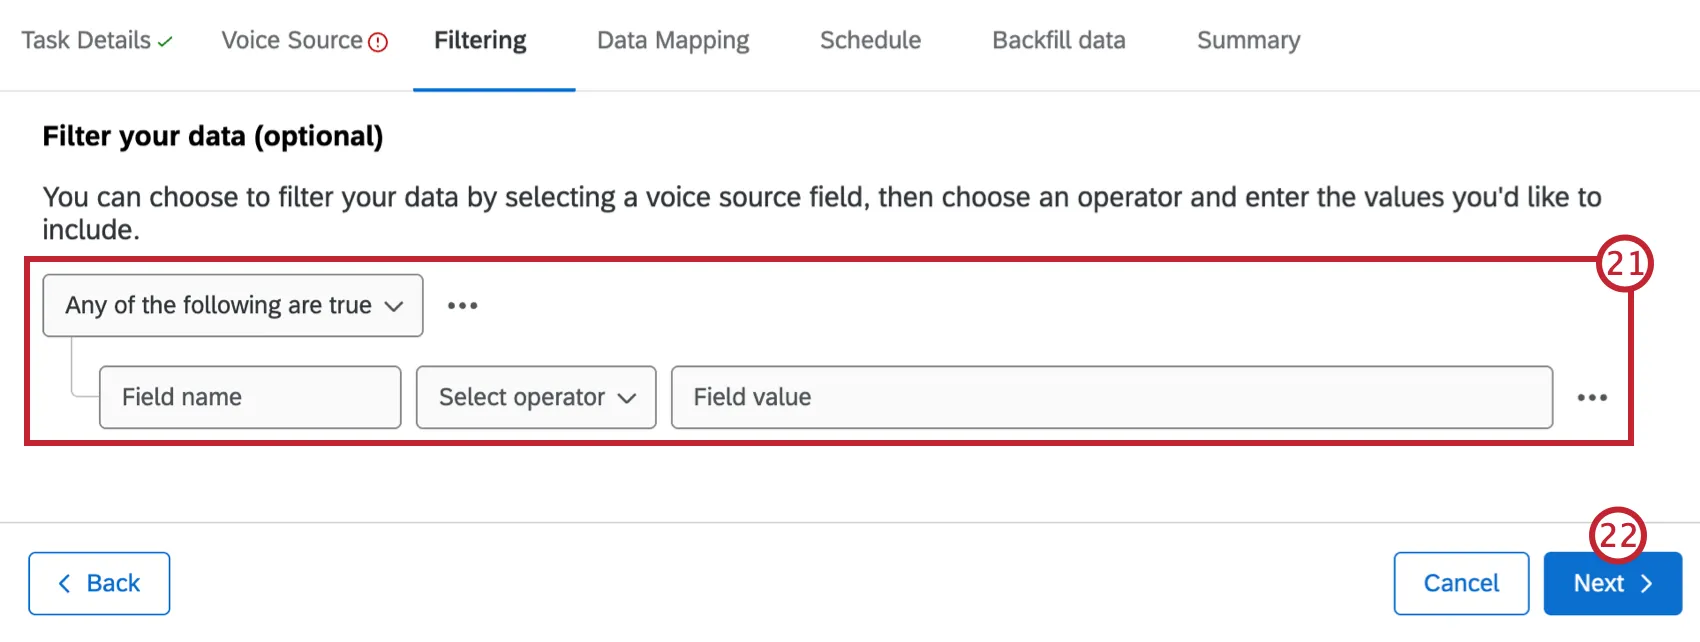
Qtip: You can add additional conditions if needed. See Conditions and Condition Sets for more information.
Click Next.
Map your contact center data to the corresponding fields in Qualtrics. See Mapping Voice Data for more information.
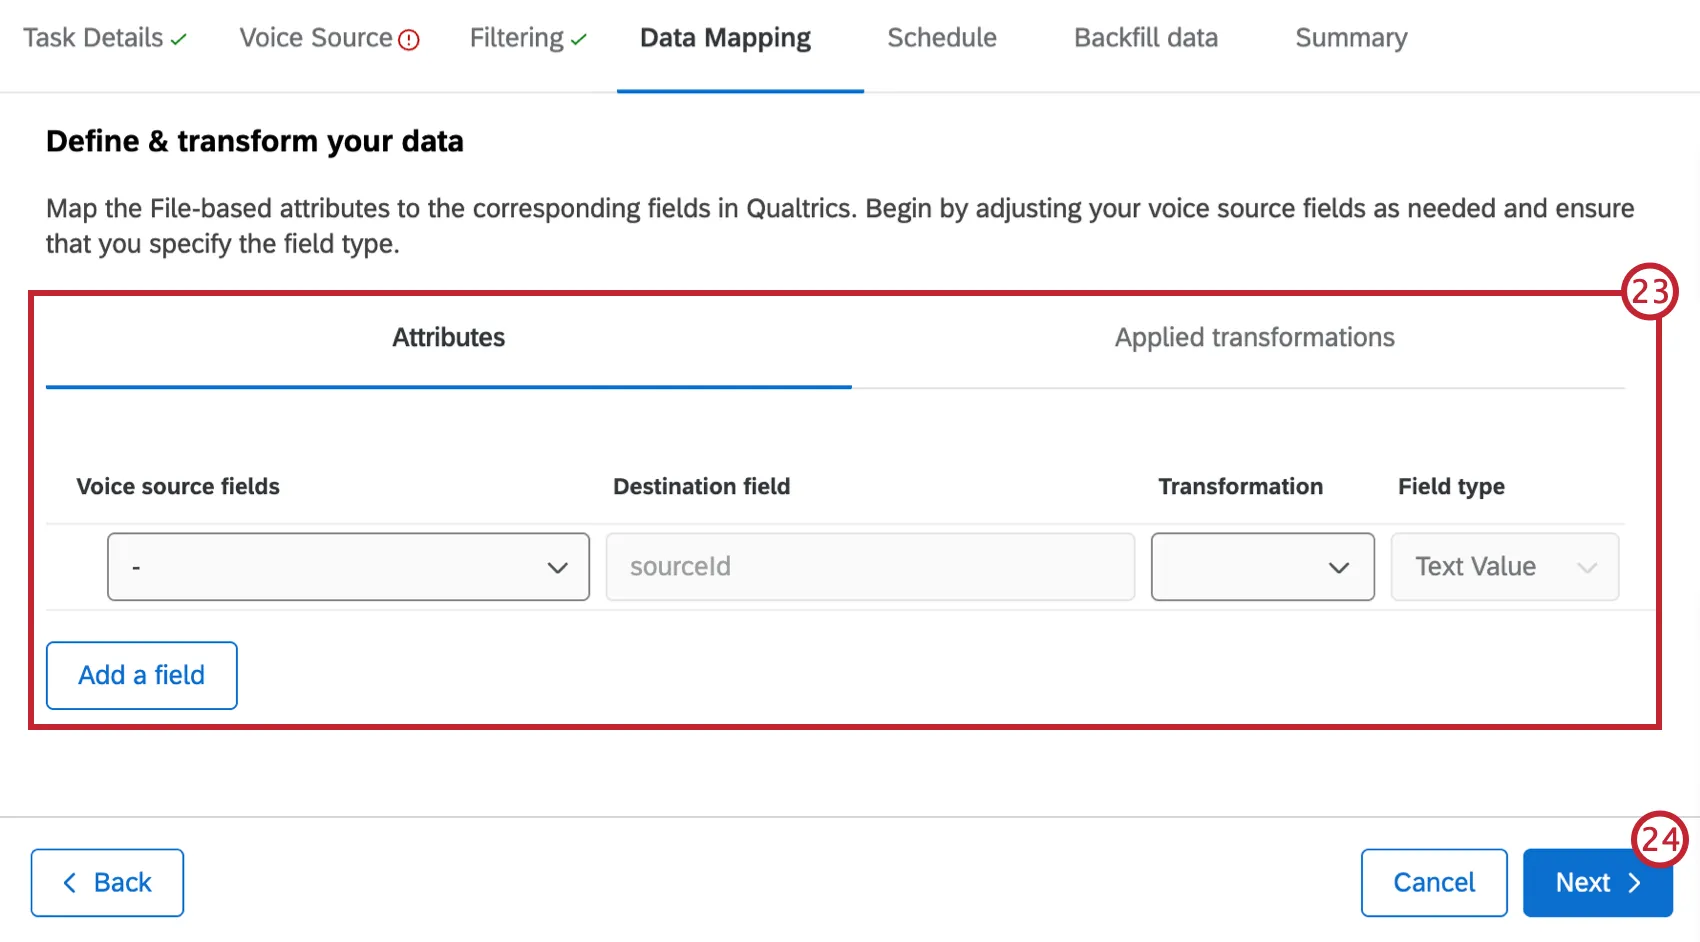
Attention: You must map a field to the sourceId destination field.
Click Next.
Use the dropdown to select how often you’d like this task to run.
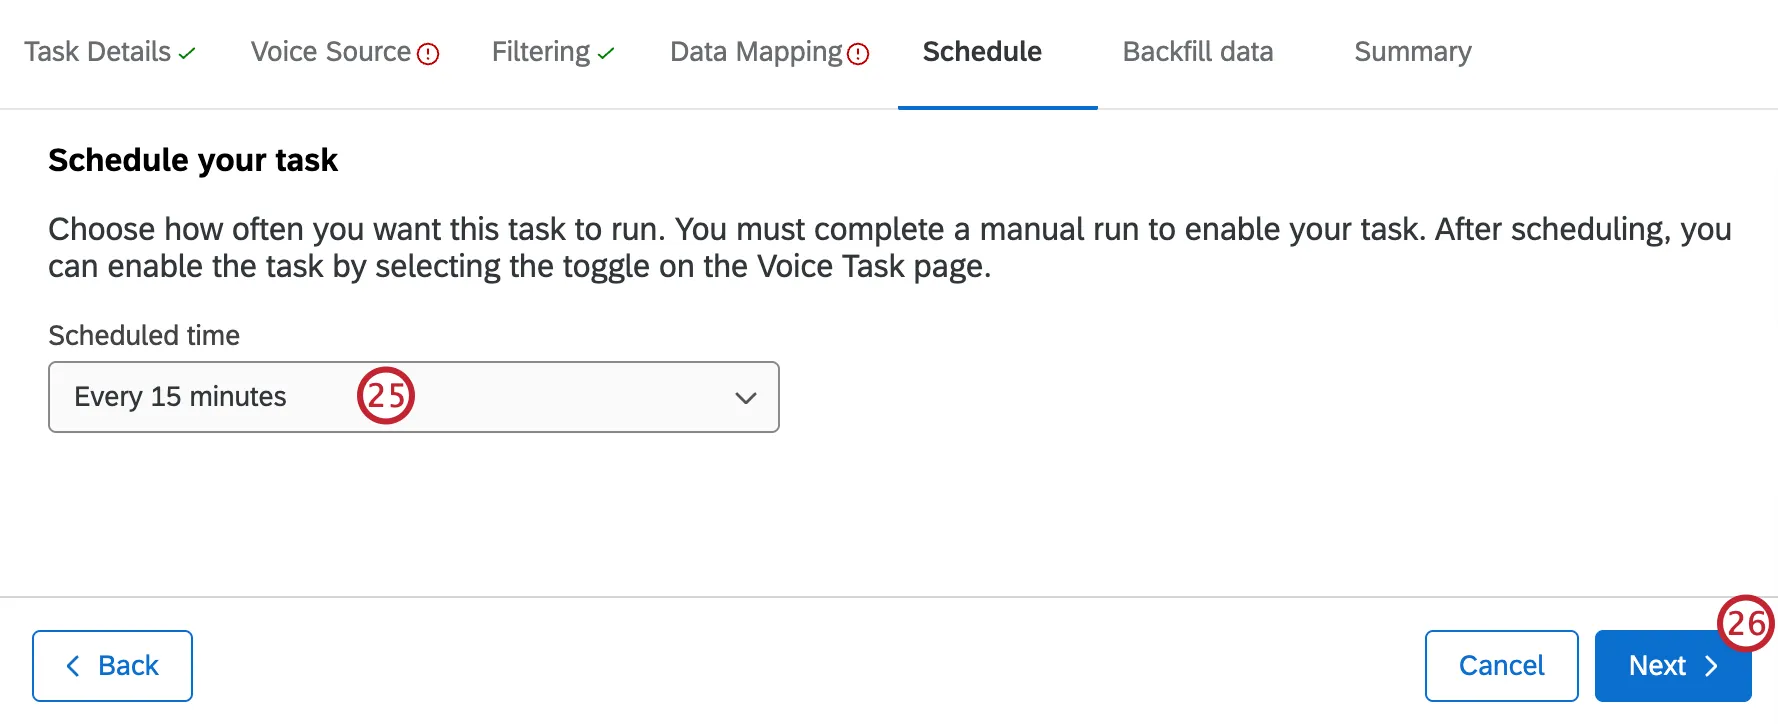
Qtip: Scheduled tasks can only be enabled after an initial manual run has been completed. To run a task manually, go to the Voice tab and select Run task now. See Viewing and Managing Voice Tasks for more information.
Click Next.
If you want to backfill past call data, see the section below for instructions. Otherwise, click Next.
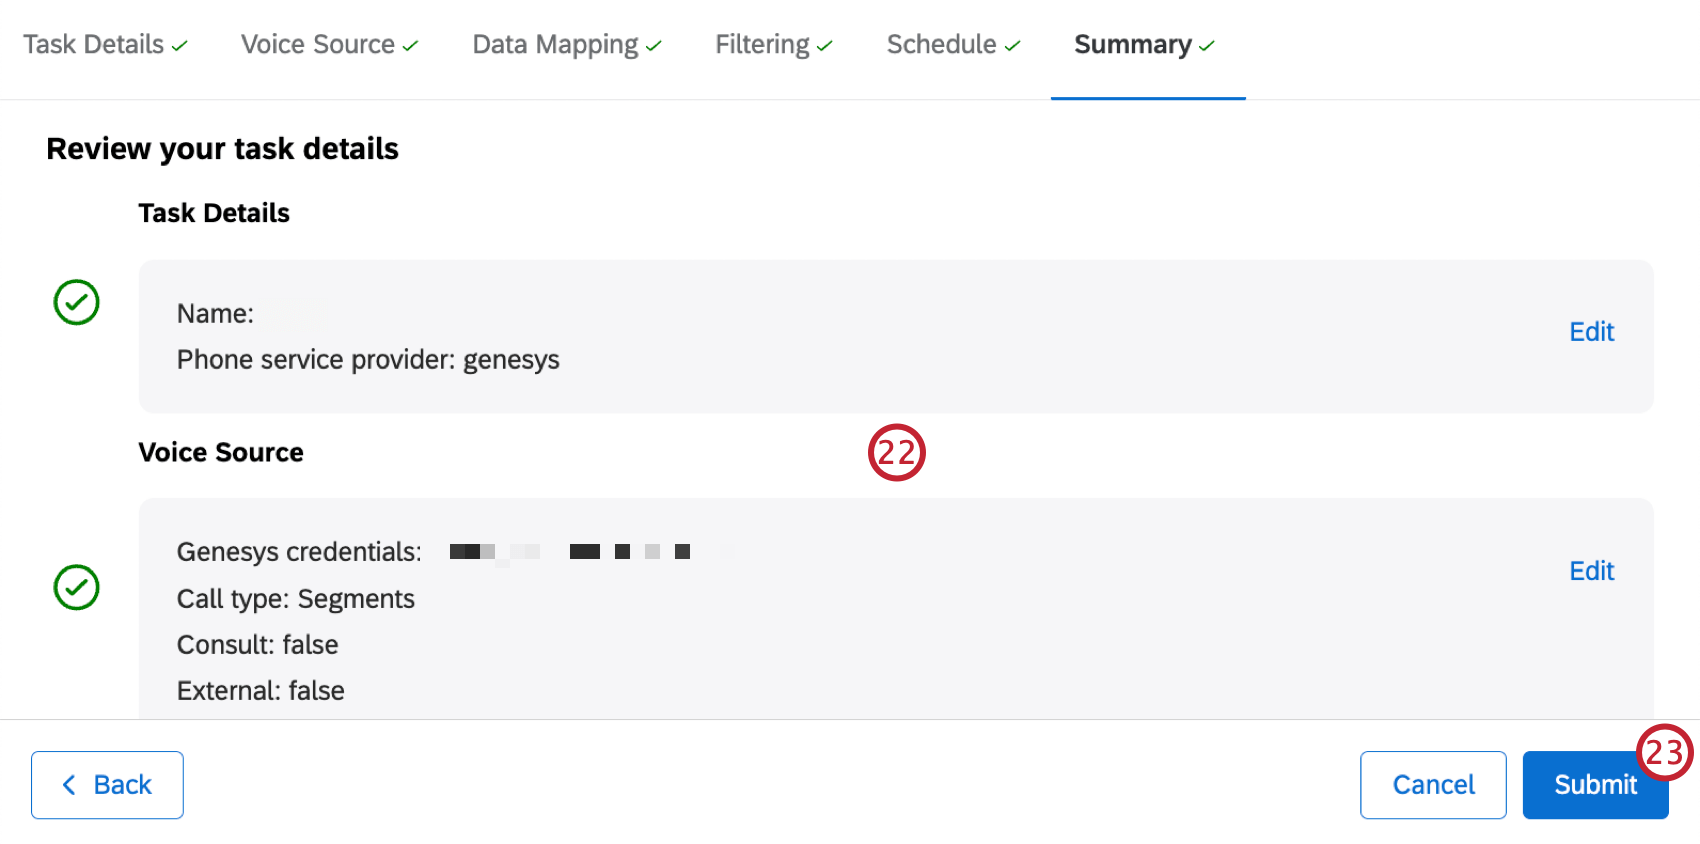
Review your task details. Click Edit next to any details you want to edit.
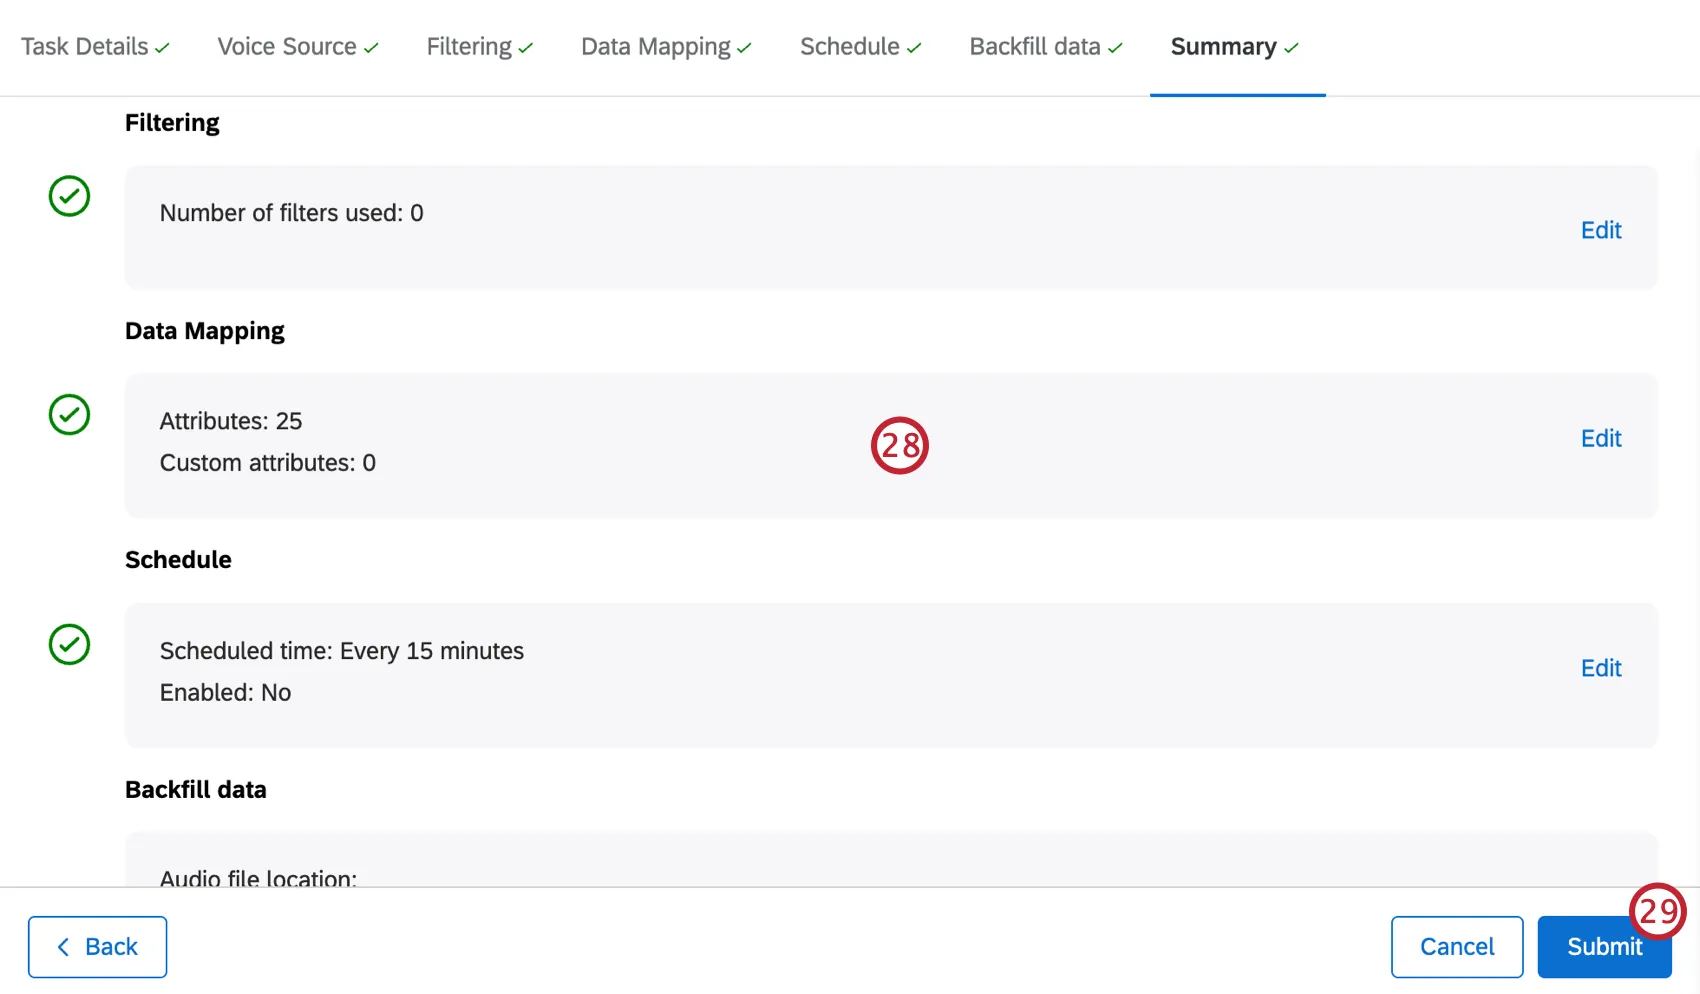
Once you’re satisfied with your task, click Submit.
Backfilling Data
If you want to retroactively process past call data, you can optionally import previous records for analysis. These steps occur after you’ve configured the rest of your voice task.
Enter the location of your audio files.
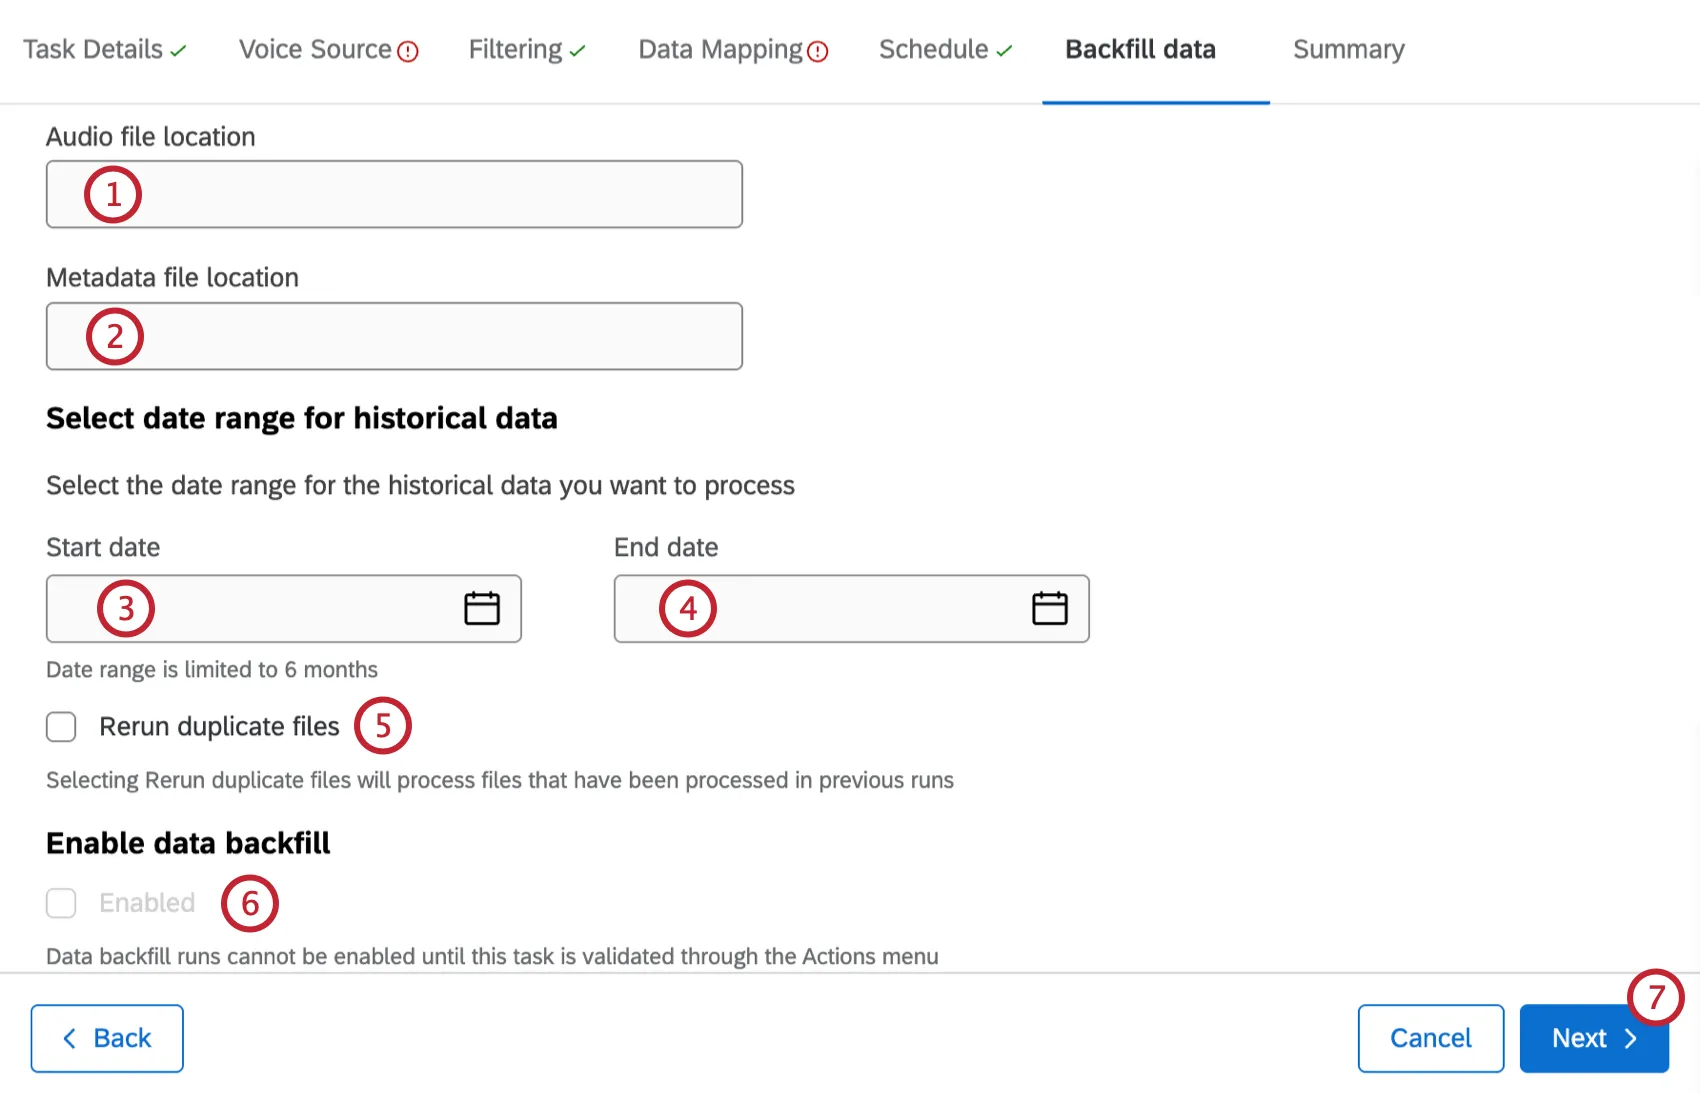
- Enter the location of your metadata files.
- Select a start date for your historical data.
- Select an end date for your historical data.
- If desired, check Rerun duplicate files. This will process files that have already been processed in previous runs.
- If desired, click Enabled to enable data backfill runs. This can only be turned on after a validation task is run. See Viewing and Managing Voice Tasks for more information.
Navigating Voice Projects
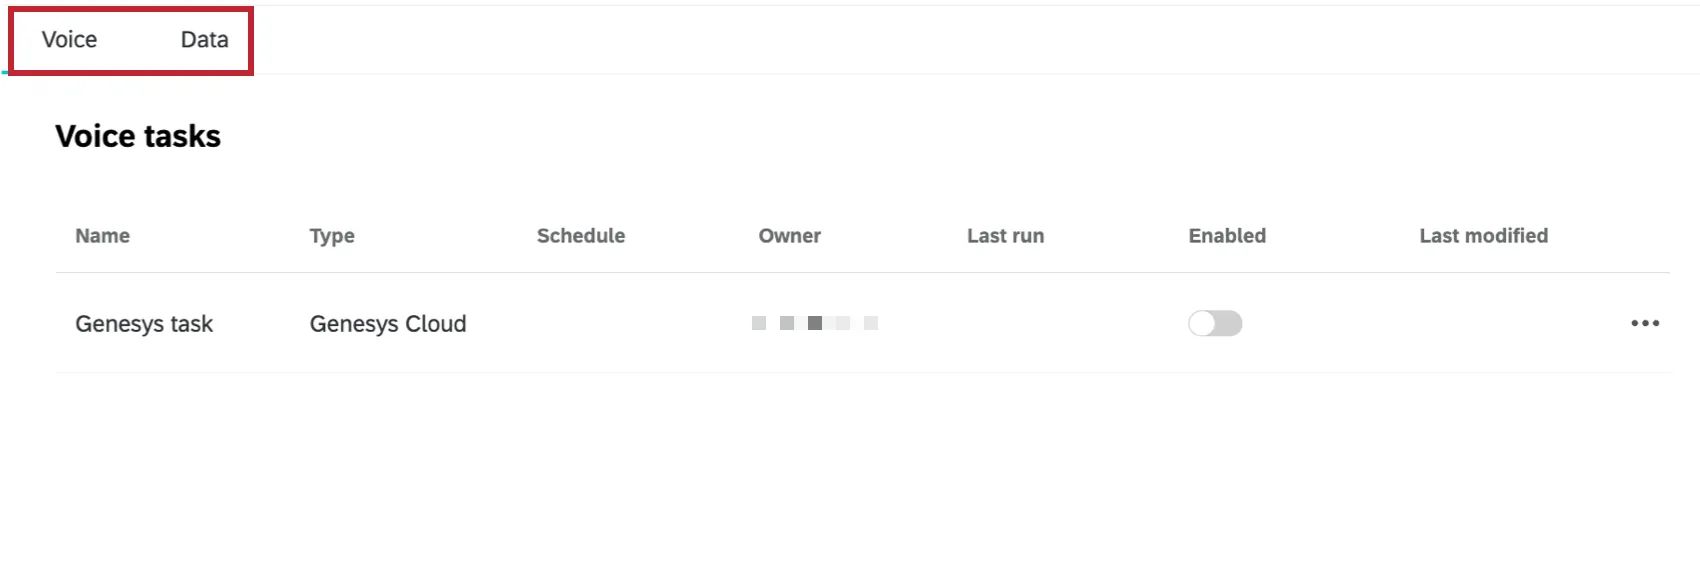
Voice projects have 2 main tabs:
- Voice: This is the homepage of your project. Here, you can see the voice tasks you have set up. You can also use the 3 horizontal dots to the right of a task to perform additional actions.
- Data: As your voice tasks pull data, those conversations will appear in this tab. Use this space to browse data and perform introductory analysis.
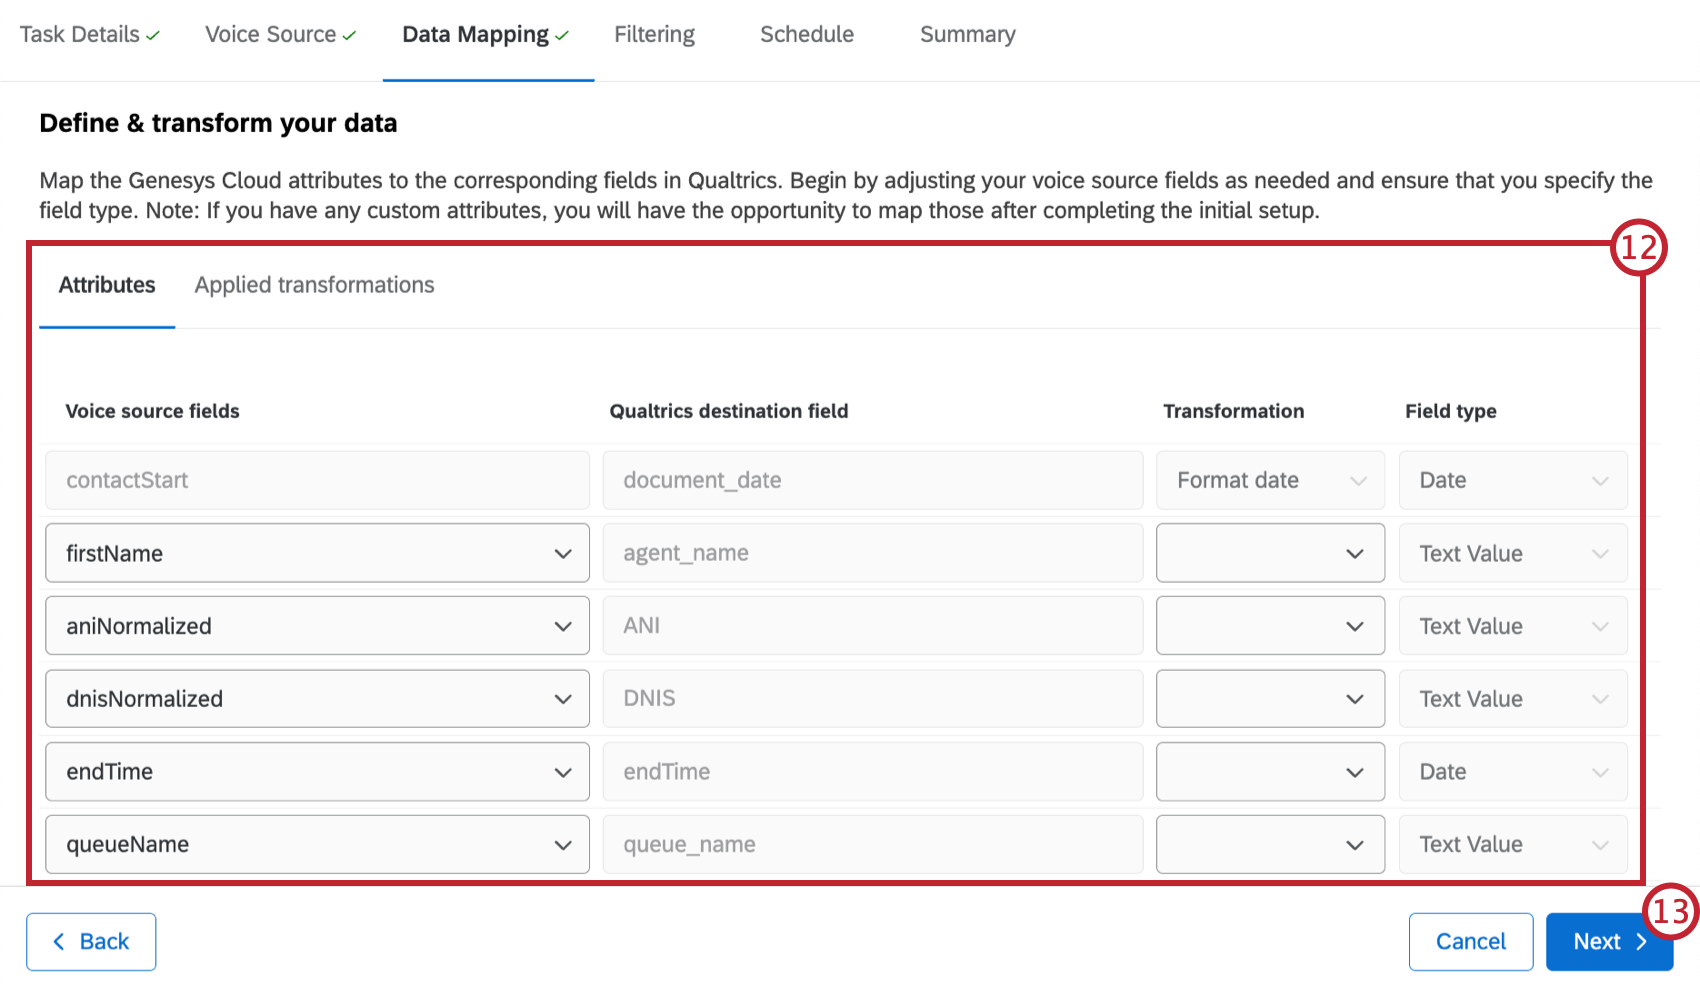
Mapping Voice Data
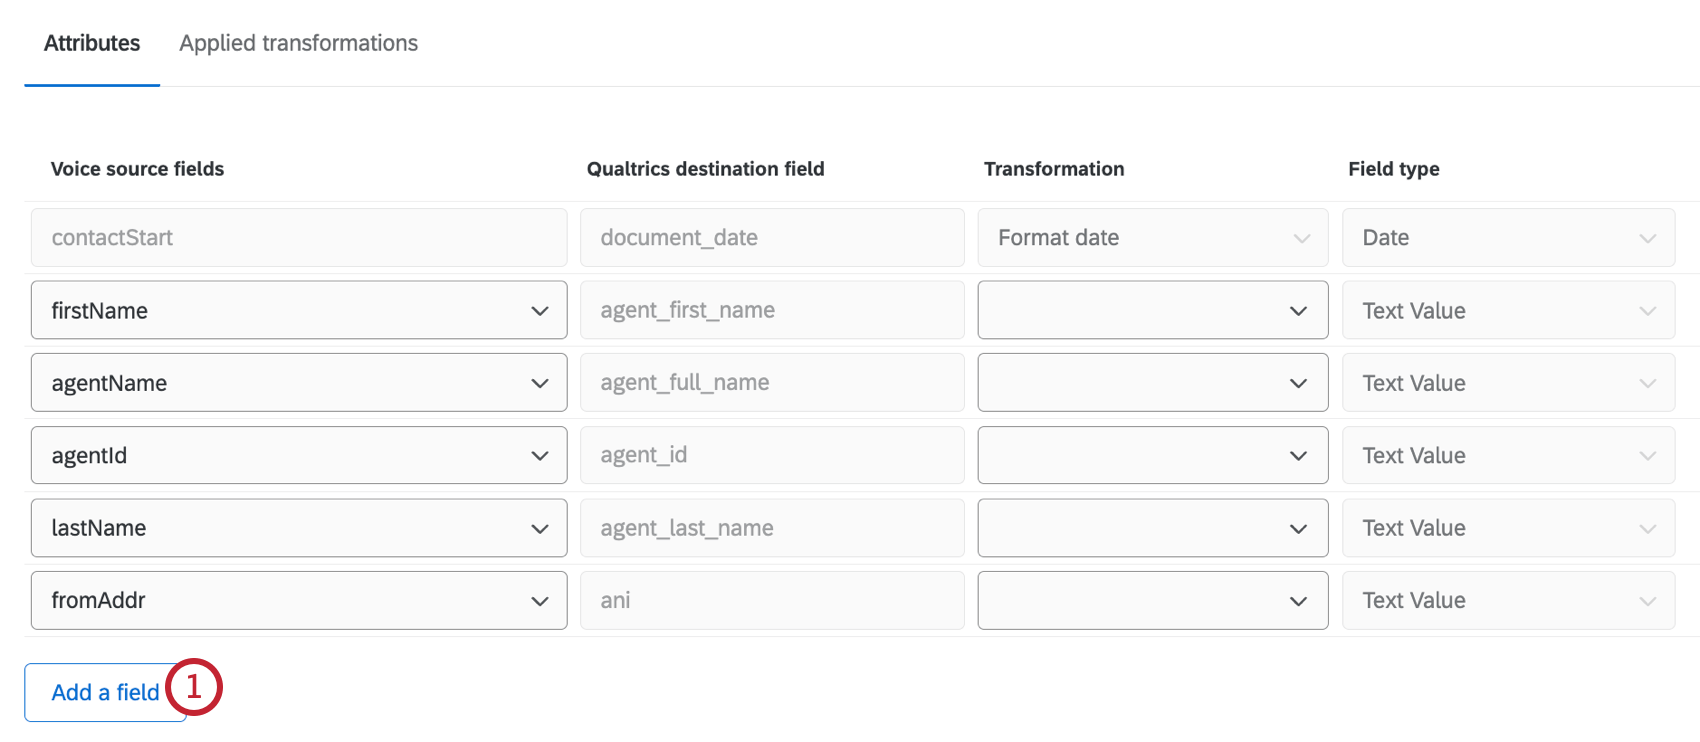
In the data mapping stage, you’ll map your voice provider attributes to the corresponding fields in your Voice project. You can also specify the field type for each field and apply transformations. The data mapping section has 2 tabs:
- Attributes: Here you can map voice provider attributes to a Qualtrics destination field.
- Applied transformations: Here you can view transformations that have been applied to your attributes.
Mapping Attributes

When you edit this task, you will be able to edit field mappings, but you won’t be able to choose different field types. You can apply transformations or add additional fields to map.
Custom Attributes
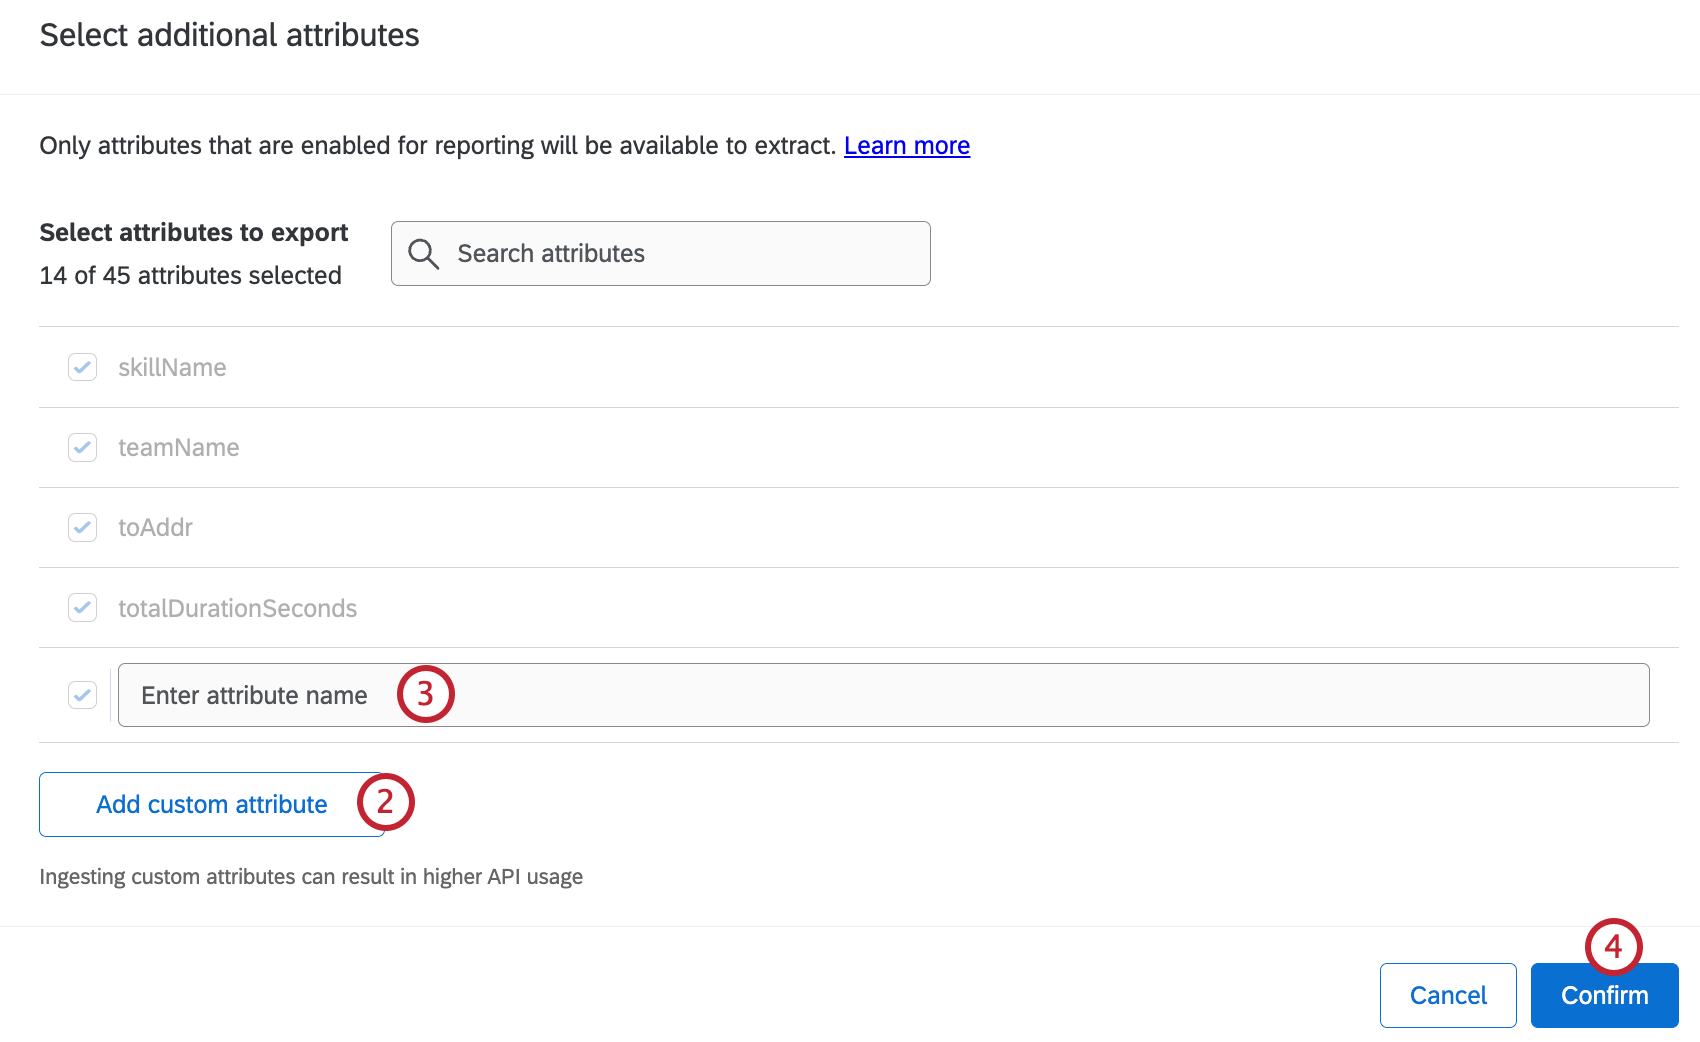
Applying Transformations
To apply a transformation, select the transformation type from the dropdown in the Attributes tab. The following types of transformations are available:
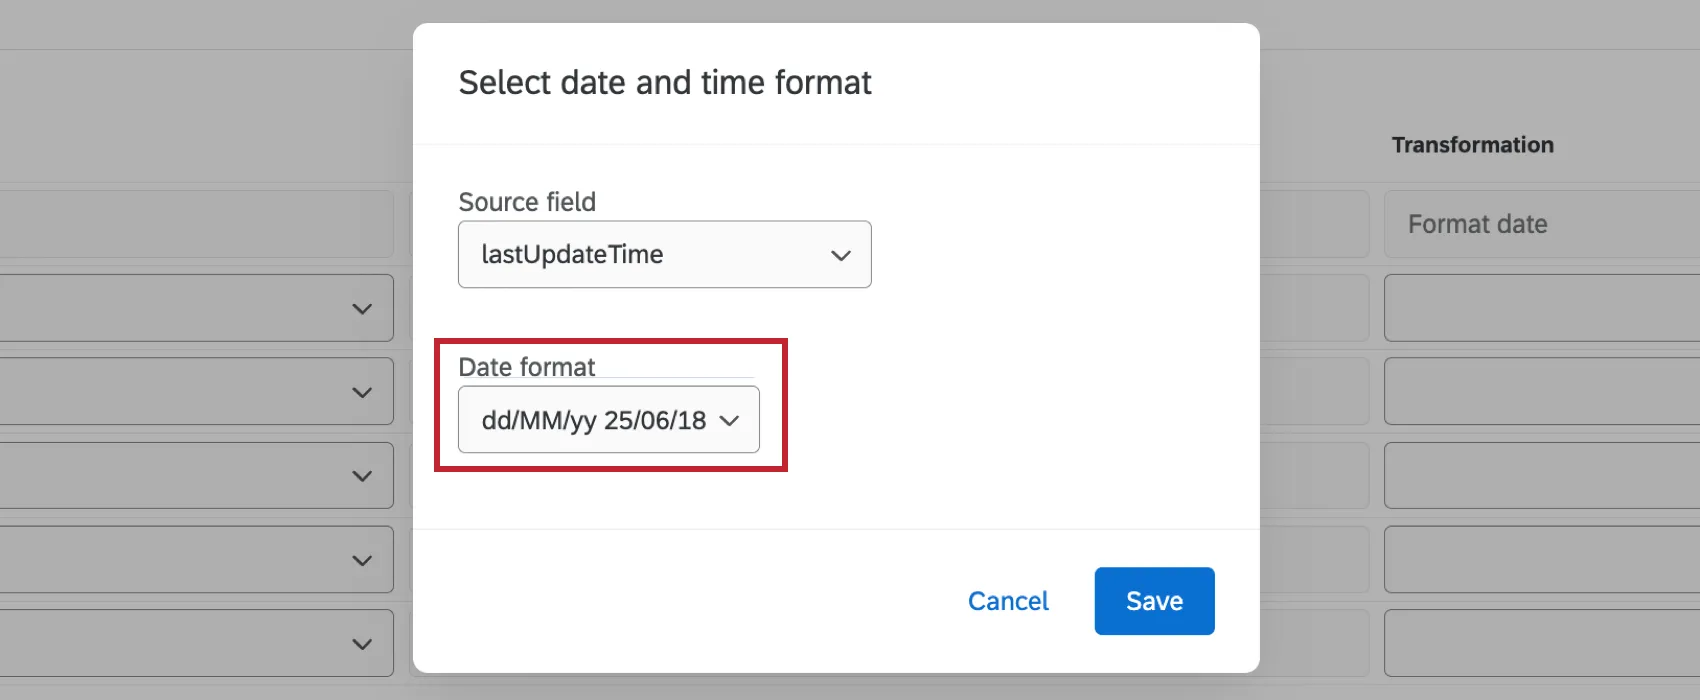
Format date: Apply a specific date format to your source field. Select the date field you want to transform and select a date format from the dropdown.
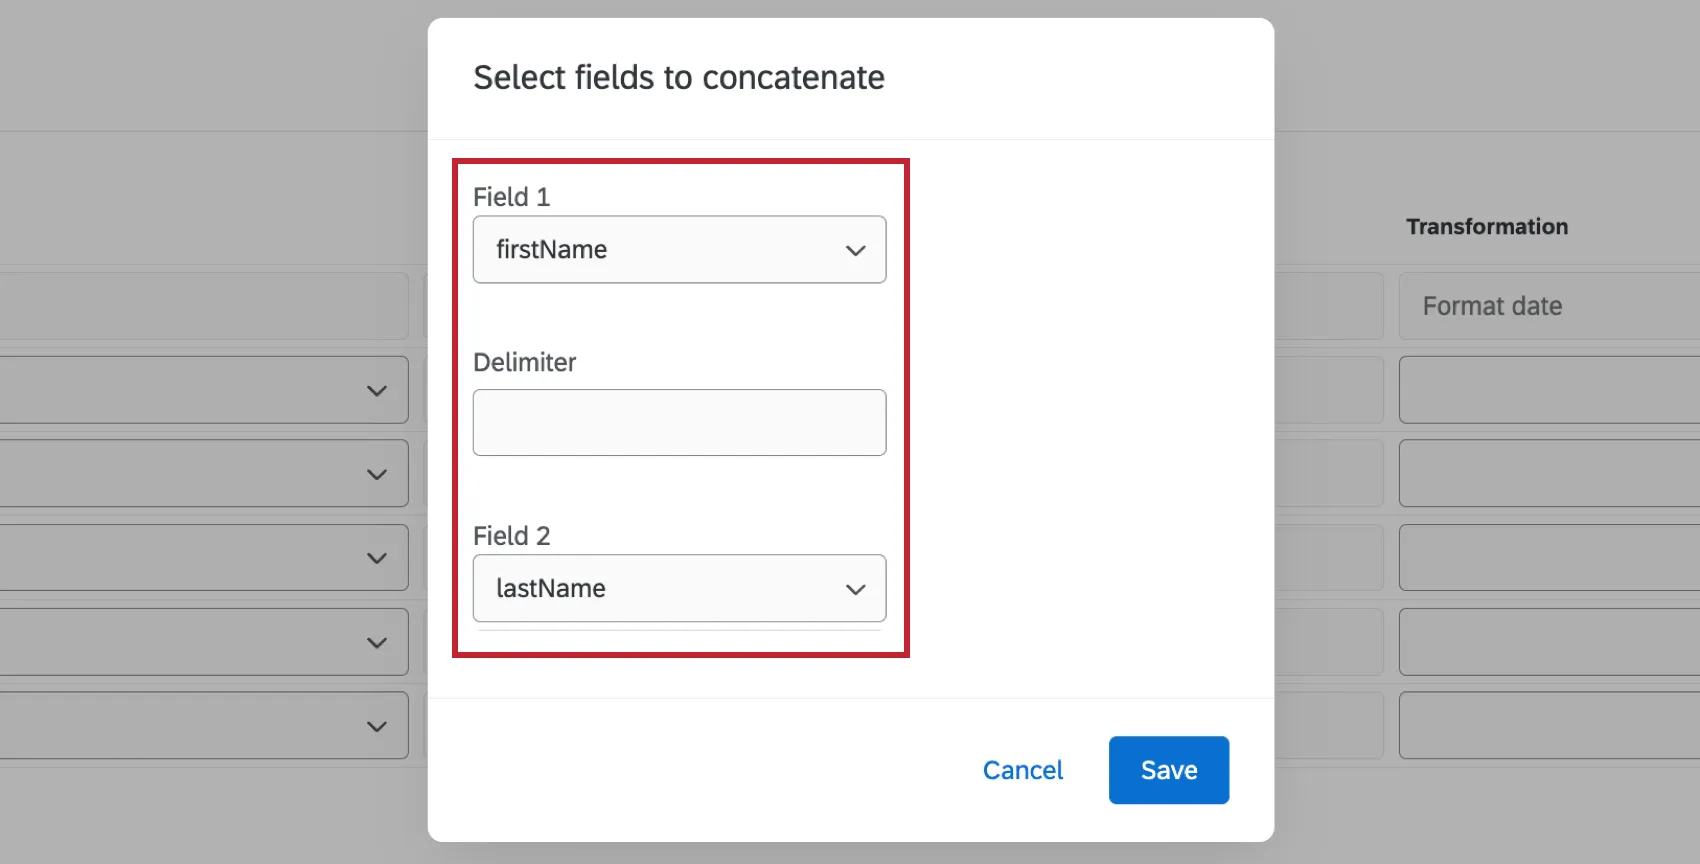
Concatenate: Combine 2 source fields into a single field. Select the 2 fields you want to combine and enter a delimiter.
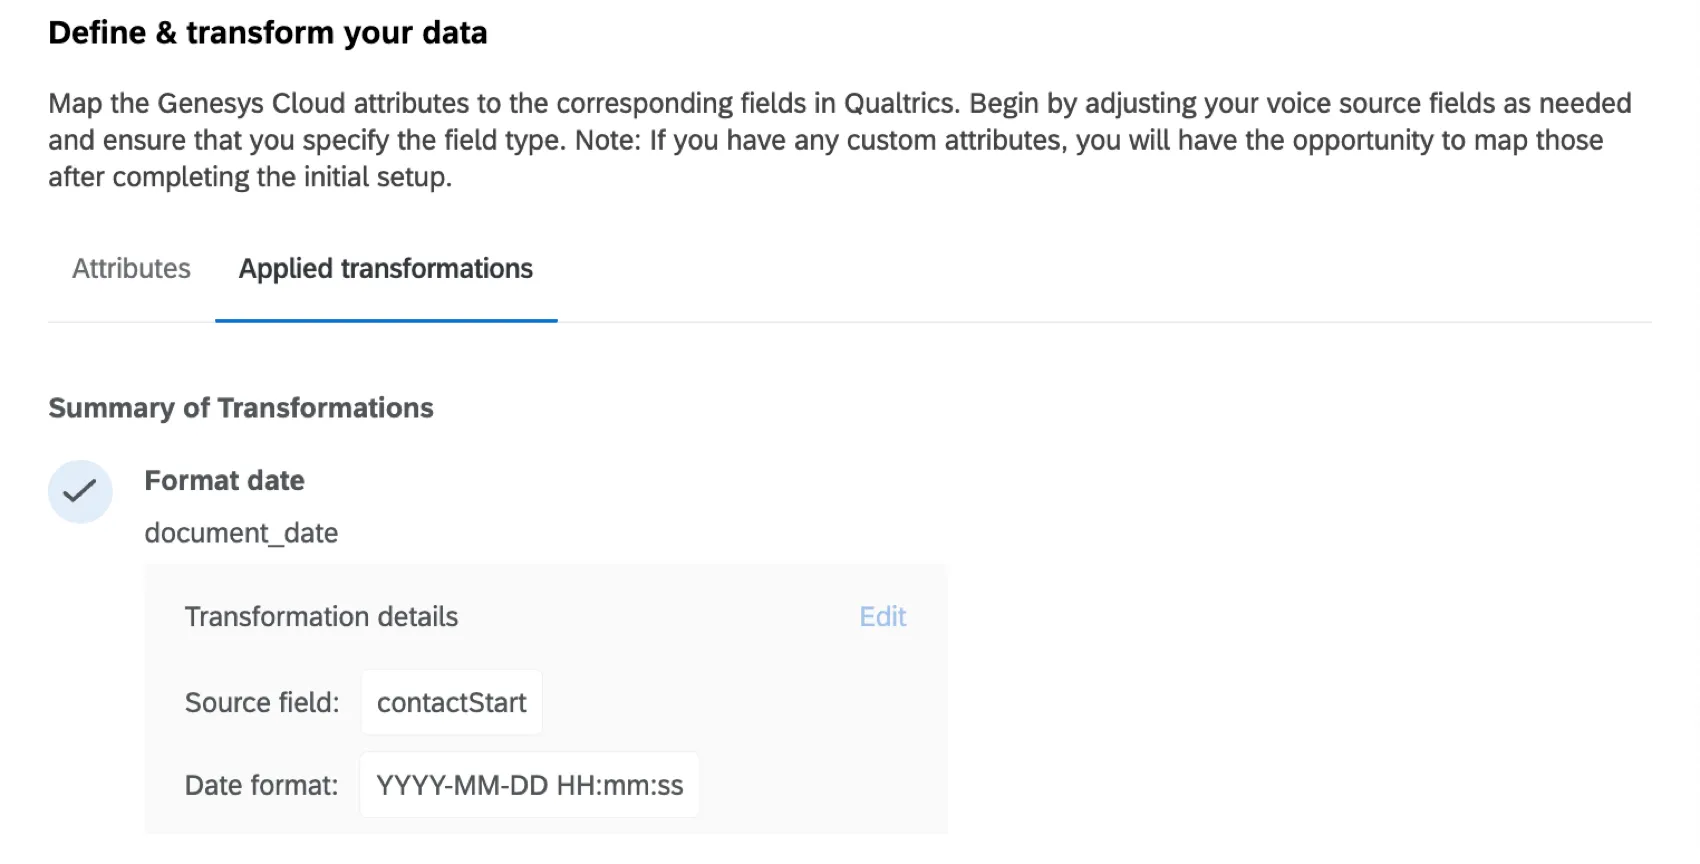
Any transformations you’ve applied will be visible in the Applied transformations tab.
Call Transcript Data
In addition to voice-to-text capabilities that Genesys and NiceCXone support, you can also use a Voice project to store call transcript data for analysis. Call transcripts are not audio files; instead, the conversation is written out and saved in a CSV or TSV format. You can transfer these transcripts to Qualtrics with methods such as Amazon S3 or an SFTP.
Qtip: If you plan to load call transcripts to Qualtrics, the files must match a specific format.
Once a Voice project contains call transcripts, it can’t be used to ingest audio data. The opposite is also true; if the Voice project has voice-to-text ingestion, call transcripts can’t be added.
Call transcript Voice projects are created through workflows instead of the project catalog.
To learn more, see Extracting Conversational Data from Files.
Permissions and Voice Provider Requirements
Qualtrics Permissions
You will need the Manage Voice Pipelines permission enabled in the General tab.
NICE CXone Requirements
To connect NICE CXone to your Voice project, you’ll need the following:
- Admin Permissions: You’ll need the following permission enabled in NICE CXone to successfully connect your account to Qualtrics:
- Edit: This permission must be enabled for “My Access Key”. This allows you to generate access key credentials.
- Historical Reporting: This permission must be enabled for “Contact Data” This allows you to retrieve completed contact records and interaction history.
- Contact/Interaction Data Access: This permission must be enabled for “Contact Data” This allows you to retrieve completed contact records and interaction history.
- Search Interactions: This permission must be enabled for the “Interactions Hub”. This allows you to access recorded audio files.
- Play/download recordings: Play Any: This permission must be enabled for the “Interactions Hub”. This allows you to access recorded audio files.
- Access Key Credentials: This includes the Access Key ID and Access Key Secret. For instructions on how to obtain these, see the NICE CXone documentation.
- Client Credentials: This includes the Client ID and Client Secret. These fields are only necessary if you are using “Open ID Connect” as the auth protocol. To obtain your client ID and secret, fill out this CXone form. You will receive your credentials within a few days.
Genesys Requirements
- Genesys Client: After creating a client within your Genesys cloud instance you can obtain the Client ID and Client Secret. See the Genesys documentation for instructions.
For more information on creating OAuth clients in Genesys, see Genesys Credentials.
File Requirements
If you are configuring your voice task by importing via files, your files will need to meet the following requirements.
Audio Files
Any audio files you import must meet the following requirements:
- File Size: Each file can be up to 1 GB. If you are on a brand with data isolation enabled, files can be up to 0.5 GB.
- File Duration: Files must be a minimum of 500ms and a maximum of 2 hours.
- Channel Configuration: Only stereo or dual channel files are supported. Mono recordings are not compatible.
- Channel Mapping: The agent channel must be explicitly defined as left or right.
- Encryption: Files must be unencrypted, unless you are using PGP encryption.
Metadata Files
Any metadata files you import must meet the following requirements:
CSV Format
- Encoding: UTF-8.
- Layout: Horizontal orientation with the header in the first row.
- Mapping: Each audio file must correspond to a single row of data.
- Headers: No special characters in header names, except underscores.
JSON Format
- Structure: Standard JSON format.
- Batching: Batch JSON files can be used.
- Flattening: Any nested objects must be flattened prior to delivery to ensure successful ingestion. JSON files can only be a single flat object, so each file can only contain the metadata for a single audio file.
Required Attributes
- Unique Identifier: This is often used to match the metadata file to the audio file.
- Call Date: This is used for file processing and for reporting in Qualtrics.
Viewing and Managing Voice Tasks
Once you’ve created a voice task in your project, you can view it within the Voice tab. Click the toggle in the Enabled column to enable or disable a task.
Attention: If you are running a backfill on your task, this toggle will not disable the backfill! You must also deselect the Enable data backfill option inside the task.
Click the 3 horizontal dots to the right of a task to perform the following actions:
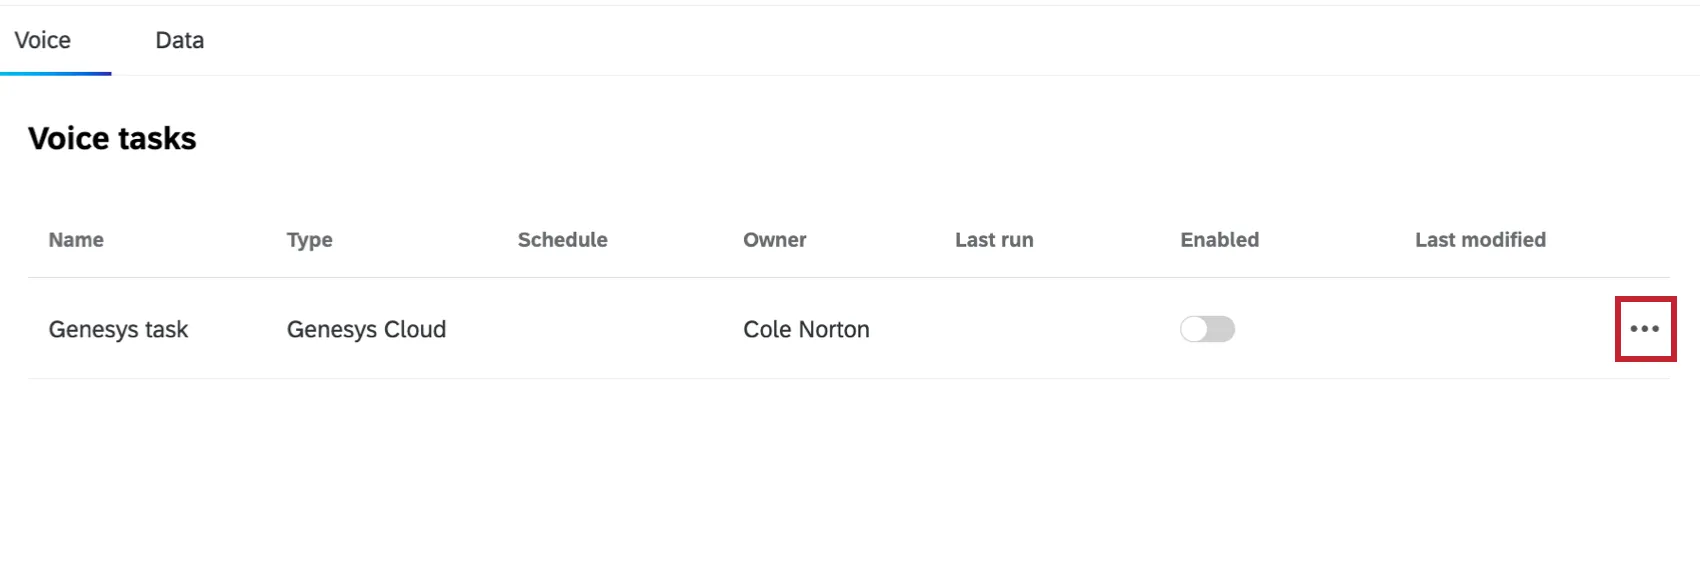
- Configure task: Edit your task. You can also click on a task to begin editing it.
- Delete task: Delete your task.
- Duplicate task: Create a copy of your task. This is the only way to have more than 1 voice task in a project.
Attention: Duplicated tasks will inherit the sample file and data mapping of the parent task. Changes to the sample file or mapped fields must be made in the parent task. - Run task now: Run your task immediately if you didn’t set up your project to run on a schedule.
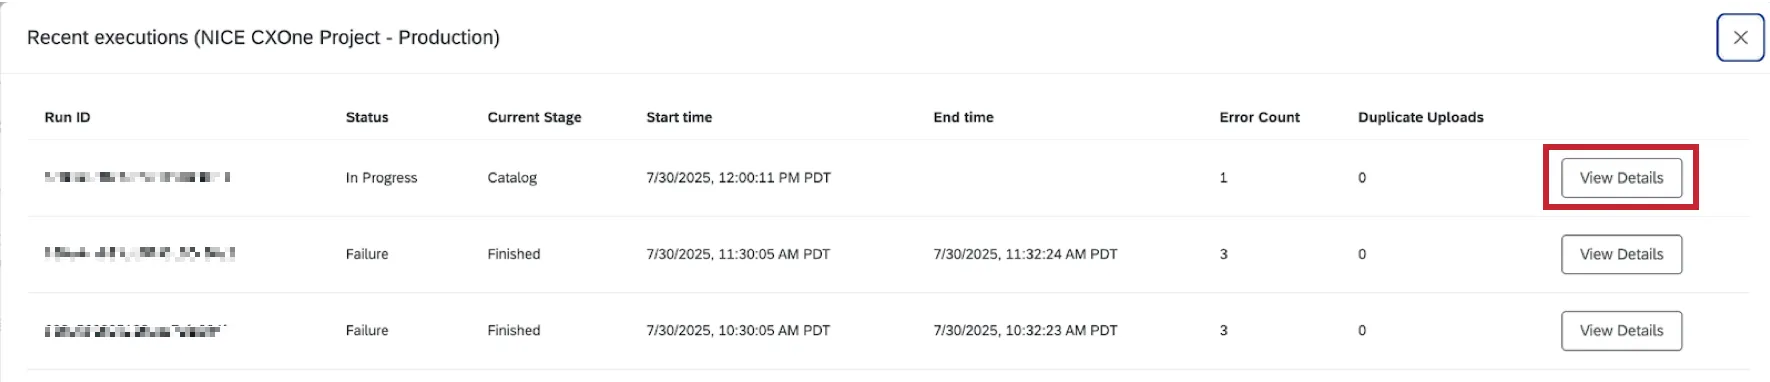
View recent executions: See information about past runs including the Run ID, status, start and end time, and the error count.

Qtip: For further details including specific error messages and more granular information of each stage, click View Details.
Data & Analysis in Voice Projects
As your workflows extract voice data, this will appear in the Data & Analysis tab. Use this space to browse data and perform introductory analysis. Here’s the functionality you can expect in this tab, with links to the appropriate support pages:
- Editing Responses
- Export Data
Qtip: The option to re-import data allows you to edit data that’s already in your project. You cannot import new social data using the Data & Analysis tab, and must instead use voice tasks to extract data from voice providers.
- Recorded Responses
- Filtering Responses
- Field Editor
Collaborating on Voice Projects
You can invite other Qualtrics users to create and edit your voice project.
Collaboration works the same with email data projects as it does with reputation management projects, except collaborators can only have Admin access. There is no read-only access for email data projects. For steps, see this page on collaboration.
Qtip: Remember to make sure your collaborators have the correct user permissions to use voice projects.
That's great! Thank you for your feedback!
Thank you for your feedback!