
Participants Basic Overview (EX)
What's on this page
Qtip: This page describes functionality available to Engagement, Lifecycle, and Ad Hoc Employee Research projects. For more details on each, see Types of Employee Experience Projects. This functionality is also available in Pulse, although with some differences detailed here.
About the Participants Section
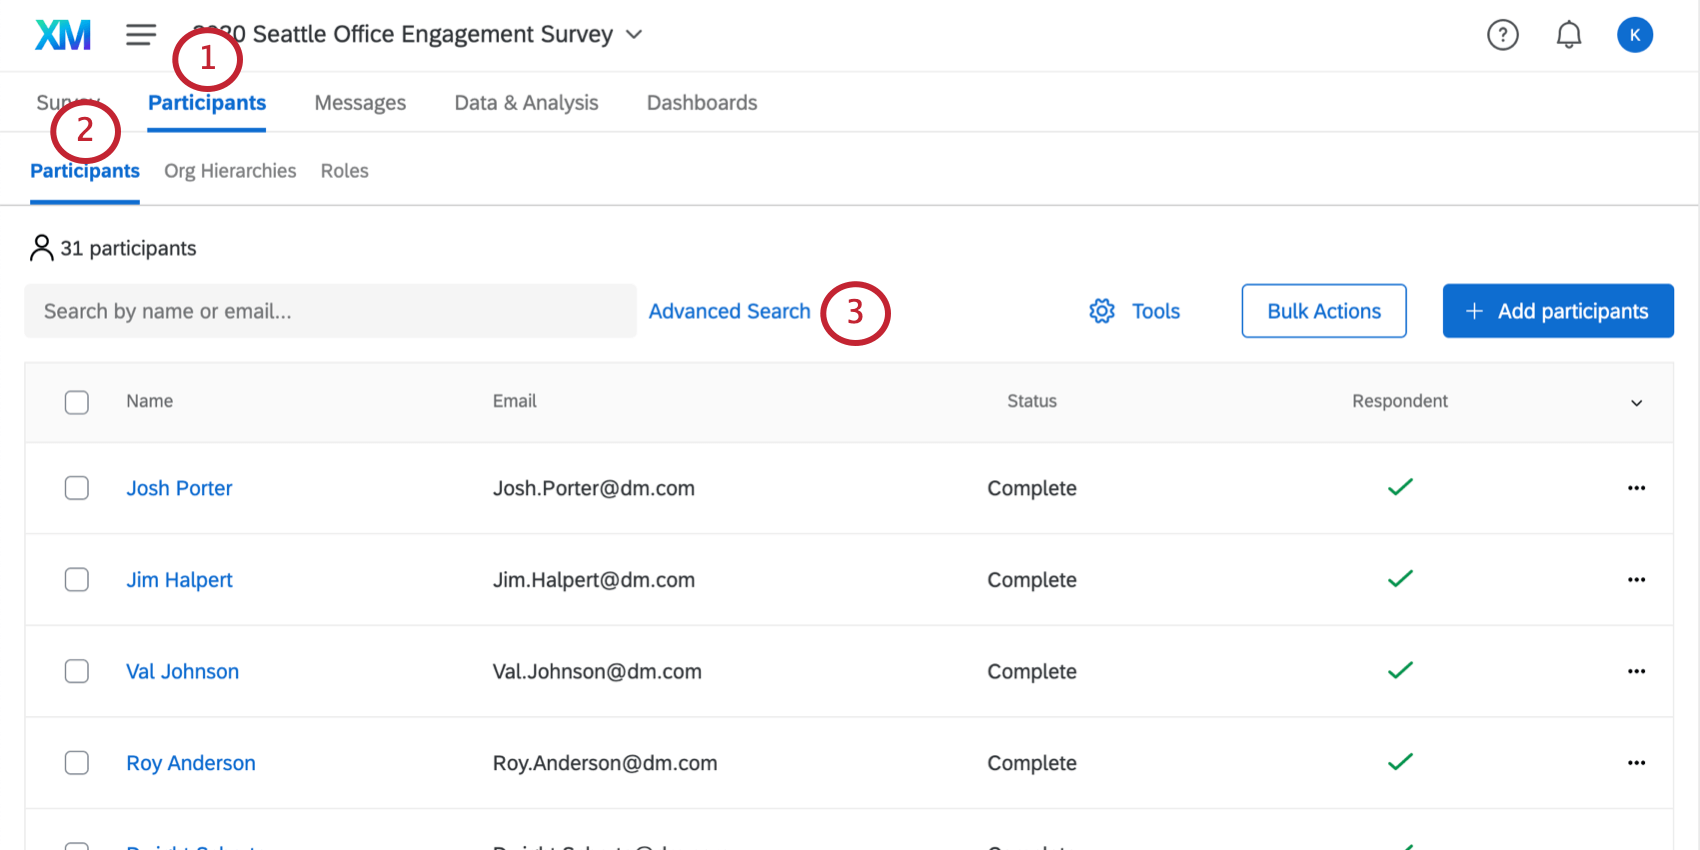
You can manage the people taking your Employee Experience survey by navigating to the Participants section of the Participants tab. In addition to accessing a number of tools, you can search and edit participants in this section.
Qtip: Want to learn how to upload participants? Visit our Adding Participants support page.
Advanced Search
You can search for a desired participant by typing a name or email address into the search bar, or you can make use of the advanced search feature.
Once you’ve found the participants you’re interested in, click their names to open their participant information window. Here, you can manage their metadata, manage their permissions, and perform other actions.
Qtip: If you’re looking to retrieve a survey retake link for a participant, use the Actions menu in their participant information window, or the Actions menu next to their response in Data & Analysis. See Retake Survey Link (EX) for more information.
Qtip: If you’re looking to view or delete a participant’s survey response, use the Actions menu next to their response in Data & Analysis. See Managing Responses (EX) for more information.
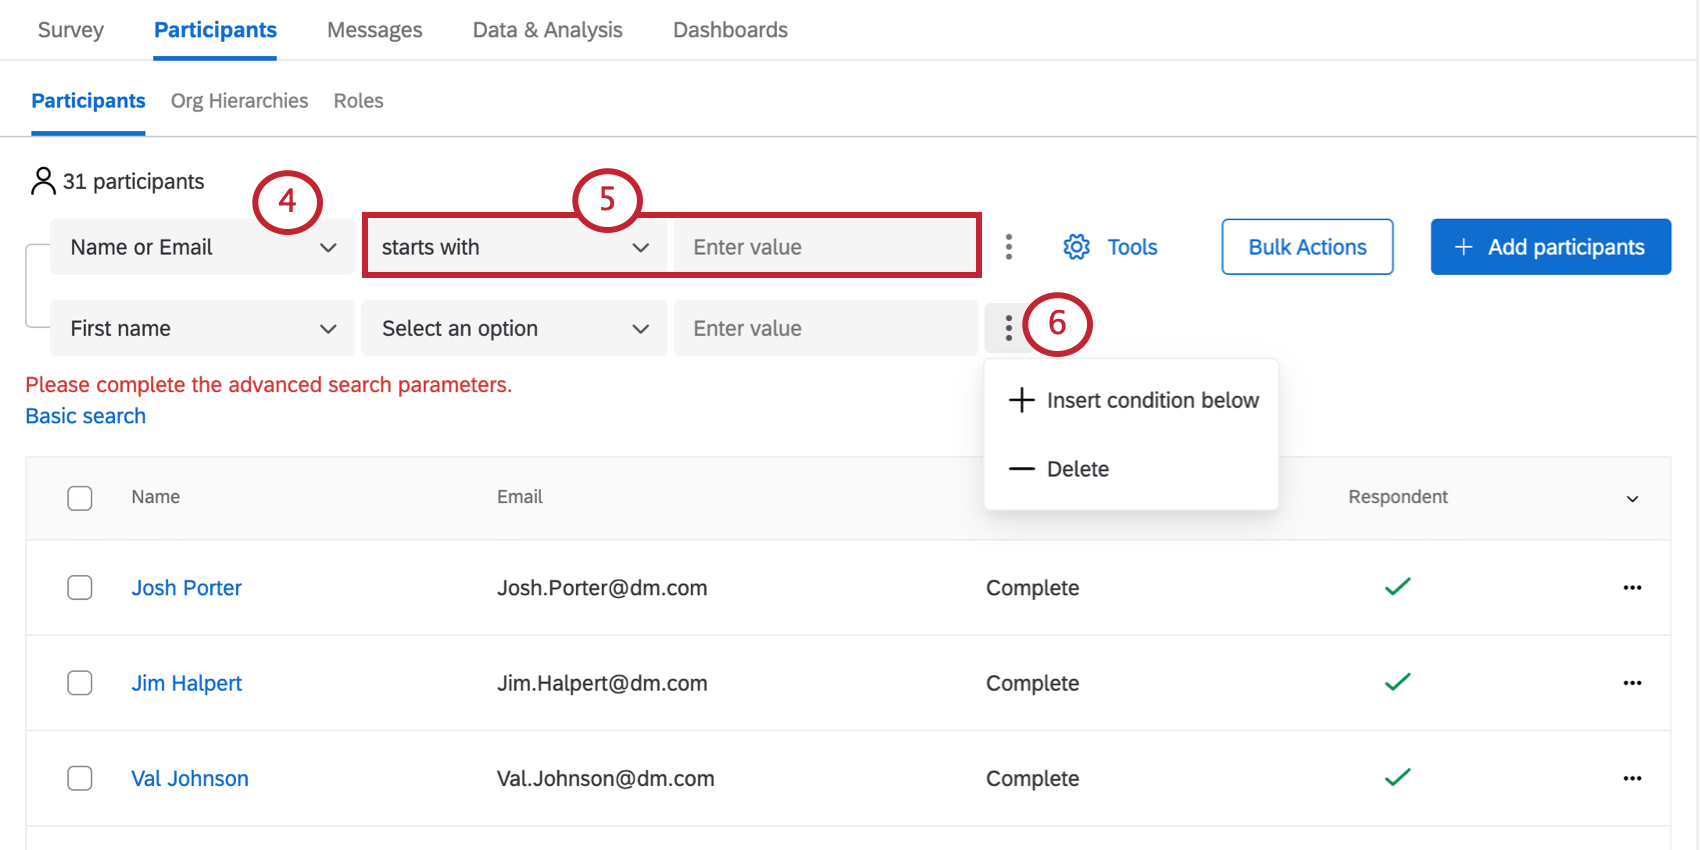
Search Criteria
The available criteria are as follows:
- Name or Email, First name, Last name, and Email: Search by a participant’s name or email address.
Project status: Filter participants by whether they finished the survey or not.

Qtip: If a response is deleted, the status will update to “Not Complete”.
Respondent: Search participants by whether or not they are respondents. A respondent is a participant who is expected to answer the survey; all participants are respondents by default. When you upload your participants, you can include a column called Respondent and specify a 0 for participants you don’t want to have to complete the survey, but who might still be in charge of dashboards or validating the org hierarchy.

Attention: Uploading participants with a 0 in the Respondent column will mark them as a non-respondent.
- Metadata: Search by metadata fields you uploaded with your participants.
- Org Hierarchy Metadata: Search using the metadata specifically used to build the hierarchy. For example, unique ID and manager ID, or levels.
- Org Hierarchy Units: Search by the units of your org hierarchy in an Engagement project.
- Role: Search by role.
Participant Dropdown Options
There is a dropdown menu to the far-right of every participant. When you click this dropdown menu, you are given the following options:
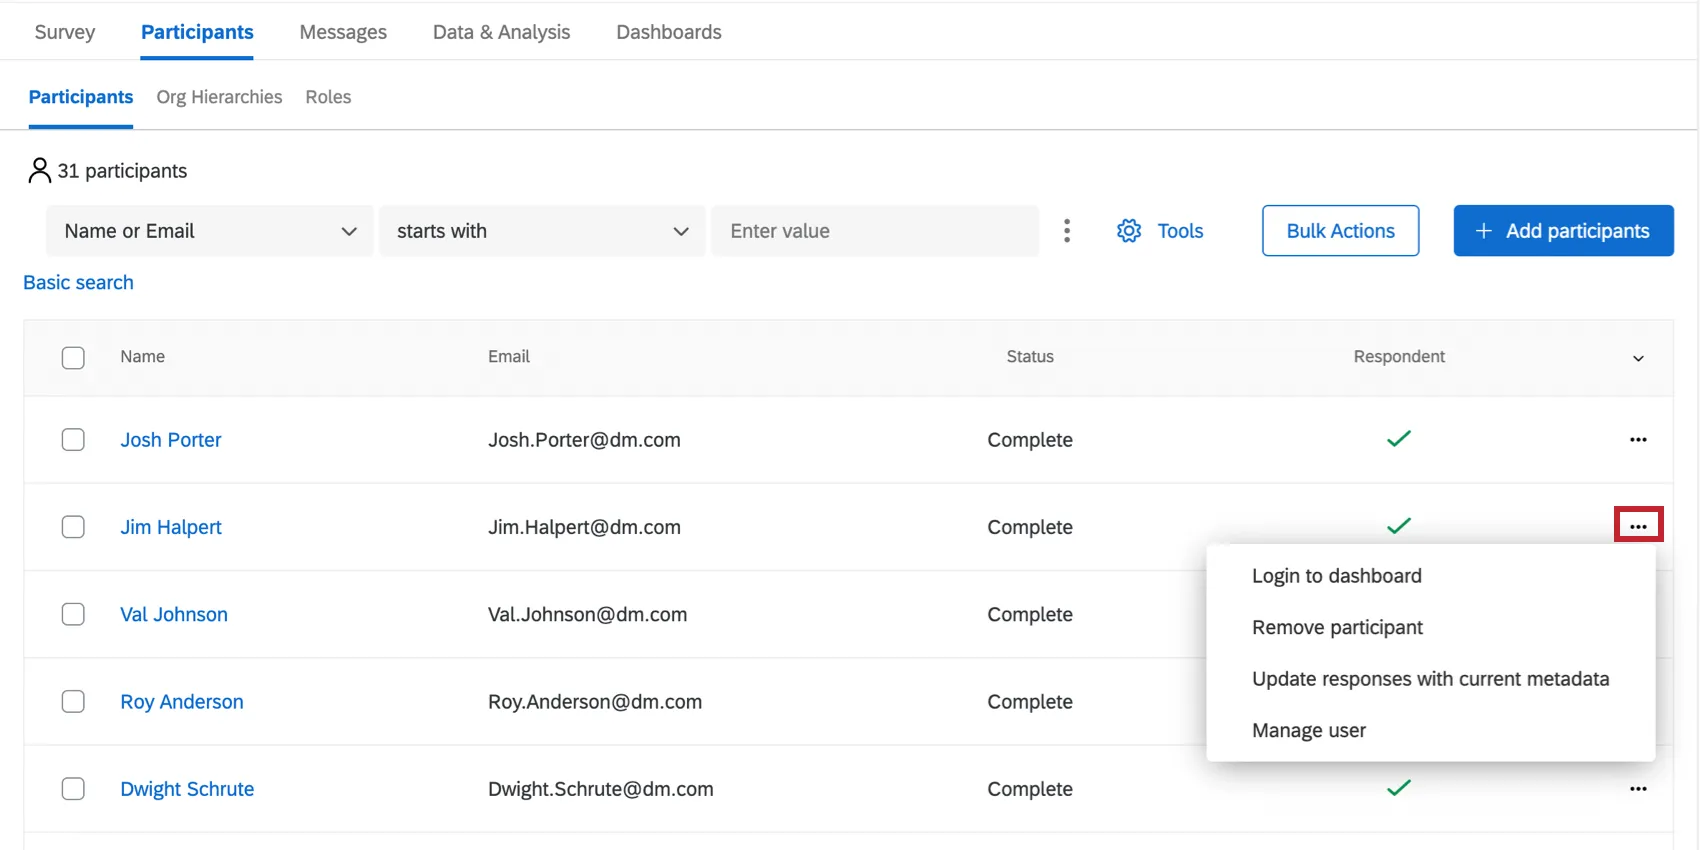
Login to Dashboard: Proxy login to the participant’s dashboard. If the participant is not set up as a dashboard user (something you can learn more about on our Roles page), there will be nothing to log into.
Qtip: The security setting “Allow proxy logins” must be enabled by a Brand Admin before you can use this option to log into participant dashboards.
Remove participant: Remove this participant from the project.
Warning: Removing the participant from the project deletes any response they’ve provided. If you want the participant to redo their response, send them a retake survey link instead of removing them and re-adding them.
- Update responses with current metadata: If you’ve made recent changes to the metadata, make sure the response you’ve collected is updated to reflect these metadata changes. This option will not appear if the participant hasn’t responded yet.
- Manage user: Open the participant information window.
Bulk Actions
In addition to the features described above, there are bulk actions you can perform on multiple participants at a time.
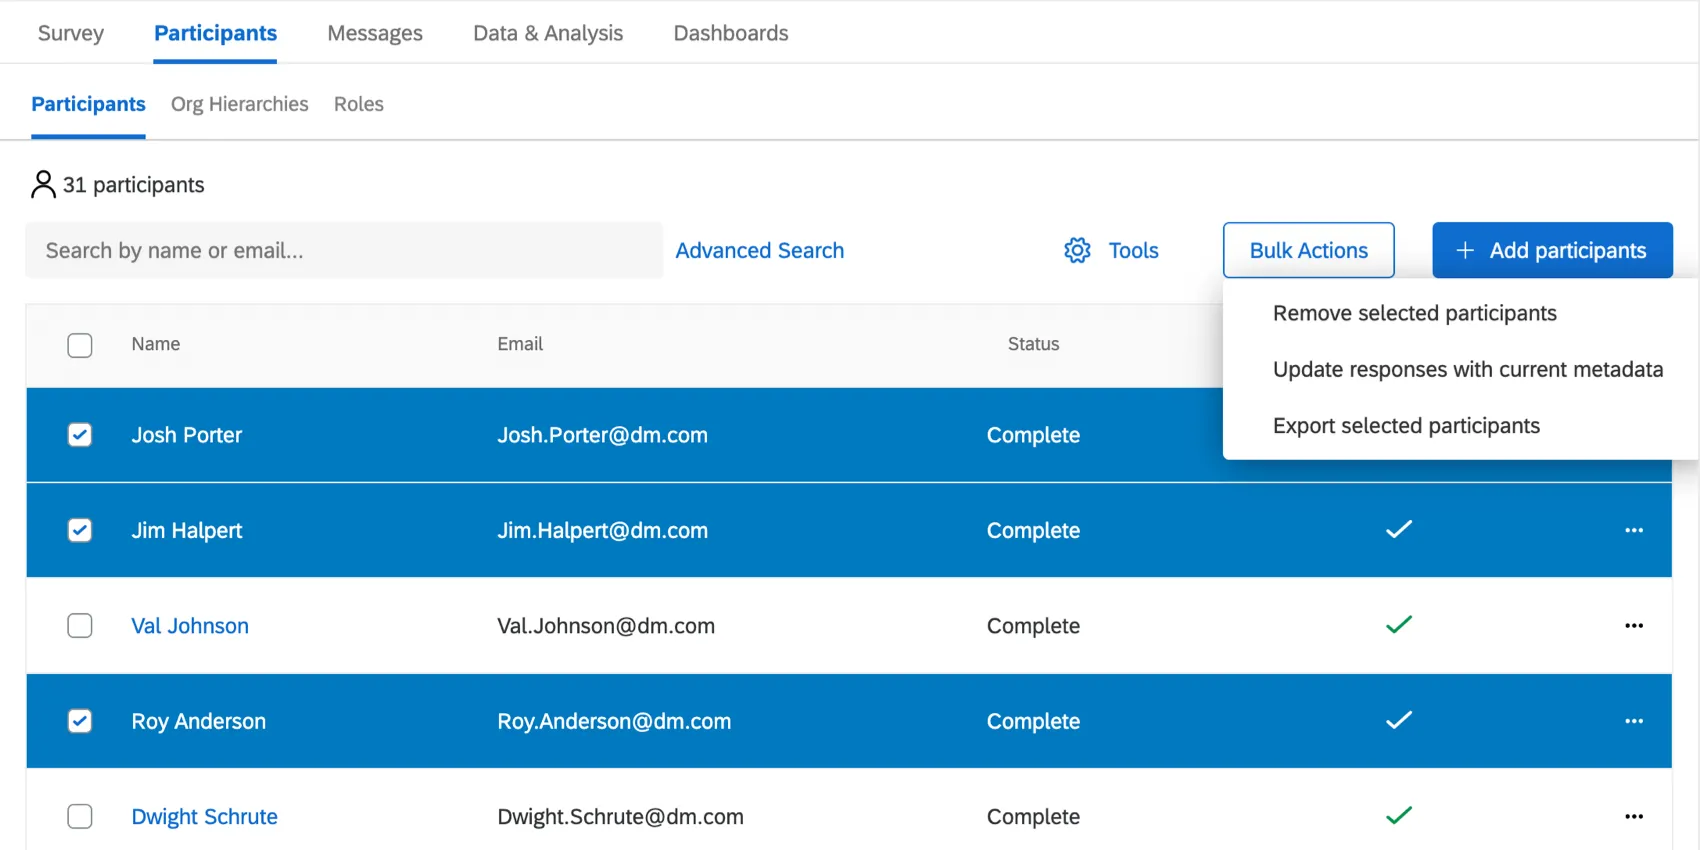
Once you select participants, click Bulk actions to see the following options:
Remove selected participants: Removes all of the selected participants from the project. See Removing Participants for all the ways to delete participants from a project.
Warning: Removing the participants from the project deletes any responses they’ve provided. If you want the participants to redo their responses, send them a retake survey link instead of removing them and re-adding them.
Update responses with current metadata: If you’ve updated your participants’ metadata in the participant information window, this option makes that change to reflect in your dashboard.
Qtip: Pulses and Lifecycle projects do not have this option. See Types of Employee Experience Projects.
- Export selected participants: Export a CSV containing first name, last name, unique identifier, and metadata for only the selected participants. See the next section for further details on various export options.
Clicking the topmost box to the left selects all of the participants on a page.
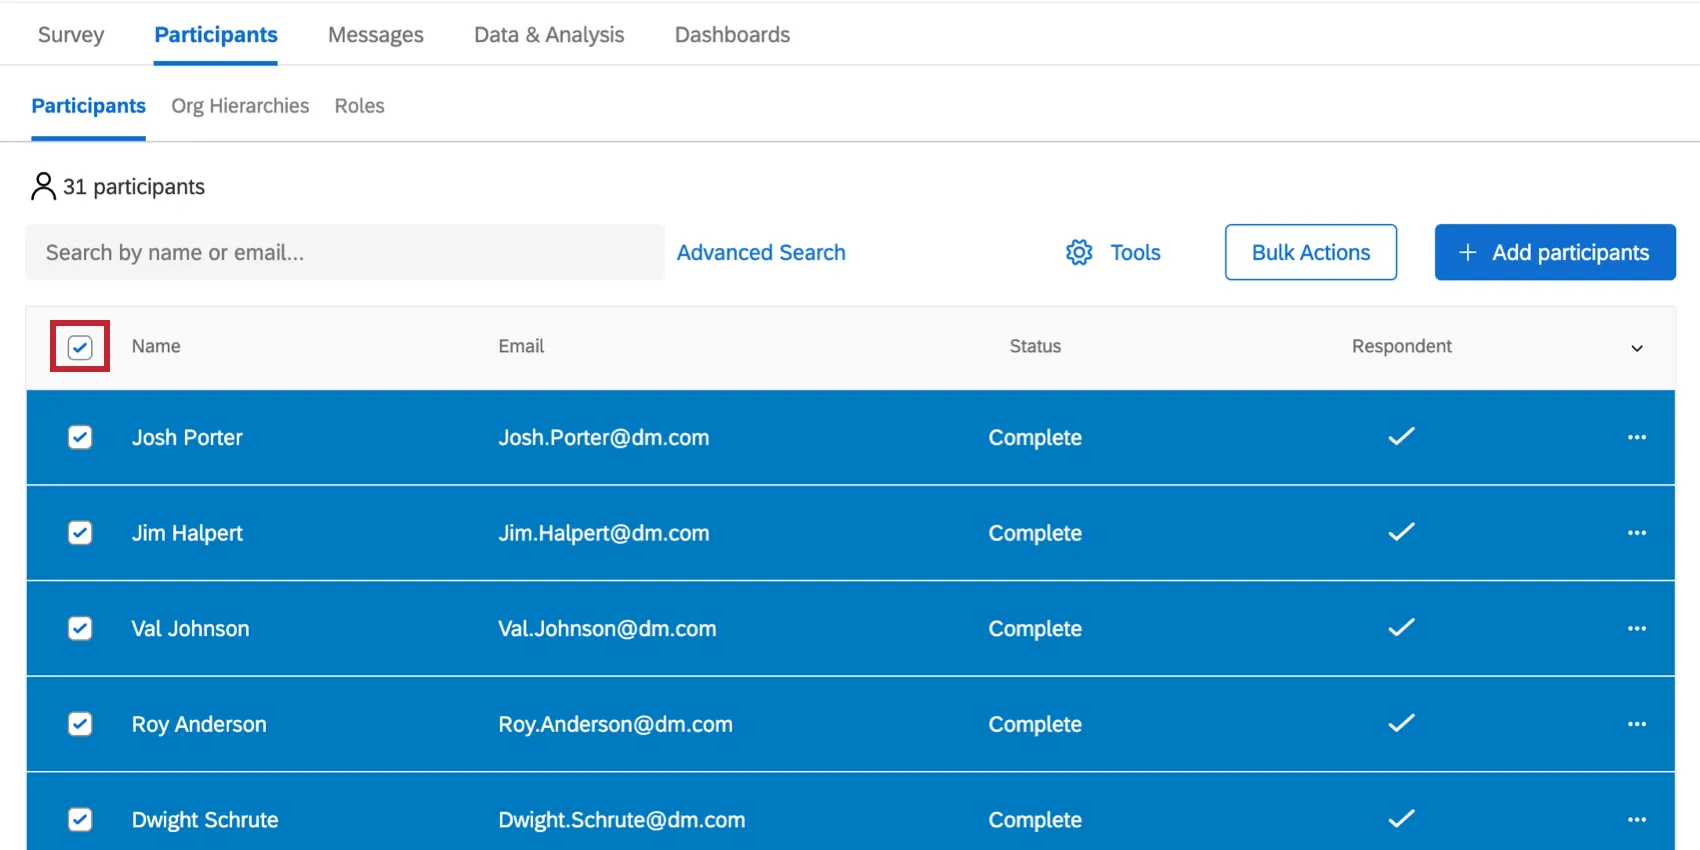
Qtip: Looking to edit participant information? Click a participant’s name to open the participant information window.
Export Participants
You can download your the project’s participants to a CSV file, complete with metadata columns. This file can act as a sample file you can re-import when you want to update your metadata, or if you want to run a survey with the exact same participants a following year.
This file comes with one custom column named Status that shows whether a participant has completed their response, or if you are still waiting for them to respond.
Qtip: You cannot currently export a TSV of participants. For troubleshooting options, see CSV/TSV Upload Issues.
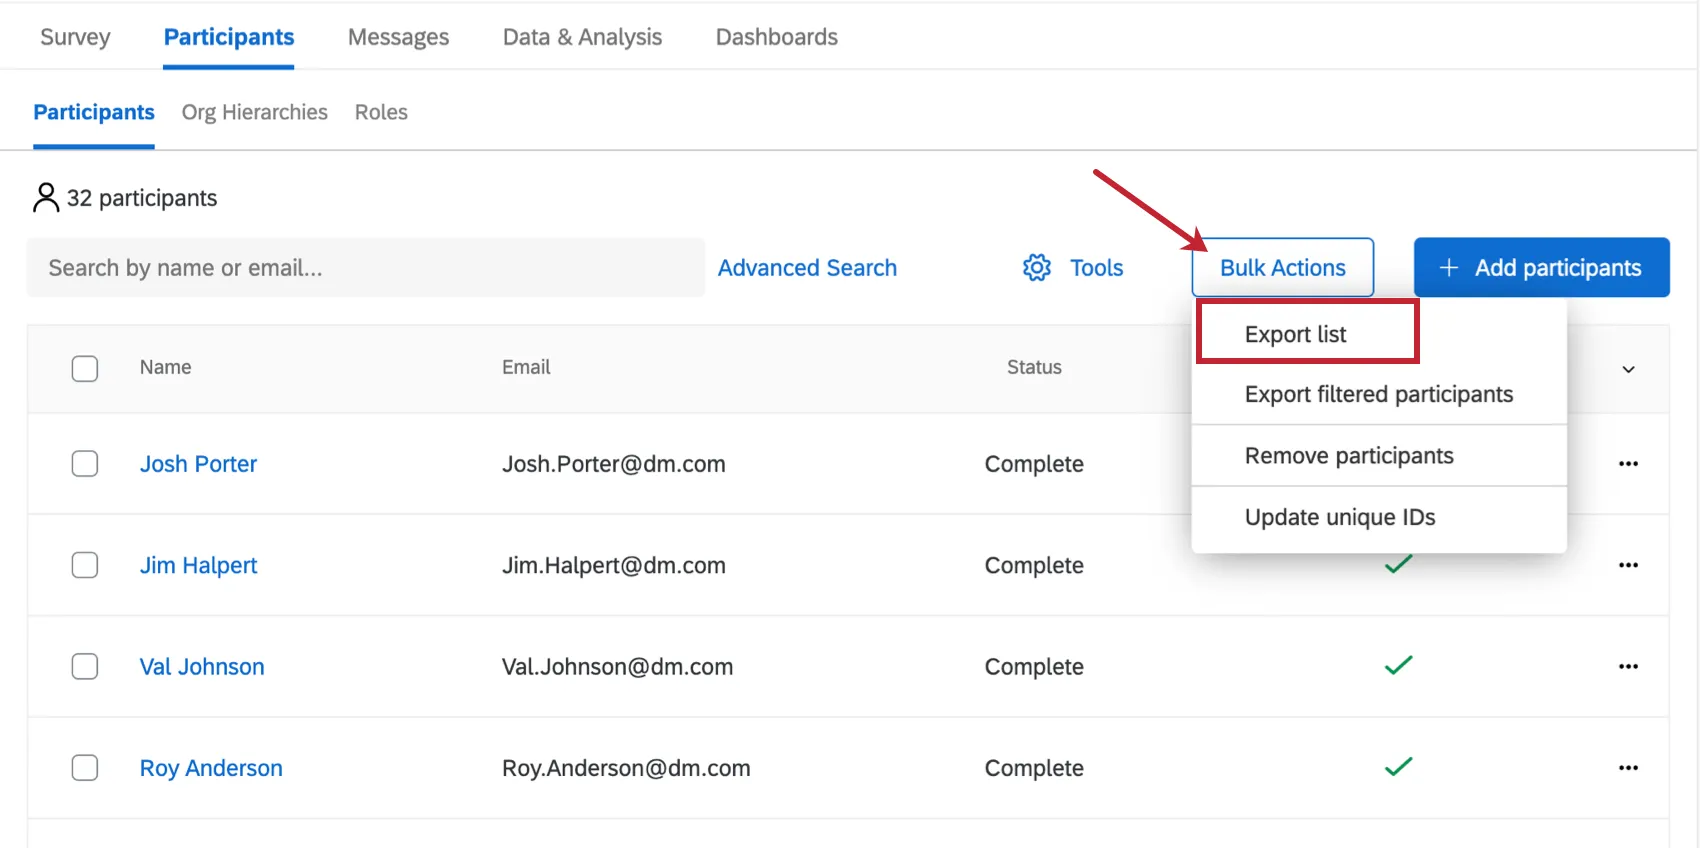
Export all participants
Make sure you do not have any participants selected. Then click Bulk actions and choose Export list.
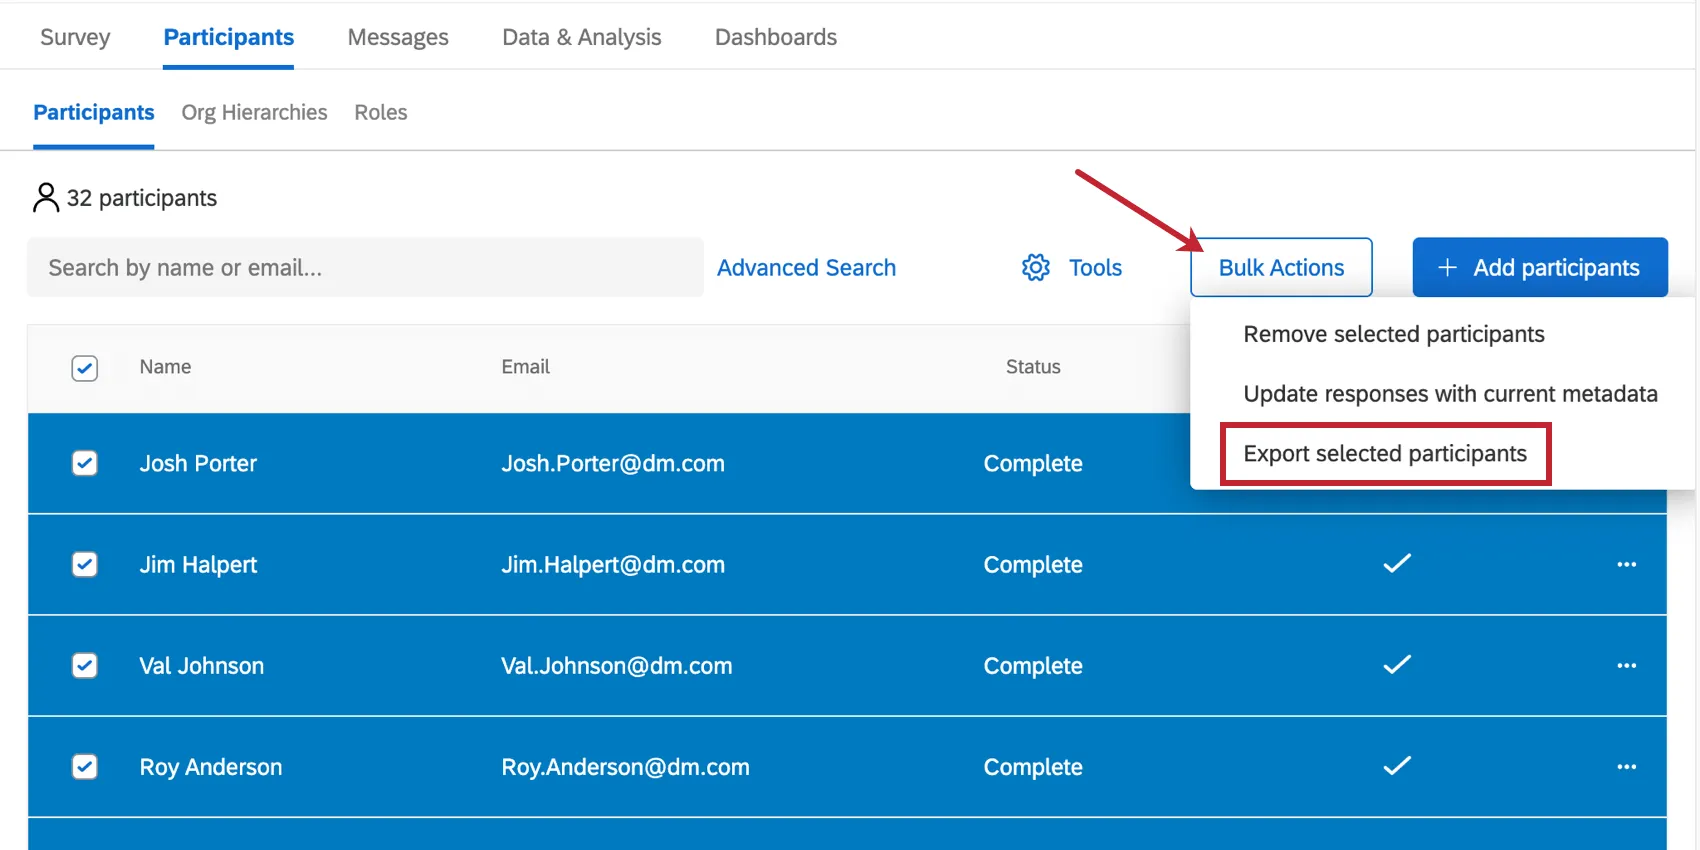
Export selected participants
Select the participants you wish to export, select Bulk actions, and then choose Export selected participants.
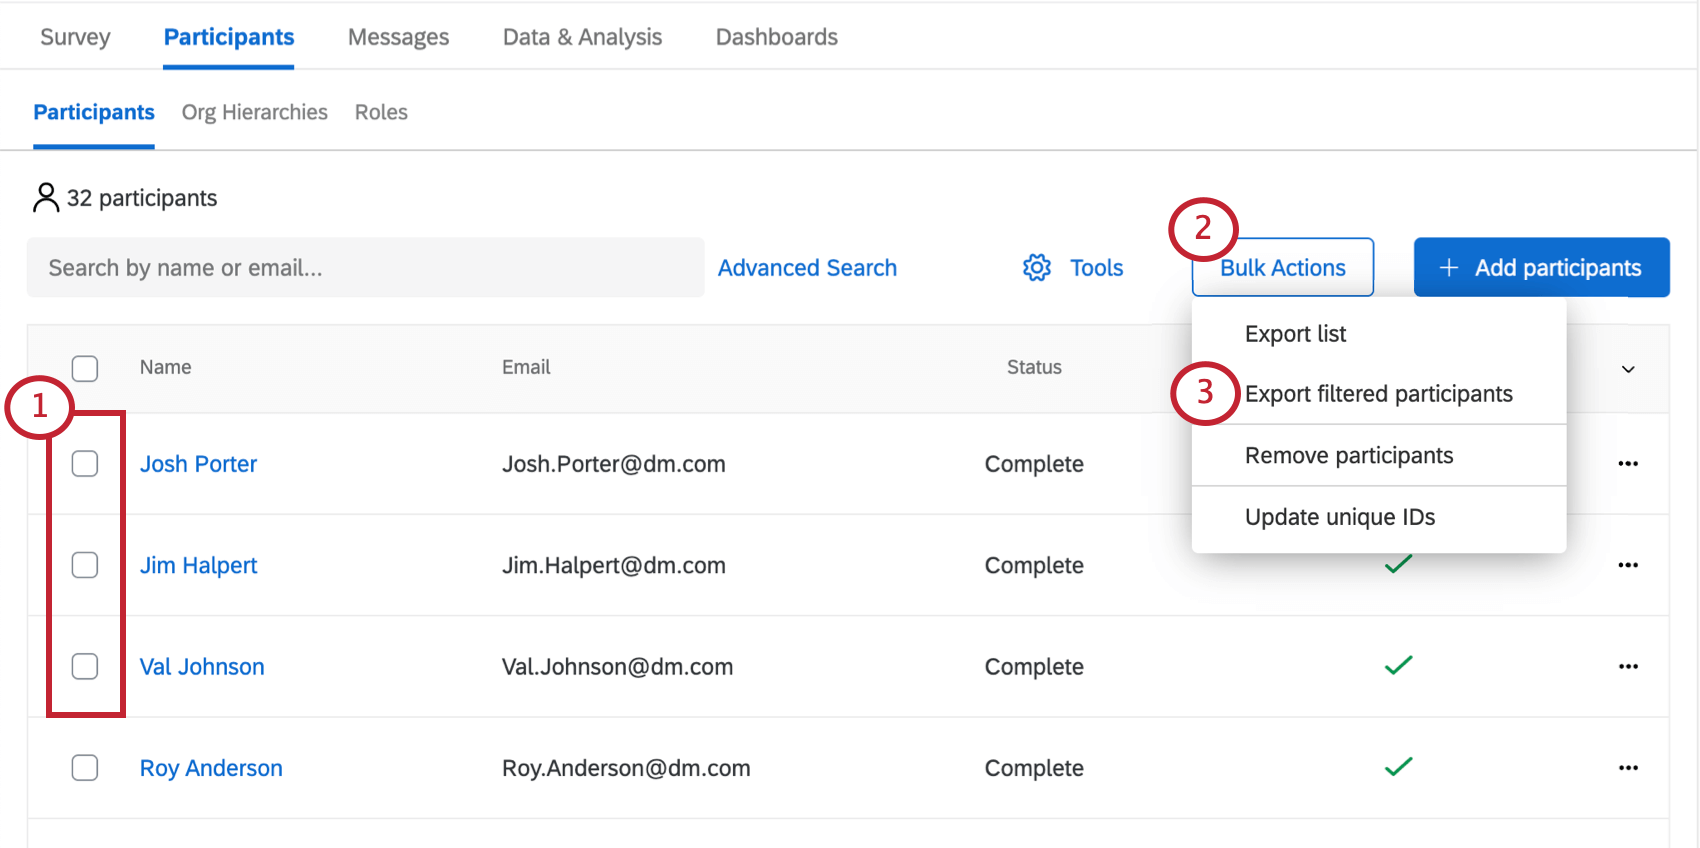
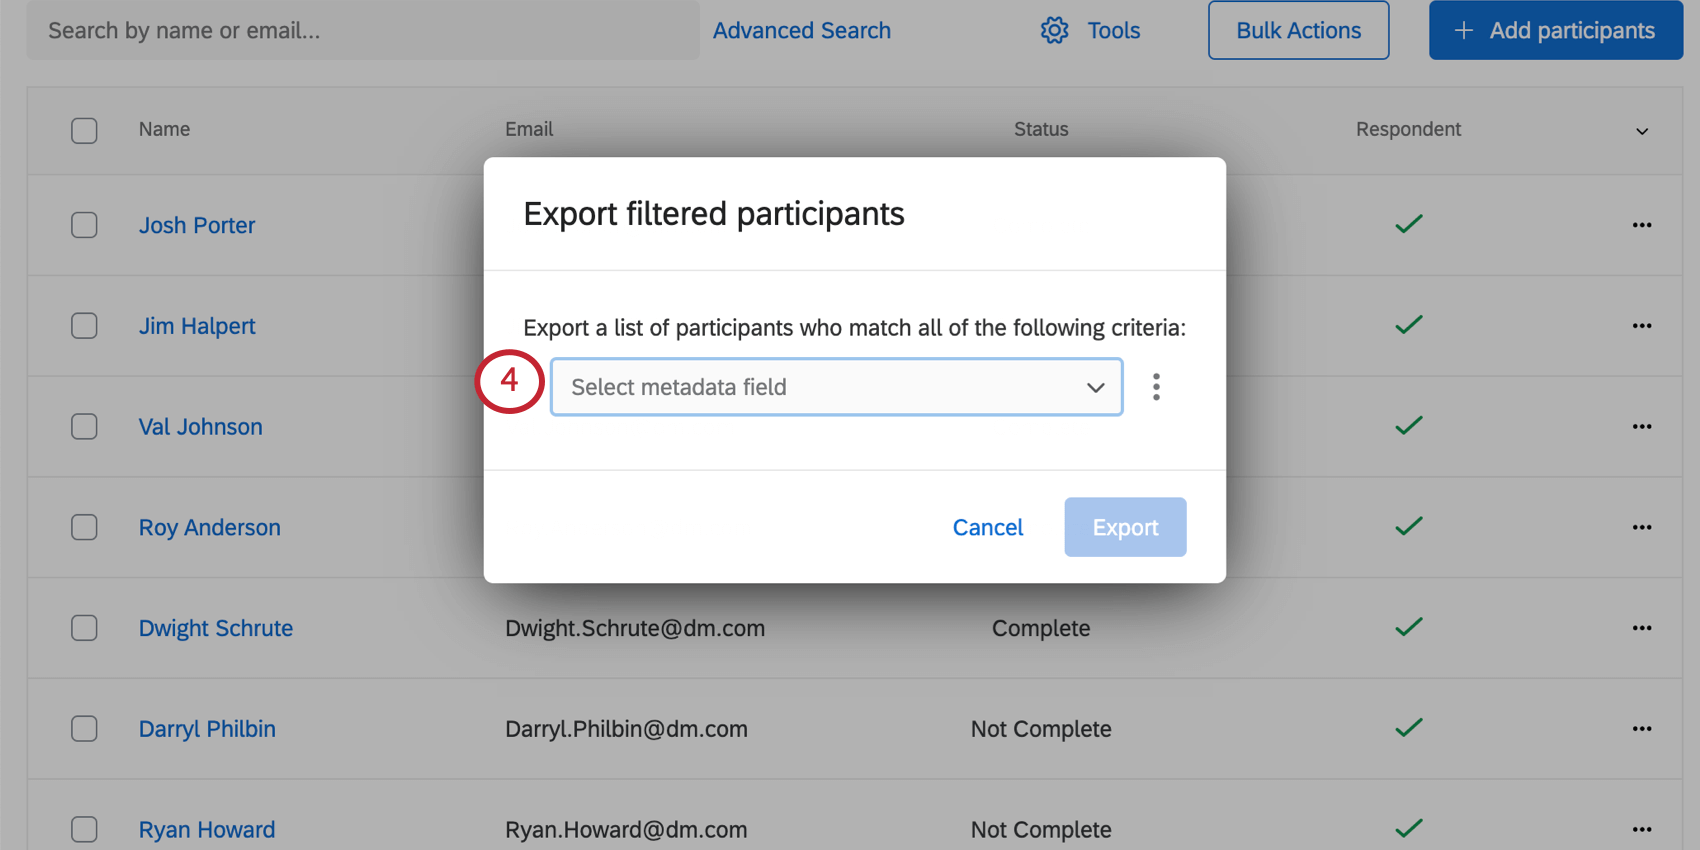
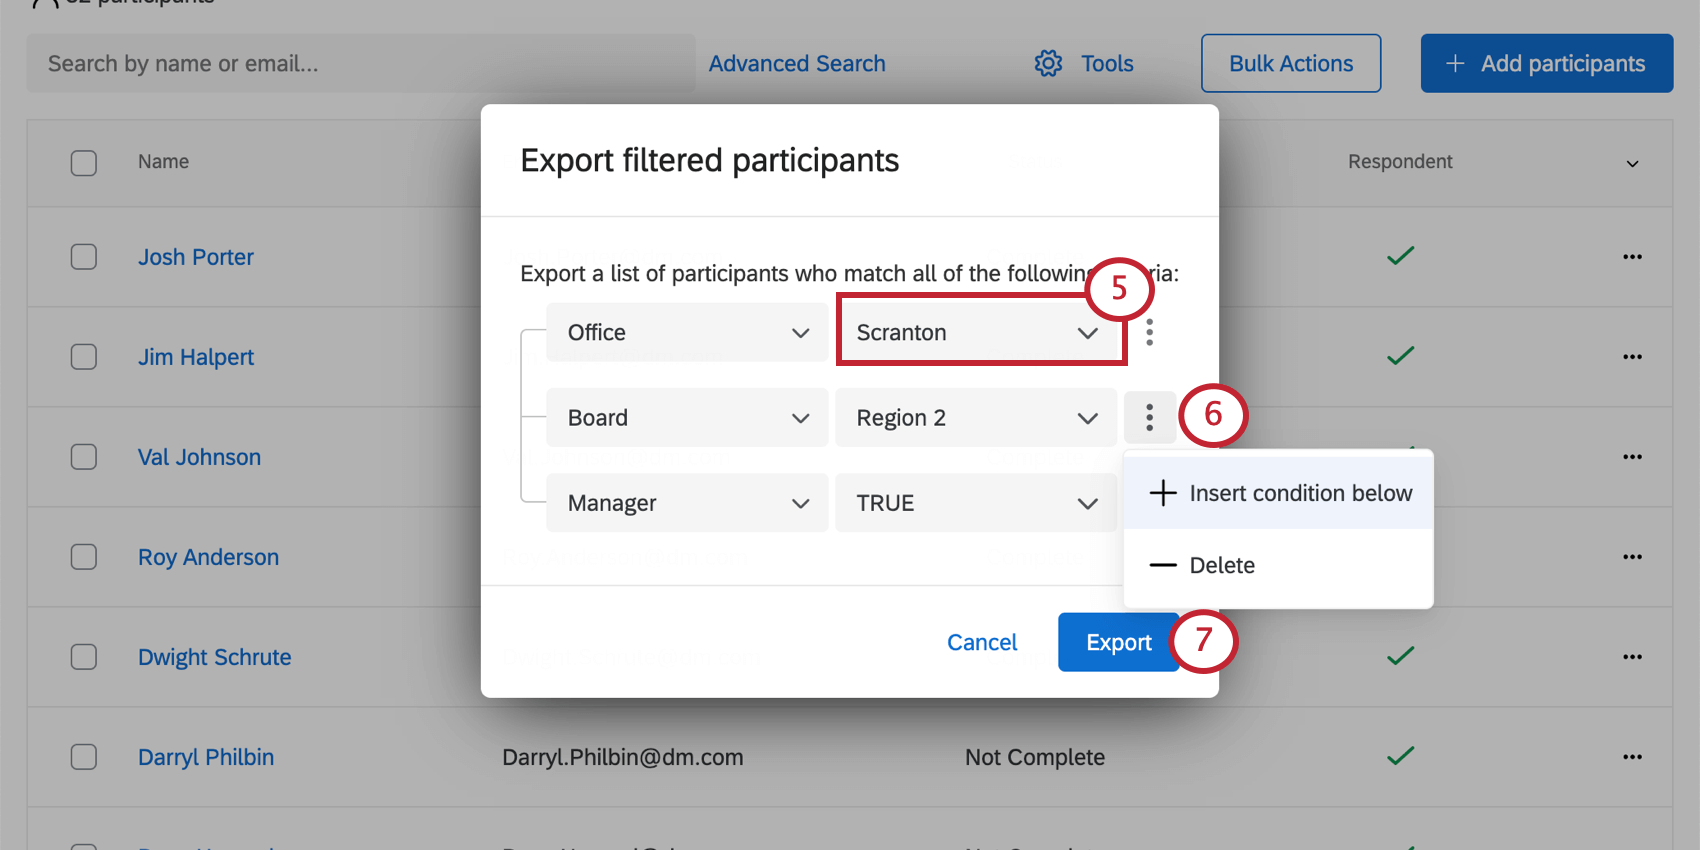
Export Filtered Participants List
Instead of exporting all the participants in your project at once, you can narrow down who should be included in the export by metadata. This allows you to quickly search your participant list. The export include the basic information fields and any participant metadata.
Example: You want data on all the finance interns. You can export participants whose metadata Department is equal to Finance and whose Employment Status is equal to Intern.
Reimporting Exported Participant Lists
You can import participant lists that have been exported, making updating many participants quick and easy. When reimporting an exported participant list, make sure to remove the columns listed below. These columns represent internal Qualtrics fields. If these columns are included in a participant import, then these fields will be saved as participant metadata. Usually, these fields aren’t useful for reporting purposes, so we recommend removing the columns from your import. The columns to remove are:
- Status: Indicates if the participant has taken the survey.
- User Type: Indicates the user’s user type.
- Last Login: Indicates when the user last logged into Qualtrics
In addition to these fields, your export file will contain the Respondent field. This is used to determine if participants are required to participate in the survey. You can change a participant’s value by changing their value in your participant file. Respondents with a value of TRUE are marked as respondents, while participants with a value of FALSE are not.
Update Unique IDs
When you have no participants selected and you click <Bulk Actions, you’ll see an option called Update unique IDs. This option lets you update the unique identifiers for any of the participants in your project.
For detailed steps, see Updating Multiple Employees’ Unique Identifiers.
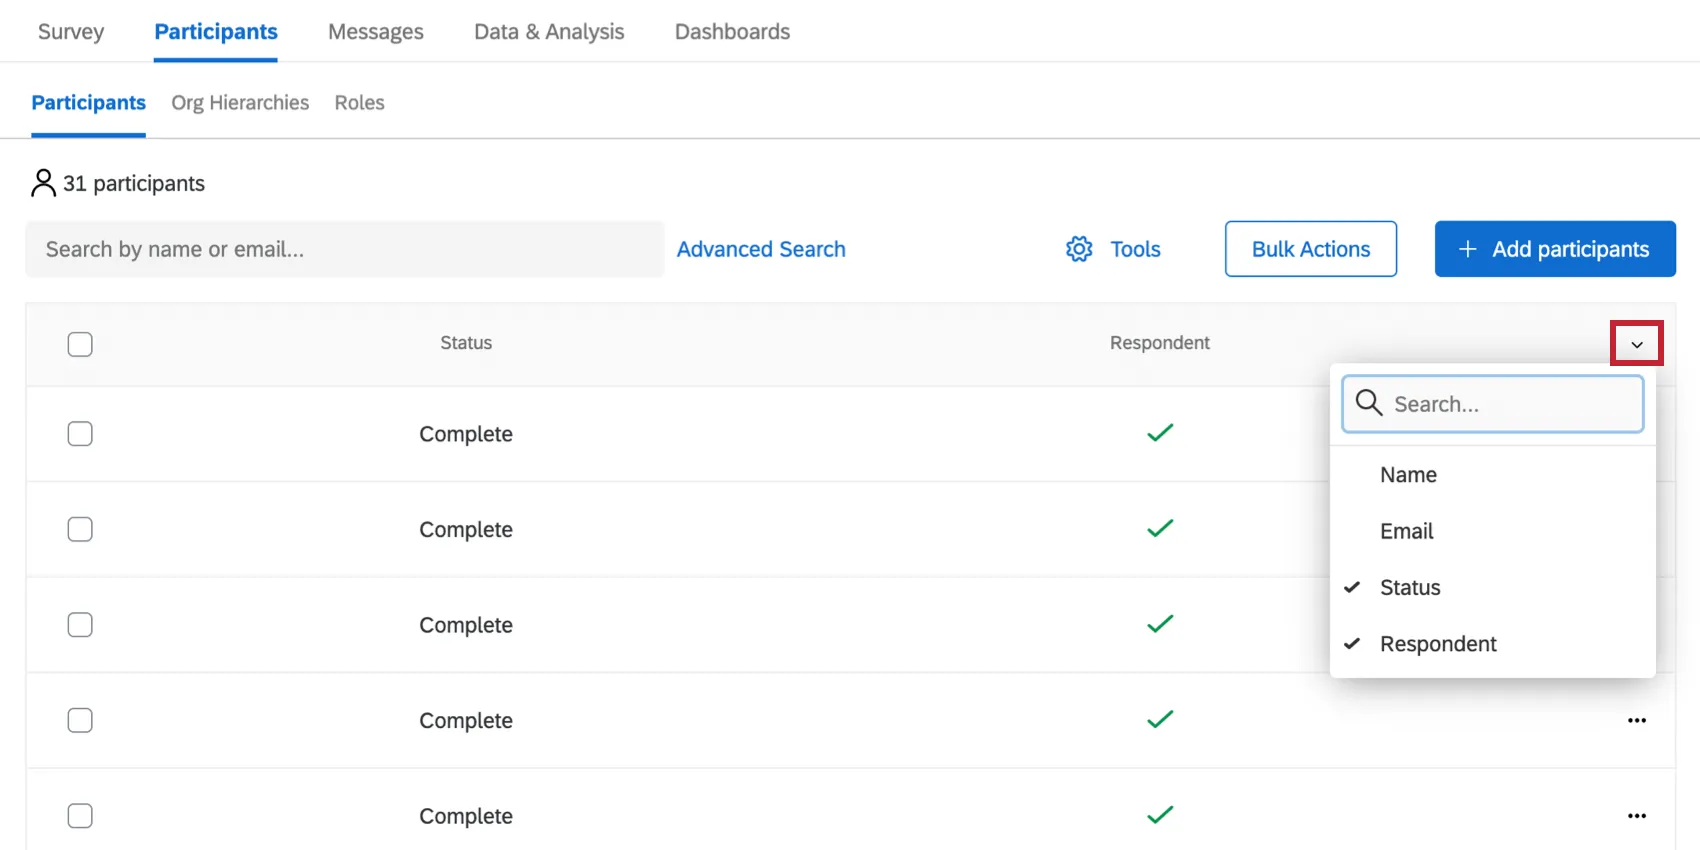
Adjusting Columns
Use the dropdown in the header to show and hide columns, such as name, email, status, and whether or not someone is a respondent.
Qtip: In the Participants tab of an EX project, the Status column shows whether all feedback has been completed for this participant. In order to view this column, you need both of the following user permissions enabled:
- Can Access Participant Personal Data
- Can Access Project Data
Response Update Banner
Sometimes, a banner may appear at the top of the Participants tab that reads, “Responses are being updated. Some functions won’t be available until this is complete.” This message is to let you know that you will temporarily be prevented from making certain changes, because the system is working on updates you just requested, and does not want you to make conflicting changes. Changes that can make this banner appear include edits to participants or the hierarchies they belong to.
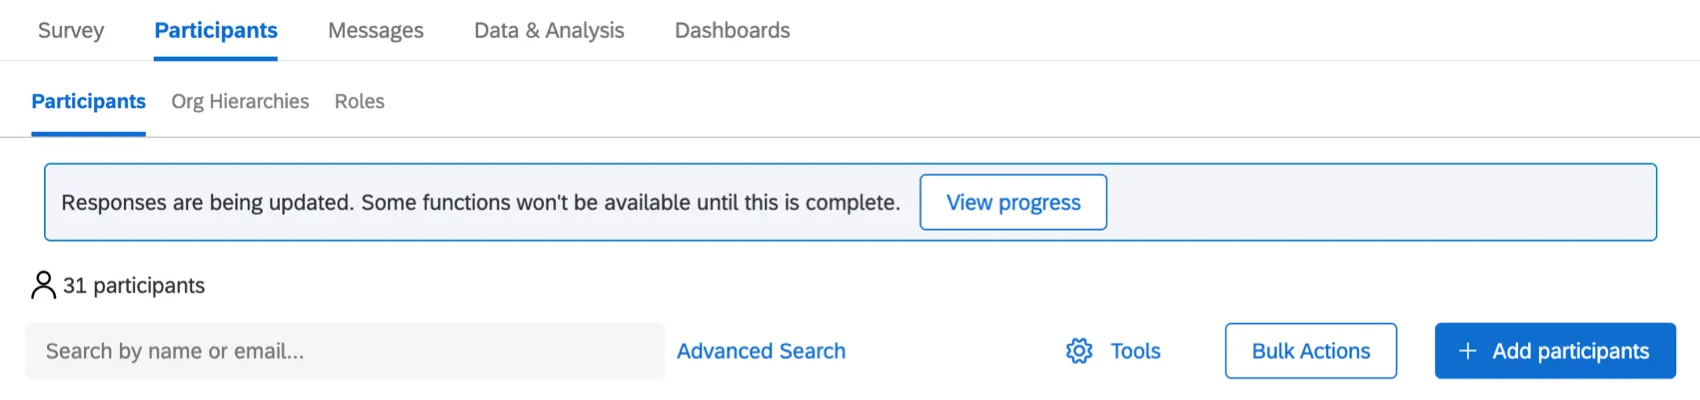
Clicking View progress will show you how much longer until the updates are done and you can resume with full participant-editing functionality again.
That's great! Thank you for your feedback!
Thank you for your feedback!