
Participants Tools (EX)
What's on this page
Qtip: This page describes functionality available to Engagement, Lifecycle, and Ad Hoc Employee Research projects. For more details on each, see Types of Employee Experience Projects.
About Participants Tools
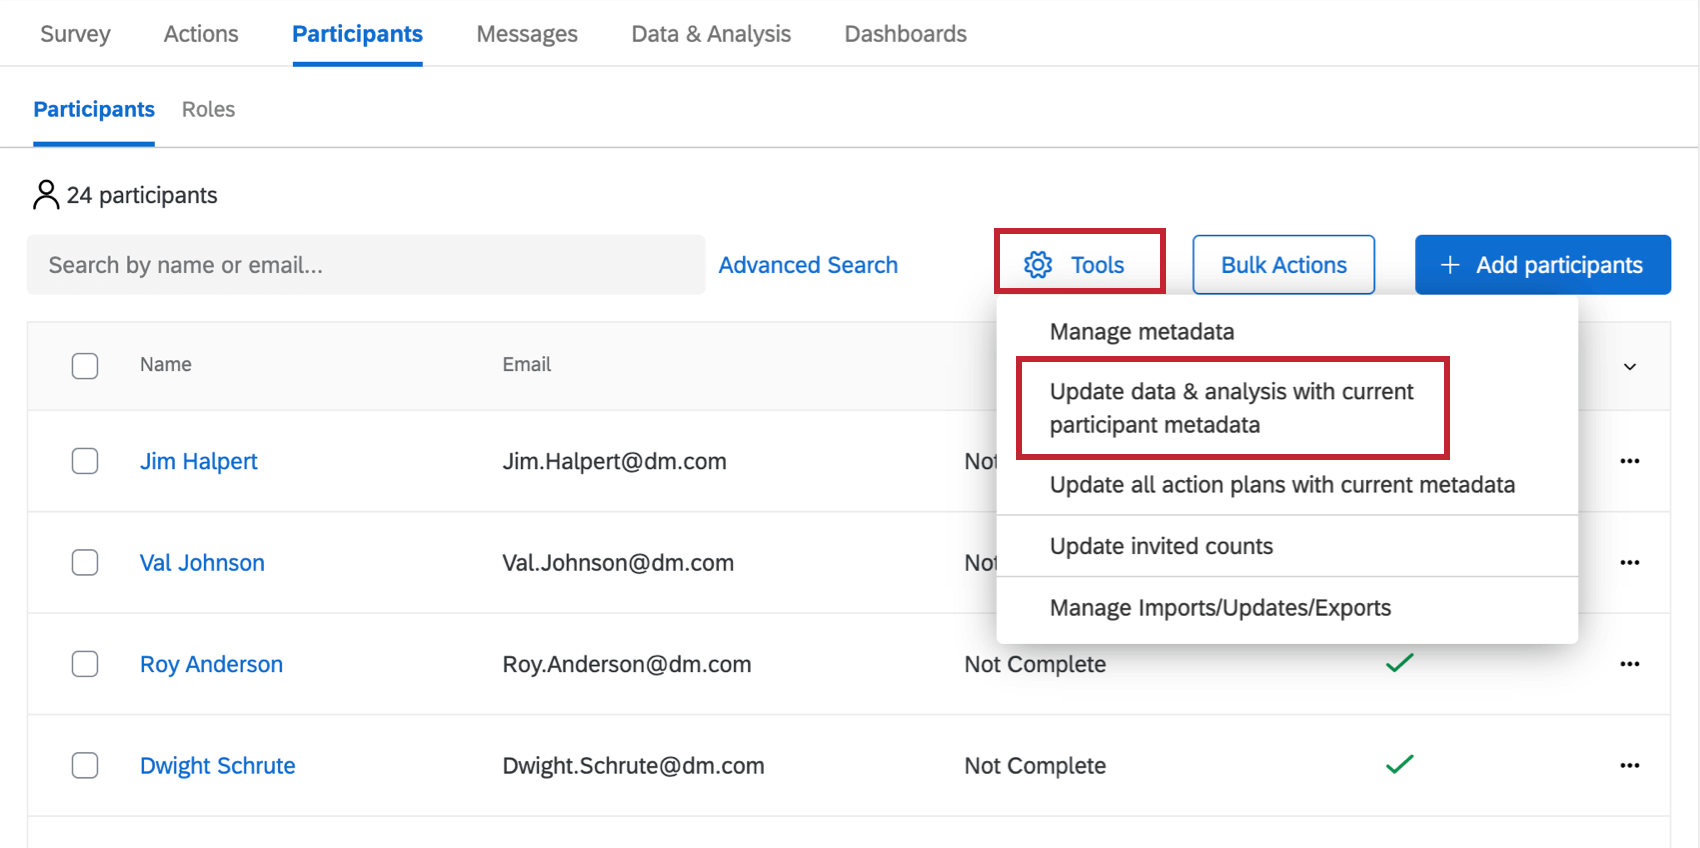
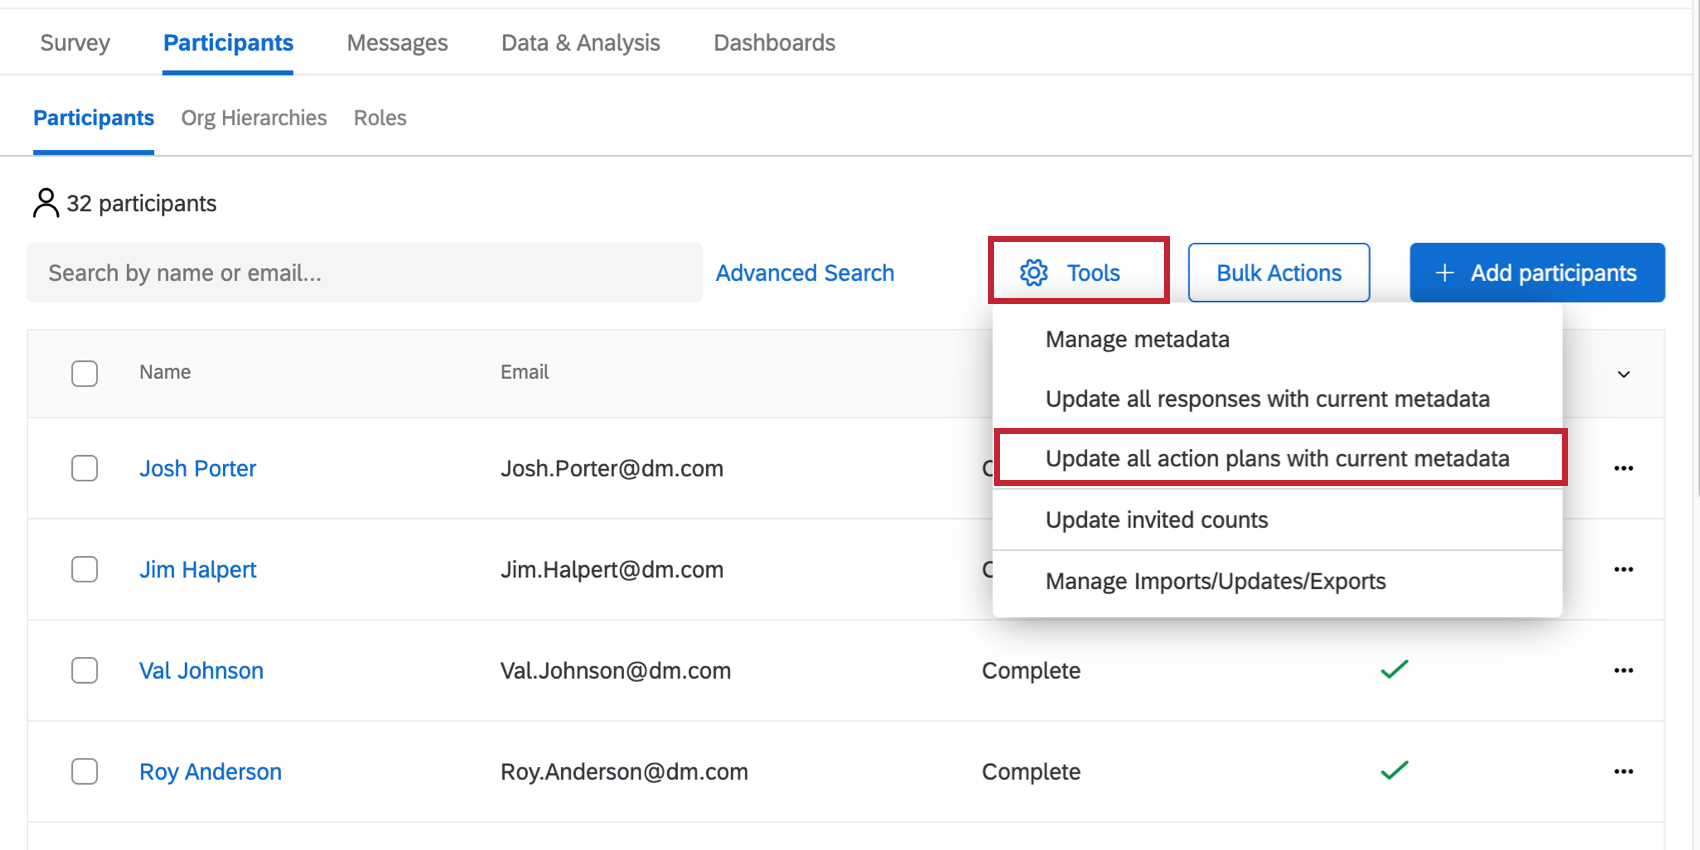
In Employee Experience projects, you are given a set of Tools that you can use to manage the participants uploaded into your project. To get to these tools, navigate to the Participants section of the Participants tab, then select Tools.
Remove Participants
Remove Participants lets you remove some participants from your project. To remove participants, you will upload a file containing the unique identifiers of every participant you want to remove. See Removing Participants for more information.
Warning: Once participants are removed, the participants and their responses are not retrievable! Only select this option if you are absolutely sure!
If you uploaded the correct participants, but not the correct metadata, then you can use a CSV import to update your participants’ metadata.
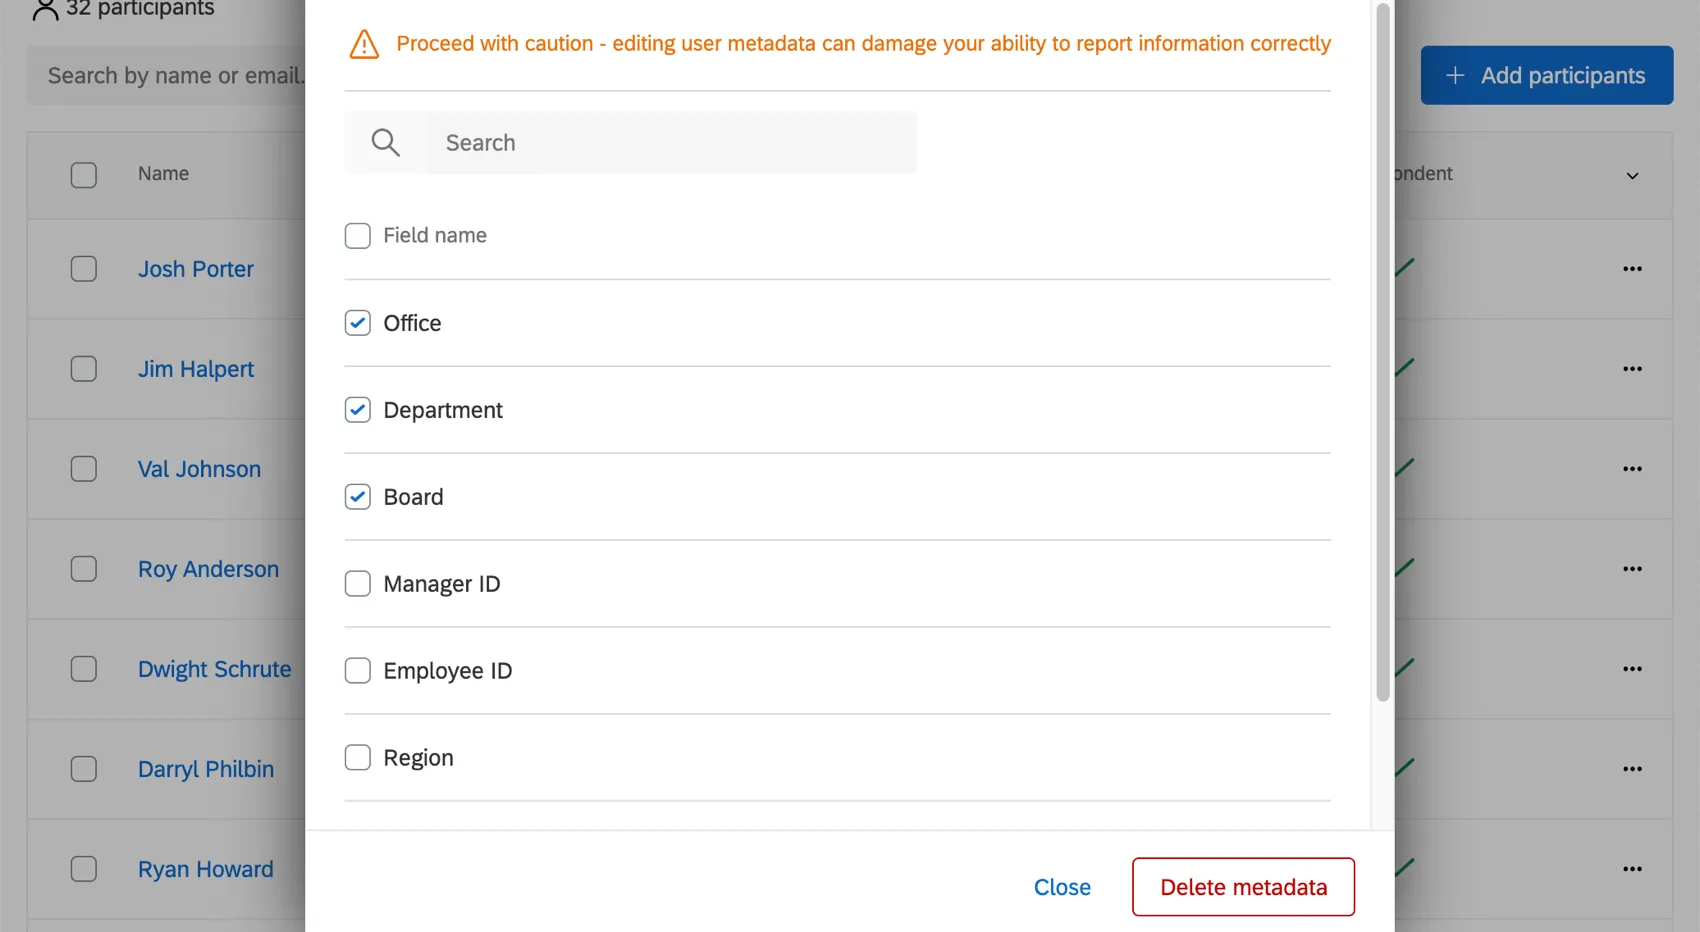
Manage Metadata
You can manage all the metadata for your Employee Experience project using the Manage Metadata tool. Editing metadata here won’t affect metadata in the directory, but it will affect it for the whole project.

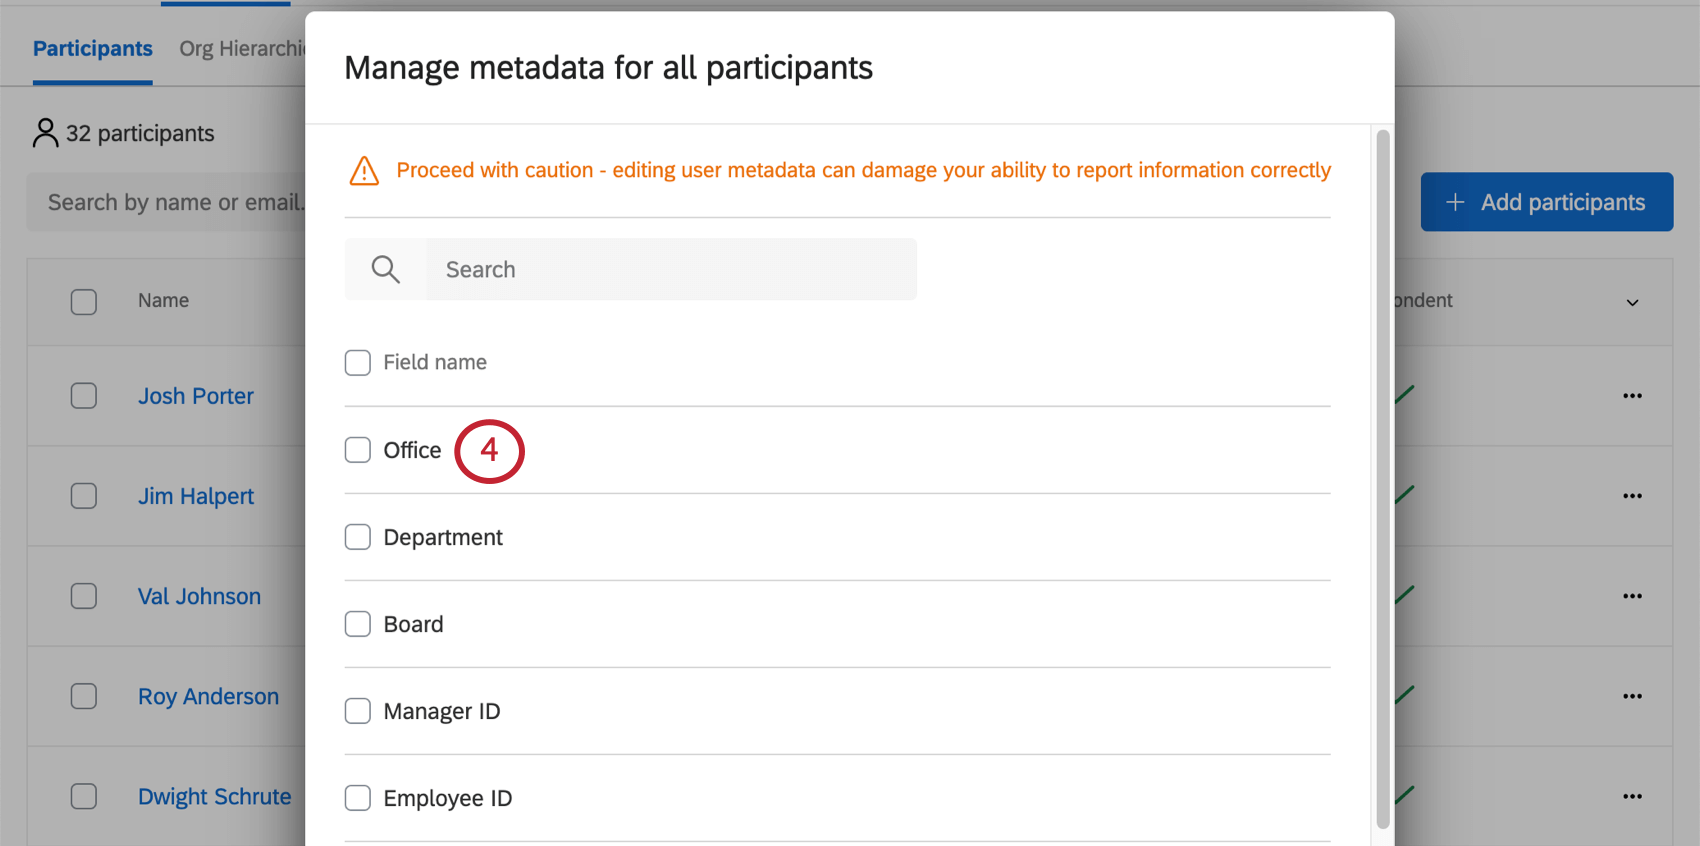
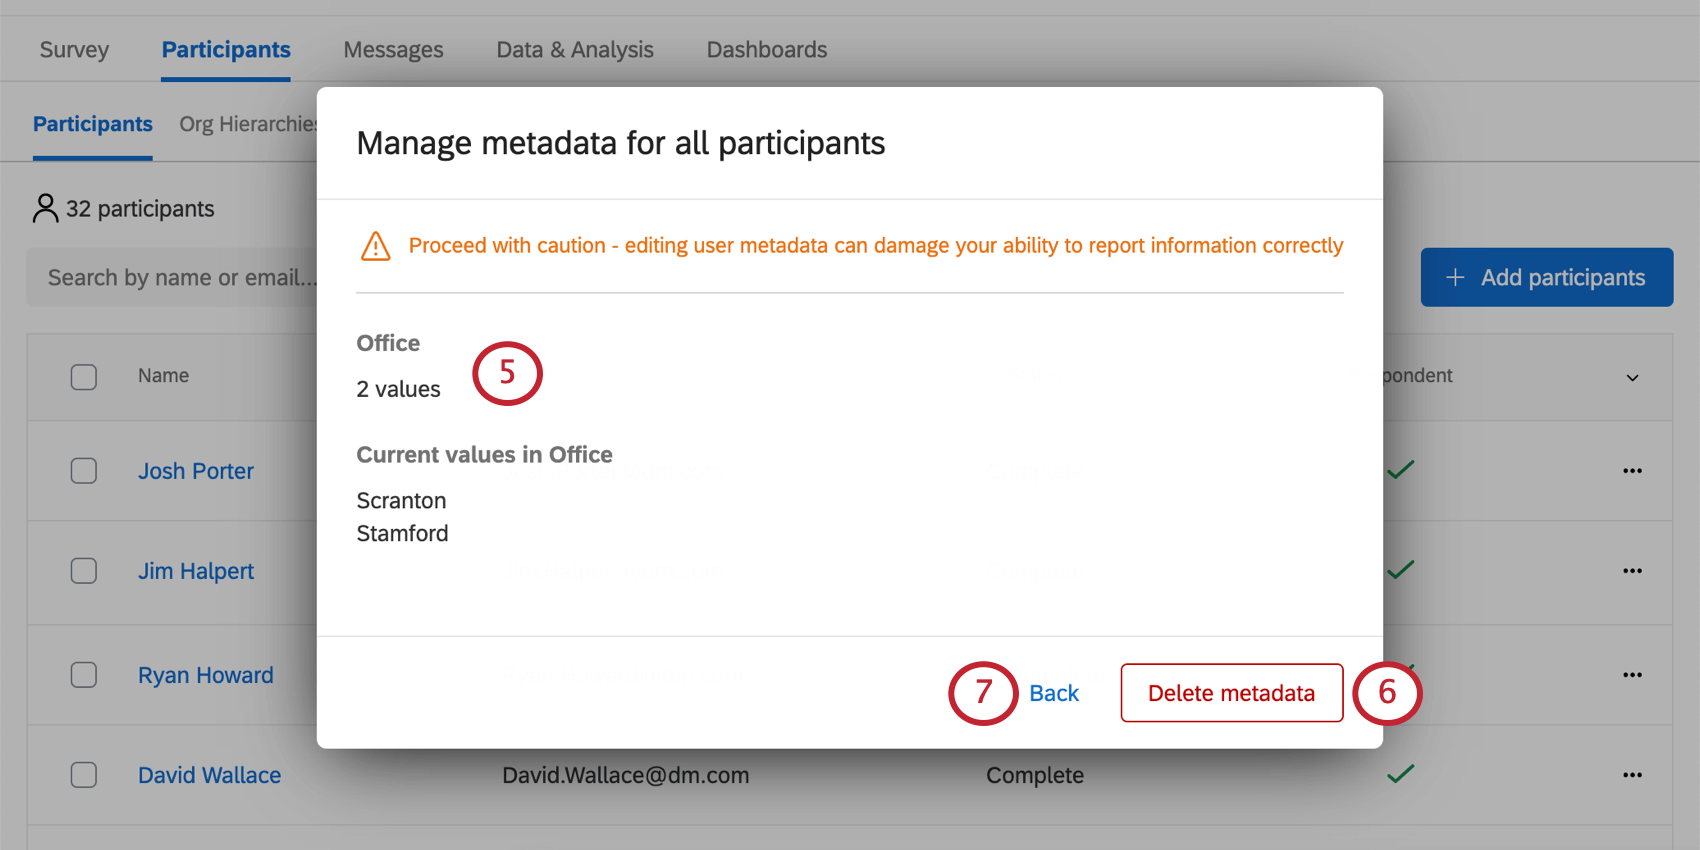
Qtip: Want to delete multiple metadata fields at a time? Check the box next to each field you wish to delete. Then click Delete Metadata on the bottom-right.
Update All Responses With Current Metadata
Attention: This option is not available for Lifecycle projects. For Lifecycle projects, use Update Data & Analysis With Current Participant Metadata instead.
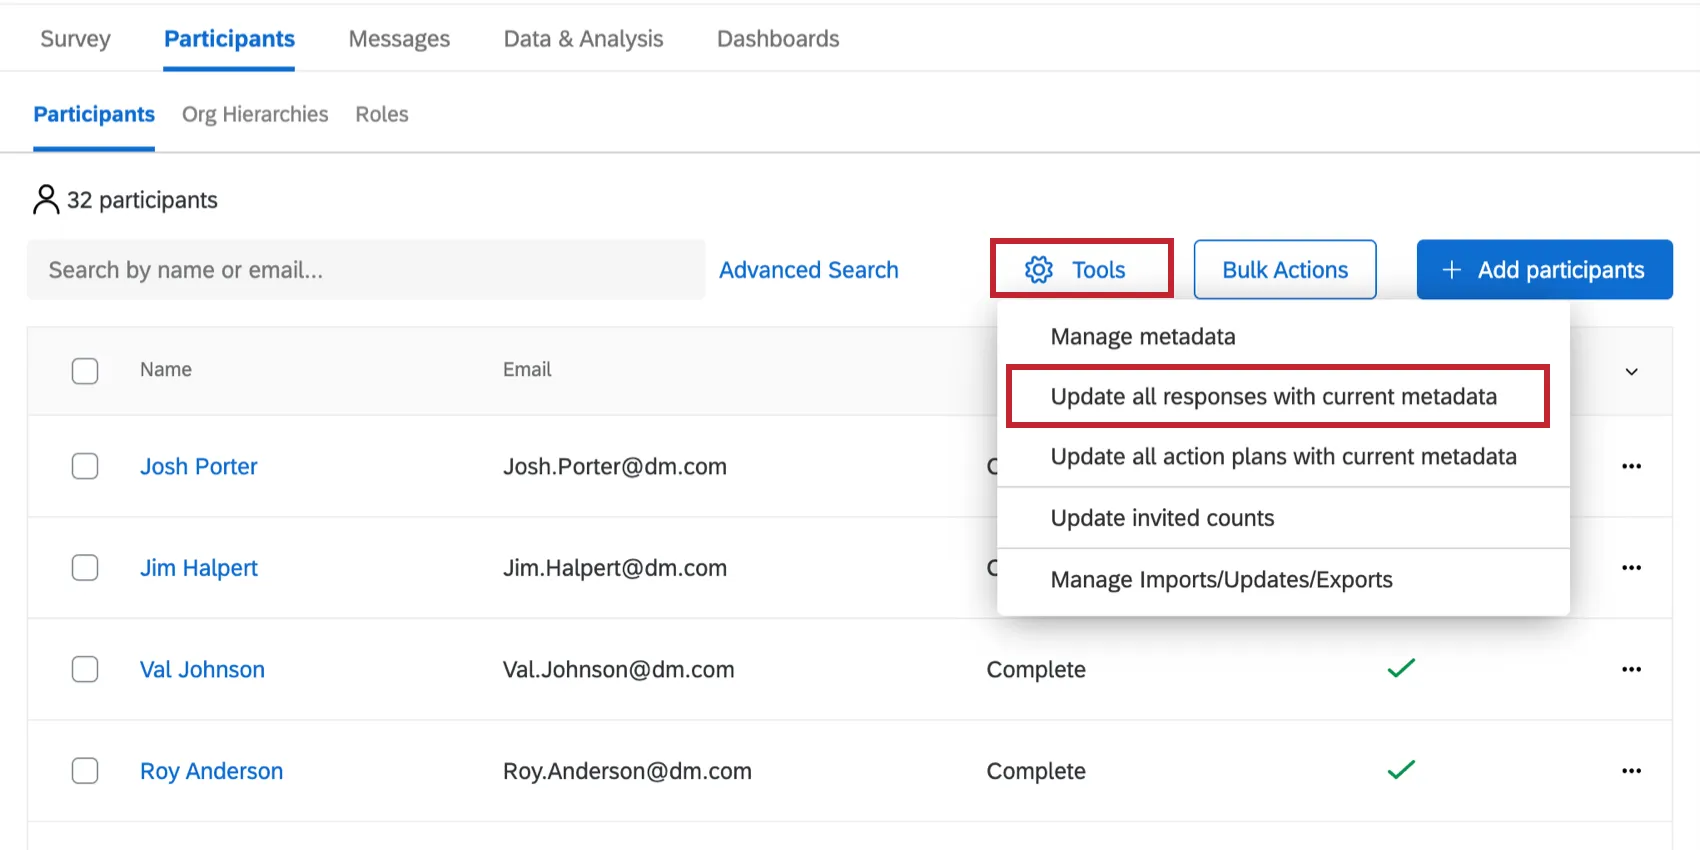
If you have modified your participants’ information by importing new metadata, edited their information directly in the participant information window, or made changes to your org hierarchy, then you will want to make sure these updates are reflected in your dashboards and with your responses. Update All Responses With Current Metadata updates this information for every single one of your participants.
Qtip: If the “Update All Responses with Current Metadata” job is stuck at the same percentage of completion for 2 or more hours, try running the job again.
Attention: “Update All Responses with Current Metadata” is not compatible with metadata where the first character is an underscore.
Attention: “Update All Responses with Current Metadata” will fail if you have multiple fields with the same names. The first 45 characters of each field must be unique.
Update Data & Analysis With Current Participant Metadata
Qtip: This option is only for Lifecycle projects. For other EX project types, use Update All Responses with Current Metadata instead.
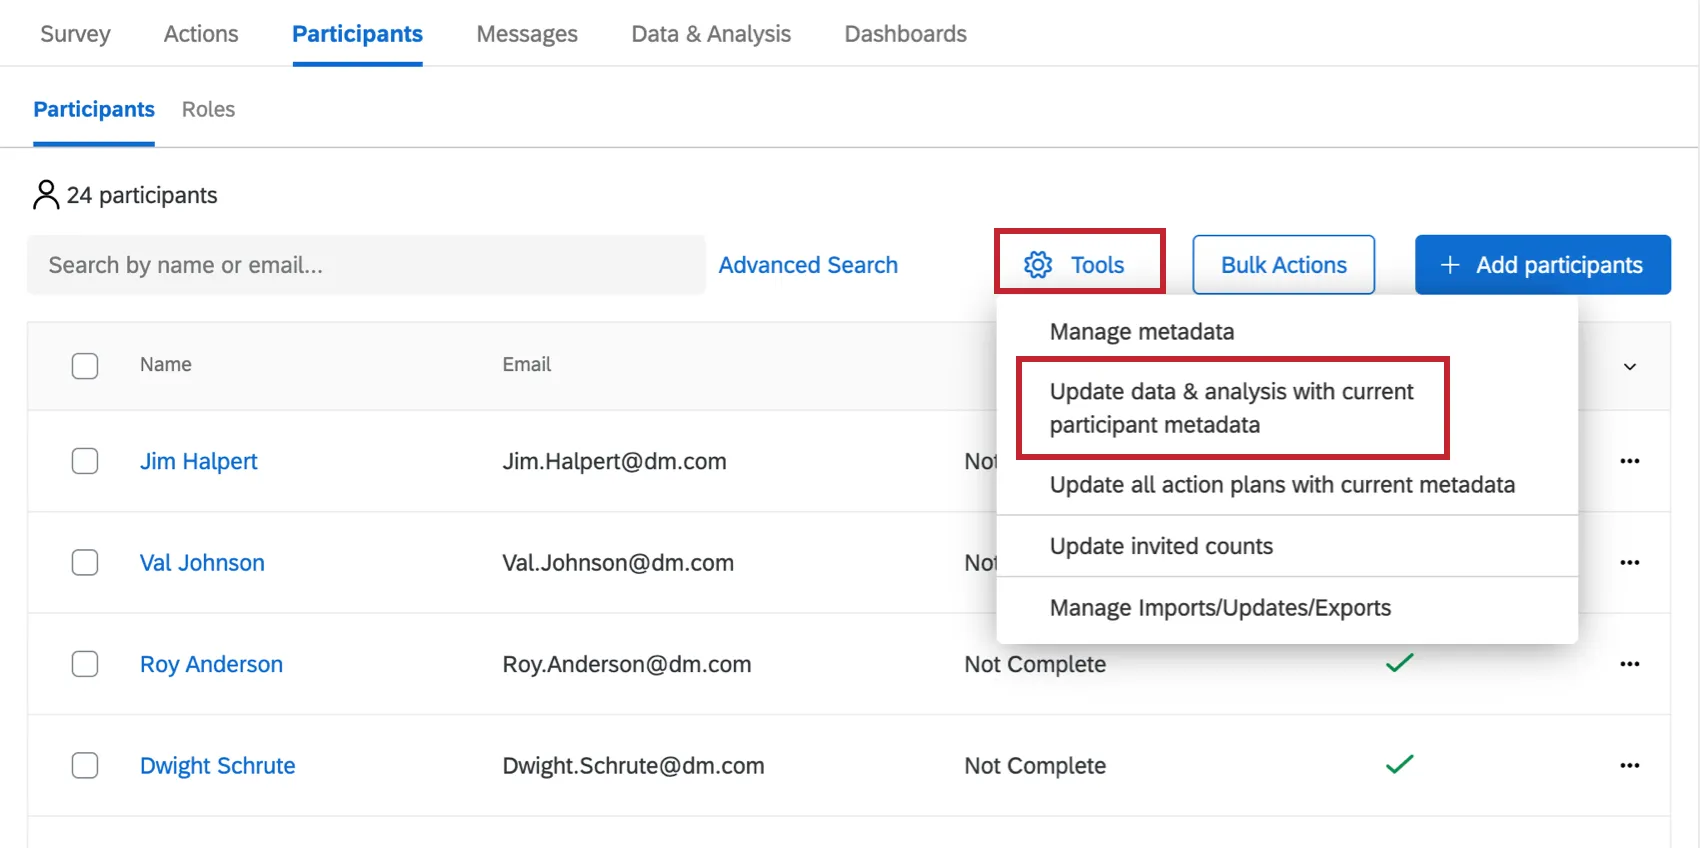
The Update Data & Analysis With Current Participant Metadata option helps your participant metadata stay updated in your project’s data. When you select this option, the following will be performed to your responses:
- If a metadata field has been added to your project’s participants, using this option will make that field available as a column in Data & Analysis.
- If a metadata field has been deleted from all participants in the project, using this option will remove the field as a column in Data & Analysis.
Please note that this option will not change the metadata values for your recorded responses. For example, let’s say you have a metadata field called “Location” which has a value of “Provo” for a participant’s response. You change the field value to “Seattle” in the Participants tab, and run the Update Data & Analysis With Current Participant metadata job. In your recorded responses, the metadata value will still be “Provo.”
If you need to change the recorded value for a metadata field in your data, you can edit the value directly in Data & Analysis. Note that this direct editing functionality is only available for Lifecycle projects. See the linked page for more information about response editing.
Update All Action Plans With Current Metadata

If you have made changes to your participants’ information by importing new metadata or through the participant information window, you will want those updates reflected in your dashboards’ action plans. The Update All Action Plans With Current Metadata option updates this information for all of your participants. Note, while this update is processing, Action Plans in your dashboard will be unavailable.
Qtip: Completion progress for this job will not appear in Manage Imports/Updates/Exports. You can only see if the job is running on the Action Planning page in the dashboard.
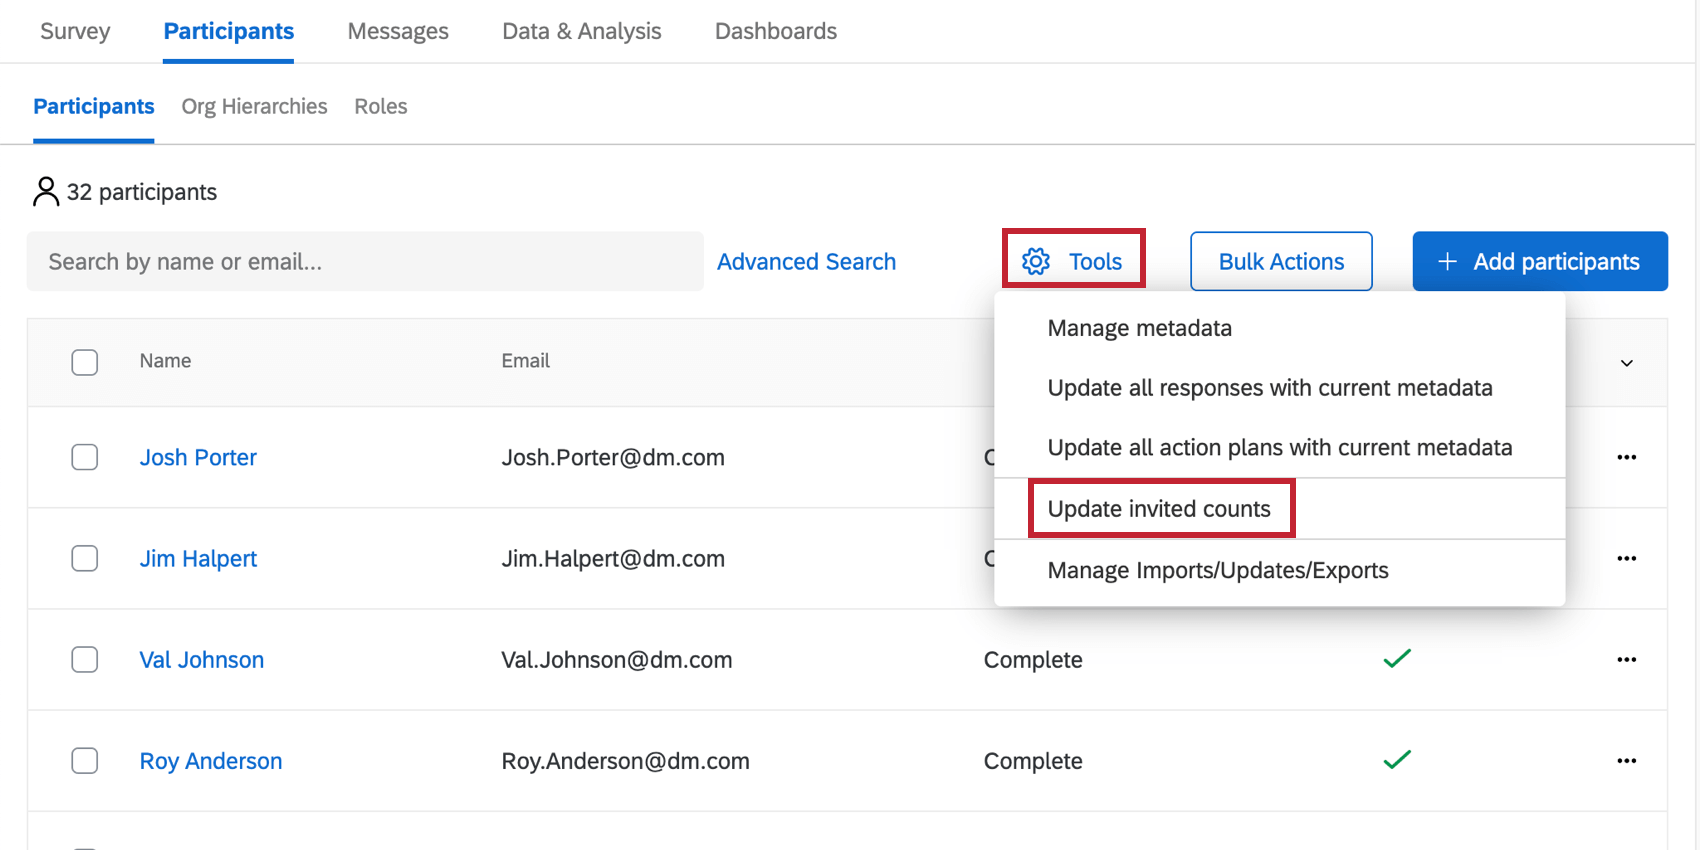
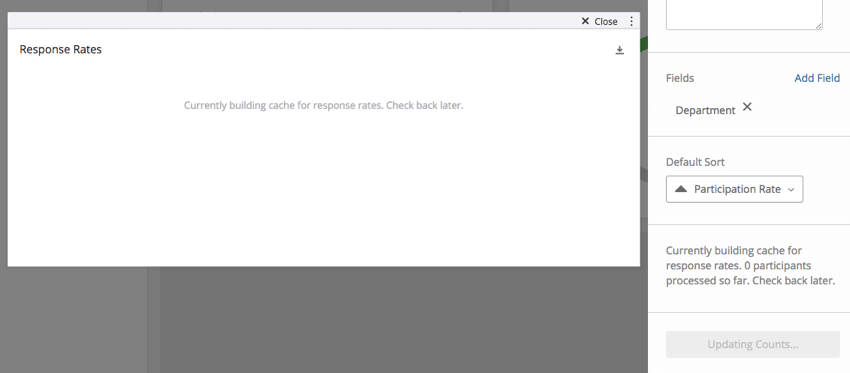
Update Invited Counts
Qtip: This option is typically not necessary for Lifecycle project types because invited counts are automatically updated any time you send a Lifecycle invite to an audience greater than 0. This option is only necessary for Lifecycle projects if you are using an anonymous link.

If changes are made to your participants or your Org Hierarchy after you’ve started working on your dashboard, you may need to Update invited counts. This feature makes sure that the invited counts in your response rates and participation summary widgets accurately reflect the participants who have been invited to participate in your project.
You need to update invited counts for all of the following scenarios:
While this job is running, you won’t be able to use other update jobs, like the Update All Responses with Current Metadata job. Additionally, widgets dependent on invited counts will show an error message while the job is processing.
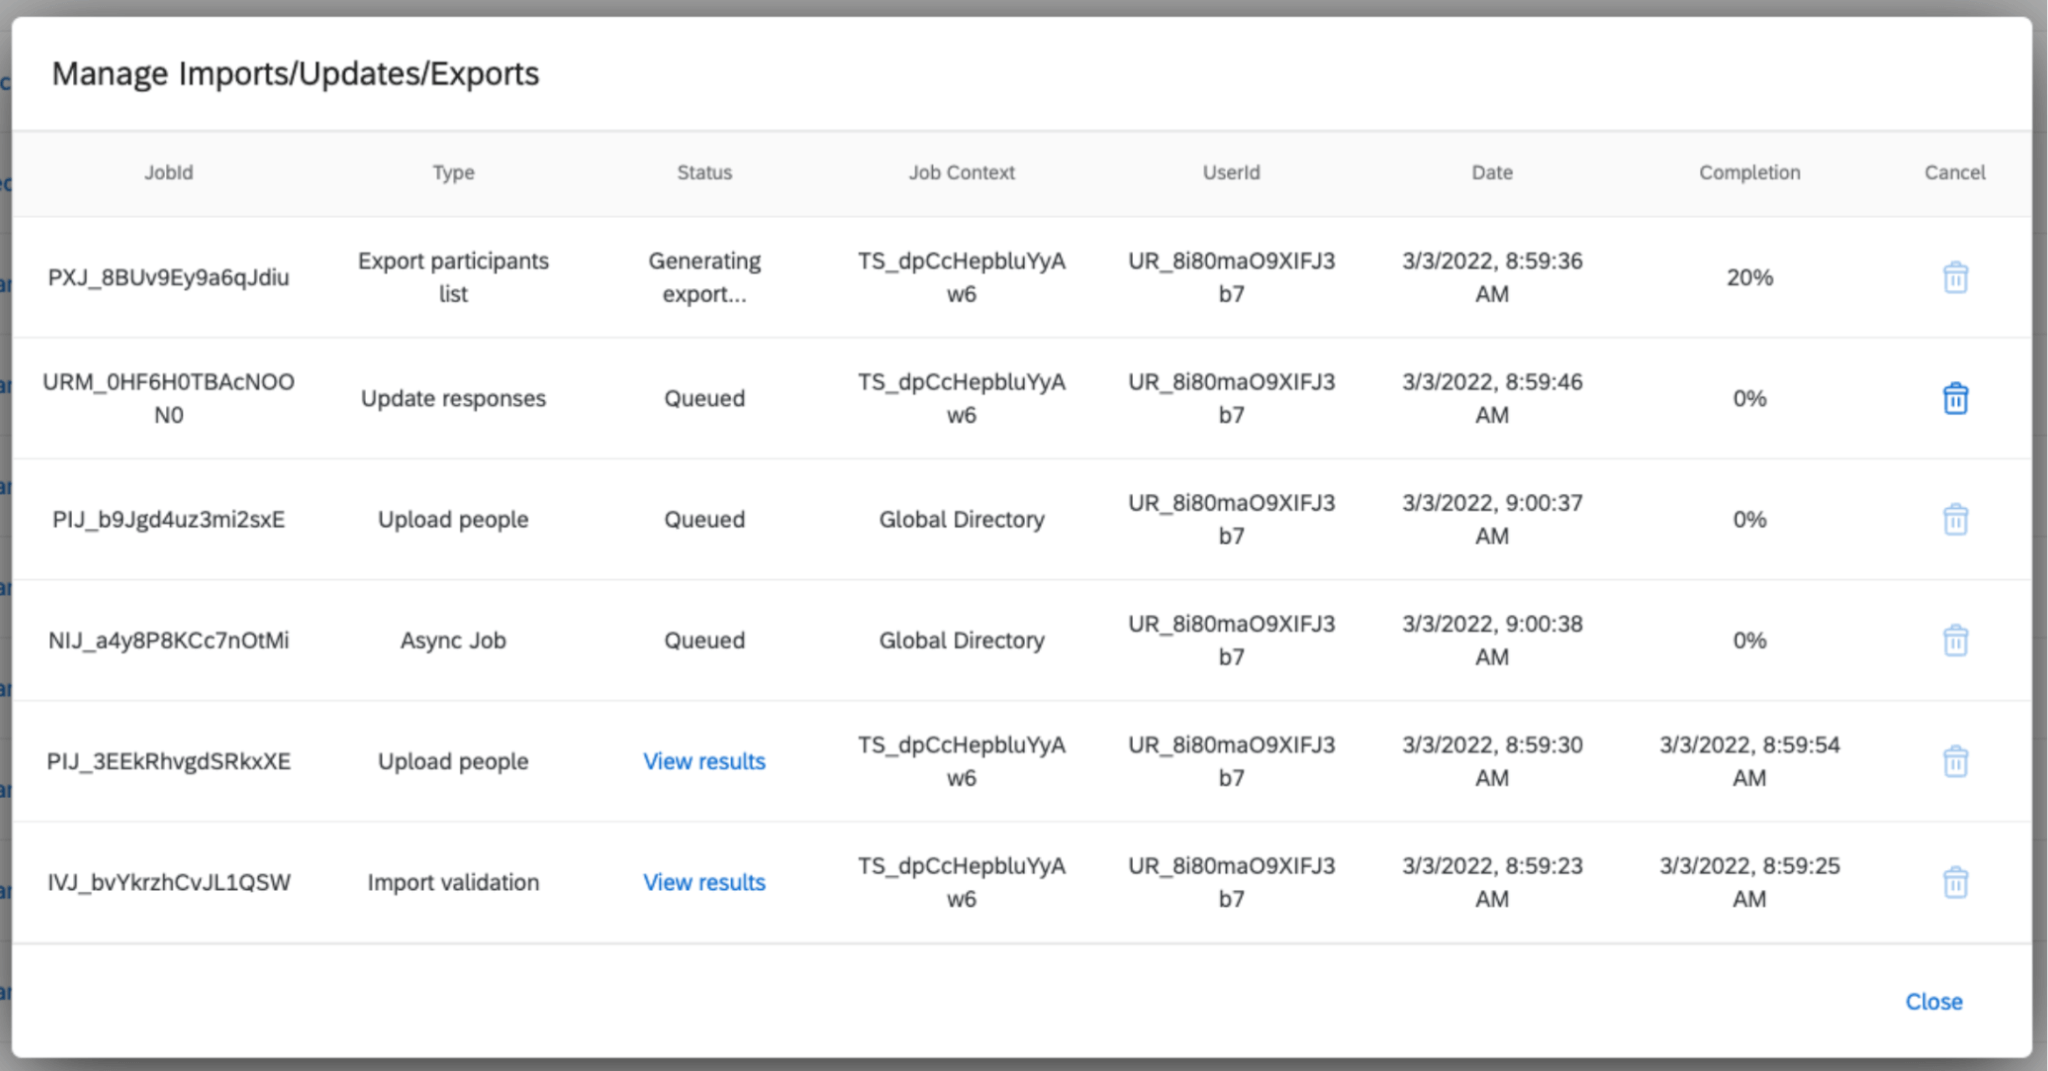
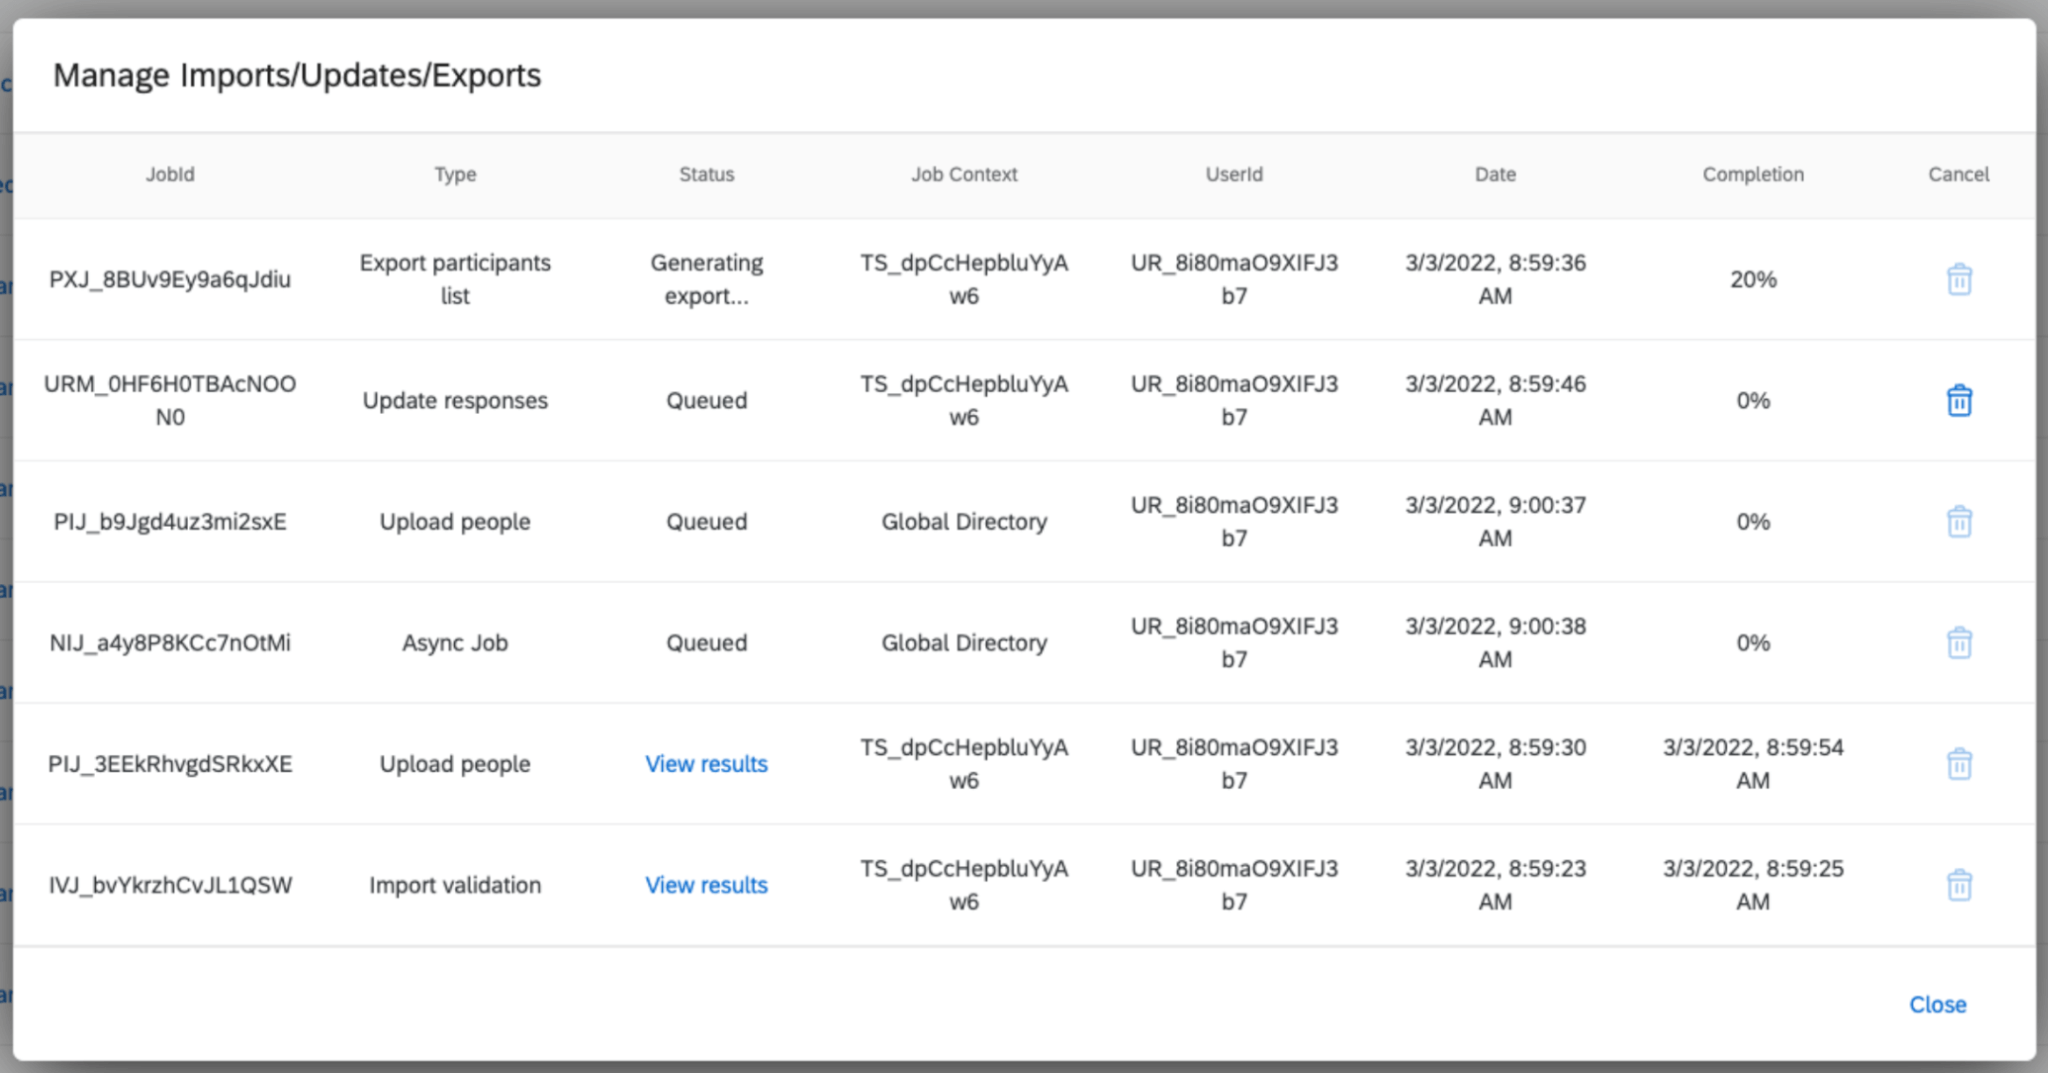
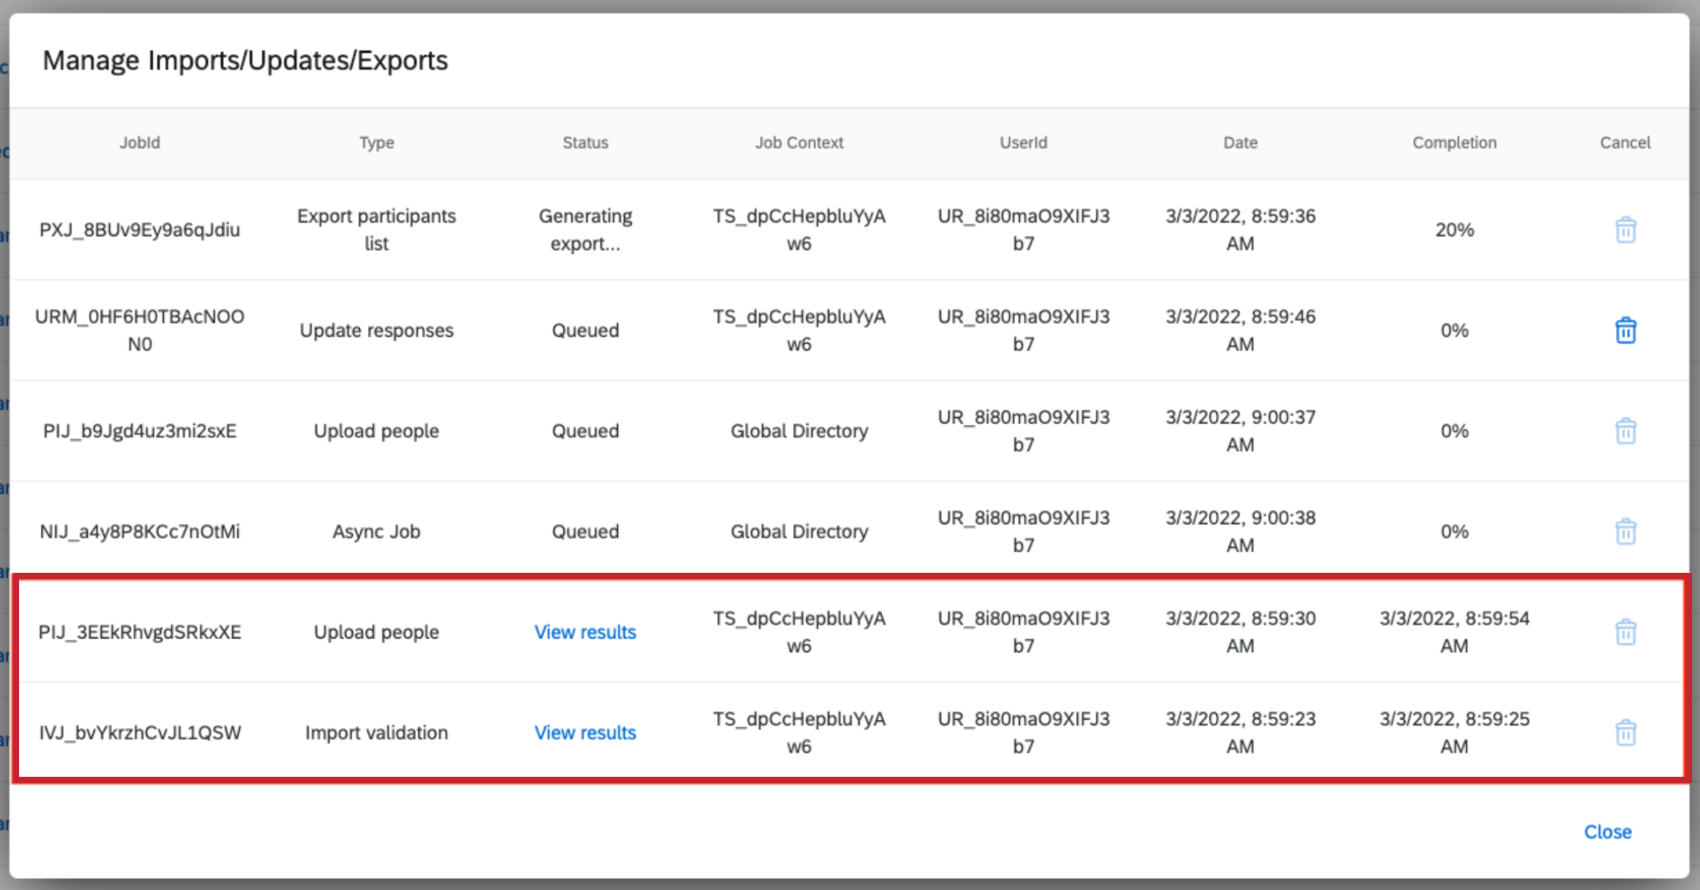
Manage Imports/Updates/Exports
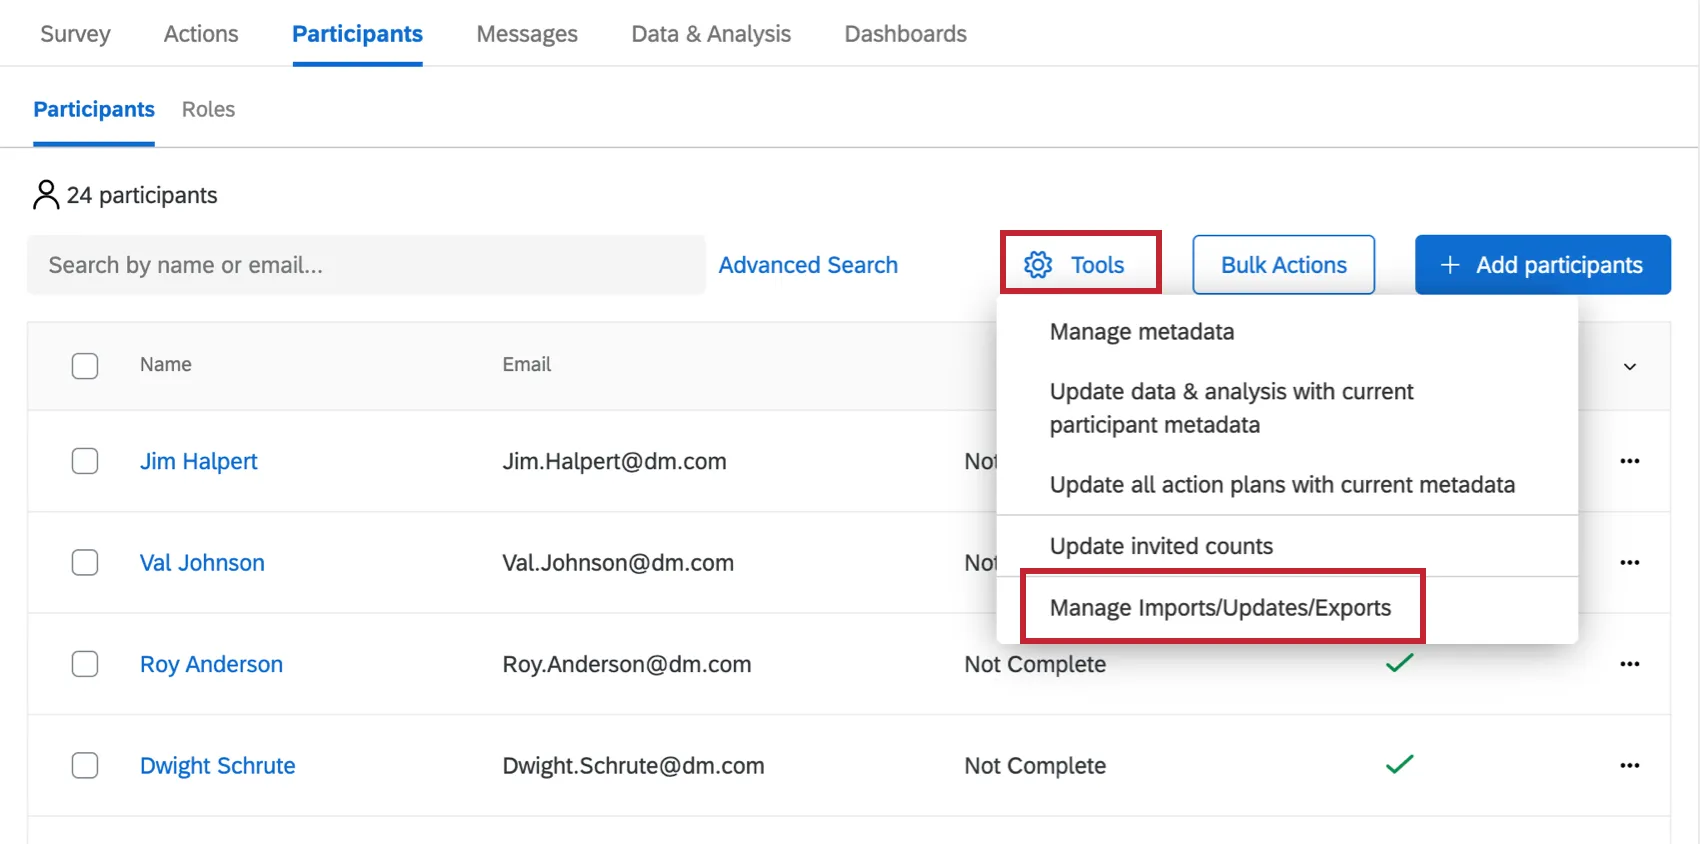
If you have recently imported your participants, chosen to Update All Responses With Current Metadata, or performed another one of the asynchronous jobs, the Manage Imports/Updates/Exports tool will allow you to look back on a history of your jobs.
A column is provided for:
- The JobId of the job
- The Type of job
- The current Status of the job
- The Job Context, or where the job was started
- The UserId of the user who started the job
- The Date and time the job was started
- The Completion percentage of the job, or for finished jobs, the date and time the job completed
- An option to Cancel queued jobs in the current context
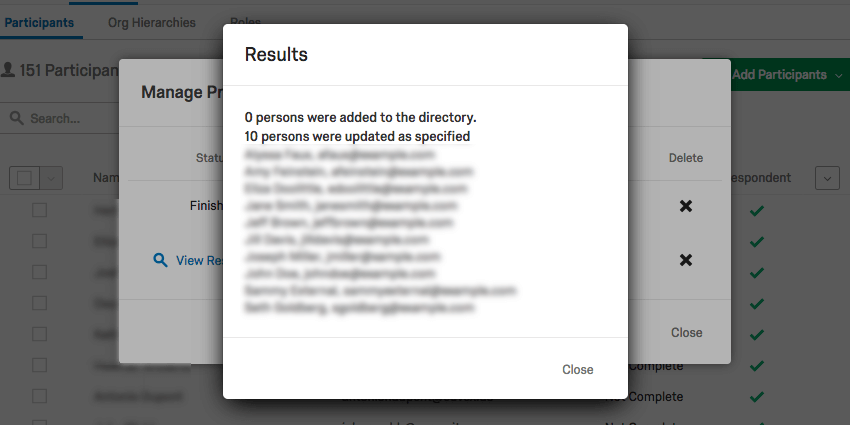
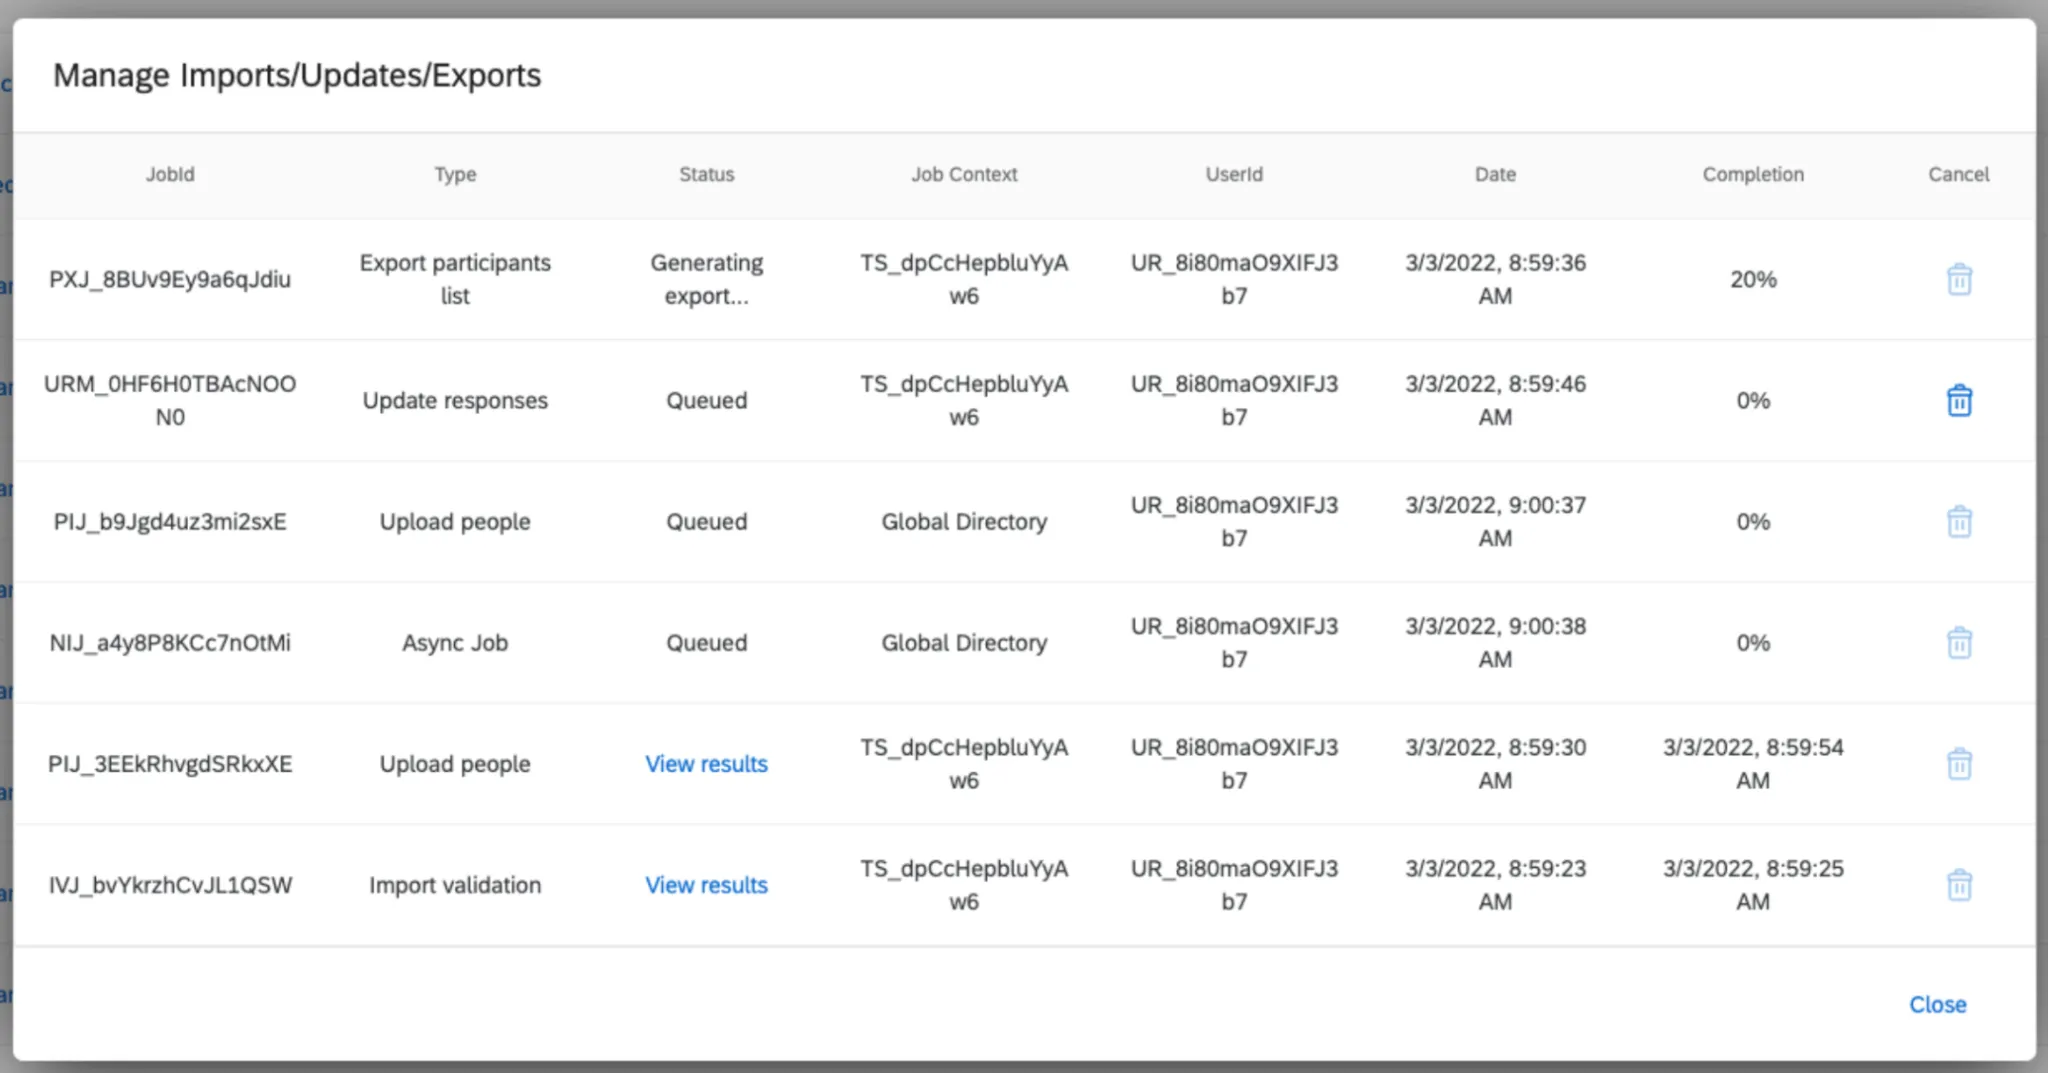
If you click View results underneath the Status column, you will receive a report of what this upload accomplished. If there were any errors that prevented the upload, they will be mentioned here.
In the above image, there were no errors, but all the users updated already existed in the directory, so no new users were added. In addition, any new metadata that might have been included with these users was added to their metadata in the directory so it could be used for later surveys.
Job Queueing
With job queueing enabled, you can start more than one job at once. These jobs can be tracked in the Manage Imports/Updates/Exports modal.
Qtip: Your organization may have up to 20 queued jobs at a time. Any queued jobs will automatically start executing upon completion of previous jobs.
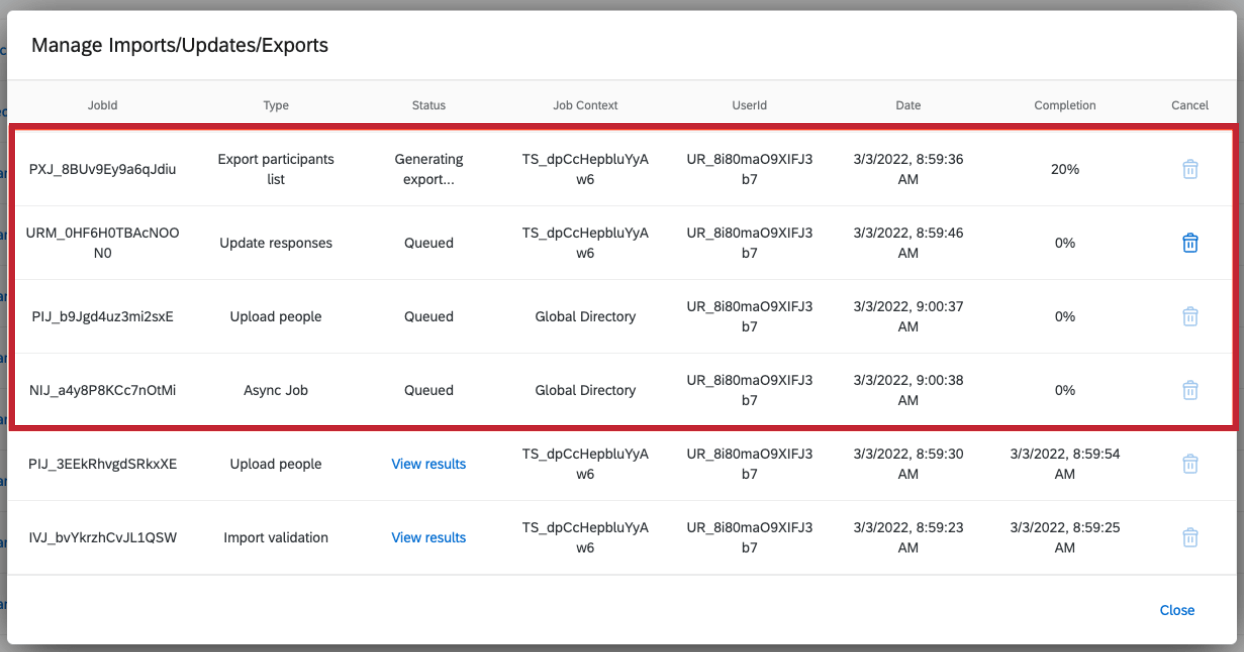
Unfinished Jobs
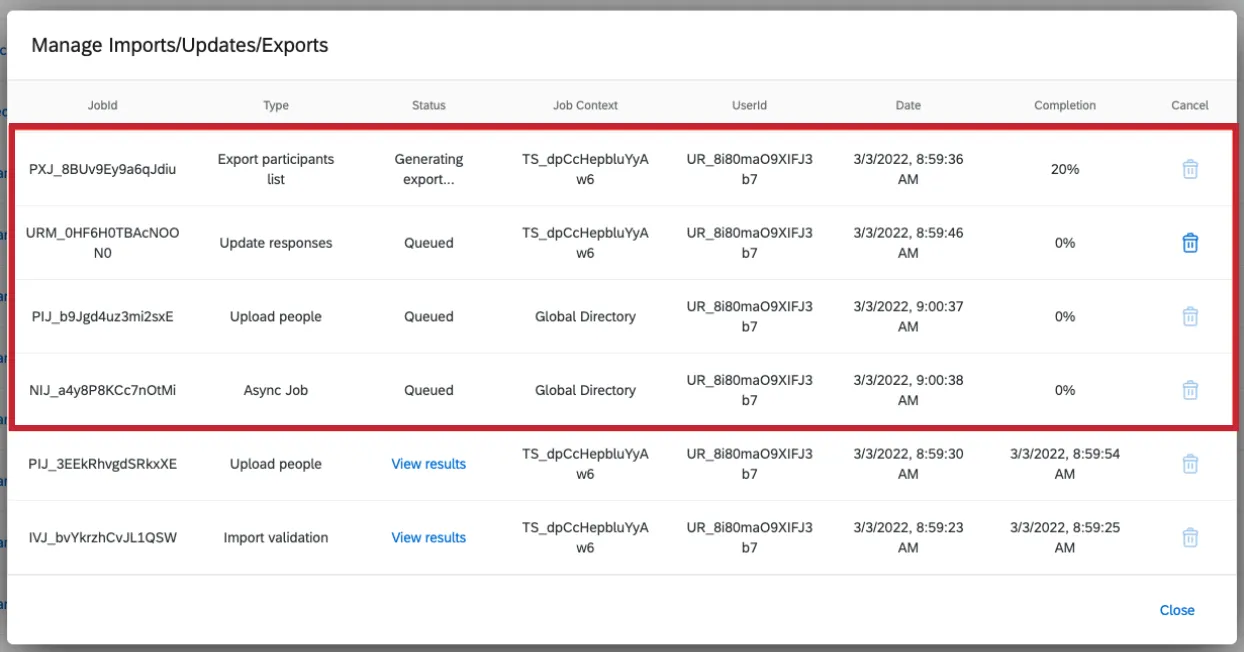
Queued jobs can still be canceled if you are in the project the job was triggered from. In the above image, the Manage Imports/Updates/Exports modal was loaded from the TS_dpCcHepbluYyAw6 project, so it is still possible to cancel the “Update responses” job. However, it is not possible to cancel the Employee Directory jobs because the Manage Imports/Updates/Exports modal is not loaded from the Employee Directory.
Qtip: If you load Manage Imports/Updates/Exports from the Employee Directory, you can cancel a queued job from any project.
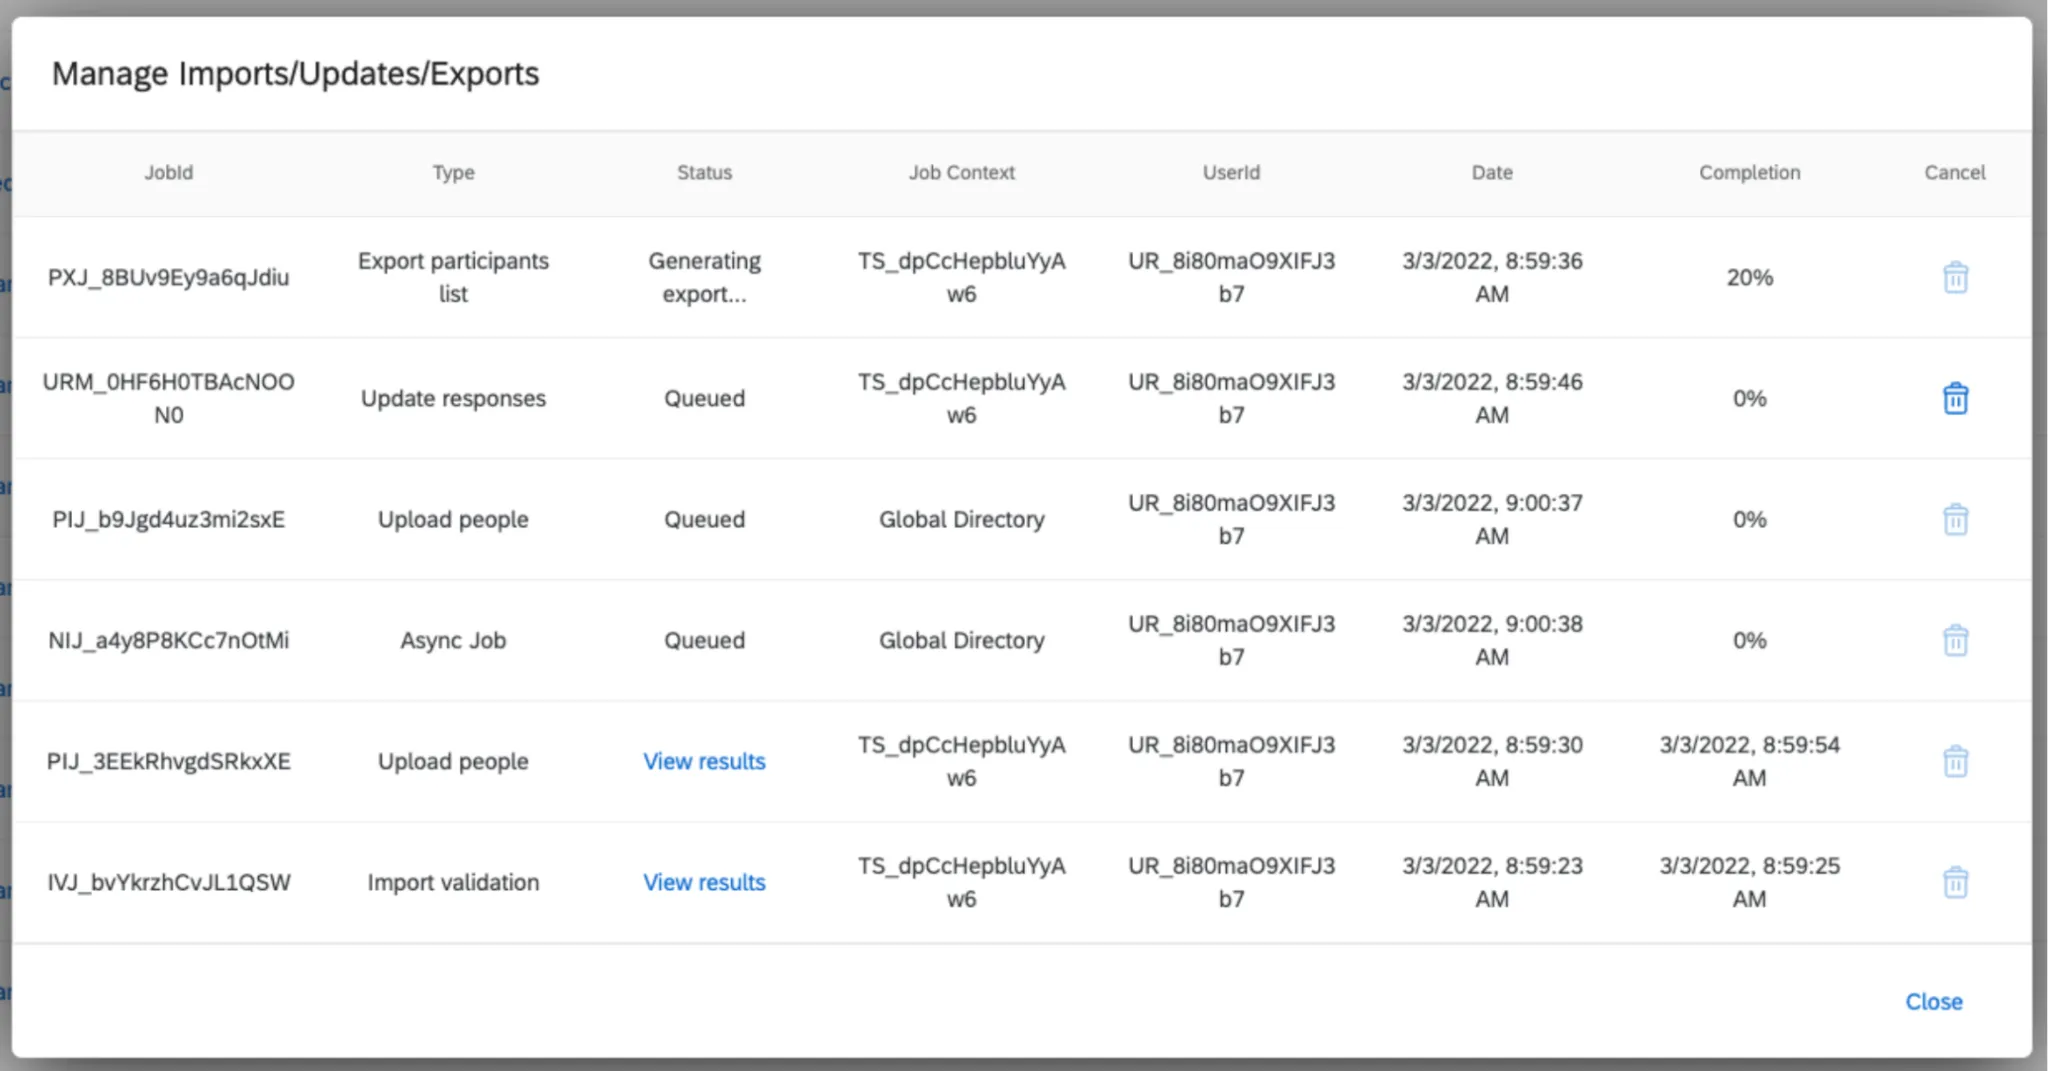
Completed Jobs
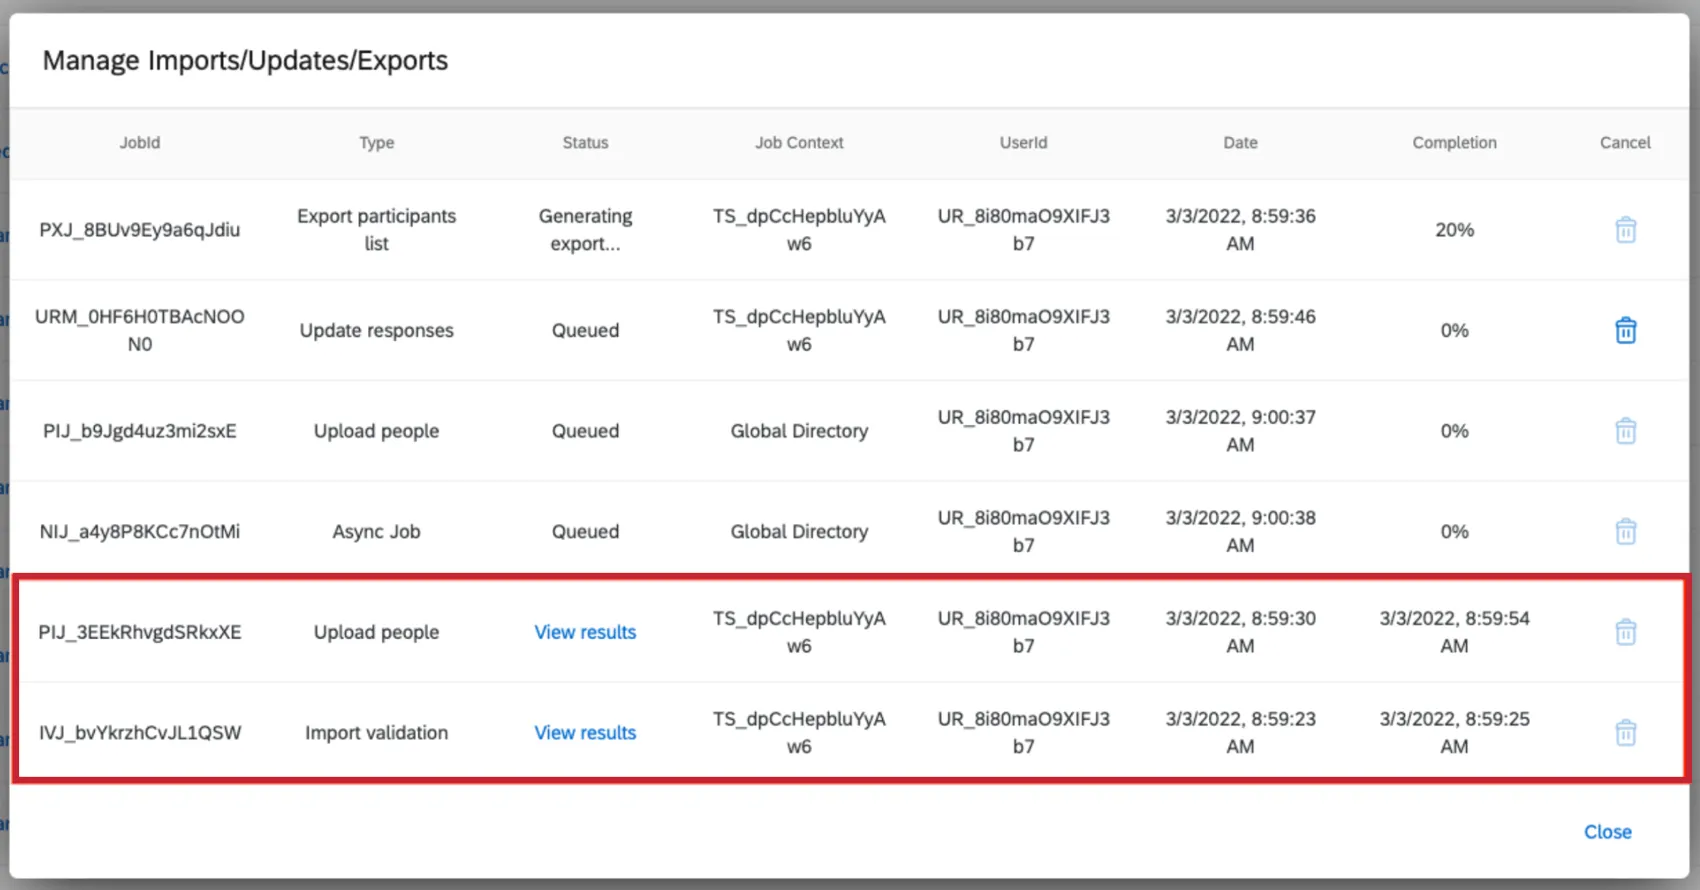
As you scroll down, you’ll find your completed jobs. These jobs have a date in the Completion column. They are listed in chronological order, with the most recently completed jobs on top. For completed jobs, you can click View results.
Qtip: These jobs cannot be canceled because they have already been completed.
Qtip: Only jobs from the current project will show in the completed section of the Manage Imports/Updates/Exports modal.
Processing Order of Jobs
Jobs are processed in the order they were initiated. Jobs in different projects can run concurrently, but jobs within the same project must be completed one at a time.
Attention: Employee Directory jobs will not start until all other unfinished jobs are completed. In addition, no other jobs will run concurrently with Employee Directory jobs, so newer jobs must wait until any Employee Directory jobs in progress finish.
Example: For example, if you have the following jobs queued:
Job 1: Project A
Job 2: Project B
Job 3: Employee Directory
Job 4: Employee Directory
Job 5: Project A
Job 6: Project AFor the above, Job 1 and Job 2 can run concurrently since they are in separate projects. Job 3 will not start until both Job 1 and Job 2 complete. Job 4 will then wait for Job 3 to complete since it is in the same project. After both Job 3 and Job 4 complete, Job 5 will start. Job 6 cannot start immediately, since it is in the same project as Job 5, so it will wait for that Job 5 to complete before starting.
FAQs
I've already uploaded my participant file and collected data, but I need to make a change to my hierarchy. How do I do this?
I've already uploaded my participant file and collected data, but I need to make a change to my hierarchy. How do I do this?
My Employee Engagement participants want to retake their responses. How can they do this?
My Employee Engagement participants want to retake their responses. How can they do this?
That's great! Thank you for your feedback!
Thank you for your feedback!