
Hierarchies in Pulse Programs
What's on this page
About Hierarchies in Pulse Programs
Hierarchies provide a way for you to upload your organization’s employee structure into Qualtrics. When employees and managers log into the dashboard, they’ll see data appropriate for their level and role. In Pulse programs, it’s especially important to account for changes in your organization so data reports are accurate over time. When setting up your hierarchies, you can decide how employee changes are mapped over time from survey to survey.
Qtip: If you need help understanding the different types of hierarchies or can’t decide which one would be best for your program, check out the Hierarchies Basic Overview. Keep in mind ad hoc hierarchies cannot be used in a pulse.
Before You Create Any Hierarchies
Qtip: Creating an import automation is extremely important in ensuring your hierarchy will update with new employee information as it comes in, so that future pulses can correctly reflect each participant’s place in the hierarchy.
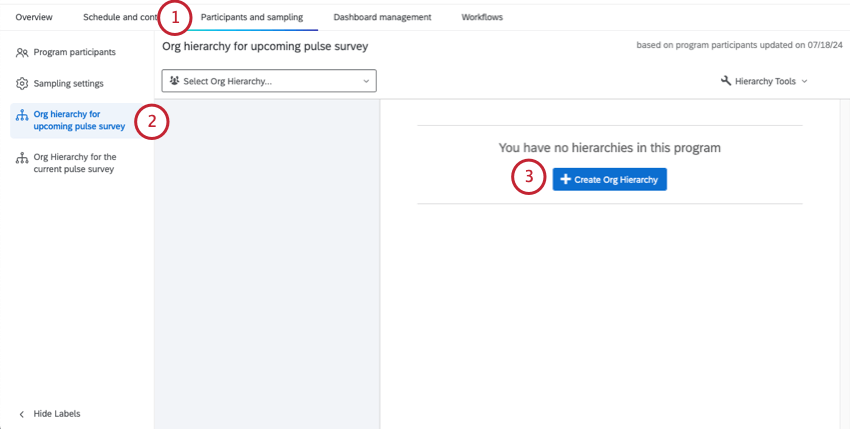
Creating a Hierarchy in a Pulse Program
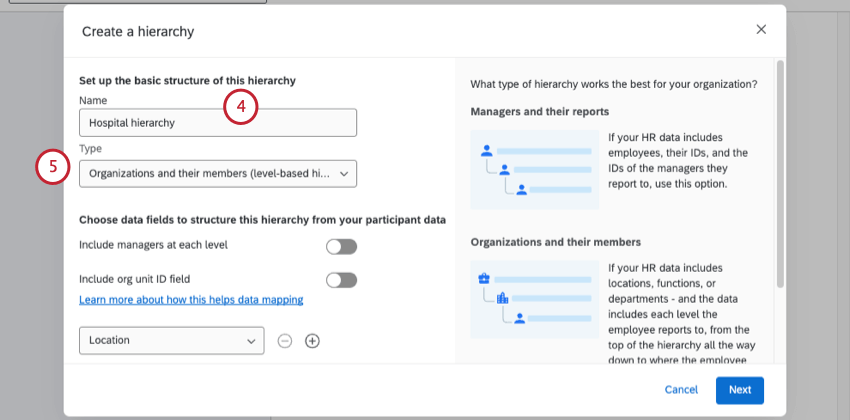
- Parent-child hierarchy
- Level-based hierarchy Attention: You cannot create an ad hoc hierarchy in a Pulse program.

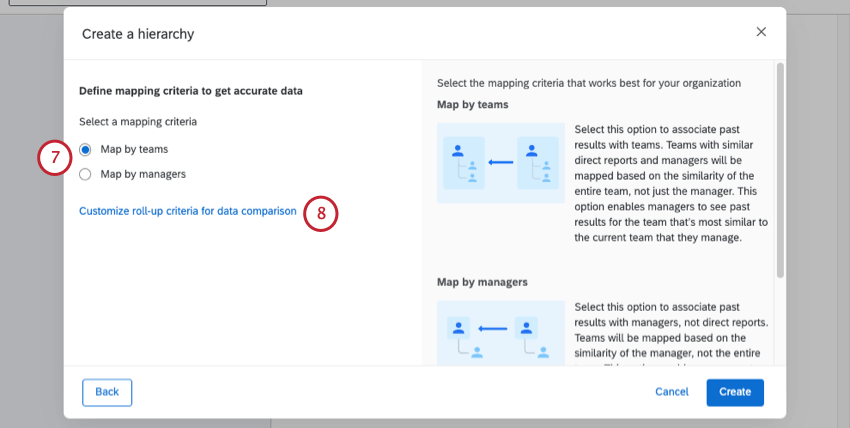
- Map by teams
- Map by managers Qtip: For more information, including examples, see Map Org Hierarchy Units.

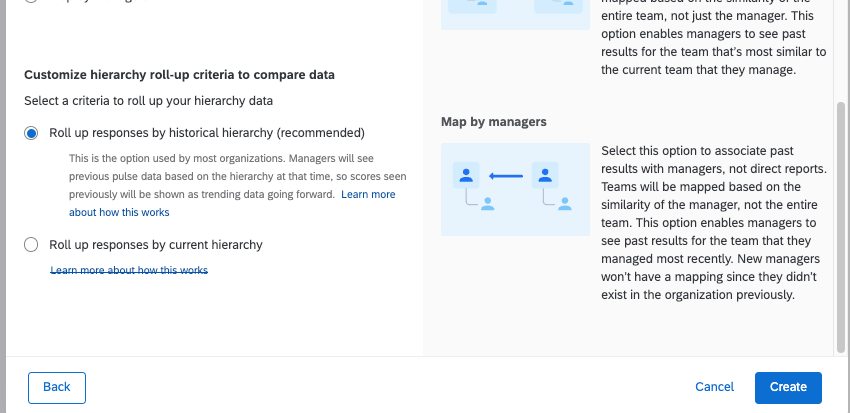
- Roll up responses by historical hierarchy (recommended, default): This is the option used by most organizations. Managers will see the historical scores for their team as these scores were shown in the past. This approach relies on the mapping to show the historical score for the unit (team) that you are currently filtered on in the dashboard. Example: Here’s an example for rolling up based on the historical hierarchy. Team X moved from Department A to Department B. The historical scores for Department A will continue to include Team X because that team was part of Department A at the time of the last pulse.

- Roll up responses by current hierarchy: This approach uses the current hierarchy structure to present historical scores. Therefore, historical scores are presented based on the structure of the new hierarchy (e.g., A team moved from Department A to Department B, the historical score for Department B will now include the team that moved). This approach is not recommended for most use-cases as historical scores will continue to change from pulse to pulse. Example: Team X moved from Department A to Department B. The historical score for Department B will now include Team X.
Once you’re finished creating a hierarchy, you can create hierarchy-based roles. This is how your dashboards know to limit what data each visitor can see.
Current vs. Upcoming Hierarchy
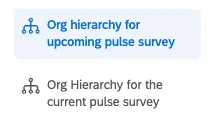
You’ll notice that there are 2 hierarchy pages in your Pulse Program: Org hierarchy for upcoming pulse survey and Org hierarchy for current pulse survey.
If participants haven’t changed and you haven’t made any edits, you’ll likely see the same org hierarchy on both pages. So what’s the difference between the two?
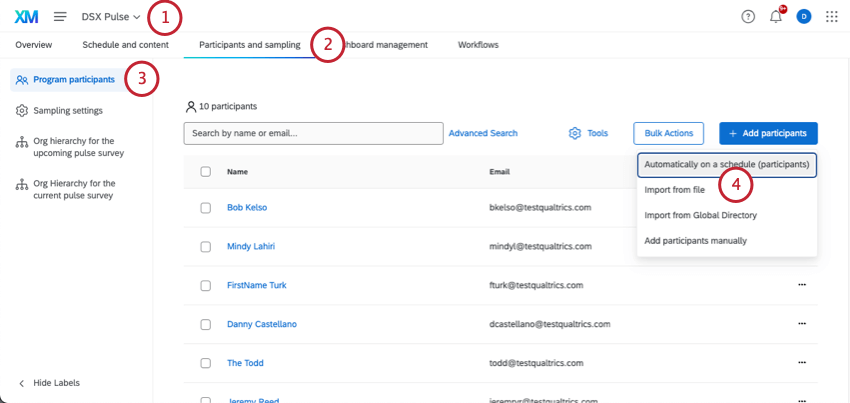
- Upcoming: This is generally the page where you should make hierarchy edits. If you’ve set up a participant automation or made other program participant updates, this hierarchy will reflect those changes. The hierarchy on the Upcoming page will be used for your surveys and dashboards, but not until the next upcoming survey is launched. If you currently have a survey live, this hierarchy won’t be reflected in that survey. No edits you make here will be reflected in dashboard roles, the dashboard filter, or your pulse survey data until the next survey launches.
- Current: This is the hierarchy being used in your dashboard hierarchy filters, roles, and any currently open survey. Your entire pulse program’s response data will also be mapped based on this version of the hierarchy, as well as the mapping rules you set up during hierarchy creation.
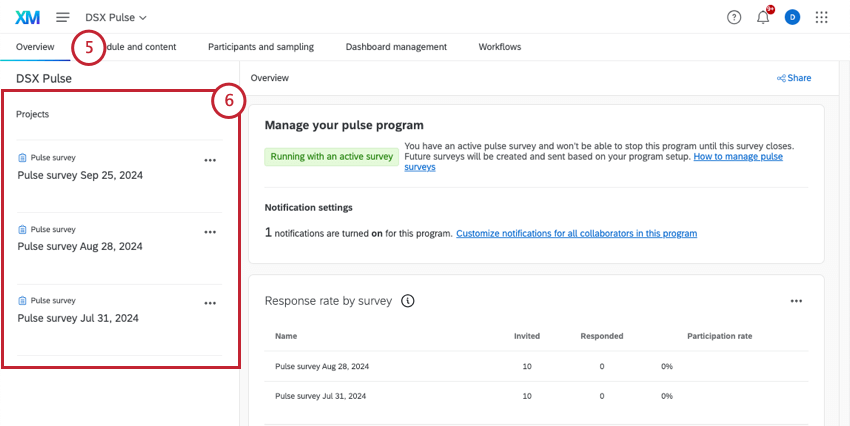
Viewing Historical Hierarchies
There is a comprehensive list of all participants in the larger Pulse program, which you set up first. From that list, participants are pulled into each Pulse survey. In the same way, there are the hierarchies saved in the program, and hierarchies in each individual Pulse survey.
3 days before each survey opens (or when using the generate sample functionality), the participant sample is pulled into the participant list and the org hierarchy version for the pulse is generated based on the program’s upcoming hierarchy. Each of these survey hierarchies acts as a historical snapshot of what the organization looked like at the time.
Qtip: At the beginning of your program, you might not see a difference between your program and individual survey hierarchies. That’s because your participants haven’t changed much. Over time, as the org hierarchy changes, you’ll start to see differences, especially from survey to survey.
Changing the Current Hierarchy
There are times that you may want to change the hierarchy for a current Pulse survey. If so, there are a few ways to make changes.
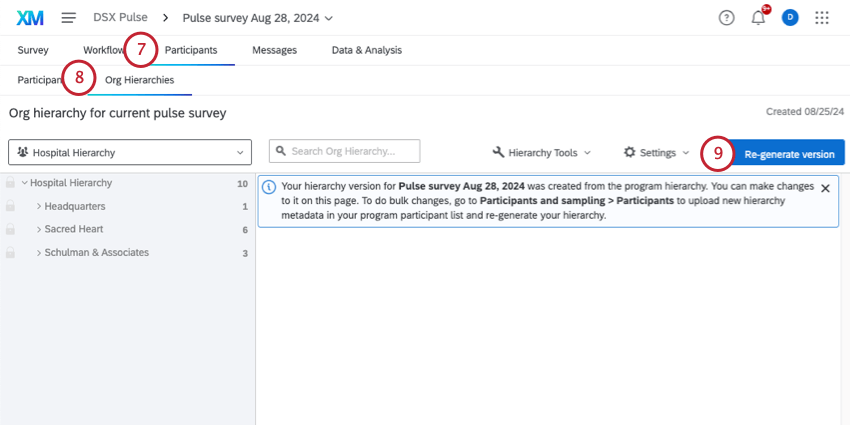
Larger Changes
If you need to make a lot of changes, you can update your program participants, which will also update any upcoming hierarchies. You can then go to your current survey and use the “Re-generate hierarchy” button to sync the survey’s hierarchy with the program changes you made. This will bring the updated hierarchy to your current survey.
Qtip: The re-generate button will only update only hierarchies that were created before Pulse survey participant sampling. If you create a new hierarchy after sampling, it cannot be added to your project, and will instead be included in the next planned survey.
Qtip: The ability to re-generate a hierarchy is only available in the current pulse survey project. You cannot do this for past surveys.
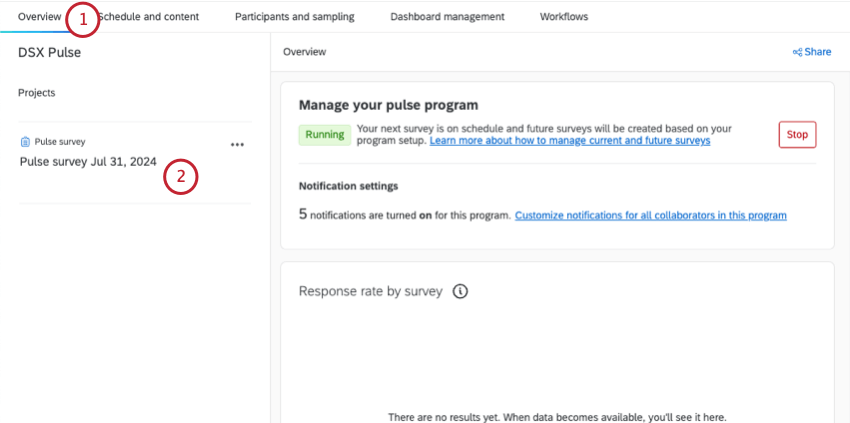
Qtip: This may not be the latest survey in the list! Look for the date that matches the current timeframe.
Minor changes
If you need to make small changes, you can make edits directly to a hierarchy. You can make edits to any historical pulse survey hierarchy or the current hierarchy.
If you make changes to a historical hierarchy, these changes will only be retained in that version. If you intend for responses and hierarchy mappings to update based on your changes, ensure you run Update all responses with current metadata in the Participants tab.
You can also make changes for your current hierarchy, either in the program’s current hierarchy or in the current pulse survey project, since these hierarchies are the same until the next pulse runs.
Here are some resources on hierarchy editing:
Qtip: You cannot edit your survey hierarchy by uploading participant metadata changes.
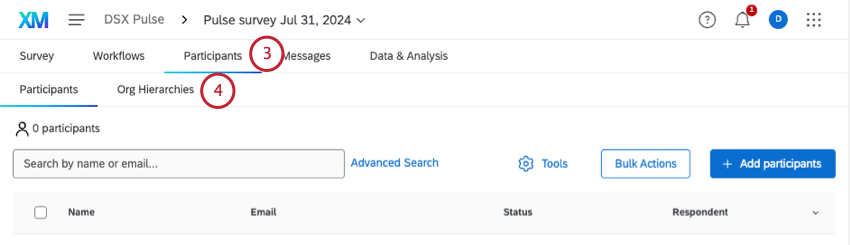
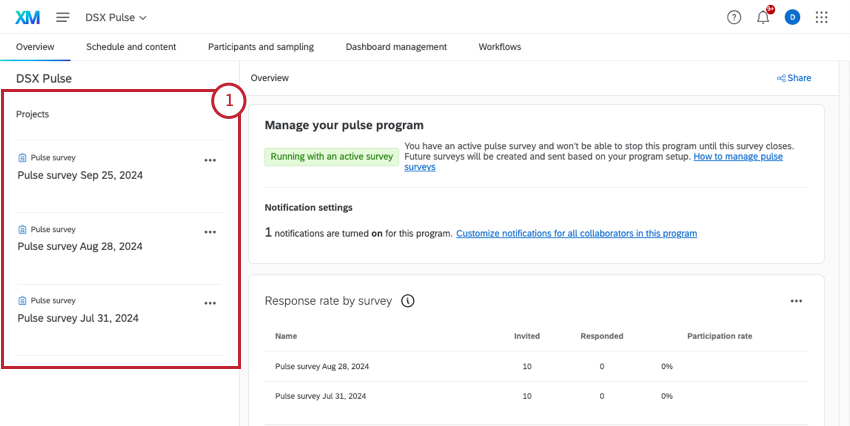
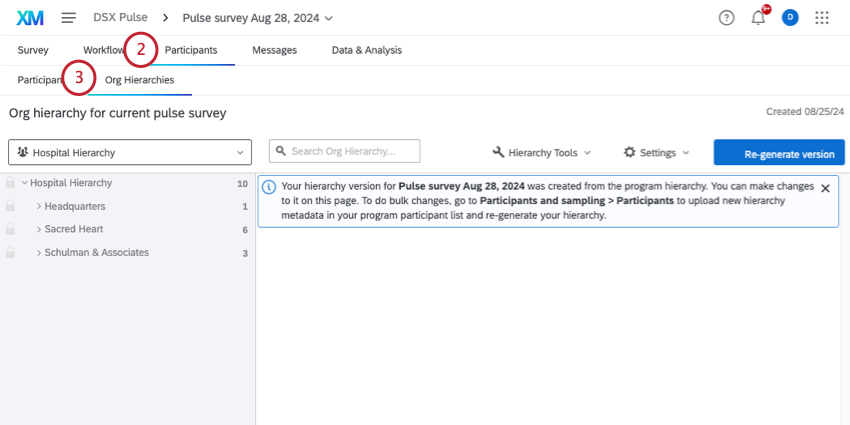
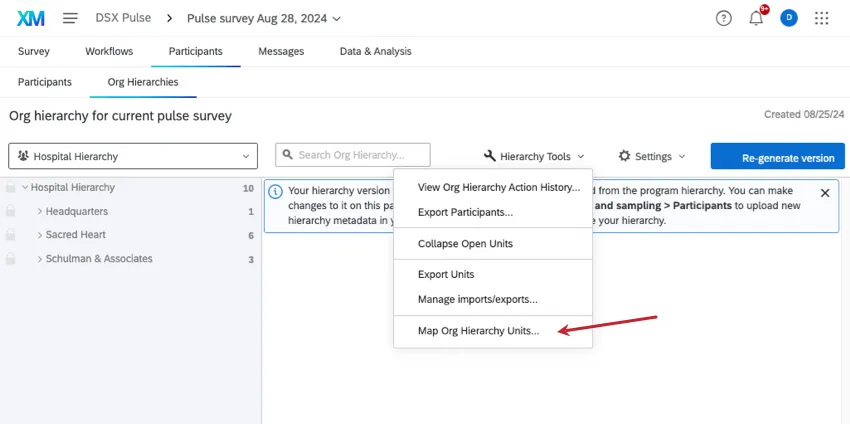
To find your survey’s hierarchy:
Changing or Updating Hierarchy Mappings
Historical hierarchies for each pulse are mapped together from pulse to pulse automatically all the way through the upcoming hierarchy. If you need to change how hierarchies are mapped, you can make those changes at any time.
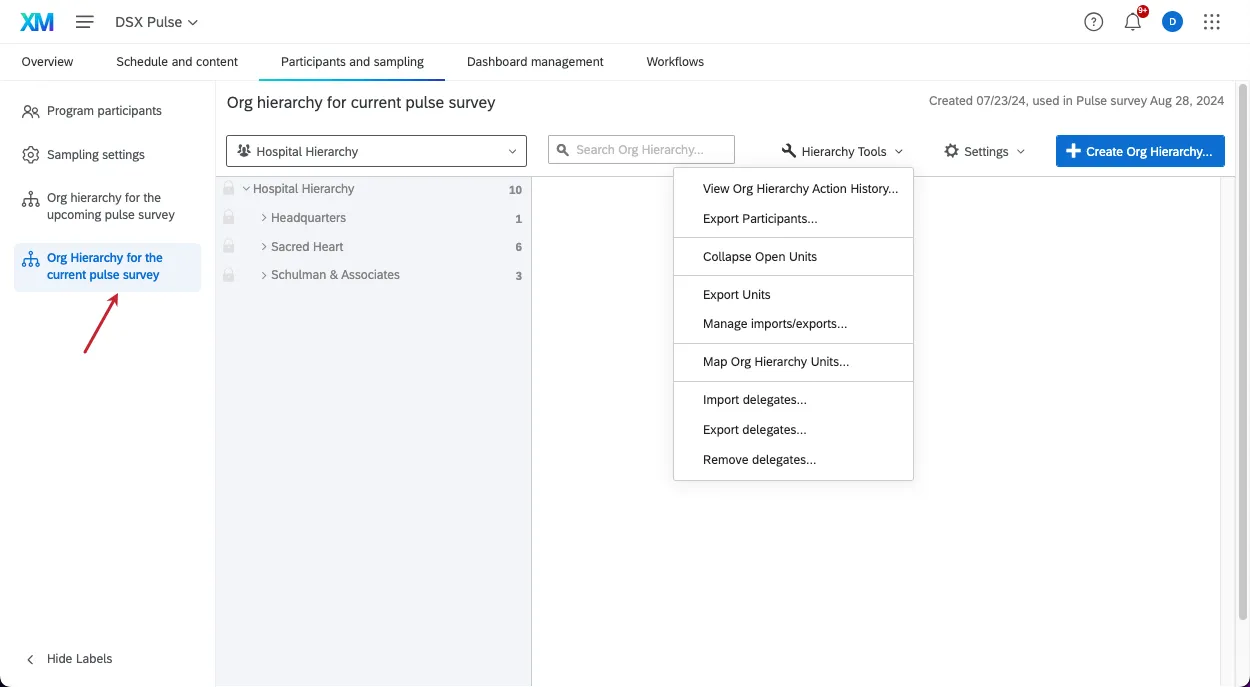
When changing mappings for the upcoming pulse, go to the upcoming program hierarchy, open hierarchy tools, and select Map Org Hierarchy Units. You will then be able to adjust mappings for your upcoming pulse based on the relation to the current pulse hierarchy.

You can also adjust mappings between each pulse survey. In order to adjust mappings between survey, you can use this same tool in a survey hierarchy.
If you want to add an Engagement project as a historical source in the dashboard, you can map the Engagement project hierarchy to your current program hierarchy by selecting map org hierarchy units in the current program hierarchy tab.
Qtip: Any mappings created manually in the areas listed above will be carried into future Pulse surveys. You will not need to recreate any manual mappings once they have been completed.
When mappings are saved, they are automatically synced to response data, which may update historical scores depending on the changes made. This may take a few minutes after saving.
Effects of Participant Changes on Hierarchies
When you create a pulse, the best way to keep your hierarchy up-to-date is with a participant import automation. As the automation runs, participant changes will be added to your program and its org hierarchy.
However, Pulses technically have 2 types of participant lists: the program’s list, and each survey’s list. It’s important to keep in mind how these participants can change, and how that affects your hierarchies.
- Pulse Program vs. Pulse Survey: There is a comprehensive list of all participants in the larger Pulse program, which you set up first. From that list, participants are pulled into each Pulse survey. Which participants (and whether it’s everyone in the program or only some people) is dependent on your sampling settings.
- Survey vs. Program Metadata: When participants are pulled into each pulse survey during the sampling process, their metadata is static. That means the participant metadata will not update, even if the employee is edited in the directory. In contrast, the program-level participant data will continue to be updated based on the participant automation.
- Removing Program Participants:
- When participants are removed from the program list, they are not removed from any pulse surveys they may have already participated in. This means the participant’s existing responses are not removed.
- However, when participants are removed from the program list, then they will be removed from the upcoming hierarchy and any dashboard roles they may have been included in.
- New Members of the Hierarchy: When participants are added to the program and they have metadata that will place them in the hierarchy, the upcoming hierarchy will be updated. In order to preserve current participants’ data, the current hierarchy will not be changed. See more on the current vs. upcoming hierarchy.
FAQs
Should I include a hierarchy in my Pulse?
Should I include a hierarchy in my Pulse?
How do I update my hierarchy?
How do I update my hierarchy?
Can I edit the hierarchy in one of my Pulse surveys?
Can I edit the hierarchy in one of my Pulse surveys?
I uploaded my participants to the program, but didn’t add any hierarchy information. Can I still make a hierarchy?
I uploaded my participants to the program, but didn’t add any hierarchy information. Can I still make a hierarchy?
That's great! Thank you for your feedback!
Thank you for your feedback!