-

Qualtrics Platform -

Customer Journey Optimizer -

XM Discover -

Qualtrics Social Connect
Navigating Customer Journey Optimizer
About Navigating the Customer Journey Optimizer
Once logged in to the Customer Journey Optimizer, you can navigate to different sections of the platform by using the tabs at the top of the page. This support page will provide a brief overview of each section with additional resources if you’d like to learn more.
Journeys Tab
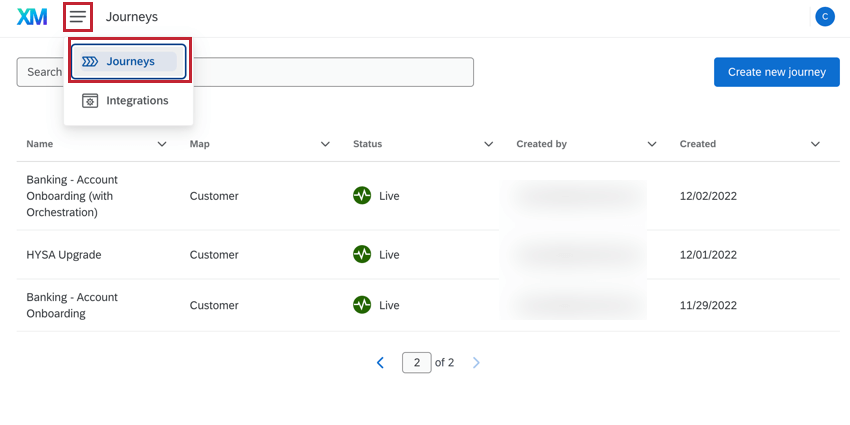
The Journeys tab is where you create new journeys and view your existing ones. See Building Journeys for more information about creating journeys. Click on a journey to view details of that particular journey.
Once you’ve selected a journey, you can navigate between the following sections:
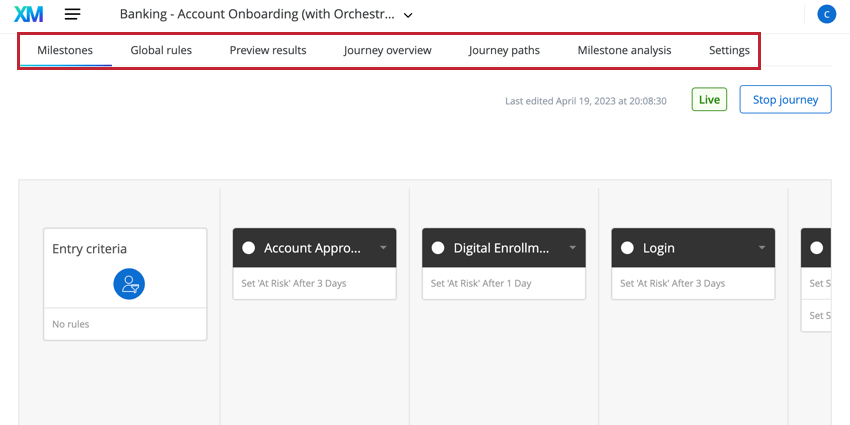
- Milestones: Create or view the milestones, or key experience touchpoints, that make up your journey.
- Global rules: Define the rules that apply to all travelers that pass the journey’s entry criteria. Global rules are evaluated before travelers enter any milestones.
- Preview results: Run a test of your journey using historical or uploaded data.
- Journey overview: View key metrics about how effective your journey is at driving toward desired outcomes.
- Journey paths: View a diagram that represents the different paths travelers take along your journey.
- Milestone analysis: View key metrics about each milestone in your journey.
- Settings: Create filters based on your data to use in the journey overview, journey paths, and milestone drill downs.
Integrations Tab
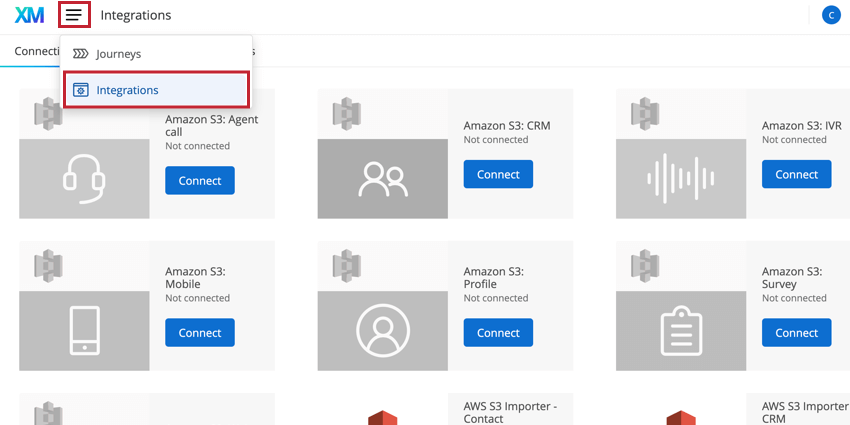
The Integrations tab is where you set up connections with third-party systems to import data into the Customer Journey Optimizer and send outgoing actions to third-party systems. See Integrating with Inbound and Outbound Connectors for more information.
Within the Integrations tab, you’ll find the following sections:
- Connections: Manage the connections to third-party systems.
- Data overview: View the number of records and entities for a given connection, plus an overview of your connection’s data health and a view of the data imported over the last 7 days.
- Maps: Create or view existing maps that link systems together.
Steps to Build a Journey
This section contains a step-by-step guide on how to launch a journey using the Customer Journey Optimizer. Visit the linked pages to learn more about each step in the process.
- Connect data sources: Integrate with inbound and outbound data channels, allowing you to import data into the Customer Journey Optimizer and send actions to third-party systems.
- Create maps: Decide what type of data map you want to use, and then create it using your connected data sources.
- Build your journey: Follow the step-by-step guide on the Building Journeys page to build your journey. This includes creating your journey entry criteria, global rules, milestones, and outbound actions.
- Test your journey: Preview your journey using sample data and then test the journey using shadow mode.
- Publish your journey: Once your journey is ready, publish it live.
- Analyze journey results: Review the results of your journey, including session outcomes, outbound actions, journey paths, and milestone analysis.