
Survey Tab Basic Overview
What's on this page
About the Survey Builder
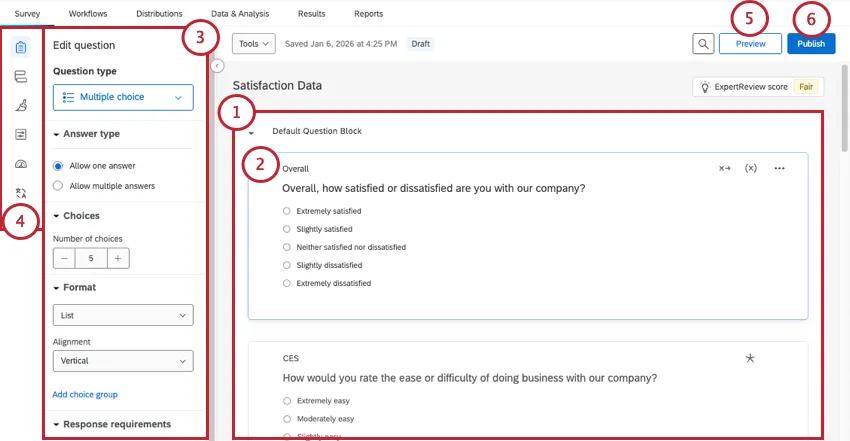
When you open a project or click the Survey tab, you’ll find yourself on the Survey Builder. Here, you’ll create questions, determine their flow, and configure other settings that will impact how respondents see your survey.

To get comfortable with the survey builder, let’s go over some of the most important tools you’ll find here:
- Survey Builder (where you currently are)
- Survey Flow
- Look and feel
- Survey Options
- Quotas
- Translations
Qtip: Click the arrow in the bottom of the left menu to expand and collapse the labels.
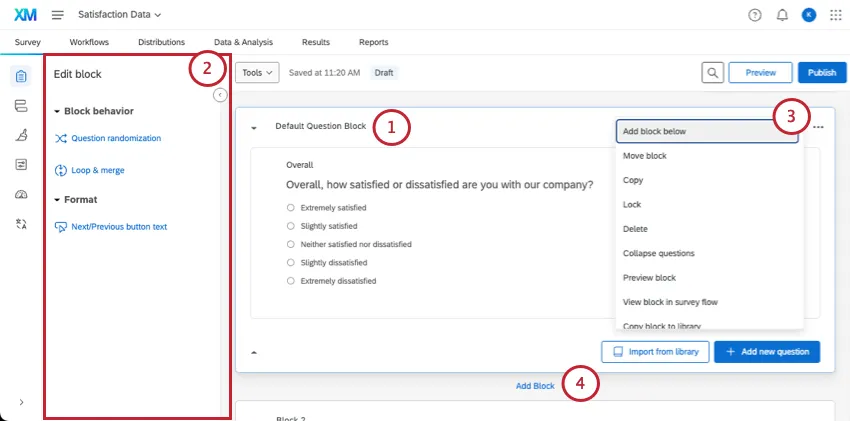
Block Basics
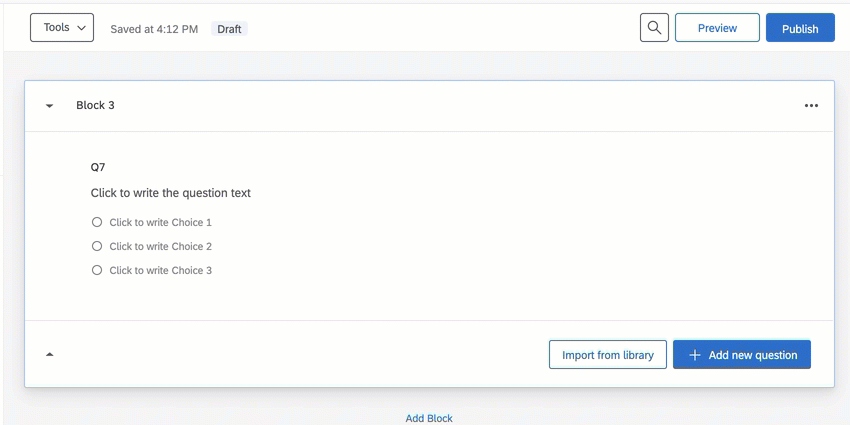
All survey questions are created, edited, and stored inside blocks. Every survey includes at least one block initially called the “Default Question Block.”
When you edit a block, here are some key options available to you:
Blocks are best understood with a few examples:
- Many surveys start with an initial “Demographics” block that asks respondents about themselves. You can even use certified demographic questions from our library.
- Additionally, you could direct the various demographics down different survey pathways (i.e., one path for parents and another for those without children) using branch logic. Splitting questions into different blocks based on the audience isn’t just organized; it will help you set up your survey flow later.
- You could also start a study with a dedicated consent block. Use these questions to determine if the respondent wants to participate in your study, and from there, redirect them accordingly.
For simple surveys, placing all of your questions in a single block is just fine. But as surveys become more intricate, organizing questions into multiple blocks lets you divide your survey into different paths with the survey flow. To learn more about how blocks fit into a larger survey flow, see Question Blocks.
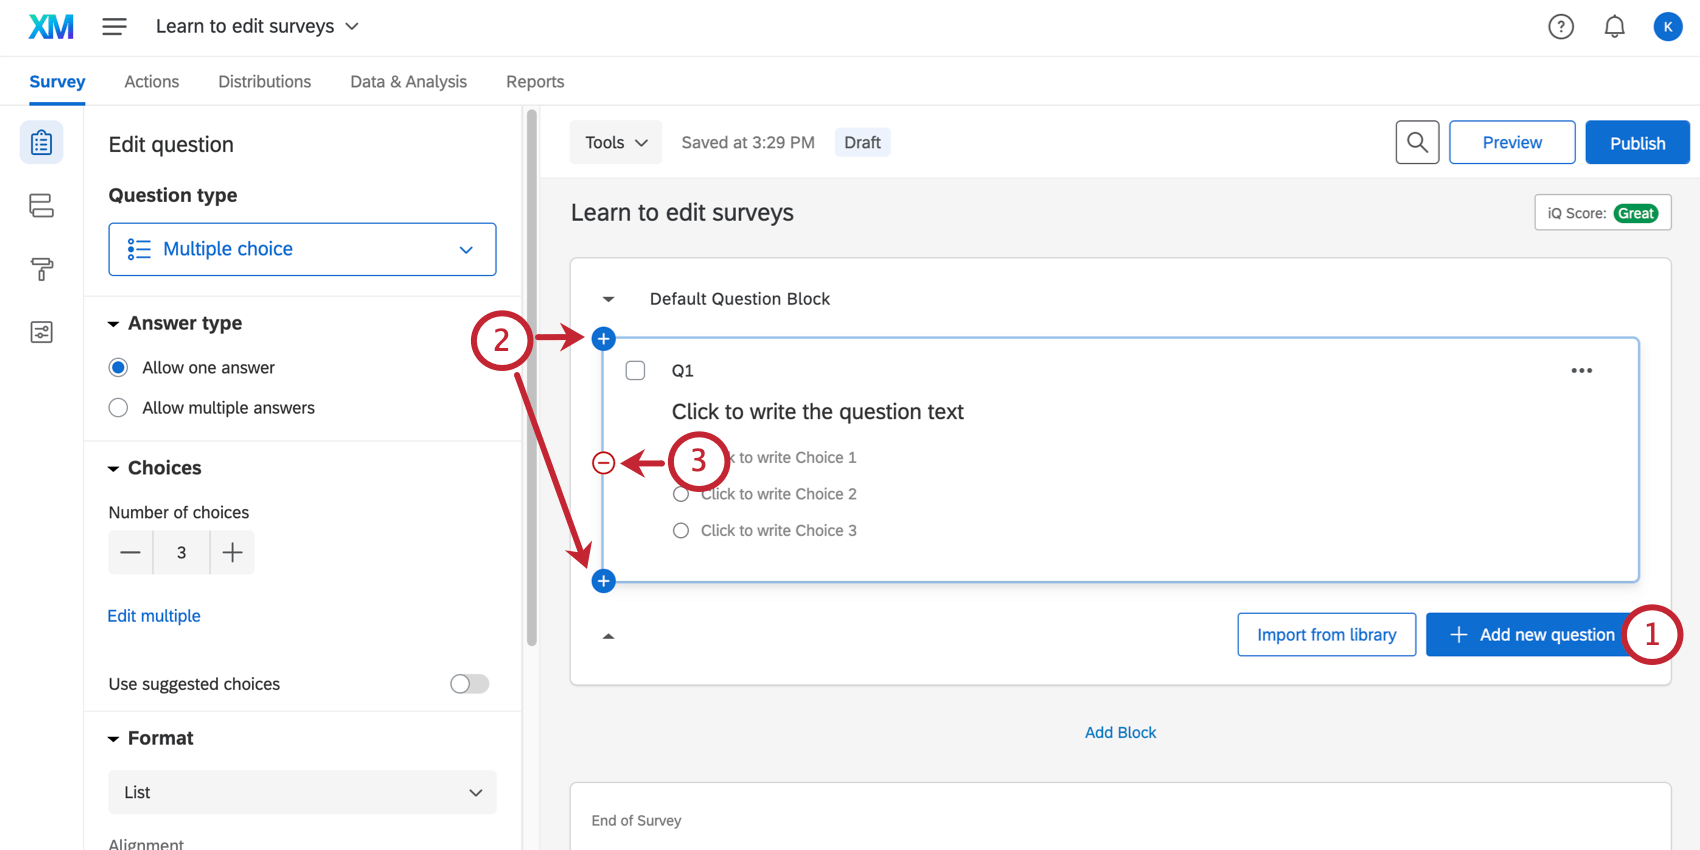
Question and Editing Pane Basics
Initially, a default multiple-choice question will be inserted into your “Default Question Block.” This ensures that your block has at least one question to start with.
Qtip: You can recover deleted questions from the trash at the bottom of the survey. See the Deleting Questions section for more details.
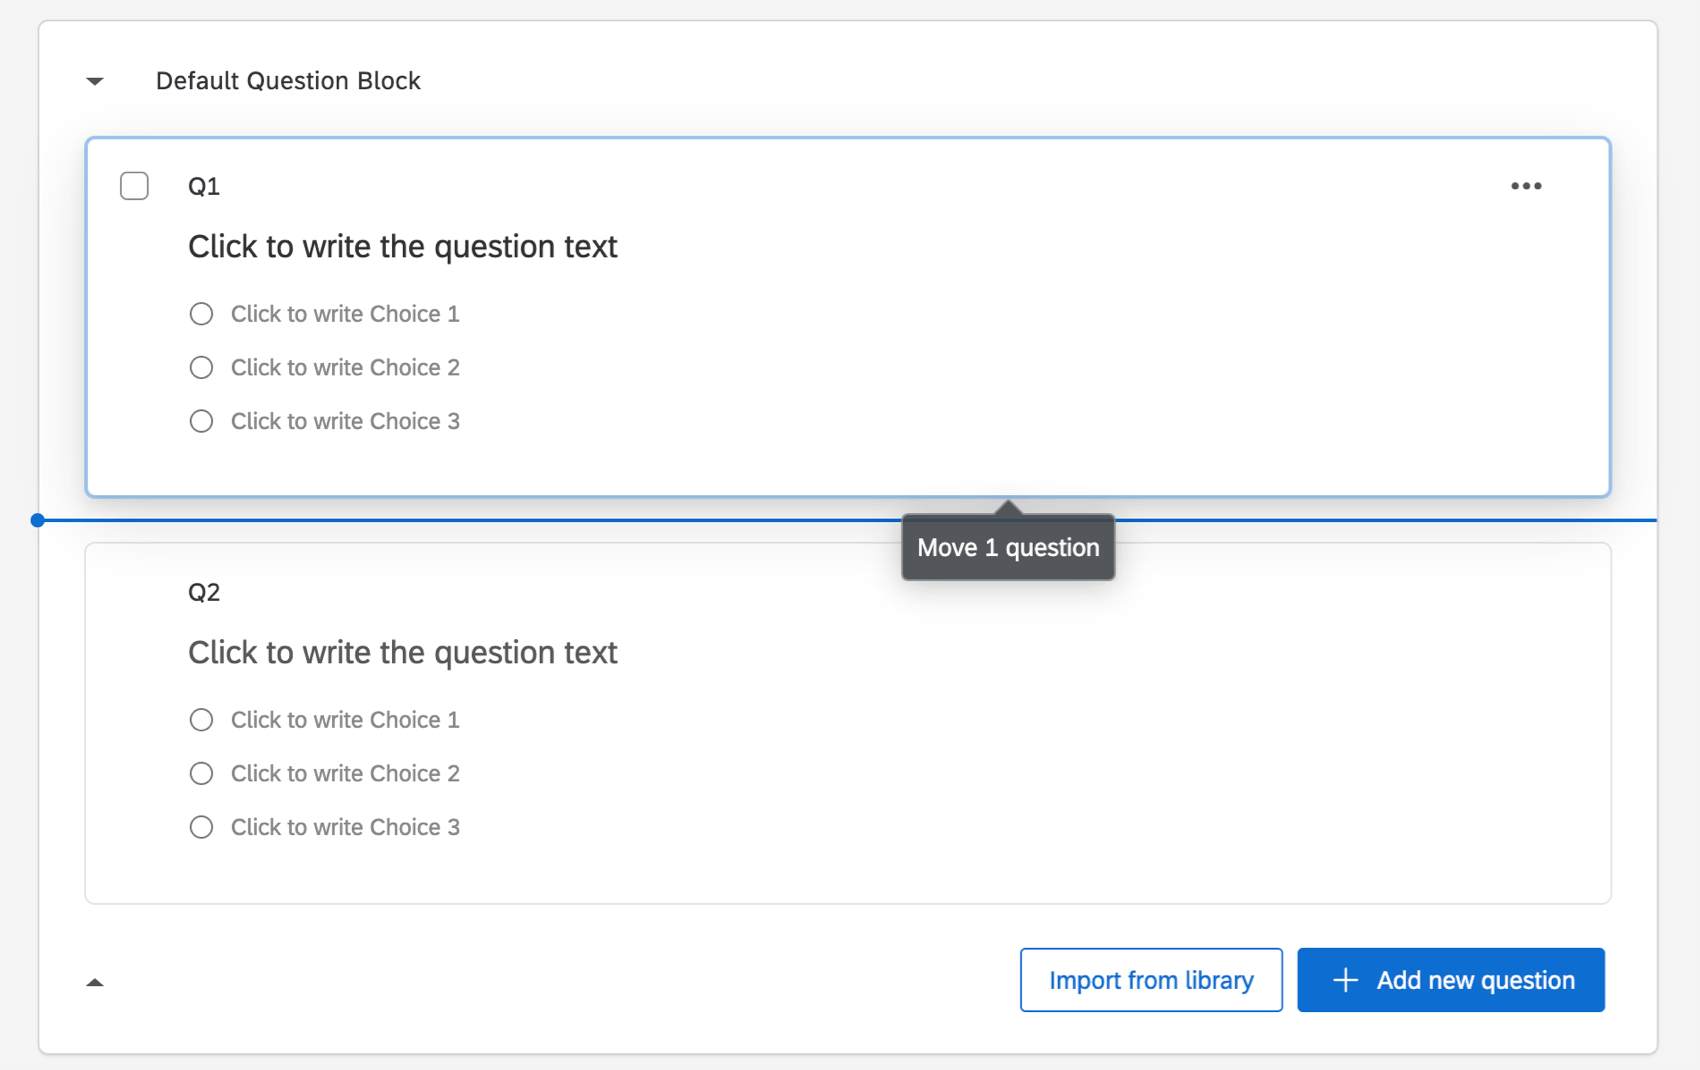
Qtip: Be careful not to click on the question text or answer choice text, or you’ll end up editing the wording of the question instead of moving the question.
Editing Questions
Click directly on a question’s text or answer choices to begin editing them. To change the text, simply type the text into the text box that appears.
Questions don’t just consist of plain text. You can insert all kinds of important information and formatting into a question. Below, we’ve highlighted some of the most important and commonly used features available when you edit questions.
Rich Content Editor: Apply formatting, such as bolding, italics, adding hyperlinks, etc.
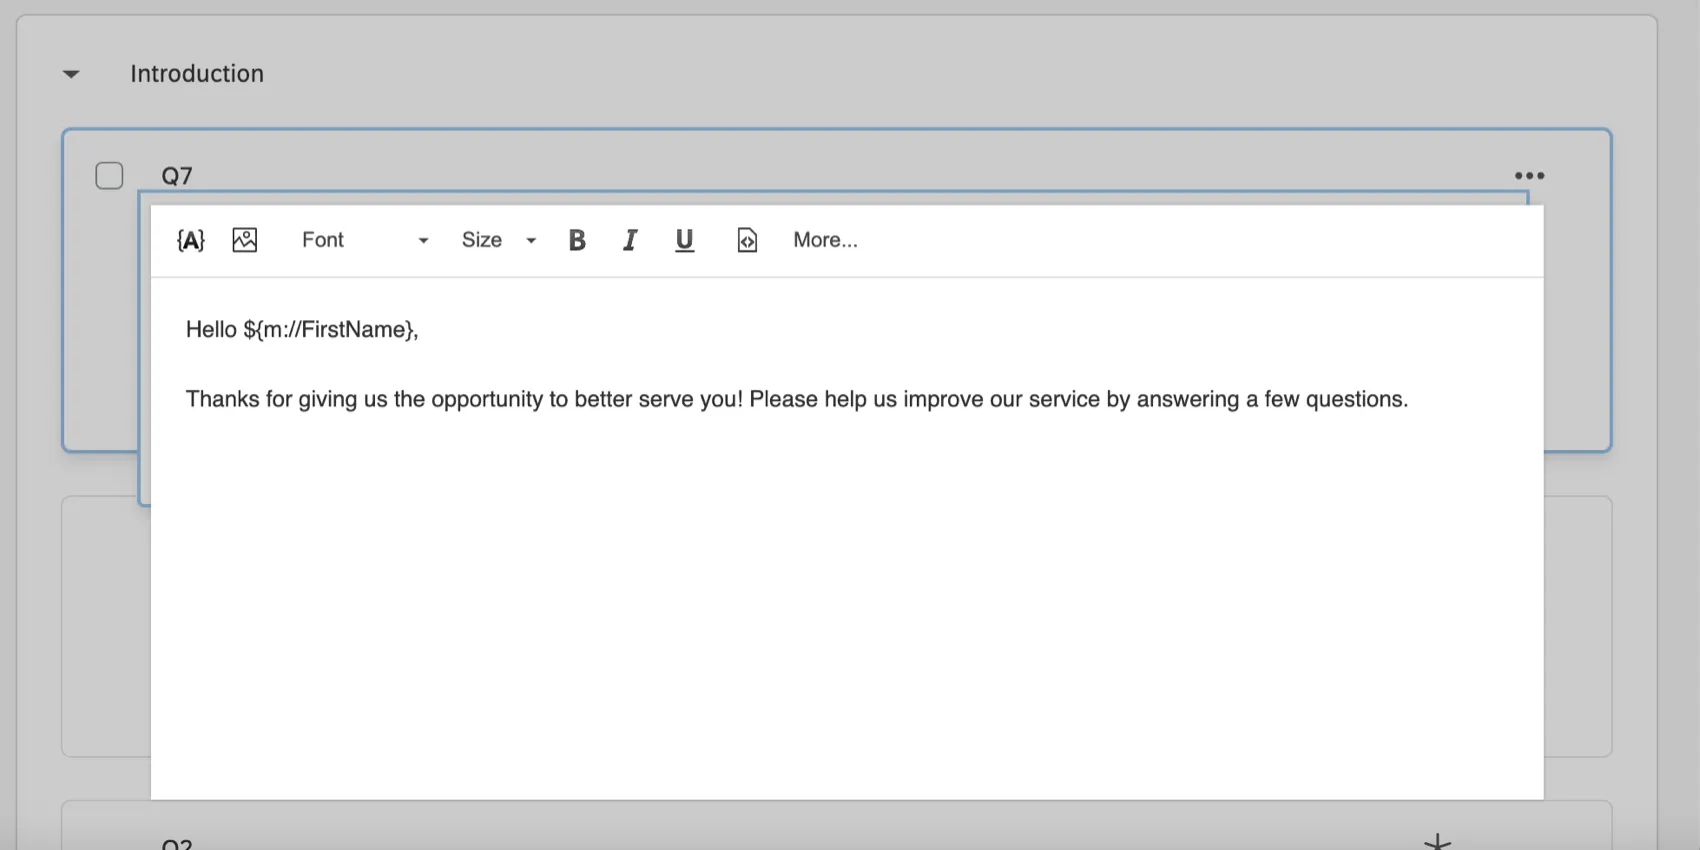
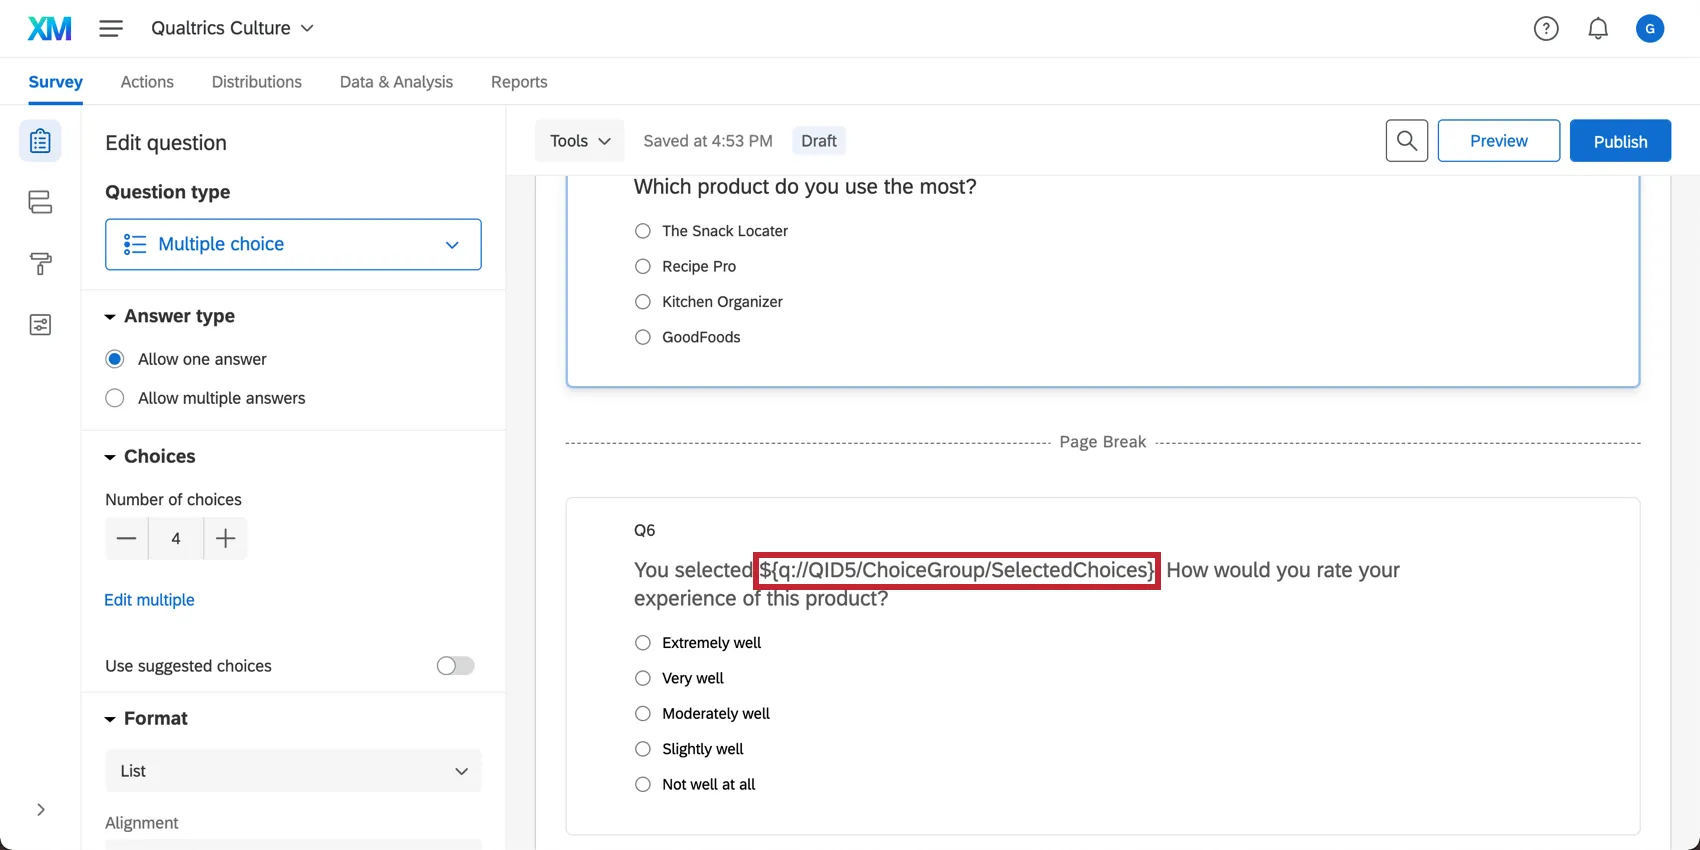
Piped Text: Piped text works as a placeholder, and allows you to dynamically pull text from a previous question, contact list information, or embedded data, and display it in the current question.
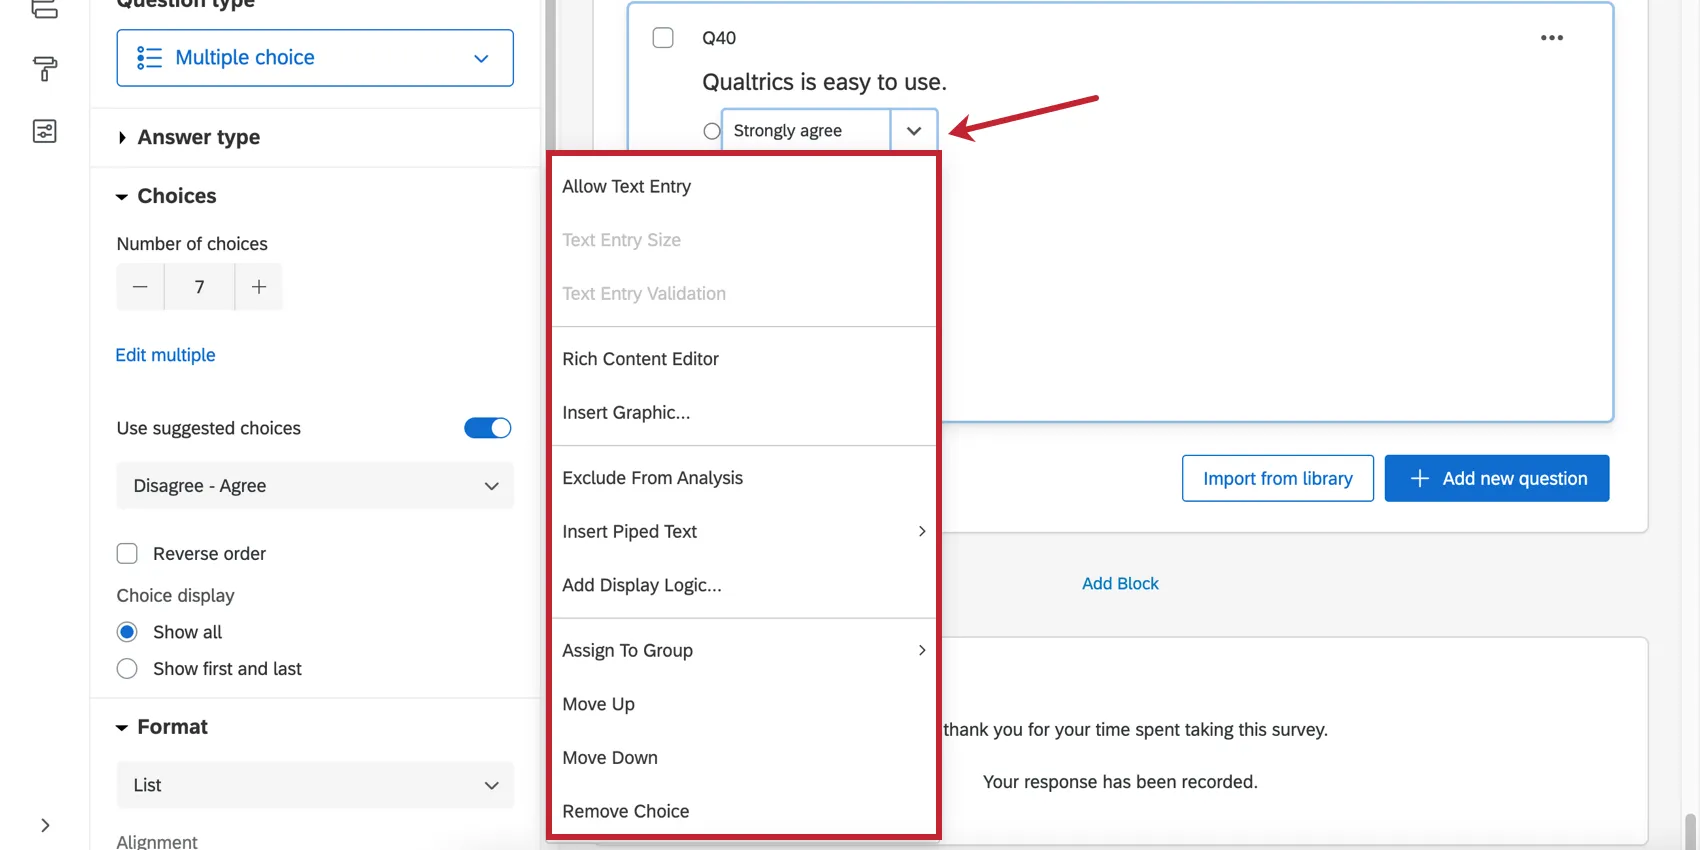
Formatting Answer Choices: Answers come with a whole host of unique editing tools. For example, you can add “Other” text to an answer in a multiple choice question, hide certain choices, or even add graphics.
Response requirements: Require your audience to respond to certain questions, or respond in a certain format.
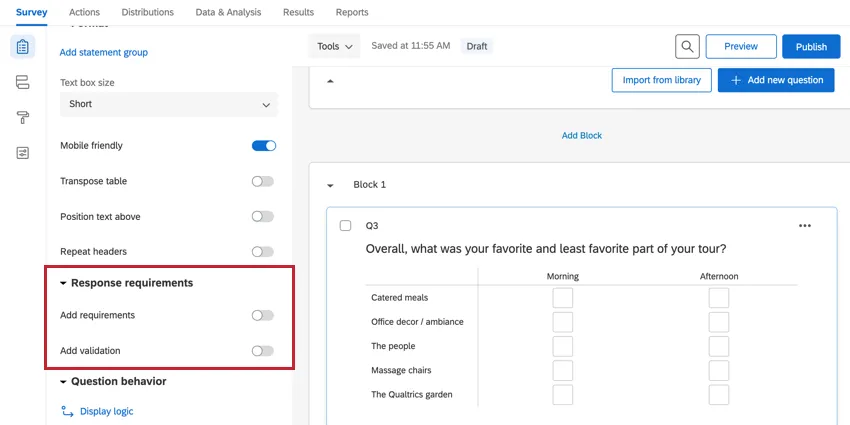
Question behavior: Add advanced behavior to your questions, such as the ability to hide questions under certain conditions, take selected choices from a previous survey question, designate a choice to be selected by default, and more. For example, some of the most commonly used question behaviors include:

- Display logic: Show (or hide) your question conditionally based on previous information.
- Skip logic: Send respondents to a future point in the survey based on how they answer the selected question.
- Carry forward choices: Copy specific answer choices from one question and bring them into a future question in the same survey.
- Recode values: Use this option to change the default numeric values or variable names for your answer choices. The coding you set here will be reflected in your reports and raw data, and is used to calculate all statistics.
For more general information on creating and editing questions, see Creating Questions and Formatting Questions.
Question Types
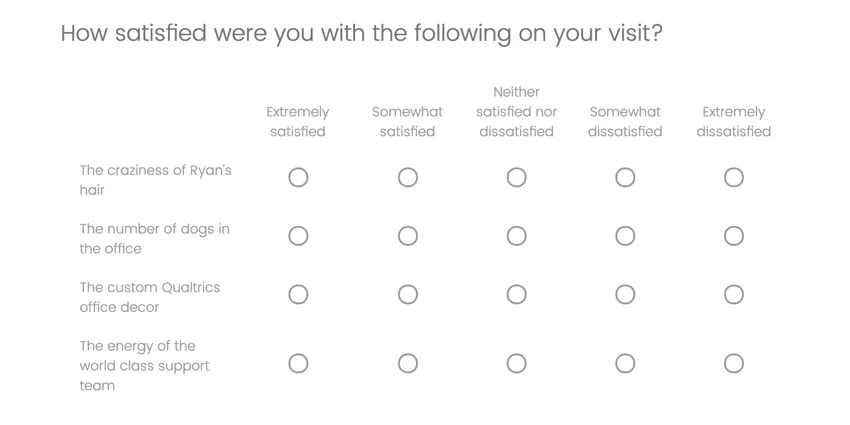
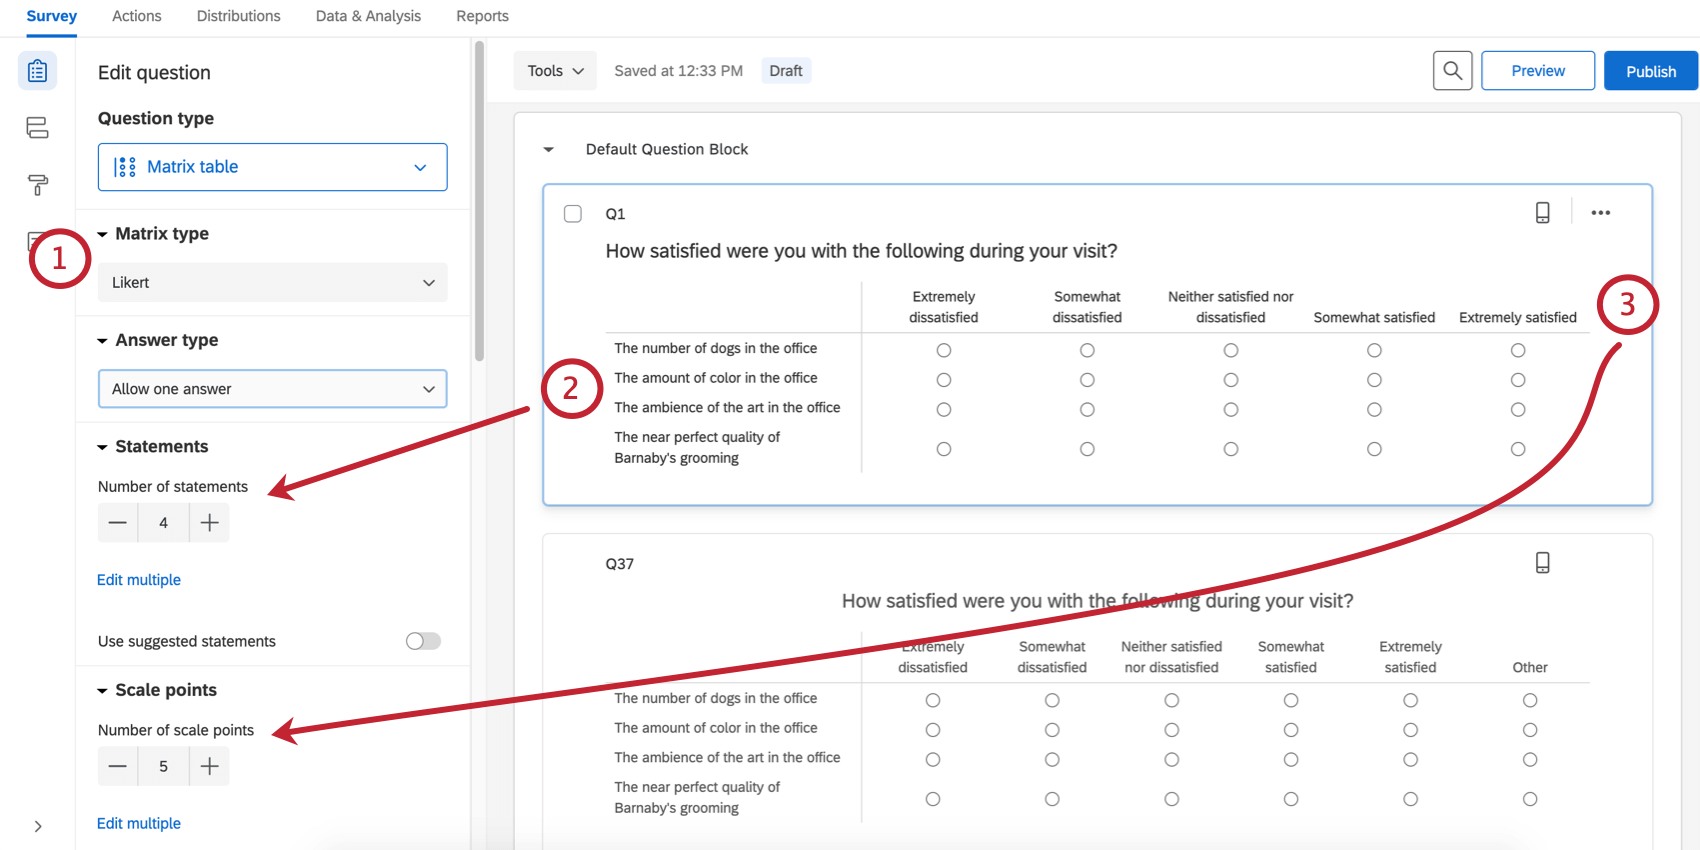
When you first create a project, a multiple choice question is inserted into your first question block by default. However, you might want to change it to another type or style of question. Use the question editing pane to choose from more than a dozen question types (e.g., multiple choice, rank order, NPS). For example, here’s a matrix table.
As the question type changes, different editing options become available. Let’s look at an example of unique settings you’d see in the editing pane for this matrix table:
If you have questions about a type of question you’re using, check out its support page. You can find a list of all question types and their pages on Question Types.
End of the Survey
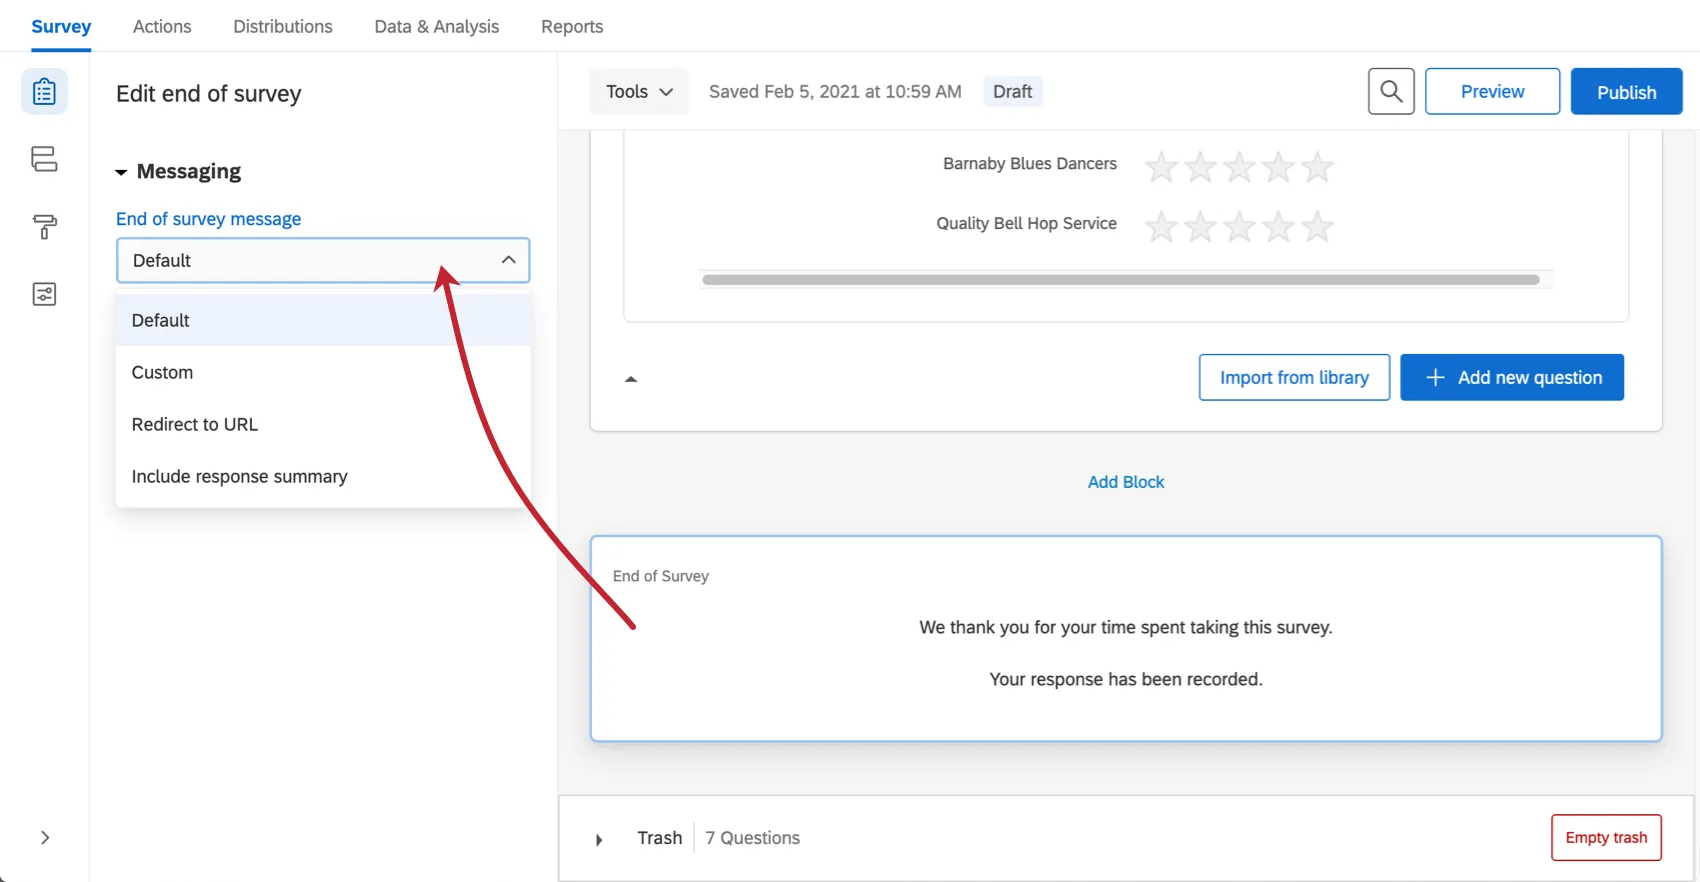
You can edit the message that displays at the end of your survey by clicking the End of Survey element at the bottom of the survey builder. In addition to customizing the message users see, you can also instead choose to show them a summary of their responses, or redirect them to a different website. To learn more, see Editing the End of the Survey.
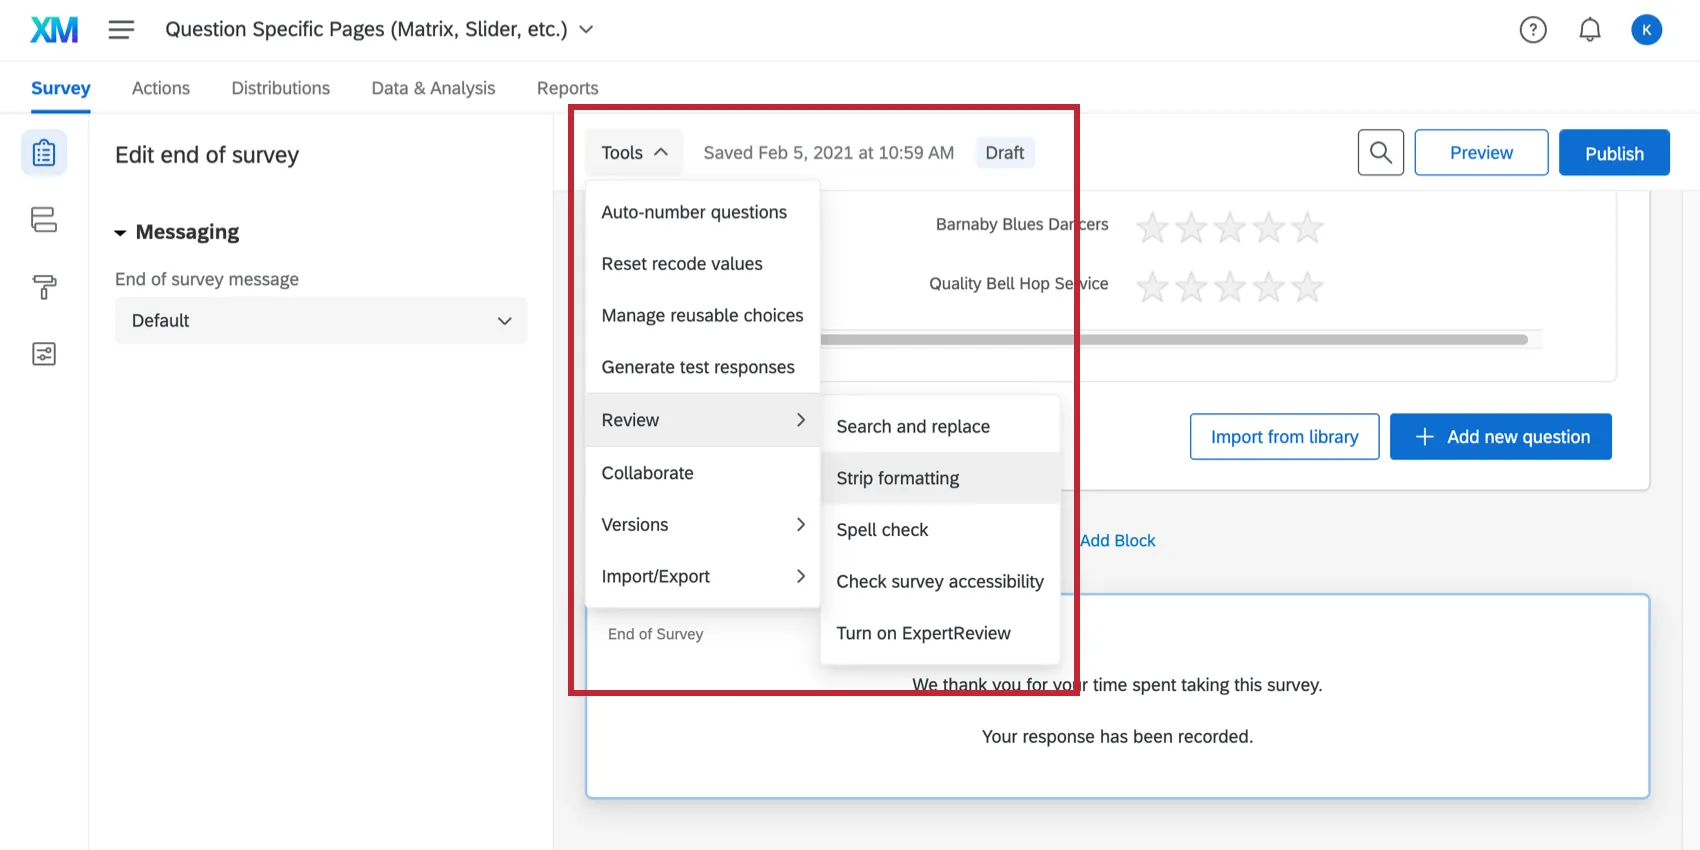
Tools
The Tools dropdown menu contains a variety of additional features to help you build your survey. These features include options like auto-number questions, reusable choices, stripping formatting, and more.
Survey Flow
The Survey flow section gives a block-level view of your survey and details the order in which blocks are displayed to your respondents. Here, you can perform simple tasks like rearranging the order of blocks, or you can add elements like branch logic that direct and personalize your respondents’ survey experience.
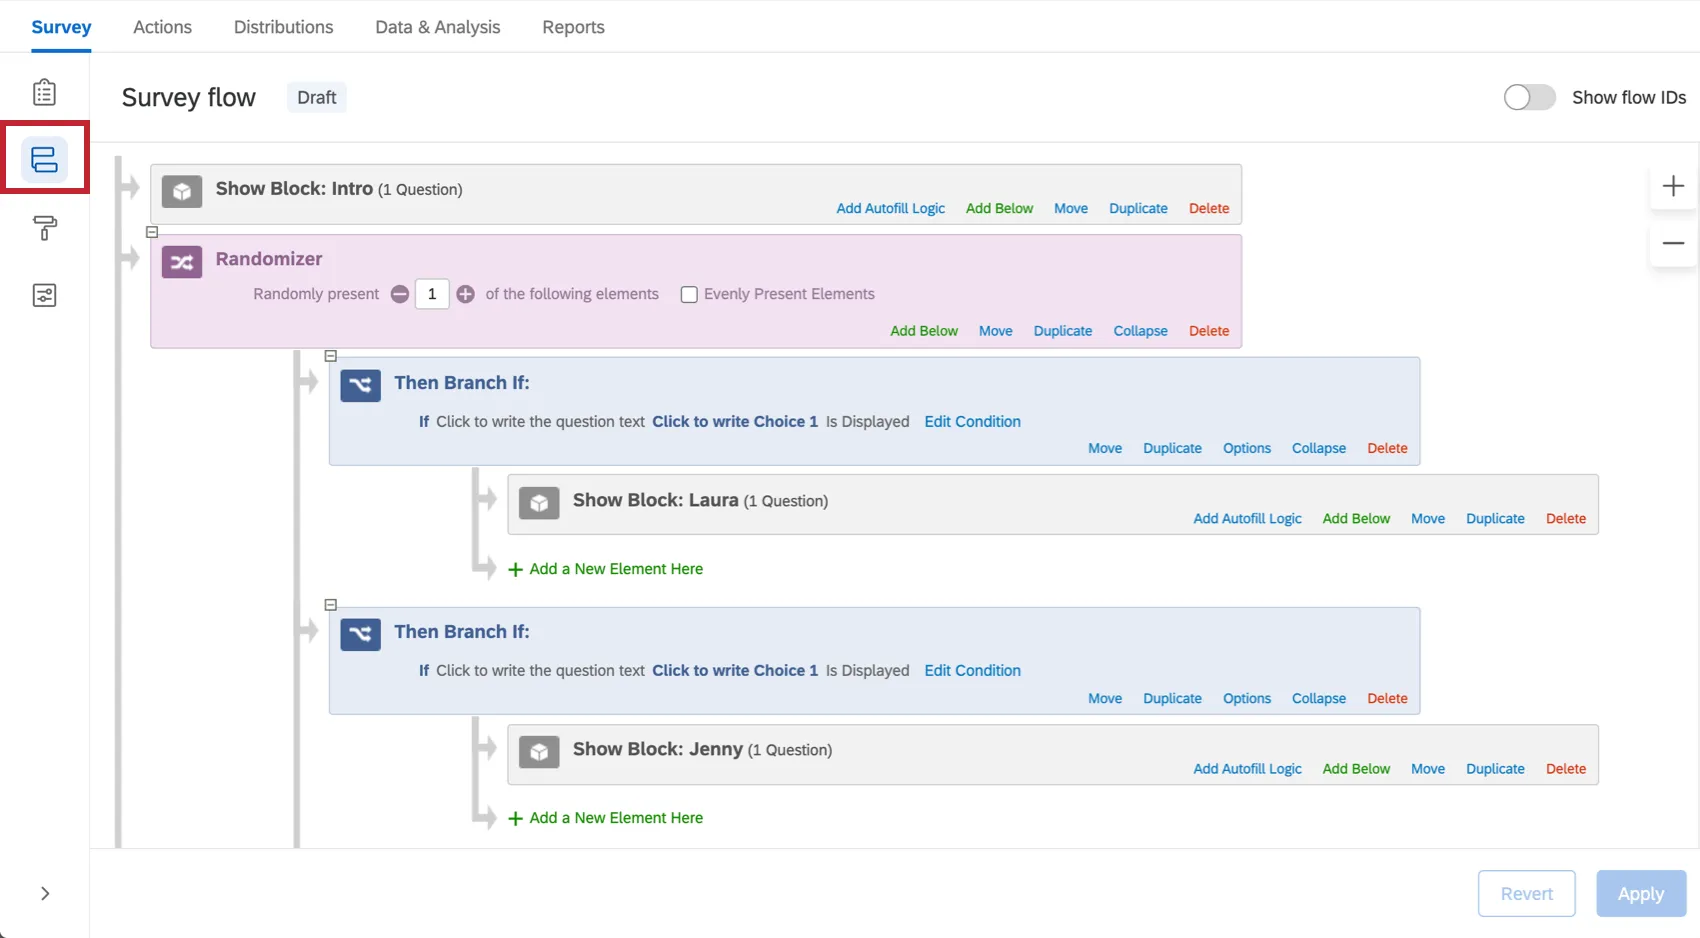
Some of the most commonly used elements in a survey flow include:

- Embedded Data: Add any extra information you want to include in the survey data beyond the question responses, such as contact data or other variables you assign by branching.
- Branches: Display blocks and other elements based on the conditions that survey respondents meet.
- End of Survey: As you set up custom branches for different groups of respondents, you can customize how the survey ends for each of these groups.
- Authenticator: Verify respondents’ identities before they take the survey.
- Randomizer: Randomly present question blocks and other elements.
To learn more about the survey flow and what it’s capable of, complete with examples, see the Survey Flow page.
Look and Feel
The Look and Feel menu will help you design your survey, like choosing a theme, fonts, colors, and headers. Here you can apply your institution’s logos and color schemes. You can also set a variety of survey experience choices, such as displaying a progress bar or having questions highlight upon selection.

Attention: The Powered by Qualtrics text cannot be removed from your survey. Qualtrics is committed to ensuring the protection and privacy of all data, and this text assures survey respondents and customers that their data and information is properly collected and securely protected. Additionally, under Qualtrics' standard terms, you are not permitted to remove Qualtrics' copyright or authorship notices.
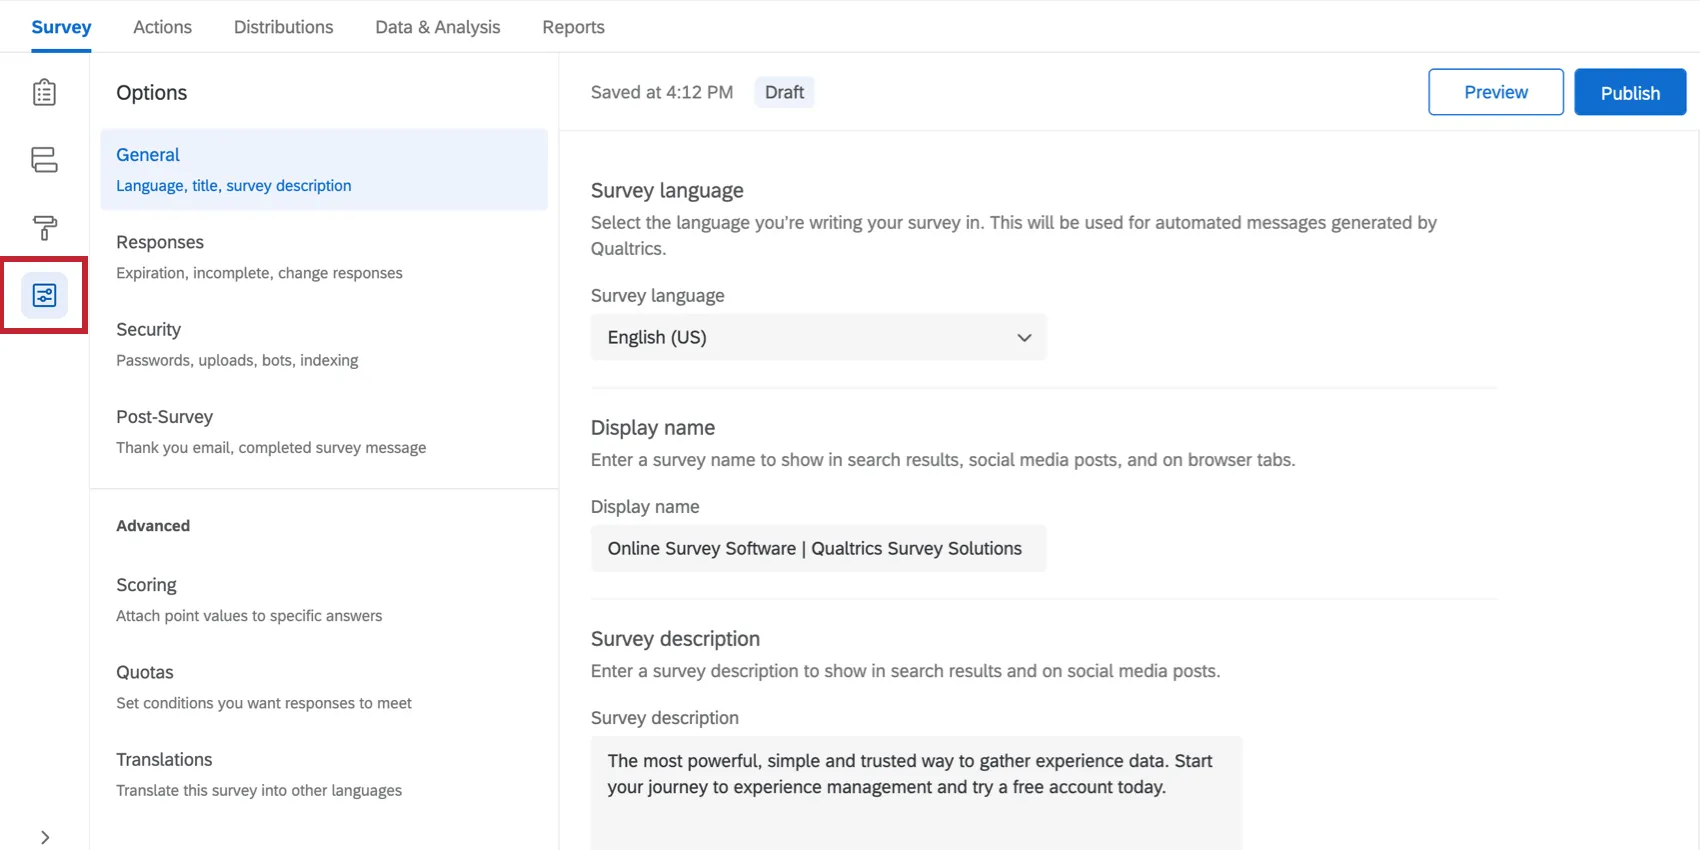
Survey Options
Survey options allow you to change many general survey settings, such as the timeframe the survey’s available, the addition of a back button or visible question numbers, and more. To make it easier to find the options you might want for your survey, they’re divided into groups by their purpose: General options, Responses, Security, and Post-Survey.
You can also find scoring, quotas, and translations in the survey options menu.
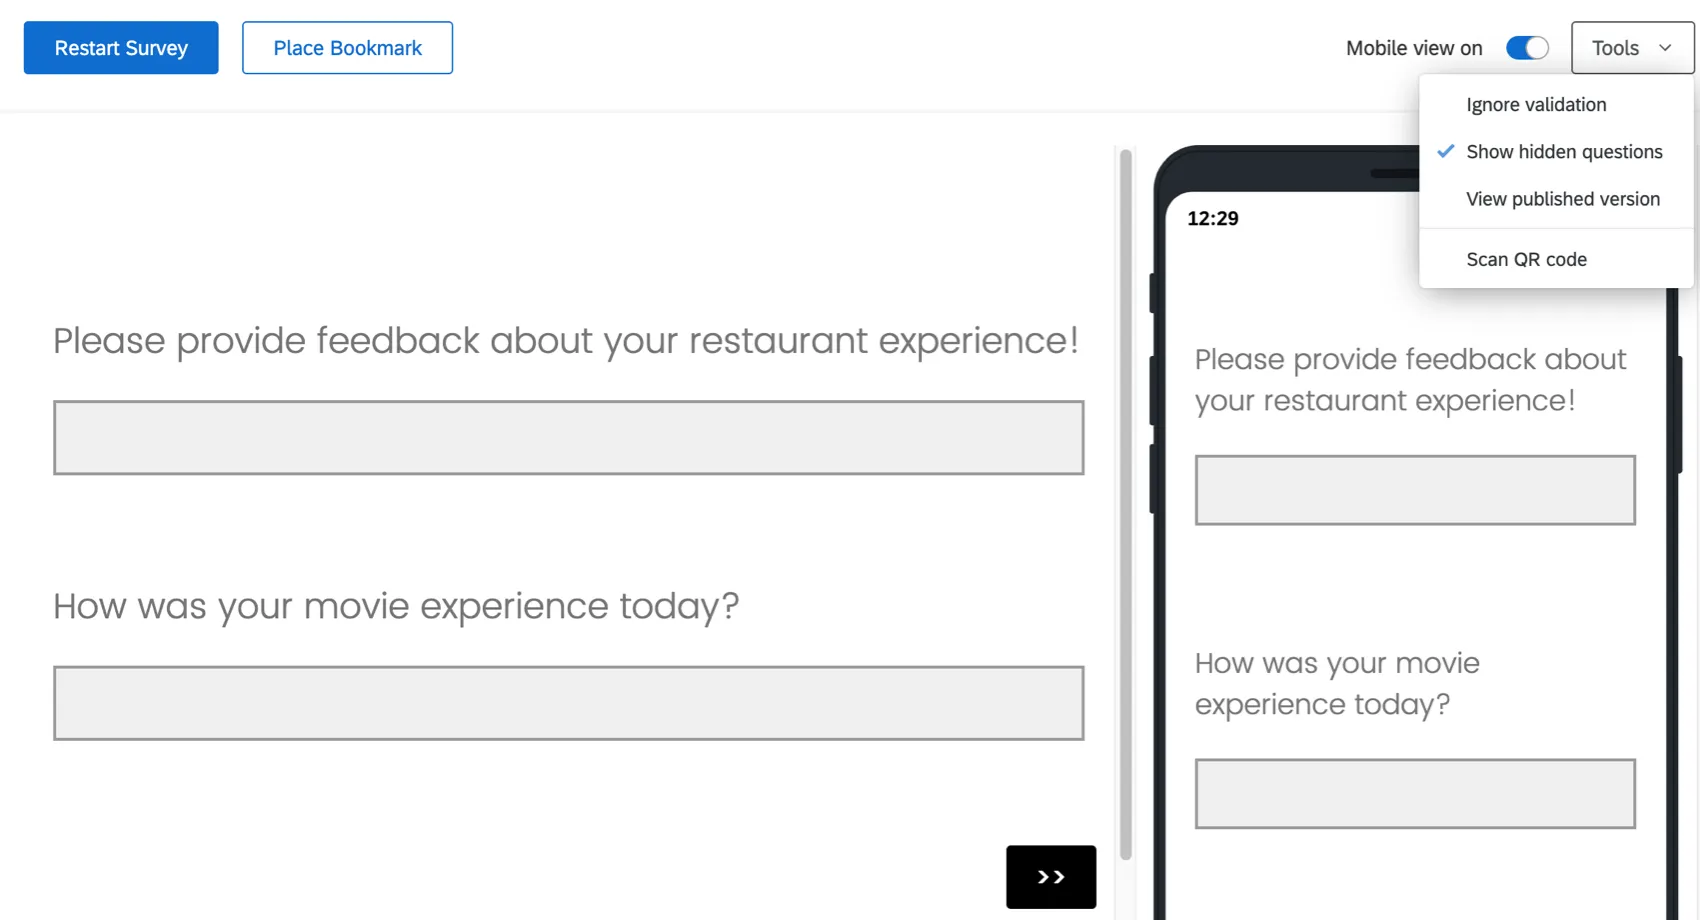
Preview Survey
Back in the Survey Builder, the preview feature lets you view and experience your survey just as your respondents will. This preview provides both computer screen and mobile device preview options.
It’s very important to preview your survey before you send it to your respondents. This way you can find potential mistakes, logic errors, and readability issues you may have missed when you were creating your survey.
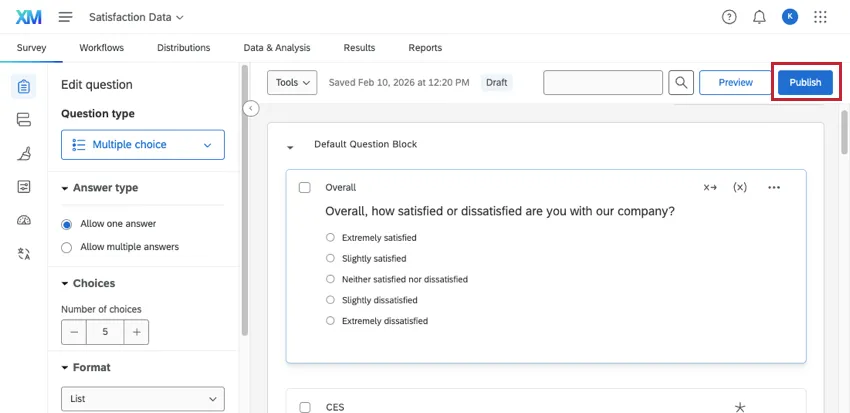
Publishing a Survey
Your survey automatically saves changes as you make edits. However, that doesn’t mean your edits are live to your potential respondents! When you are satisfied with your changes and you’re ready to launch your survey, you must click Publish.
The publishing tool is a great way to control when your edits go live. You can also restore old versions of your survey as needed. To learn more, see Survey Publishing & Versions.
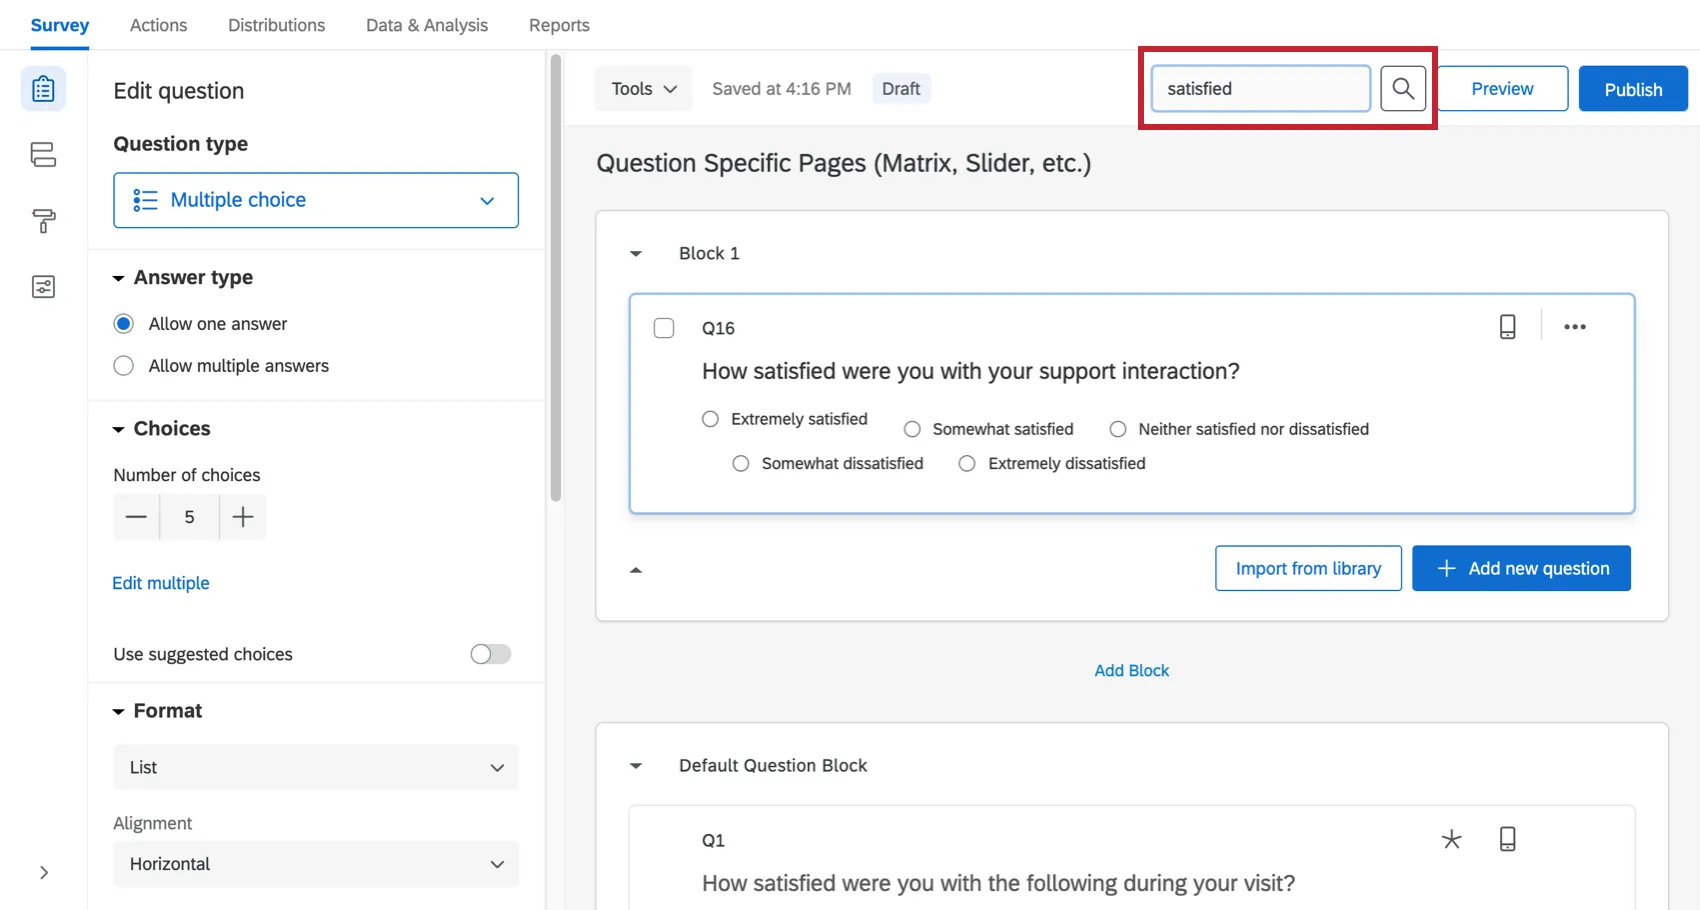
Search
The search in the survey builder lets you find questions and blocks quickly. Click the search button, then type in the field that appears. As you type, the survey will be filtered accordingly.
The search tool can search for questions by their text, question number (e.g., Q3 or Q17), and internal IDs.
Banner Notifications
Sometimes, banners will appear across the top of the survey builder to tell you something important. We cover some of the most common here.
Changes Won’t Be Live Until You Publish
If you see a yellow banner that states, “You are making edits to this survey. Changes won’t be live until you publish,” see the Publishing support page on how to push your edits live.
Multiple Users Editing the Survey
If you have invited other users to collaborate on your survey, you want to make sure you aren’t making edits at the same time that could cancel each other out. For example, if you’re changing the wording of your survey’s introduction at the same time your colleague is, her edits might override yours.
The banner will read, “Multiple people are editing this survey and you might impact each other’s changes.” It will also tell you how many users are in the survey at the same time, and when you hover over Currently Editing, you can see their names.
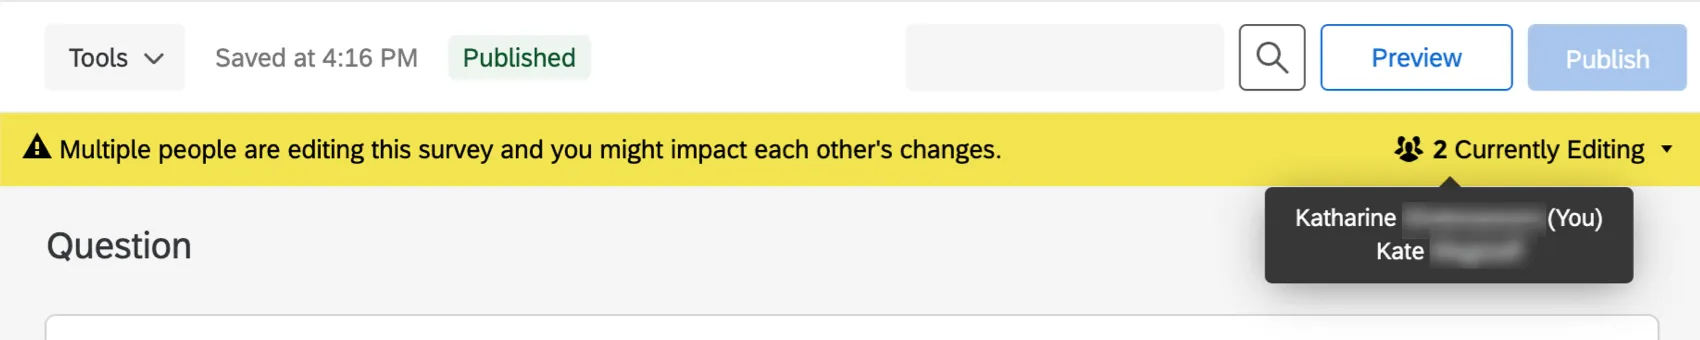
The banner is updated as users enter or exit the survey. Entering the same survey from the same account in multiple tabs will not activate this banner.
File Size Warning
If your survey exceeds 10MB, you will get a warning in red at the top of the survey builder. It reads: “This survey file size is getting too large and could cause performance problems. Consider making changes to reduce its size.”
This warning will not prevent you from making more edits. It is meant to caution you against making a survey too large.
Qtip: Loop and Merge tends to expand a survey rapidly because every time a block is looped, every one of those questions is duplicated in the data. It is okay to use Loop & Merge; just be careful how many loops you create in large blocks.
Web Accessibility Standards
If you see a red banner that warns, “This survey does not meet web accessibility standards,” see the Requiring Accessible Surveys support page.
FAQs
Can I edit a live survey that is currently being taken?
Can I edit a live survey that is currently being taken?
- Who will see the changes? Only those who have not yet started the survey will see the new changes. Anyone who started the survey prior to your changes will see the original survey, not the updated one.
- What kinds of changes are okay? Superficial text edits are fine (e.g., fixing a typo or changing the font), as are adding questions or answer options. However, deleting questions or answer options can harm previously collected data. We recommend never deleting answer choice options or questions (unless you are 100% positive that you will not ever need any of the collected data associated with those answer choice options or questions). Instead, we recommend hiding unwanted questions and answer options with Advanced Randomization.
How do I save/undo my edits to my survey?
How do I save/undo my edits to my survey?
Often, Qualtrics will allow you to undo a change if you hit Ctrl + z (PC) or Cmd + z (Mac) on your keyboard. However, not all changes are undoable.
Qualtrics automatically saves previous versions of your survey when you make edits or publish your survey. Survey versions are a snapshot of your survey and its settings and allow you to view any past version and restore your survey to that form. See the linked page for more information on this feature.
Why are my page breaks being ignored?
Why are my page breaks being ignored?
- Questions per Page set in the Look and feel
- Question randomization set up in a block
- Skip logic, display logic, and carry forward (all 3 by default will insert a page break)
How do I export a survey?
How do I export a survey?
- Export Survey: Export a QSF of your survey that contains all formatting and settings but not any response data. This option is usually used to create copies of your survey for storage or sharing. Unlike the other 2 formats covered here, a QSF can be imported back into Qualtrics.
- Export Survey to Word: Export a DOCX of your survey that contains all of the questions, logic, and coded values, but not the stylistic formatting.
- Print Survey: Print a physical copy of your survey or save a PDF.
I’m missing some editing options when I open a project I'm collaborating on. Why?
I’m missing some editing options when I open a project I'm collaborating on. Why?
- The project owner did not give you full access to the project. Check with the project owner to make sure they gave you the access they intended, as described in the Collaboration Permissions section.
- The project owner has a limited Qualtrics account. The project owner won’t be able to give you permission to make edits that they themselves aren’t allowed to make.
How can I send automated emails to my respondents and/or myself based on survey completion?
How can I send automated emails to my respondents and/or myself based on survey completion?
You can also send an email to the participant if you don’t initially have their email by asking them for it in a survey question and then piping their response to that question into the "To" email field.
Does a survey expire? Under what circumstances?
Does a survey expire? Under what circumstances?
- Incomplete Survey Responses: After someone begins a survey session, they will have 7 days to complete the survey before it closes (meaning the data is recorded and they can no longer edit their response). You can adjust this setting in the Survey Options in the Survey tab. Once changed, the change only applies to new respondents going forward.
- Link Expiration: When you send an email distribution or create personal links, your respondents will have 60 days to open the survey link before it expires. After they begin the survey, they will be subject to the Incomplete Survey Responses rule mentioned above. Once this expiration is set, it can’t be edited.
- Survey Expiration Date: You can set this in the Survey Options for a specified date and time. Any respondent that attempts to start the survey after the set expiration date will not be able to enter. However, those respondents who have already started a survey will still be able to access it. You can turn this expiration on or off at any time.
How do I translate my survey into other languages and specify a language for my survey respondents?
How do I translate my survey into other languages and specify a language for my survey respondents?
I don't have the tab described on this page! What do I do?
I don't have the tab described on this page! What do I do?
That's great! Thank you for your feedback!
Thank you for your feedback!