
Files Outbound Connector
Suite
Customer Experience
Product
Qualtrics
What's on this page
About the Files Outbound Connector
You can use the files outbound connector to export enriched data from XM Discover to your organization’s SFTP server.
You can export data at the sentence and document levels, limit it to new and updated records, and choose which fields, enrichments, and classifications to export. Exported data is available in both CSV and JSON formats.
Attention: To use this feature, your organization will need its own SFTP server. Qualtrics offers SFTP servers for customer use through our Professional Services team. There is a cost associated with this service; however, we guarantee that these servers are compatible with Qualtrics. For more information, please contact our Professional Services team.
Qtip: For a list of key exchange ciphers supported by XM Discover, see this support page.
Setting Up a Files Outbound Job
Qtip: The “Manage Jobs” permission is required to use this feature.
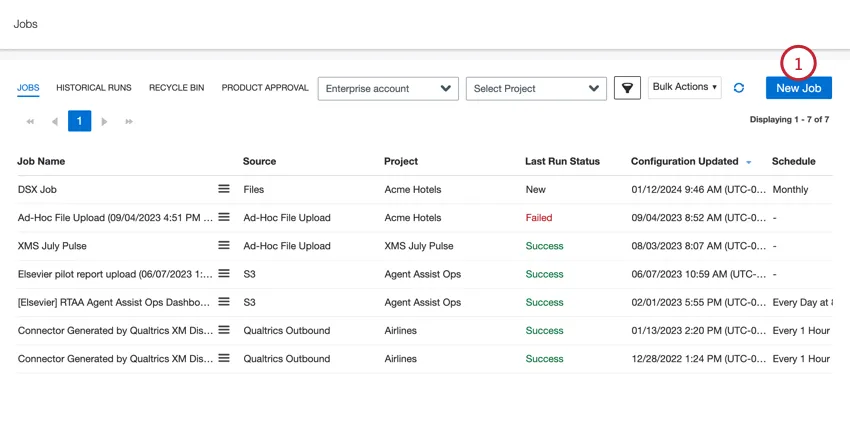
On the Jobs page, click New Job.

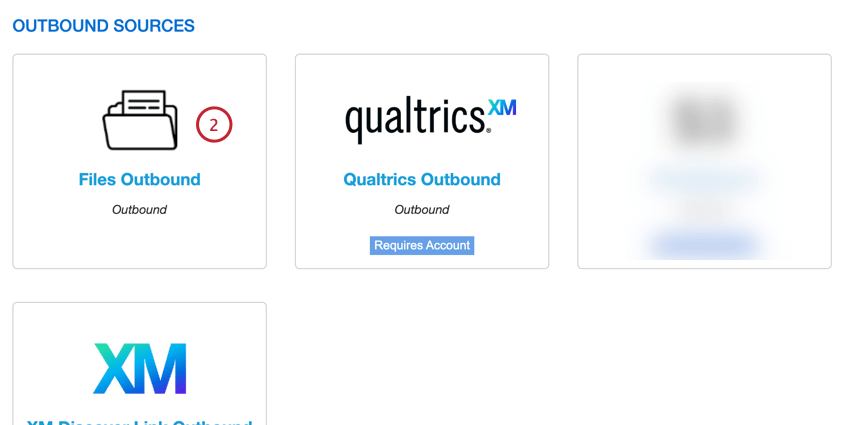
Select Files Outbound.

Give your job a name so you can identify it.
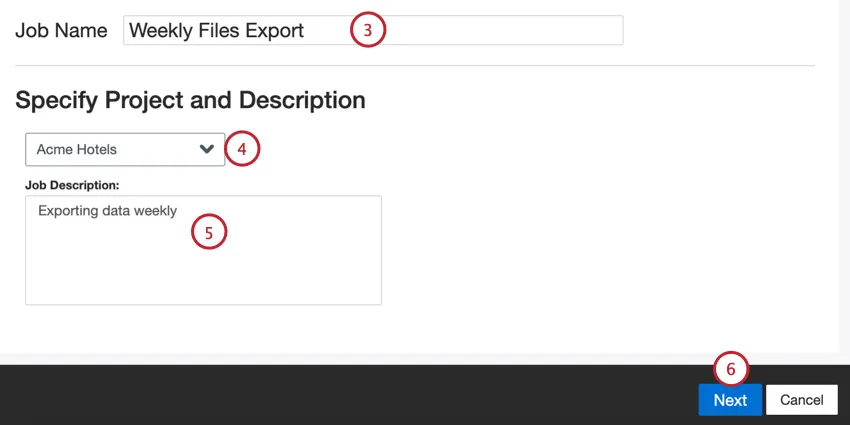
Choose the project to load data into.
Give your job a description so you know its purpose.
Click Next.
Choose the Authentication Method for your SFTP server:

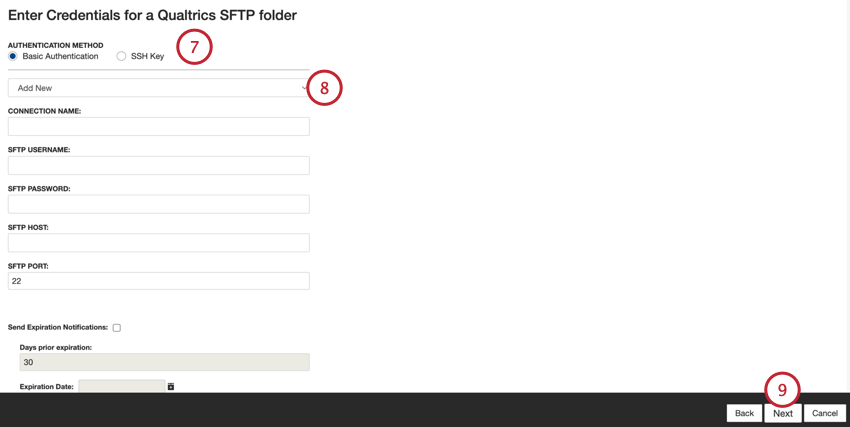
- Basic Authentication: Connect using a username and password.
- SSH Key: Connect using a Secure Shell (SSH) key that you provide, or a key provided by Qualtrics.
Use the dropdown to either select an existing connection, or select Add New to set up a new connection. See Adding an SFTP Account for more information about creating a new connection.
Click Next.
Provide your XM Discover Export API endpoint.

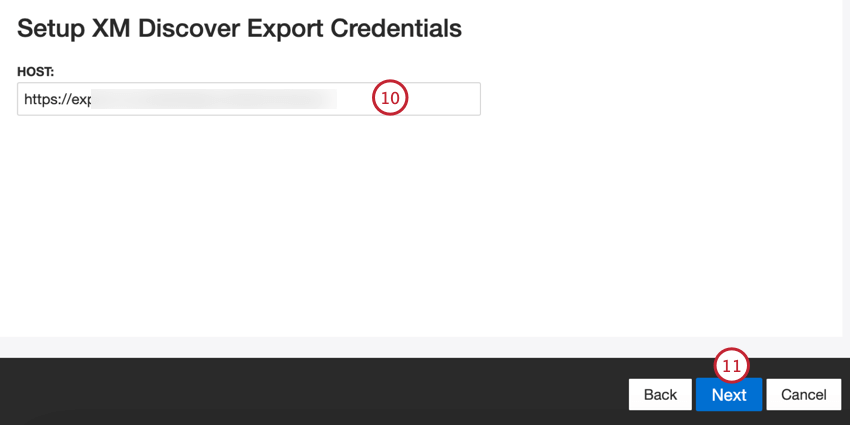
Click Next.
Choose the level of data you’d like to export:

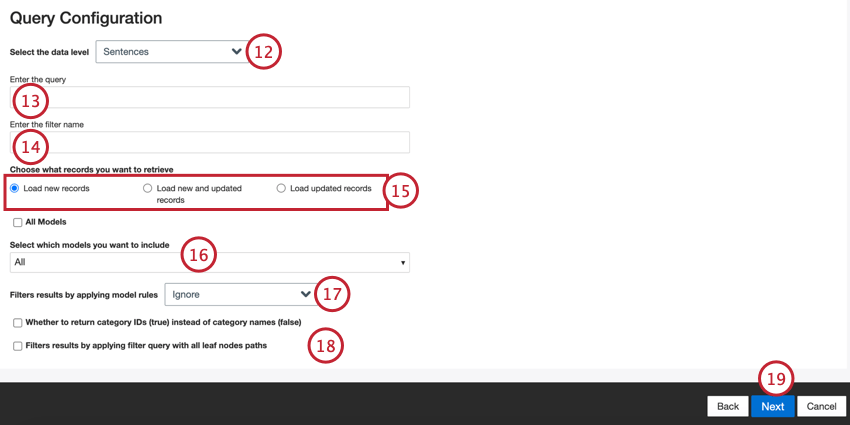
- Sentences: Use sentence-level data.
- Documents: Use document-level data. Qtip: The remaining steps on the Query Configuration page are optional and will help you narrow down the data that is exported.

Provide a search query to filter the outbound data by. Use the same syntax used to look up data in Designer. Leave this field empty to include all data.
Example: You can specify one or more survey IDs to only update the selected survey records using the following syntax:surveyid:sv_01
Enter the name of the filter from your project that you’d like to be applied to the outbound data. Leave this field blank if you do not want to filter your data.
Choose which records you’d like to import:
- Load new records: Records that were created since the last time the outbound job ran.
- Load new and updated records: Records that were either created or updated since the last time the outbound job ran.
- Load updated records: Records that were updated since the last time the outbound job ran.
Use the dropdown menu to choose which classification models you want included in your data. Select the All Models checkbox to include the classification data for all models available in the project.
Choose how you want classifications to impact data filtering:
- Ignore: No filtering is applied based on the selected model(s).
- Currently Classified: Returns the records that were classified by the selected model(s) during the most recent classification run.
- Ever Classified: Returns the records that have been classified by the selected model(s) at any point in time.
Choose the additional export options you’d like to use:
- Whether to return category IDs (true) instead of category names (false): Export category IDs instead of category names.
- Filters results by applying filter query with all leaf nodes paths: Adds multiple models with the “leaf_only flag” parameter to the Export API call.
Click Next.
Choose the type of file you’d like to export:
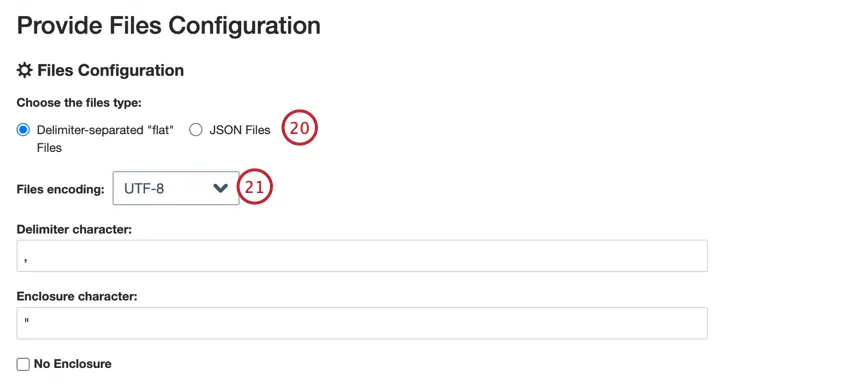
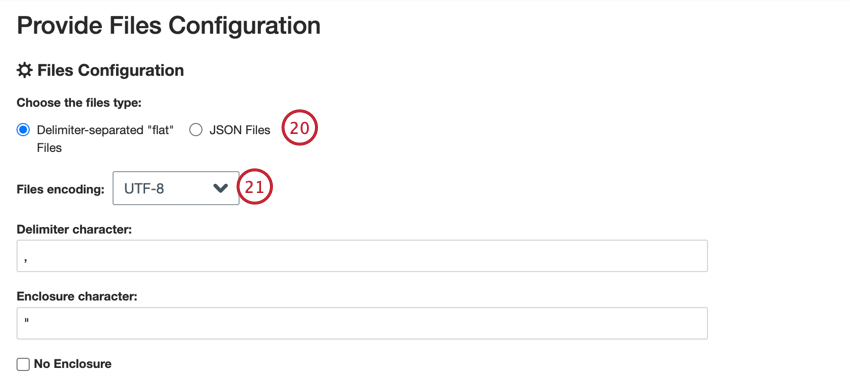
- Delimiter-separated “flat”: Format is a delimited text file, such as CSV or TSV.
- JSON Files: Format is a JSON file.
If exporting to a delimiter-separated flat file, choose your file settings:
- File encoding: Choose the file’s encoding, such as UTF-8 or ASCII
- Delimiter character: The character used to separate entries, such as a comma or tab.
- Enclosure character: The character used to enclose data. Leave this field empty if you do not want an enclosure.
- No Enclosure: If you do not want your data enclosed in an extra character, enable this option.
Click Browse and choose your SFTP folder.
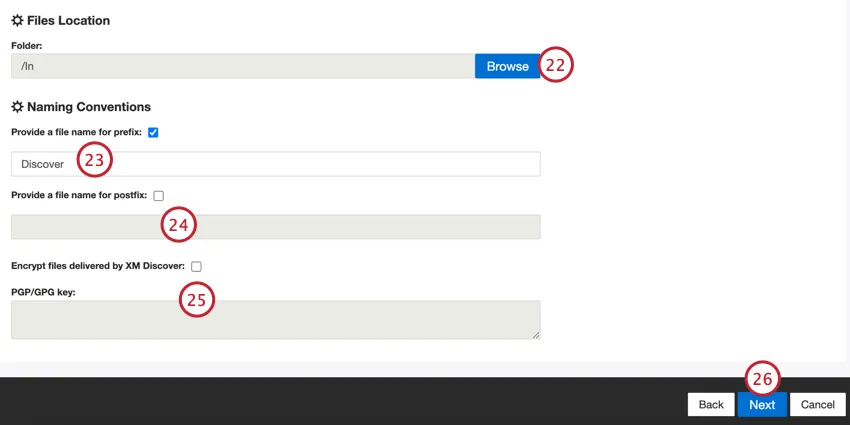

Qtip: When choosing a folder path, you can click on a folder icon to expand that folder. Click on the folder name to select that folder, and then click Ok when done.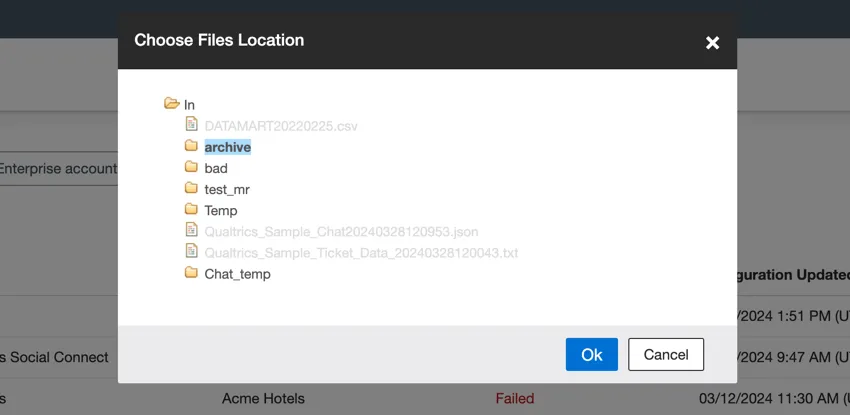

If you’d like exported files to have a prefix attached to them, enable Provide a file name for prefix and enter the desired prefix in the box.
Qtip: The prefix cannot contain [ ] \ / and cannot exceed 100 characters.
If you’d like exported files to have a postfix attached to them, enable Provide a file name for postfix and enter the desired postfix in the box.
Qtip: The postfix cannot contain [ ] \ / and cannot exceed 100 characters.
If you’d like to encrypt your data, enable Encrypt files delivered by XM Discover and enter your PGP/GPG key in the box.
Qtip: Files will always be encrypted into a GPG file. You can enter a PGP/GPG key, but it will never encrypt into a PGP file.
Click Next.
Map fields from XM Discover to Qualtrics. Click the empty box and choose the XM Discover attribute you’d like to send to Qualtrics.
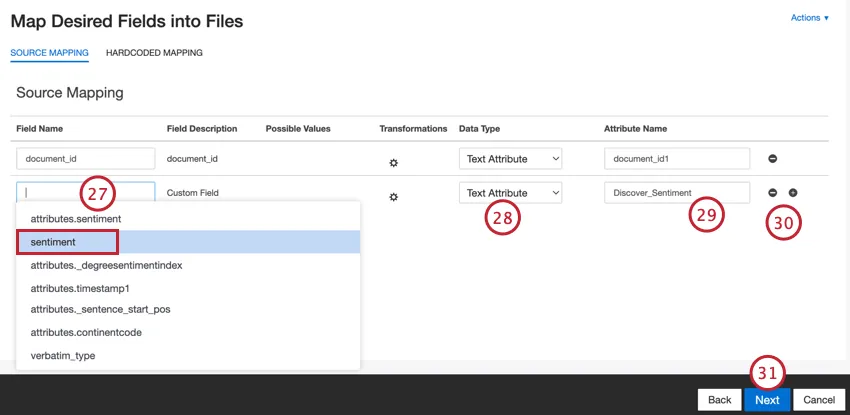

Select the data type the field should be exported as:
- Do Not Map: No specified variable type.
- Number Attribute: Number variable type.
- Text Attribute: Text set variable type.
- Date Attribute: Date variable type.
- Verbatim: Text variable type.
Enter the Attribute Name for this field. This will be the field’s name when it is exported.
Use the plus ( + ) and minus ( – ) signs to add and remove fields as needed.
Click Next.
If desired, you can add a connector filter to filter the incoming data to limit what data is imported.

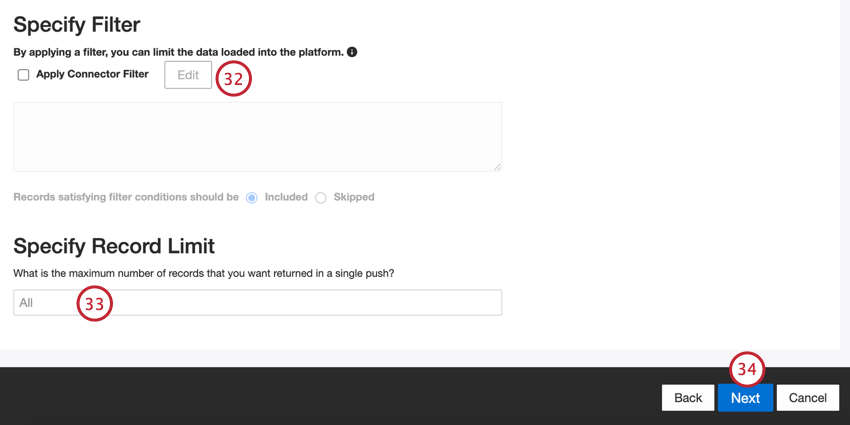
You can also limit the number of records imported in a single job by entering a number in the Specify Record Limit box. Enter “All” if you would like to import all records.
Qtip: For conversational data, the limit is applied based on conversations rather than rows.
Click Next.
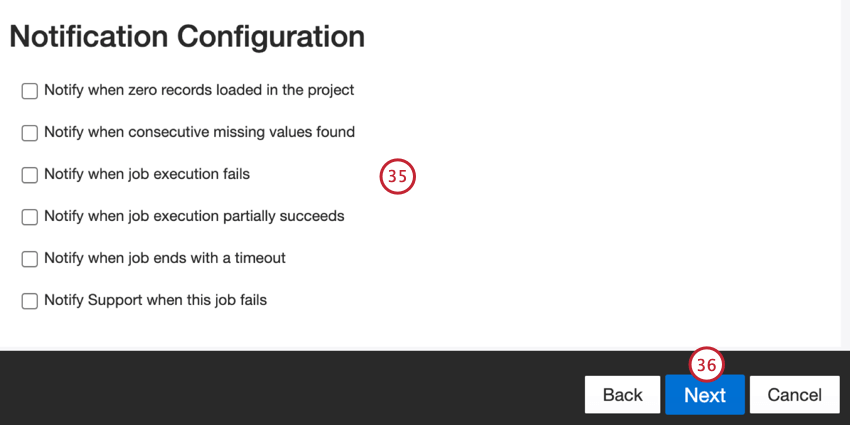
Click Next.
Choose when your job runs. You can do either a one-time pull or set up a recurring data pull. See Job Scheduling for more information.
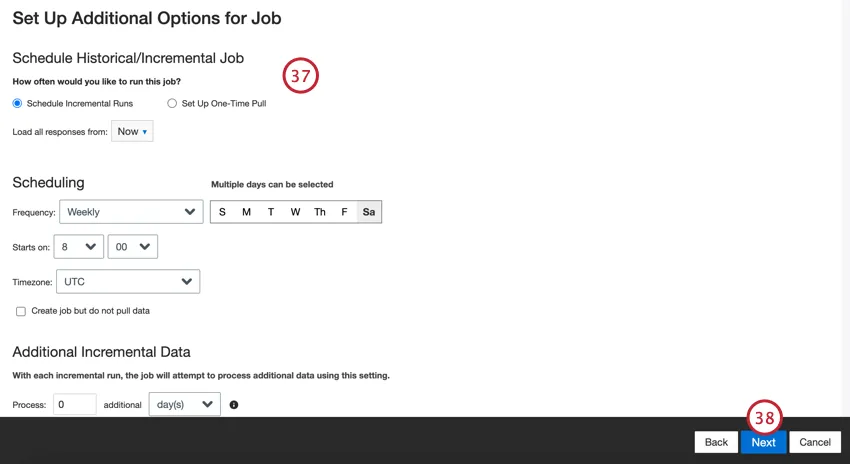

Click Next.
Review your setup. If you need to change a specific setting, click the Edit button to be brought to that step in the connector setup.
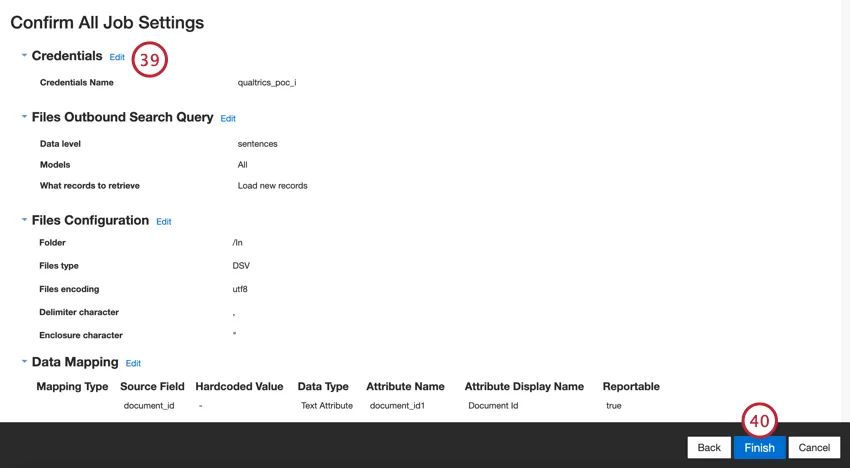

Click Finish to save the job.
Adding an SFTP Account
In XM Discover, you can connect an SFTP server for sending data to and from Discover. This section covers how to set up a new SFTP connection. SFTP connections are used in the following Connectors:
When connecting an SFTP server, you can use either of the below connection methods:
- Basic Authentication: Connect using a username and password.
- SSH Key: Connect using a Secure Shell (SSH) key that you provide, or a key provided by Qualtrics.
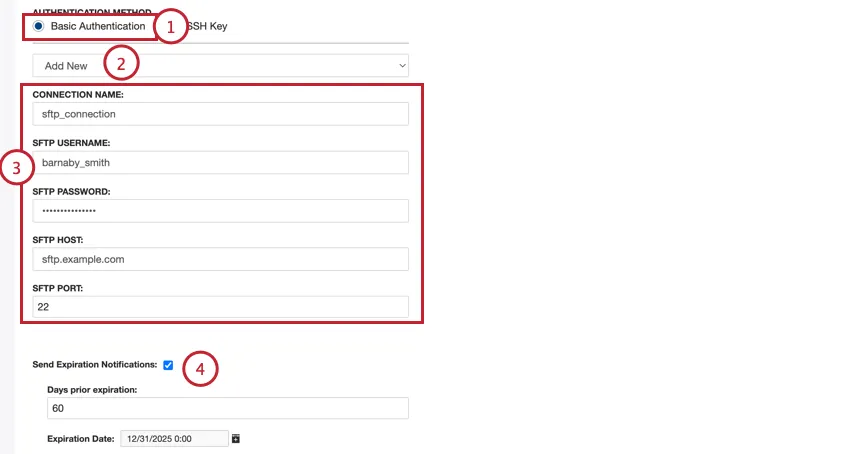
Basic Authentication
SSH Authentication
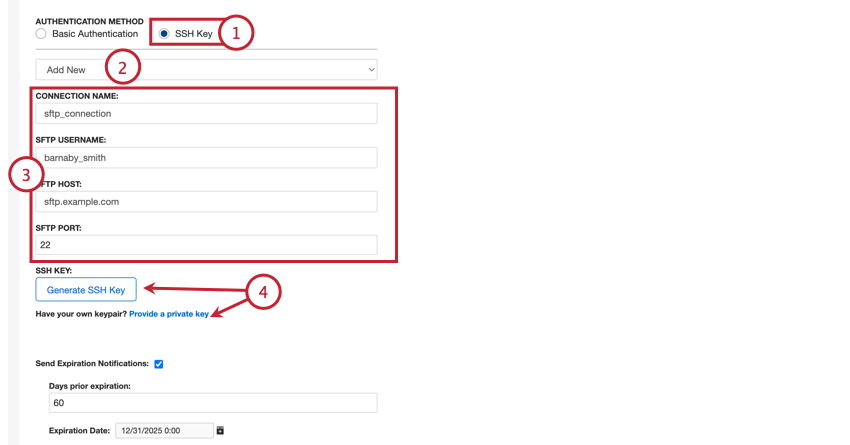
Choose SSH Key for the authentication method.
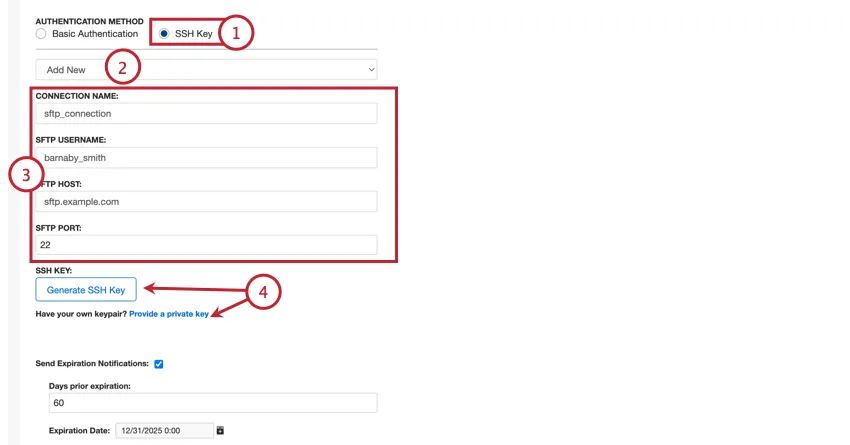
Select Add New to create a new connection.
Add the following information about the connection:
- Connection Name: Give the connection a name so you can recognize it later.
- SFTP Username: Enter the username to connect to your SFTP server.
- SFTP Host: Enter your SFTP server host URL.
- SFTP Port: Enter your SFTP Port. Usually this is 22.
You can either provide your own SSH key or have Qualtrics generate one for you:
- Generate SSH Key: Download a key provided by Qualtrics.
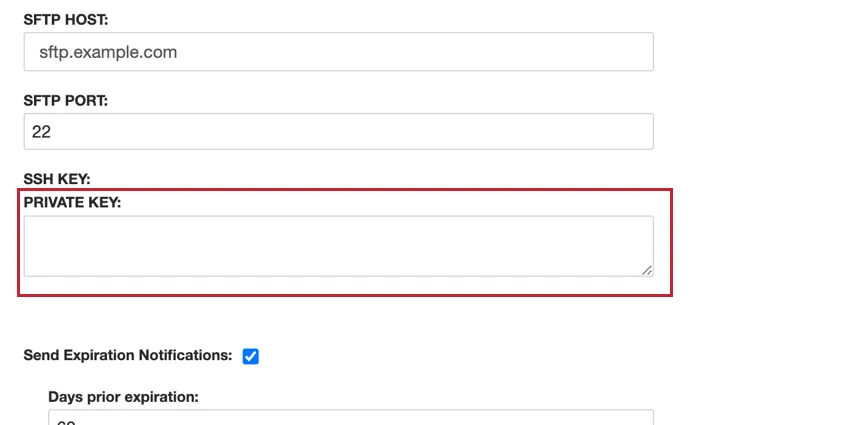
- Provide a private key: Enter your own key.
This step depends the previous step:
- If using a key generated by Qualtrics, click Download public SSH key to download the public key as a .pem file to your computer. The associated private key will be stored by Qualtrics. Then click Copy to clipboard to copy the key’s fingerprint to your clipboard. Save both of these in a secure place so you can reference them if needed.
- If using your own key, enter it in the Private Key box.

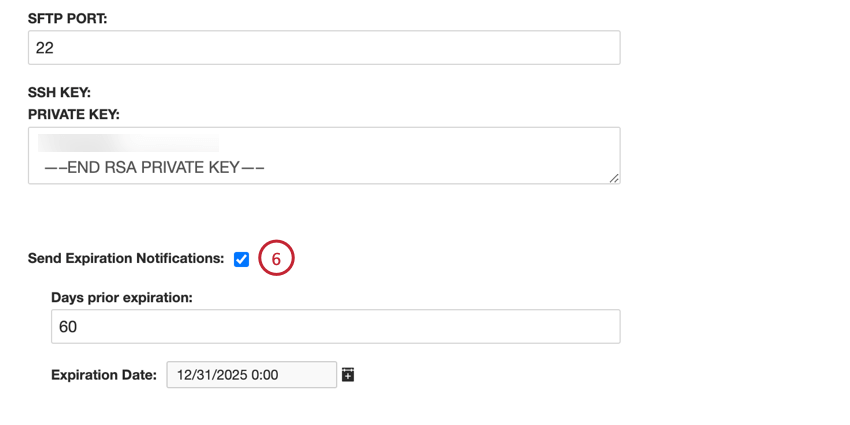
This step is optional. If you’d like your SFTP credentials to expire after a certain amount of time, select Send Expiration Notifications.

Then, configure the following:
Then, configure the following:
- Days prior expiration: Enter how many days you’d like to be notified before the expiration. You may enter a value between 1 to 100 days.
- Expiration Date: Set the date when the credentials will expire. Click on the box to open a calendar to pick the date.
That's great! Thank you for your feedback!
Thank you for your feedback!