
Appearance Studio Overview
What's on this page
Appearance Studio Overview
Appearance Studio is a new visual editor for designing the look and feel of your digital intercepts. It allows you to build responsive layouts, apply brand styling, and configure accessibility and translation options without writing custom CSS code.
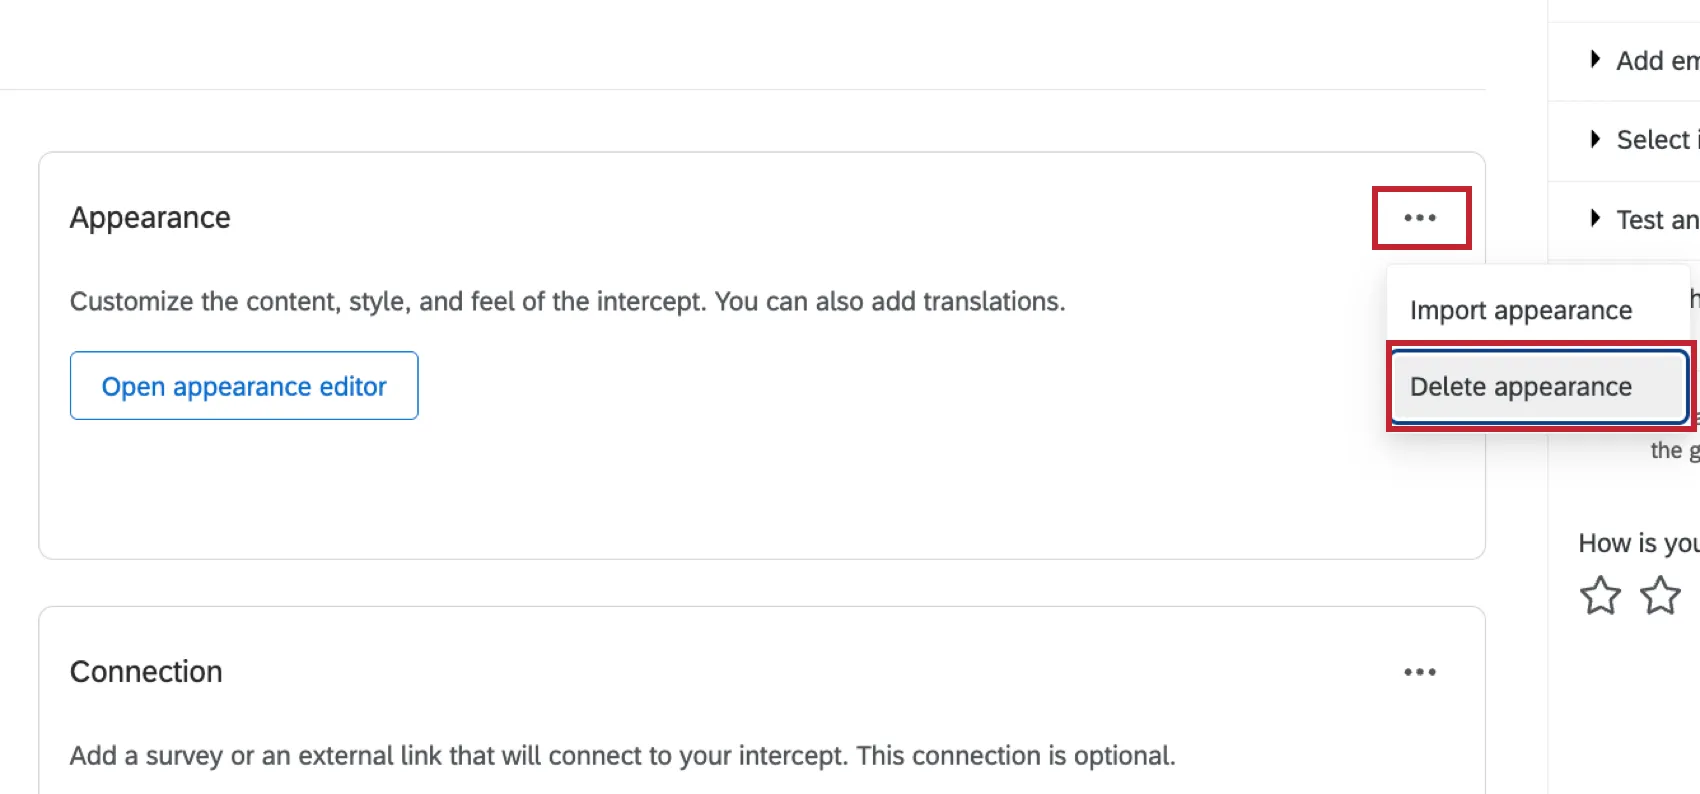
Qtip: At this time, you can only use the new Appearance Studio for new creatives and existing creatives that have had their appearance deleted. There will be a migration path for existing creatives at a later date. Select “Delete appearance” to delete the appearance settings for an existing creative. Please note that deleted appearances cannot be recovered!

Accessing Appearance Studio
You can use Appearance Studio to customize your guided intercepts.
Qtip: At this time, Appearance Studio is not available for Mobile App Creatives.
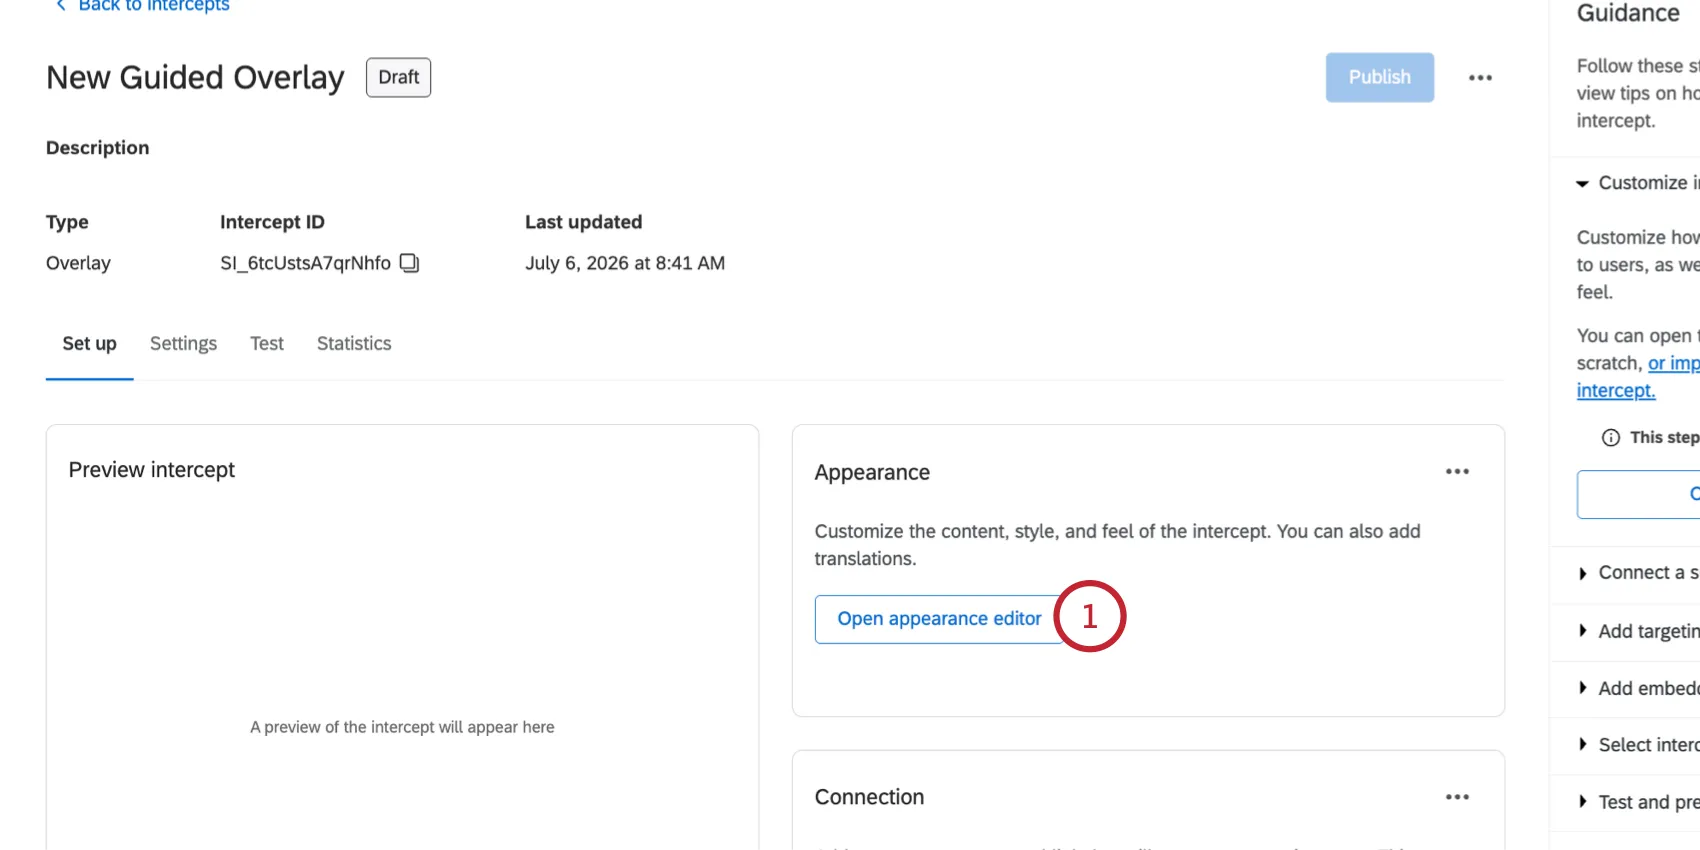
In your guided intercept, click Open appearance editor.
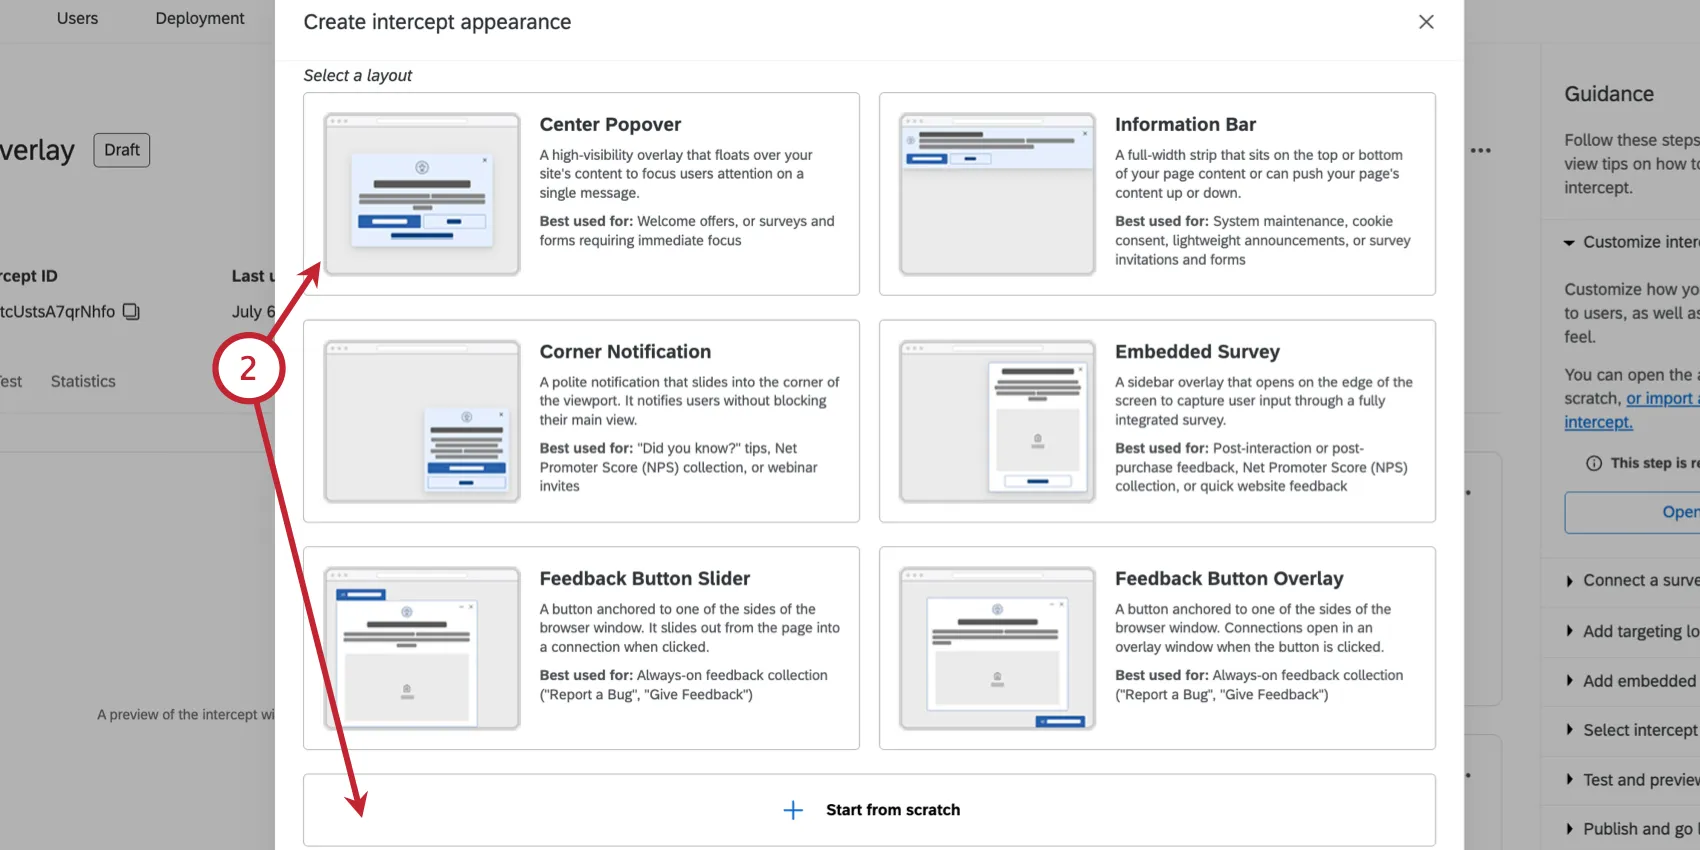
You can choose one of the preconfigured layouts as a starting point, or click Start from scratch to start with an empty layout.
You can then navigate through the different sections of Appearance Studio:
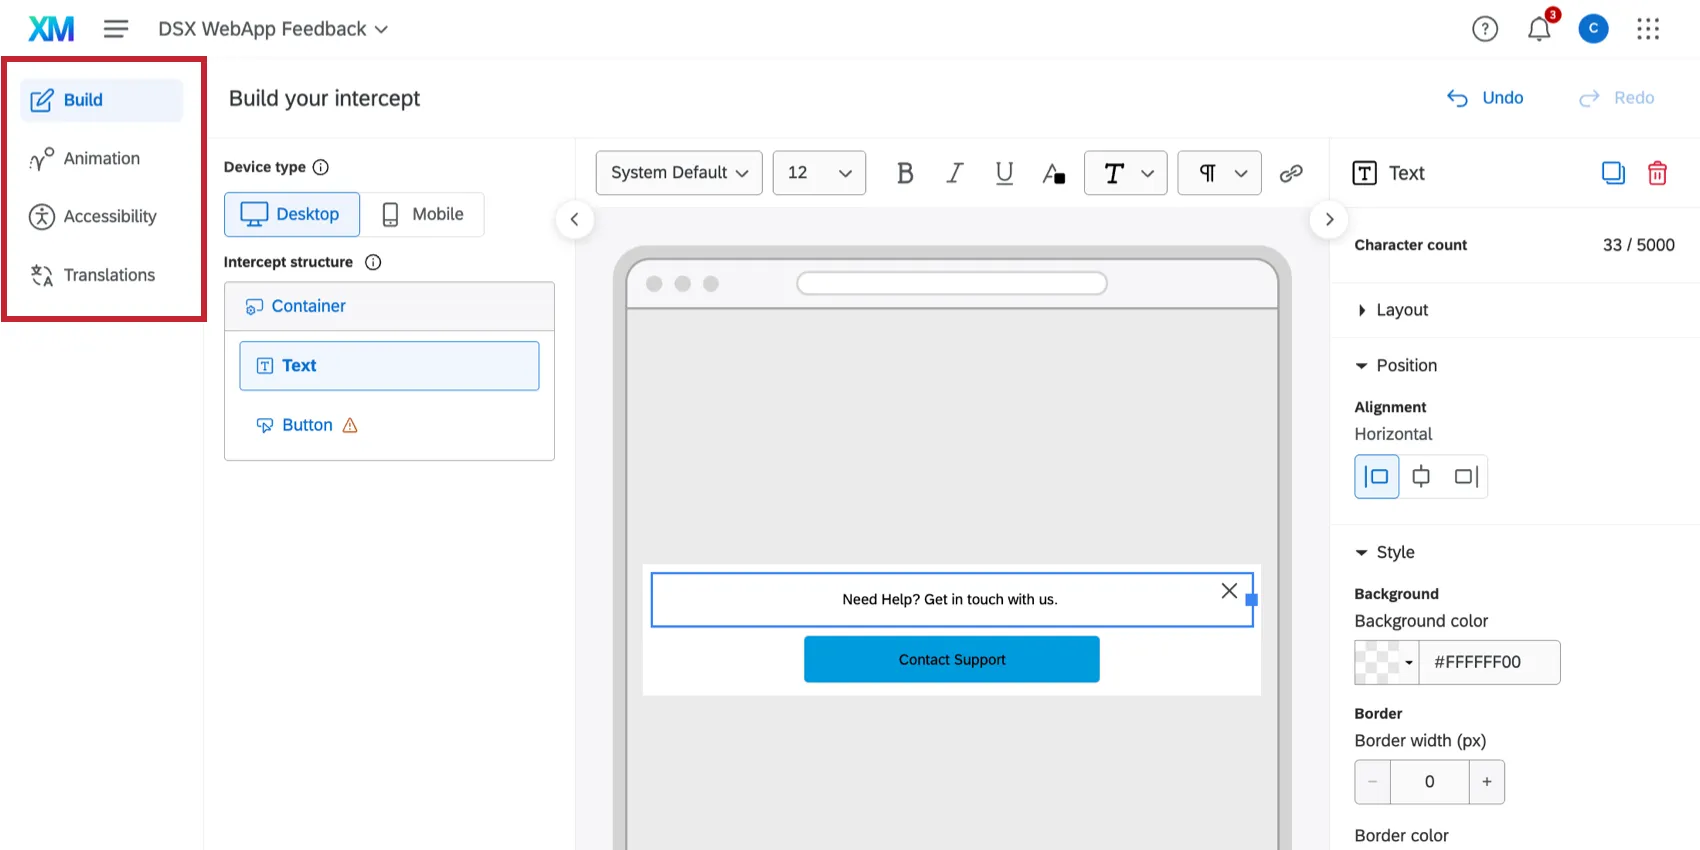
- Build: Build and customize the components of your reactive.
- Animation: Set an animation for how you intercept appears on the screen.
- Accessibility: Ensure your intercept is accessible to assistive technology.
- Translations: Add translations and set how visitor language is determined.
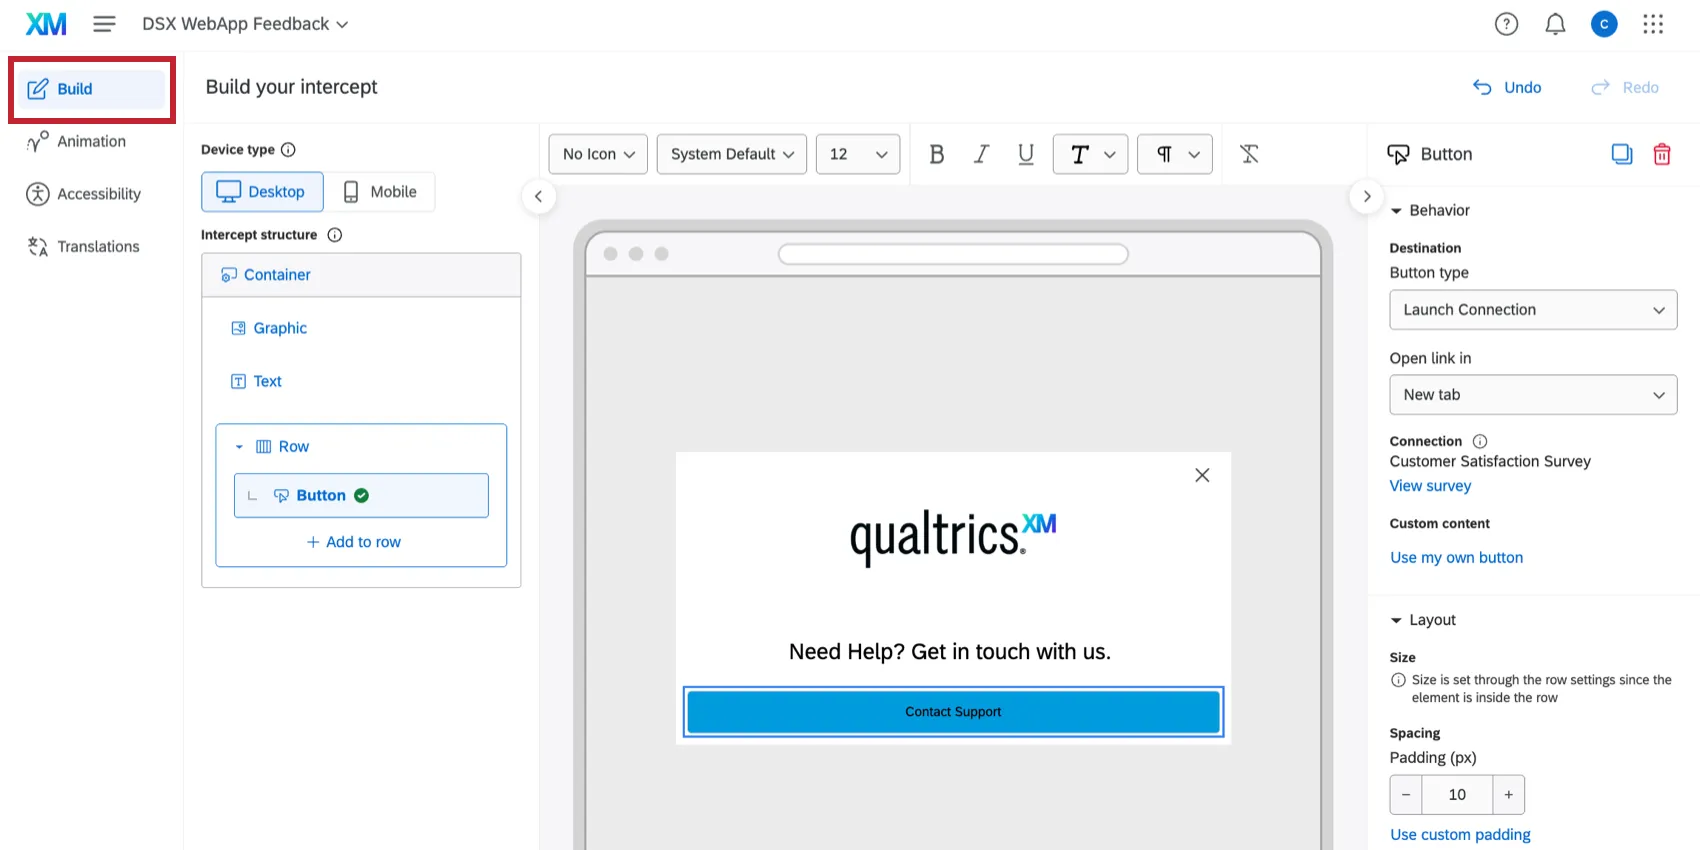
Build Tab
The Build tab is where you create the layout of your creative and customize the different elements. For in-depth instructions, see Building Appearance Layouts.
Animation Tab
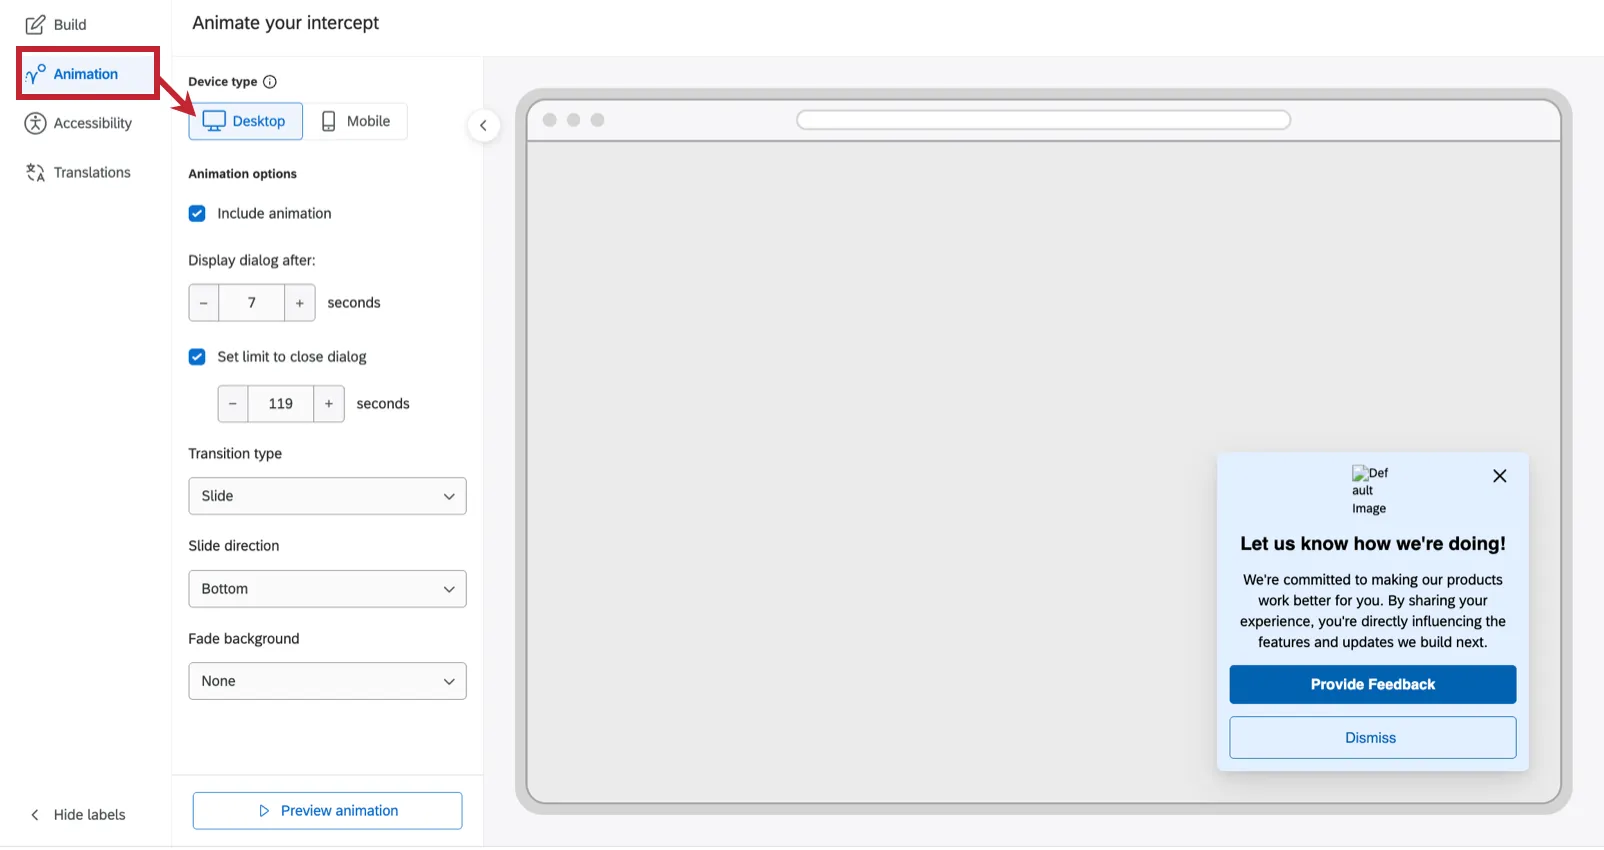
The Animation tab is where you can customize how your intercept enters the screen and how long it remains visible to visitors.
Enable Include animation to animate your intercept.
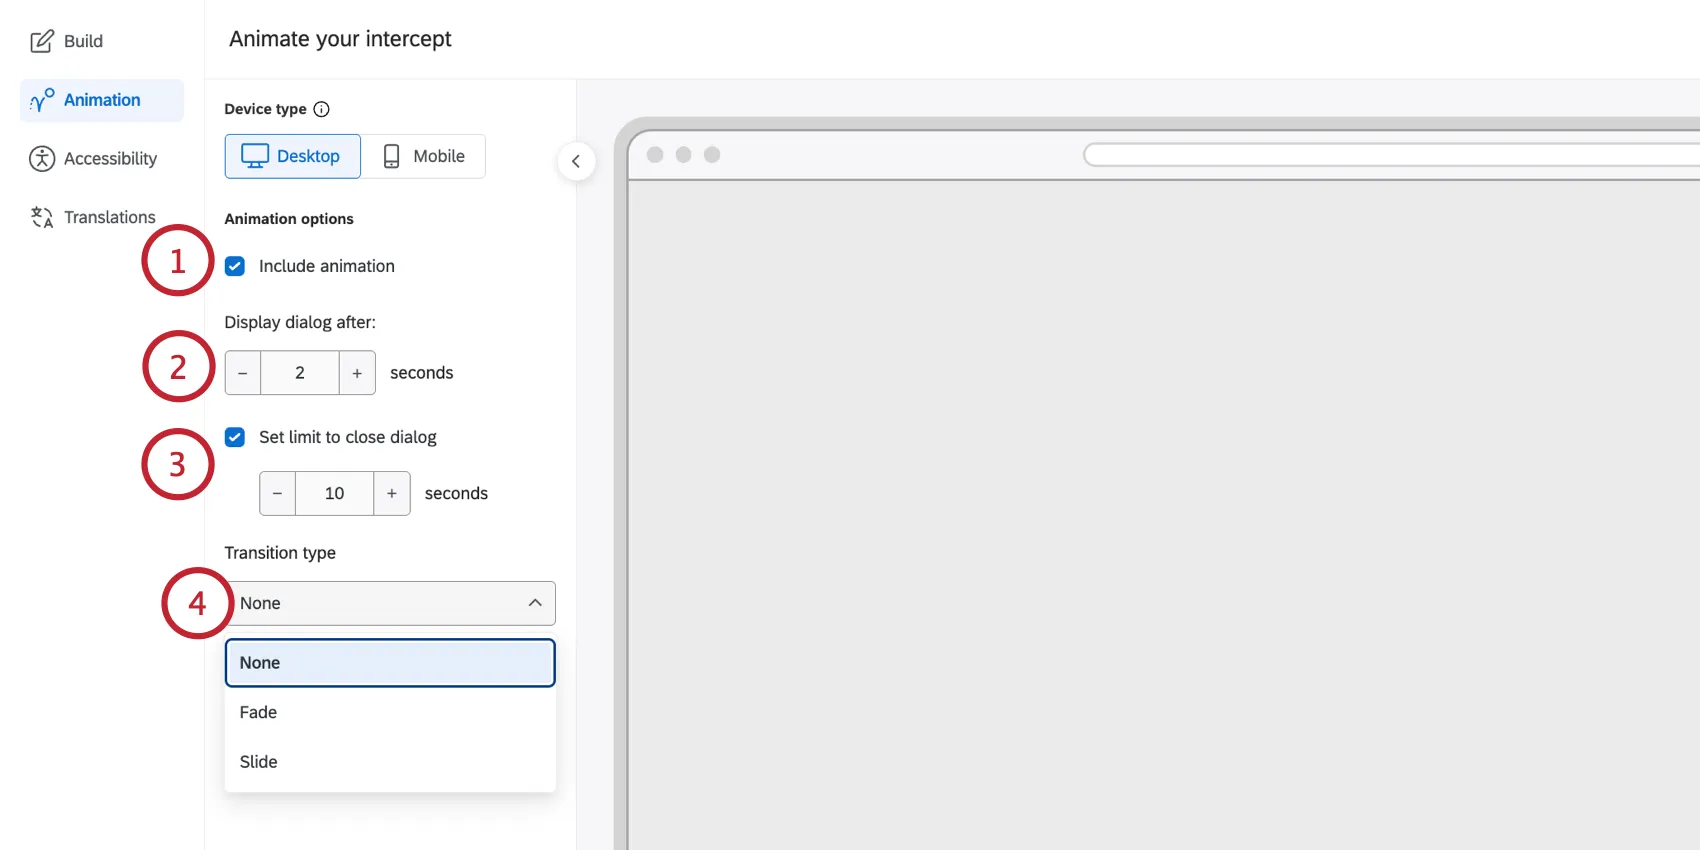
Qtip: When disabled, the intercept will simply appear on the page.
Determine the delay (in seconds) before the intercept appears after the page loads.
If desired, enable Set limit to close dialog. When enabled, specify a number of seconds before the intercept automatically closes itself.
Choose the Transition type:
- None: No transition. The intercept will suddenly appear on the page.
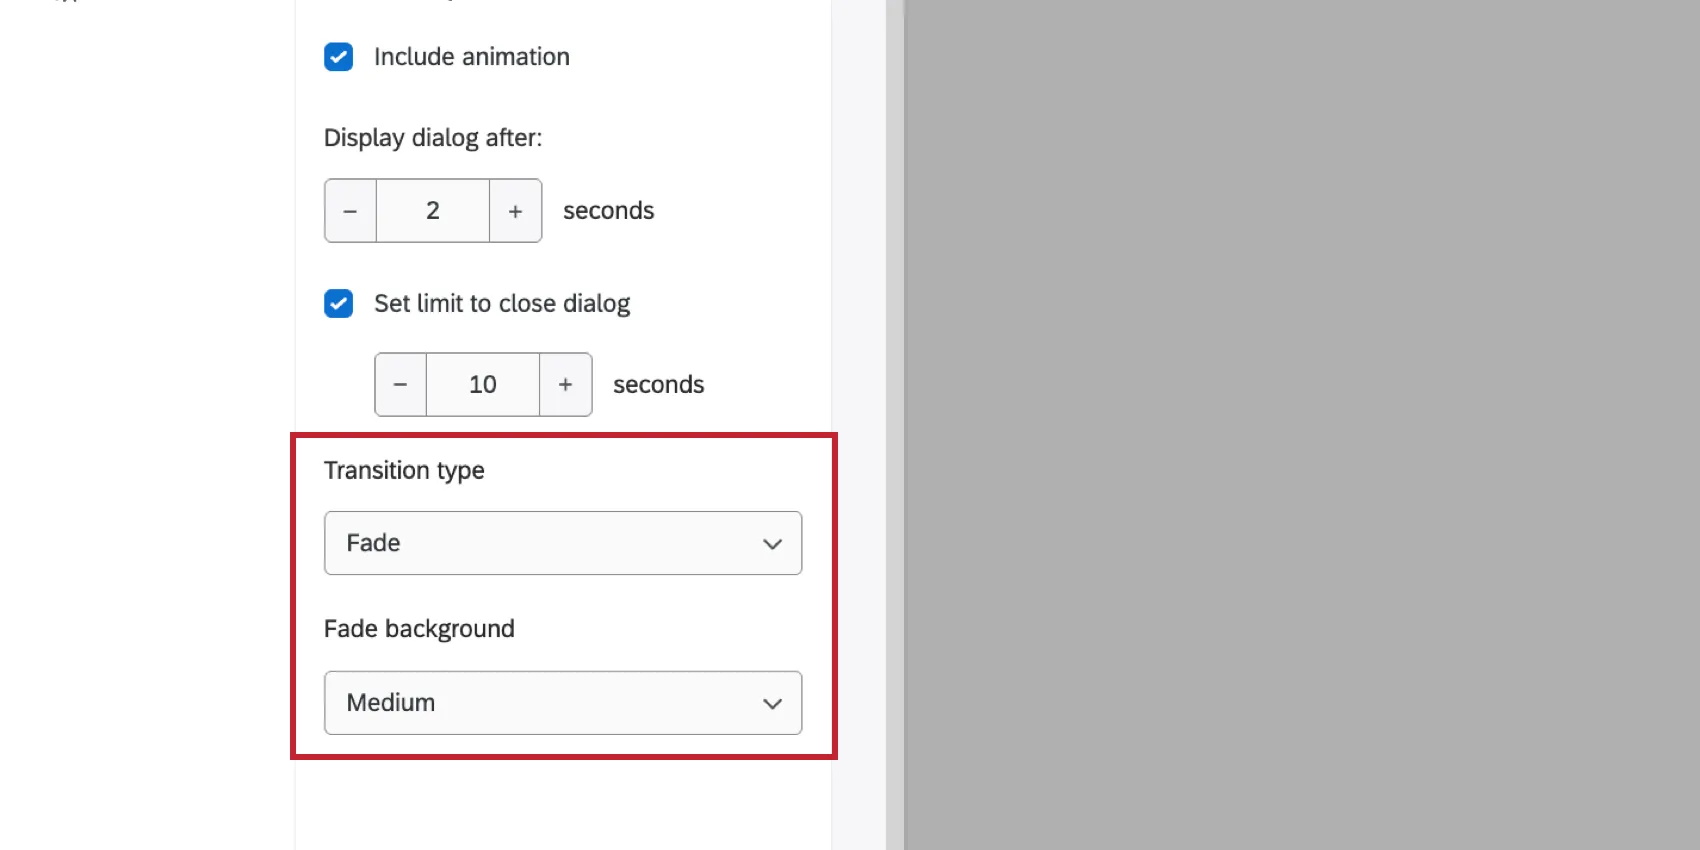
- Fade: The intercept slowly becomes opaque.
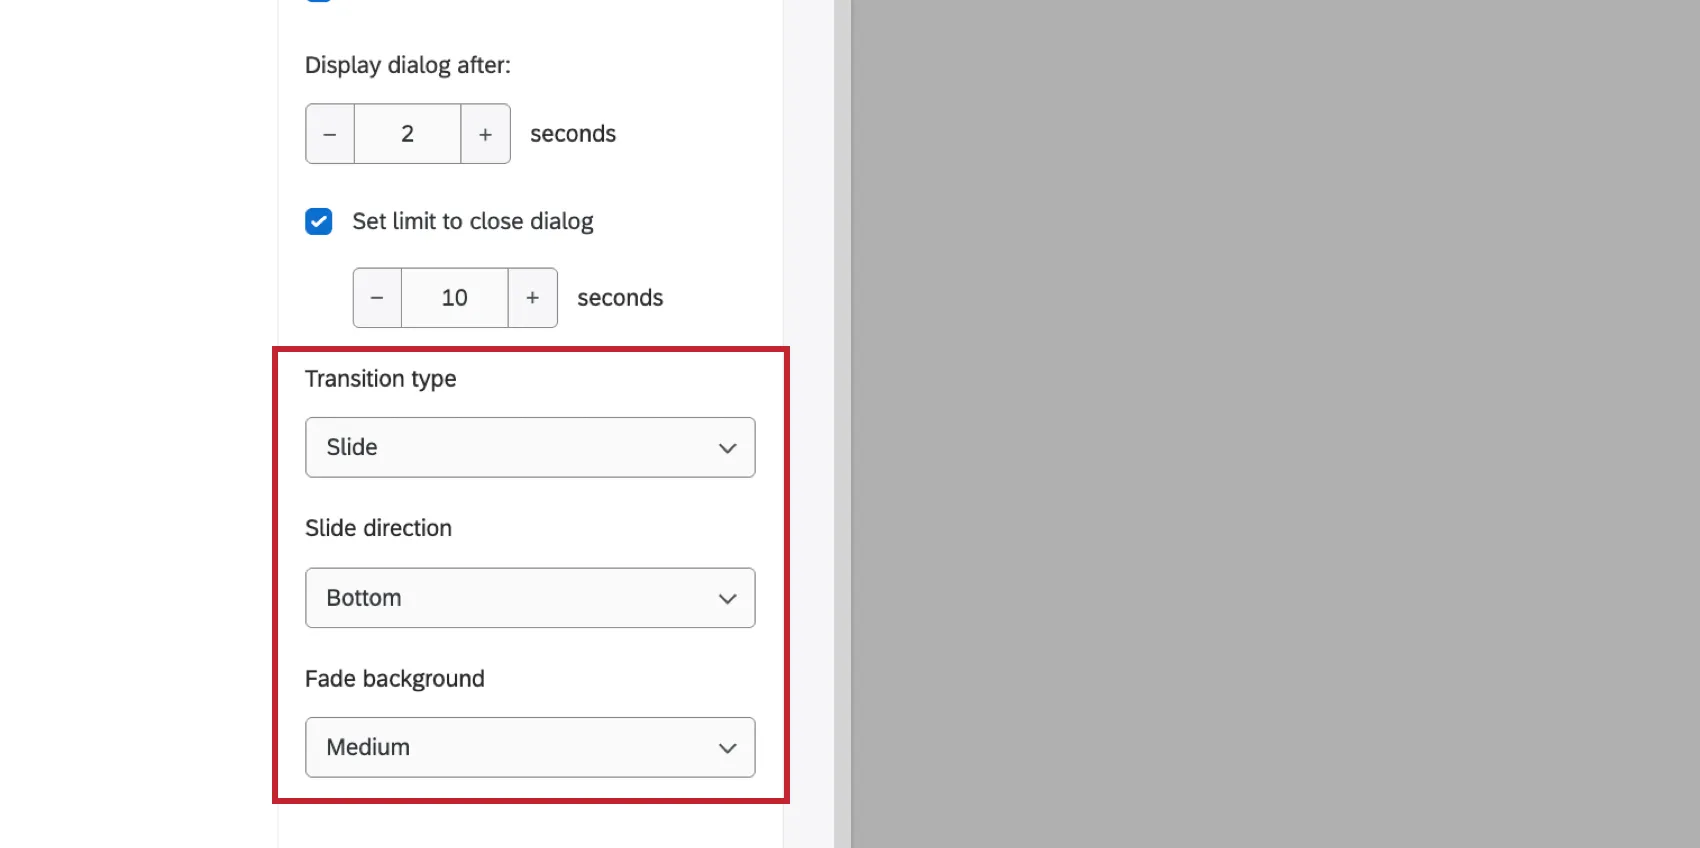
- Slide: The intercept moves onto the screen.
Depending on the selected transition type, you’ll have extra options to configure:
Fade: Choose the Fade background (from light, medium, and dark). This setting dims the website behind the intercept.
Slide: Select a Slide direction (from bottom, top, left, or right). You can optionally choose a fade background when using a slide animation.
Click Preview animation to test the animation in the preview window.
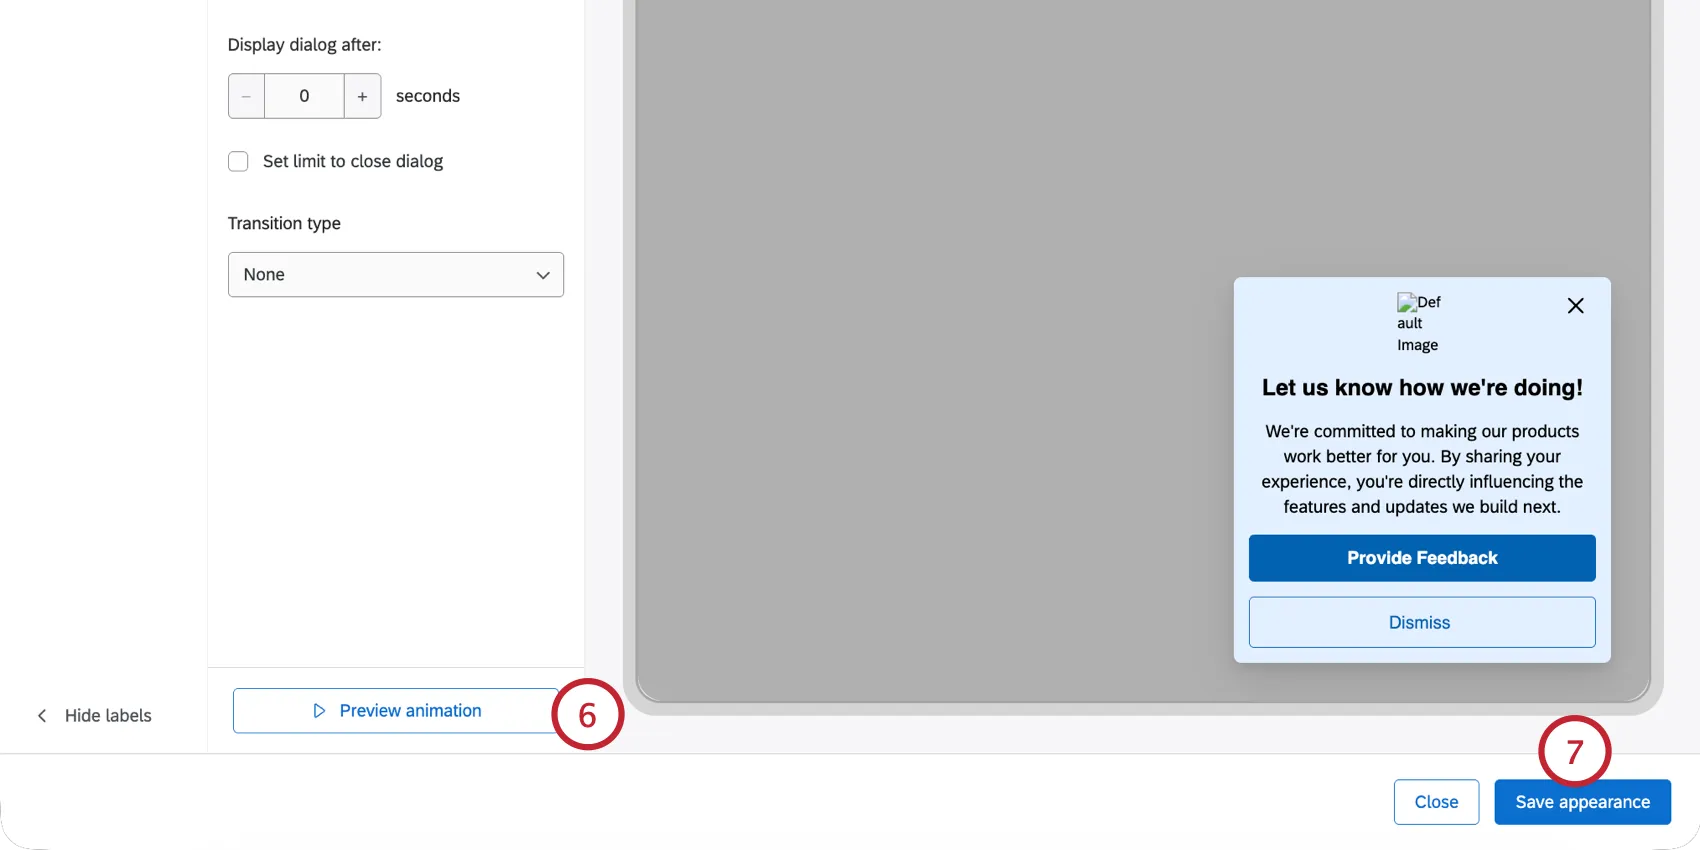
When finished, click Save appearance.
Accessibility
Qualtrics gives you the tools to ensure your intercepts are inclusive and comply with web accessibility standards. Assistive technologies like screen readers rely on hidden text labels to explain visual content to users. There are 2 different labels used by Qualtrics intercepts that will be read by assistive technology:
- Alternative text (alt text): Alt text is a short, clear description of what an image shows.
- ARIA labels: ARIA labels are attributes added to interactive elements (like buttons) to give extra context about what action the element performs.
You can review the elements that support accessibility labels in the Accessibility tab of Appearance Studio.
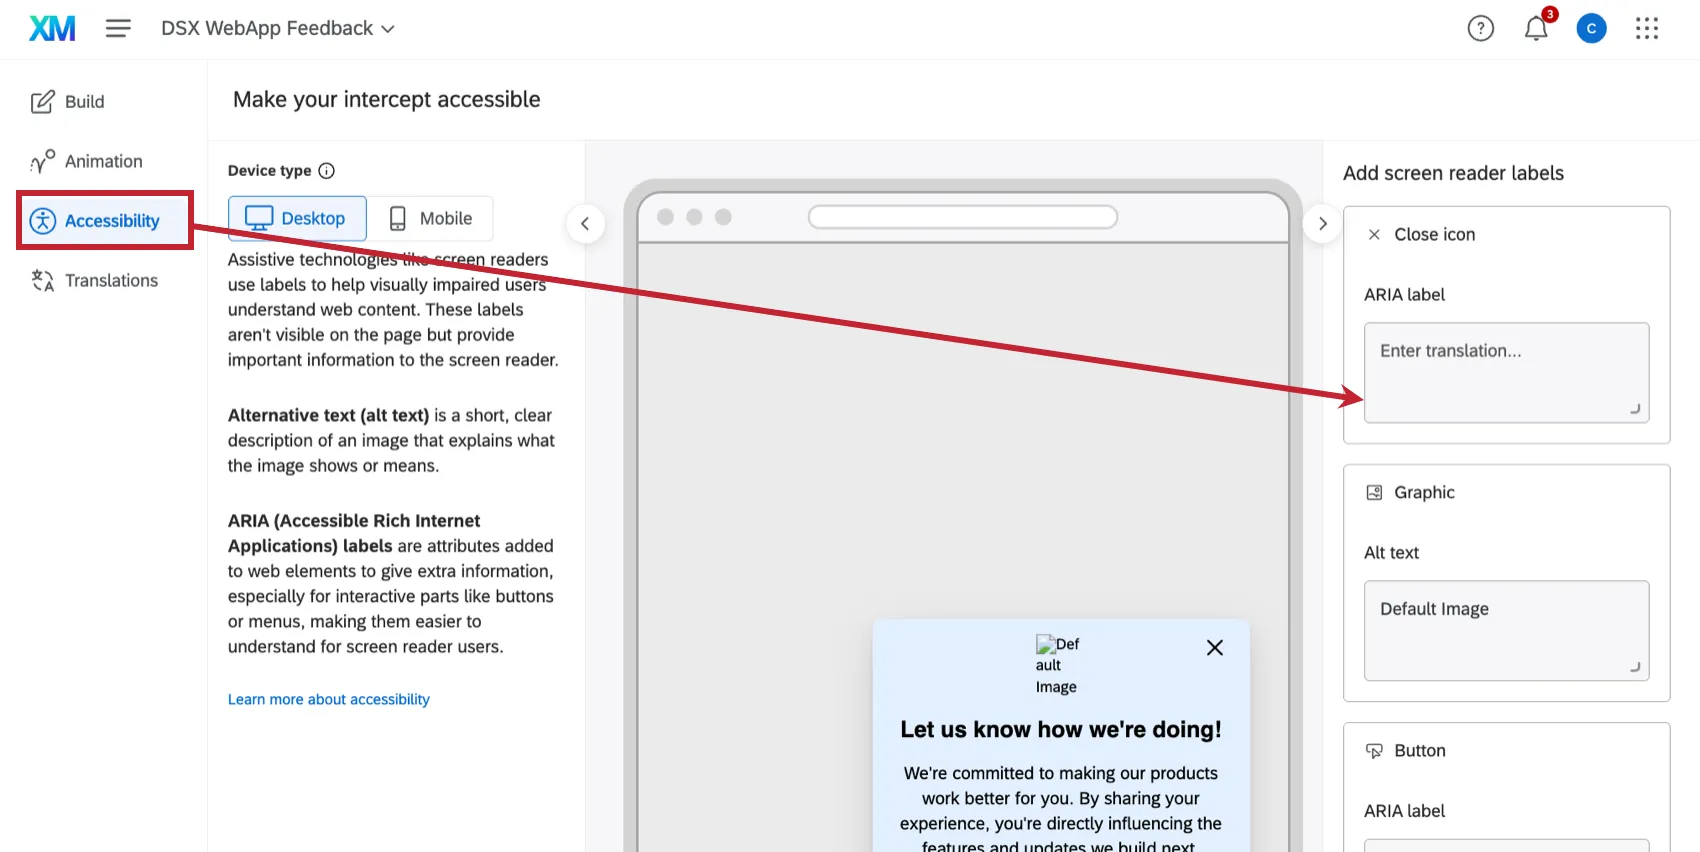
From here, you can customize any elements that use Alt text. This includes:
- Close ("X") icon
- Minimize icon (when used with a feedback button)
- Graphics
- Embedded connection
Qtip: Elements that use ARIA labels, such as standard buttons and the feedback button, cannot be separately customized. The button’s display text is used as the ARIA label and this behavior cannot be changed. Because the label comes from the button text, the ARIA label can be translated when the creative is translated. These elements will still appear in the Accessibility tab, but will be Read only. They can be changed by editing the element (or its translations) directly.
Translations
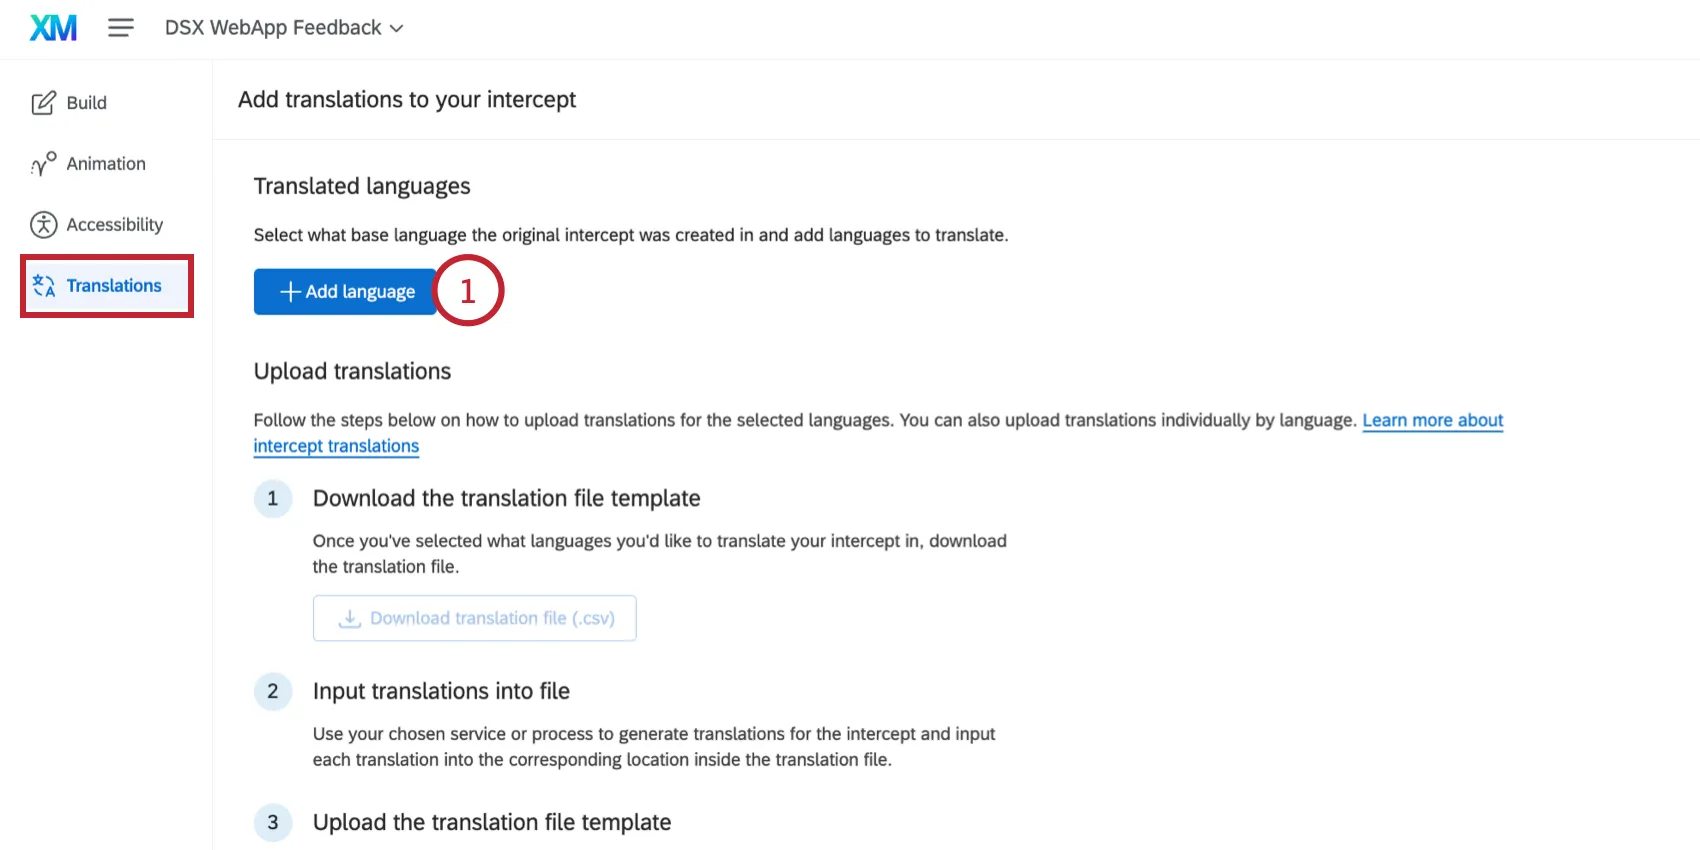
If you deploy intercepts to a global audience, you can translate all intercept text directly in the Translations section of Appearance Studio.
In the Translations tab, click Add language.
Select the Base language, which is automatically determined by the text you originally entered in the Build tab. Any untranslated fields will display the base language text.
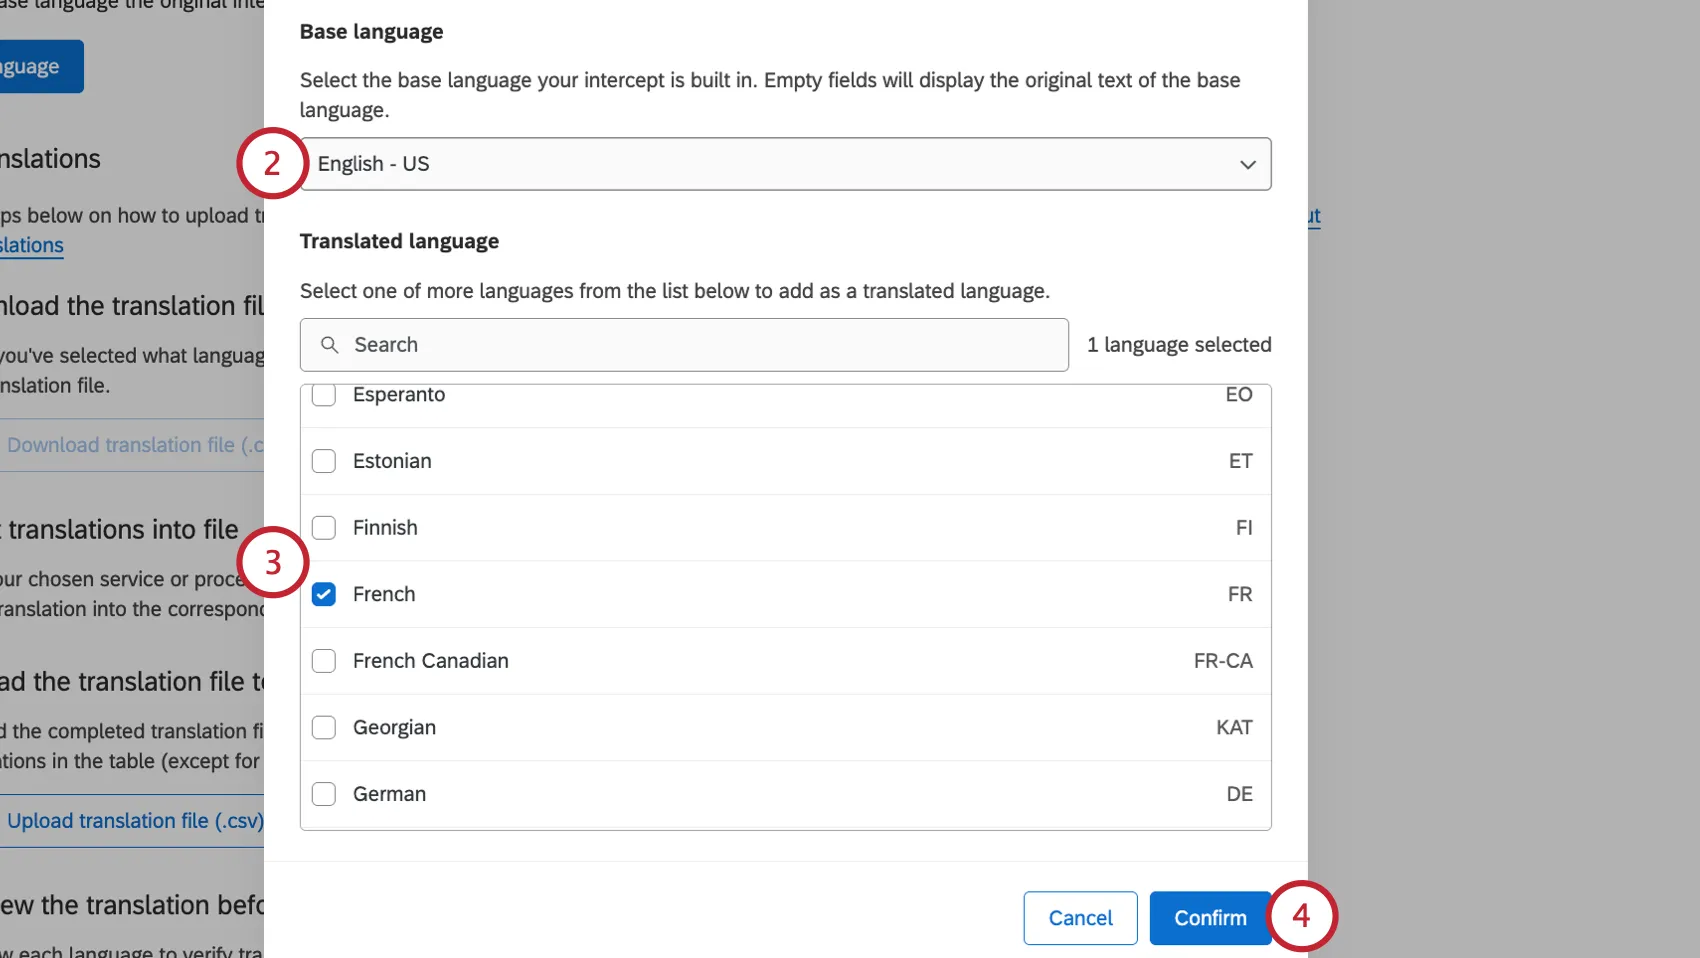
Qtip: Need to change the base language but don’t see your desired language as an option? Add the language as a translation and then save your changes. Afterwards you can reopen this menu and select the language as your base language.
Choose the Translated language(s) you’d like to add to your intercept.
Click Confirm.
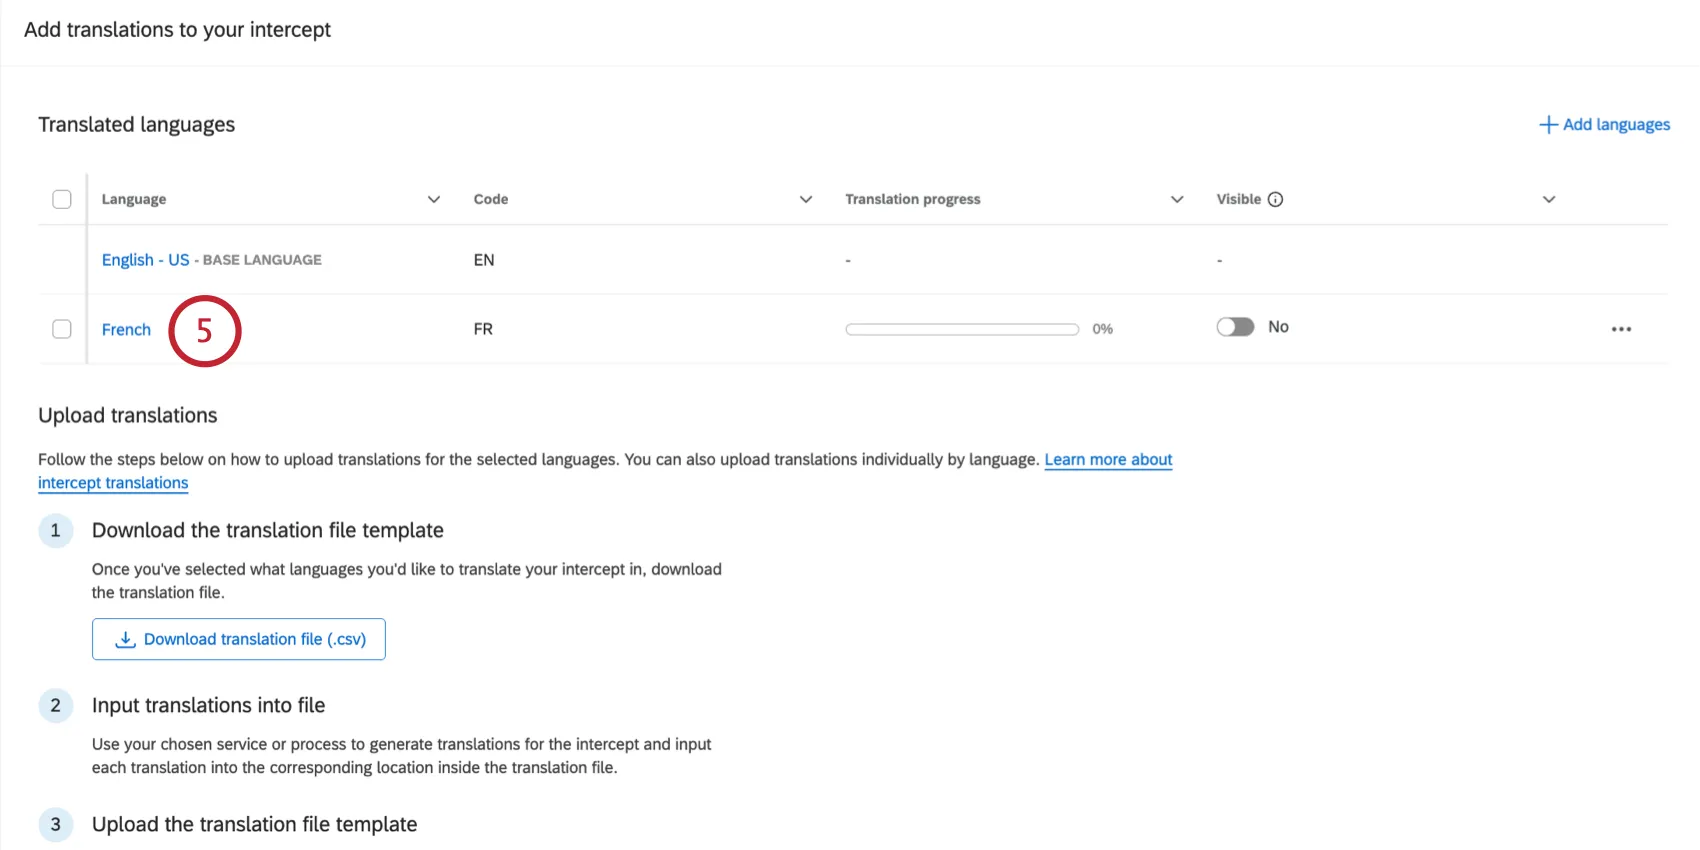
To manually translate a language, click on it from the list of available languages.
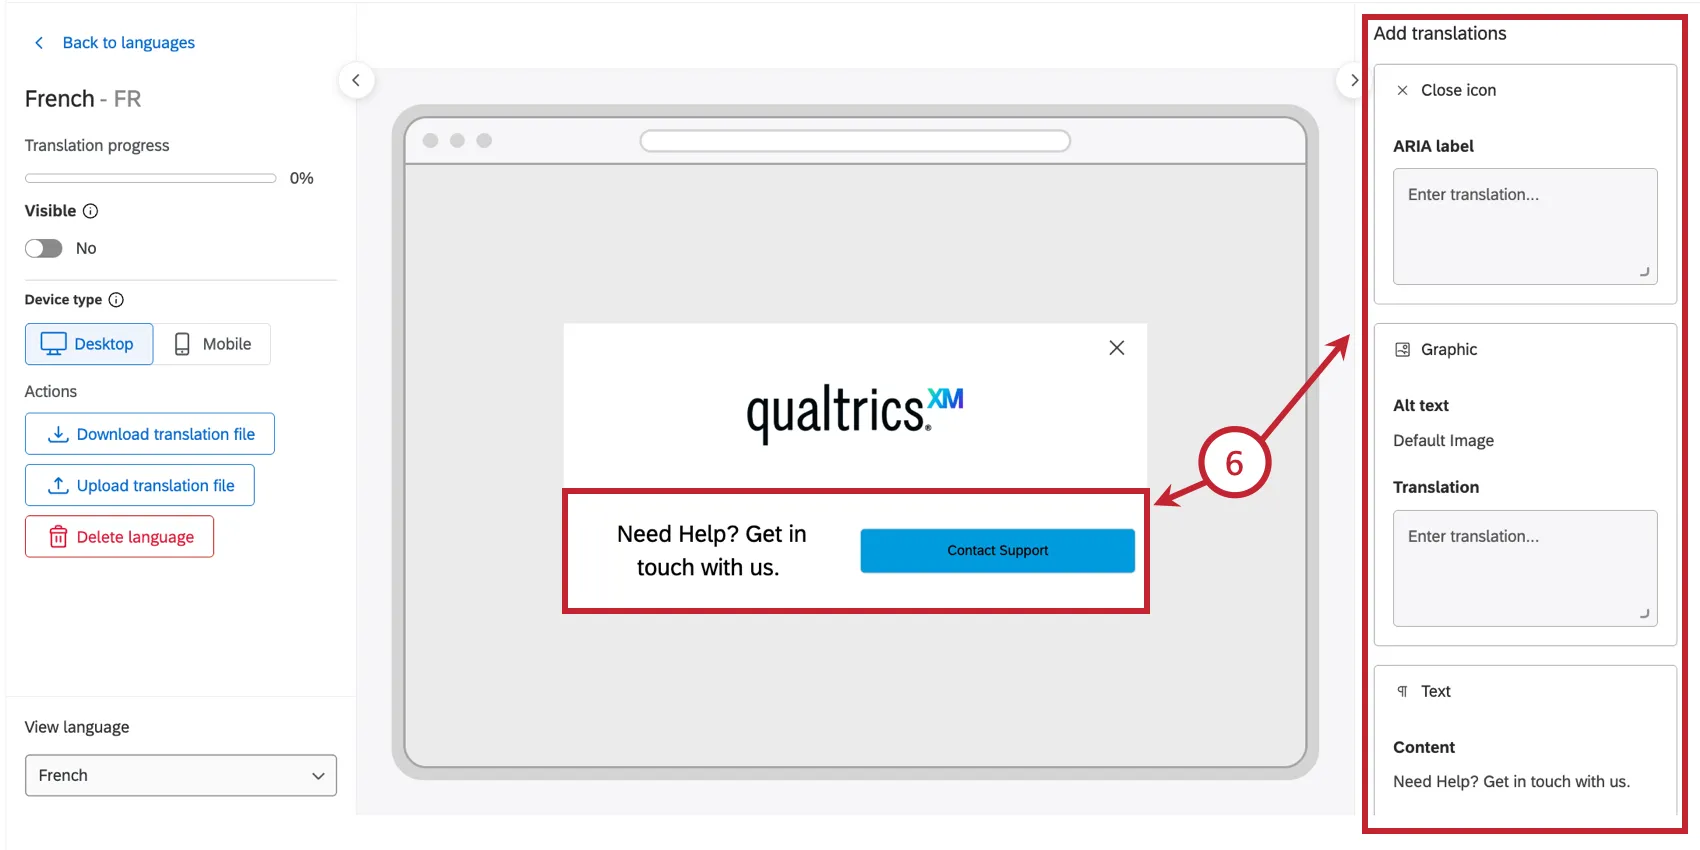
You’ll be brought to a Build editor where you can translate each element in your intercept. Click on an element to edit it directly, or use the side panel to navigate each translatable element. See Customizing Text Elements for help with formatting text.
Qtip: Content inside an embedded survey is translated within the survey itself, not in Appearance Studio.
To manage translations in bulk, click Download translation file.
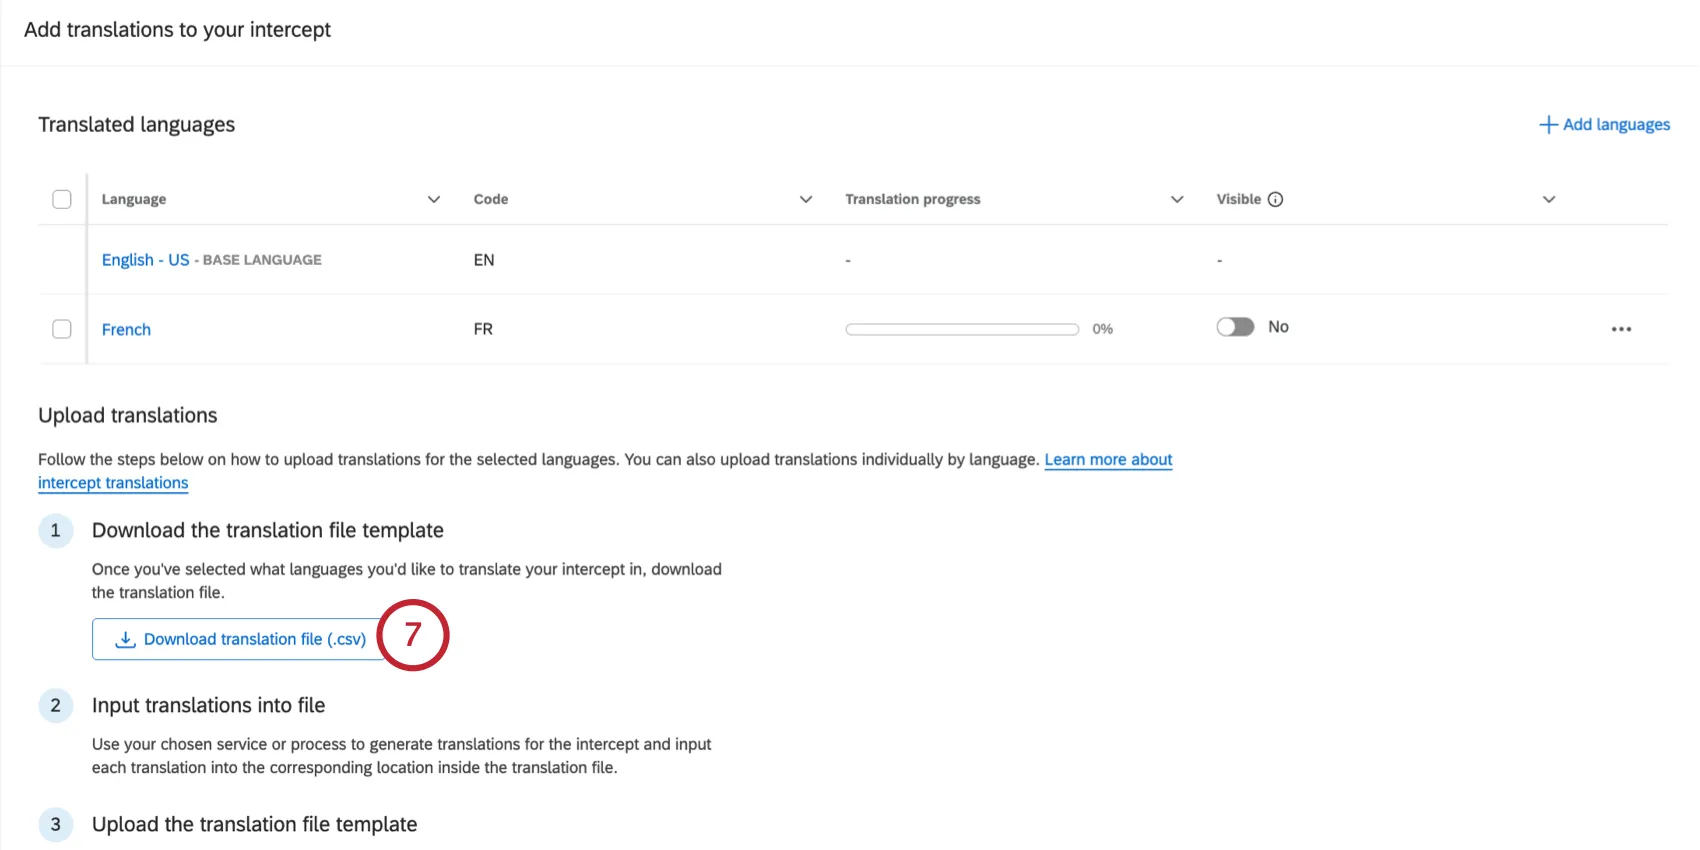
Qtip: Uploading a CSV will overwrite any previously added translations, except for fields left entirely empty in the file.
Open the file in a spreadsheet editor (like Microsoft Excel) and add translations under the language columns. Make sure to save your file as a CSV.
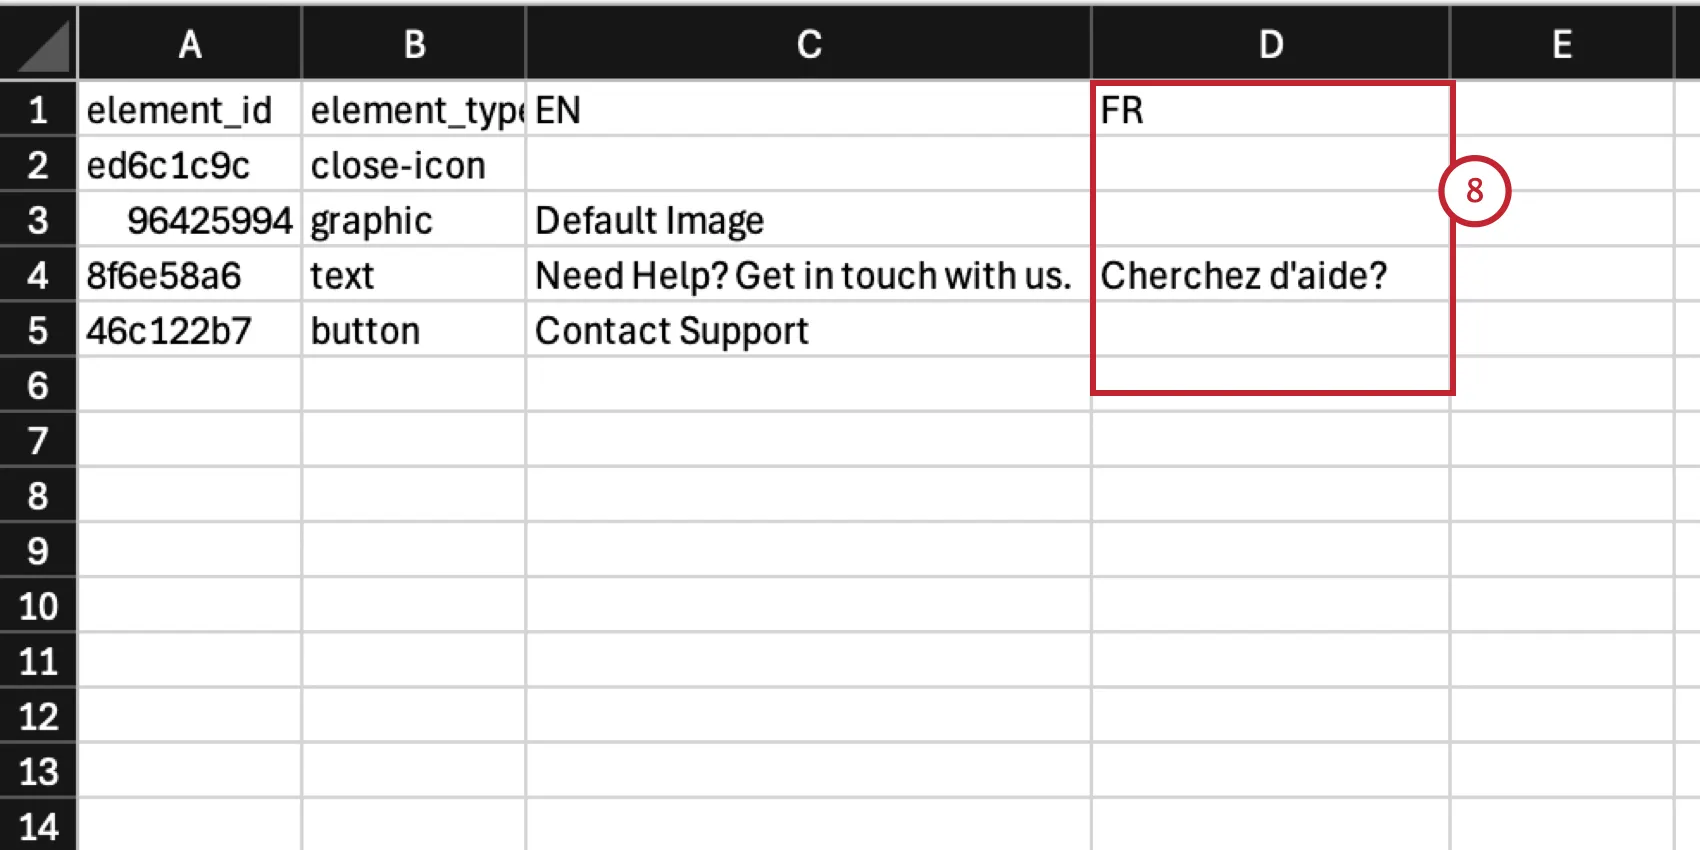
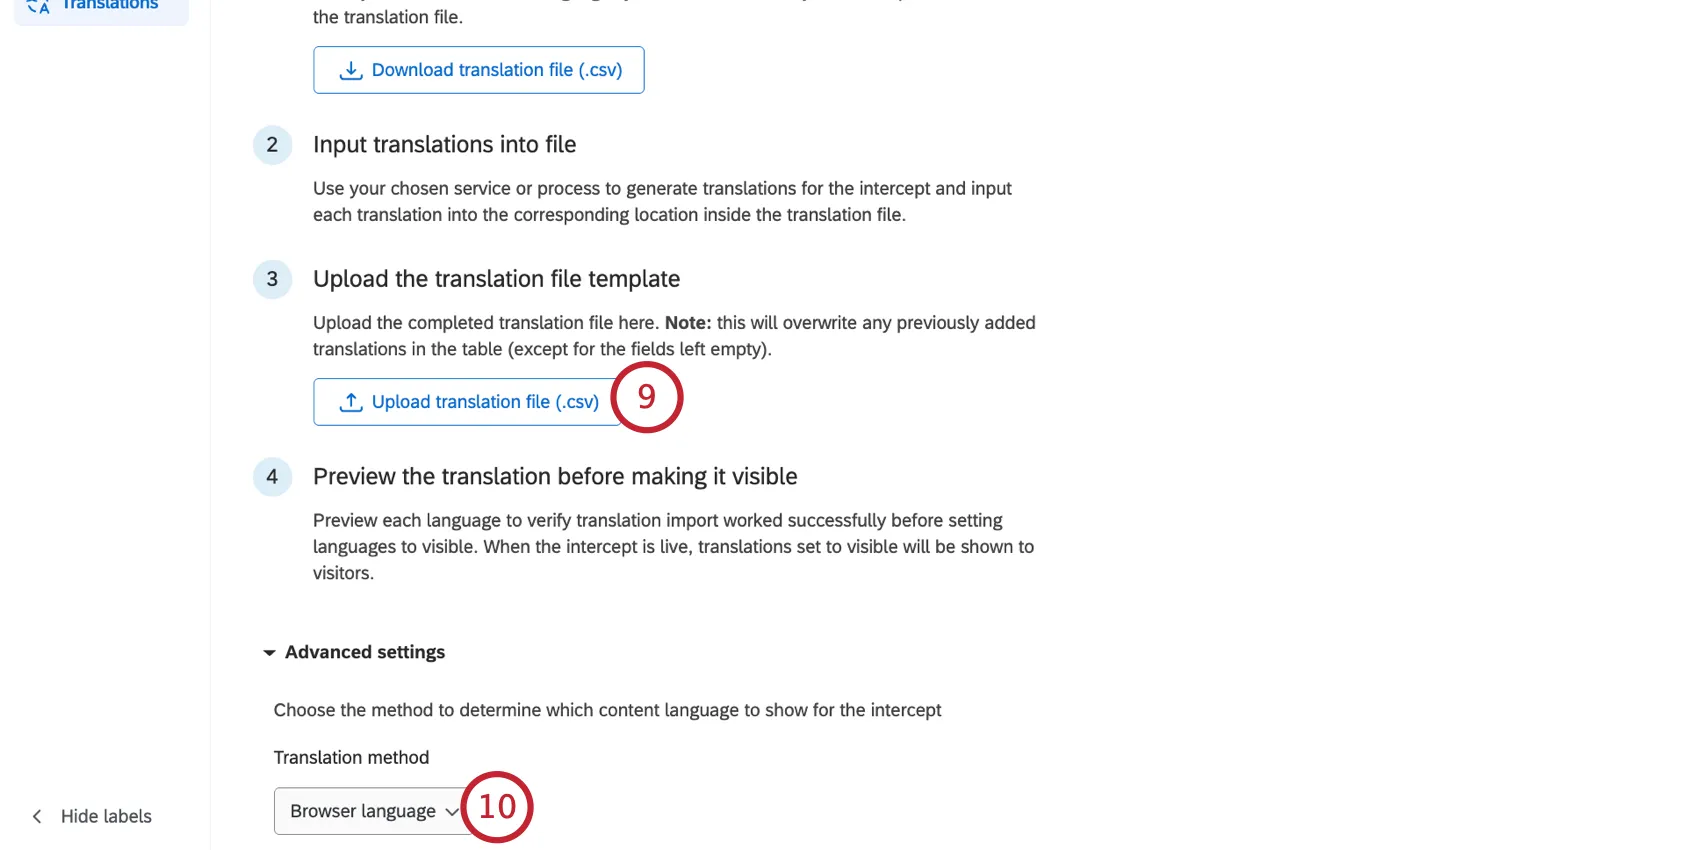
Click Upload translation file and select the file saved on your computer.
Qtip: See CSV & TSV Upload Issues for troubleshooting tips.
Under Advanced options, choose how you’d like Qualtrics to detect the language to show site visitors:
- Browser language: Use the visitor’s browser language to determine which language to show.
- Global JavaScript variable: If your site captures the visitor’s language in a JavaScript variable, provide the variable to determine which language to show. The variable values should pass the corresponding language code.
Double check each translation by clicking on it and reviewing the intercept in the editor.
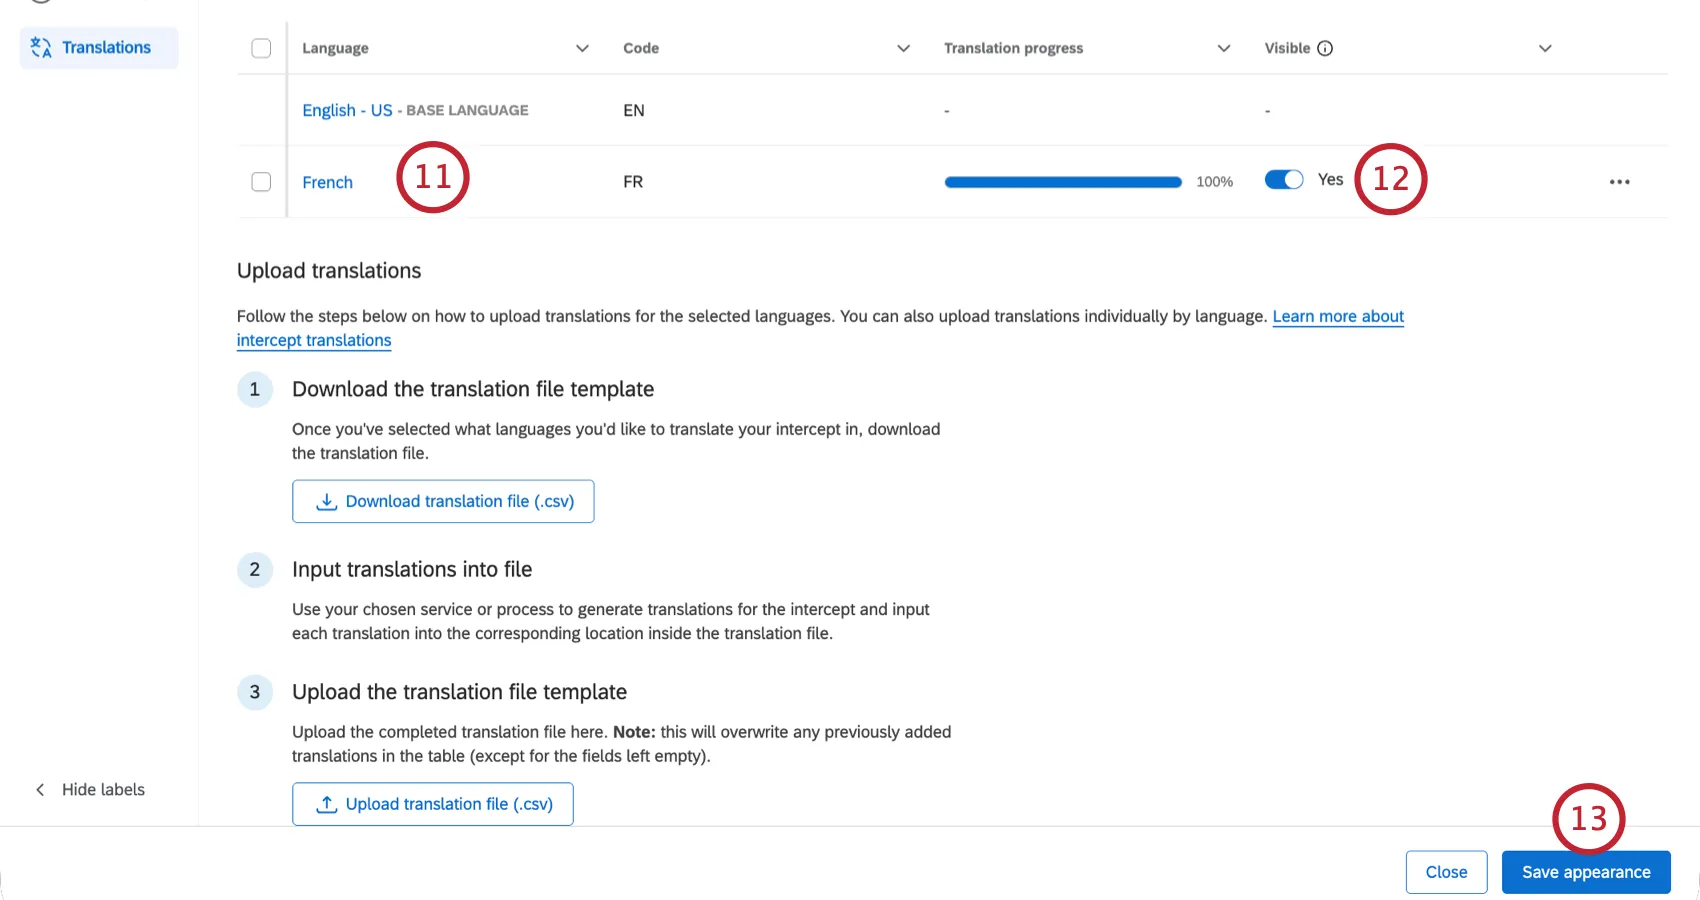
Each translation must be enabled by toggling the Visible option to Yes.
Click Save appearance.
That's great! Thank you for your feedback!
Thank you for your feedback!