
Filtering Results-Reports
What's on this page
Qtip: There is a new version of Results available. To opt in to the new Results Dashboards, navigate to the Results tab and click Try it now.

About Filtering Results-Reports
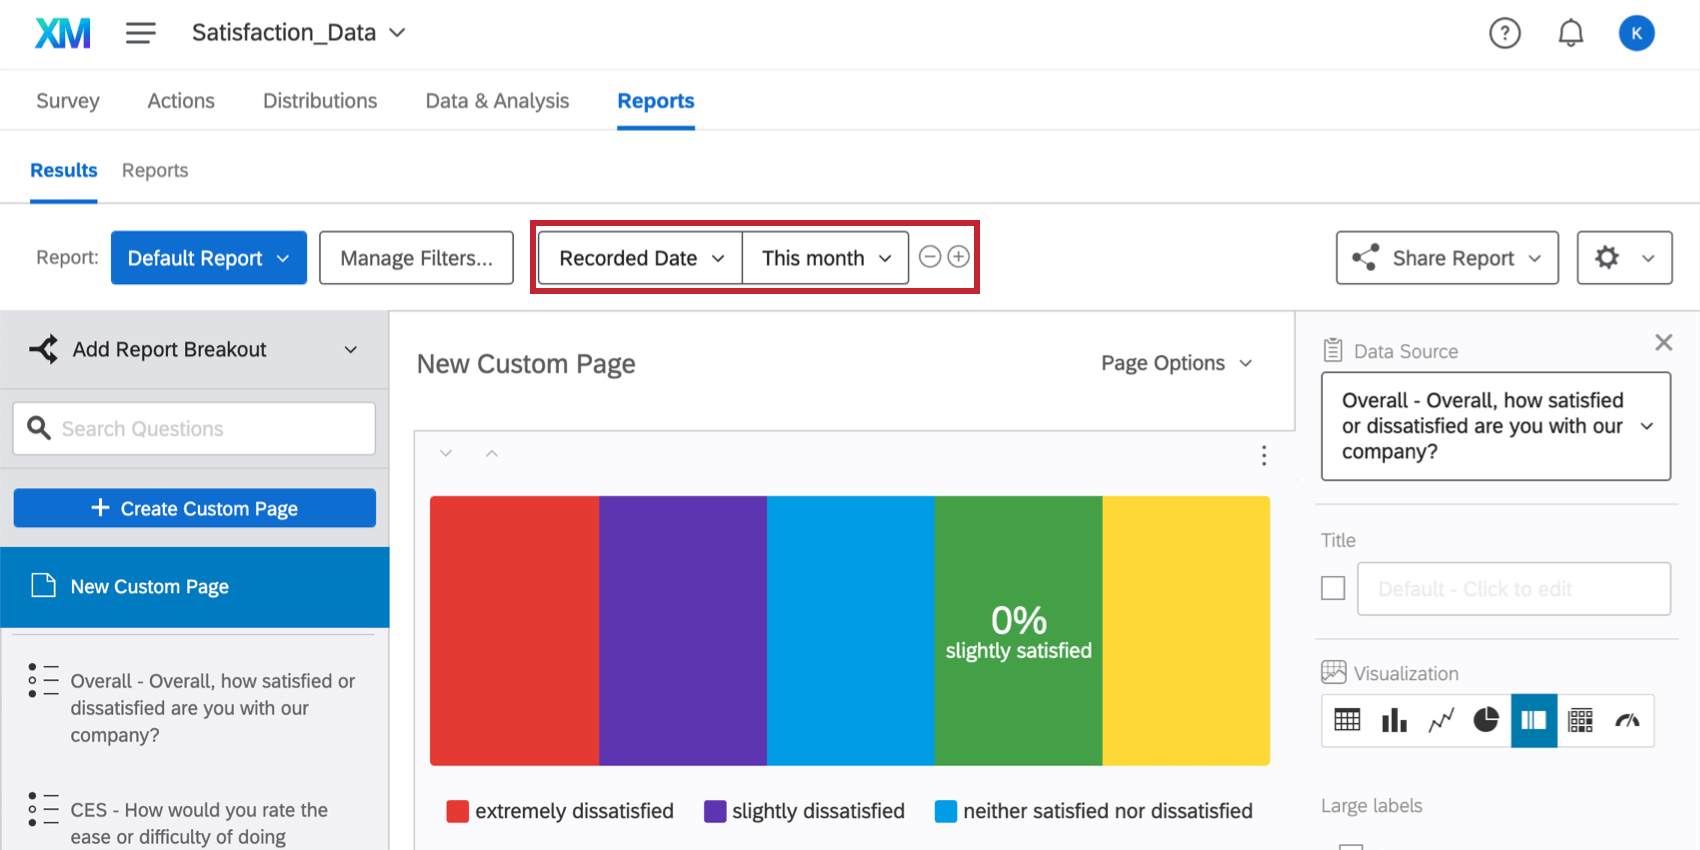
Sometimes you’ll want to look at a specific subset of your results, rather than all the collected data. You can use filters to refine results-reports to show only results that meet specific criteria. Filters apply globally to a results-report, so once applied, all visualizations and pages in the results-report will be filtered to show only information that meets the filter criteria.
Example: You produce a monthly report on customer satisfaction and you want to view data just for the current month. You can add a date filter to your results-report to view only this month’s data.

Qtip: These filters you build in Results-Reports are also accessible in Advanced-Reports and Data & Analysis!
Adding a Filter
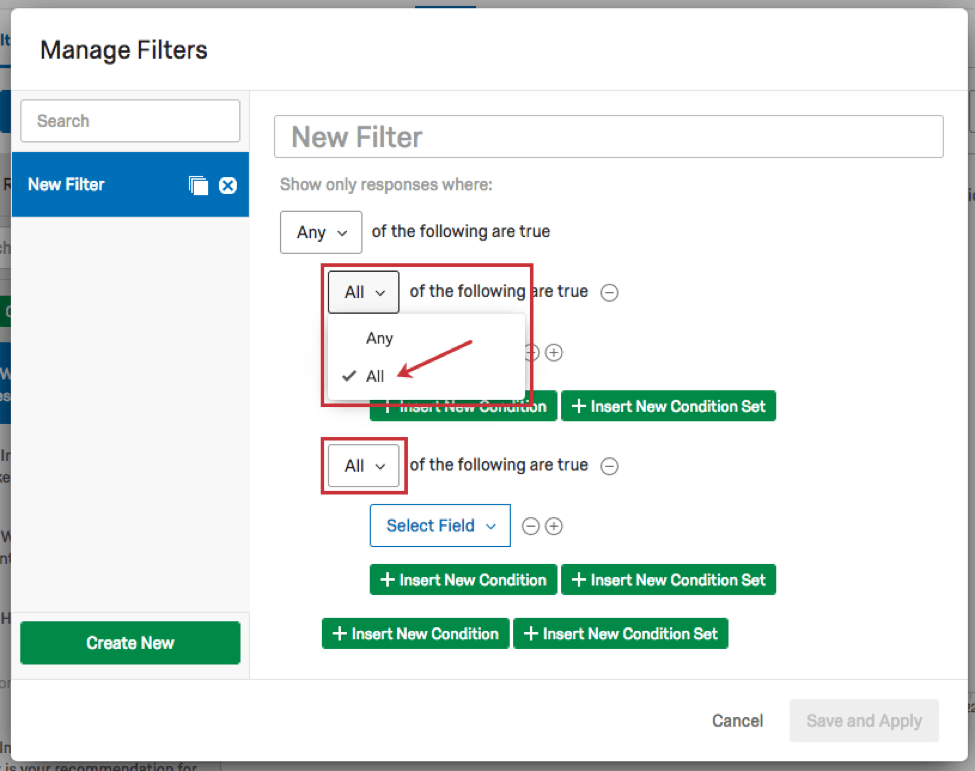
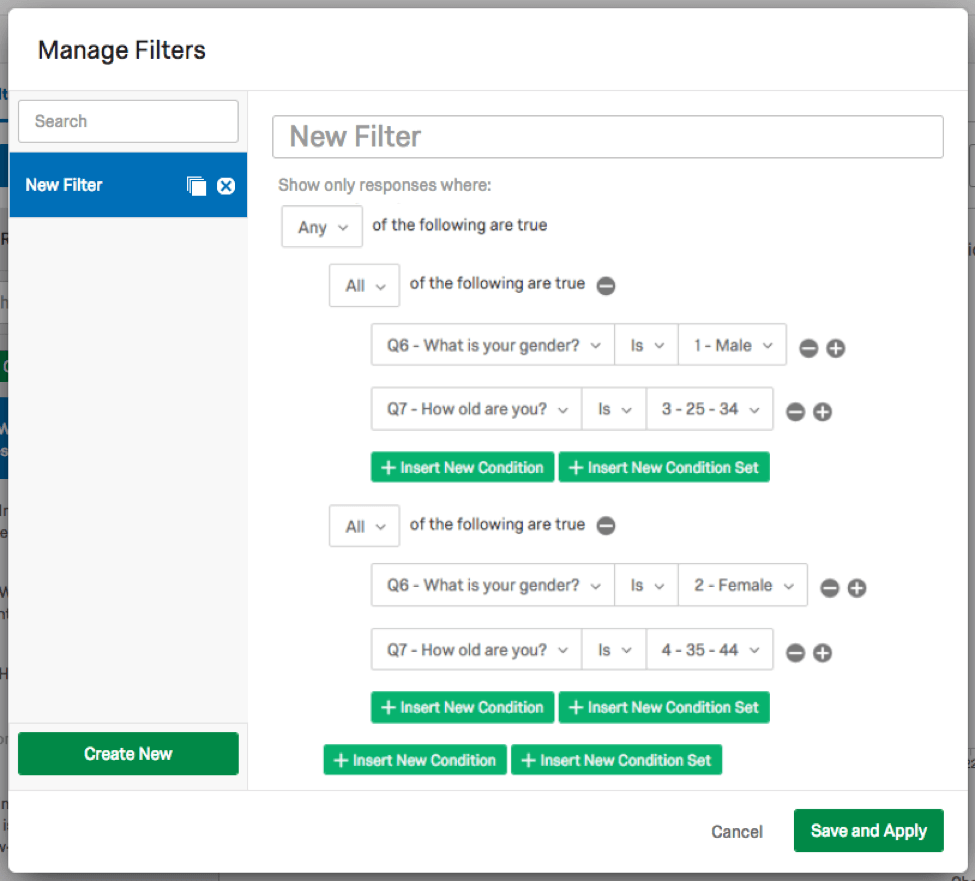
Qtip: Adding additional filters will bring you to the Manage Filters window. Here you can create more dynamic logic sets to isolate particular sets of respondents. See the Managing Filters section for more details.
To practice adding filters, expand the Step-by-Step guide below.
Step-by-Step
Step-by-Step
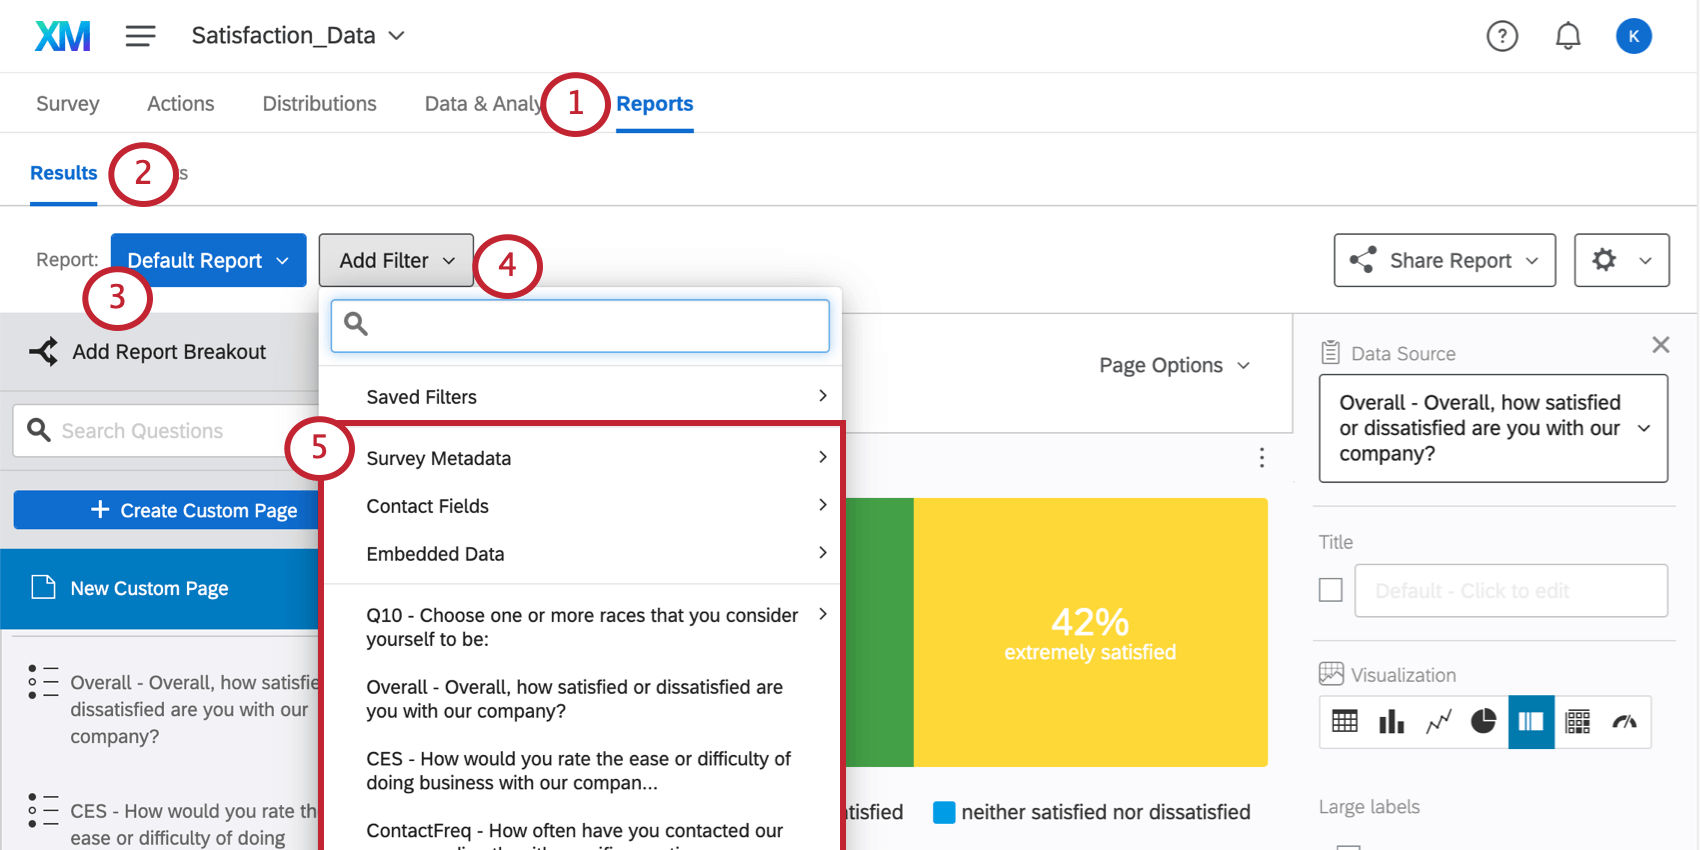
- Question Answers: Note that each question type has unique filtering options. Qtip: To learn more, visit the Fields You Can Filter By section.

- Survey Metadata: Includes information automatically collected when a respondent takes a survey, such as Start Date, End Date, Response Type, IP Address, Duration, Finished, and Recorded Date. Qtip: To learn more, visit the Fields You Can Filter By section.
- Contact Fields: This consists of the default recorded contact fields (e.g., Recipient Last Name, Recipient First Name, Recipient Email, External Reference, and Distribution Channel). These will only be recorded if the survey response is connected to a contact list.
- Embedded Data: Extra information is recorded in your survey beyond your question responses. Embedded data consists of fields and values that can be accessed effectively by filters. Field names act as your variables (e.g., Gender, State, Status). Fields can have multiple values (e.g., the field Canadian Provinces may have Ontario, Newfoundland, and British Columbia as values). Qtip: If you are new to embedded data, check out the Embedded Data support page.
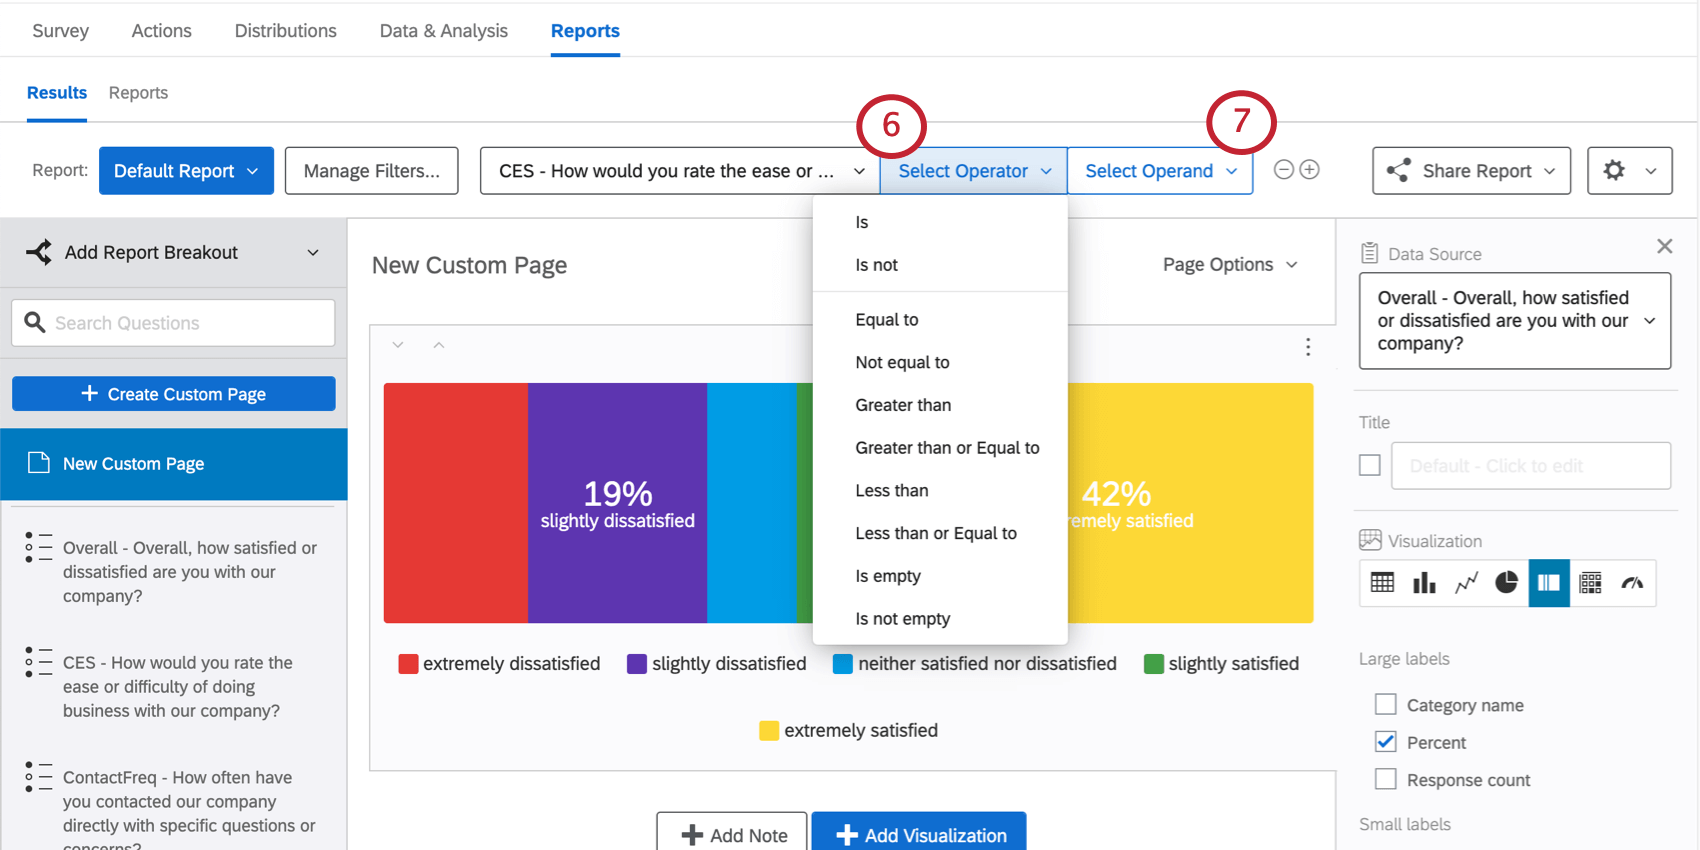
Follow the below steps to learn how to add a filter.

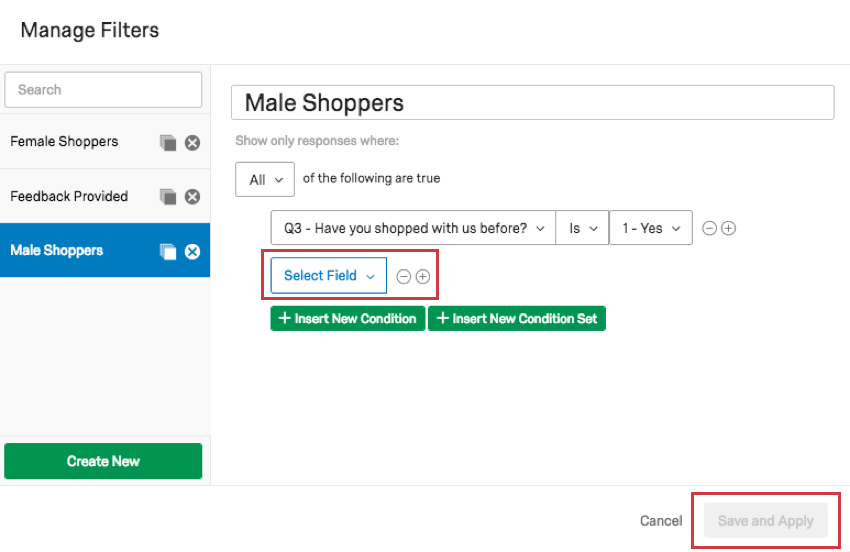
Saving and Reloading Filters
Any time you add more than one condition to your filters, you are creating a filter that will be saved for later. This section will discuss creating and managing these saved filters.
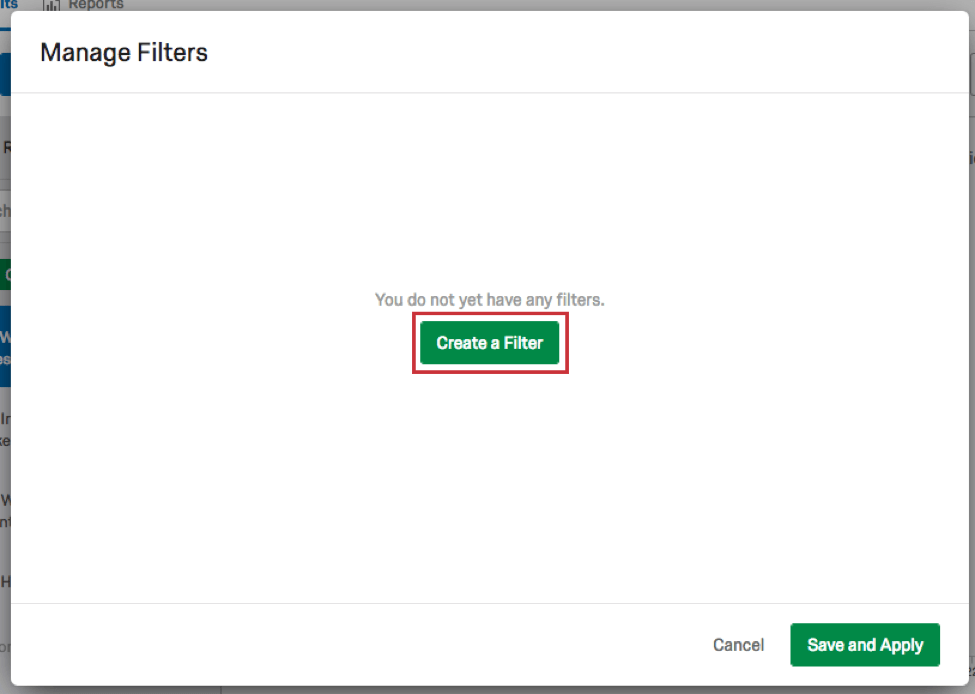
Saving a Filter
Qtip: Be sure not to leave the page before saving!
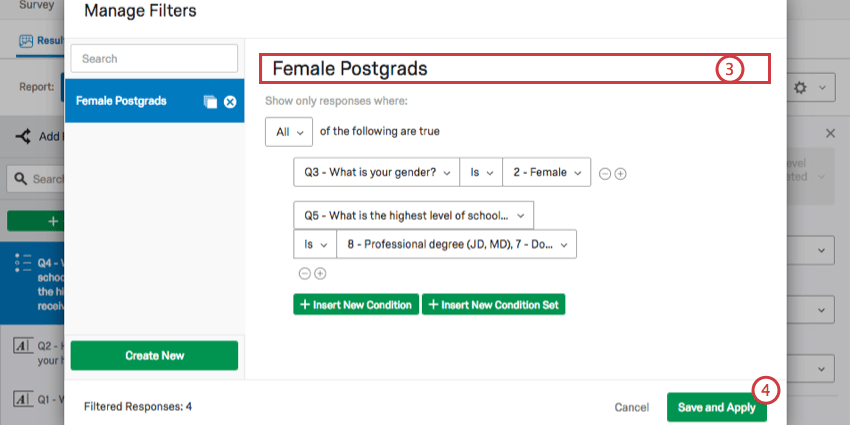
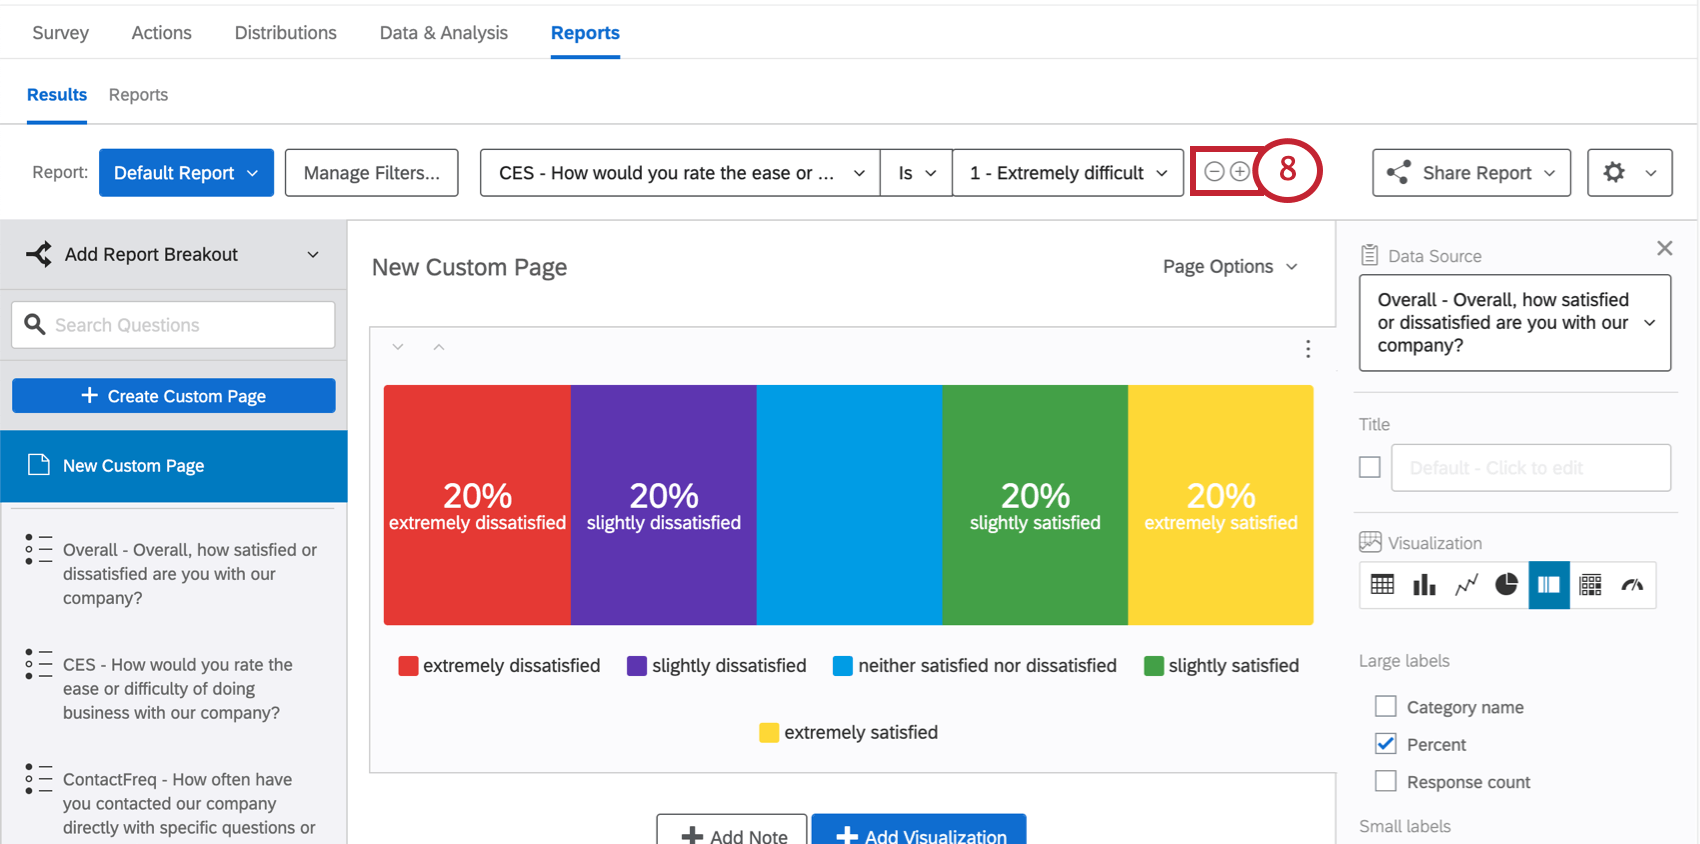
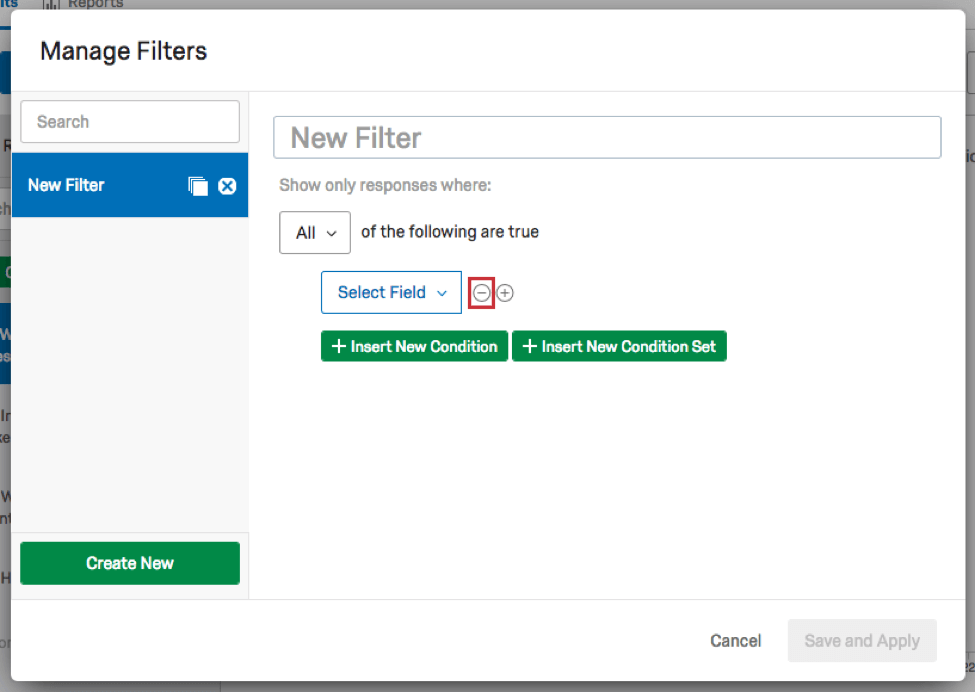
Qtip: This button will not be clickable until you make sure all your conditions are complete. Click the minus sign ( – ) to remove any incomplete conditions you do not want to complete or have added accidentally.

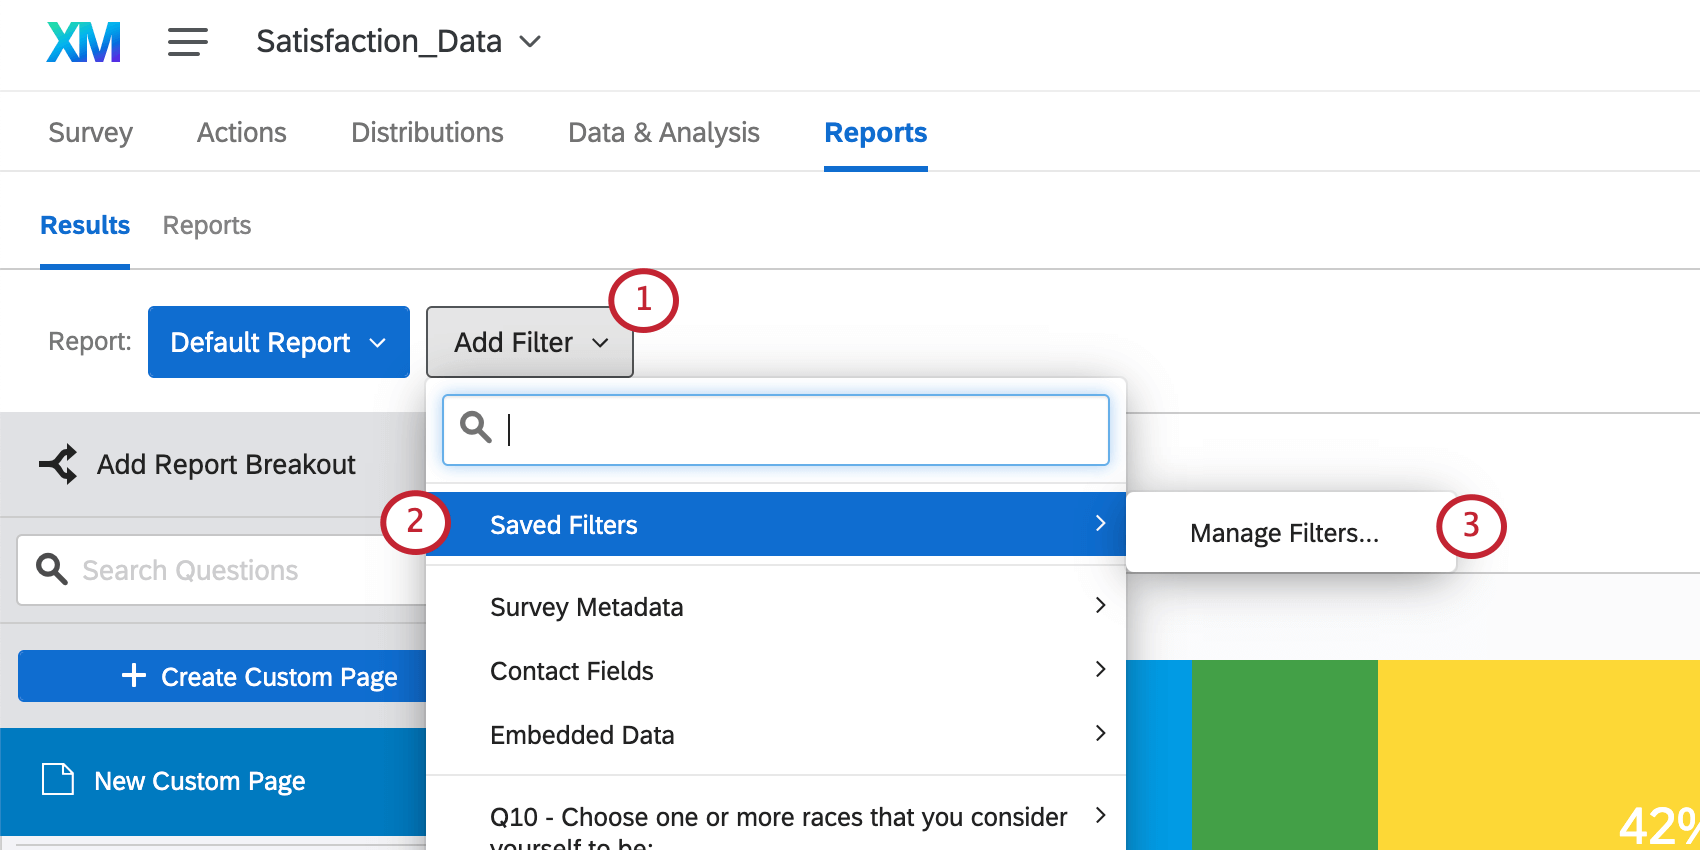
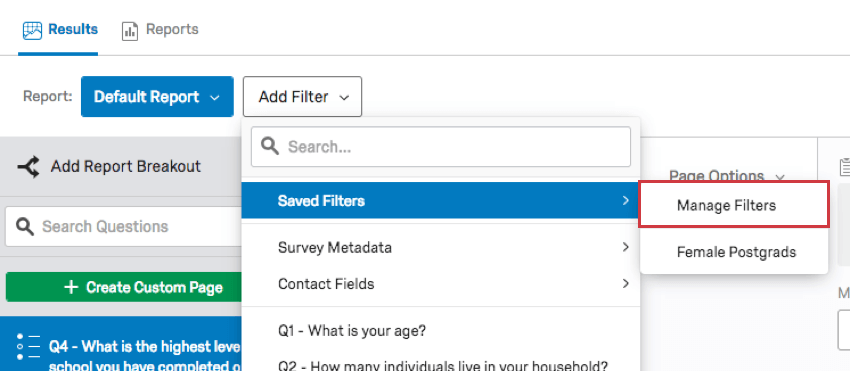
Qtip: You can also open the Manage Filters window by clicking Add Filter, selecting Saved Filters, and then clicking Manage Filters.

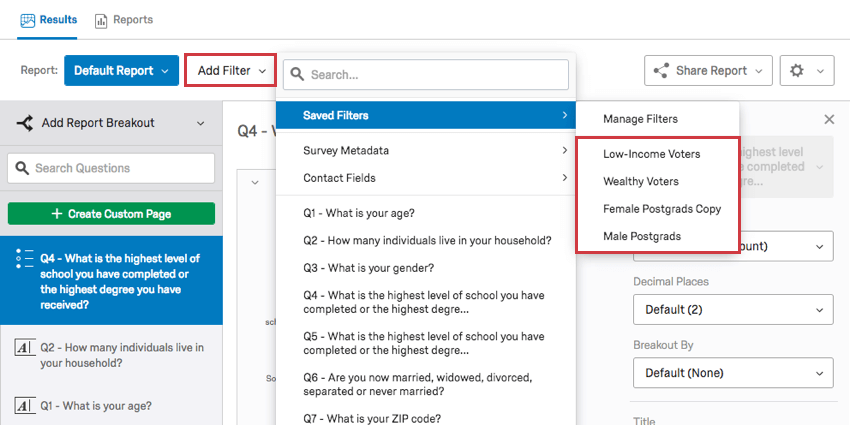
Loading Saved Filters
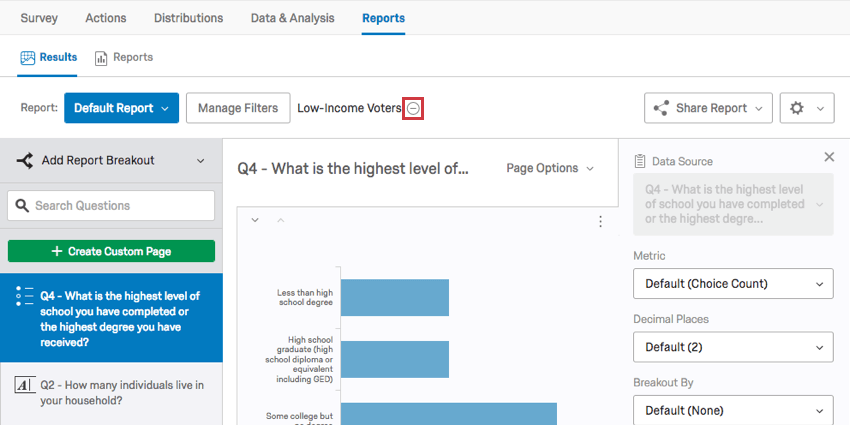
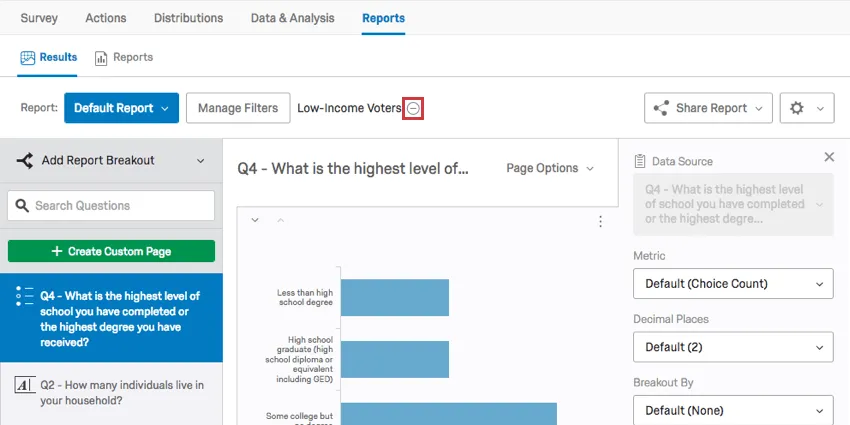
To select a preexisting filter to use, click Add Filter, select Saved Filters, and then select the desired filter.

To temporarily remove a saved filter, click the minus sign ( – ) next to it.
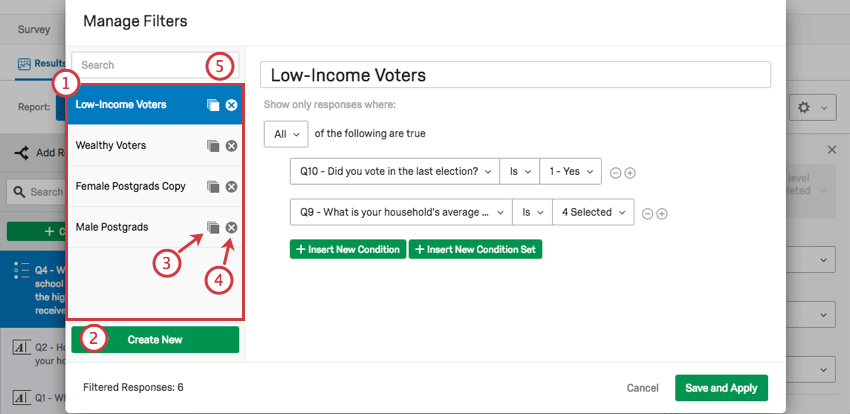
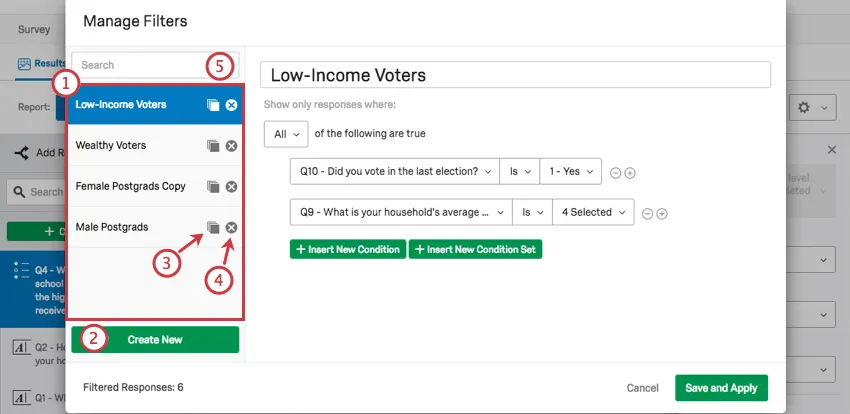
Managing, Copying, and Deleting Saved Filters
You can manage your filters by navigating to the Manage Filters window. The following options are available to you.
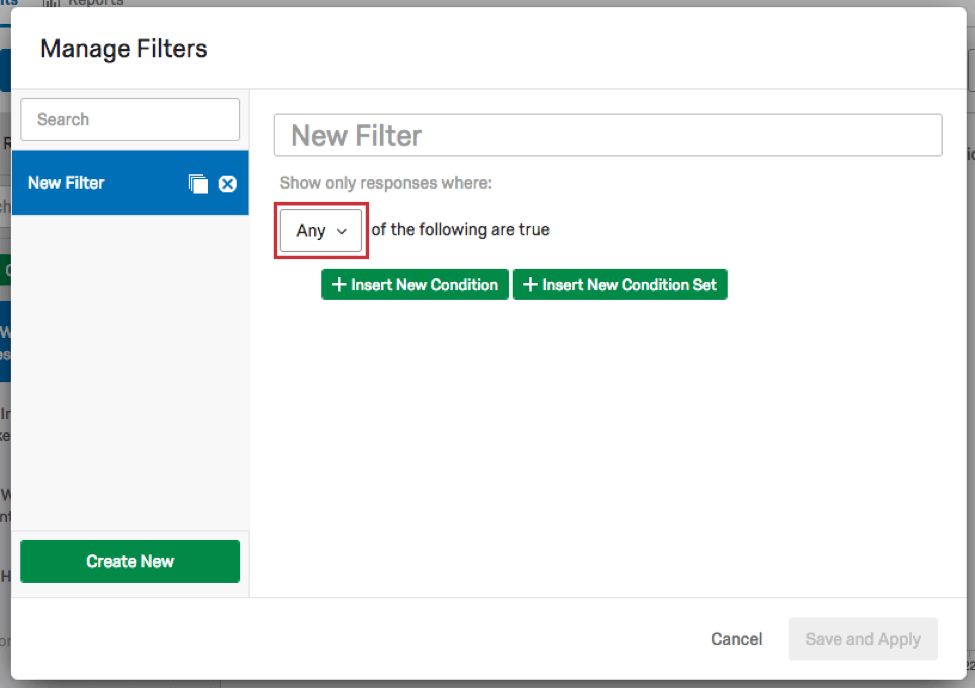
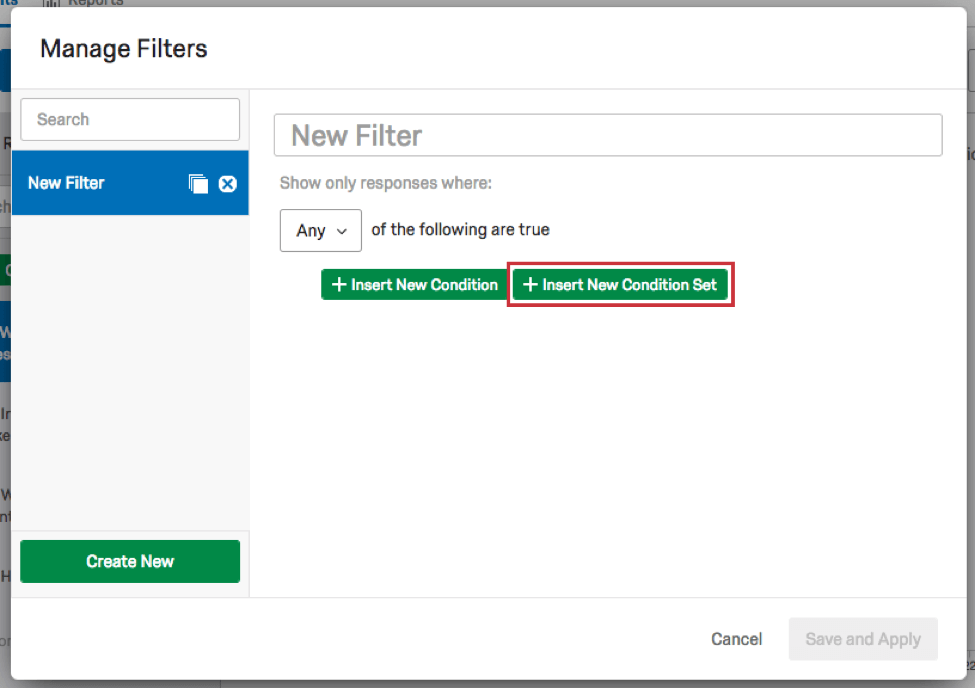
Conditions and Condition Sets
Filters work the same in Data & Analysis as they do in Reports – in fact, the filters you create there also appear in Results-Reports, and vice versa!
To learn more about building the conditions of your survey, see the following sections of the Filtering Responses support page:
FAQs
Why is my contact list information not appearing in any of my reports?
Why is my contact list information not appearing in any of my reports?
If you forgot to put Embedded Data in the Survey Flow, you can add it to your data retroactively, so long as there are values in the contact list. See the Embedded Data support page for further instruction.
Note that if the contact list information you’re trying to download was not included in the contact list at the time the members took the survey, retroactively adding the Embedded Data fields to the Survey Flow will not add that information to the reports later.
Can I break down the information in a visualization into groups based on other data?
Can I break down the information in a visualization into groups based on other data?
See Breakouts for Advanced-Reports or Breakouts for Results-Reports, depending on the reporting you are using.
That's great! Thank you for your feedback!
Thank you for your feedback!