

Programs
What's on this page
About Programs
Programs are a means of organizing different related projects in 1 container. The key difference between programs and folders is that programs come with guidance and a means of sharing the entire program with your colleagues.
Available Programs
There are several types of programs to choose from. Each program has a different purpose and components. See the linked pages for details specific to these programs and instructions for getting started.
- Customer Experience Program: The Customer Experience Program provides guidance on best practices in customer experience program management. This program does not contain prebuilt surveys or dashboards, but allows you to use your own content or choose from available libraries of certified surveys and questions.
- Digital XM Solution for Commerce: The Digital XM Solution for Commerce uses best practices to help you understand customer needs and preferences, leading to insights that can improve customer conversion and retention. This pre-built Digital CX program contains pre-built surveys, digital intercepts, and dashboards designed by experts to help you quickly launch your digital customer experience program.
- Candidate Experience Program: The Candidate Experience Program allows you to continuously measure and act on candidate feedback across recruiting touchpoints. This EX program contains pre-built surveys, a dashboard, and an optional Website / App Insights project.
Creating a Program
To create a program, go to the catalog and select the type of program you want to create. You can create a preexisting program or create your own program from scratch.
Preexisting programs have expert-designed surveys, dashboards, and intercepts already created for you, and include solutions like the Digital XM Solution for Commerce.
When you create a program from scratch, you can add projects to it as needed. To create your own program from scratch, select Customer Experience Program.
Projects in a Program
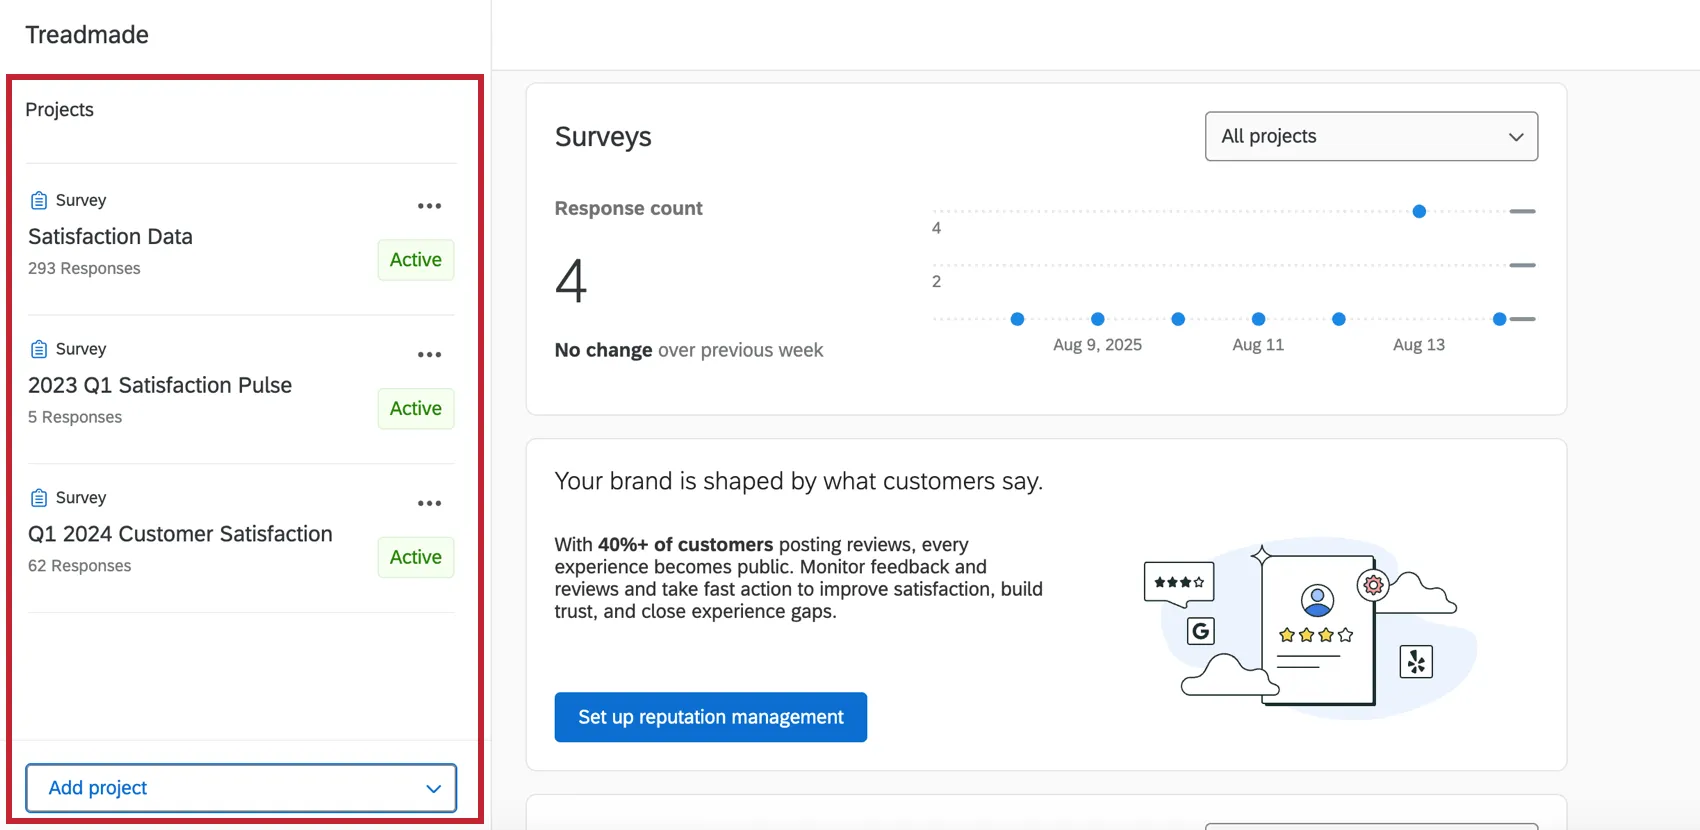
Once you’ve created a program, all the resources for your program are listed on the left side of the page. Customer Experience Programs do not have any pre-built resources, so this list will be blank until you add projects to your program.
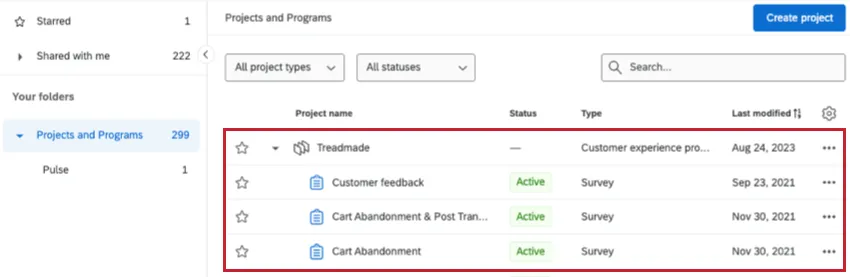
Qtip: These individual projects are not only listed in the program, but also on the main Projects page, when you expand the arrow next to the program.

Adding projects to a program
You can create brand new projects from scratch from right inside a program, or you can move existing projects into programs.
Get started by clicking Add project.
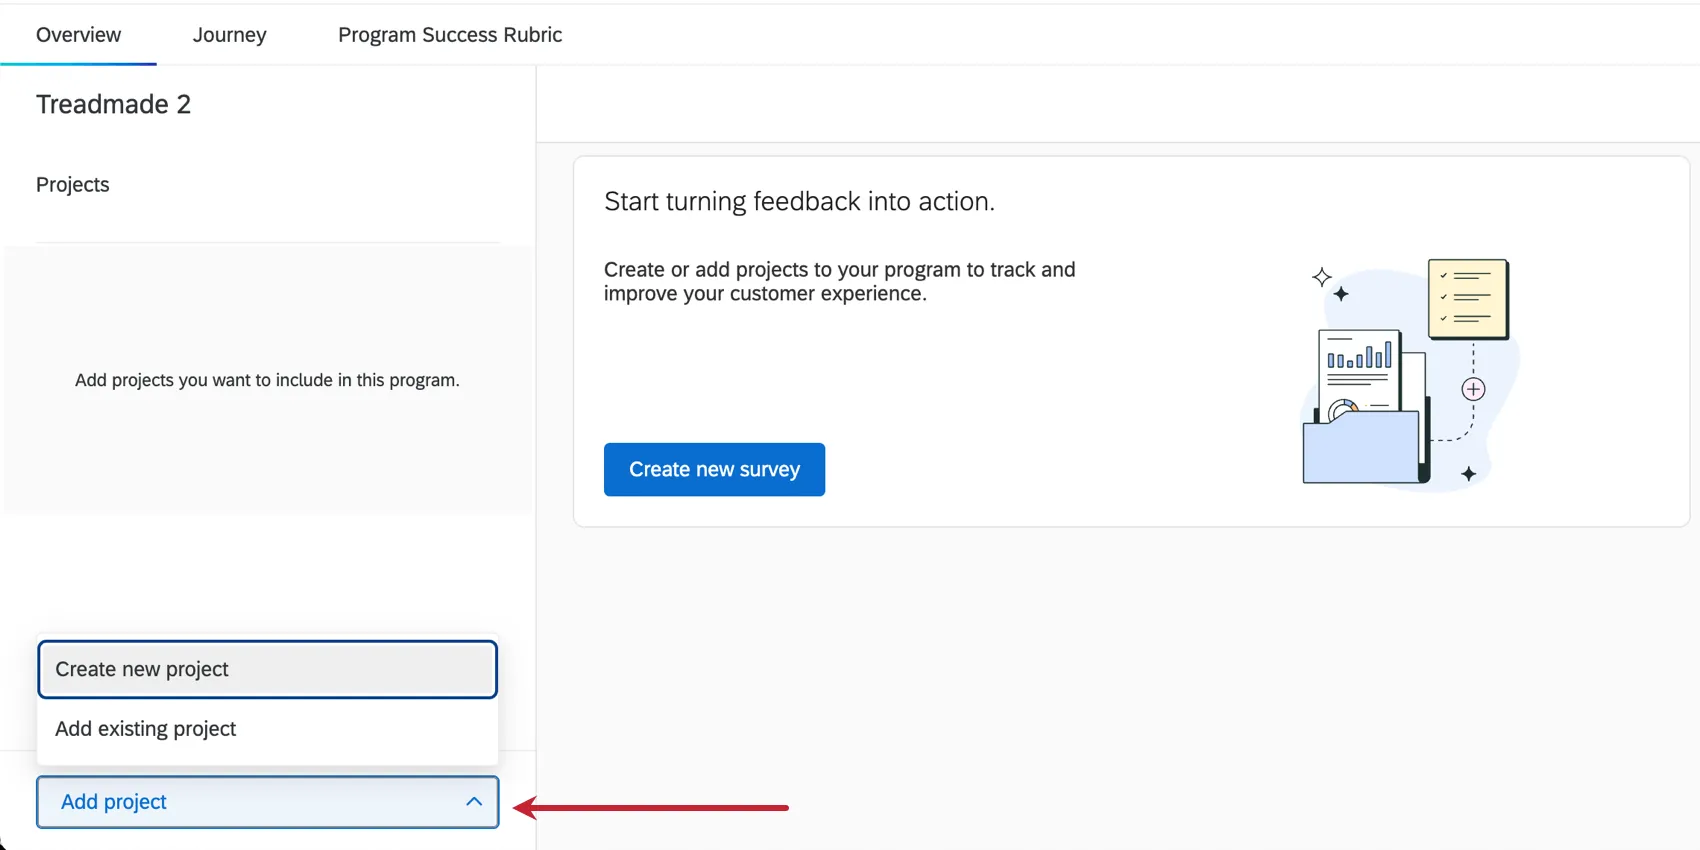
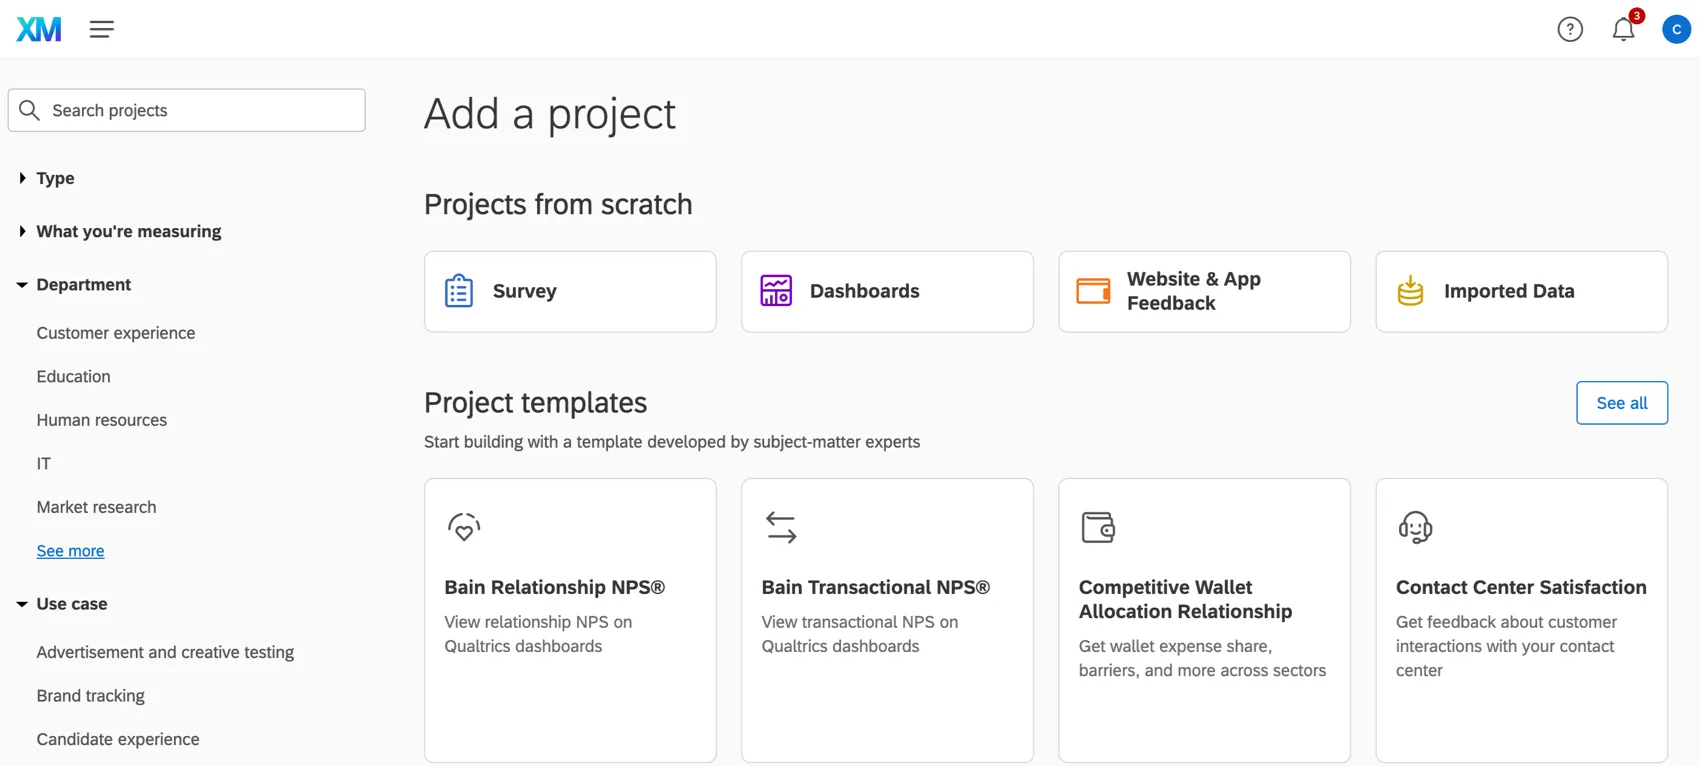
Create new project: Create a new project. The steps will match creating something new from the Catalog page, although you may have fewer options available for the sorts of projects you can create.
Add existing project: A new window will open where you can select from a list of your existing projects. Projects that are incompatible will be grayed out; an individual project cannot belong to more than 1 program at a time.
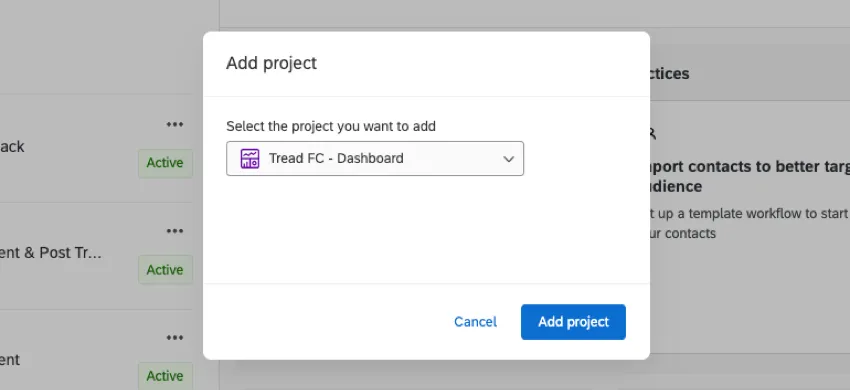
Qtip: Although you can drag and drop items on the Projects page, this functionality cannot be used to put projects into a program, or to take them out.
Removing projects from a program
You can remove a project from the program without deleting it entirely. Click the dots next to a project and click Remove. You may need to scroll to see this option. Once a project is removed from a program, it will appear on your Projects page.
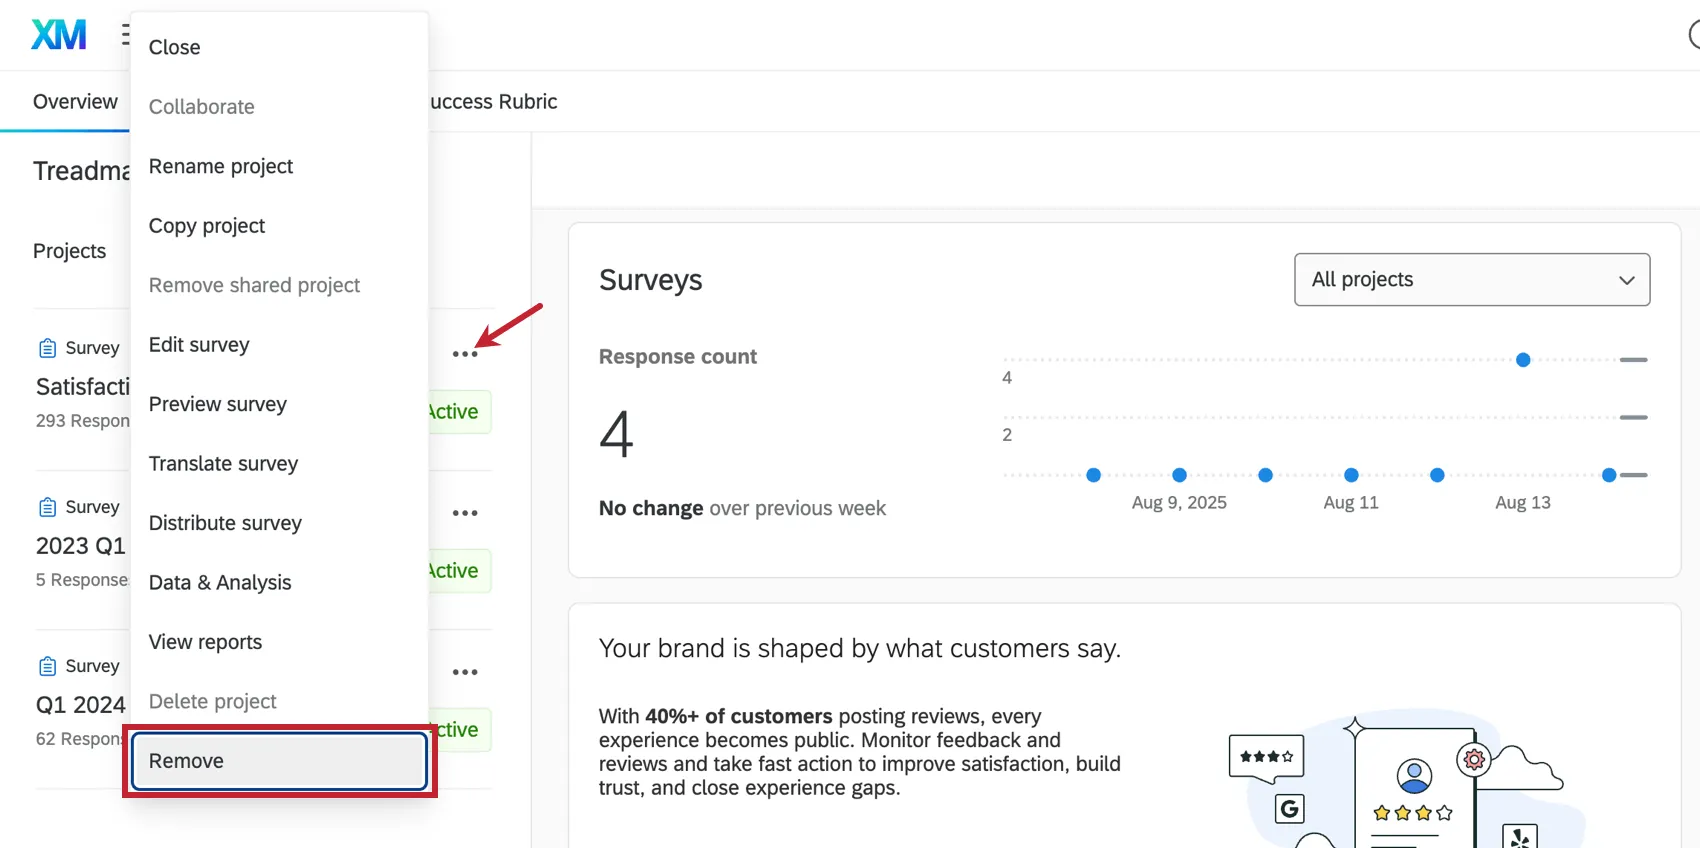
Qtip: If you remove a project accidentally, it’s no problem – you can add it back at any time.
Managing projects within a program
When you click the dots next to a project, you’ll see many of the same actions you’d see if you were accessing it on the Projects page. Actions vary based on the type of project. For more information, see the following resources.
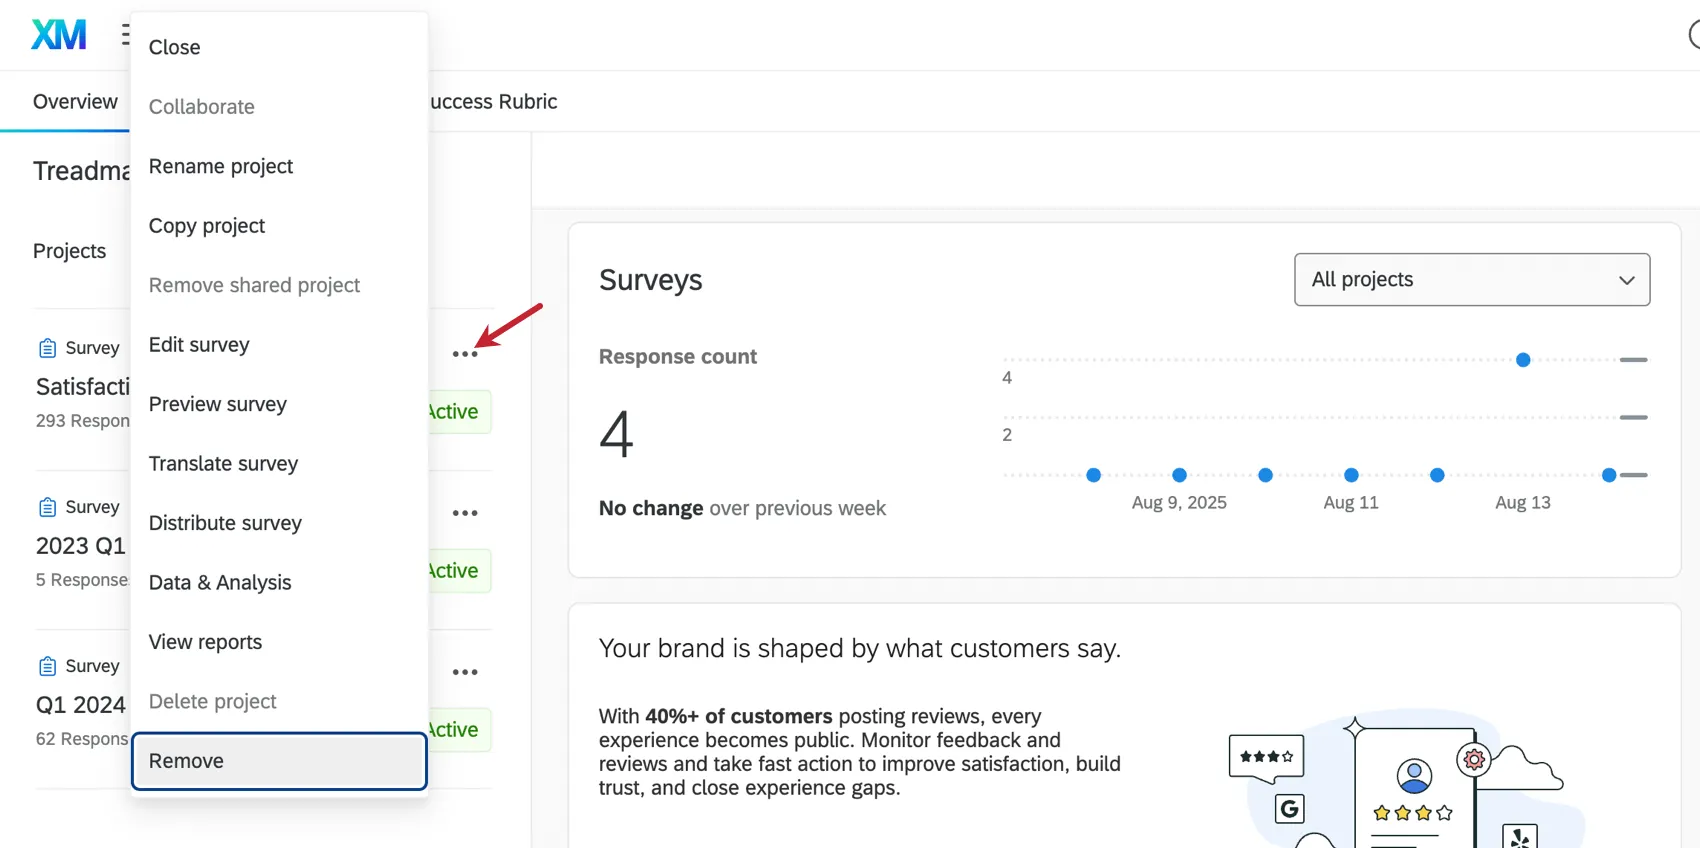
Guidance
Programs with pre-built components have a guidance sidebar instead. It’s equipped with links straight to your projects and to support pages with additional details that can help you get started.
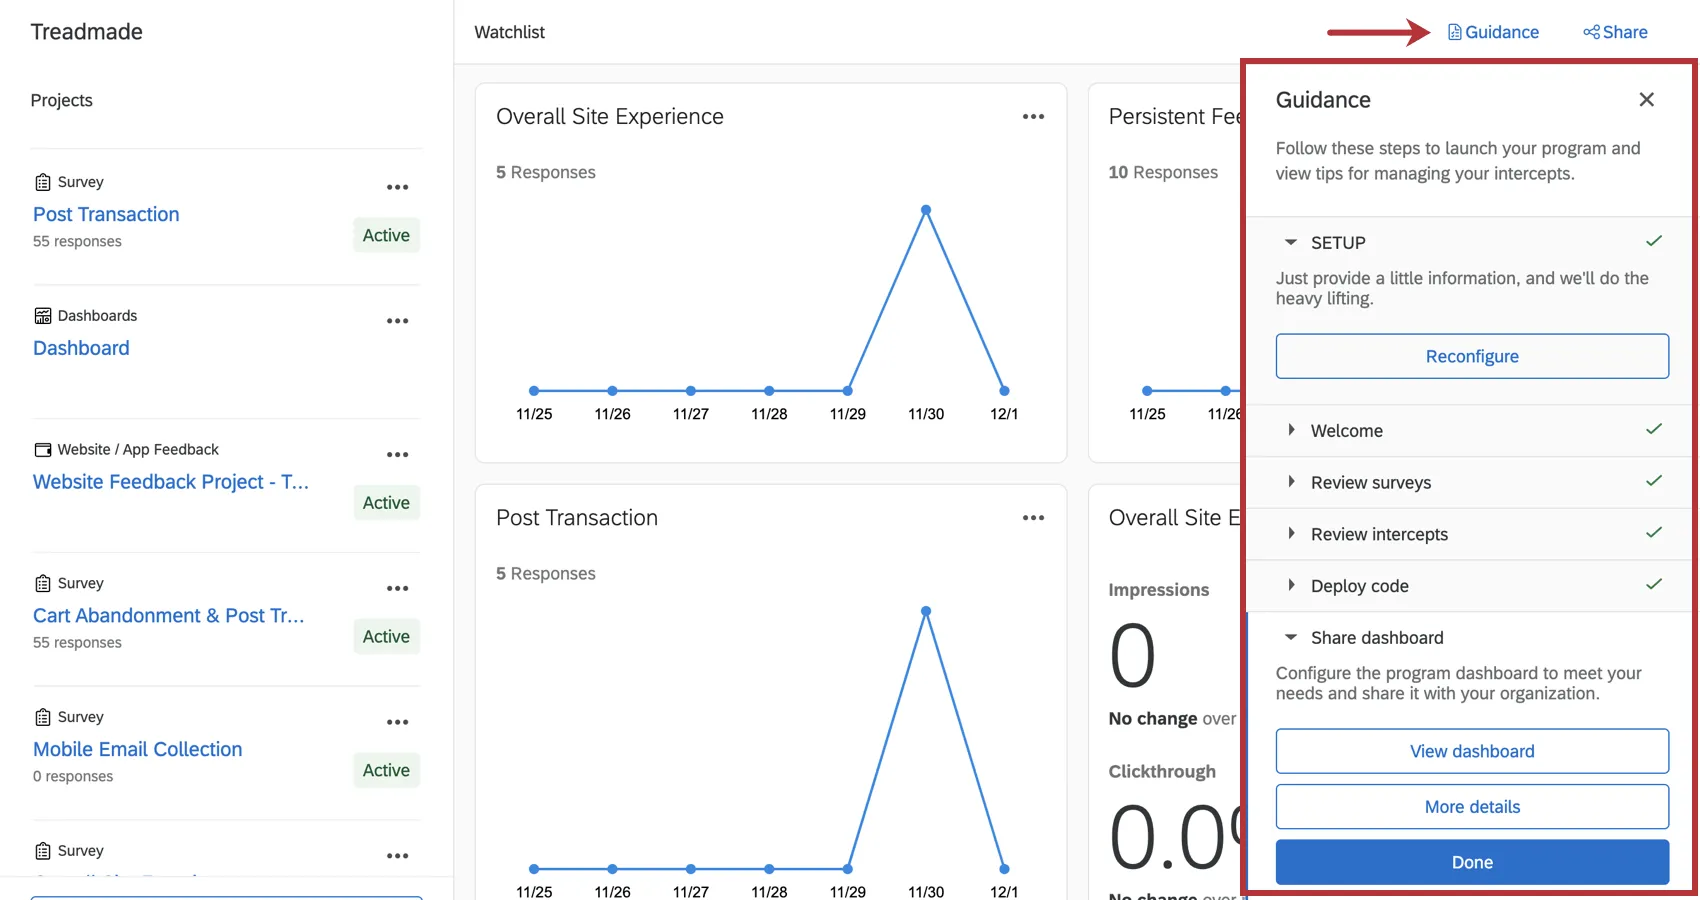
As you click through the steps, they will be marked as complete. This sidebar also allows you to reconfigure the program – we do not recommend this unless you are comfortable losing data in order to start over. Steps can be expanded or collapsed as needed.
Sharing a Program
You can share your entire program with other members of your organization. Anyone you share the program with will have the same level of access you do – that means they will be able to edit all projects, delete projects from the program, delete the program, view guidance, and invite other users to collaborate on the program.
Qtip: Guidance is only available when sharing Customer Experience Programs. Anyone you share solutions with will not have access to guidance.
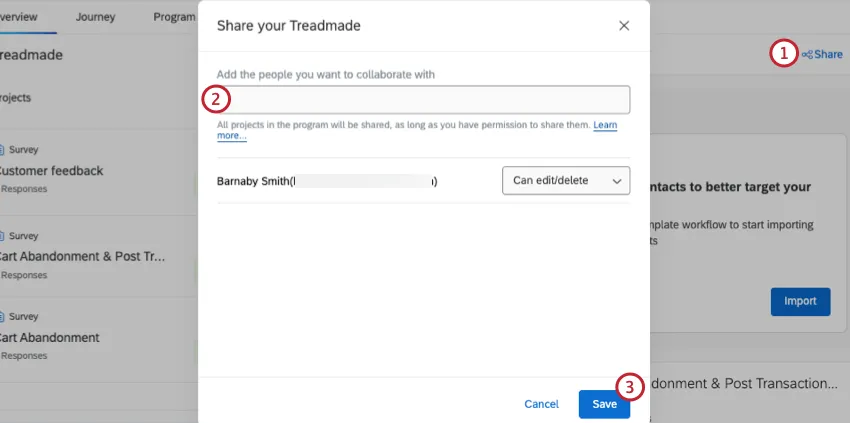
Qtip: Everyone you want to share with has to have an existing Qualtrics account. If you cannot find certain users, reach out to your Brand Administrator. Brand Administrators, see our guides on Creating & Managing Users and User, Group, & Division Permissions.
Once shared, the user can log into their account and either open the Shared folder or search the program by name to find it.
Qtip: You can share a program with any user who has collaboration permissions. However, that does not automatically mean they will be able to edit every project in the program. A Brand Administrator can make sure users have the appropriate permissions, such as “Access Website Feedback” or “Use CX Dashboards.”
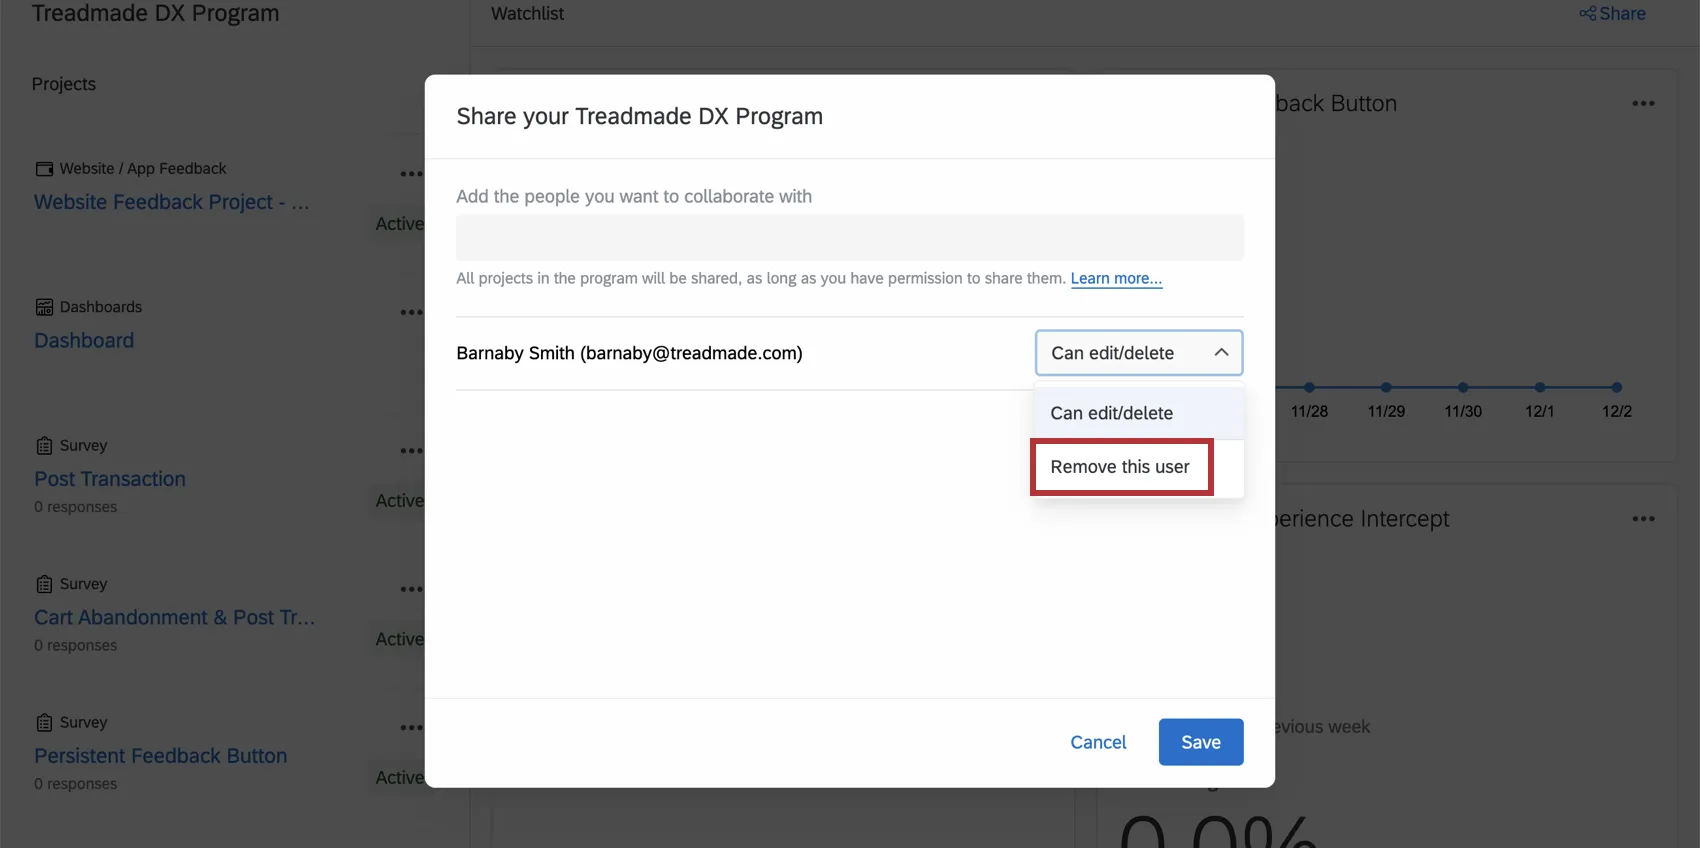
You can remove users you’ve collaborated with by opening the Share menu and using the dropdown to select Remove this user.
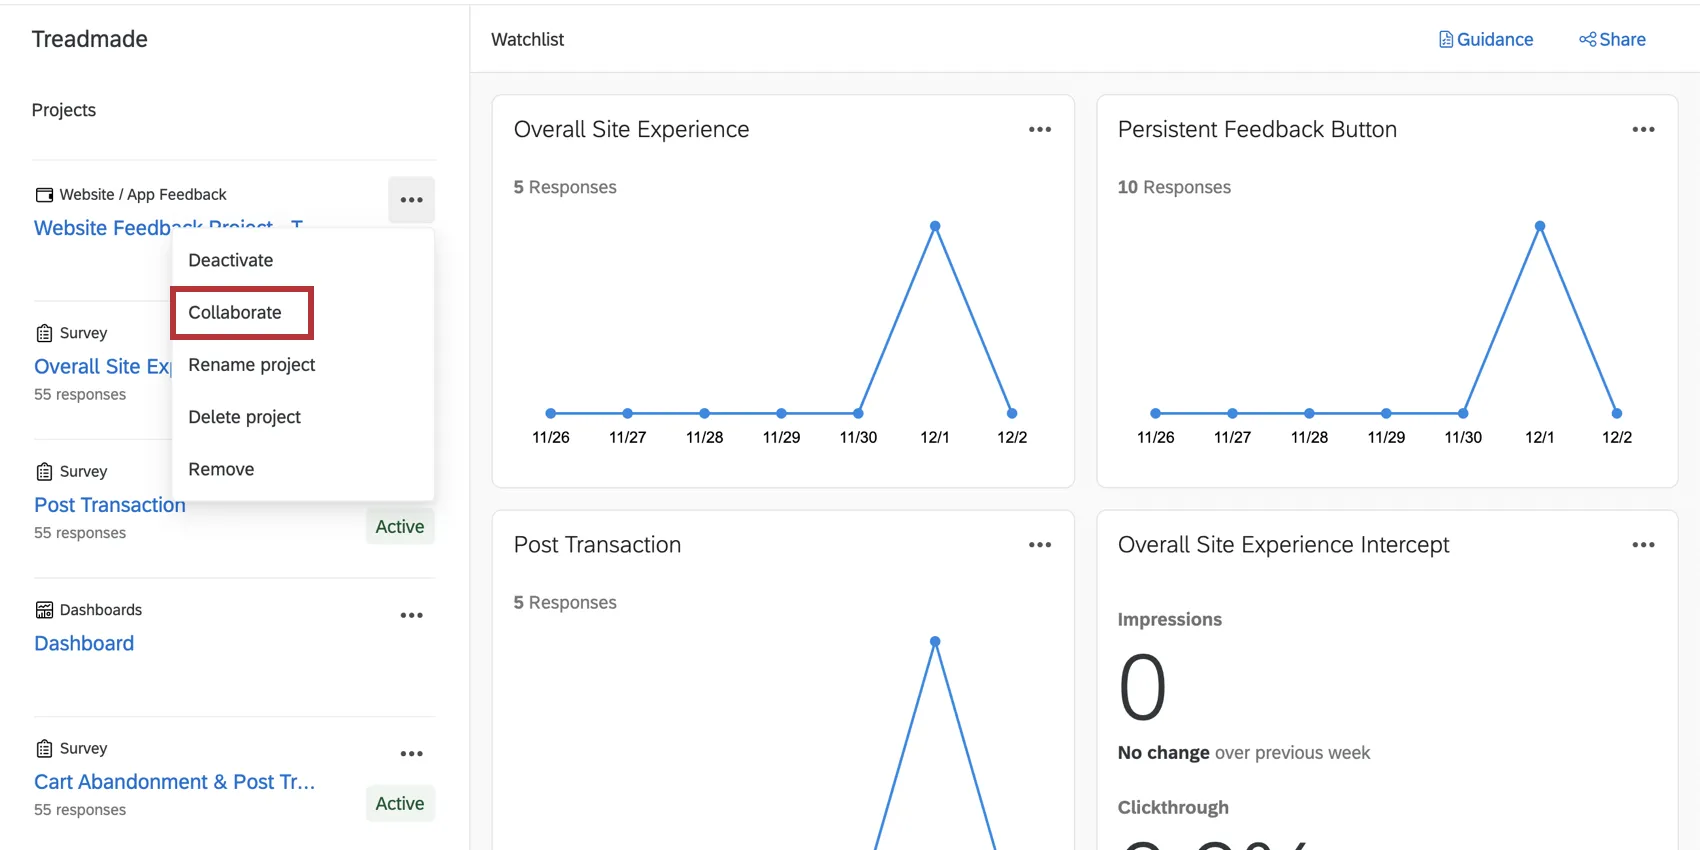
Qtip: You can also invite users to collaborate on individual projects within the program. You can do this by using the dropdown of actions next to each project in the project list. See Survey Collaboration vs. Website / App Insights Collaboration.
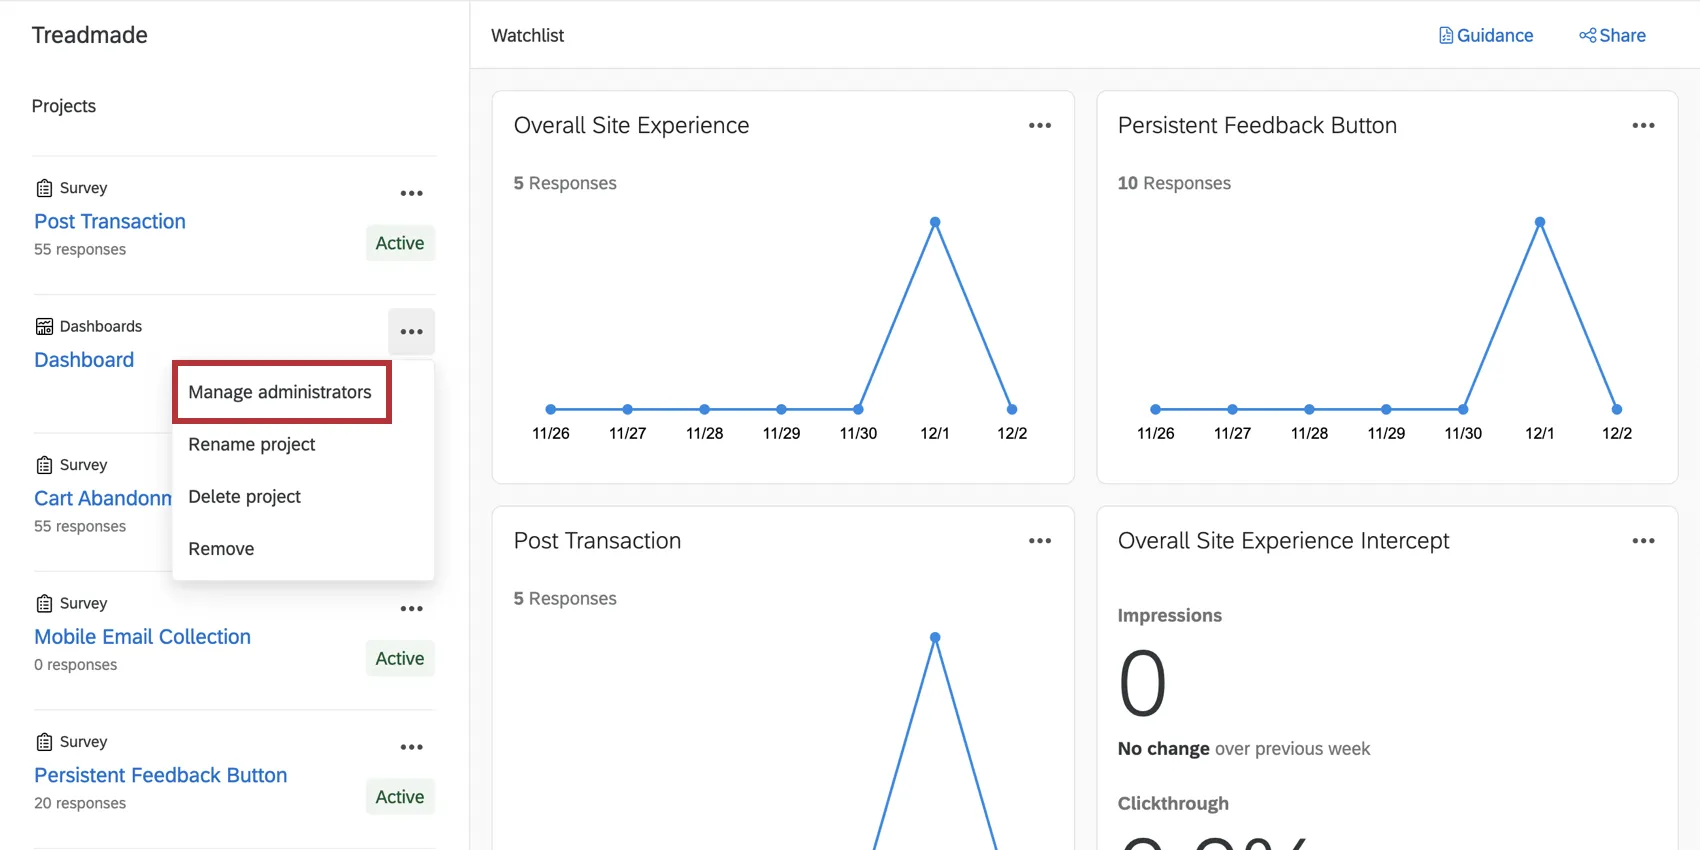
For dashboards, you’ll click Manage administrators, not Collaborate.
Navigating to a Program
In the Projects page, you can search programs by name and sort them into folders, as you would individual projects.
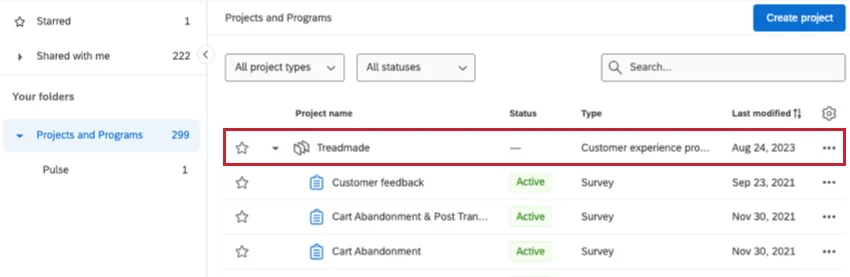
When you click the 3 dots next to a program, you can rename the program or delete it.
Warning: When you delete a program, the projects within the program will still appear within the Projects page, but will no longer be nested within or attached to the program.

That's great! Thank you for your feedback!
Thank you for your feedback!