
Load into a Data Project Task
What's on this page
About the Load into a Data Project Task
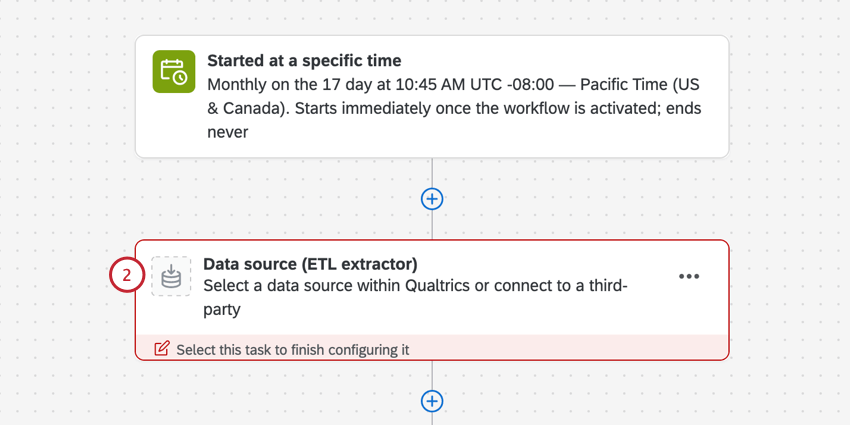
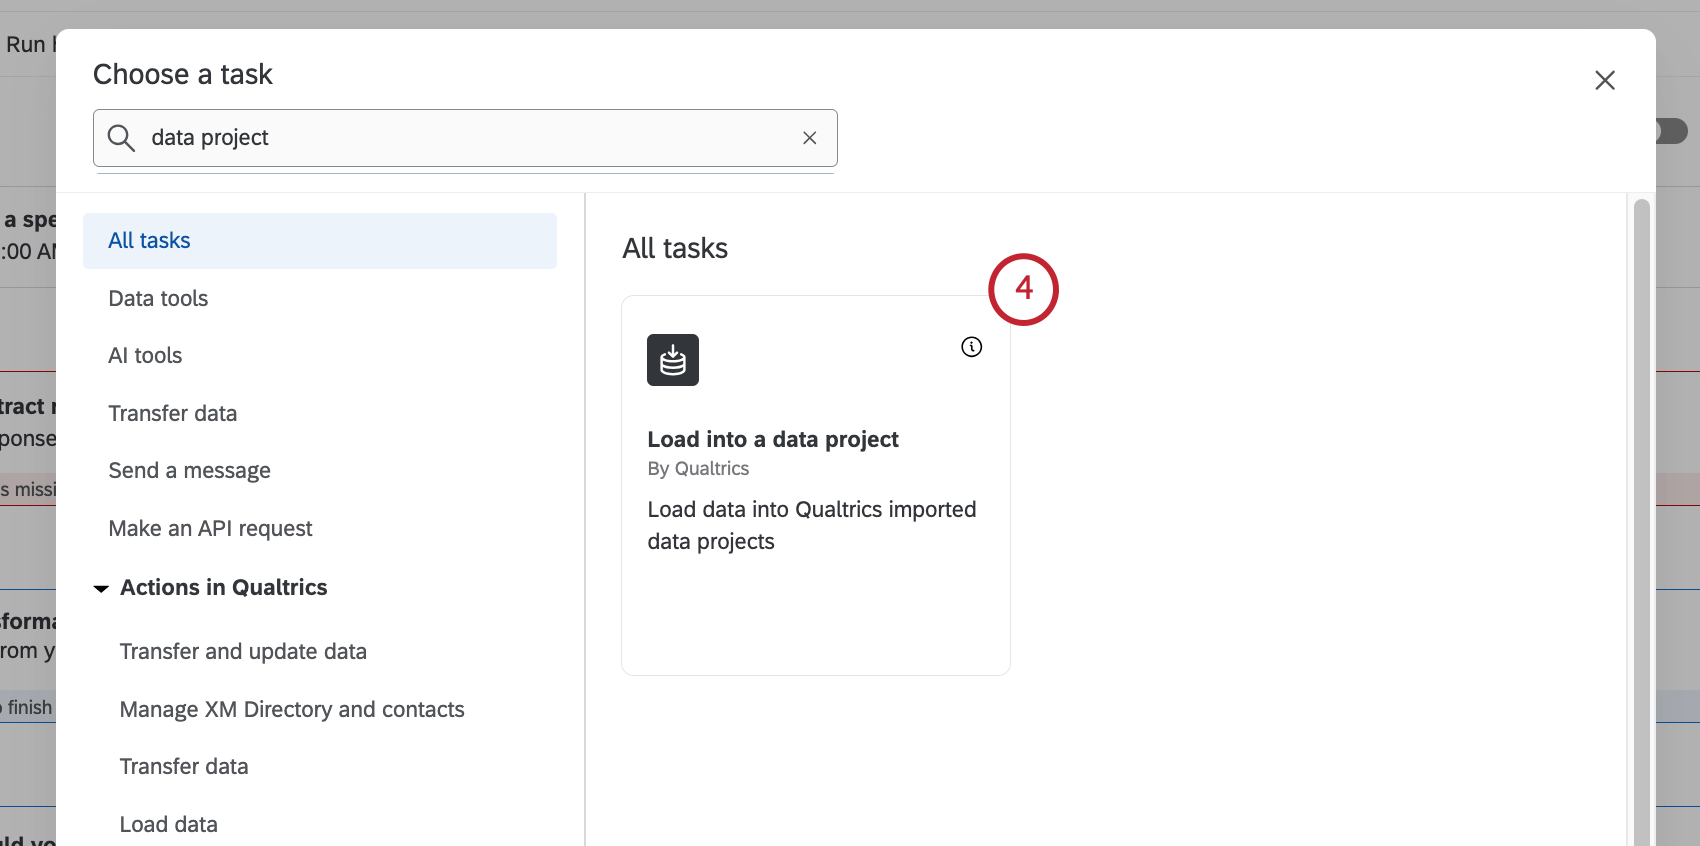
The Load into a data project task allows you to take data that’s been previously imported by a data extractor task, and save that data into a Qualtrics imported data project. You can use this task to add new data records and update existing ones.
Once you’ve loaded your data into an imported data project, you can analyze your data using Stats iQ or a dashboard.
Qtip: After the task completes, it may take up to 1 hour for the data to be available for use in other workflow tasks.
Qtip: For more information on using data loading and extracting tasks, see using Workflows tasks to build ETL workflows.
Qtip: For information on general limits that apply to ETL workflows, see Workflow Limits. For any task-specific limits, refer to the information on this page.
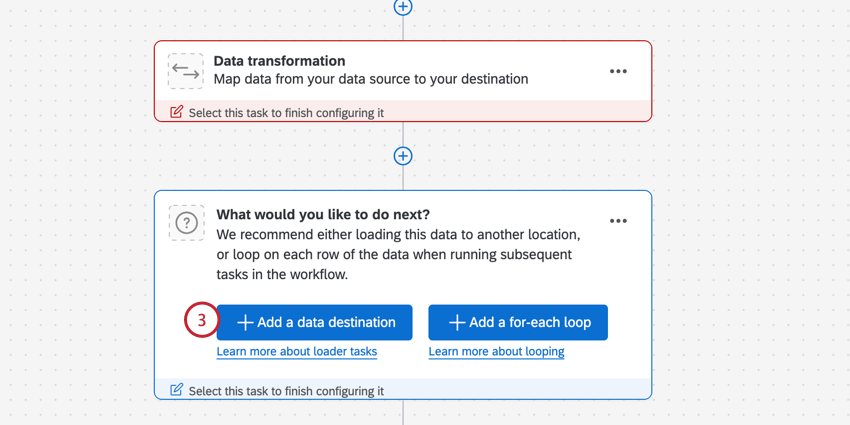
Setting Up a Load into a Data Project Task
Qtip: Before setting up your workflow, make sure you’ve already created your imported data project.
Qtip: For file size limits on data extractor tasks, see ETL Workflow Limits.
Qtip: For information on how to format date fields, see Custom Date Formats.
If you’d like to visualize your imported data project in a dashboard, see importing data as a CX dashboard source.
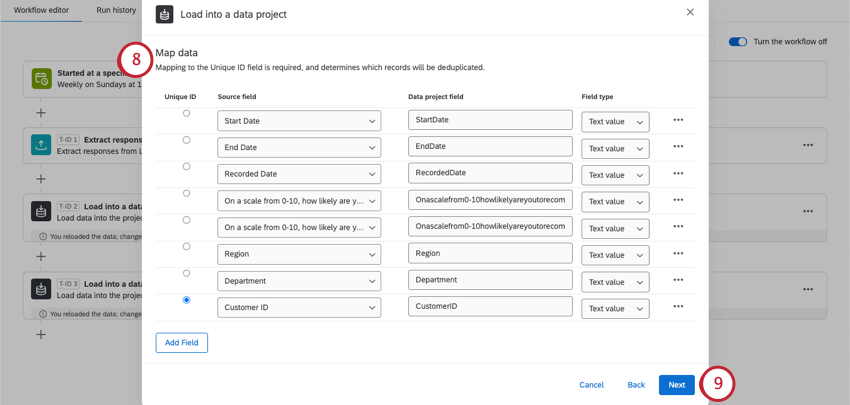
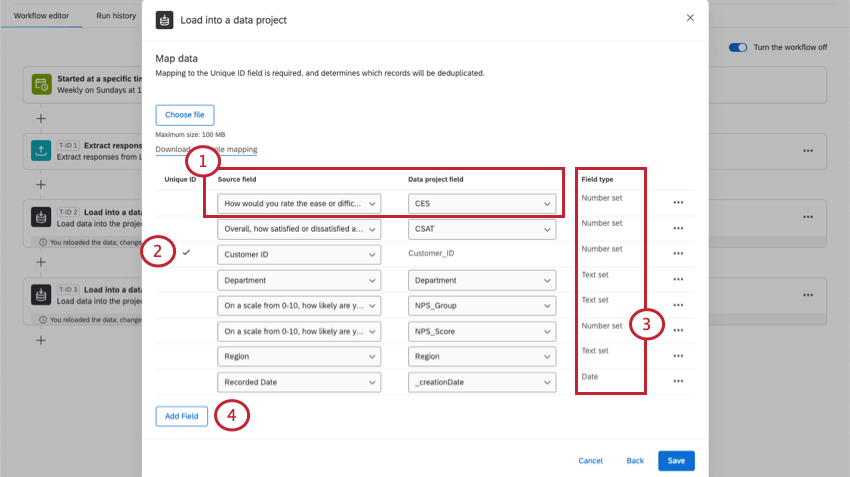
Mapping Source Fields to Data Project Fields
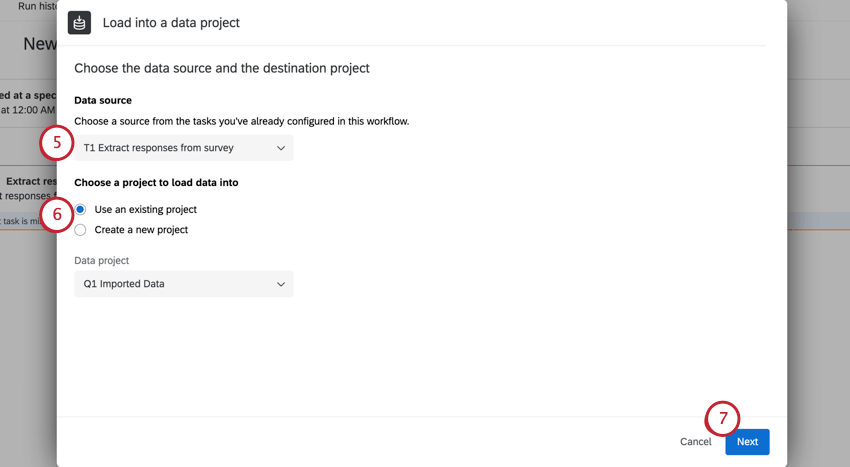
The source is the data pulled from your data extractor task. The data project is the existing or new imported data project you’re uploading the data to.
Attention: The Unique ID must have a unique value for every record in your file. This field can’t be empty.
Qtip: When data is imported, entries will be deduplicated by the specified unique ID field when setting up your imported data project. See the linked support page for more information. If your imported data project doesn’t already have a Unique ID, you won’t be able to update existing records in your project, only upload new ones.
Mapping to an Existing Project
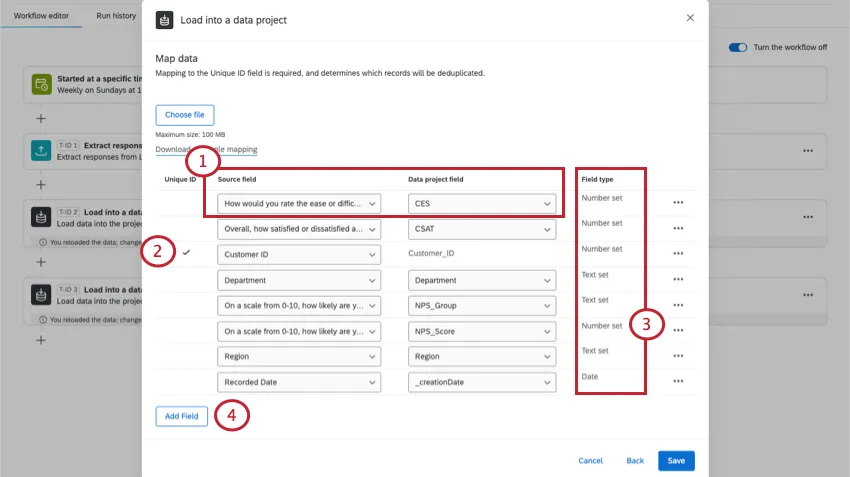
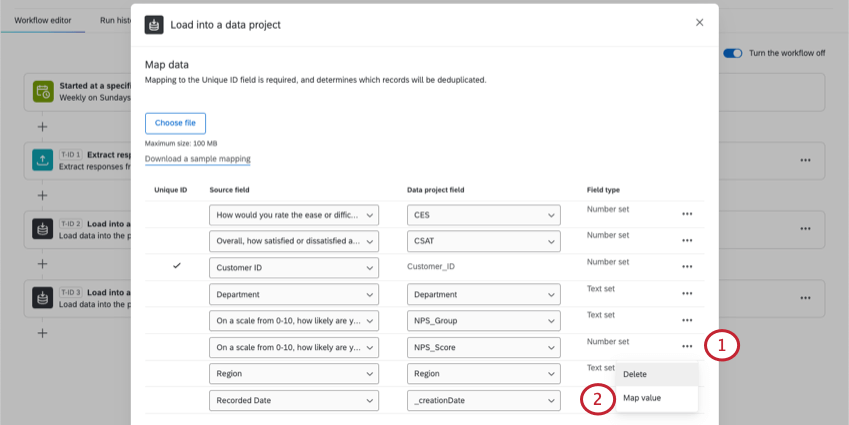
Qtip: Sometimes field names will vary across sources, especially with metadata. For example, surveys have “Recorded Date,” which is similar to an imported data project’s “creation date.”
Qtip: Not every field will have an equivalent. For example, imported data projects have a “last updated date,” but surveys don’t have anything similar. You can delete a field if it doesn’t exist in both sources.

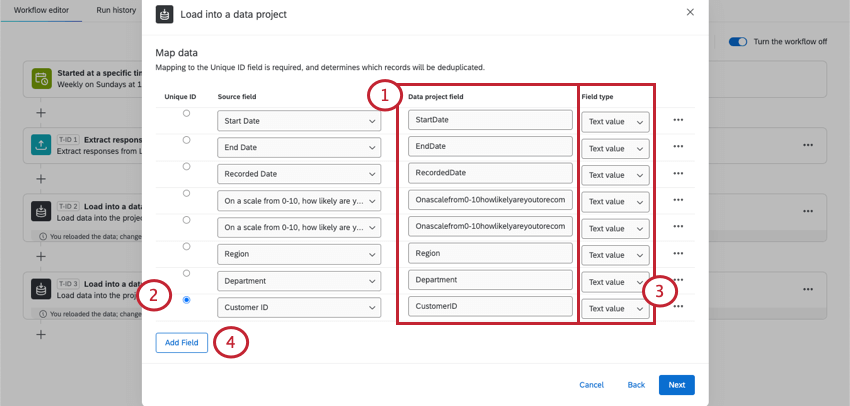
Mapping to a New Project
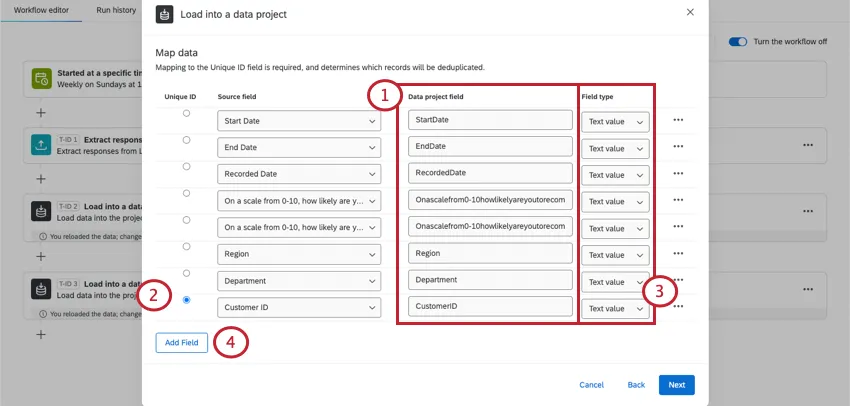
Once you complete this step for the first time, your project will be created immediately. That means that when you edit this task, you will be able to edit mappings, but you won’t be able to rename columns or choose different field types or assign a new Unique ID. To rename columns and change field types, you can find the project on the Projects page and edit it directly.
Qtip: Make sure to delete any fields you don’t want to appear in your new imported data project.
Uploading Field Mappings
For new or existing projects, you can choose to upload field mappings instead.


Qtip: Make sure columns match the same fields together. Exclude columns of data you don’t want to include in the imported data project.
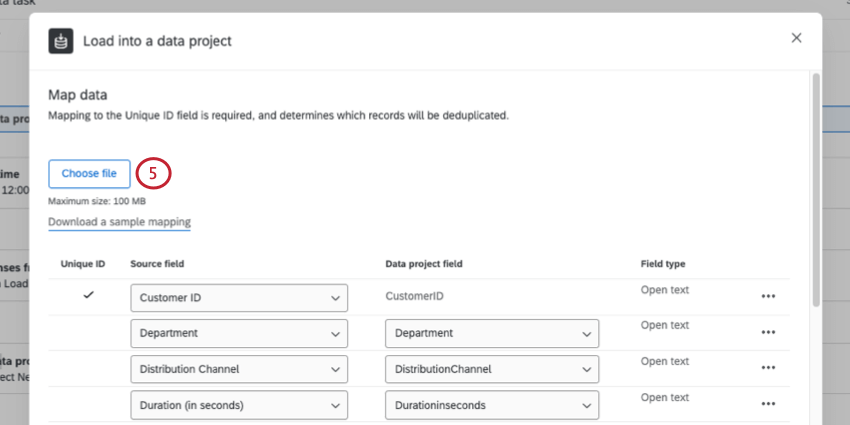
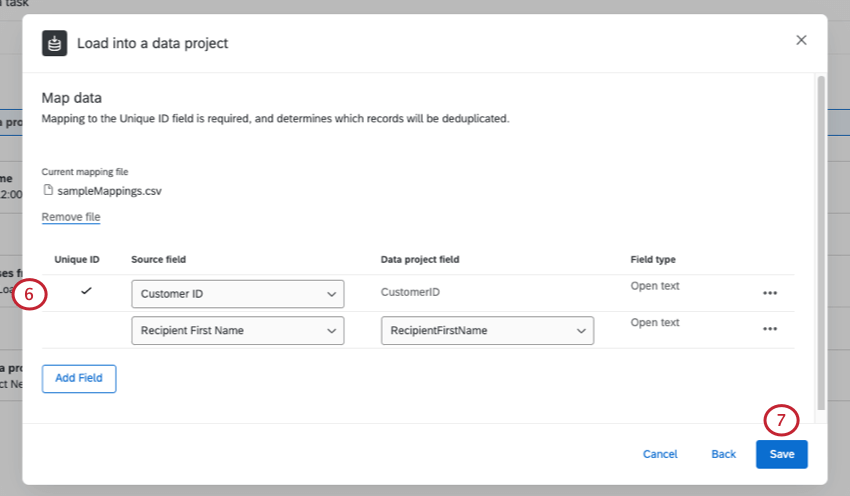
Qtip: You can click Remove file if you want to upload a new file.
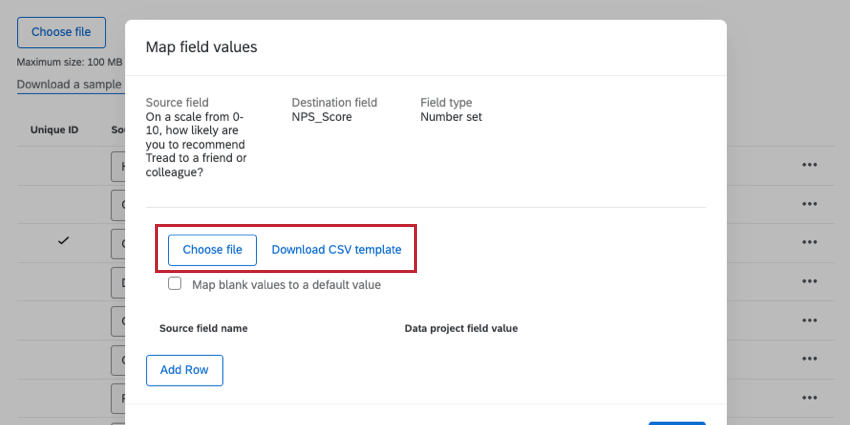
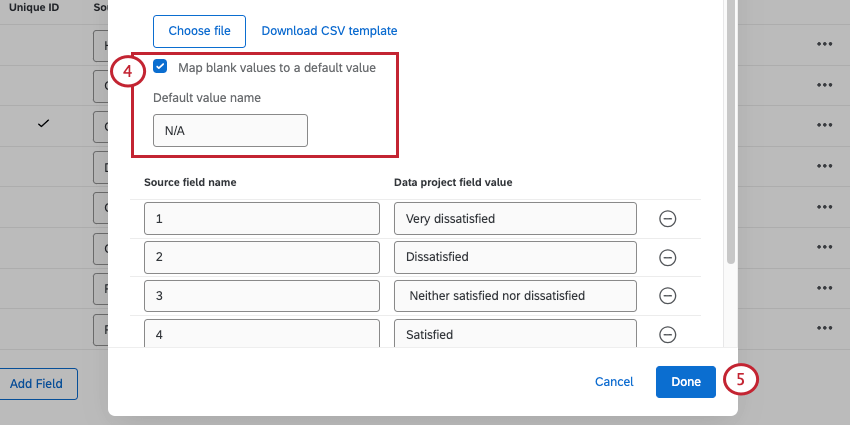
Mapping Field Values
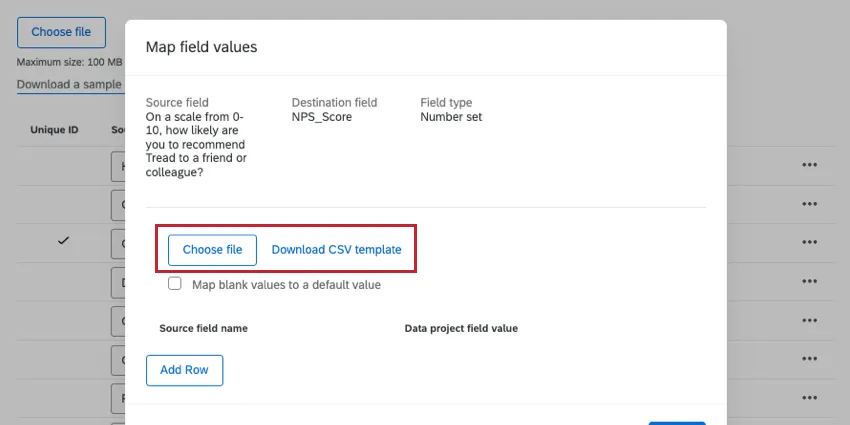
In addition to mapping fields to each other, you can also map individual values.
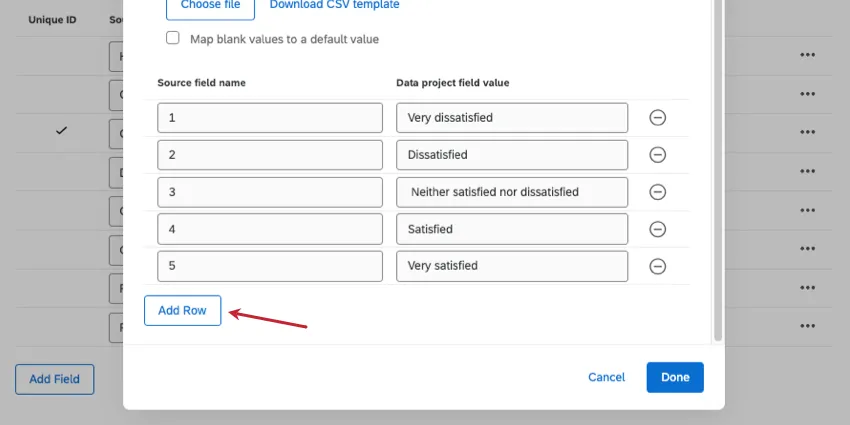
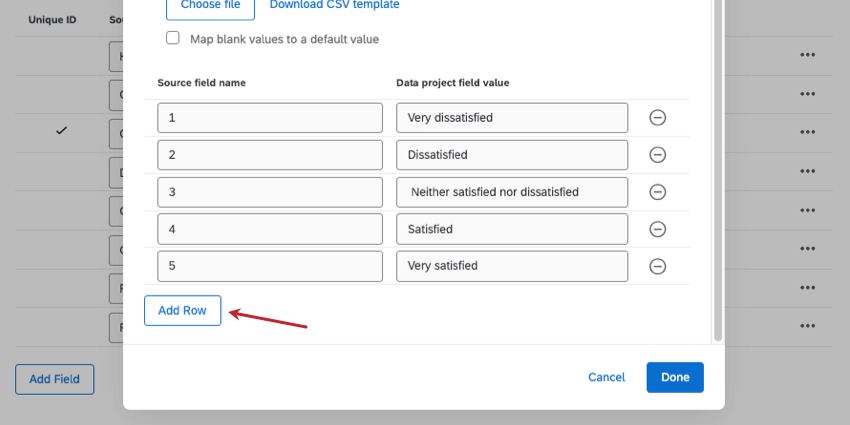
Example: You’re pulling data from a survey into another destination, like an imported data project. One of these fields is a satisfaction rating question. You’d like to rename the different satisfaction ratings like this:
- 1 should become Very dissatisfied
- 2 should become Dissatisfied
- 3 should become Neither satisfied nor dissatisfied
- 4 should become Satisfied
- 5 should become Very satisfied
Qtip: While this example is for the Load into a Data Project task, this concept works for many different data loader tasks. Furthermore, the user interface and steps are also the same for many tasks, such as the Add Contacts and Transactions to XMD task, the Load to SDS task, and the Load Responses into Survey task.
- Upload values: You can upload a spreadsheet of all the values you want to map. Click Download CSV Template. The left column (from) should be the original value in the source, and the right column (to) should be the final value you want to appear in the destination. Upload this file when you’re finished.
 Qtip: Make sure to save your changes in a UTF-8 encoded CSV.
- Manually input values: Click Add Row to input each value. The left should be the original value in the source, and the right should be the final value you want to appear in the destination.
FAQs
Do I have access to all extensions available through the Workflows templates?
Do I have access to all extensions available through the Workflows templates?
Is there a link to all Workflows events and tasks?
Is there a link to all Workflows events and tasks?
What are Workflows templates?
What are Workflows templates?
What are workflows? / Where are actions?
What are workflows? / Where are actions?
There are no changes to workflow functionality as part of this update.
That's great! Thank you for your feedback!
Thank you for your feedback!