
Salesforce Best Practices
What's on this page
Attention: Your Salesforce interface may vary from what’s pictured on this page, but the steps remain the same.
Salesforce Extension Best Practices
In setting up any new automated system, planning is essential to making sure you can get the most out of it. This page offers suggestions for setting up your Salesforce environment and managing your surveys for maximum effect. Please note that the survey owner should be the one setting up the Salesforce extension.
Managing Your Data in Salesforce
When working in Salesforce, properly managing data is essential. Here are a few tips for how to get the most out of your survey data. By following these steps, you can keep historical survey responses, relate them to each relevant record, and be ready to aggregate your survey data in your Salesforce reports.
- Consider using a custom object to store your responses. This object can be connected to your Contact, Account, or Case objects, or any other object you might be sending surveys to via a Lookup or Master-Detail This will allow you to store historical survey data in a related list when a respondent takes your survey multiple times, and you can filter for these objects in Salesforce as well.
- If you want to aggregate data on a parent record (such as an Account), make sure to relate your Survey Response object with a Master-Detail field. This will give you access to powerful tools such as Roll-up summaries, which can automatically aggregate survey data. For more detail on how to use these tools, make sure to check out Salesforce’s support documentation.
What if you have multiple integrated surveys?
If you are working with several integrated surveys, it may not make sense to have one static Survey Response object. Here are a few suggestions for how to manage this:
- If you only have a few surveys and don’t anticipate creating too many more, consider creating multiple survey objects (for example, a CSAT Feedback object and a Recent Buyer Feedback object).
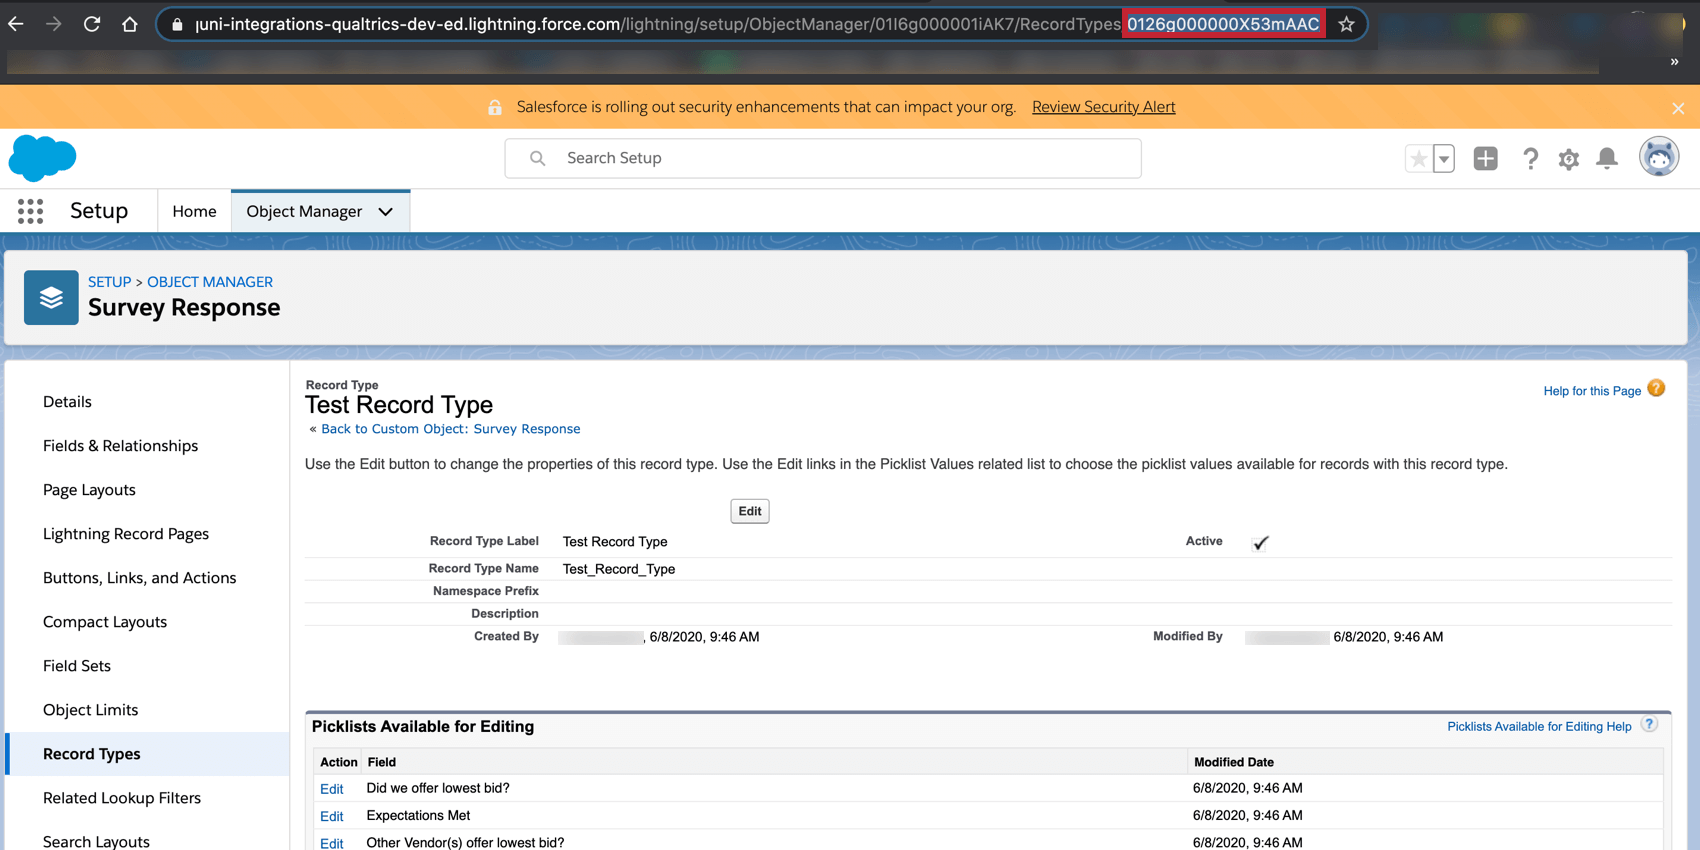
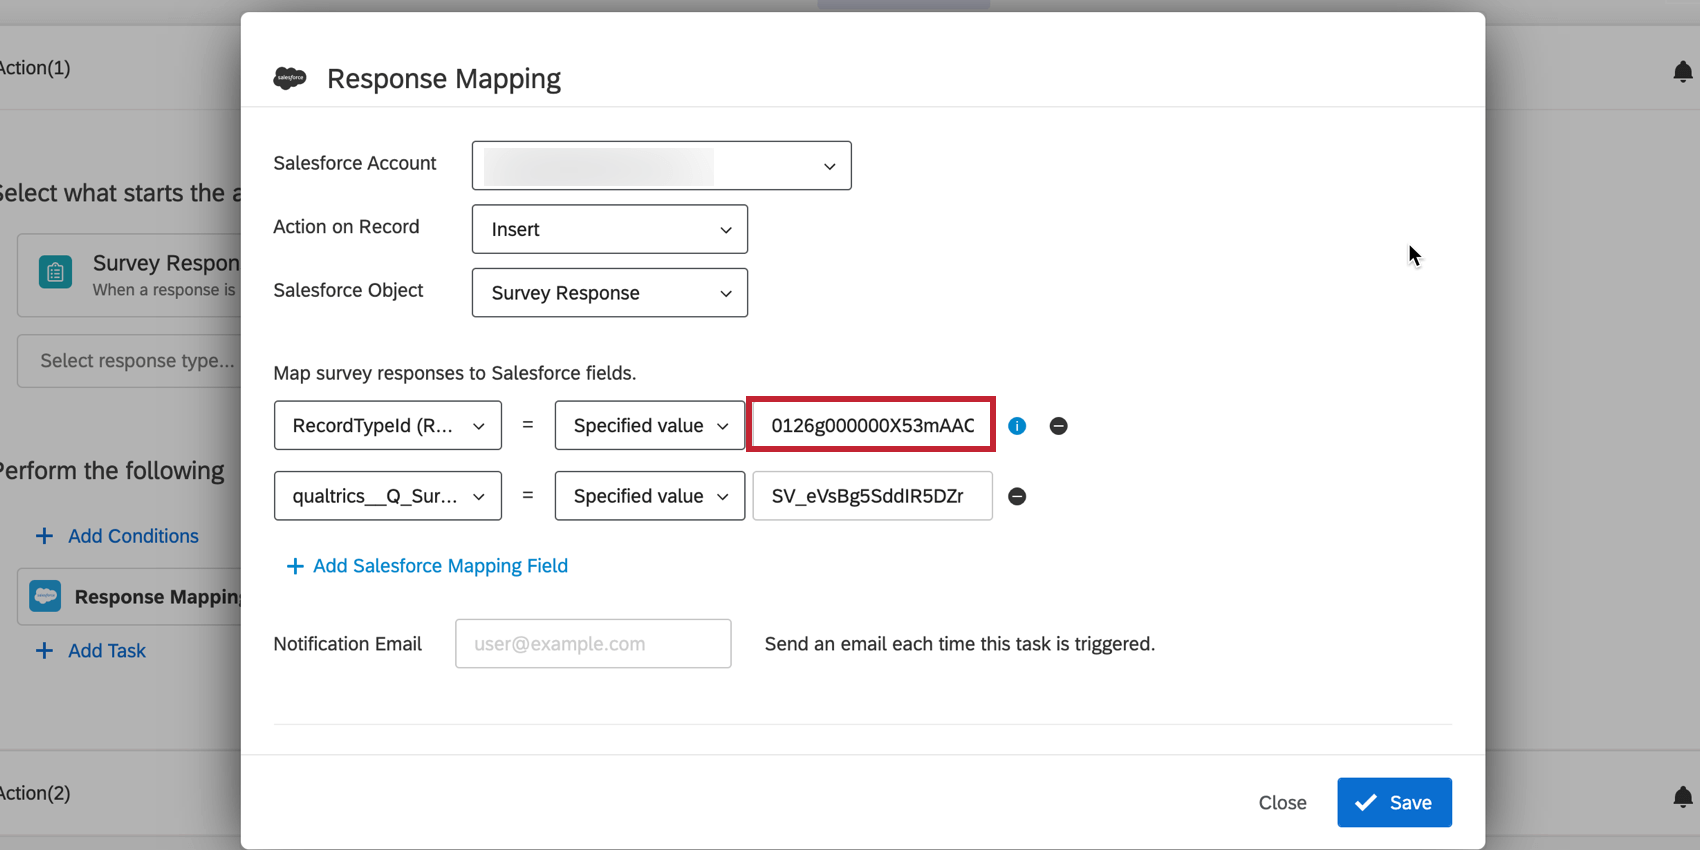
- If you have several surveys and want to prepare for the possibility of more, consider using one Survey Response object with multiple record types. Each record type can be customized in Salesforce to only display fields relevant for each respective survey. Once you’ve created your record types, follow these instructions to tell Qualtrics how to know which record type to use:

Transitioning Your Survey from Sandbox to Production
Attention: The Sandbox version of the extension is no longer supported and will not be available in the near future.
Qtip: The below section is not relevant if you are using the Salesforce task in the Workflows tab. There you can select your desired Salesforce account from a list of of linked accounts so that there is no need to transfer surveys between accounts.
Most organizations use a Sandbox environment in Salesforce to test out new systems prior to going live. As we talk about in our page on switching Salesforce environments, it can be useful to have one Qualtrics account connected to the Sandbox, and one (or more) connected with your live environment. When you’re done testing a survey in the sandbox and you’re ready to go live, the steps below will help you move it over:

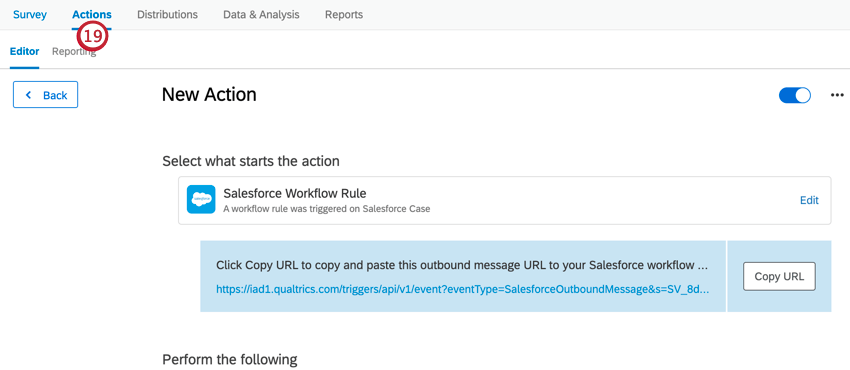
Using Salesforce in Workflows
Now that you have set up your Salesforce workflow in your Qualtrics account, there are certain features of the Salesforce extension to be aware of. The Salesforce extension in Qualtrics:
- Uses v55.0 of the Salesforce REST API.
- Can map incomplete responses when conditions are set on the workflow and the incomplete response meets those conditions.
- Can link up to five Salesforce instances within each Qualtrics account. In other words, each user has the ability to access five different sandbox or production instances in Salesforce.
- Saves a record of each time the workflow was triggered, which can be found in the Workflows Reporting.
- Requires that only the workflow owner edits the Salesforce workflow. When making edits to your Salesforce workflow, it’s important that the user who initially set up the workflow is the only user who edits the workflow. If a user who did not set up the workflow tries to edit it, the Salesforce integration will stop working. If you are not the Salesforce workflow owner but need to edit the workflow, then copy the workflow and make edits to the copy.
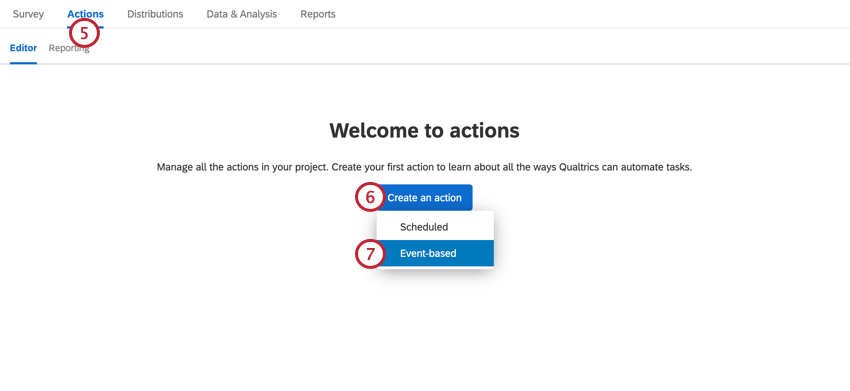
Opting-Out Contacts in Salesforce and Qualtrics
By default, the Qualtrics opt-out link will only unsubscribe respondents from their Qualtrics mailing list. This creates a problem where Salesforce doesn’t receive notice of the opt-out, meaning respondents could be sent additional surveys via Salesforce despite having opted-out of communications.
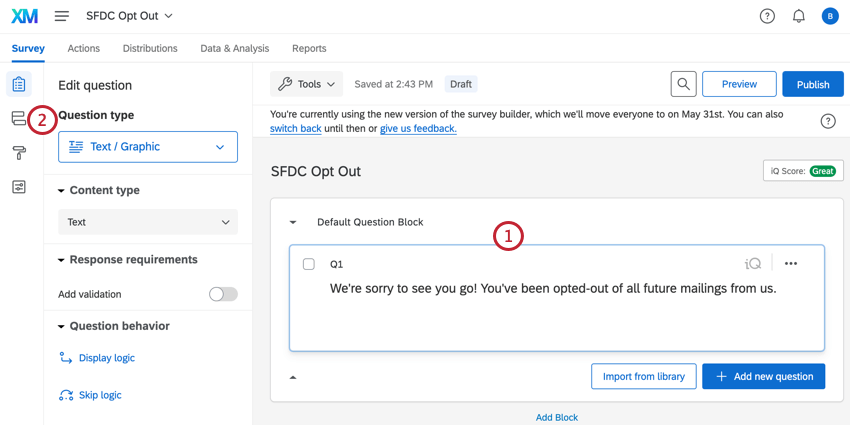
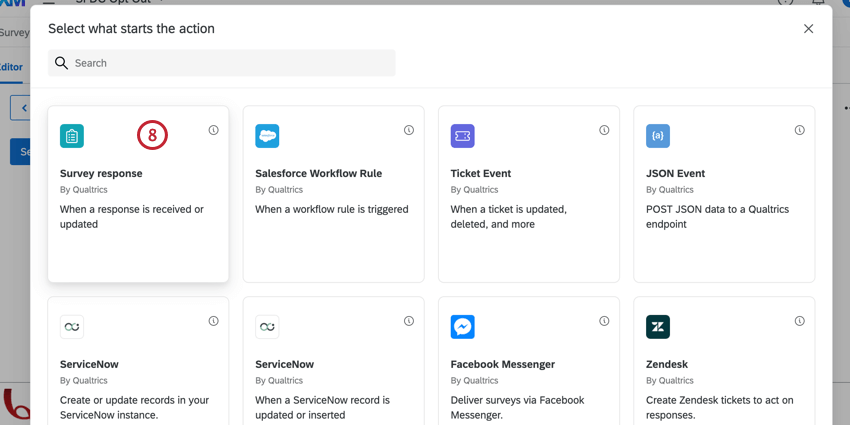
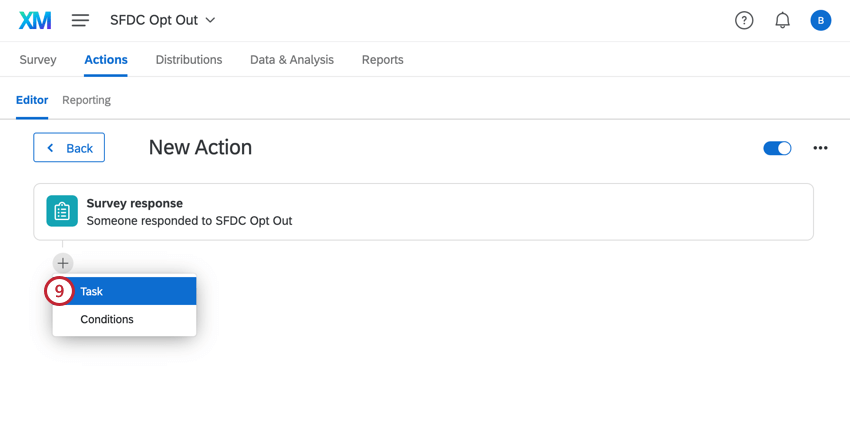
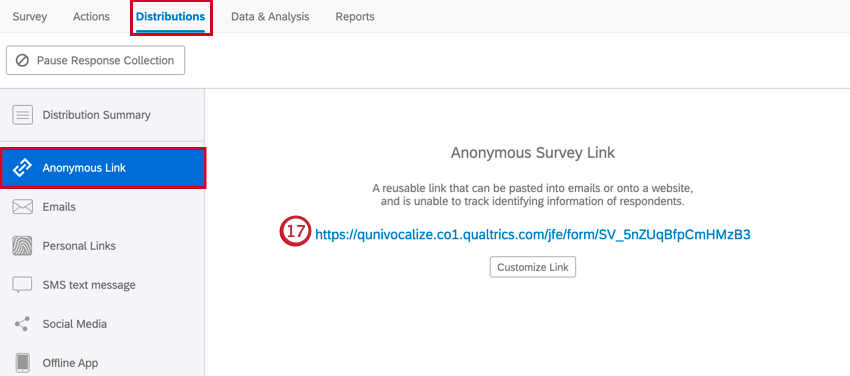
The solution is to create an “opt-out survey” using an anonymous link that will unsubscribe the contact from Salesforce and Qualtrics. The way we do this is by replacing the default Qualtrics opt-out link with a custom “opt-out” link containing two query strings attached: the Salesforce Contact ID and the Qualtrics opt-out link. Follow the steps below to complete this setup.
Qtip: It is important that your respondents finish the opt-out survey so that they are truly opted-out. You can use a timing question to auto-complete the survey for the respondent to make sure they complete the opt-out survey.
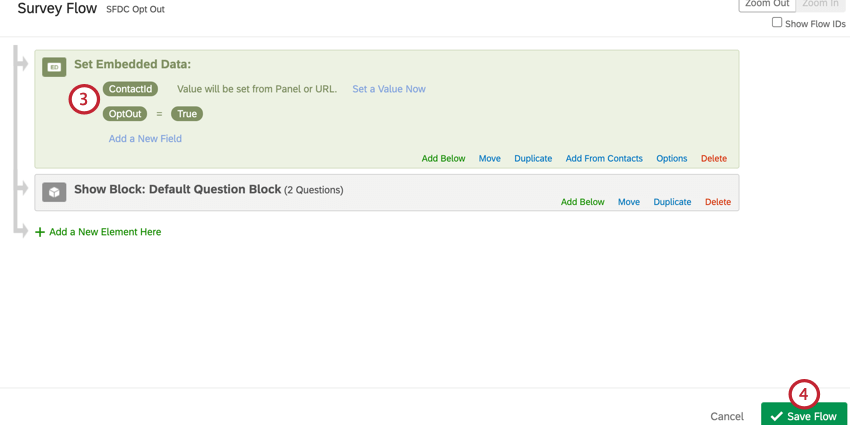
Attention: Your fields must match these names exactly.
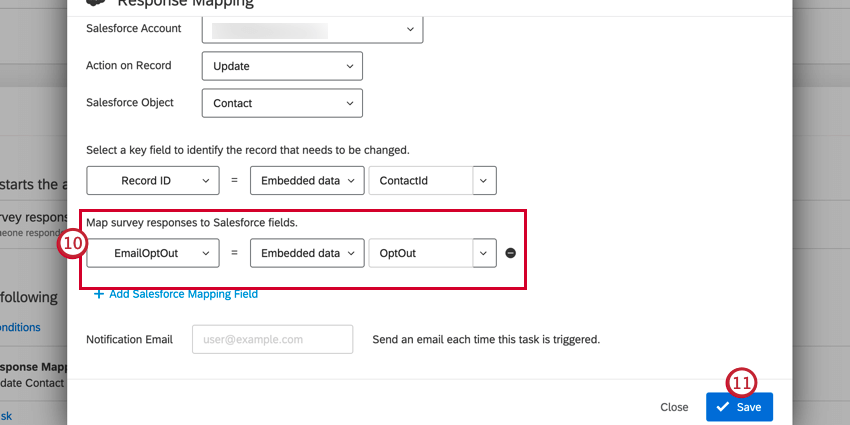
?ContactId=${e://Field/ContactId}&OptOut=${l://OptOutURL}
Qtip: The OptOutURL passes the info needed to unsubscribe from Qualtrics, and the ContactId has the Salesforce Contact ID which can be used to opt the individual out in Salesforce. Note that you may use ContactId, AccountId, or a different embedded data field depending on the object you are triggering from in Salesforce.
Example: After adding the query strings, our URL looks like this: https://qunivocalize.co1.qualtrics.com/jfe/form/SV_5nZUqBfpCmHMzB3?ContactId=${e://Field/ContactId}&OptOut=${l://OptOutURL}
Qtip: When setting up your distribution, make sure you select the same mailing list you chose in your Update XM Directory Contacts task.
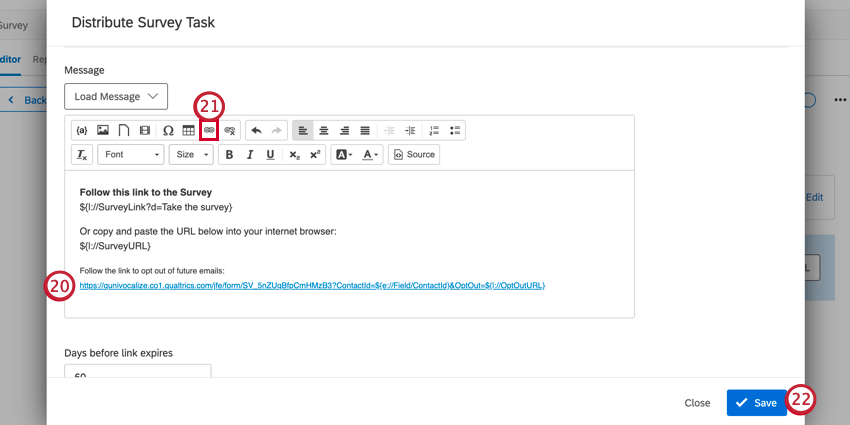
Qtip: If your link is too long or unsightly, you can change the Display Text of your hyperlink to make it something more presentable.
Now, when a respondent clicks the opt-out link on your invitation, they will be sent to your opt-out survey. Once their opt-out response is recorded, they’ll be automatically opted-out in Salesforce and the corresponding Qualtrics contact list. Please note that the original survey invitation link will still be valid, meaning the respondent can still submit a survey response. However, they will remain opted-out of your contact lists.
That's great! Thank you for your feedback!
Thank you for your feedback!