
Pulling Data Into a Second Survey (Longitudinal Surveys)
What's on this page
About Pulling Data into a Second Survey
Longitudinal research can involve following up with the same respondents later, in addition to retaining previously provided data about the same respondents. For example, you can use randomly generated IDs to link responses in an anonymous study. As another example, you can carry over certain information respondents have already filled out, such as an email address; the email will be presented to them in the second half of the study, and they can either leave it alone, or change it, if their email has updated.
This support page will explain how to connect data in two different surveys, so that the second survey prepopulates with certain information for the same respondent. You must follow the directions in every section of this support page to successfully complete your project.
Qtip: Remember that changes are only live to your respondents after you publish them! This includes any workflows you may have added to your surveys.
Attention: This particular survey process has been designed for longitudinal surveys meant to be several hours or days apart. As such, there is often a several minute delay before the contact list updates and the authentication can be fully processed. We do not recommend using the process for automatic authentication.
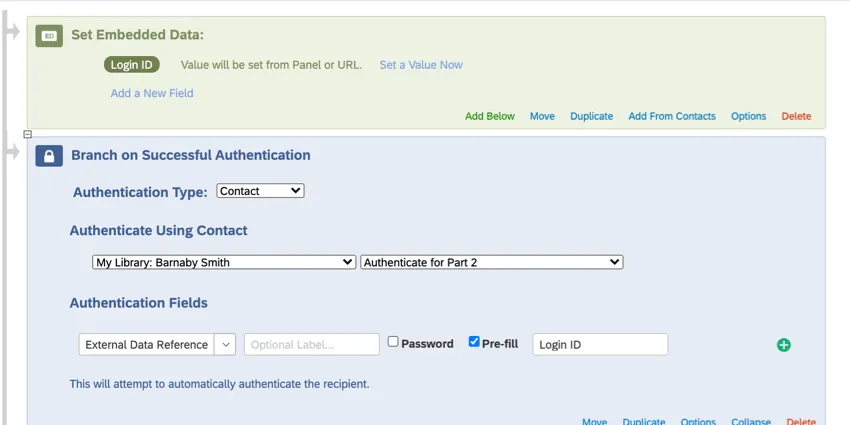
Listing Your Fields
This project involves two different surveys and lots of different features. One thing that can help you stay organized is a list of the data you want to transfer from one survey to another. It’s important to think of short, intuitive names for each of these fields, because you will be using these shorthand names throughout the project. You also need to make sure spelling and capitalization stays the same throughout.
For example, let’s say you want to carry over someone’s employee identification number, the office where they work, and the department they work for. Your list might look like this:
- EmployeeNumber
- Office
- Department
You would then want to use these same names throughout. For example, you can’t use “Employee Number” and “EmployeeNumber” interchangeably. Choose one you prefer and stick with it.
First Survey Setup

Qtip: The best random number ID is 5 characters or more, decreasing the chance respondents can be randomly assigned the same ID. To learn more about generating random IDs, see Assigning Randomized IDs to Respondents.
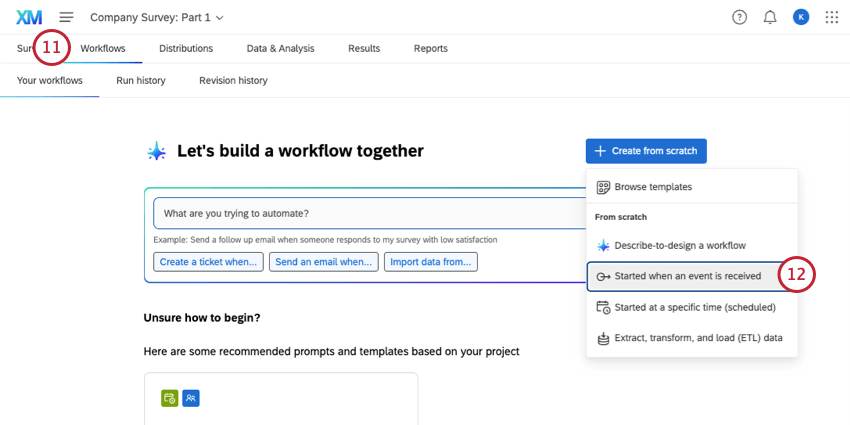
Qtip: For information on settings not covered here, see the Survey Response Event support page.
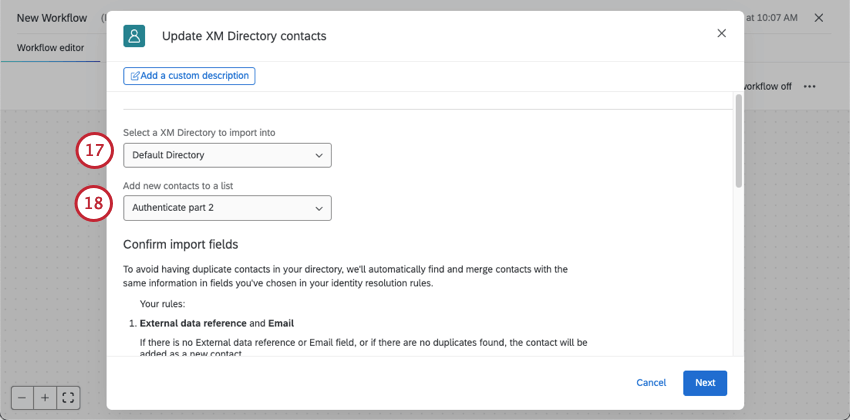
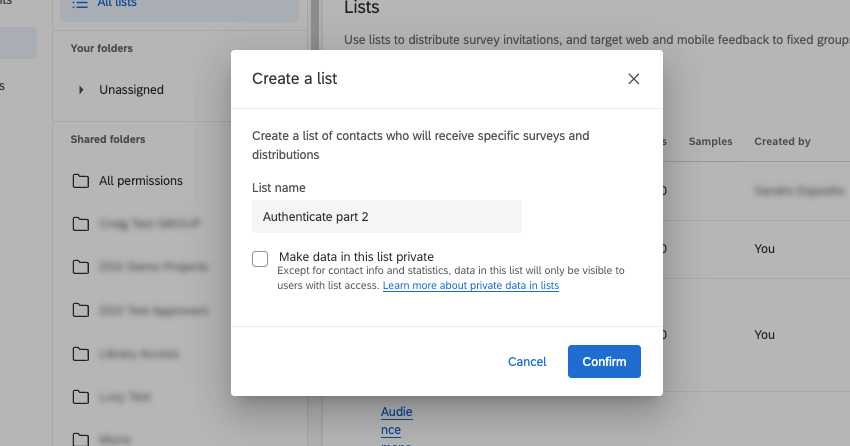
Example: In our example, this is a list named “Authenticate part 2.”
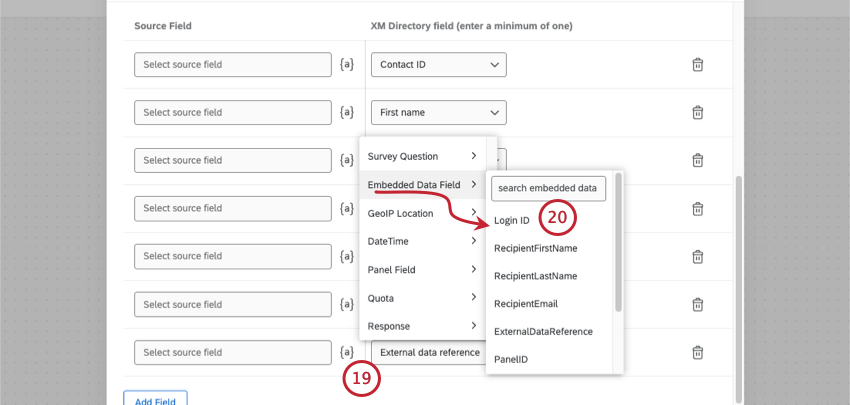
Qtip: Any of the default fields that you don’t plan to use, you can delete. Keep in mind some may be required by your organization. We recommend removing Contact ID.
Attention: Required contact info can vary by organization. It is highly likely that email is required, but you may also need to include information such as first name or last name.
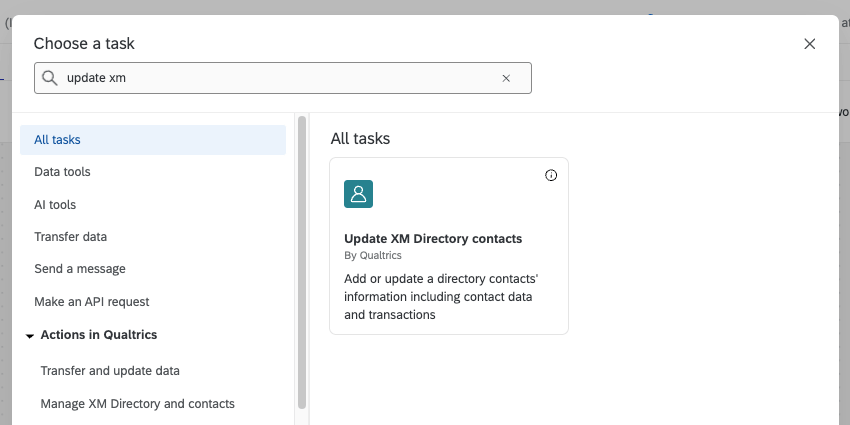
Qtip: For information on settings we didn’t cover in these steps, see Update XM Directory Contacts Task.
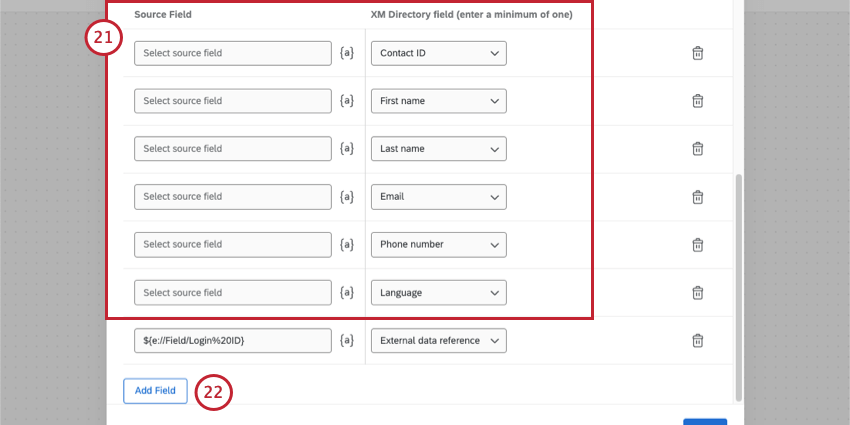
Displaying the Login ID to User
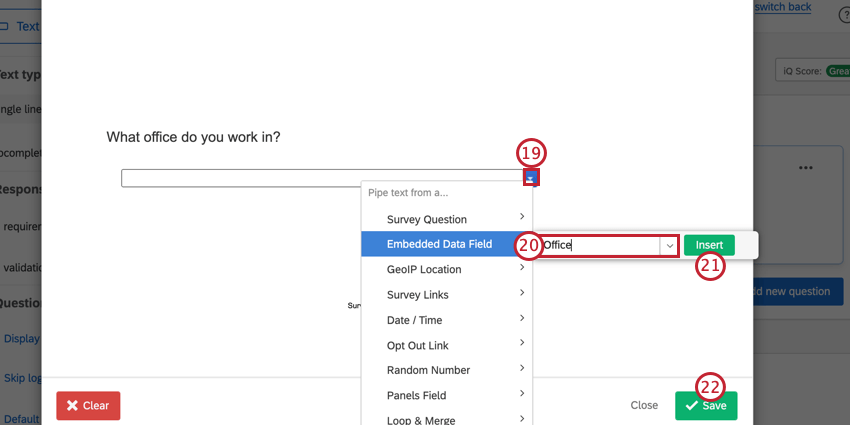
Although the setup described on this support page doesn’t require that you show the respondent what their Login ID is, you may still want them to know this information, just in case. Using Piped Text for the “Login ID” embedded data field, you can show the Login ID to the respondent in several parts of the survey, including:
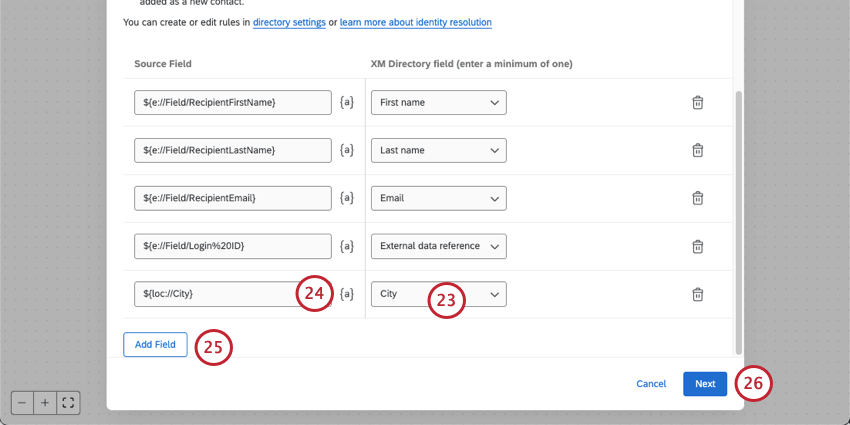
- An email task that is sent to the respondent after they complete the survey. Qtip: You must already know or ask a respondent to provide their email address to use this option.

- An end of survey message.
- A question.
For more on displaying this information to respondents, see Assigning Randomized IDs to Respondents.
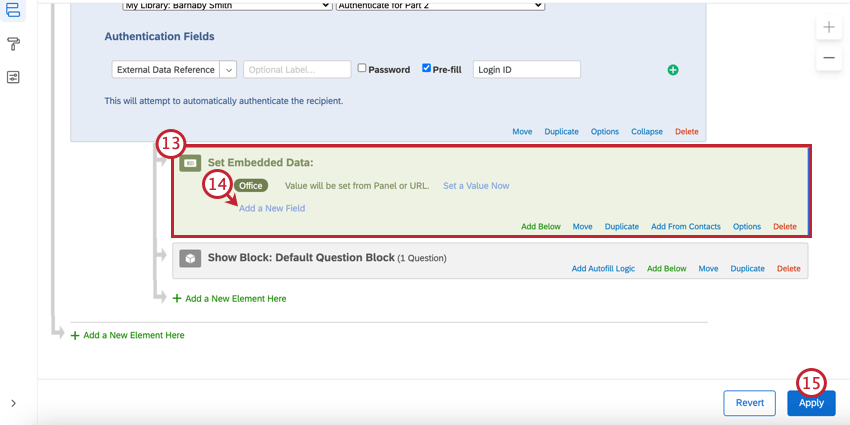
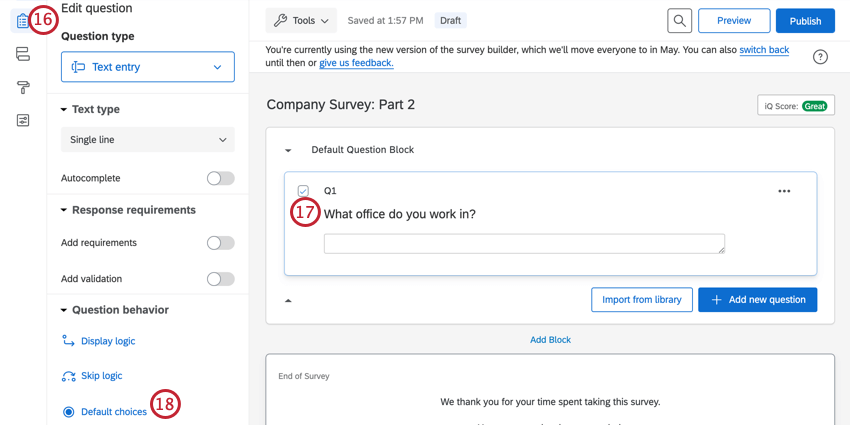
Second Survey Setup
Qtip: The information from the first survey can only be brought into the second survey as open text data. This means the second survey will have one text entry question for each field being brought over.
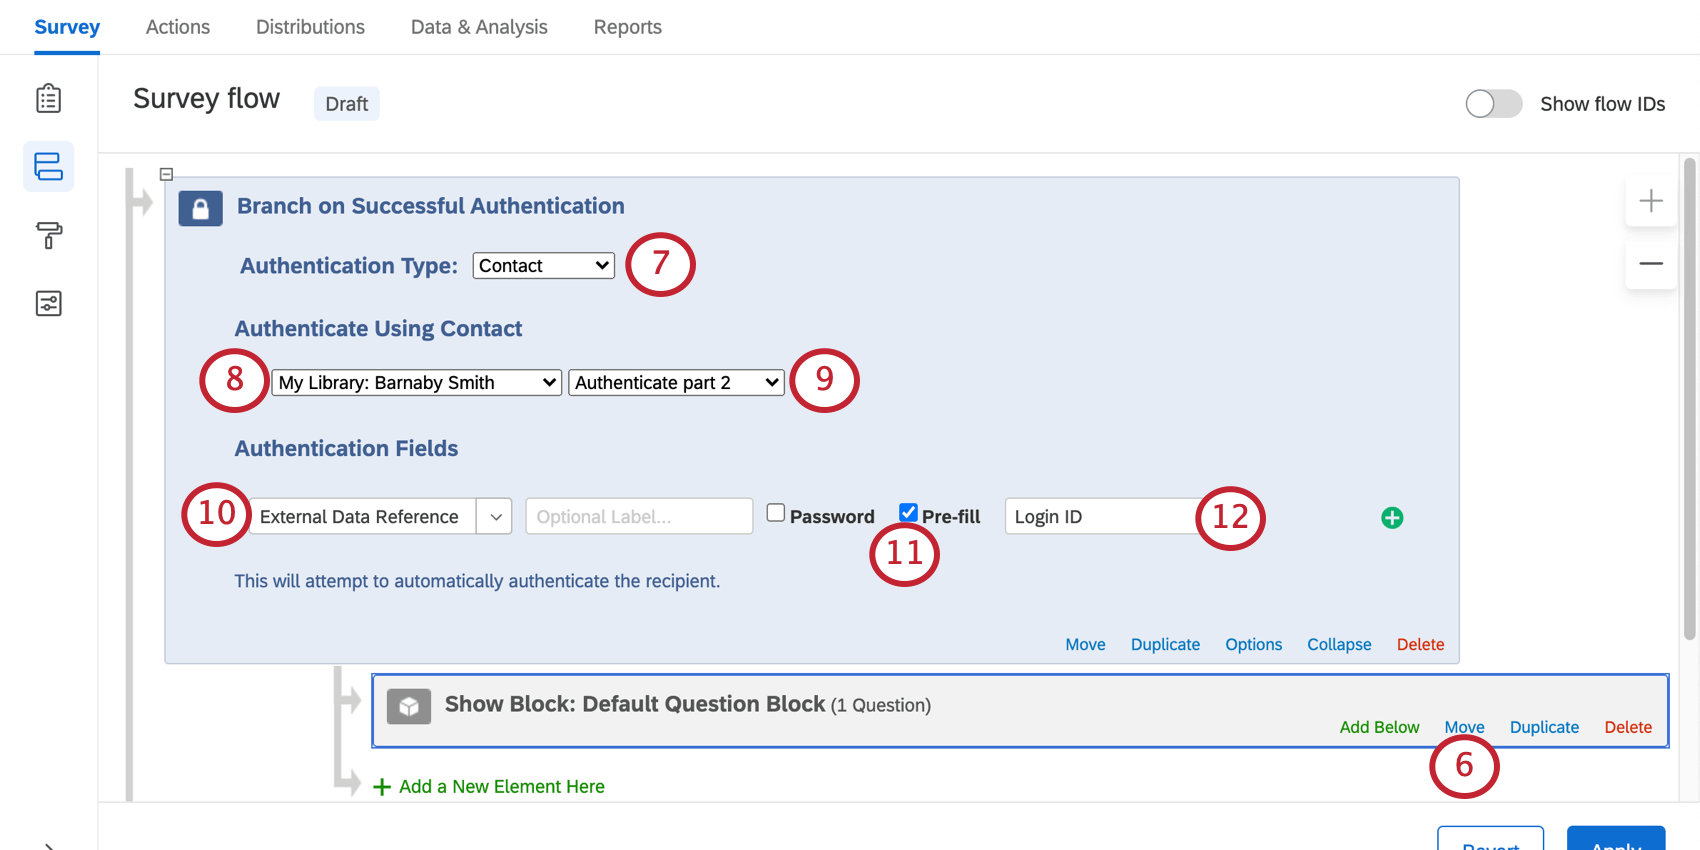
Qtip: If a respondent uses the correct link to access a survey, this option assures they are automatically logged into the survey without having to remember or type their Login ID in.
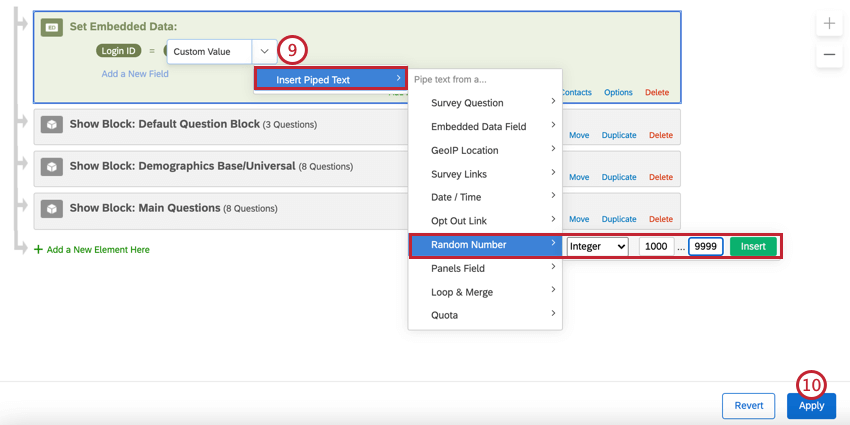
Qtip: You’ll also need to make sure you have an embedded data element before your authenticator to capture the Login ID field.

Qtip: Create a workflow started by a survey response event, then add an update XM Directory contacts task. This workflow should be very similar to the one you made for the first survey, but should be triggered by your second survey instead.
Qtip: In order to carry over specific default choices for multiple choice questions instead of text entry questions, you will need to use JavaScript. Qualtrics Support cannot advise on custom coding, however, you can always try asking our community of dedicated users instead.
Distributing the Second Survey
In order to connect the data from your first survey to your second survey, you need to do two things: build the right link using query strings, and distribute the second survey directly from the first.
Building the Survey Link
https://survey.xx1.qualtrics.com/jfe/form/SV_XXXXXXXXXXXXXXX https://survey.xx1.qualtrics.com/jfe/form/SV_XXXXXXXXXXXXXXX?Login%20ID=${e://Field/Login%20ID} Qtip: If your survey has been translated into multiple languages, it’s possible to specify which language a respondent gets when they open the survey using query strings. You can add the language field onto the end of the link, using the below text:
&Q_Language=XXInstead of XX, add your language code of choice.
Connecting the Surveys
Using the link you created above, you have several options for distributing your second survey.
- Email task: Distribute the second half of a study to the participant based on hours / days since they finished the first half. Remember, although you’re linking to the second survey, you must add the email task to the first survey!
- Send survey via email task: Distribute the second half of a study to the participant based on days / months since they finished the first half. Remember, although you’re linking to the second survey, you must add this task to the first survey!
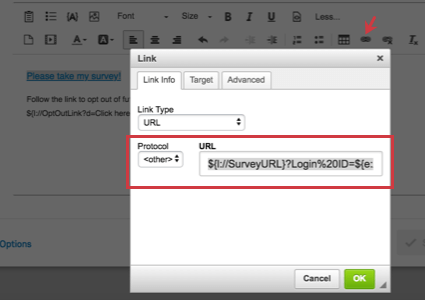
Qtip: Send survey via email tasks won’t let you save them if you don’t have special piped text in them. For your link to the second survey, you will need to copy your query string and put it on the end of the “Survey URL” piped text to link to the survey, like this:
${l://SurveyURL}?Login%20ID=${e://Field/Login%20ID}You can also copy this exact piped text and use it as a hyperlink in your XM Directory task.

- Redirect to URL at End of Survey: When your respondents finish the first survey, they will be immediately redirected to the second survey. Remember, although you’re linking to the second survey, you must add the redirect to the end of the first survey! Qtip: This feature is not available for free accounts.
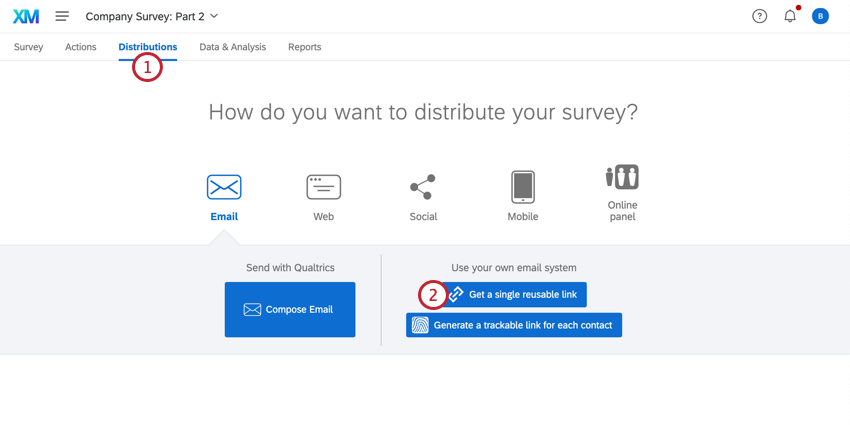
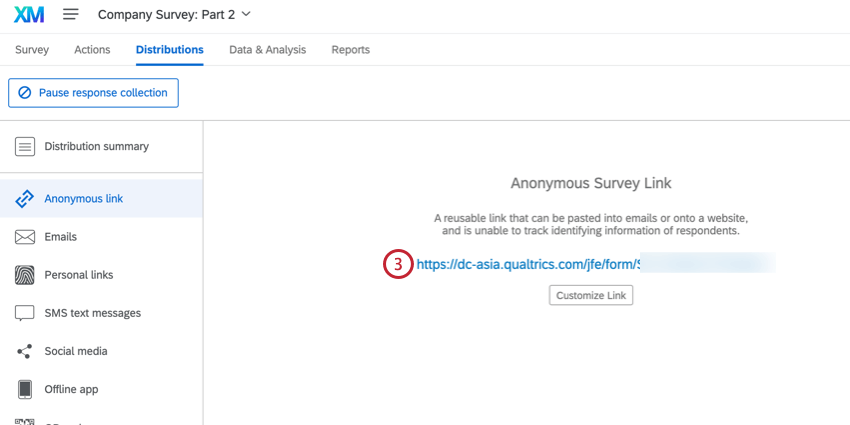
- Posting Your Link: Did you display the Login ID to the participant? Do you expect them to remember this ID? After the first part of the study is complete, you can paste the second survey’s link to a website, send it to an email group, or post it wherever you know the participants will see it. Respondents can then use their Login ID to “log into” the second survey.
That's great! Thank you for your feedback!
Thank you for your feedback!