
Transactional Surveys
What's on this page
About Transactional Surveys
Transactional surveys – also called post-interaction surveys – are sent to customers automatically following an interaction with your company. Sending these surveys as close to when the interaction happened as possible allows for a higher response rate and better quality data, because the experience is still fresh in your customer’s mind.
Example: Here are two common types of transactional surveys:
- Post-support survey: Send a survey to a customer after their support case is closed, asking for their feedback on the experience.
Post-purchase survey: Send a survey to a customer after they make a purchase, asking how easy the process was.
How Transactional Surveys Work
Here’s an overview of how a transaction survey works in Qualtrics:
An interaction takes place, either in Qualtrics tickets or in your chosen Customer Relationship Management (CRM) system.
Example: For post-support, this event would be when the support case is closed in Qualtrics tickets, Zendesk, ServiceNow, or another service.
A workflow is triggered by the interaction.
Qtip: You may need the help of your organization’s IT team for this step.
The workflow takes the information the customer provided in the interaction and saves it back to the contact’s profile in XM Directory as transaction data.
Qtip: While it might seem optional, this step is extremely important. Transaction data is a special type of data where, instead of values overriding each other, the full history of changes is visible. For example, if a customer purchases a product every time they perform an online transaction, you want to know each product purchased. This could give you insight into which offerings are performing better than others, which products have the easiest purchase process, and so on.
The workflow emails or texts the transactional survey to the customer following the interaction.
Step 1: Contact Directory Setup
Before you run transactional surveys, we recommend setting up your contact directory so it’s ready to receive customer information. These steps need to be completed by a directory administrator, and may already be in place when you start to build transaction surveys.
- Identity resolution: This feature prevents duplicate contacts from being created in your directory. You can identify contacts by information such as last name, email, or an internal ID, and use this to make sure that contacts are seamlessly updated with new information as it comes in.
Contact frequency rules: To prevent survey fatigue, consider how often contacts should be sampled, and if certain surveys should be exempt from the rules.
Example: Industry best practices say post-support surveys should be sent after every support interaction, meaning they should be exempt from contact frequency rules. However, you may want to space out how often you send post-purchase surveys to prevent survey fatigue.
Qtip: For additional directory setup unrelated to transactional surveys, see our XM Directory Implementation Guides.
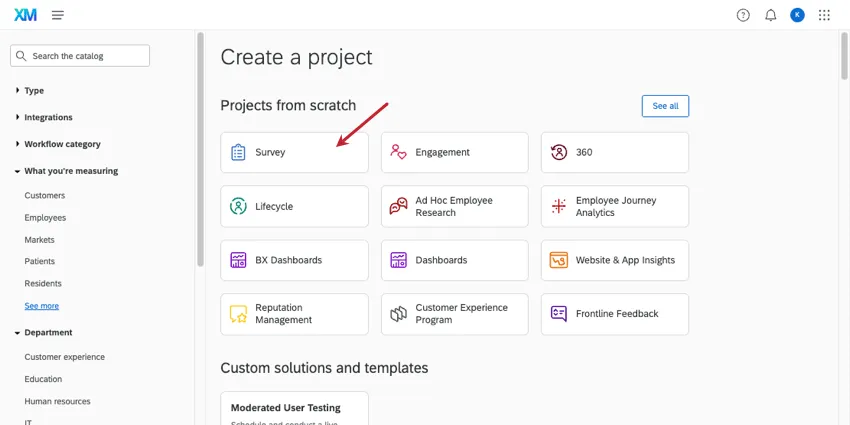
Step 2: Creating the Survey
Transaction surveys typically include a “hero metric” (e.g., CSAT, CES), a few key driver questions (things that impact the experience, e.g., agent knowledge), and a text entry question. If you don’t want to start from scratch, you can find many common questions like these in our library of certified questions.
Qtip: If you don’t want to build the survey from scratch, try exploring the catalog for premade solutions. Make sure if you use a premade solution, you still add embedded data and preview before you publish!
Add your questions, such as multiple choice or NPS.
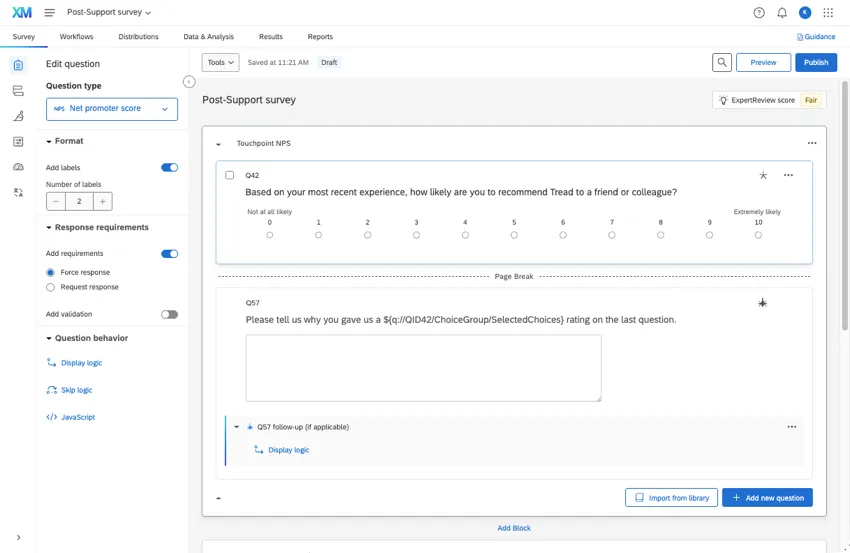
To text entry questions, you can add the following to get higher quality responses:
Add embedded data to the top of your survey flow. Include fields important to the interaction, such as:
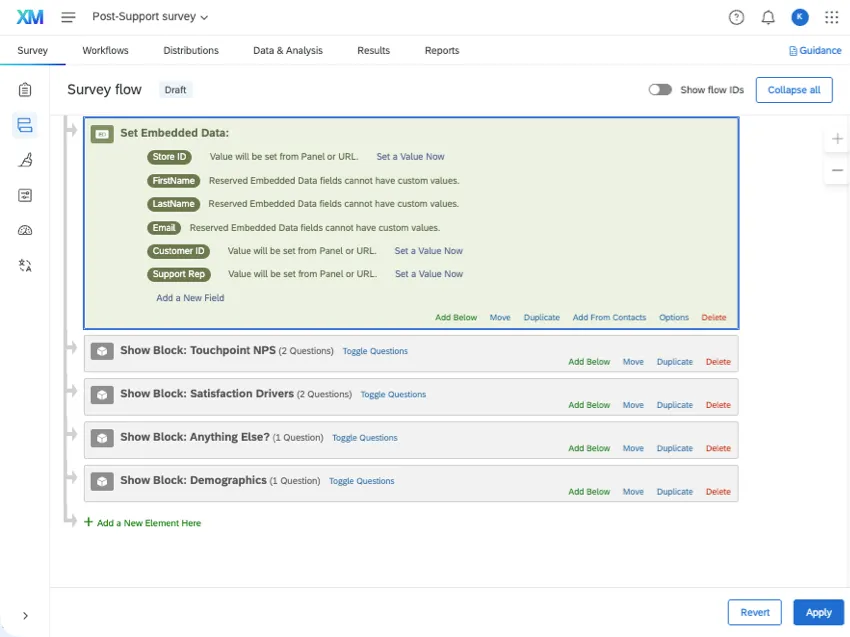
- Store or location
- Product purchased
- Topic discussed
- Representative assigned to ticket
Qtip: Just add the embedded data names to the survey flow, not values. The goal is to pull the values from the contact’s profile in XM Directory and from your systems.
Qtip: These interaction fields will come up throughout this support page. Make sure that no matter where you add them in Qualtrics, the spelling, capitalization, and punctuation of the name is always the same. See more on embedded data naming.
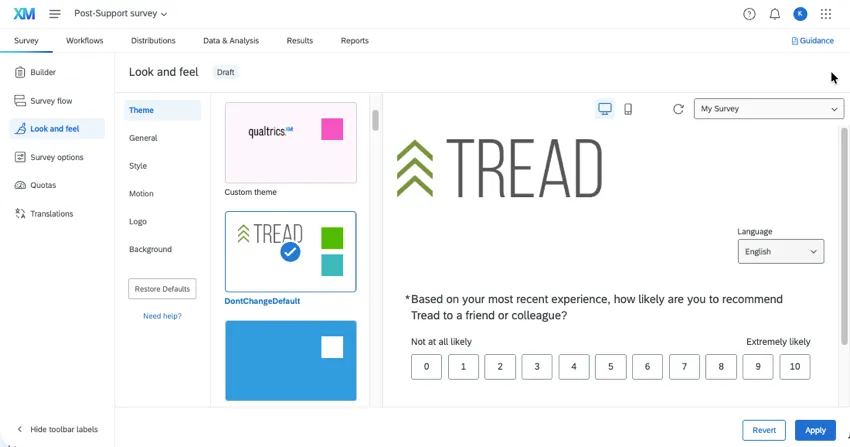
Preview your survey.
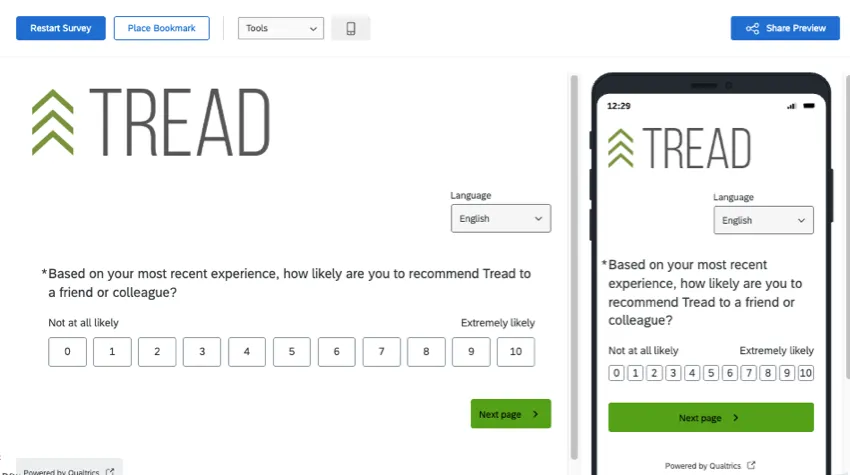
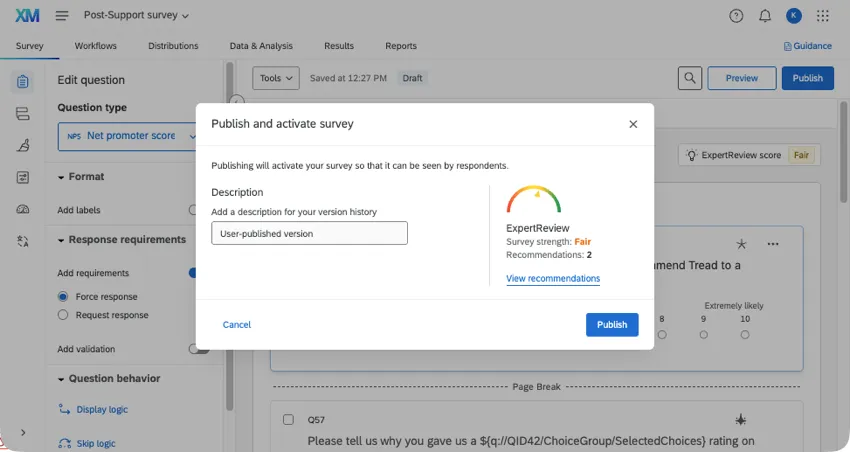
When you’re done, publish your survey.
Step 3: Automating the Distribution with a Workflow
Transaction surveys are sent automatically using Qualtrics workflows. This means you don’t have to manually email anything to your customers after an interaction happens. In this section, we’ll show you how to build a workflow that connects to your systems, saves customer contact information to XM Directory, and then distributes the transaction survey.
Qtip: Getting started with workflow creation can be a lot faster and easier if you use a template or describe your desired workflow to AI. Just make sure you compare the final result against the steps below before you launch!
Go to the Workflows tab of your survey.
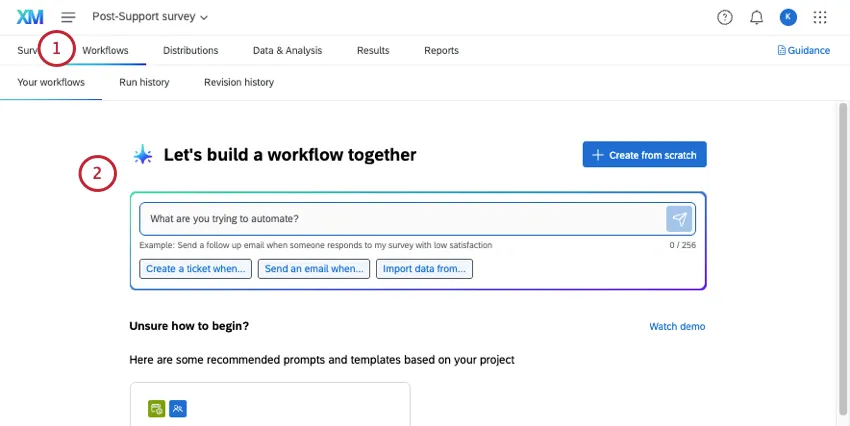
Qtip: You can create this workflow wherever you want, but it can be easier to find later if it’s inside the survey it distributes.
Choose a specific event to start the workflow:
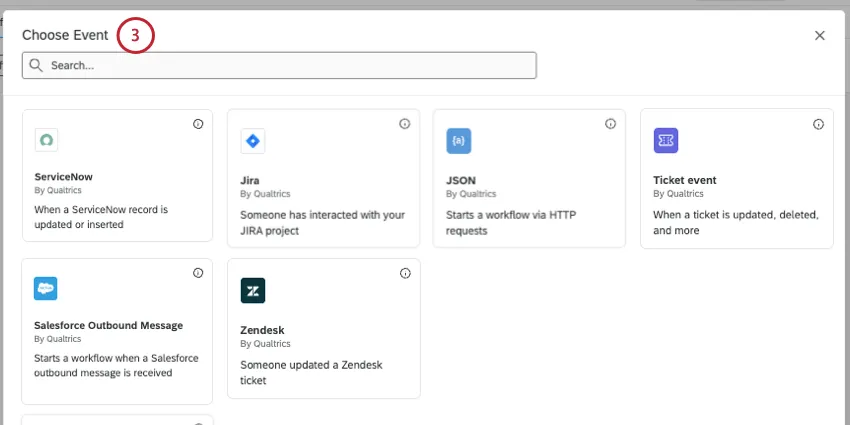
- Post-Support: A ticket was closed in Qualtrics, Zendesk, ServiceNow, Jira, or another custom setup.
- Post-Purchase: Use the JSON event to connect to your system.
Qtip: We highly recommend working with your IT team for this step, especially if you need to use a JSON event for a custom setup.
If your event requires you to map fields, then make sure you map important information from the interaction, such as:
- Customer name and contact information
- Store or location
- Product purchased
- Topic discussed
- Representative assigned to ticket
Finish setting up your event according to the support pages linked above.
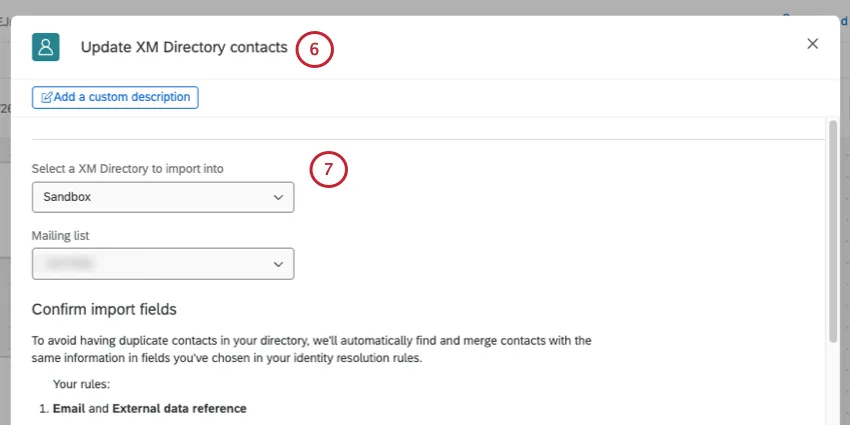
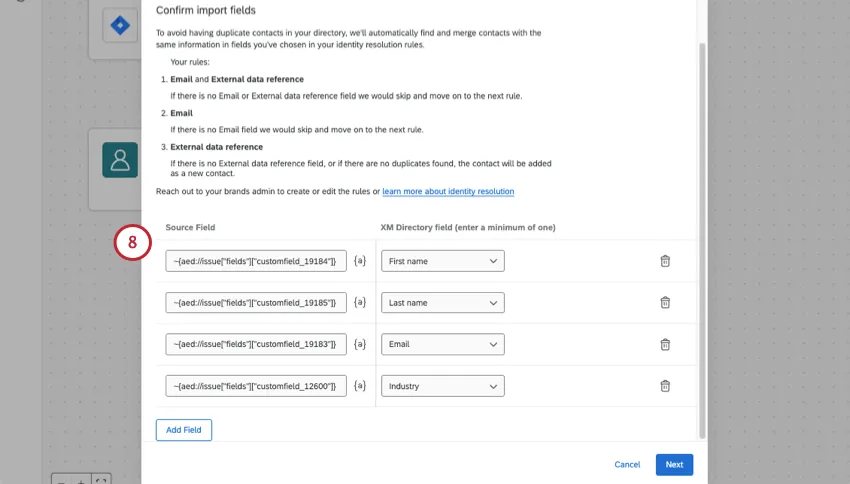
Select a directory and a list to update.
In these first fields you can map, add contact data that isn’t specific to the interaction. This tends to be demographic, like name, email, phone, age, industry, and so on.
On the next page, select Transaction data.
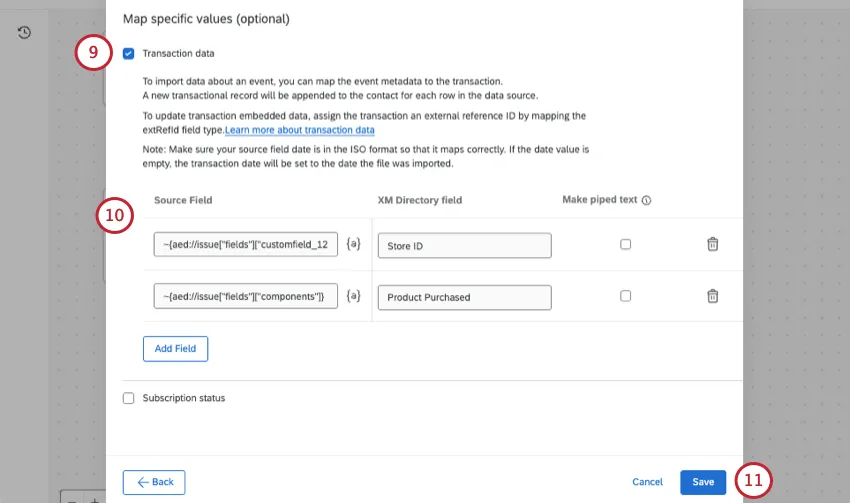
Add contact details that are going to change with each transaction. These include the fields you used during event setup, such as:
- Store or location
- Product purchased
- Topic discussed
- Representative assigned to ticket
Finish the task and save.
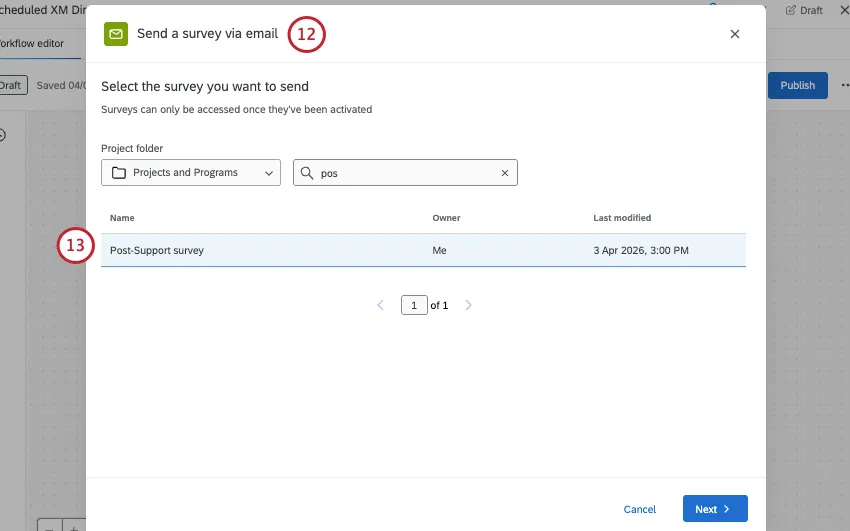
The survey should be the transaction survey you created earlier.
For the recipients’ source, choose your Update XM Directory Contacts Task, single transaction from the group.
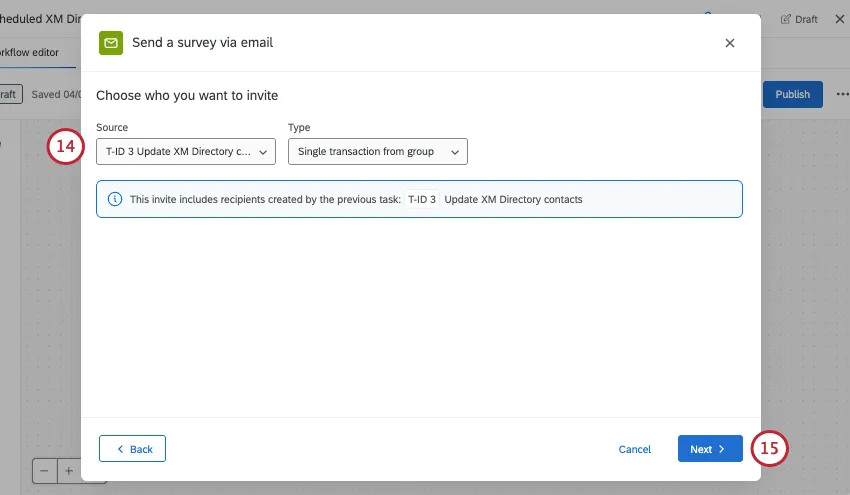
Finish your task setup and save.
Activate the workflow.
Qtip: Want to track the rating the customer gives you in the transactional survey? Create this second workflow:
- Started by a survey response.
- Update XM Directory Contacts Task.
- Save the contact’s rating (CSAT, NPS, etc.) as transaction data.
Step 4: Reporting on Results
If you plan to include transactional surveys in a dashboard, you’ll need to prepare the data in a specific way to make sure the individual transactions come through. See Transactional Joins for end-to-end steps.
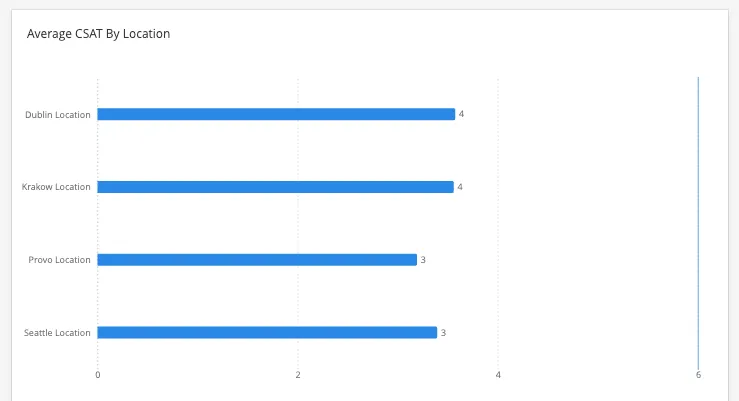
Once your dataset is created, you can start building dashboards. Consider popular widgets like:
Example: With a line, bar, or table widget, you can break out average CSAT rating by store or location.
Other Features Useful to Transaction Surveys
Below are a few optional features that could enhance how the transactional survey is set up.
Locations
Using location directories in Qualtrics can be a great way to store a lot of information about different locations without having to map those fields to every single task and survey flow. Instead, you can map a single location ID to an interaction. This ID can later be used to pull in a location’s name, address, site manager, and more as you build reports.
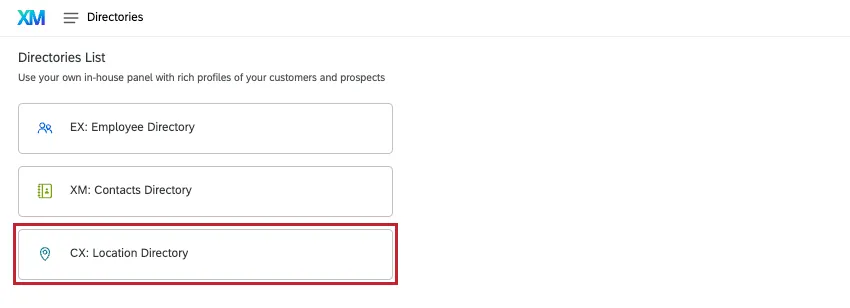
To create a directory, see Location Data Management.
To bring location data into your reporting, see Location Data in Dashboards.
Ticket Reporting
If you use Qualtrics tickets, you can build dashboards that show ticket progress, escalations, and time to resolution.
For an overview of dashboard and widget-building, see Ticket Reporting.
To learn how to report on tickets alongside survey data, as opposed to putting it in a separate page of the dashboard, see Combining Ticket & Survey Data in Dashboards (CX).
That's great! Thank you for your feedback!
Thank you for your feedback!