
Location Data Management
What's on this page
About Location Data Management
In Qualtrics, you can establish a source of truth for your organization’s location data, that you can then reference in different projects and dashboards. This lets you collect comprehensive feedback on all of your locations, and analyze them accordingly. This is also especially useful if you ever need to update your list of locations; you only need to edit one source to make updates all across the program.
Qtip: Location directories are shared globally within your brand, meaning any user with access to your brand also has access to the location directories created. When a directory is created, an Imported Data Project is automatically created using the following syntax: “[Location directory] <directory name>”. These projects are only shared with the creator of the directory by default. IDPs are useful for using location data for survey customization and dashboard reports, but must be shared with the necessary users to apply to these project types. See Imported Data Projects for more information.
Qtip: To access and manage the location directory, you need the Manage Location Data permission. To create location directories, you need the Use Imported Data Projects permission.
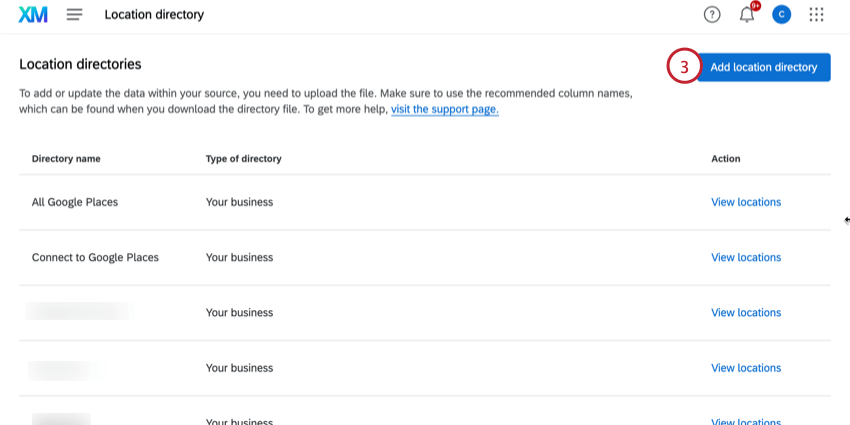
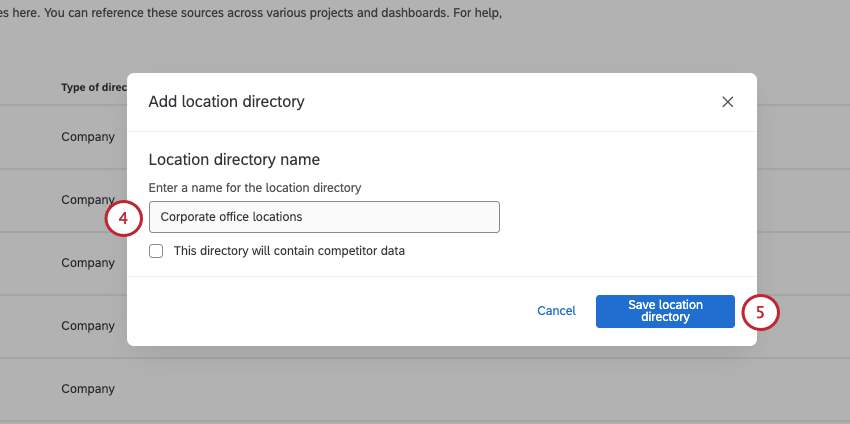
Creating a New Location Directory
Qtip: For more information about adding competitor information to location directories, see Competitor Reviews.
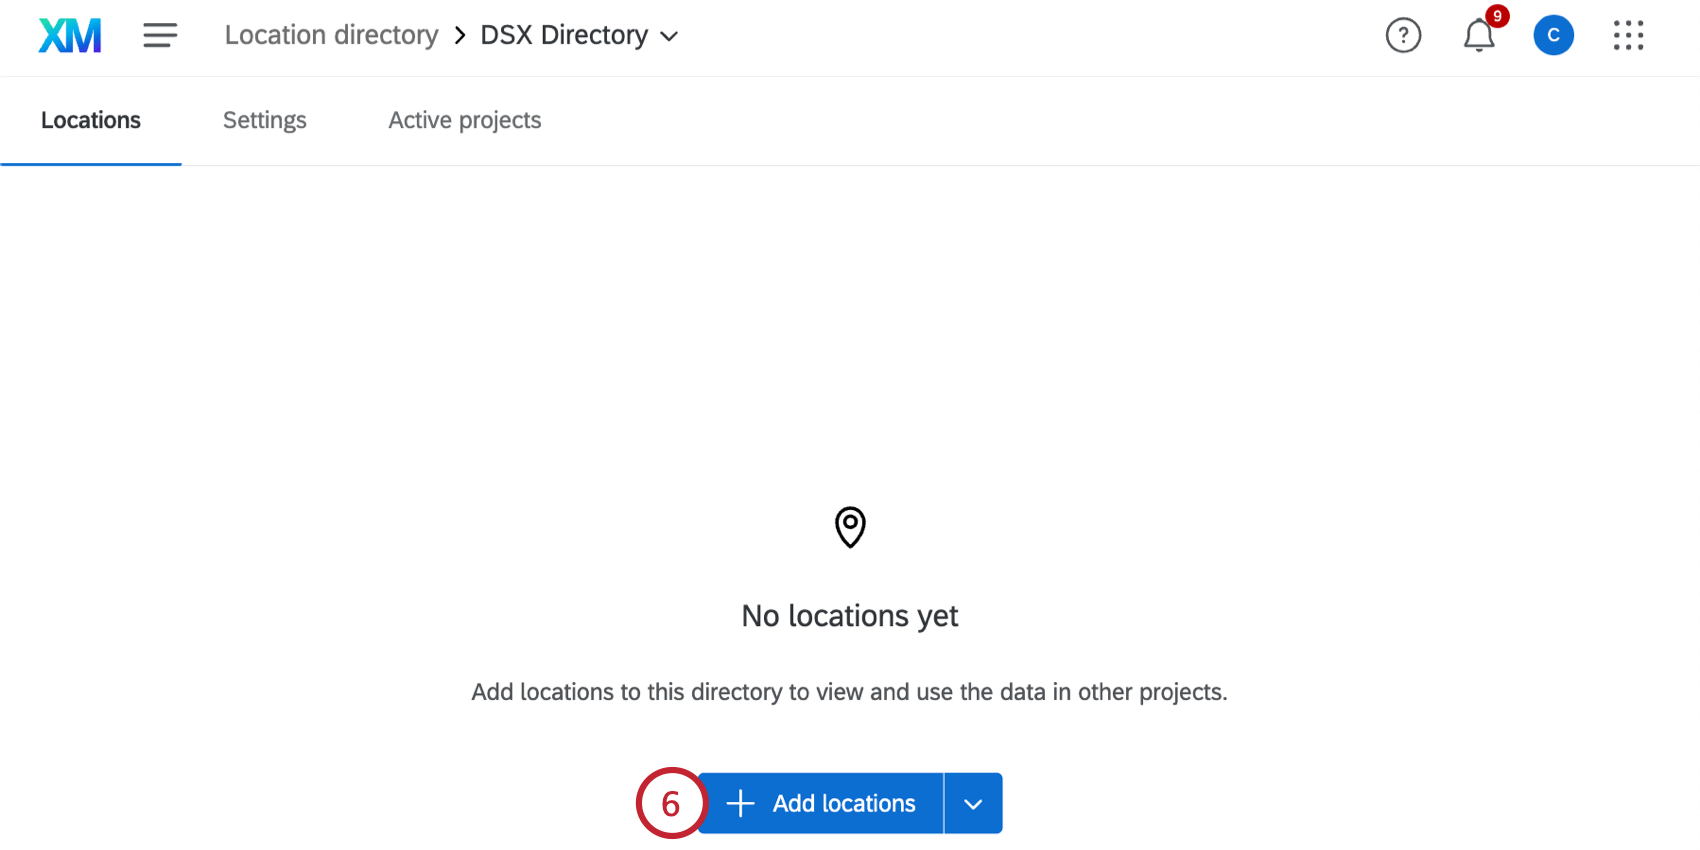
Qtip: Instead of uploading a file or using a workflow, you can also add a single location at a time.
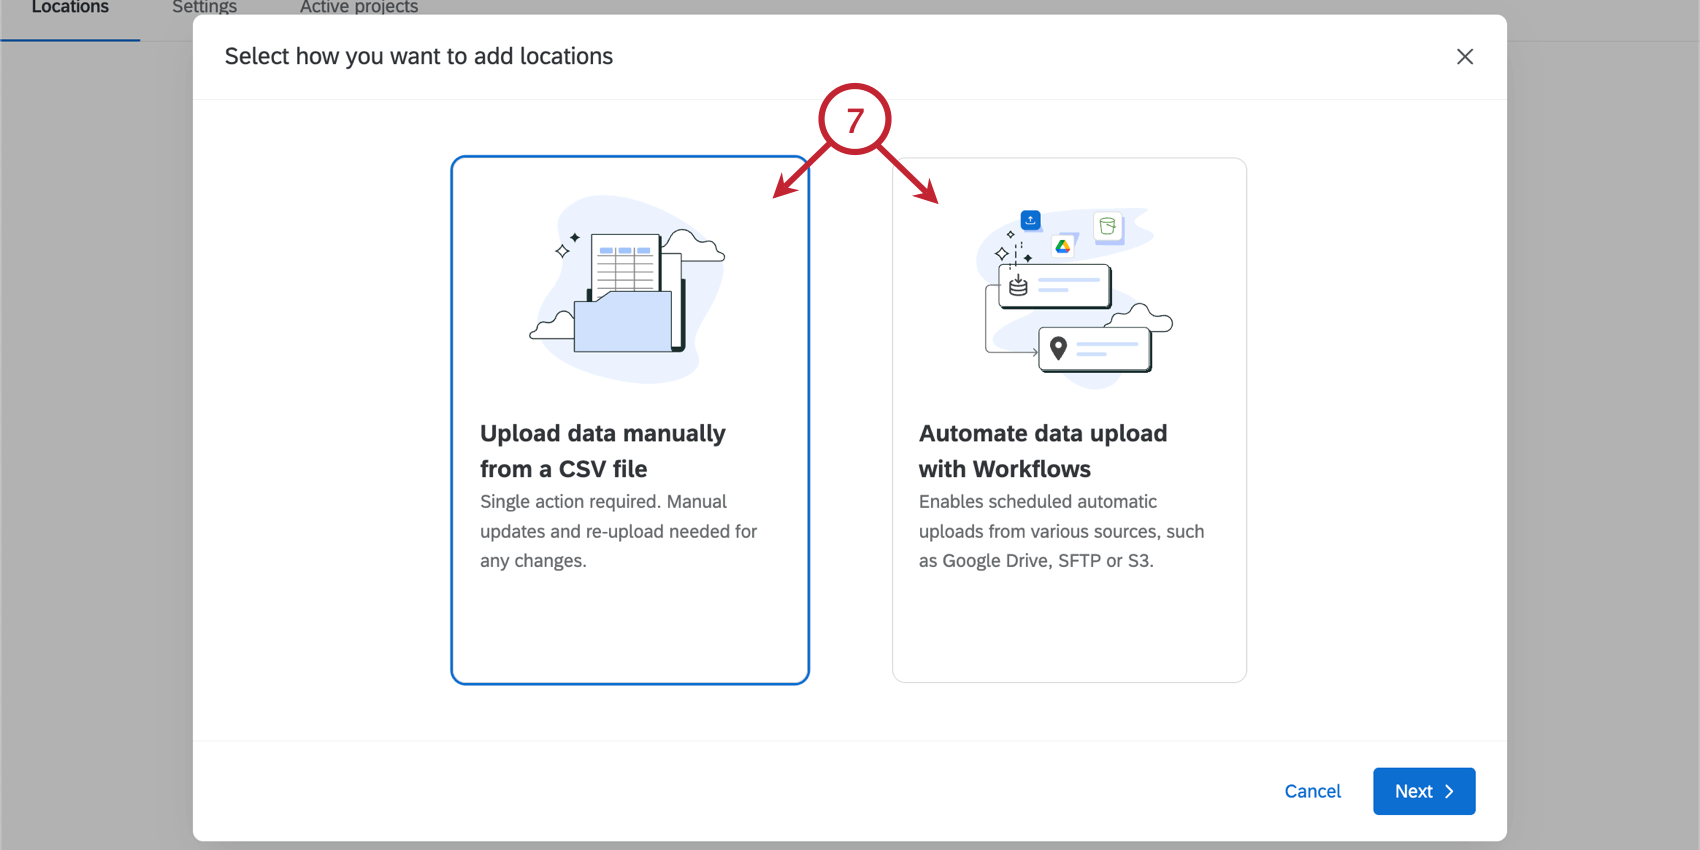
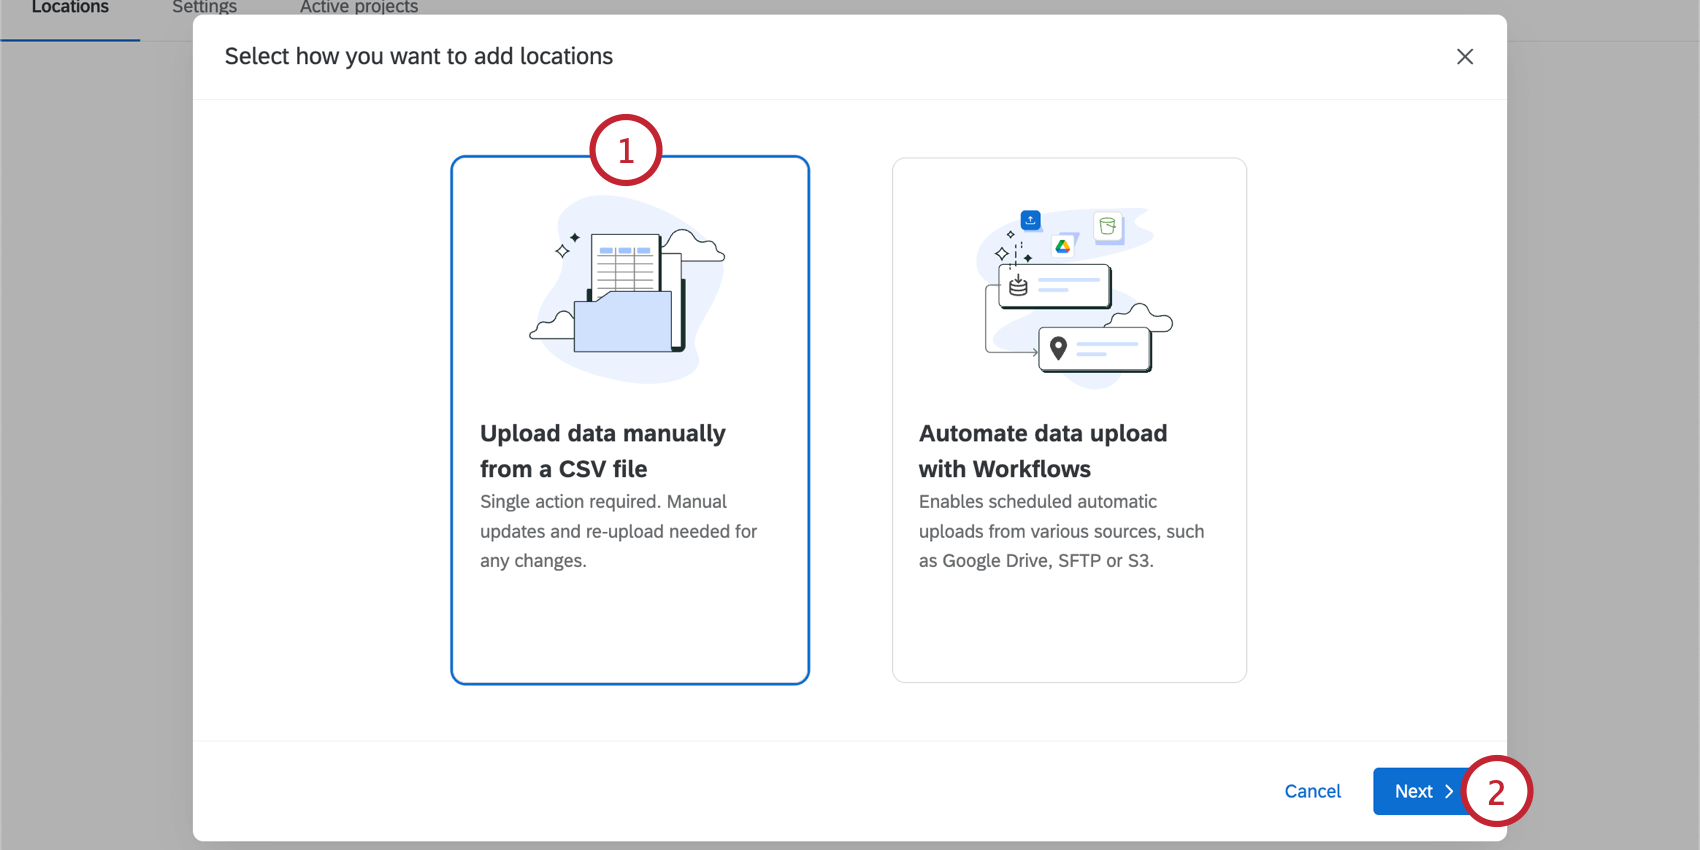
Uploading Location Data from a CSV File
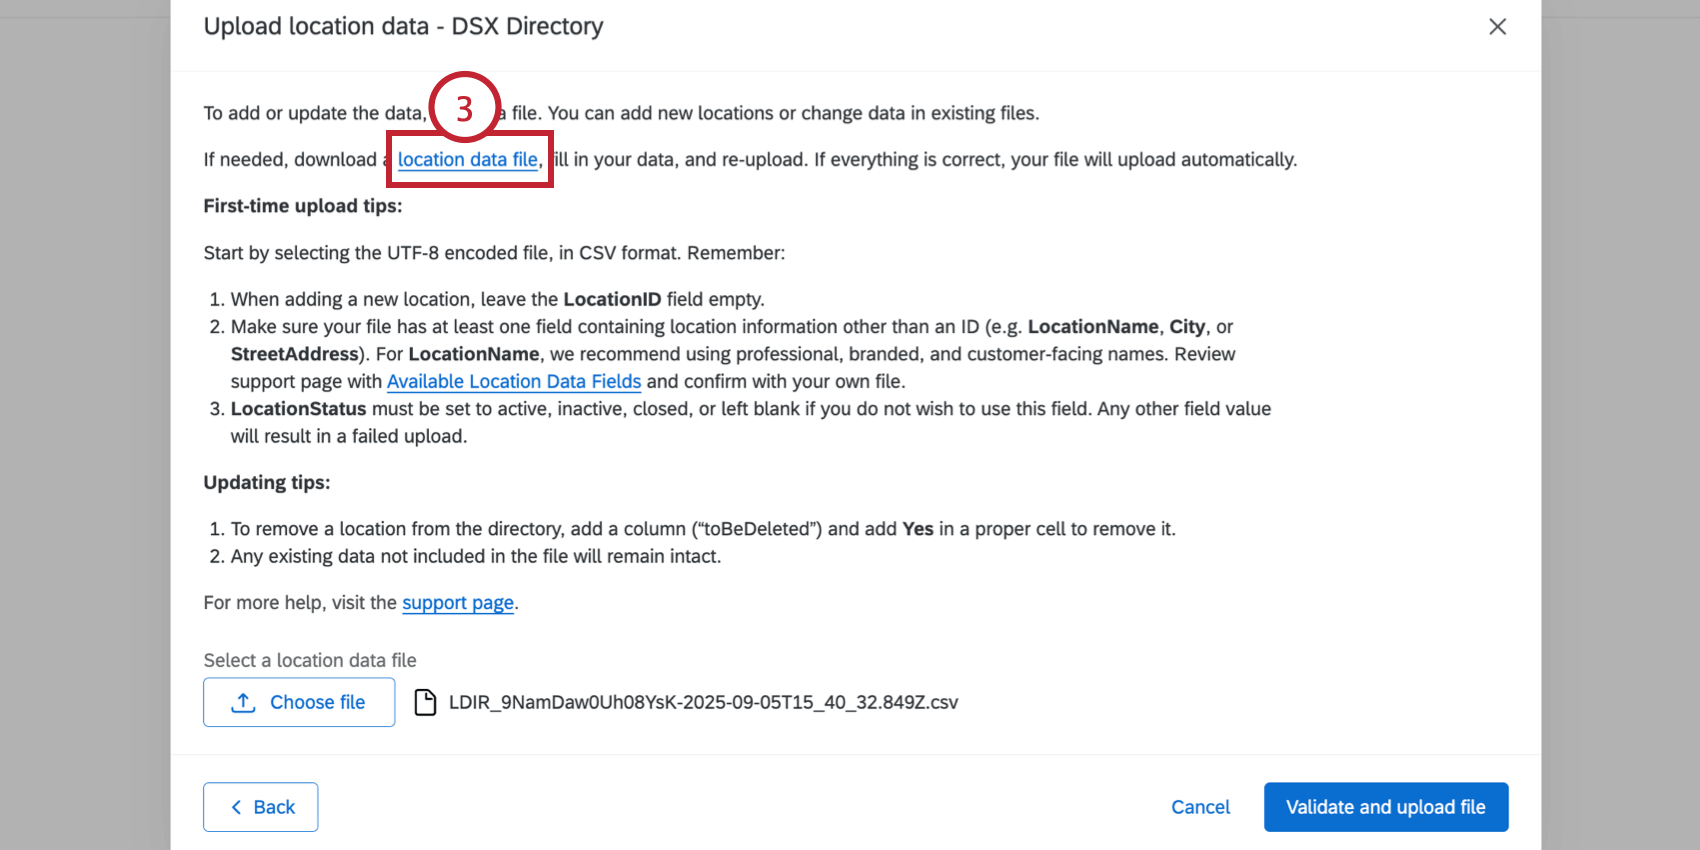

Attention: Leave the Location ID field blank. If you have IDs you already use for your locations, put them in the LocationExternalReference column instead.
Qtip: See required fields for location selectors and reputation management. See a full list of fields.
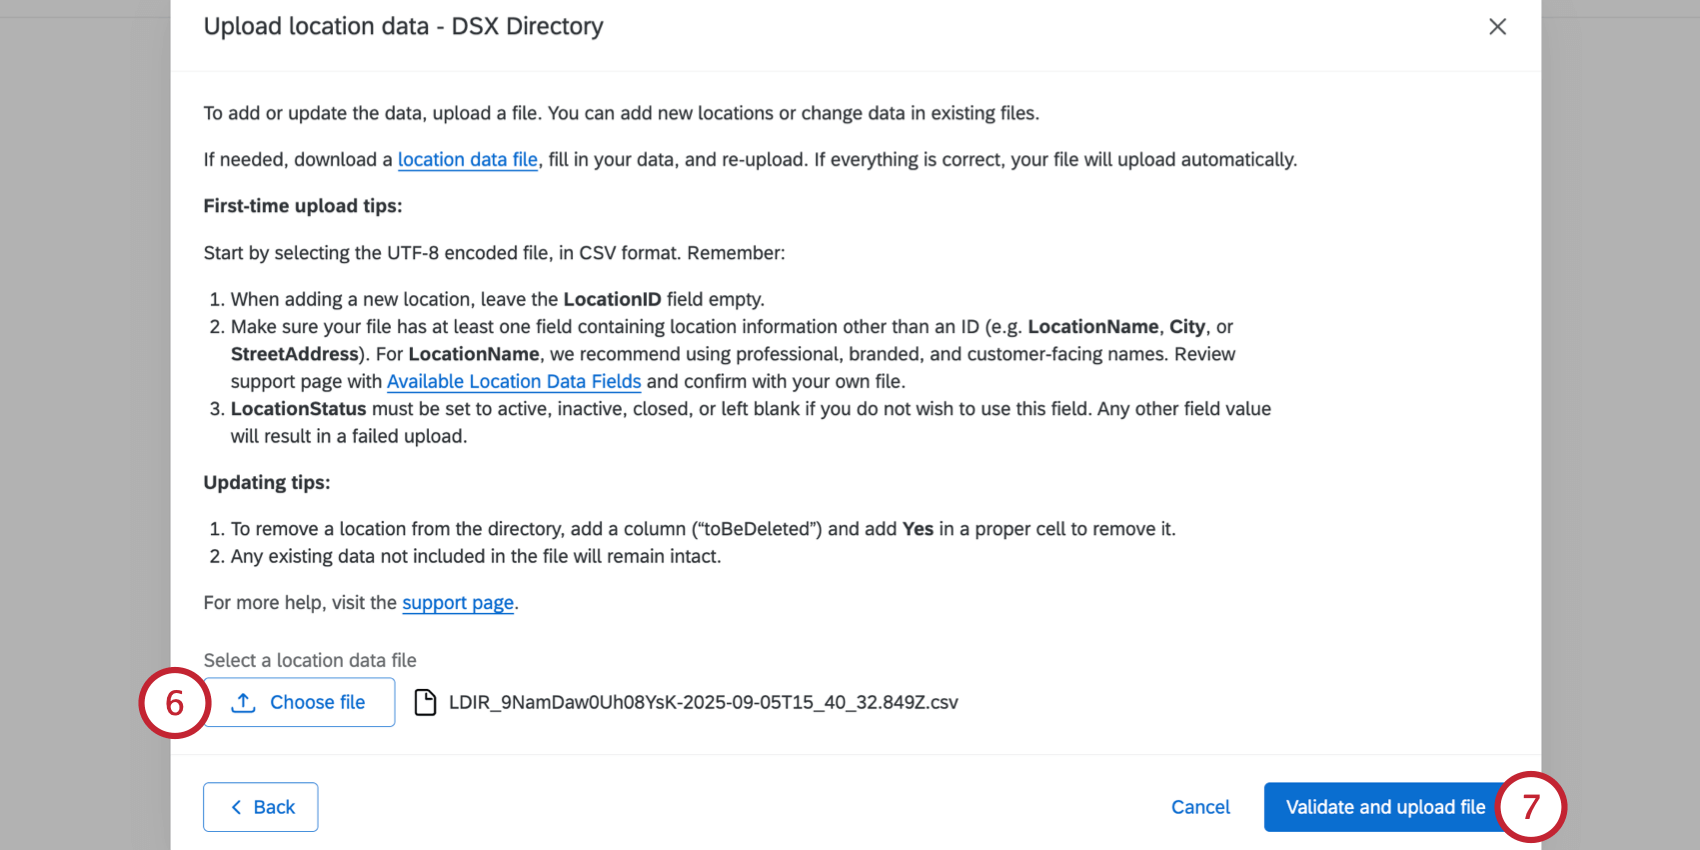
When a file is successfully validated, the file begins to automatically upload to the directory.
You’ll see a banner in the locations directory showing the upload’s progress, including whether all locations were successfully imported, or if there were issues detected in the file.
Qtip: See Troubleshooting File Upload Issues if you run into problems while uploading your file.
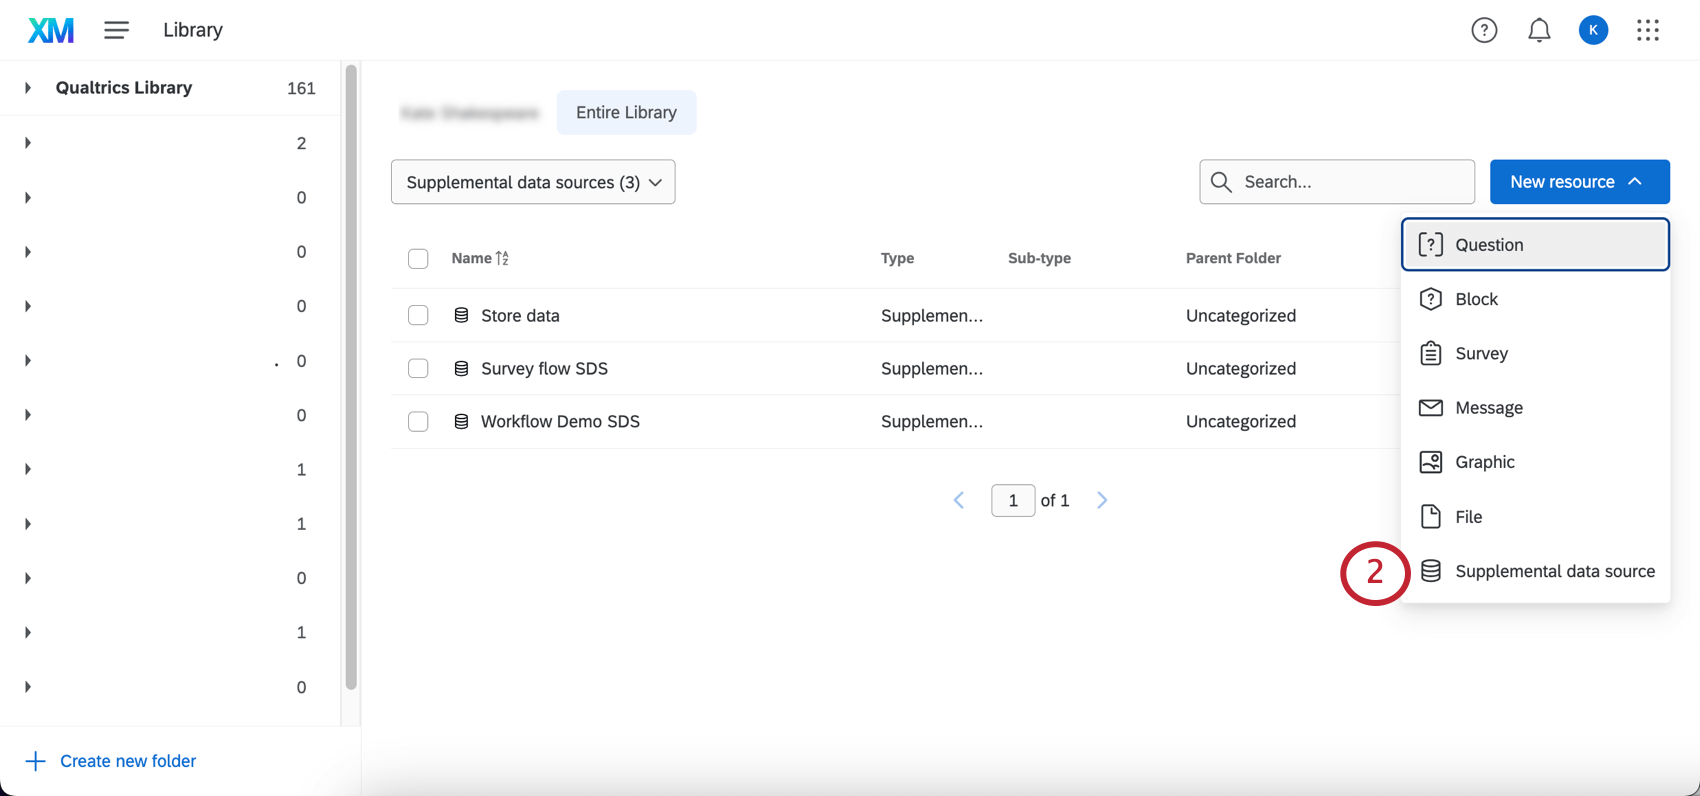
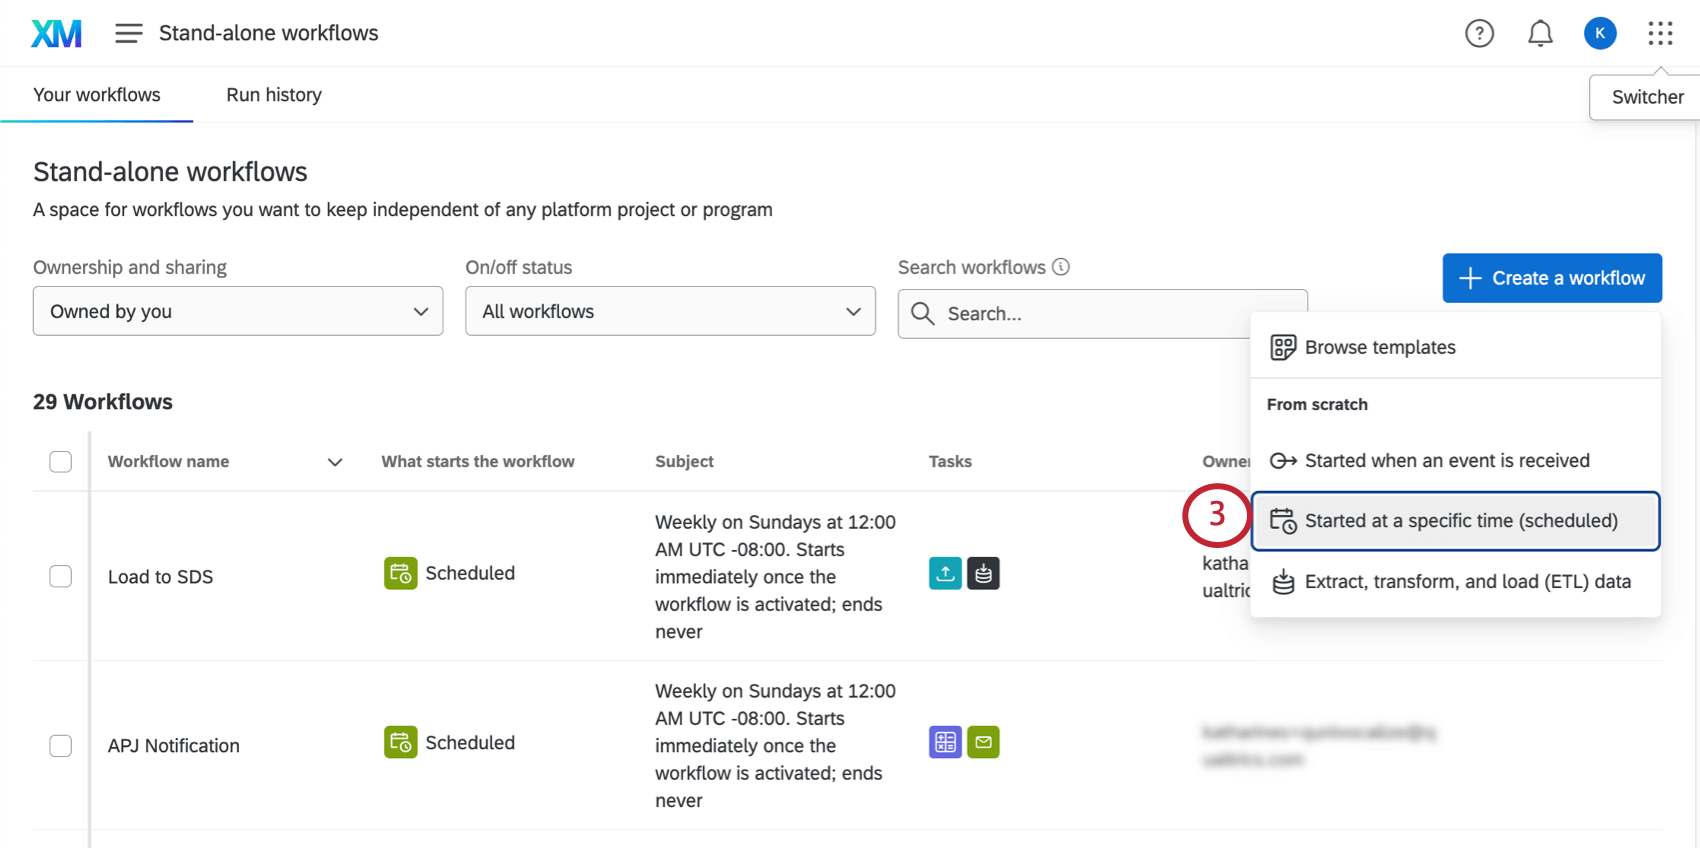
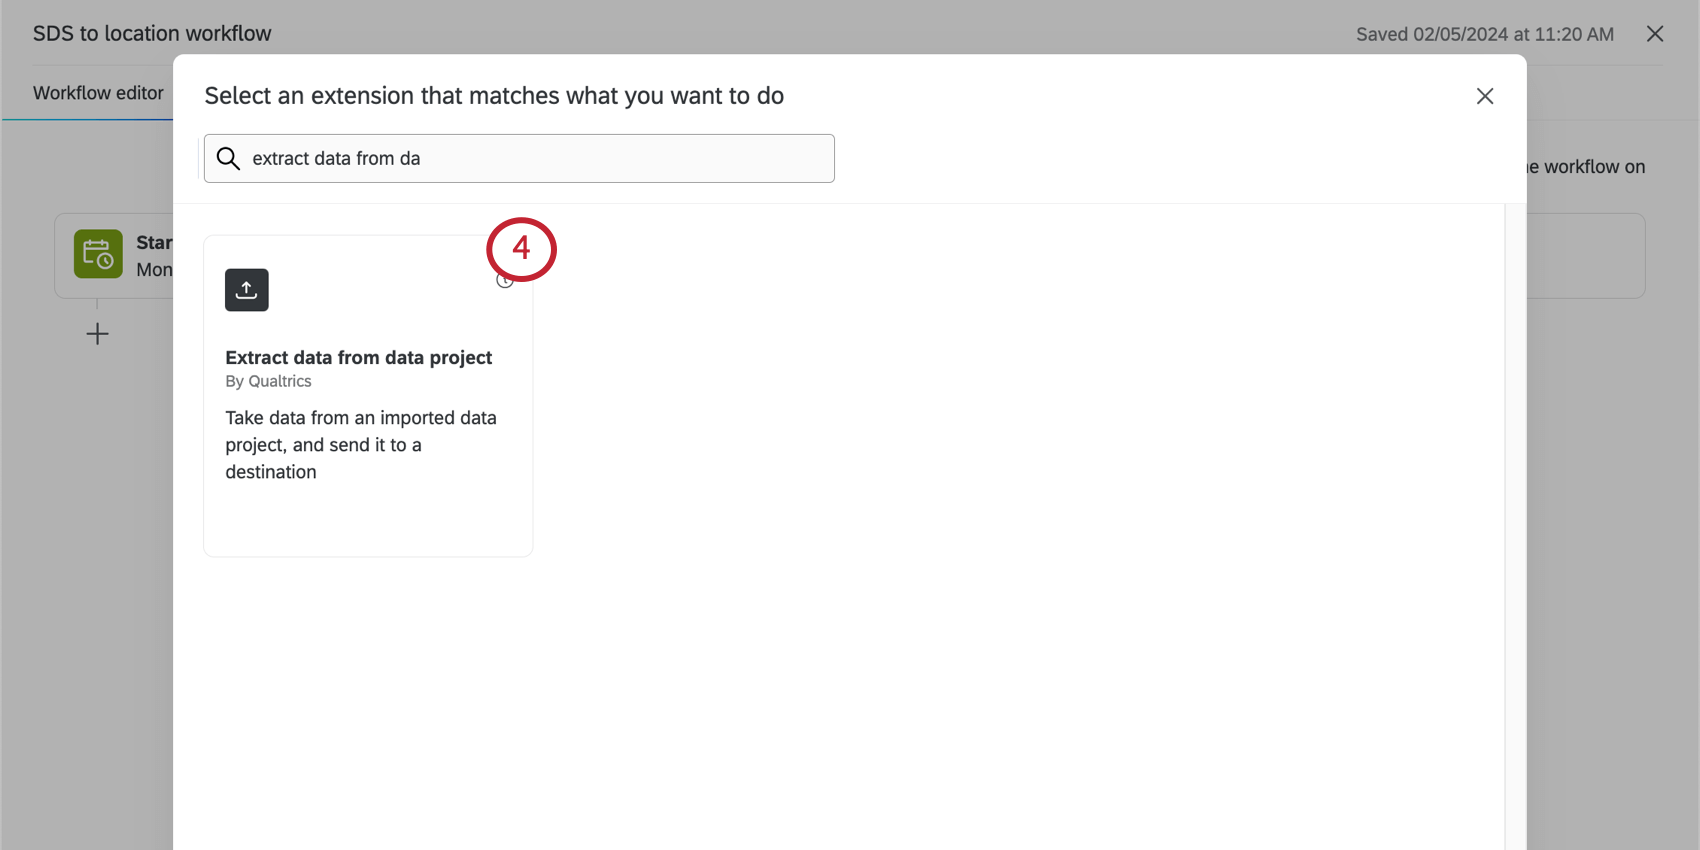
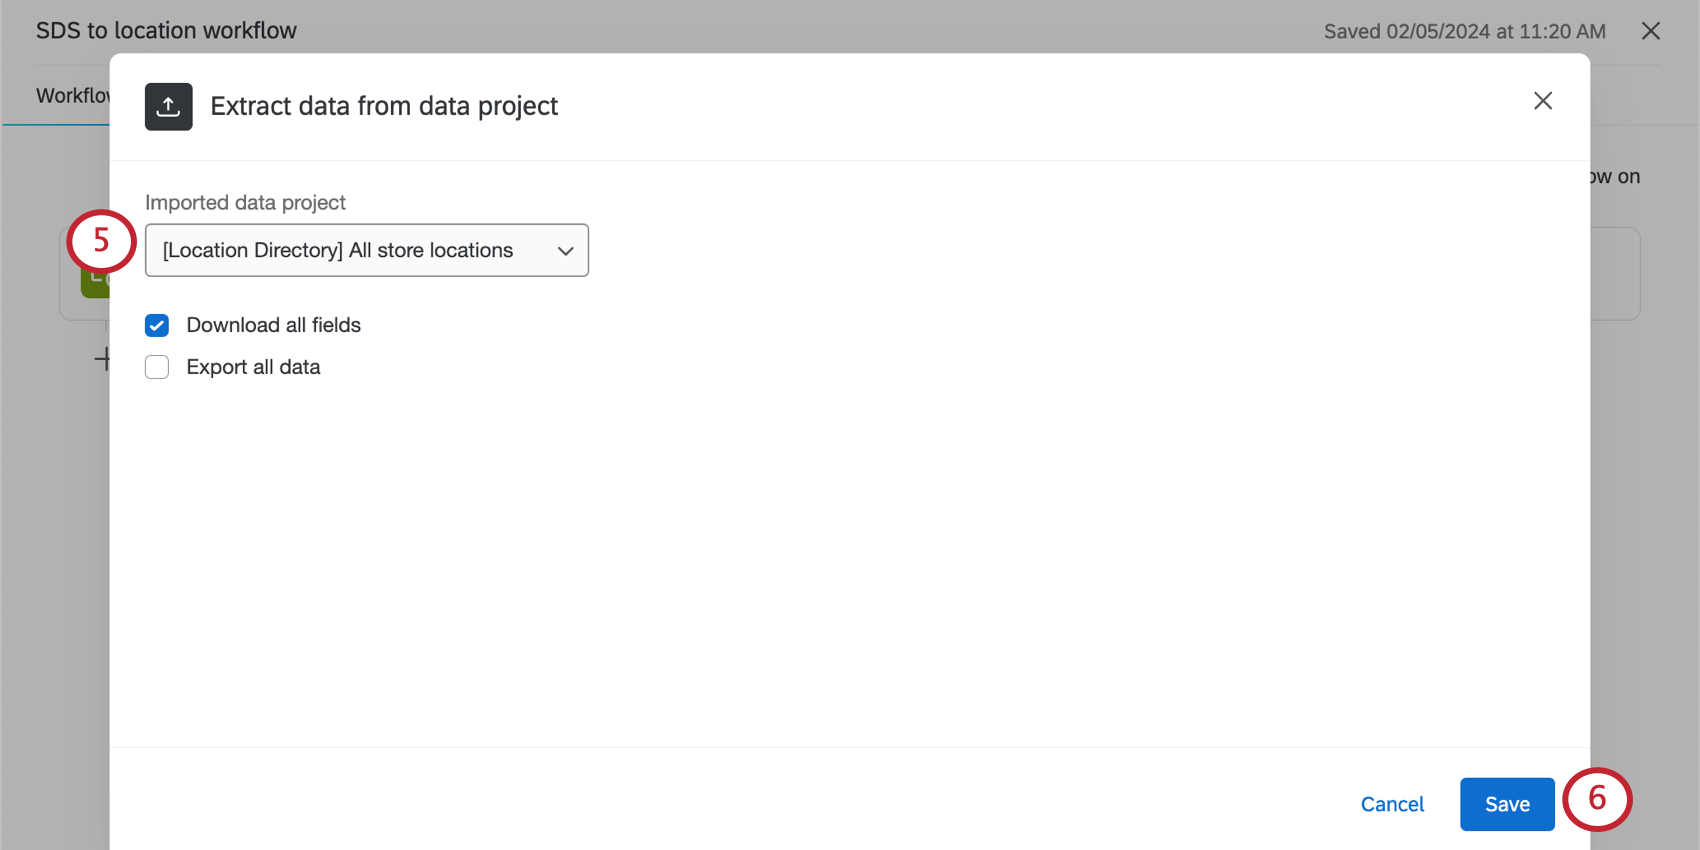
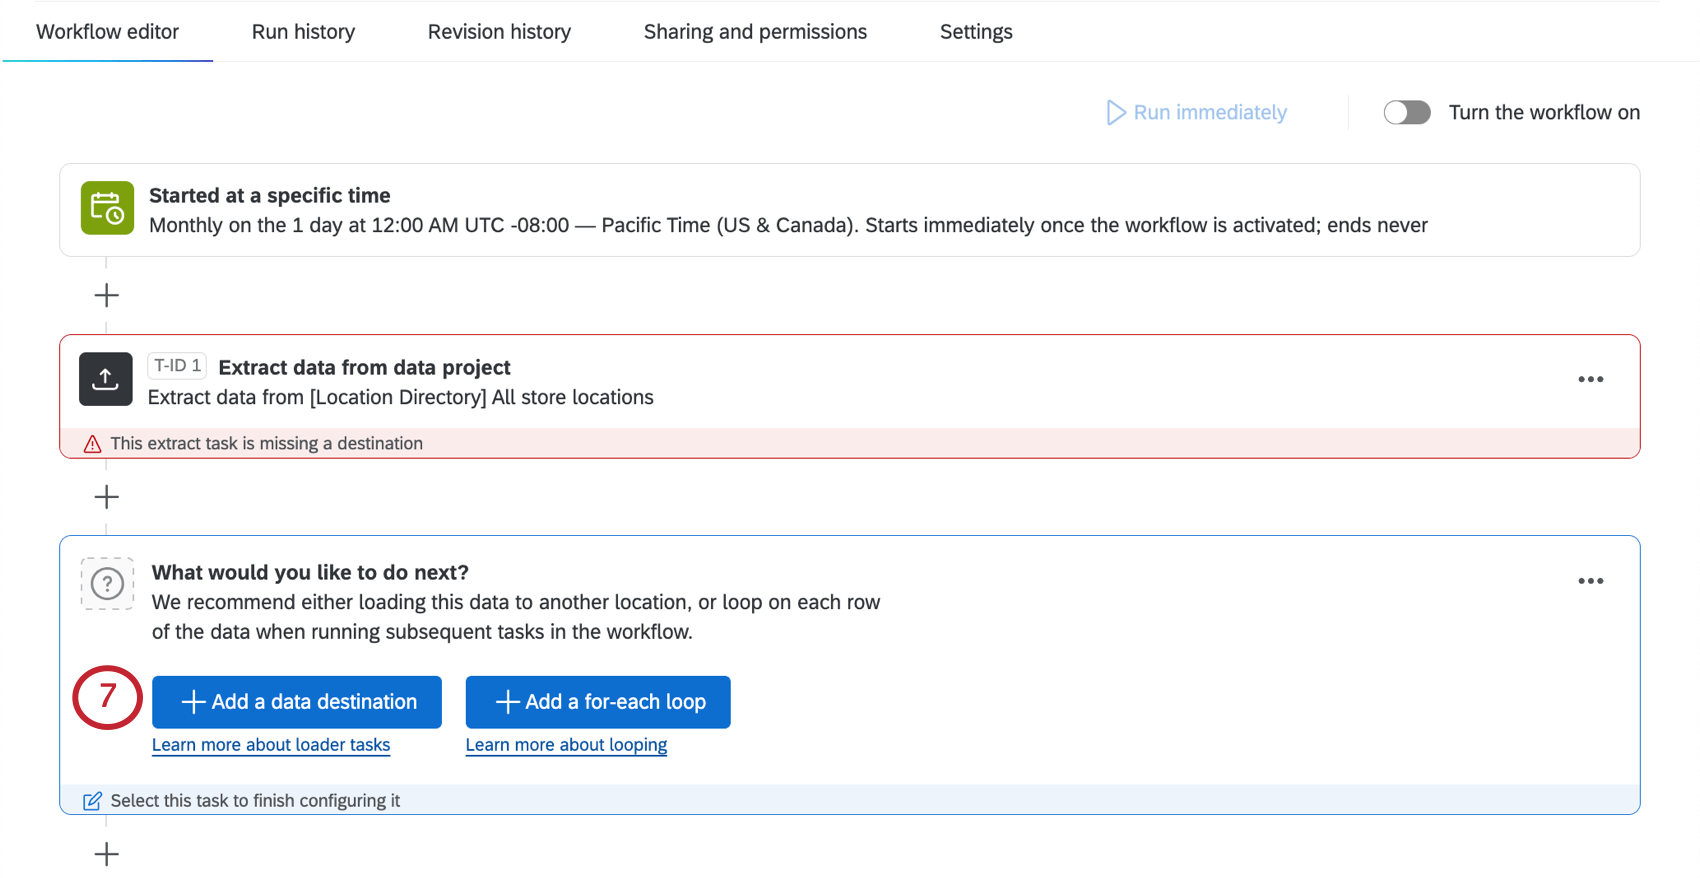
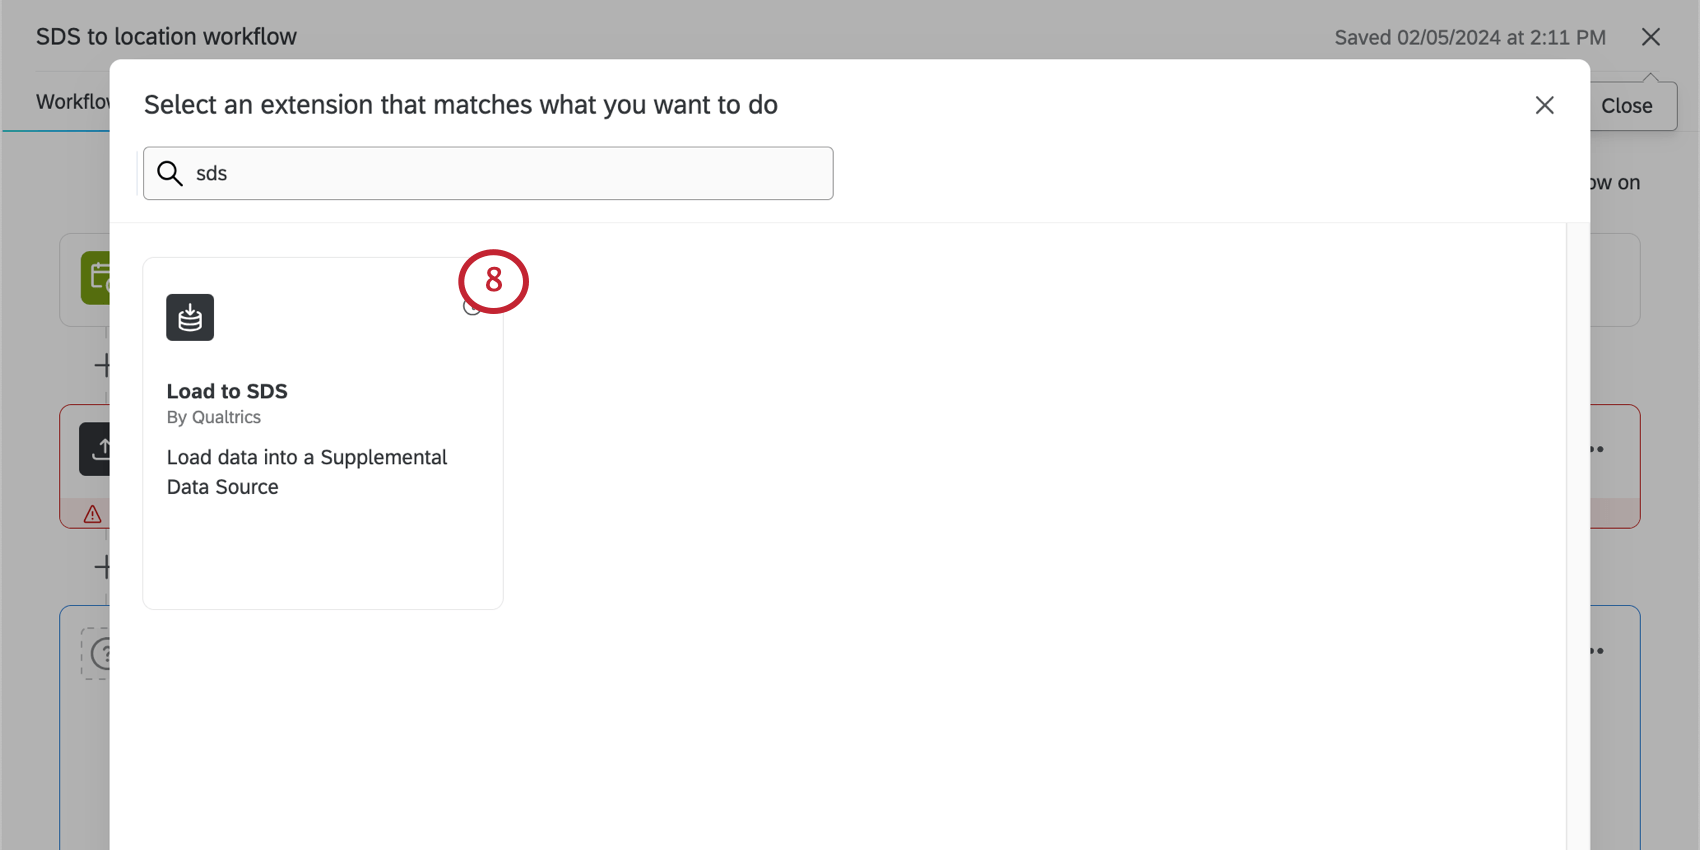
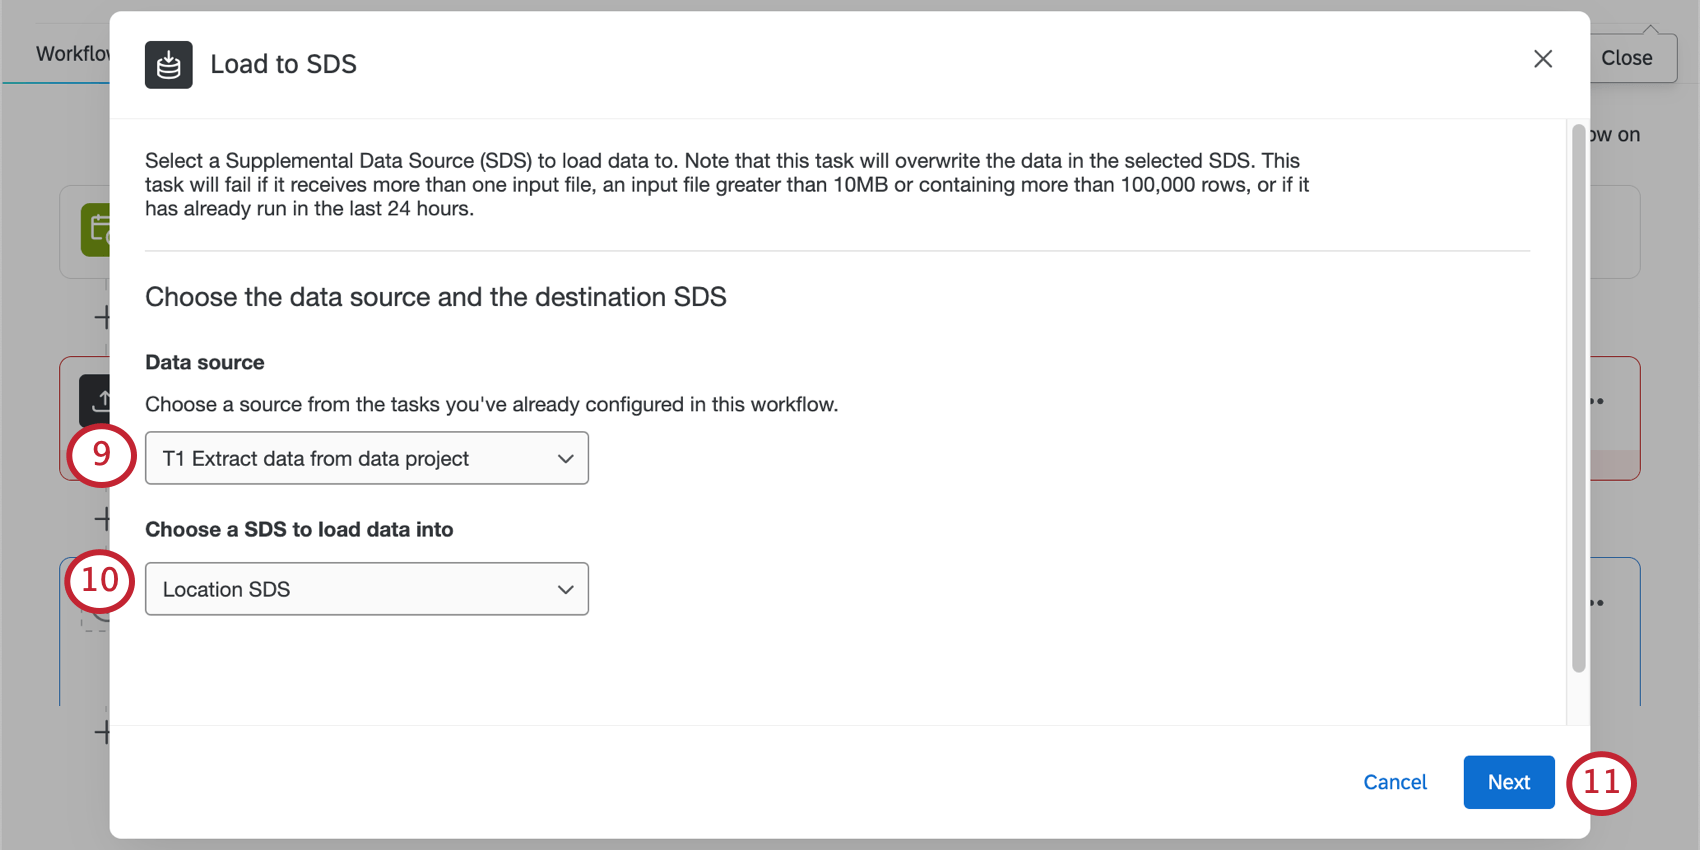
Uploading Location Data with an Automated Workflow
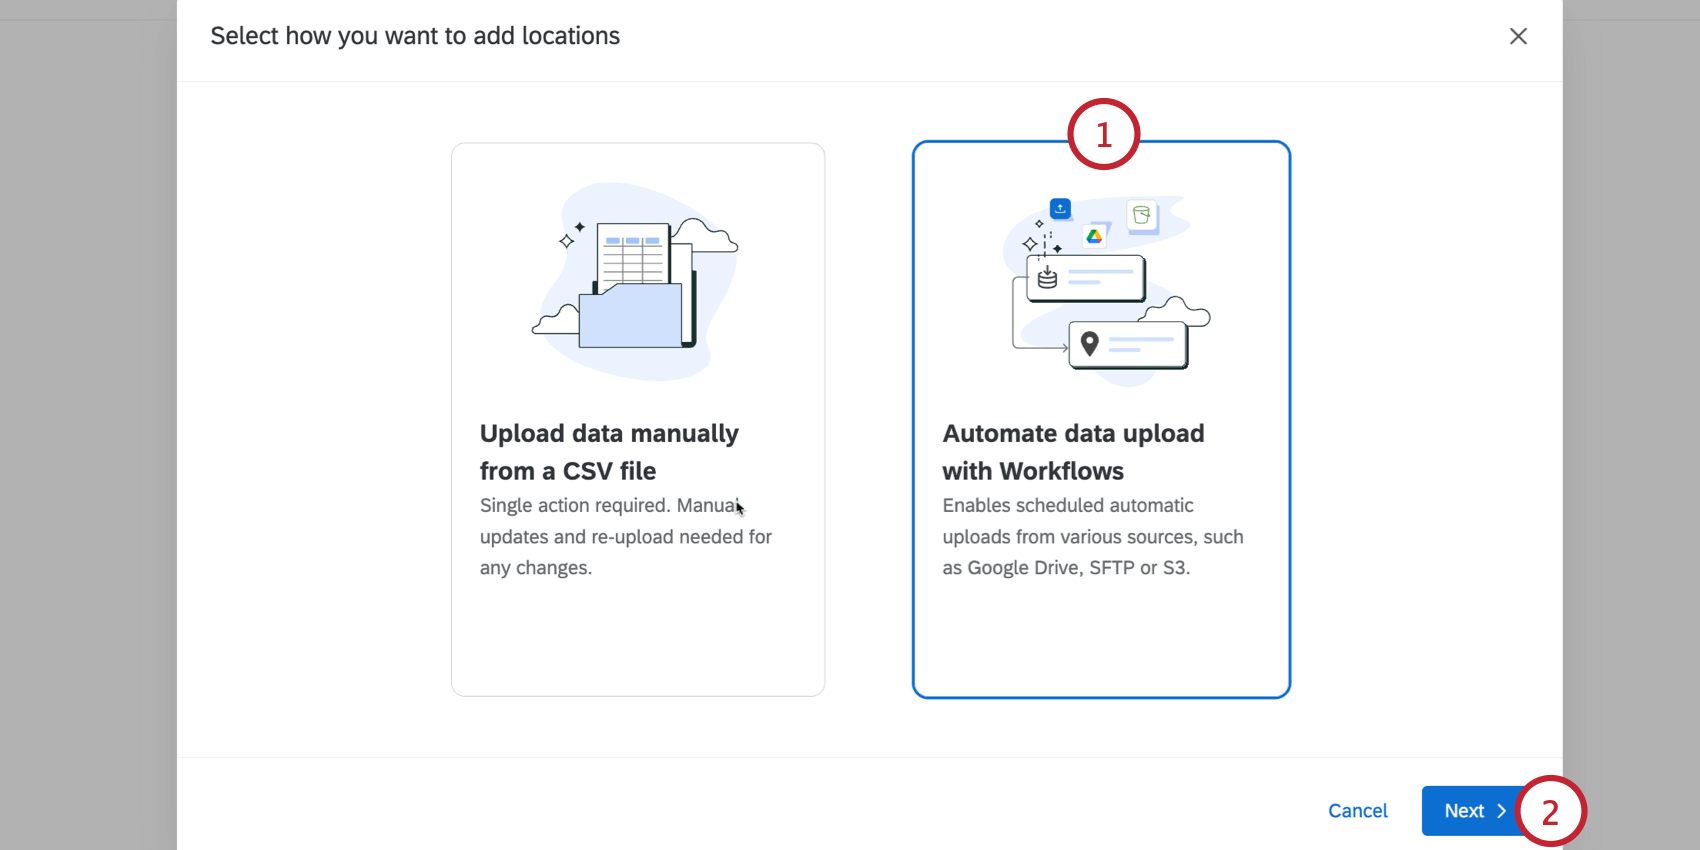
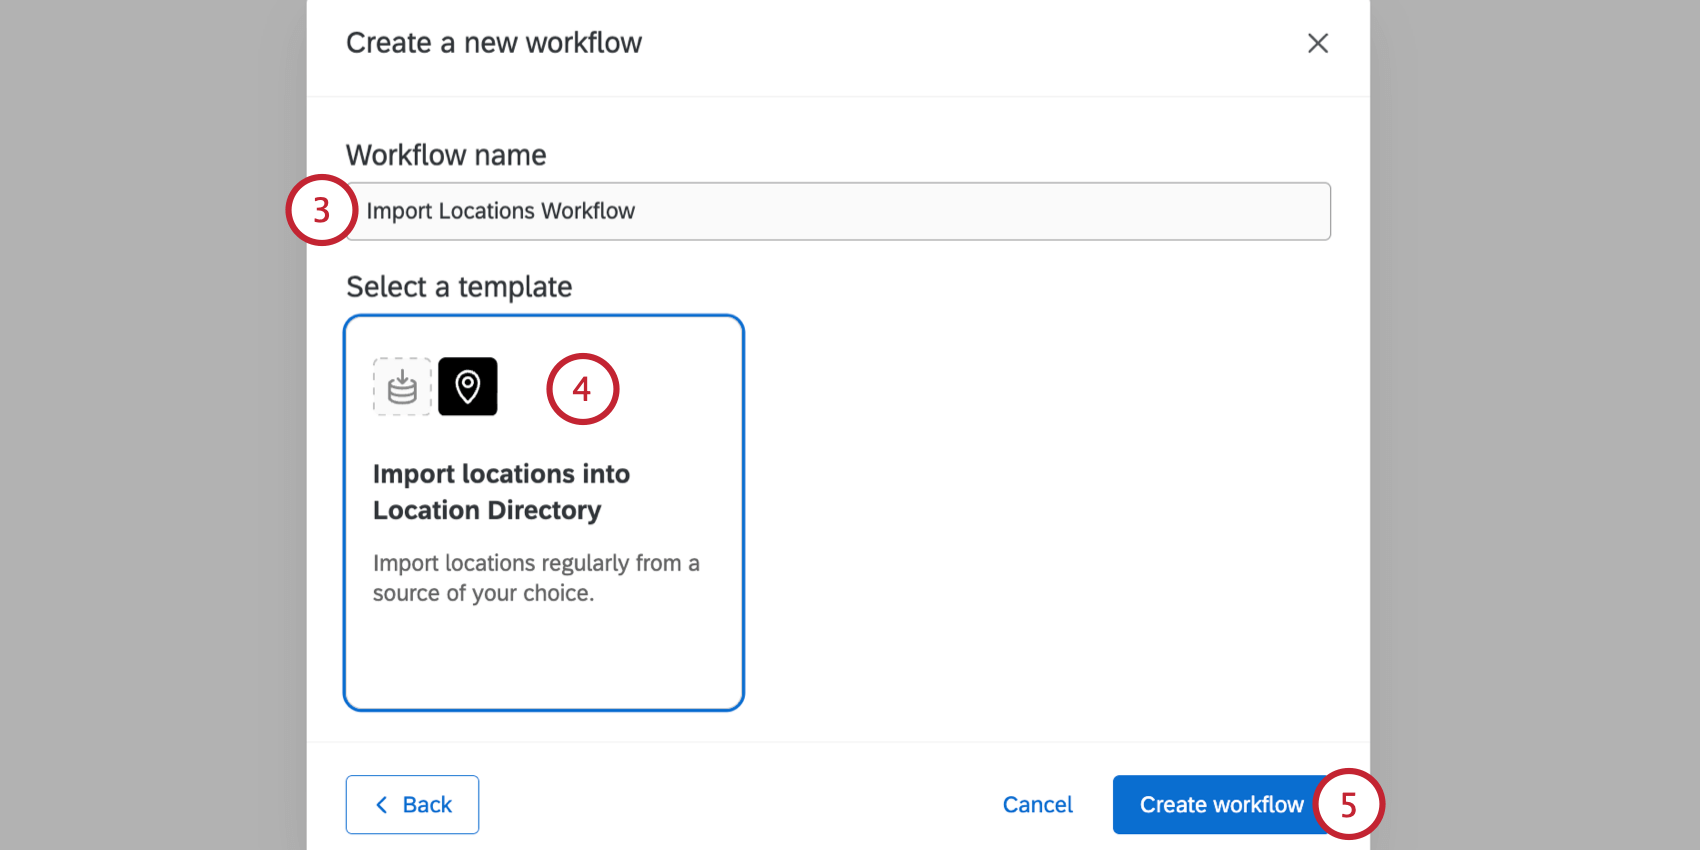
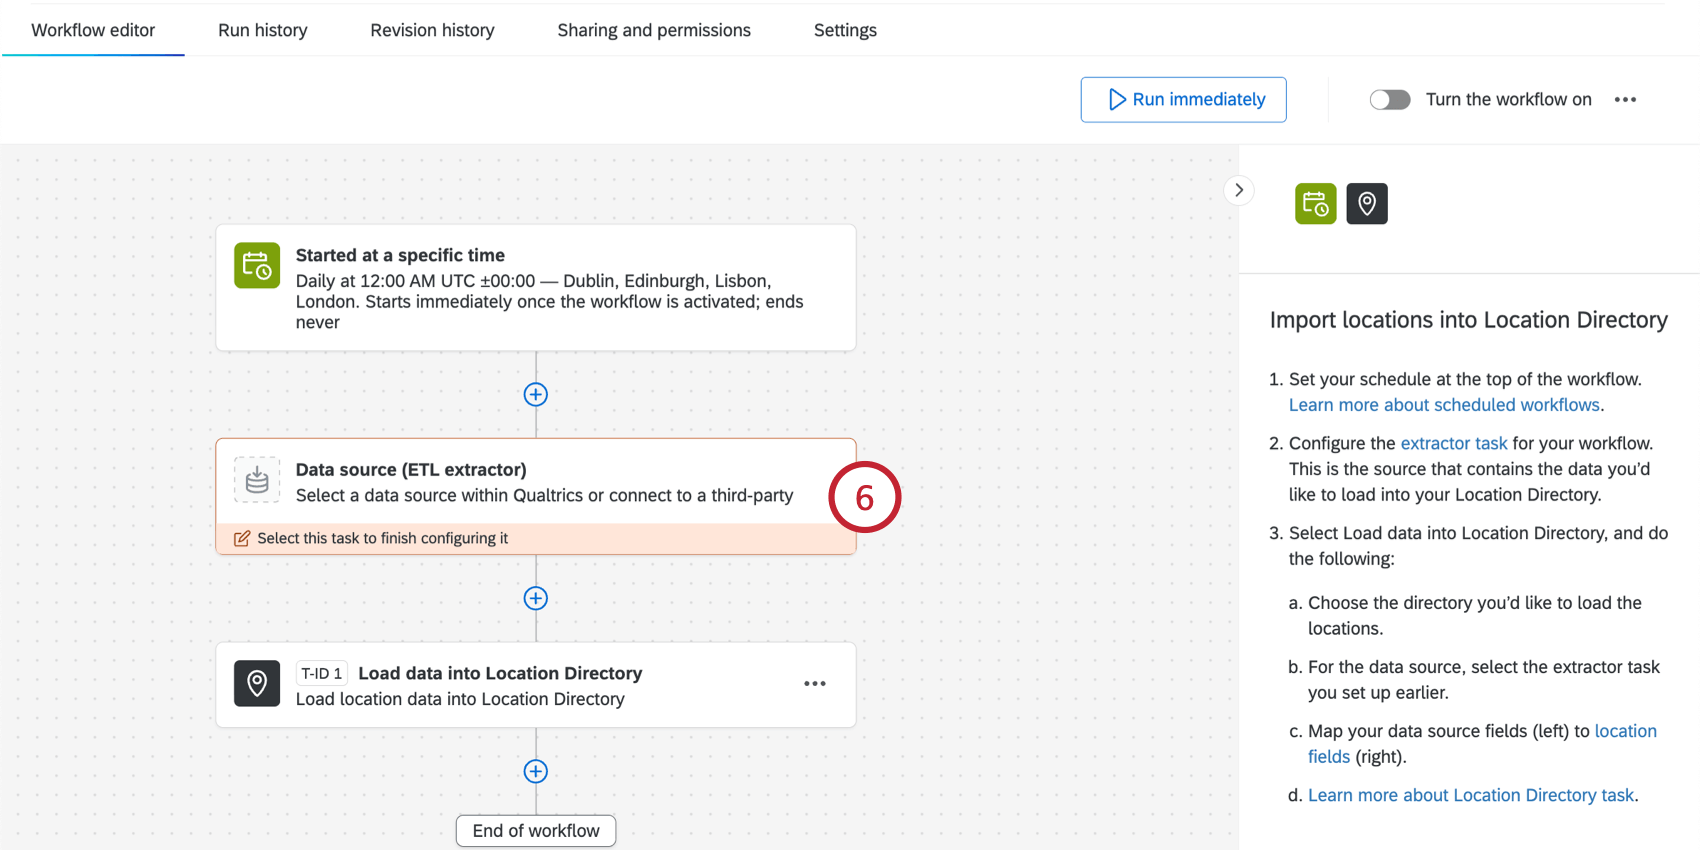
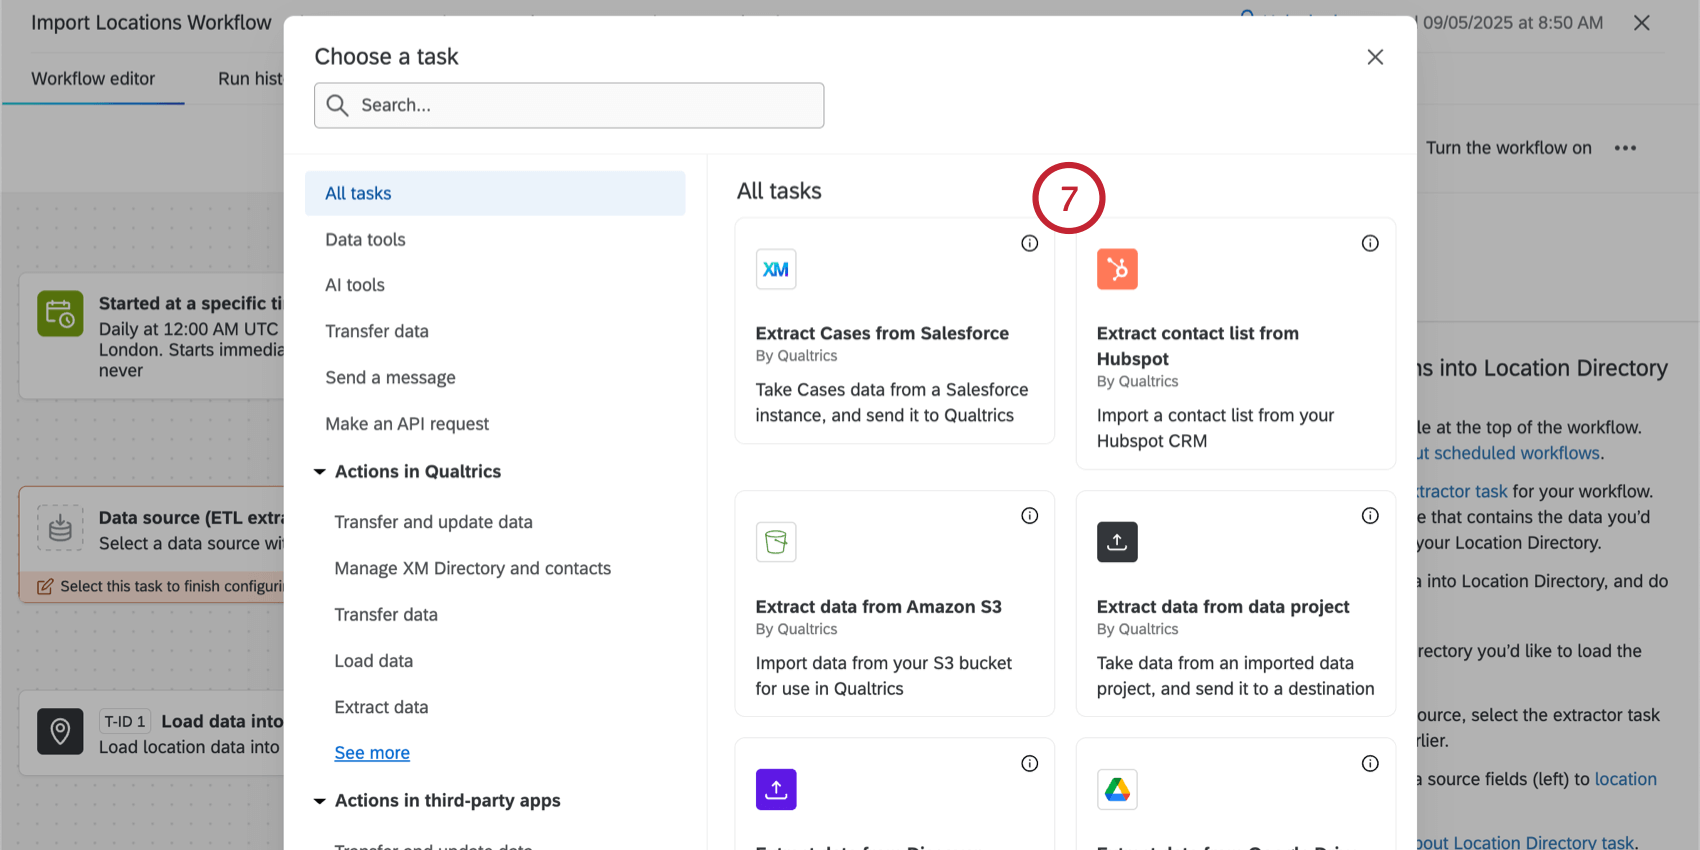
For locations, these tasks are most commonly used:
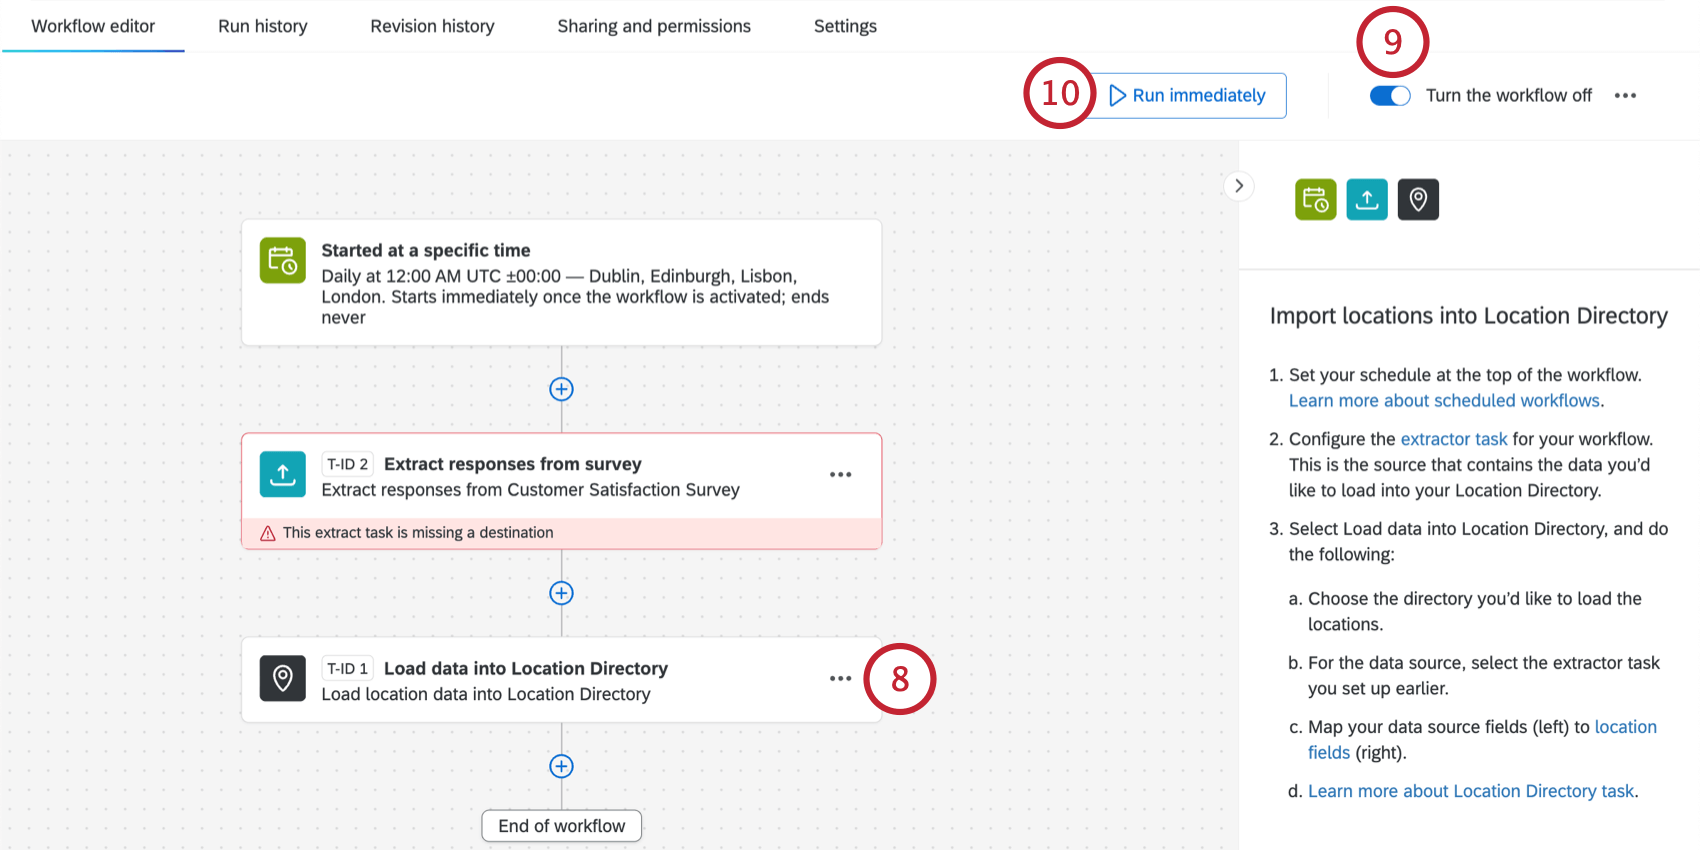
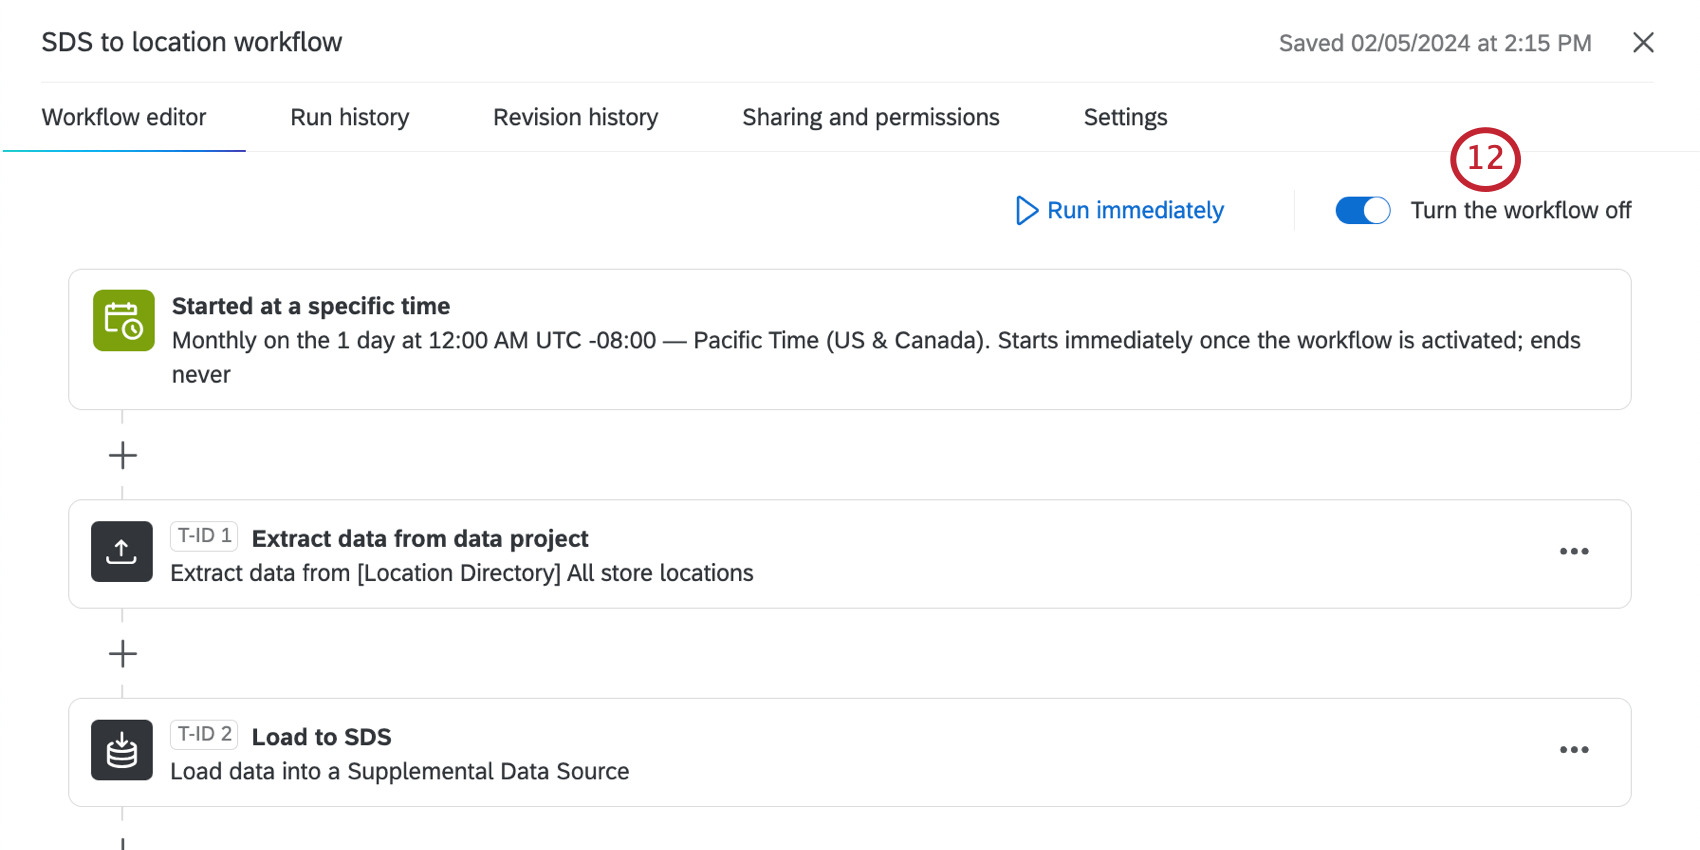
Once you’ve created a workflow, you can manage it from the Data Sources section of the Settings tab in your location directory.
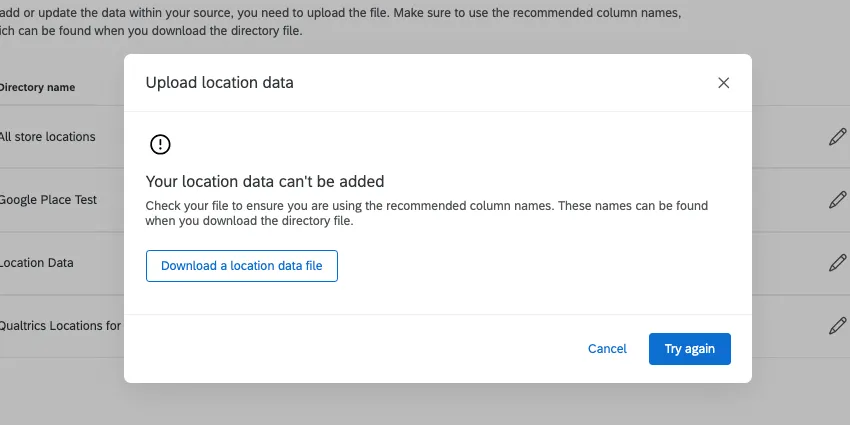
Troubleshooting File Upload Issues
If there are issues with your file and no locations can be successfully uploaded, a message will appear, and you’ll be able to try again.
If only a few locations were successfully uploaded, you’ll see a summary of how many locations were added, whereas how many locations had issues and couldn’t be added.
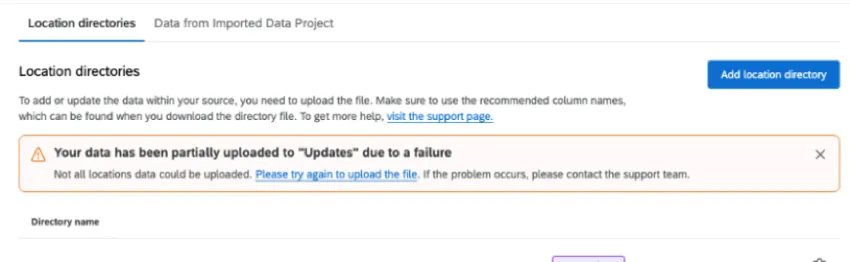
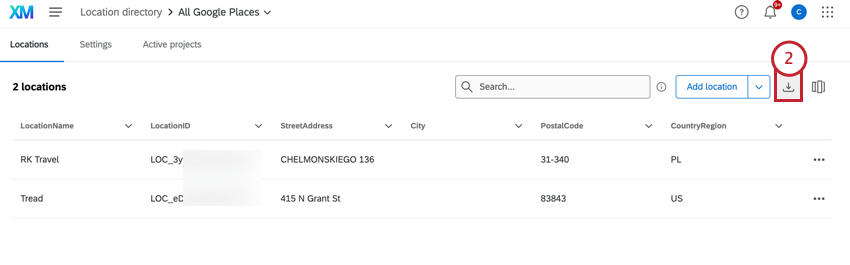
You can always download your directory to see which locations succeeded:

File formatting
- The location directory only supports TSV or CSV files with UTF-8 formatting. The directory does not support XLSX or any other file types.
- The maximum file you can upload is 100 MB.
Qtip: For additional help with TSV and CSV file formatting, see CSV and TSV Upload Issues.
Reasons for file failure
- Includes a location ID that doesn’t already exist in the directory. (If updating a location.)
- Contains columns of data that aren’t supported.
- Does not contain any location information other than an ID. (E.g., no location name, city, or address.)
- Has a “Location Status” is set to anything other than active, inactive, or closed. You can also leave the status blank.
- Has a latitude greater than or equal to 90, or lesser than or equal to -90.
- Has a longitude greater than or equal to 180, or lesser than or equal to -180.
Adding a Single Location
You can also choose to manually add one location at a time to your directory.
Click the arrow next to "Add locations."
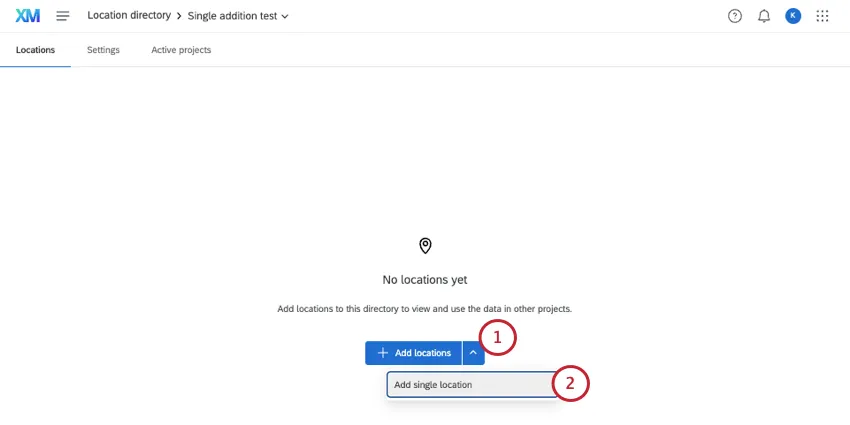
Click Add single location.
Fill out details about the location.
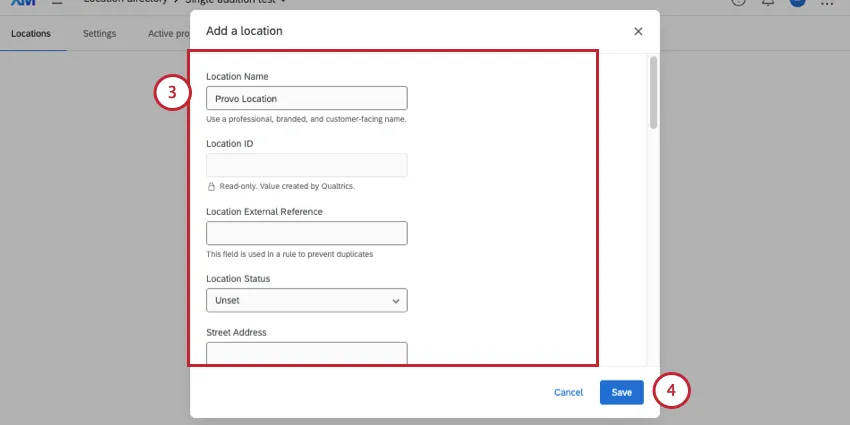
Qtip: You'll only see supported location fields. Location ID is read-only, and Location Status is multiple choice, only allowing you to choose from supported statuses.
When you're finished, click Save.
Creating a Competitor Directory
Most location directories act as a repository of your own brand or organization’s locations. However, you can create a directory with competitor locations. This can be valuable for linking specific competitors to each of your own organization’s locations, adding comparative insight to your reputation management reporting.
To learn more, see Competitive Reviews.
Editing Locations
If you want to remove locations or change how they appear in the location selector, you can return to the location directory.
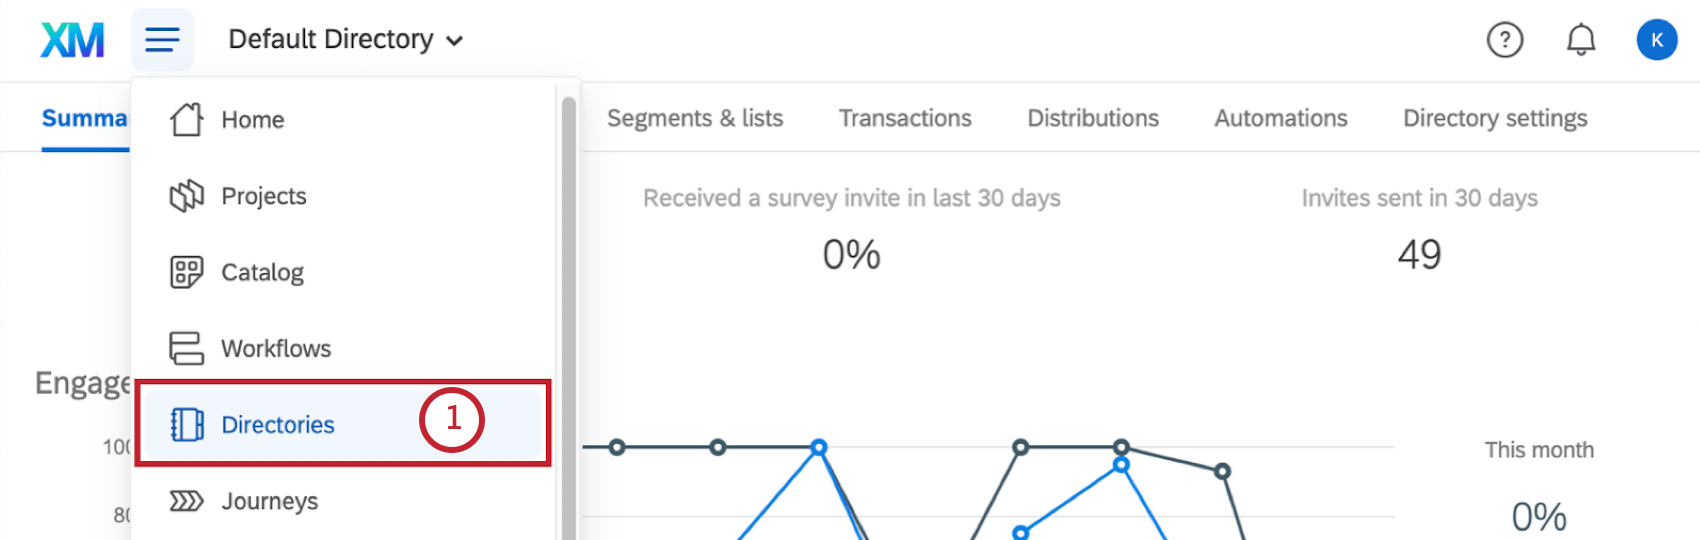
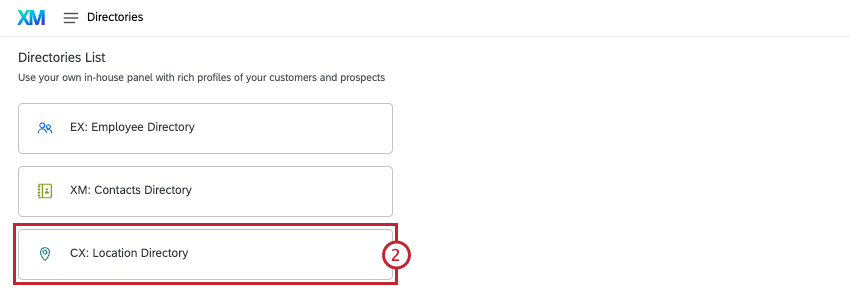
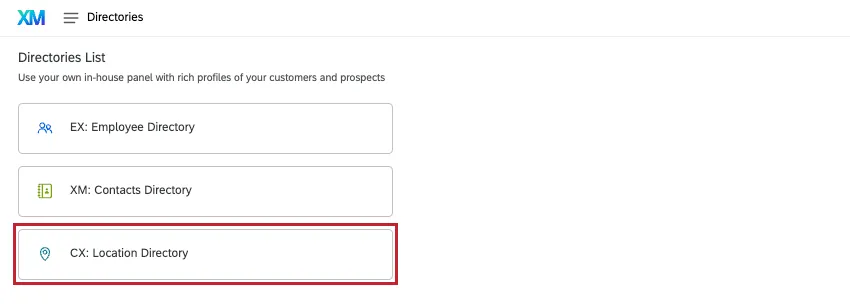
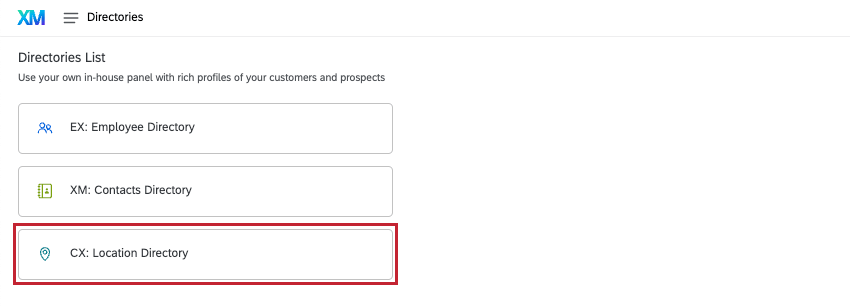
Go to the global navigation menu, select Directories, then select Location Directory.
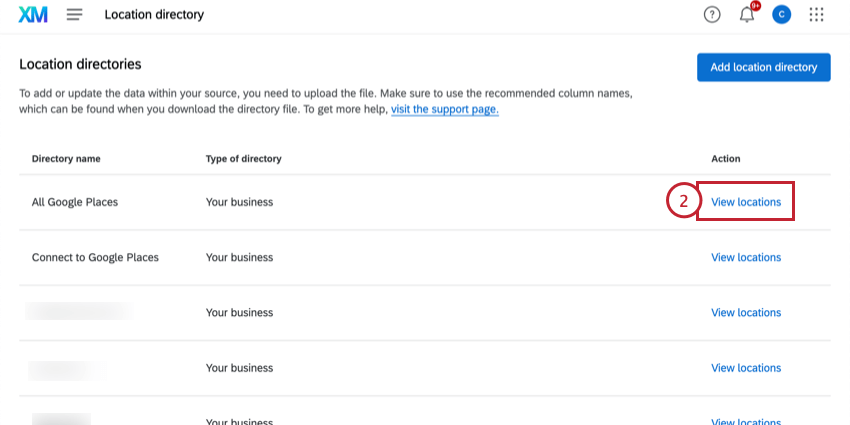
Then, click View locations next to 1 of your location directories.
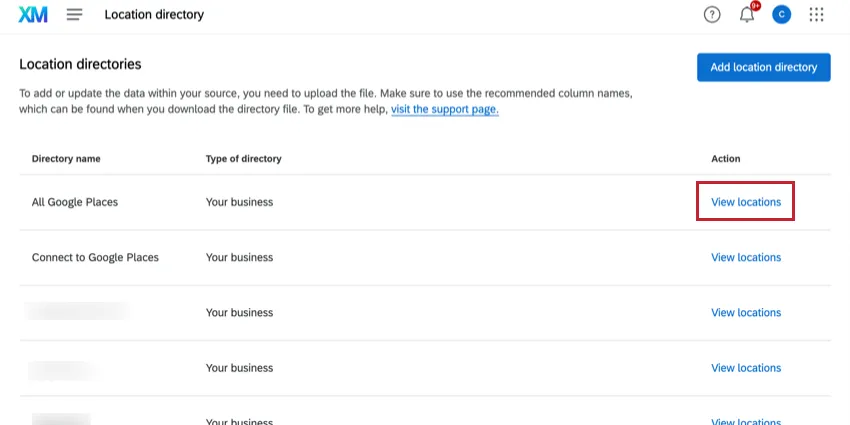
Once there, you can do the following:
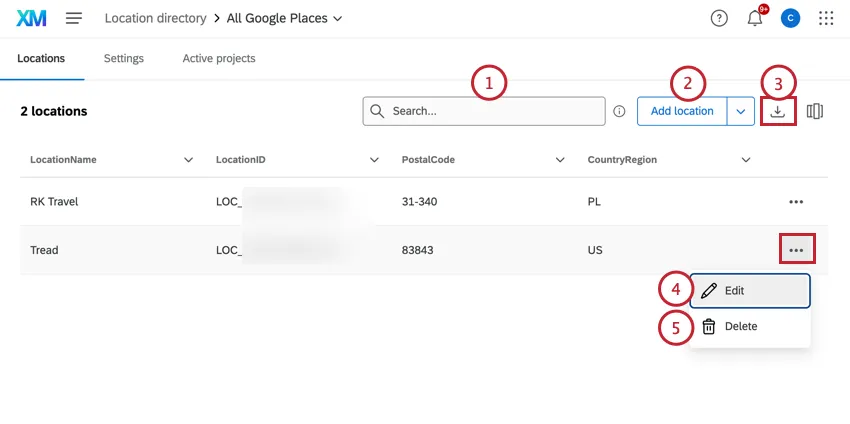
Qtip: If you are syncing your directory with an external source, like Google, Amazon, or an SFTP, edits you make here may be updated when the synchronization is refreshed.
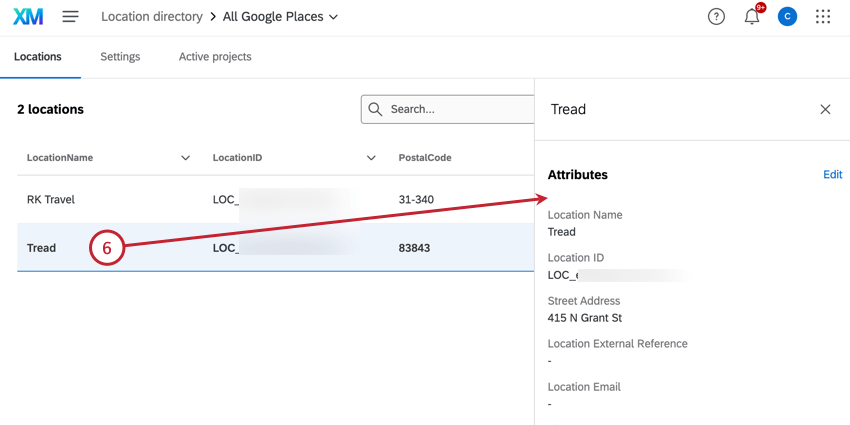
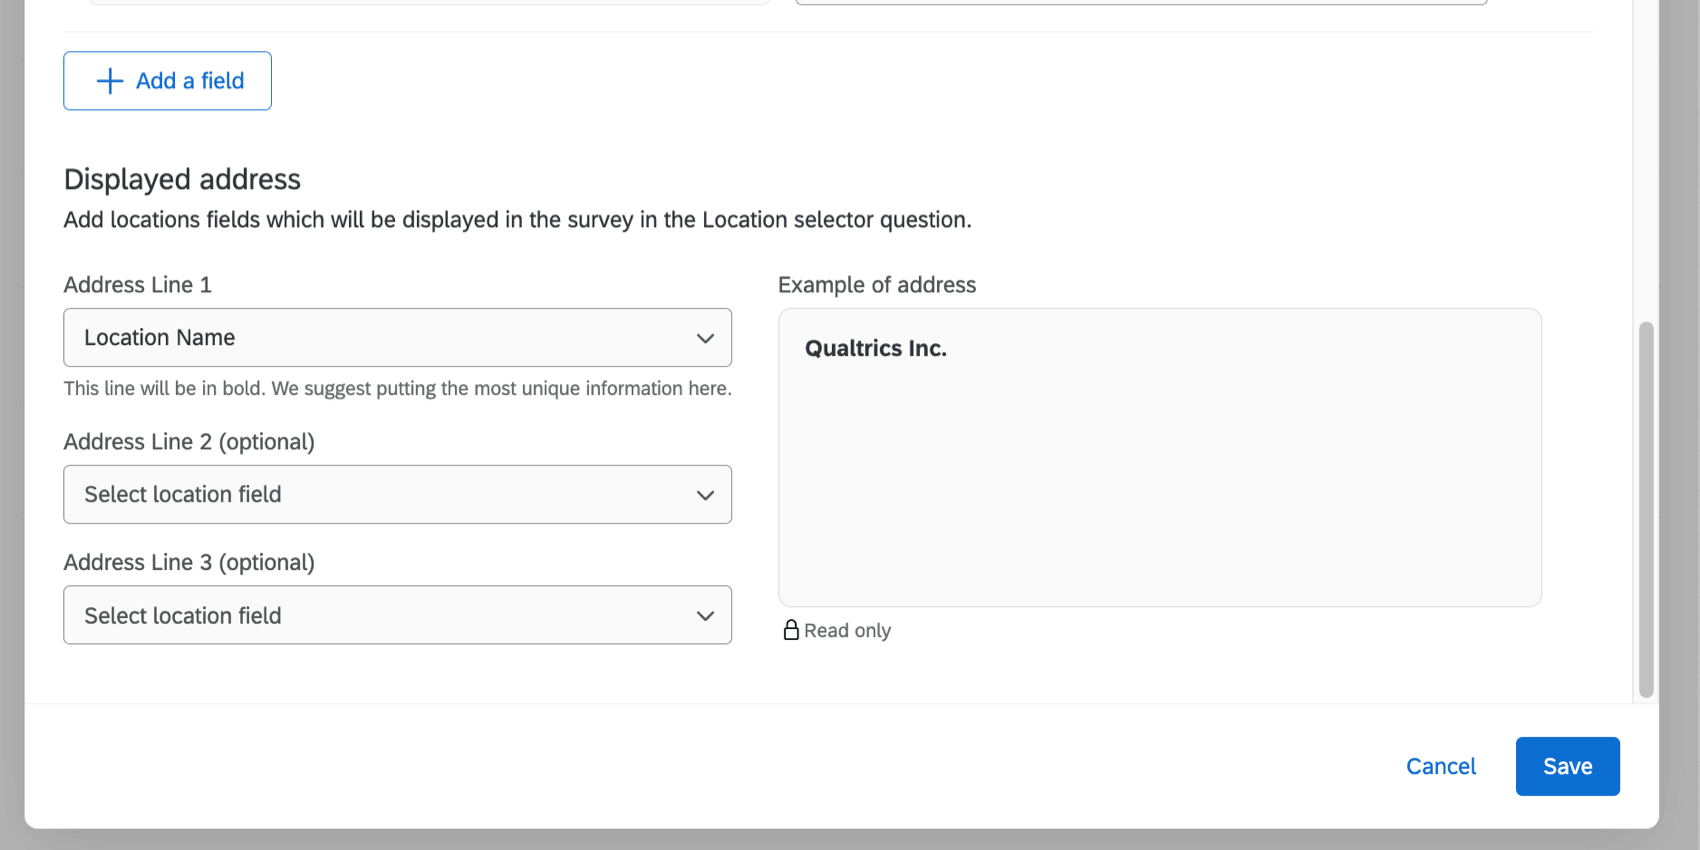
Displayed address
You can decide what information you want to display with each location in the selector. You can choose 3 from any of the fields mapped to the location directory. When you’re finished, click Save.

Location Settings
The settings menu provides different settings that you can configure for your directory.
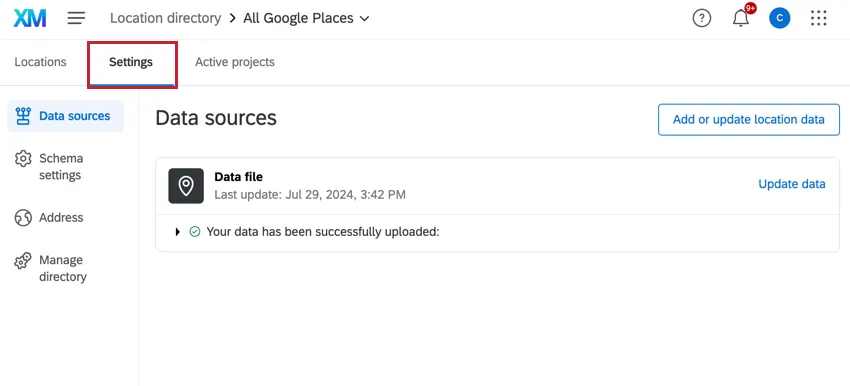
Data Sources
The data sources tab contains a list of the data sources used in the location directory you selected. Click Add or update location data to upload a location list.

- To add a new location: leave the “LocationID” field empty.
- To update existing locations: edit the fields you would like to update but leave the existing “LocationID” field the same. For more information, see Uploading Locations to a Directory.
- To delete a location: Add a column with the title “toBeDeleted”, then enter “yes” for the rows of locations you would like to delete. These values are case sensitive. See Deleting Locations from a Directory for more information.
Qtip: Any existing data not included in the uploaded file will remain the same.
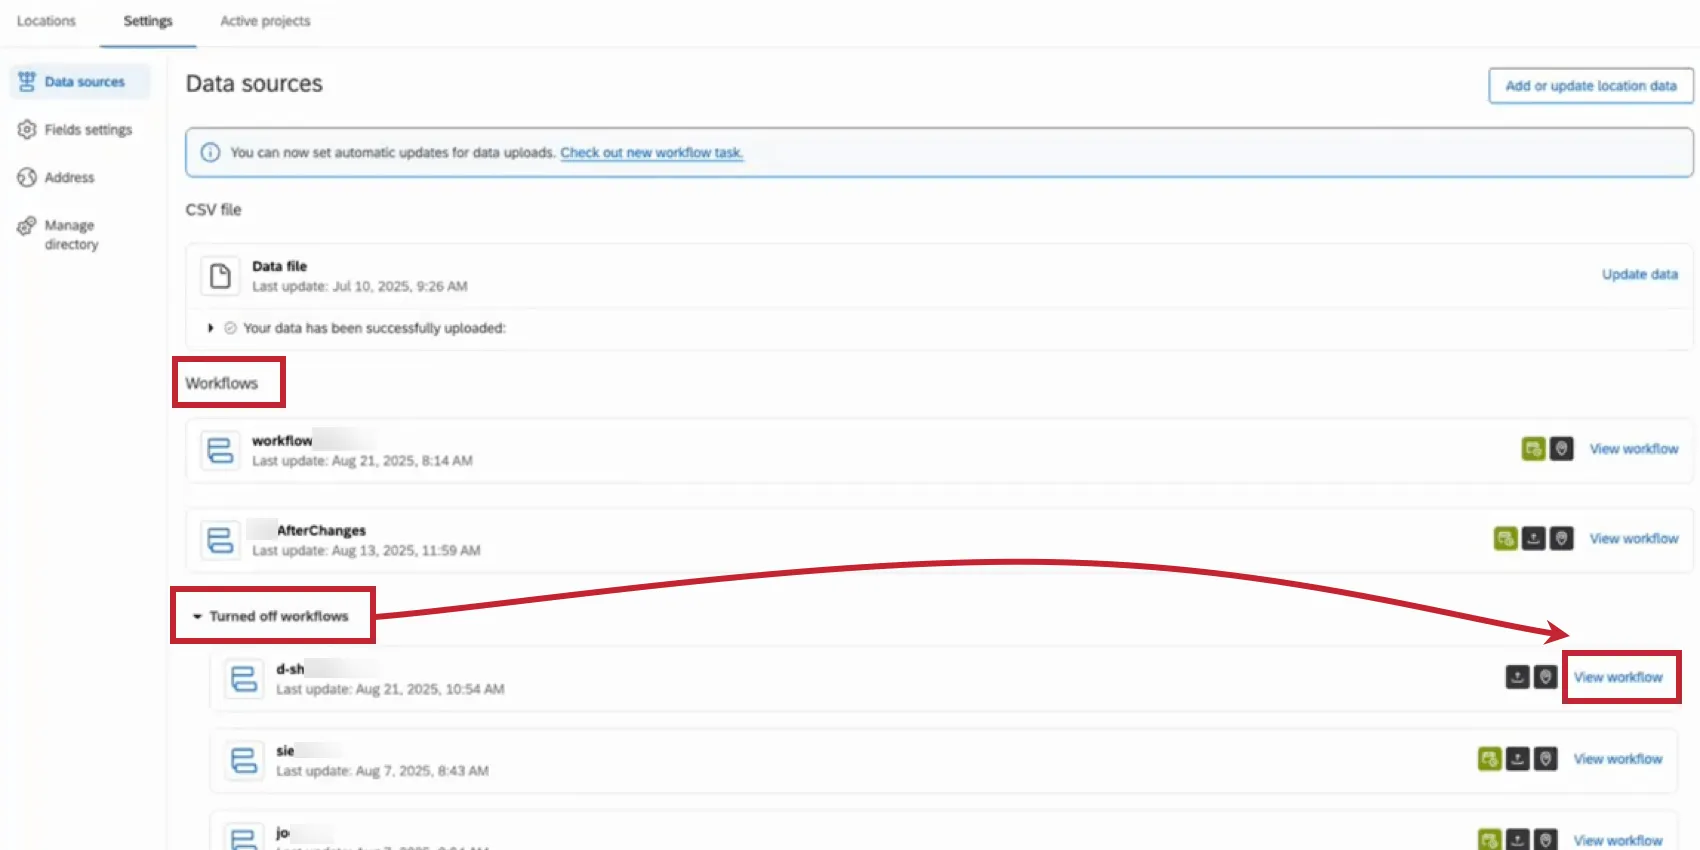
If you’ve set up any automated workflows to import location data, they will also be listed in the data sources section. You can see which workflows are currently active and which have been turned off. Click View workflow to be brought to the workflow editor for that specific workflow.
Schema Settings
The schema settings contain the location fields used in your directory. Click Create a custom location field to add a new field to the directory.
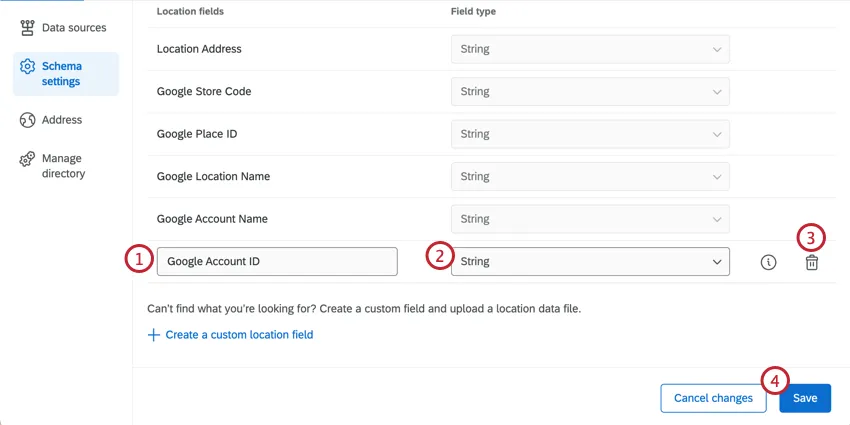
Qtip: Custom fields are shared across all location directories. You can create up to 30 custom fields per brand. Once custom fields are created, they cannot be deleted.
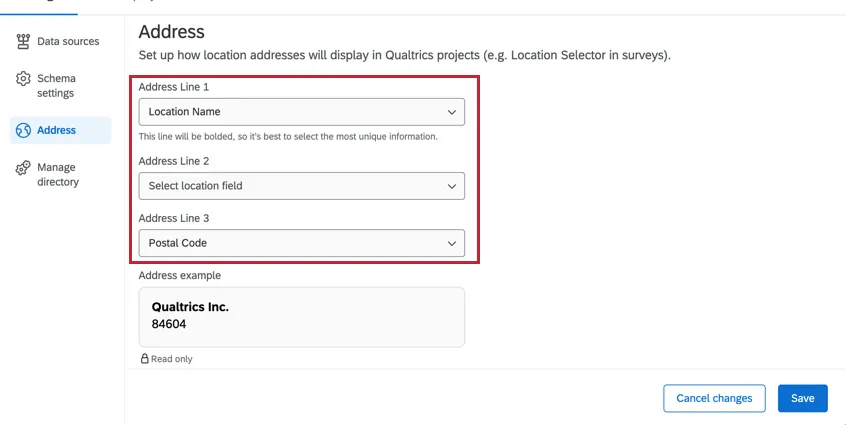
Displayed Address
You can decide what information you want to display with each location in the selector. You can choose 3 from any of the fields mapped to the location directory. When you’re finished, click Save.
Reporting
Only competitor directories having a Reporting section. This is where competitor and company directory locations are aggregated. For more, see Competitive Reviews.
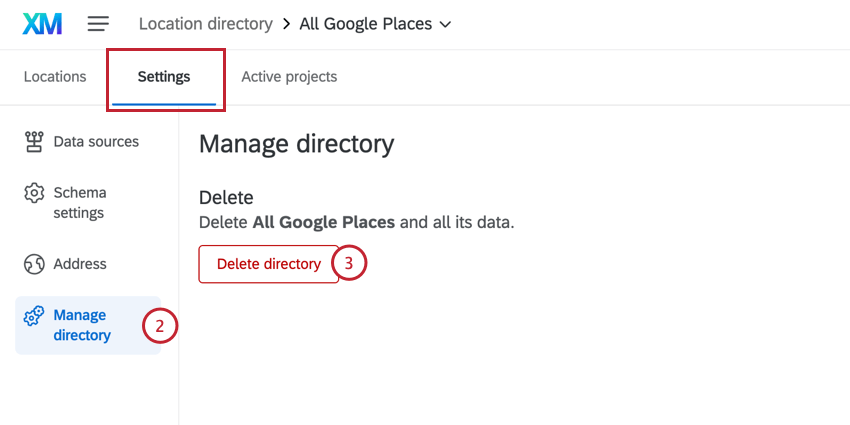
Delete Directory
Warning: Deleting a location directory will impact any dashboards, location selectors, or reputation management projects it’s connected to. Once a location directory is deleted, it is irretrievable, and you will need to create a new directory to connect to selectors and projects.

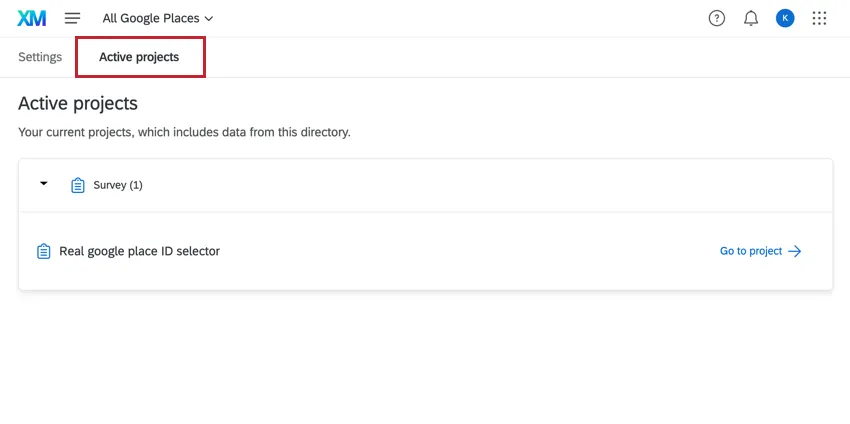
Active Projects
Navigate to the Active projects tab to view the projects that currently use data from your location directory. For example, a project that uses location selector questions would be here. Click Go to project to open a specific project.
Deleting Locations from a Directory
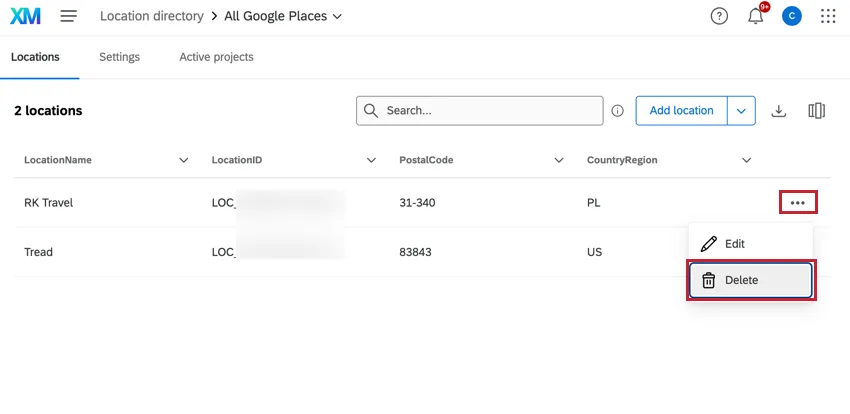
You can delete individual locations from your directory manually. To remove multiple locations at once, you can upload a file:
Qtip: If you have an automation such as a workflow set up for your locations, we recommend also deleting the location from your automation source (such as your Google Business account). Otherwise, the location will be added back when your automation runs.

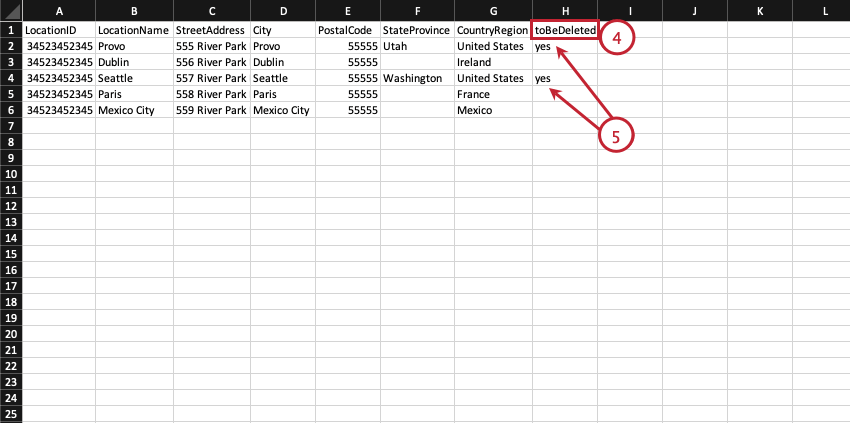
Qtip: This column is case-sensitive.

Qtip: Alternatively, you can delete a single location by clicking the options menu next to the location and selecting Delete.
Available Location Data Fields
Attention: We highly recommend exporting a sample file before you create a file of location data.
One of the steps to set up a location directory is to create a file of the locations you want to be able to use in Qualtrics. Below, we’ll give you a list of all of the fields we support.
Qtip: If there are additional location fields you’d like to include that aren’t covered here, you can add them as custom fields. For more information, see Schema Settings.
- LocationName: Provides a recognizable name for each entry in the directory, allowing users to easily identify and manage different locations (e.g. “Qualtrics Provo”). These should be professional, branded, customer-facing names, and should ideally match what appears in Google Maps. This field is required for Search The Web projects.
LocationID: This is a unique identifier automatically assigned by the Qualtrics system. For first time imports or when adding new locations to an existing directory, make sure to include this column, but leave the values blank. This field is required for Search The Web projects.

Warning: You must leave location IDs blank to upload a new location. Upload existing location IDs to make updates to existing locations.

Qtip: Once location IDs are generated, they take the format LOC_XXXXXX.
Warning: Records with existing location IDs will have all non-null fields overwritten with the revised values in the new CSV file when uploaded, including LocationExternalReference.
LocationExternalReference: Relies on a unique identifier from your internal system of record, and is often used to identify a specific location across different datasets, directories, and projects. Make sure every row of your file has a unique value for this field. This field is required for Search The Web projects.
Qtip: A common use for this field is Store Code. In other words, if you have unique IDs you assign to each store, you can store them in LocationExernalReference.
Warning: Using an internal field that does not act as a unique identifier to populate values in the LocationExternalReference column may result in data inconsistencies.
- City: The city that the location is in (e.g. “Atlanta”). This field is required for Search The Web projects.
- CountryRegion: The country or region that the location is in (e.g. “United States” or “Midwest”). This field is required for Search The Web projects.
- Department: The department or location type that the location is associated with (e.g. “Outlet Store”).
- District: The district that the location is in. This is typically the District ID.
- GoogleMapsURL: The Google Maps URL of the location. This field makes Search The Web projects more precise.
- LocationEmail: The email that feedback for the location should be sent to.
LocationLatitude: The latitudinal coordinates for the location (e.g. “40.3030”). The coordinates should be in decimal degrees, within the range of -90 to 90.
Qtip: The location selector question has a “Nearby” feature that will search which of the locations you provided is closest to the survey respondent. To activate this feature, your data file must include latitude and longitude fields.
- LocationLongitude: The longitudinal coordinates for the location (e.g. “111.6634”). The coordinates should be in decimal degrees, within the range of -180 to 180.
Qtip: Longitude and latitude values are retrieved from the "latlng" field in the Google Business Profile API. If these values are not appearing in Qualtrics, then you contact Google Support so the API passes a value for latlng. Alternatively, you can edit the location and manually add values in Qualtrics.
- LocationPhoneNumber: The phone number used by customers to reach a specific location.
LocationStatus: Indicates whether this location is operating under usual business hours, is temporarily closed, or has been permanently closed.
Qtip: Values should only be set to active, inactive, closed, or otherwise left empty (null).
- Active: Set manually for open stores.
- Inactive: Set manually when you decide to stop pulling reviews for a specific location.
However, directories that are synced with Google only have these statuses:
- Empty / null: All locations that are synced to Google have this status.
- Closed: Will be set automatically when a location is deleted from a connected Google account.
Qtip: If you use the optional field “LocationStatus,” locations with a status of “Closed” will stop loading new reviews to your Search the Web project. (Reviews that already were ingested to your project will not be removed.)
Warning: Failure to use the pre-defined values for this field will result in a failed data upload for the locations with this field assigned incorrectly.
- PostalCode: The zip code of the location. This field is required for Search The Web projects.
- StateProvince: The country or region of the location (e.g. “Utah” or “Nova Scotia”). This field is required for Search The Web projects.
- StreetAddress: The street address of a physical location. Values in this field should contain a building number and street name (e.g. “333 River Park Dr”).
- LastUpdateDate: For directories that have been updated at least once, this field indicates the date that a given location entry was last updated.
- CreationDate: Once a directory is established, this field indicates the date that a given location entry was created.
- GoogleAccountName: The name of the Google Business account used to manage the location’s Business Profile.
- GoogleLocationName: The name used to represent the location on Google.
- GooglePlaceID: The unique identifier populated by Google for your location. This type of identifier is created by Google to organize places such as businesses, landmarks, parks, and intersections. Google Place ID is used by the solicit reviews question to identify Google locations. Google Place ID is not used by Search the Web projects.
- GoogleStoreCode: The unique identifier assigned to each location in your Google Business Profile.
Attention: For the fields required by each solution, see Required Location Data Fields for Location Selectors and Required Fields for Reputation Management.
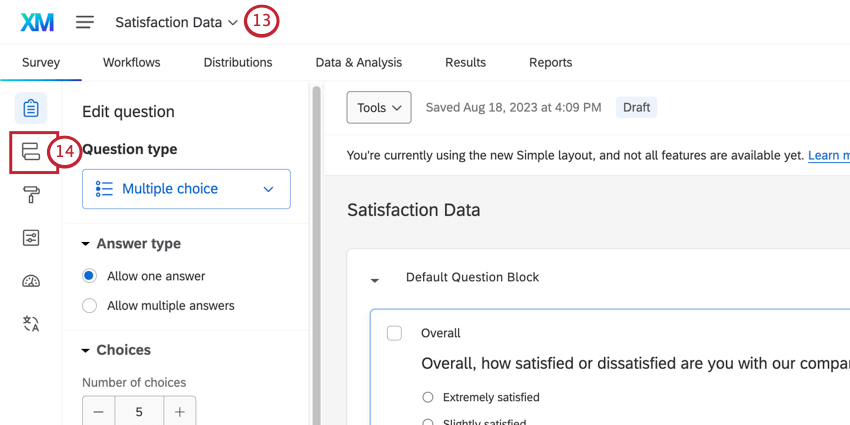
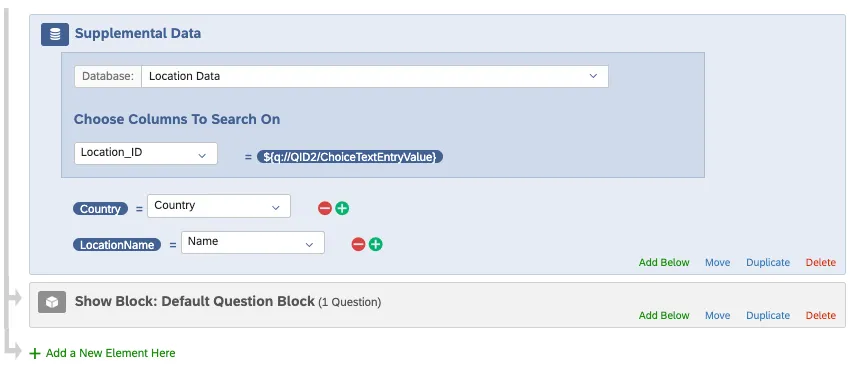
Customizing Surveys with Supplemental Data
Using supplemental data sources (SDS) in your survey projects lets you use location data to customize the survey experience and enhance your data analysis. You’ll be able to customize what customers see based on their location, and you’ll be able to pull in a lot of location data without having to individually save each piece of information in the survey itself.
Once you set up supplemental data in the same survey as your location selector or solicit reviews question, you’ll be able to use the following features:
In addition, you will then be able to save your location data as embedded data, which can be used in results dashboards, reports, Stats iQ, and more.
Qtip: If you’re using a solicit reviews question, make sure you’ve got your your Google Place IDs so you can add them to the location directory.
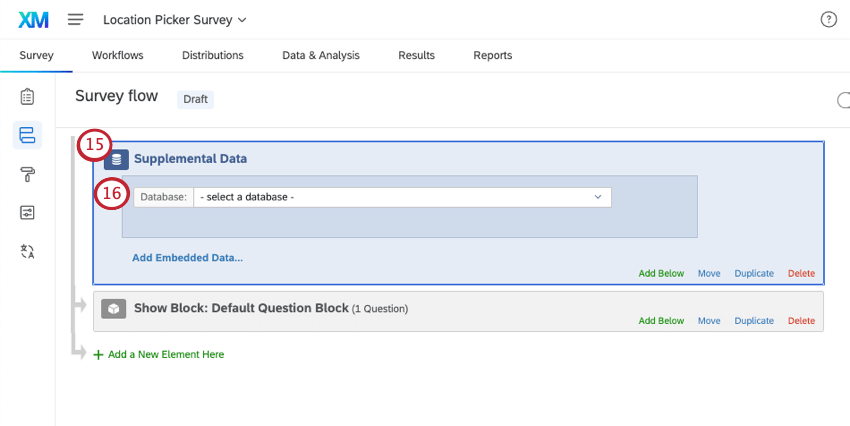
- For surveys with location selector questions:Move the SDS so that the source comes after the question block that asks your respondents to choose their location.
- For surveys with solicit reviews questions: Move the SDS to the top of the survey flow, or at least anywhere before the block where the solicit reviews question appears.
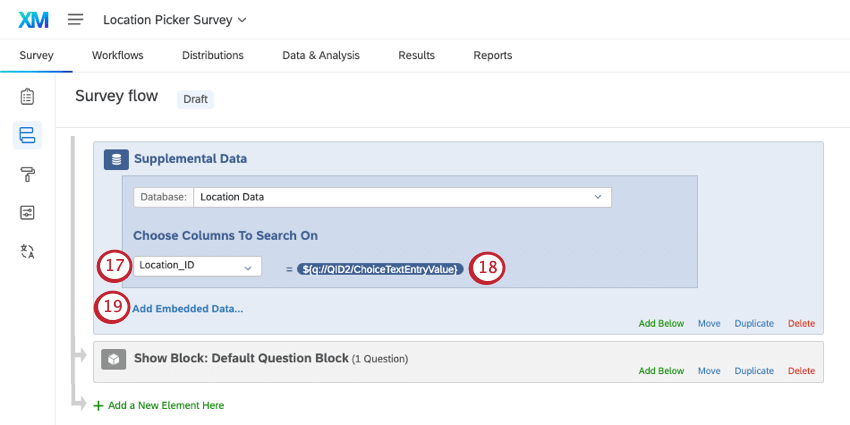
- For surveys with location selector questions: Select the Location ID column.
- For surveys with solicit reviews questions: Select the Google Place ID field. Qtip: For surveys with both question types, try the location ID. However, you’ll need to make sure you add the embedded data for google place IDs in step 19.
- For surveys with location selector questions: Set it equal to the answer of the location selector question.
- For surveys with solicit reviews questions: Set it equal to the embedded data for Google Place ID (e.g., GooglePlaceID). Qtip: Use the dropdown to access the piped text menu. Don’t select “Question Text.”
Example: We added the country and location name because we want to use these in branch logic and piped text.

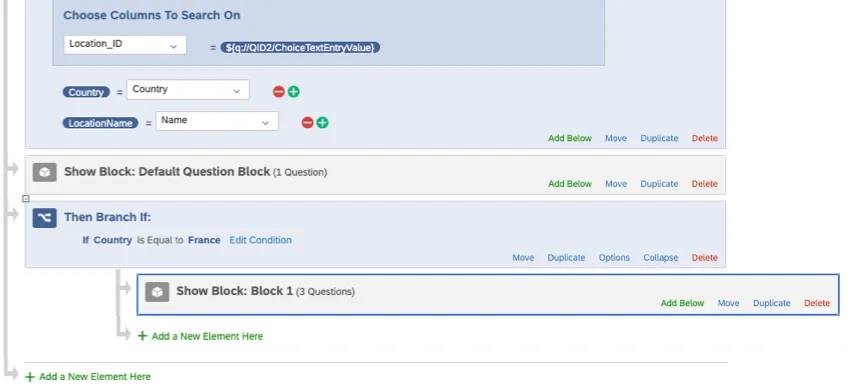
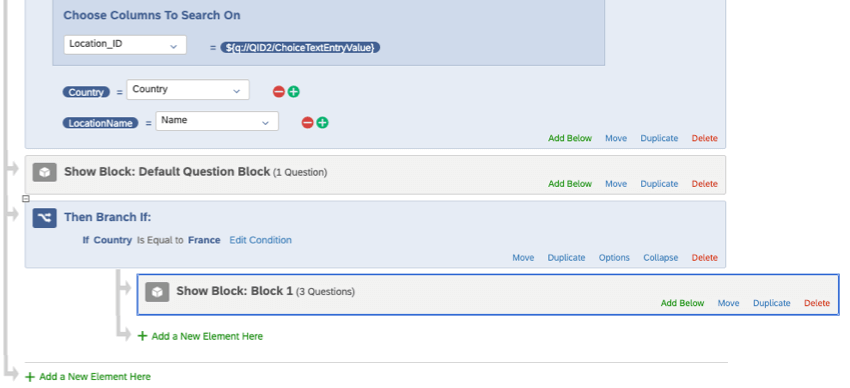
Example: We are directing the respondent to a different set of survey questions if the selected location is in France.
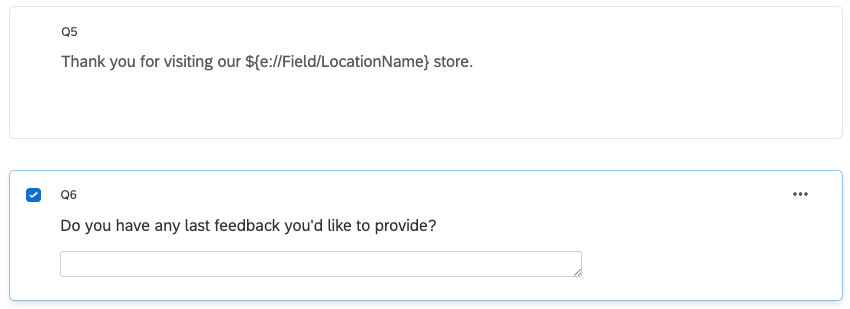
Example: Here, we’re thanking the respondent for visiting a particular location.
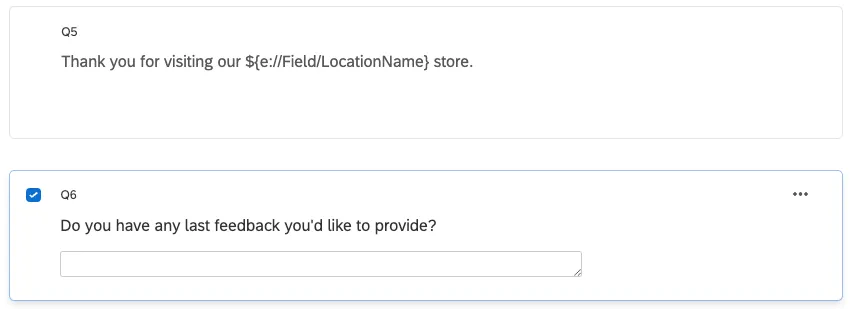
Attention: All logic and piped text should be based on the embedded data you created in step 19.
Managing Location Directories from Imported Data Projects
Attention: Directly imported location directories have several performance and functionality improvements that imported data project directories do not. We recommend directly importing your location data instead.
Qtip: If you are using an imported data project rather than uploading a file directly, it may take up to 24 hours for you to see the updated values in the location selector.
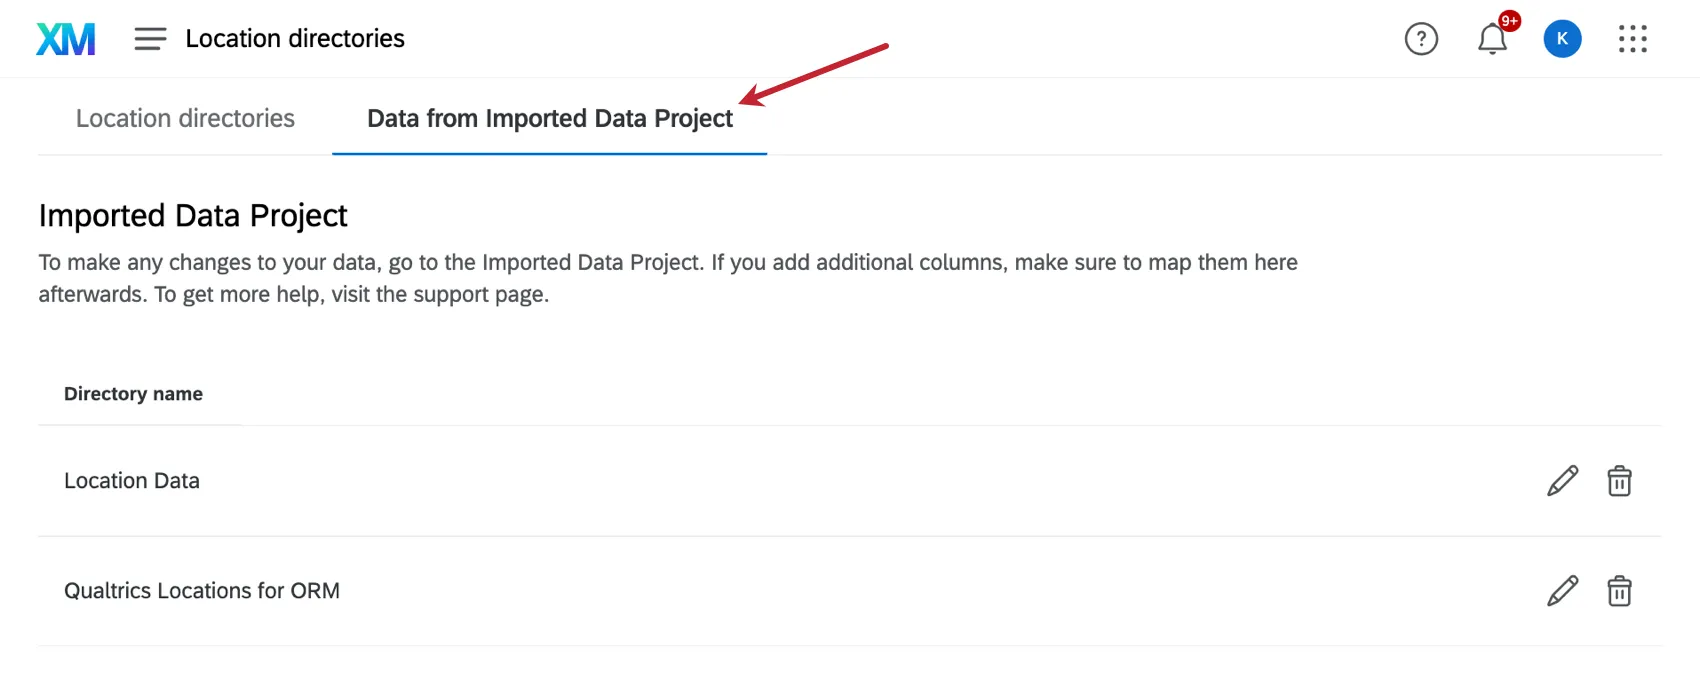
You can no longer create location directories using imported data projects. However, if you’ve made such location directories in the past and want to edit or delete them, go to the location directory, then go to the Data from Imported Data Project tab.
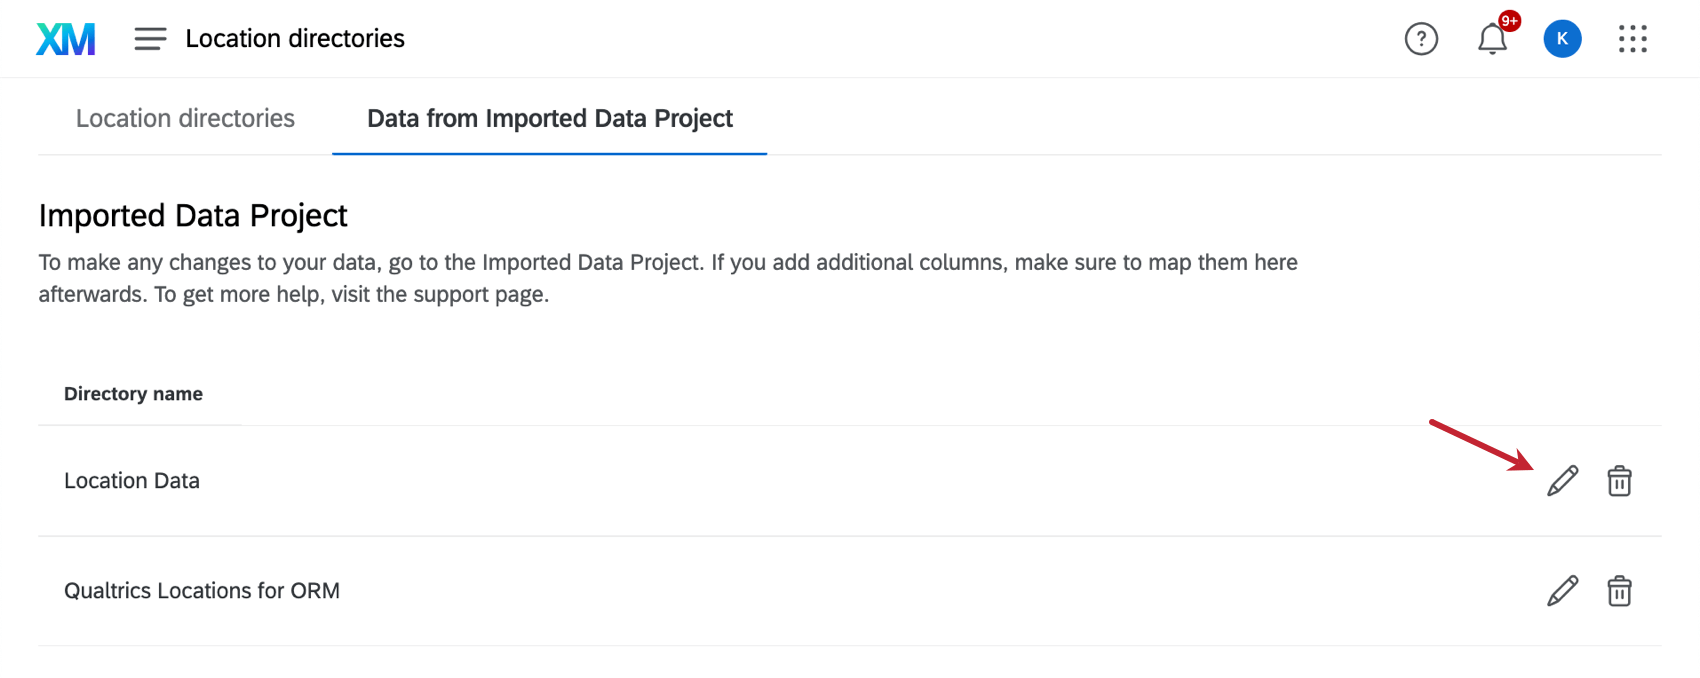
Click the edit icon to adjust field mappings or the displayed addresses for location selector questions.
Formatting Imported Data Fields
In the imported data project, you must set a unique ID. This unique ID must be a text value, even if it’s actually a numeric ID.

If you included latitude and longitude fields, make sure they are mapped as numeric values.
Qtip: If you ever need to change the available locations, you’ll need to edit your original locations data file and re-import the updated file into this imported data project. Any new data must be re-imported. Once the data is re-imported, it may take up to 24 hours for you to see the updated values in the location selector.
Mapping Location Directory Fields
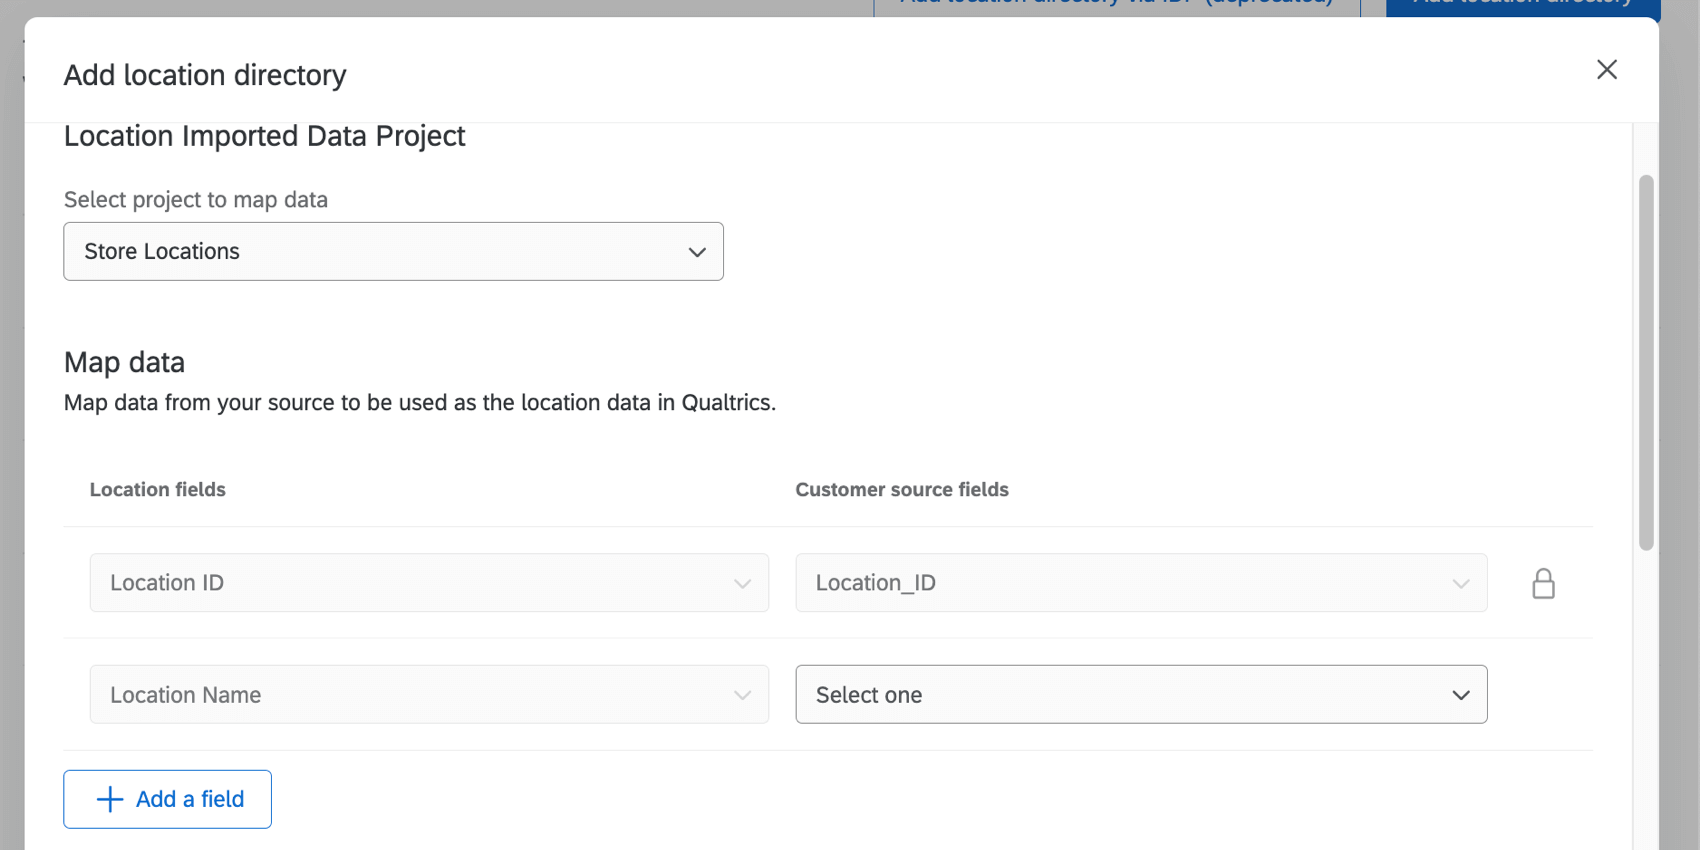
Attention: Each field can only be mapped once.
FAQs
How do I reach the location directory?
How do I reach the location directory?
We also link to the location directory in the platform when you create a location selector question and when you create a reputation management project based on searching the web.
If I edit a location's data in a location directory, will this change be applied retroactively to my dashboard data?
If I edit a location's data in a location directory, will this change be applied retroactively to my dashboard data?
Can I use my location data in dashboard reporting?
Can I use my location data in dashboard reporting?
That's great! Thank you for your feedback!
Thank you for your feedback!