
Competitive Reviews
What's on this page
About Competitive Reviews
Analyzing your competitors’ reviews can help you understand your business’s brand perception in comparison to competitors, giving you specific areas where your online reputation already excels and where it can improve. It’s especially important comparing to competitors on a local level, where the specific competitors for each of your stores may change.
Attention: This feature is only available to users on the new simplified pricing and packaging plans or customers who actively participated in the Preview Program for this feature. For more information, see Qualtrics Public Preview. If you have questions about your Qualtrics pricing and packaging plan, reach out to Account Services.
To set up competitive reviews in Qualtrics, you’ll first upload a directory of your competitors’ business profiles, location-by-location. From there, you’ll link each of your locations to their competitors, then set up a Reputation Management project. Once that’s finished, you can build dashboards your location managers can use to get insights on local competitors.
Attention: Competitor reviews are refreshed in Qualtrics on a weekly basis. There is not a set day of the week for updates.
Qtip: Because this feature uses competitor reviews, not reviews for your brand that may require action, we don’t recommend using workflows or tickets with a competitor reviews project.
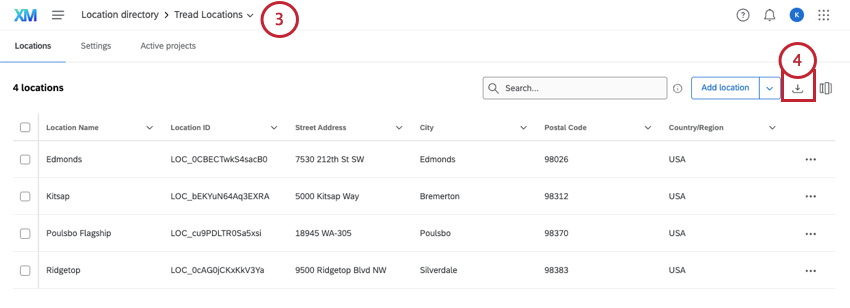
Step 1: Preparing Your Own Location Data
Before you start pulling competitor reviews into Qualtrics, it’s important to make sure you’ve already got location data started for your own brand. If you’ve already set up a Reputation Management project for your own brand, or you have a directory of your locations already uploaded, you can skip this section.
Otherwise, it’s important to start with your own location data, because competitor stores can be linked to yours. Follow the steps on this page to upload your own locations.
We also recommend that you already have your company’s location data added to a reputation management project.
Step 2: Creating a Competitor Location Directory

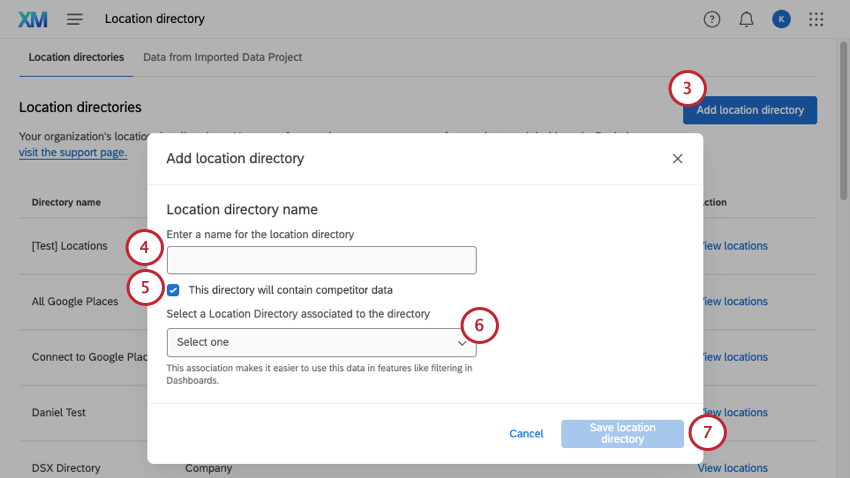
Attention: This step is optional, but very important. It determines whether you will be able to link your own location data to compare against local competitors. We’ll cover how this linking works in more detail below.
Attention: Right now, you can only edit the field competitorLocations manually or with a CSV. This field cannot be edited with the automated location data workflow.
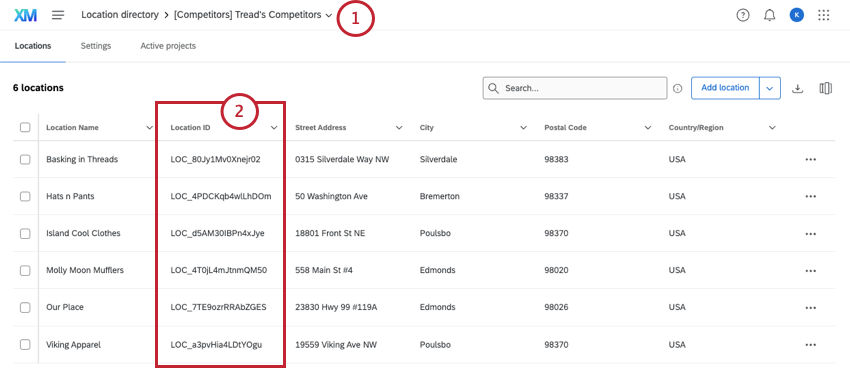
Step 3: Linking Competitors to Your Locations
You have 2 ways you can link a location to its competitors: manually or with a file upload.
Qtip: If you did not link your competitor and company directories earlier, make sure you do this before linking individual locations. You can link directories by following these steps.
Manually linking locations

Linking locations via CSV Upload

- [LOC_Competitor1,LOC_Competitor2,LOC_Competitor3]
- Square brackets on either side of the list.
- Comma separated, no spaces.
- Use location IDs of the competitors, no other identifiers.
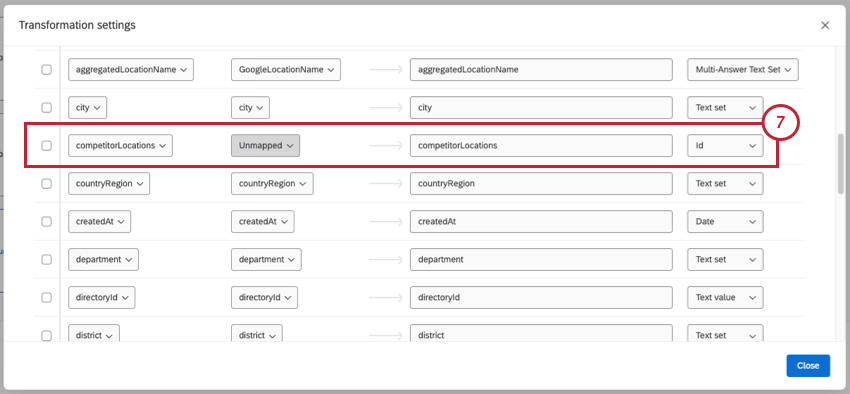
Step 4: Aggregating Competitor Data
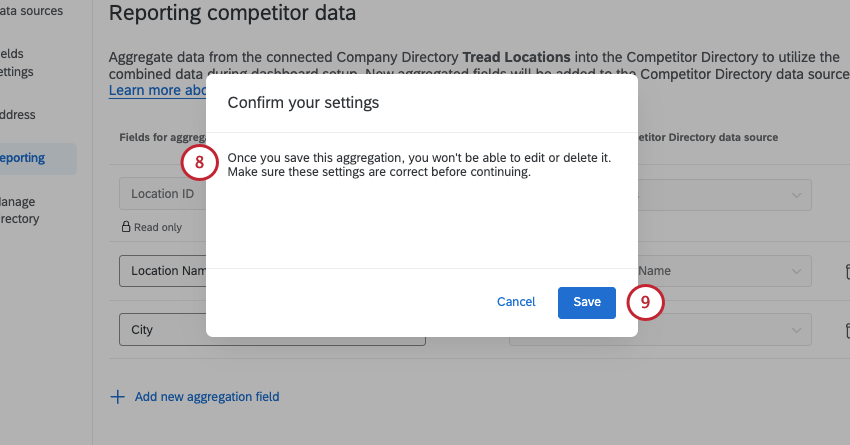
Warning: Once you save your competitor data aggregation, you won’t be able to edit or delete it. Make sure these settings are correct before continuing. If you need to delete competitor data aggregations, please reach out to Technical Support.
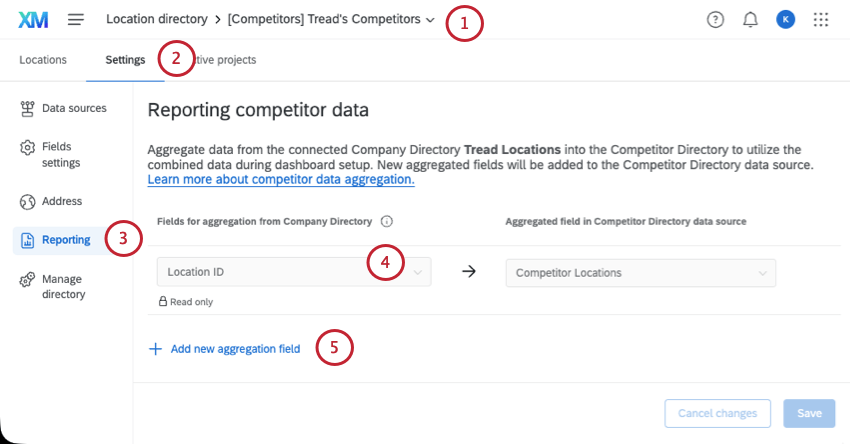
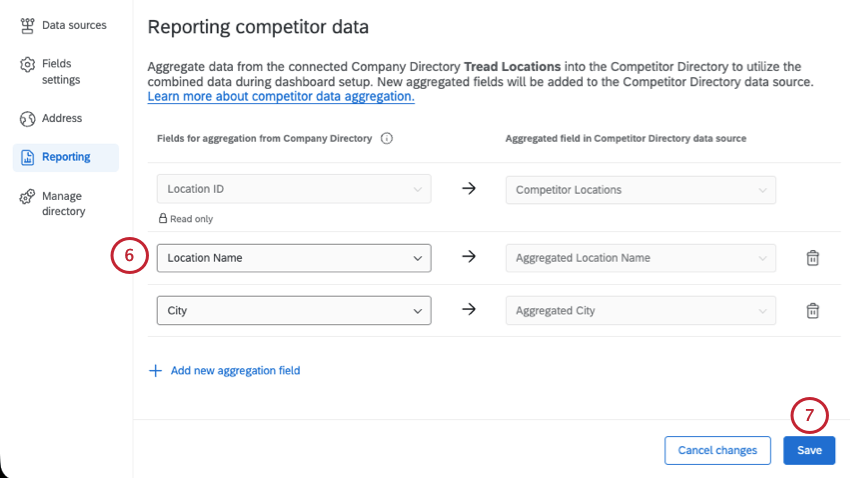
Example: In this screenshot, we chose to map location name and city, because those fields will be easier for dashboard users to identify than a location ID. Other common choices include store code.
Qtip: You can only add up to 5 aggregated fields total.
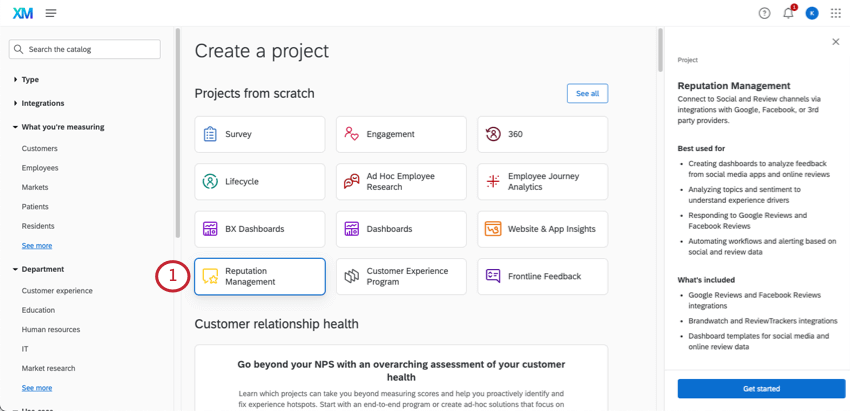
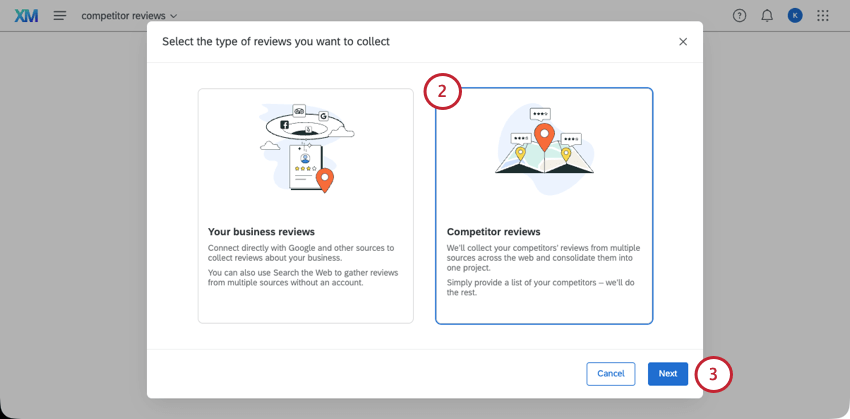
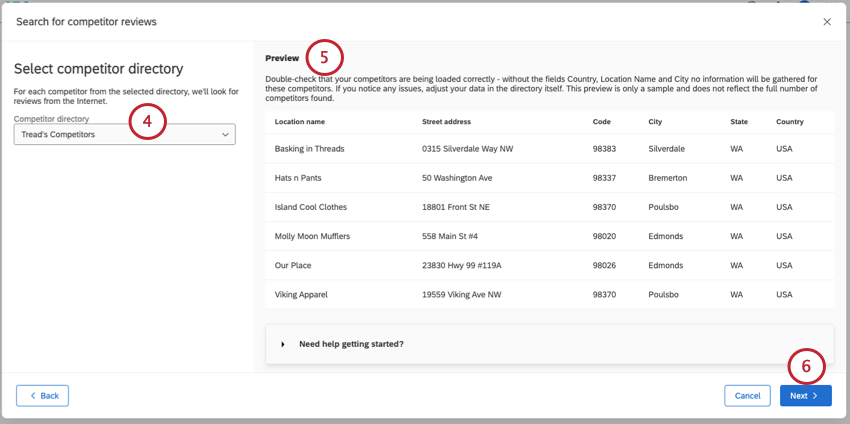
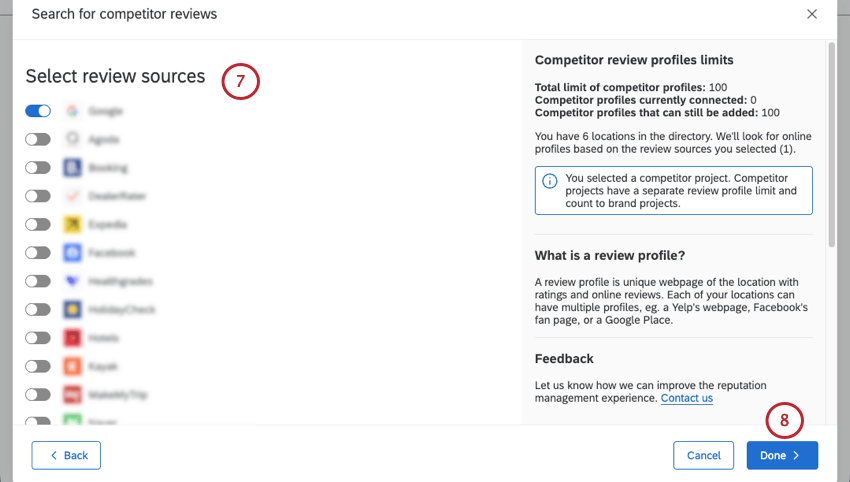
Step 5: Creating the Project
Qtip: For limits and troubleshooting advice, see Troubleshooting Search the Web Projects.
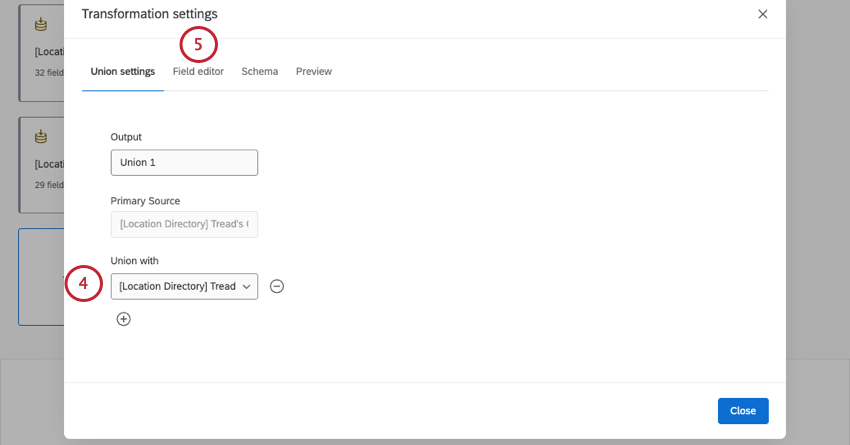
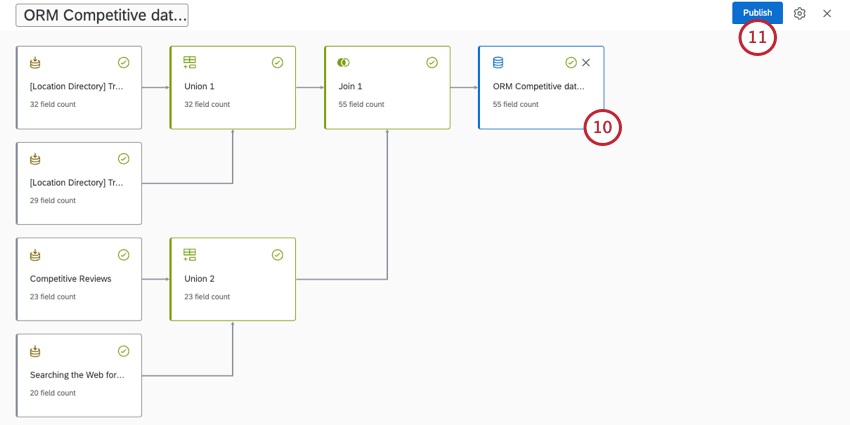
Step 6: Preparing a Dashboard Dataset
Once competitive review data has started to pull into your Reputation Management project, you can put together a dashboard dataset.
Qtip: If you’re unsure whether review data is loading in your project, check out the Data & Analysis tab.
Qtip: Before you start to build data models, we recommend reading Understanding Left Outer Joins. This short example explains how data is combined in a join, and can help you start to think about how you want to set up your own dataset.

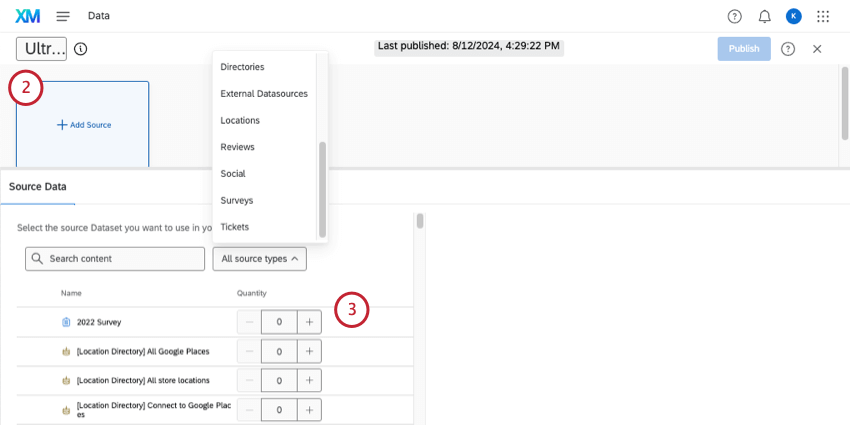
- Your company location directory
- Your competitor location directory Qtip: Filter for location directories under All source types by selecting Locations.

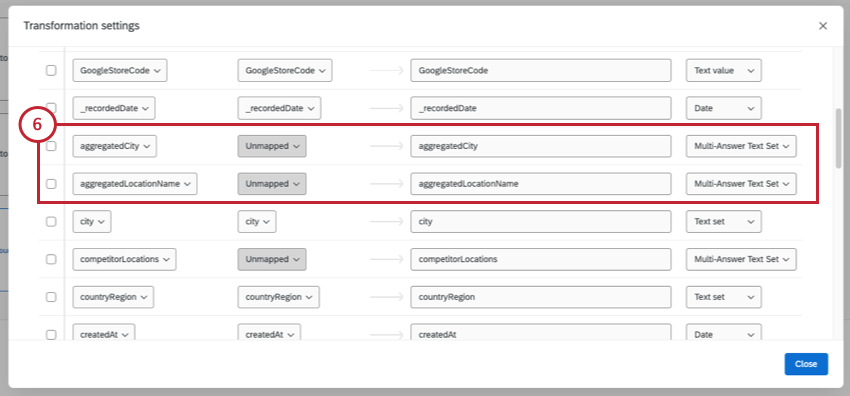
- AggregatedCity – City
- AggregatedLocationName – Location Name
- AggregatedStateProvince – StateProvince
Qtip: Before you go on to the next step, we recommend making sure your fields have presentable names for your dashboard. For example, “aggregatedCity” could become “City,” “LocationExternalReference” could be “Store Code,” and so on.
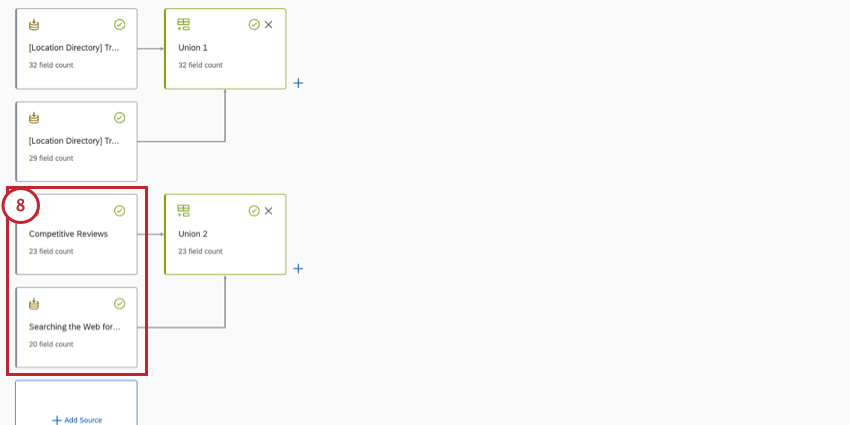
- Your competitor reputation management project
- Your company reputation management project Qtip: Reputation management projects are under External Datasources.
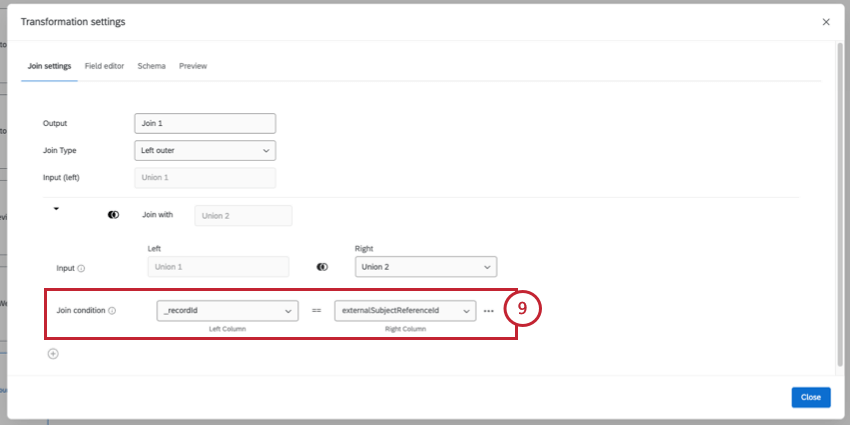
Qtip: Your join key is _recordId in the location directories, matched to the subjectReferenceId in your reputation management projects.
Step 7: Customizing Dashboards
Filtering Company and Competitive Reviews At the Same Time
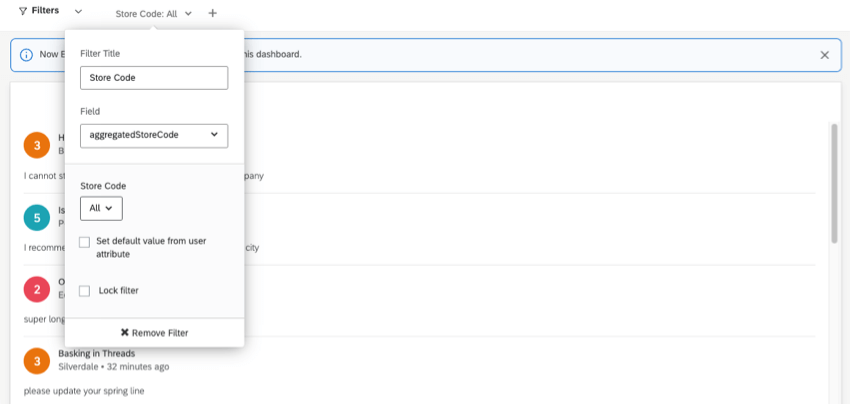
One of the most valuable insights you can add to your competitive reviews dashboard is a filter that uses an aggregated field. This is the main way locations managers can narrow down results to the local competitors relevant to them, plus the performance of their own stores.
Qtip: Make sure the location name or store code is set to the title or subtitle, so you can identify which reviews are which.
Example: Location managers can filter by store code to see competitors as well as their own reviews for their specific location.

Qtip: Make your design even more efficient by matching the filter value to user attributes. For this to work, your aggregated field must be text set, and dashboard users must be uploaded with appropriate metadata, such as store code. You can even use metadata to assign roles!
Qtip: If you don’t want managers to change the filter you create, you can lock it.
Comparing Your Brand and Competitors in Separate Widgets
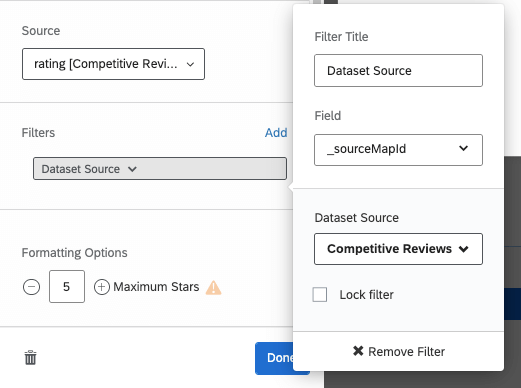
You can filter a widget so it only shows data from 1 data source. This allows you to create separate widgets side-by-side, so 1 shows your brand’s rating, and the other shows the competitors’ rating.
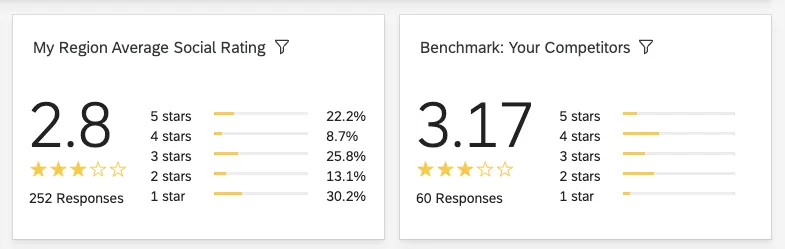
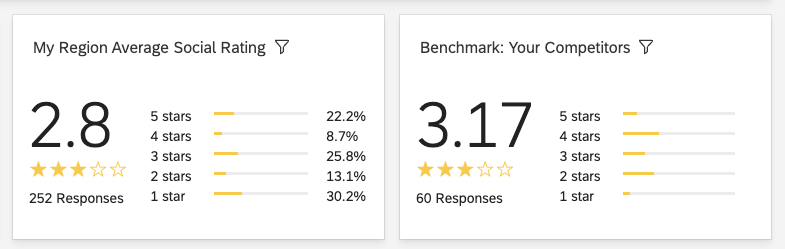
These widgets will still be affected by the filters we covered in the previous section, so these can be a great starting point for location managers to see their scores vs. their local competitors. See more on filter interactions.
Other Dashboard Design Guides
You can build your competitive reviews dashboard however you want. Here are some guides that might be useful:
- Planning Your Dashboard Design: How to design a dashboard for your stakeholders.
- Building Your Dashboard: Common widgets and their setups.
- Field Types: Field types affect the widgets you can use with those fields. Includes tables showing what types can be used with which widgets.
- Reputation Management Fields: Common fields included with your Reputation Management data.
- Location Fields: Common fields included with your location directories.
Managing Competitor Profiles
Once your reputation management project is created, you can edit the profiles, export the locations, and more. The following links go to the “Searching the Web for Reviews” support page, but the functionality is the same for competitor profiles.
Linking Location Directories
If you didn’t link your company and competitor directories together when you first created them, that’s okay. You can follow the steps below.
Attention: Your location directories for your company and its competitors must be connected before you can link individual locations.
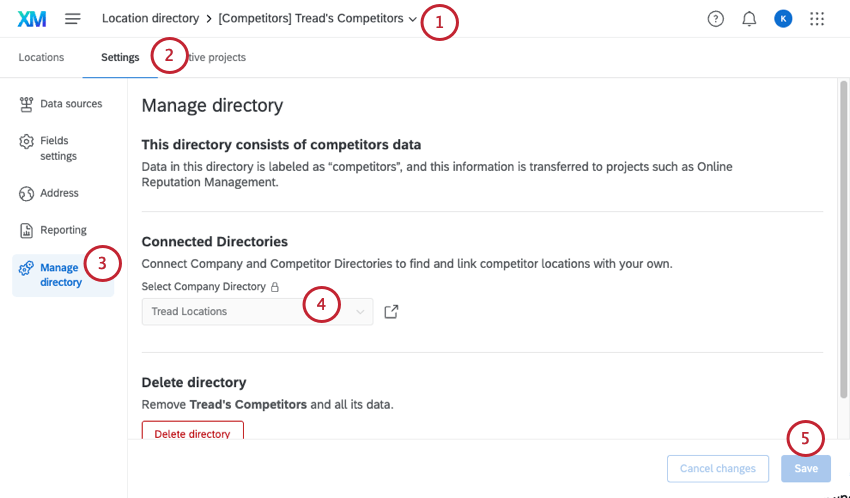
Qtip: If you have already linked individual locations by competitor, you can’t edit the connected directory. You’ll have to remove those individual location links before you can change the linked directory here.
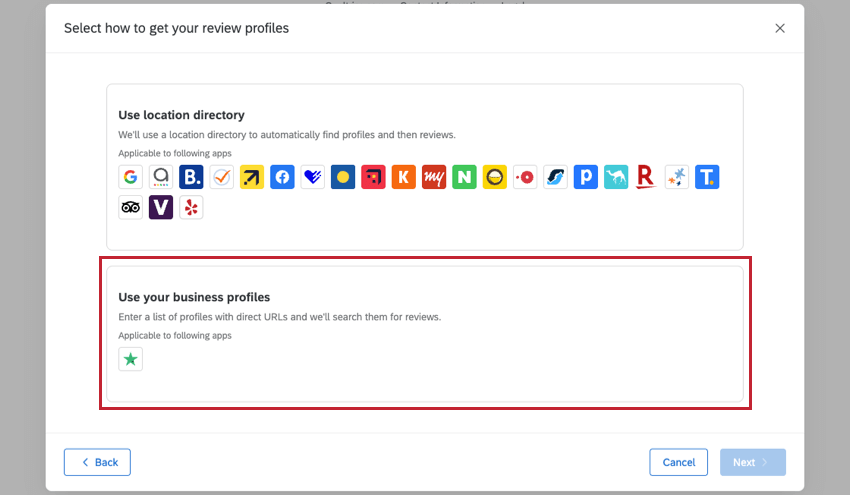
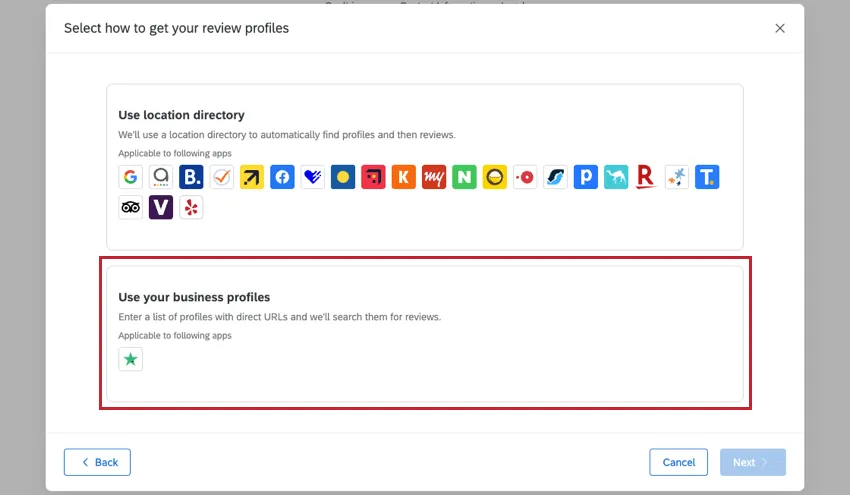
Use Your Business Profiles
When setting up your competitor profiles, you may see an option called Use your business profiles. This option is in preview and is not available to all users. If you have questions about this feature, please reach out to your Preview program representative.
Qtip: Qualtrics may, in its sole discretion and without liability, change the timing of any product feature rollout, change the functionality for any in preview or in development product feature, or choose not to release a product feature or functionality for any reason or for no reason.
FAQs
Can I add new locations to my Reputation Management project after it’s created?
Can I add new locations to my Reputation Management project after it’s created?
If you are Adding reviews from sources or from Google places, then no, you cannot add new locations after the project is corrected. Make sure you have a full list of locations you want to use before you create your project.
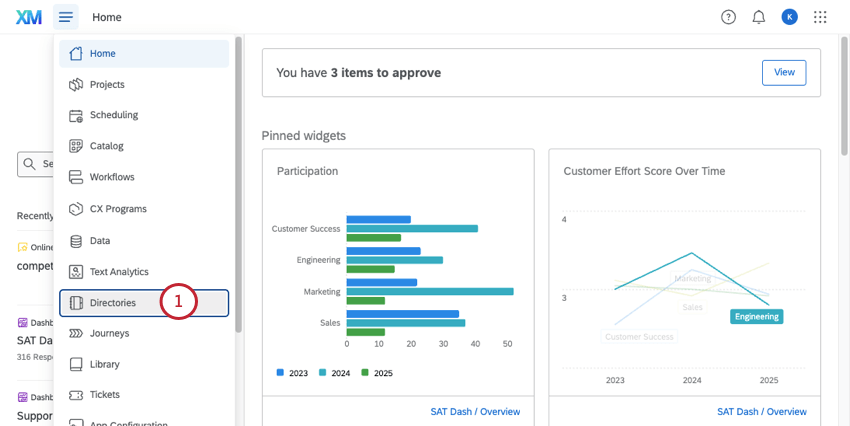
How do I reach the location directory?
How do I reach the location directory?
We also link to the location directory in the platform when you create a location selector question and when you create a reputation management project based on searching the web.
What is a join?
What is a join?
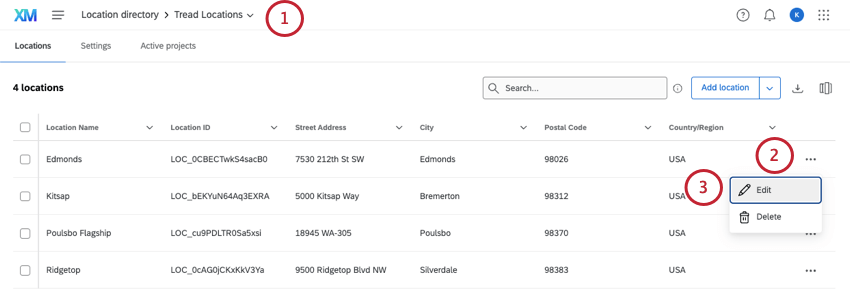
How do I edit my locations?
How do I edit my locations?
How are aggregated review dates calculated?
How are aggregated review dates calculated?
Are review scores normalized for sites with different rating scales?
Are review scores normalized for sites with different rating scales?
That's great! Thank you for your feedback!
Thank you for your feedback!