
Digital XM Solution for Commerce
What's on this page
Qtip: If you don’t have access to any of the features described on this page, reach out to your Account Executive. For more information about the differences between Digital Feedback and CustomerXM for Digital, see Digital Feedback vs. CustomerXM for Digital.
About the Digital XM Solution for Commerce Program
The Digital XM Solution for Commerce provides you pre-built surveys, digital intercepts, and dashboards designed by experts to help you quickly launch your digital customer experience program. This pre-built Digital CX program uses best practices to help you understand customer needs and preferences, leading to insights that can improve customer conversion and retention.
This feature is available for any CX license that includes Website / App Feedback and CX Dashboards.
Qtip: If you’re looking for best practices around running a digital program, see our Digital Experience Playbook.
Qtip: This project involves the deployment of intercepts onto your company website. You will need to be in contact with your IT or web development team for certain steps of this project. We recommend using a tag manager to expedite the deployment if you have one already.
Methodology
The Digital XM Solution for Commerce is specialized in collecting data around five common experiences that impact your site visitors every day. In this section, we’ll go into more detail about those experiences and how those translate into different components of the Digital XM Solution for Commerce.
All components of this program – including a pre-built dashboard that communicates the results of all these surveys – are housed in one easy-to-access spot.
For more details on how to edit these surveys, creatives, or intercepts after initial setup, see the linked sections.
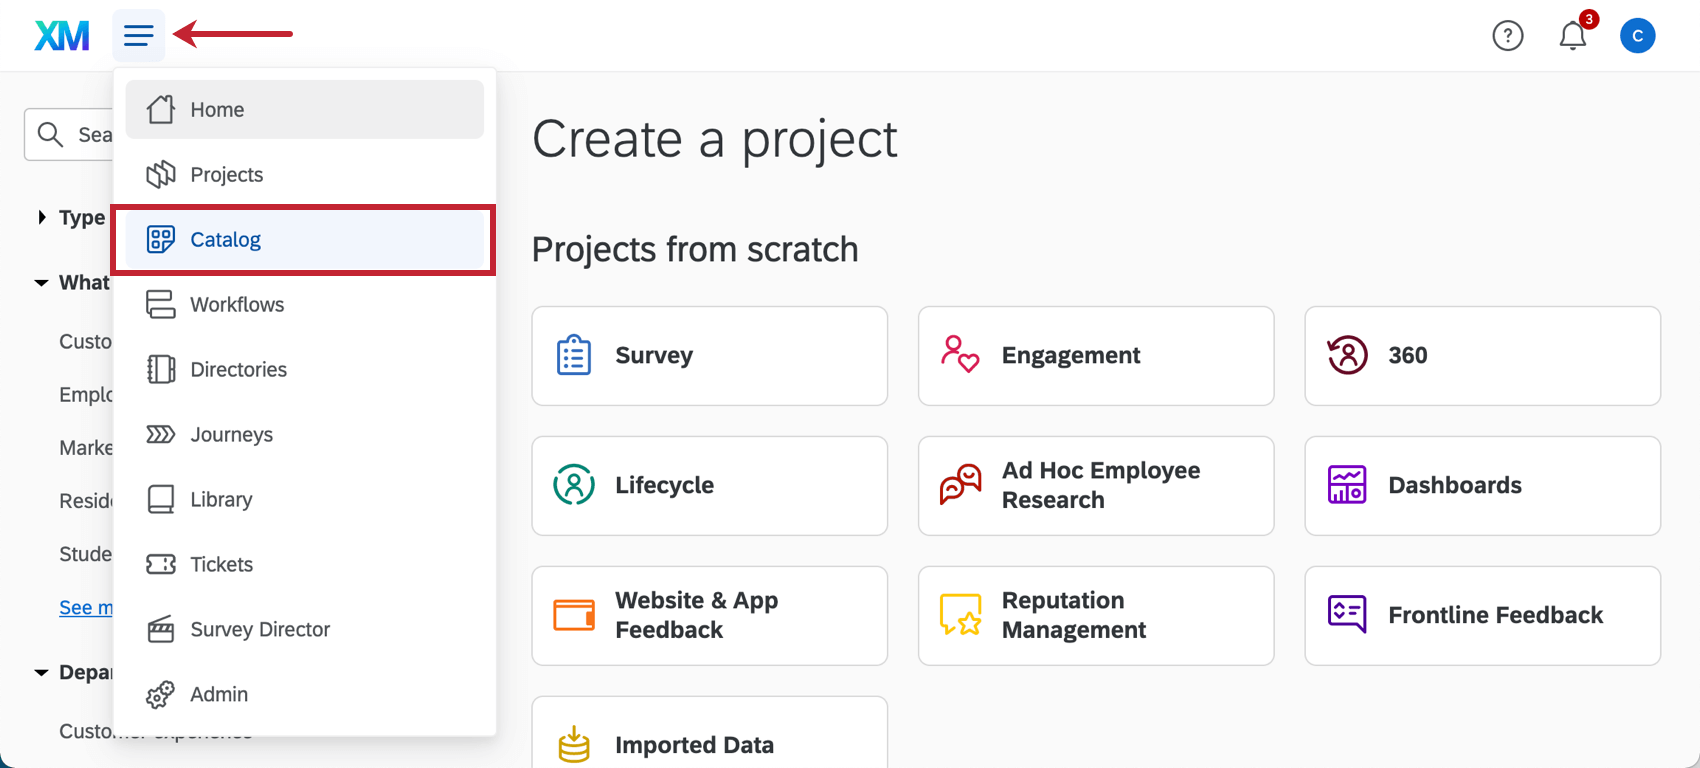
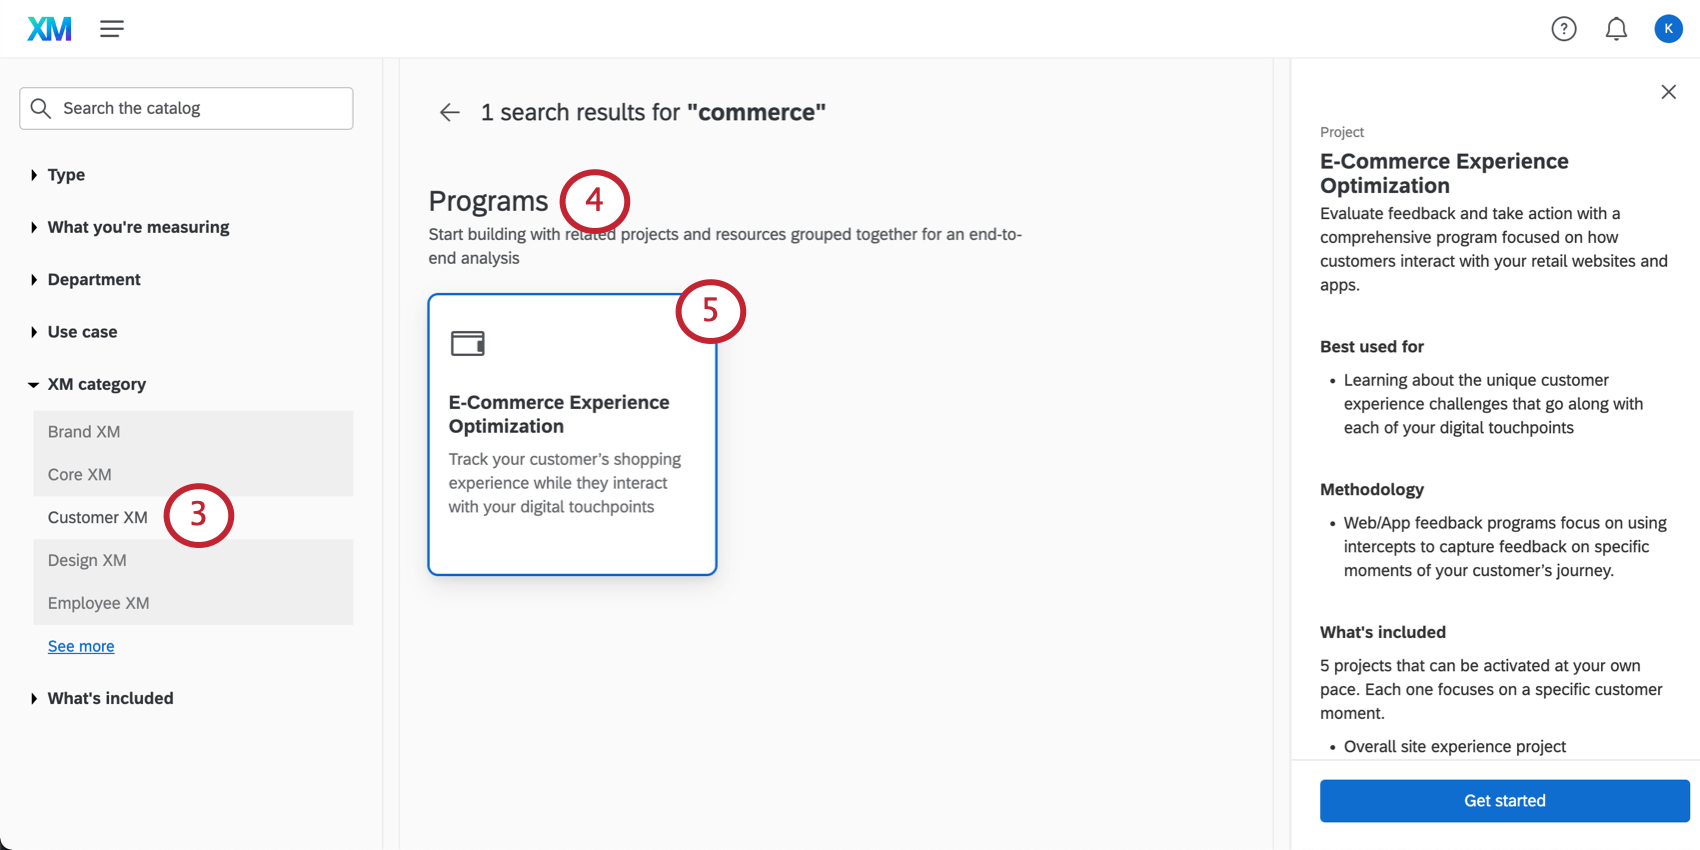
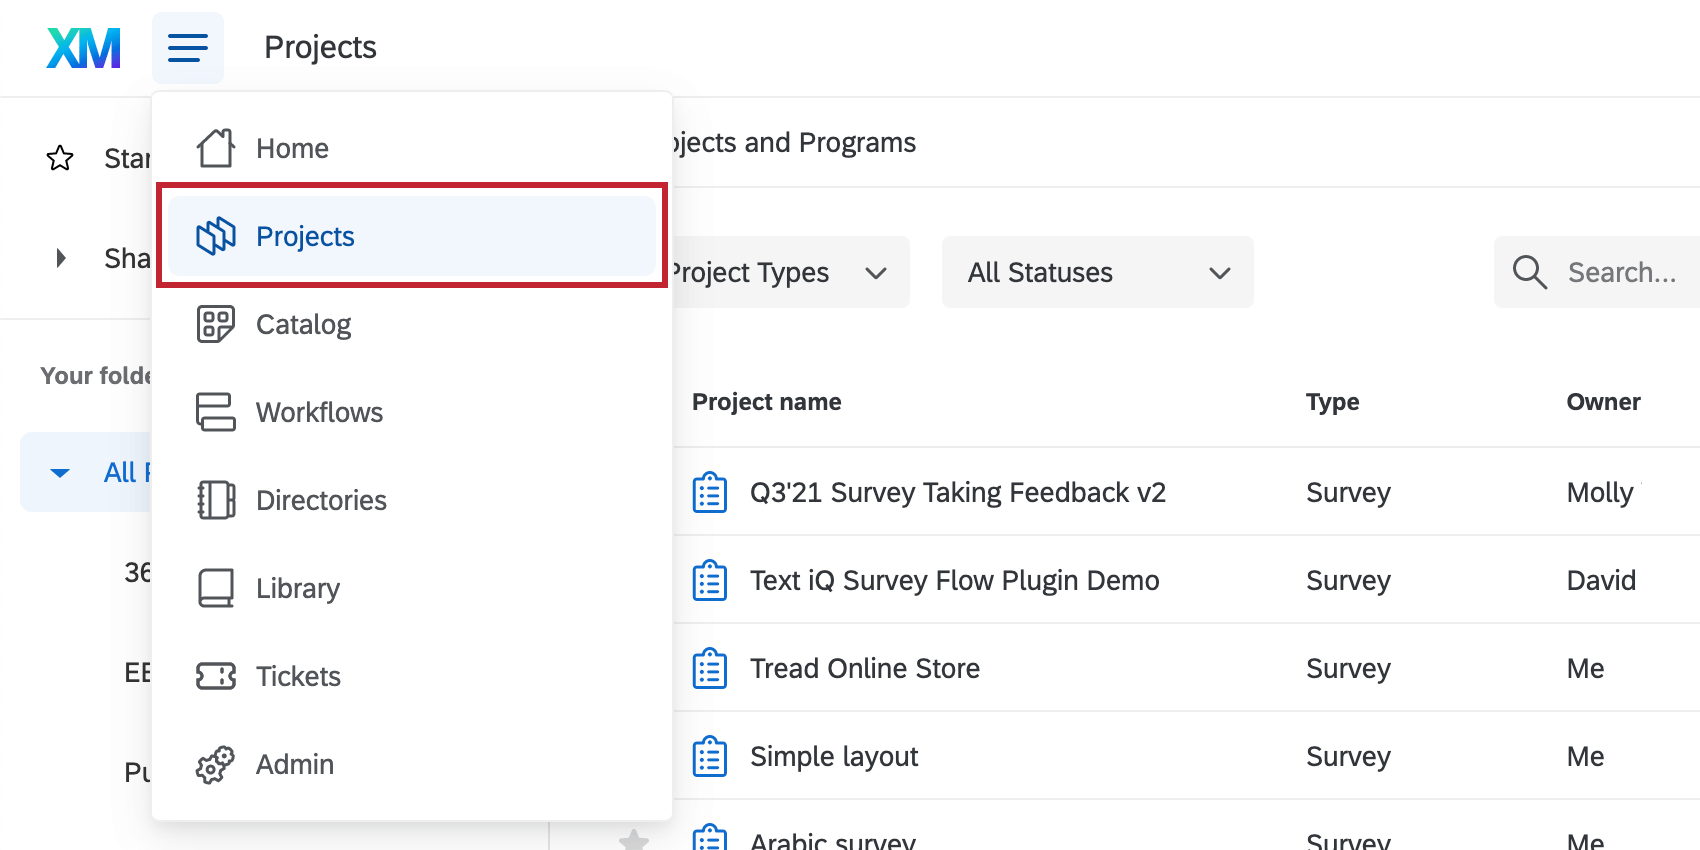
Creating a Digital XM Solution for Commerce
Qtip: This XM Solution is only available in English, and you will only be able to make this project if your account language is set to English.
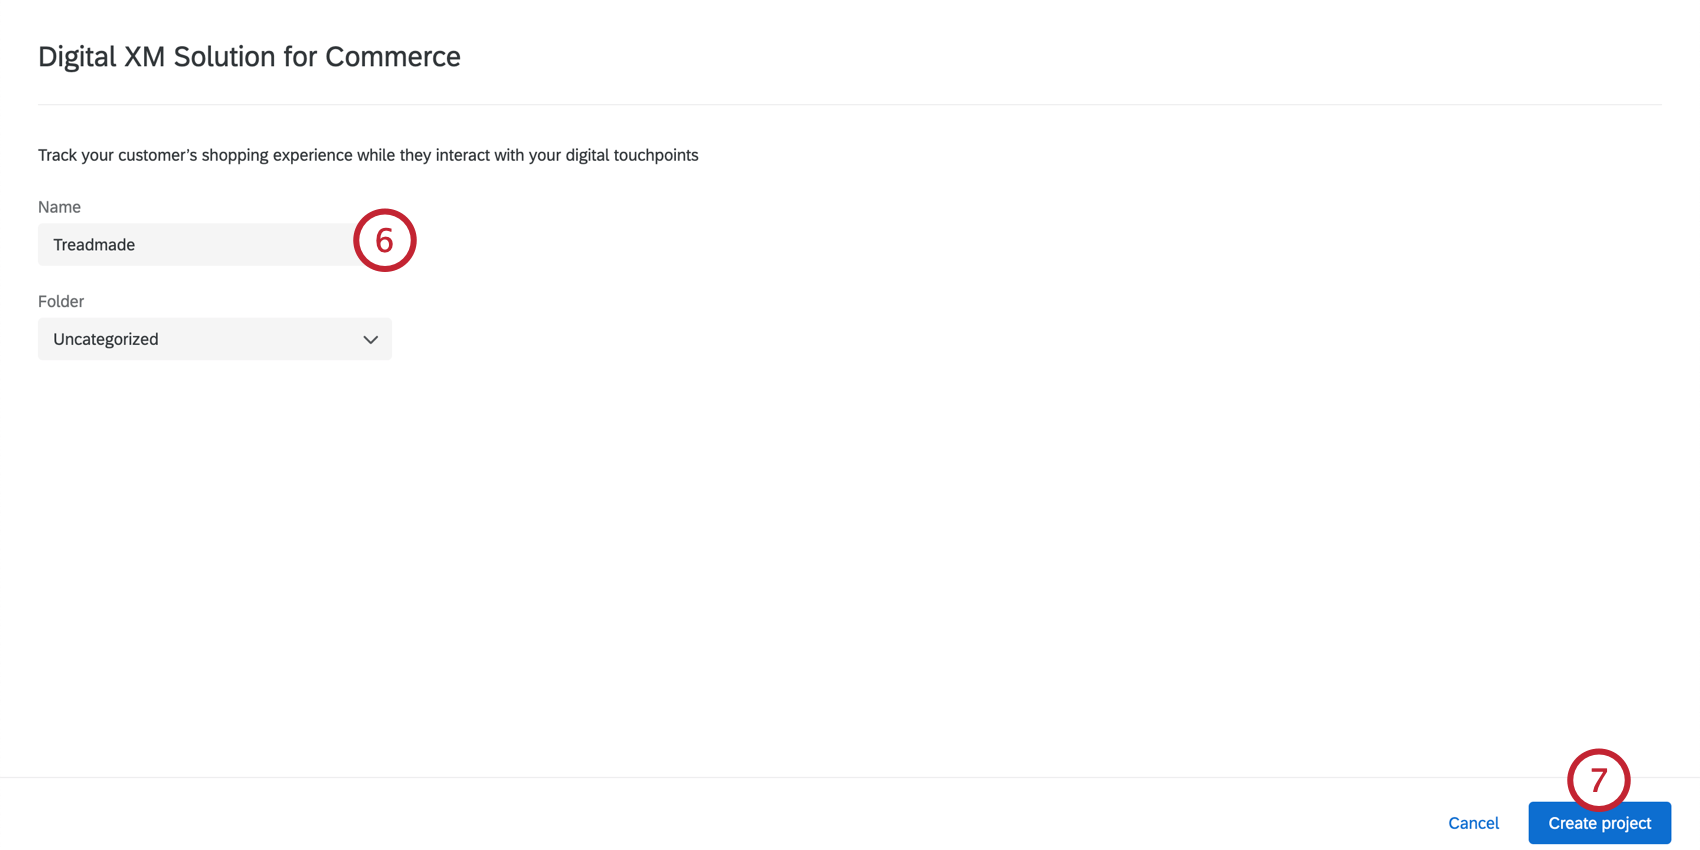

Qtip: This will appear several times in the survey when referring to your site. We do not recommend entering a full URL. Something short like Qualtrics.com or Qualtrics Support will suffice.
Qtip: You can change this later if you need to by editing individual surveys or creatives.
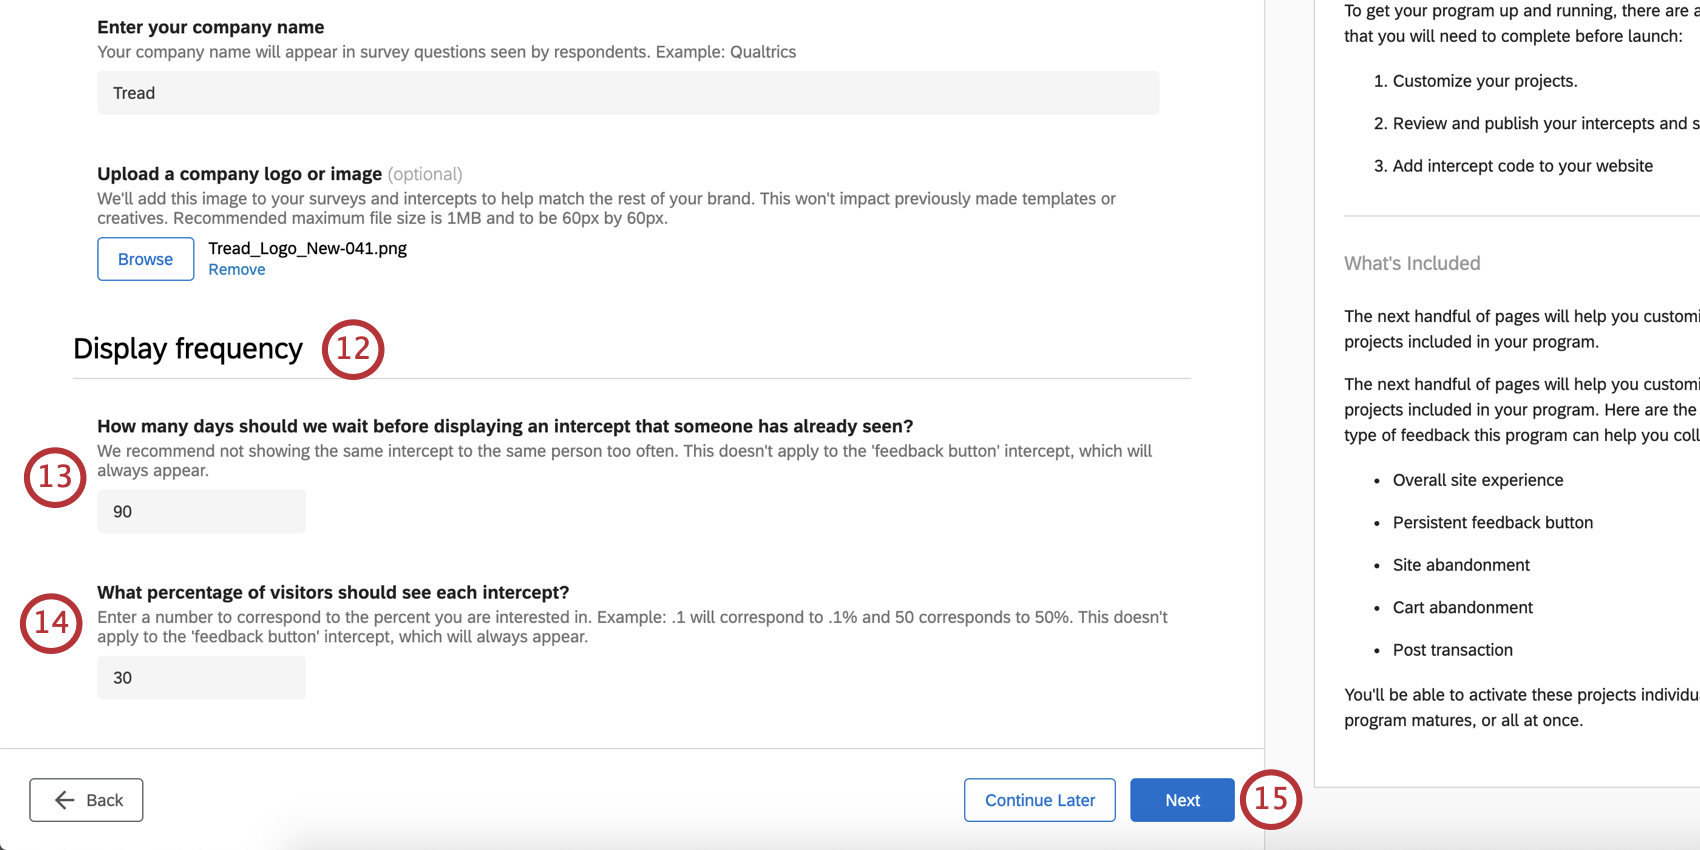
Qtip: You can adjust these settings after completing this initial setup, but you will have to do it individually for each intercept rather than all at once.
Qtip: You can adjust these settings after completing the initial setup, but you will have to do it individually for each intercept rather than all at once.
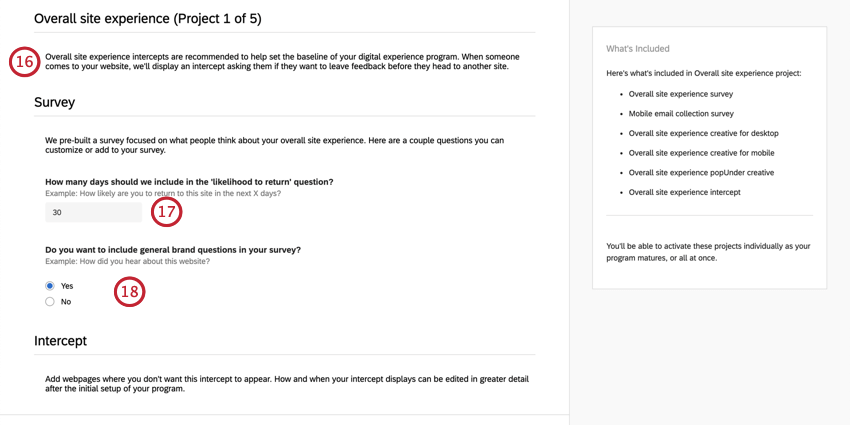
Example: How likely or unlikely are you to return to Qualtrics.com in the next 30 days?
Qtip: Once your overall site experience survey is created, you can check these out in the block named “Brand.”
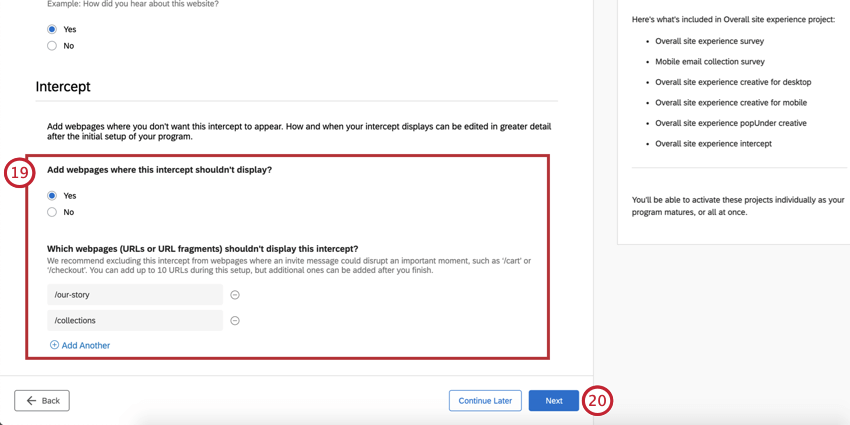
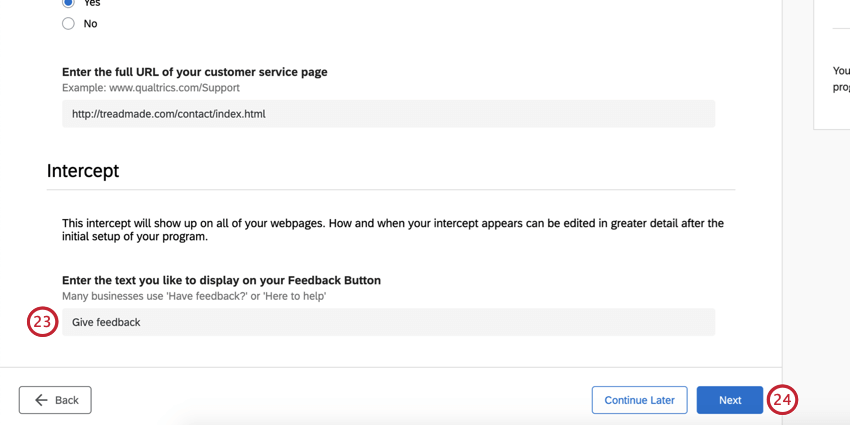
Example: We have placed Feedback buttons on every page of the Support Site.
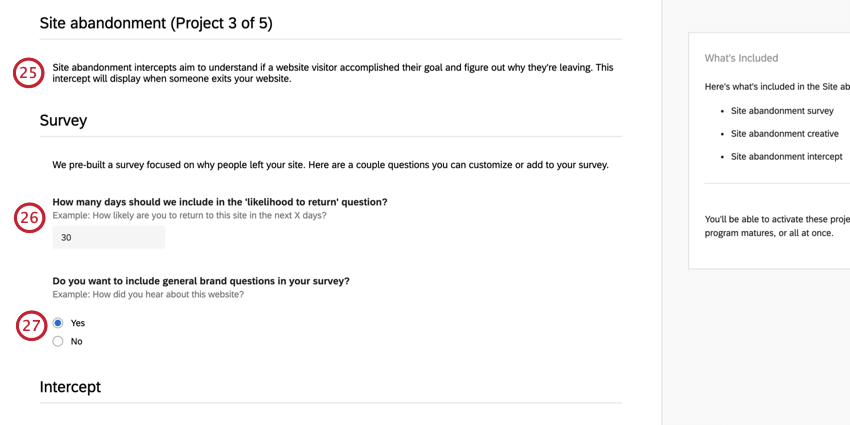
Example: How likely or unlikely are you to return to Qualtrics.com in the next 30 days?
Qtip: Once your site abandonment survey is created, you can check these out in the block named “Brand.”
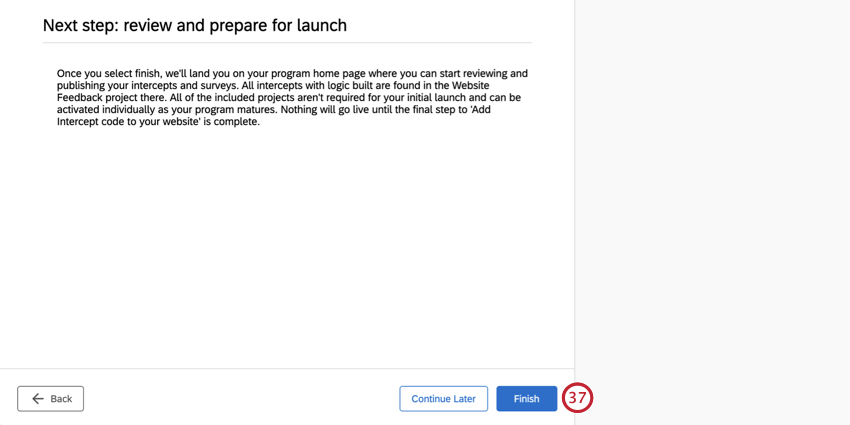
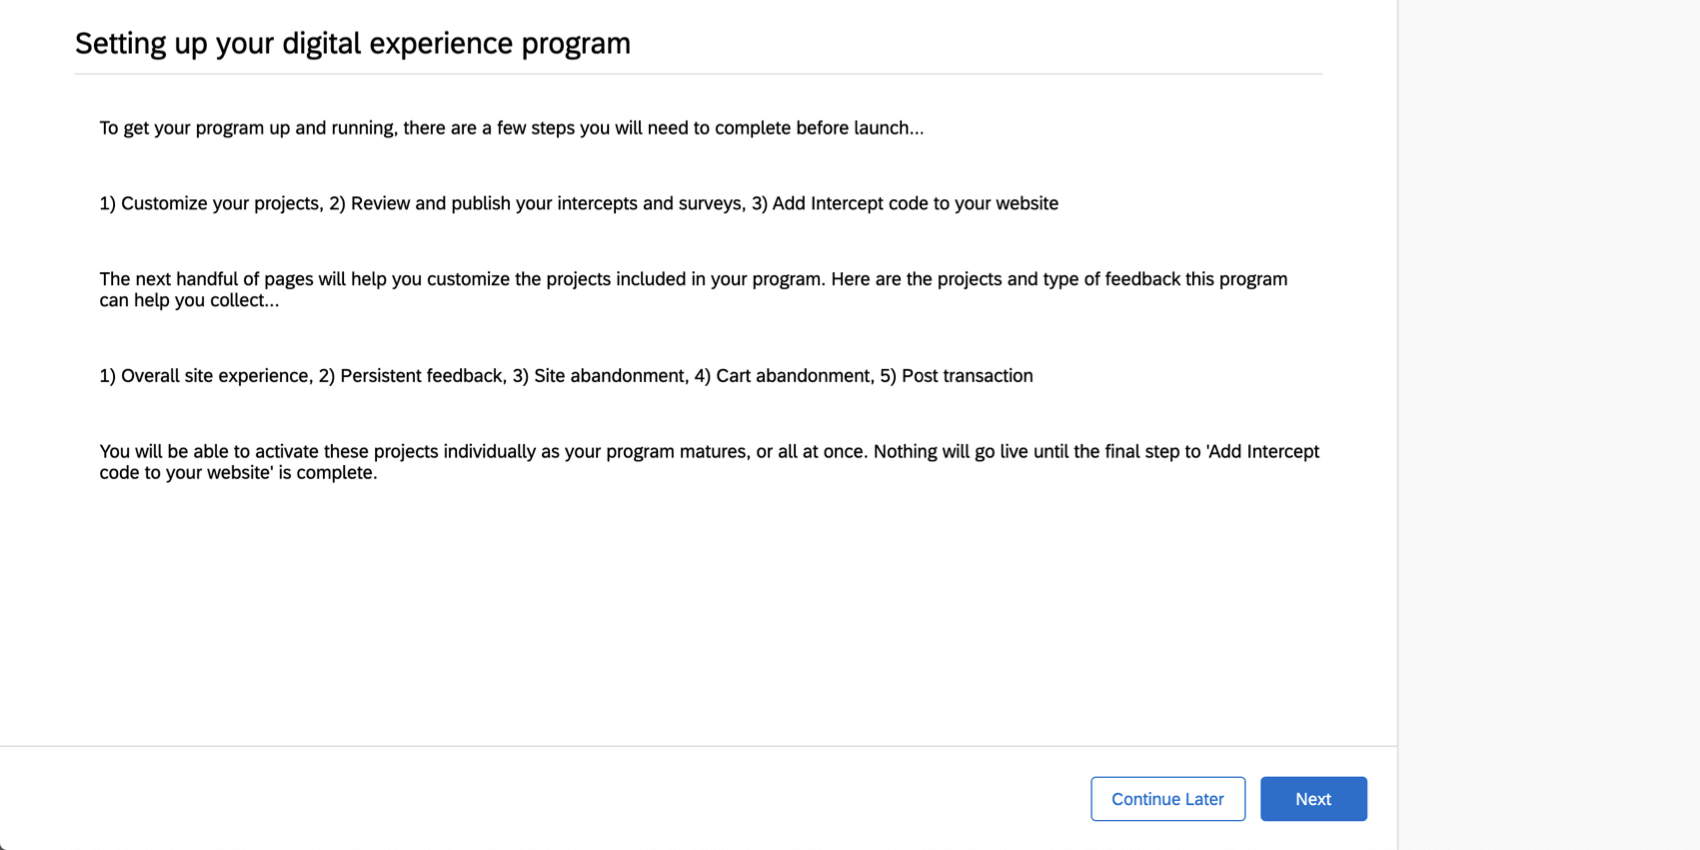
Qtip: This last step will not deploy the program to your website – it will just finish creating all the associated surveys, website feedback projects, and dashboards, which you can then review and edit as needed before deployment.
Managing Your Digital Experience Program

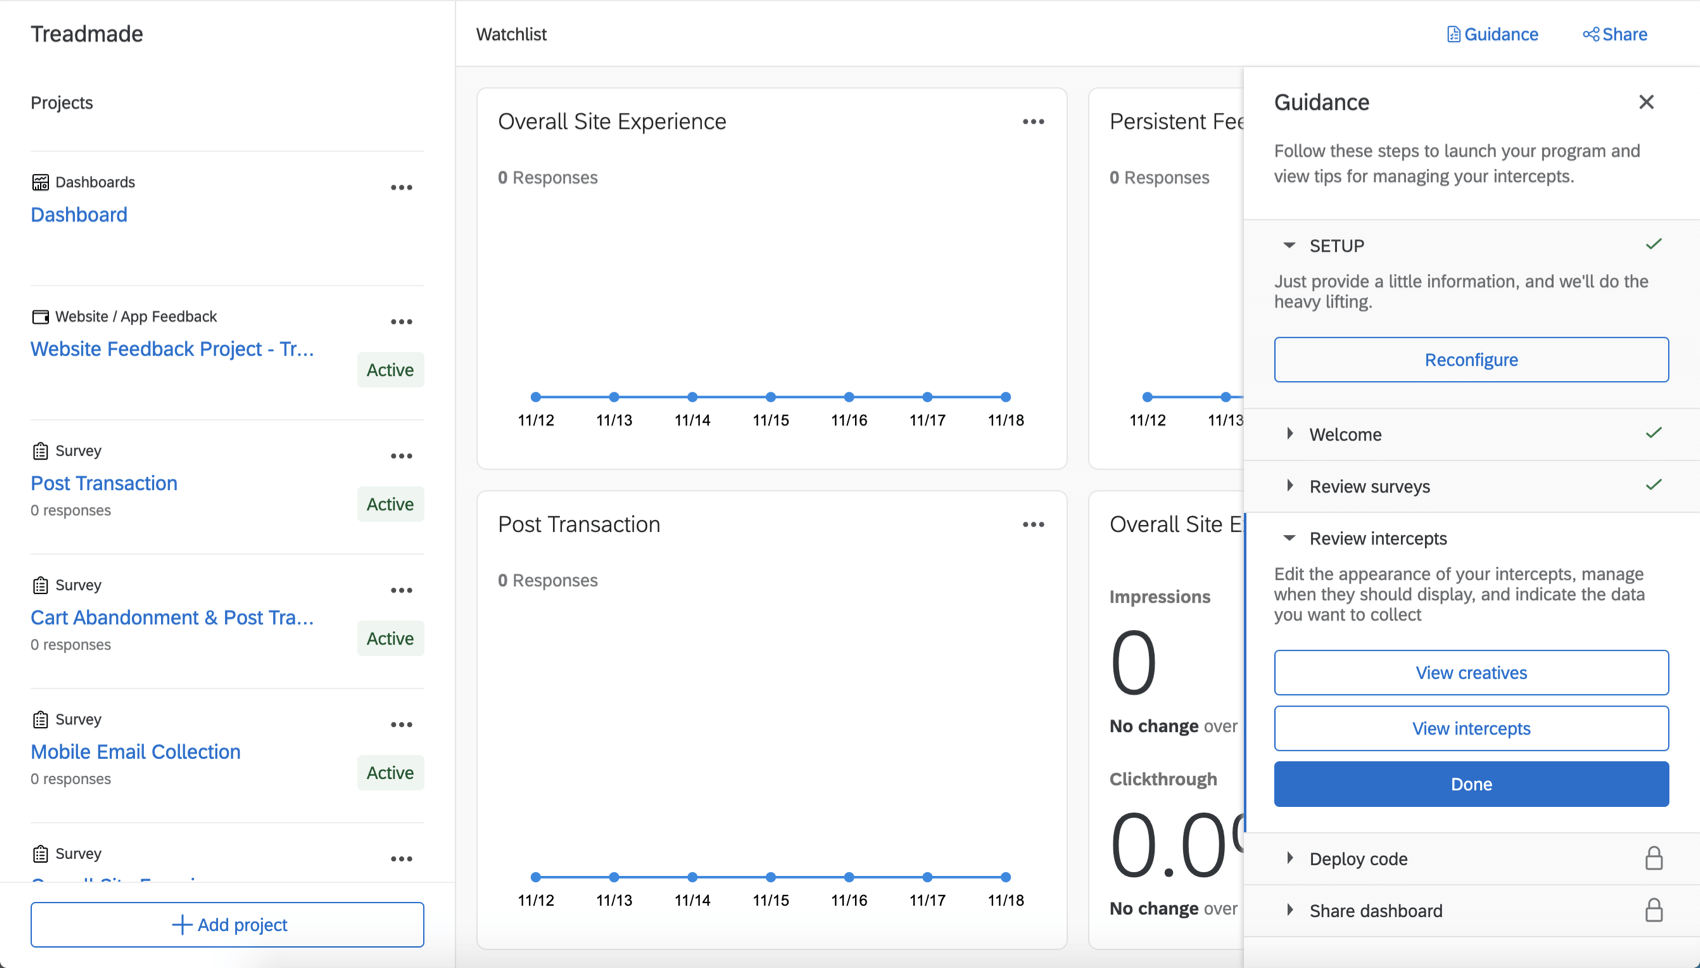
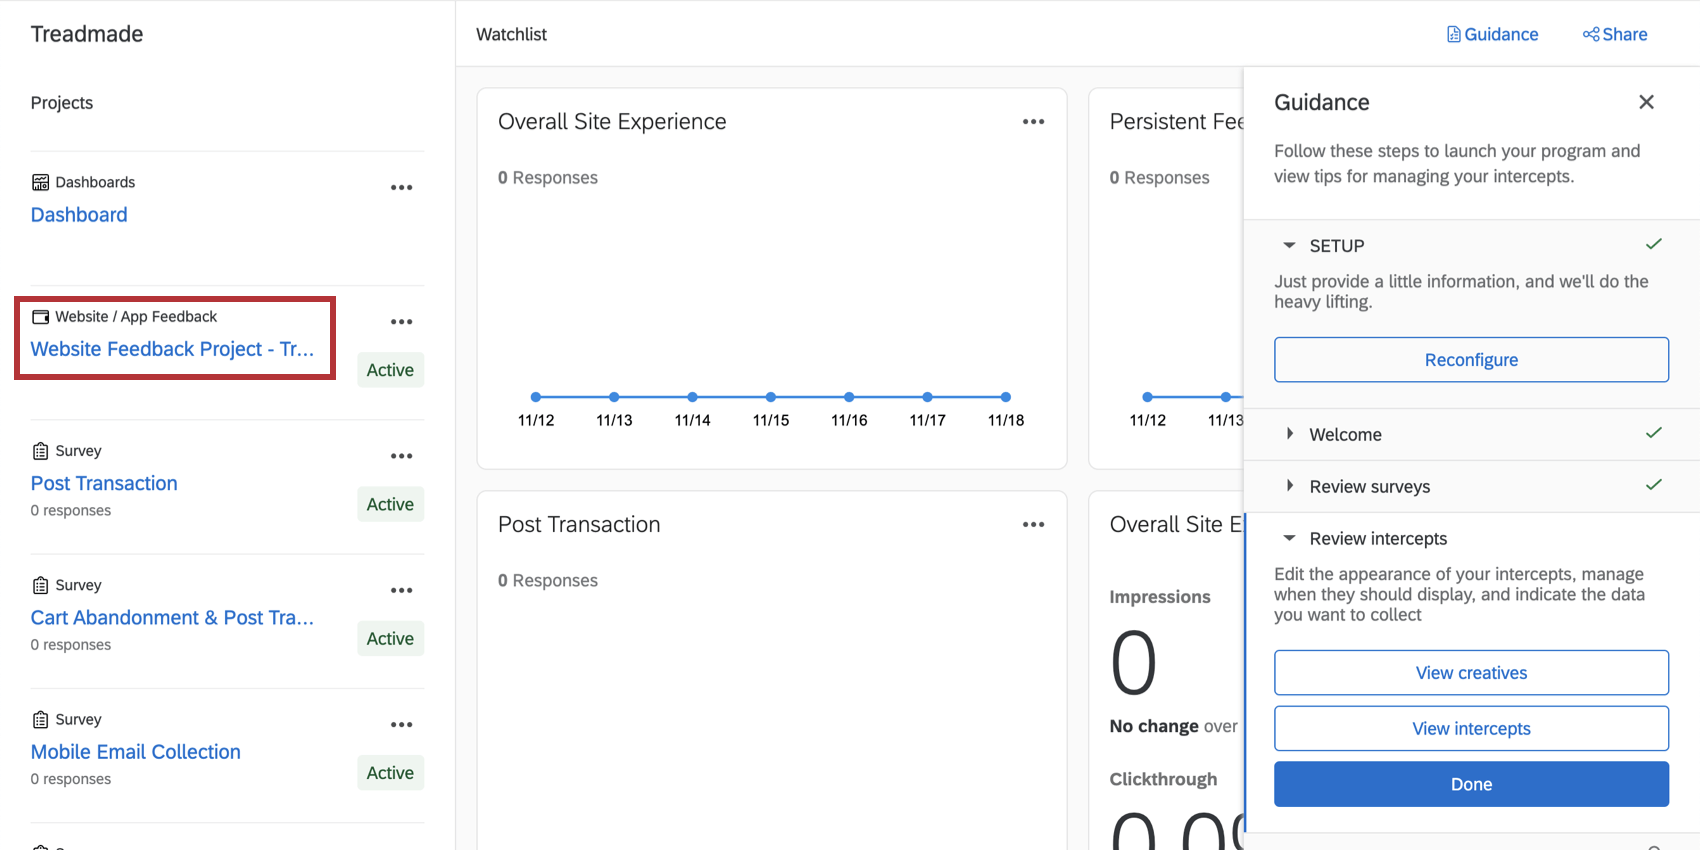
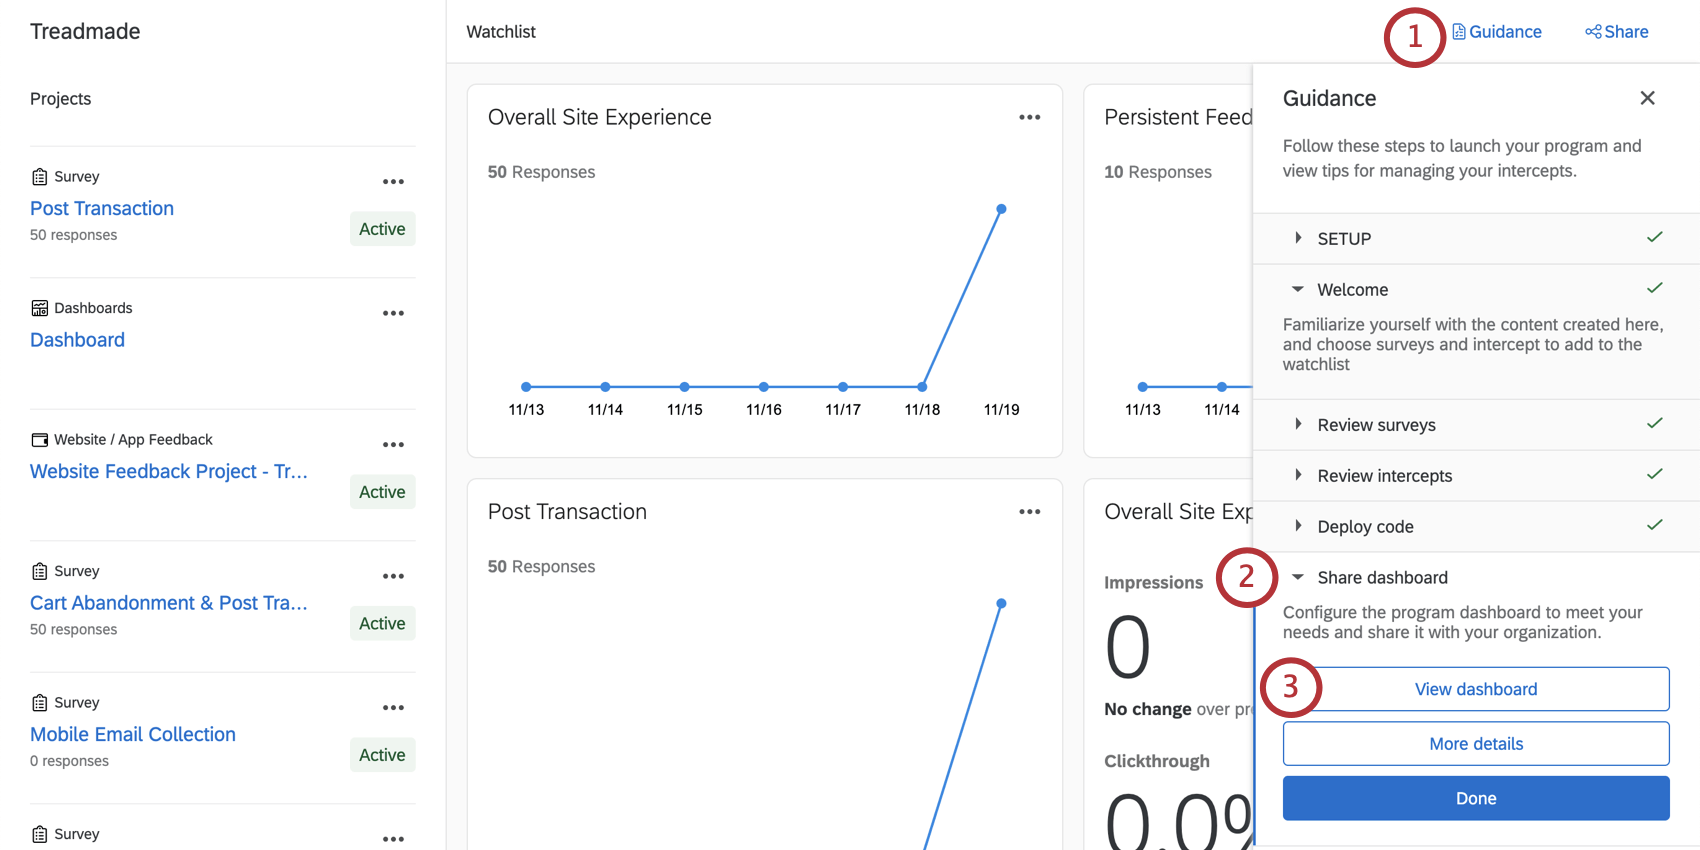
Once you’ve finished setting up the Digital XM Solution for Commerce, you’ll find yourself on a page that unifies all the resources and top-level reports you need to run this program.
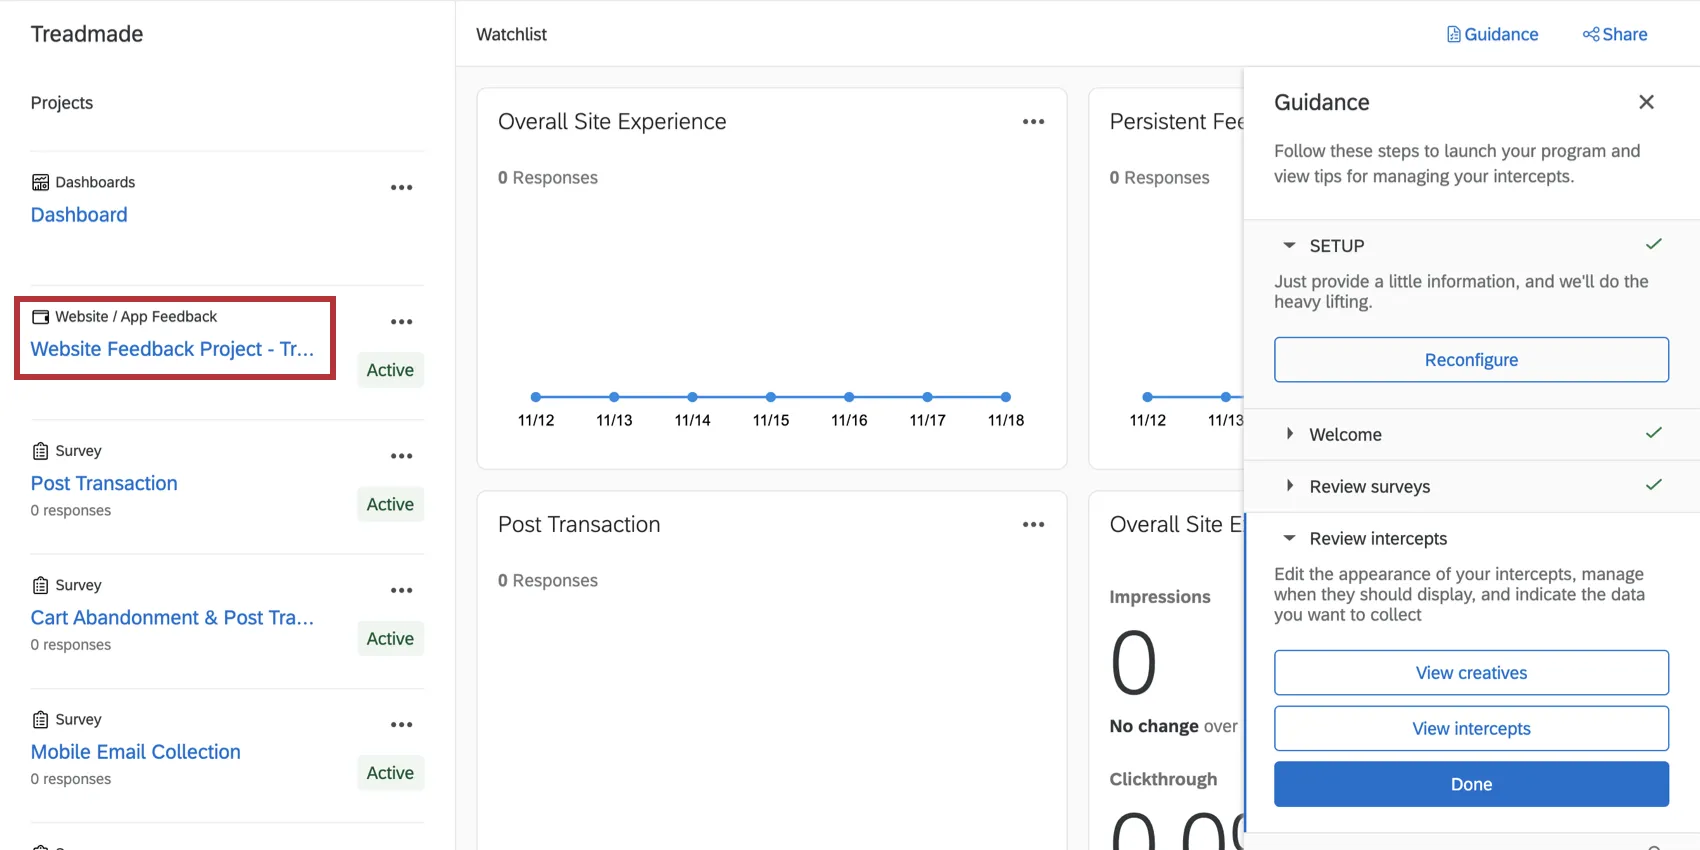
A handful of resources have been created for you, which you’ll see listed on the left under “Projects.” These include:
In the center is a watchlist. This is a helpful place to keep track of response rates and click through rates without looking into individual resources.
On the right-hand side is step-by-step guidance on the remaining tasks left to finalize and launch this program.
To learn more about navigating this program, see the Programs support page.
Digital Commerce Surveys
Each of the surveys included in your program already contains questions and embedded data fields. Below we have a list of each of the surveys you should see. Feel free to pick and choose which ones you want to use.
Qtip: This survey has a pre-made action where every time a survey response is submitted, an email is sent.
You do not have to use all of these surveys. The ones that you do want to be used should be published.
Common survey edits
Here are some common edits you might want to consider making to your surveys:
- Appearance and Theming: Customize the Look and feel of the survey, including the theme.
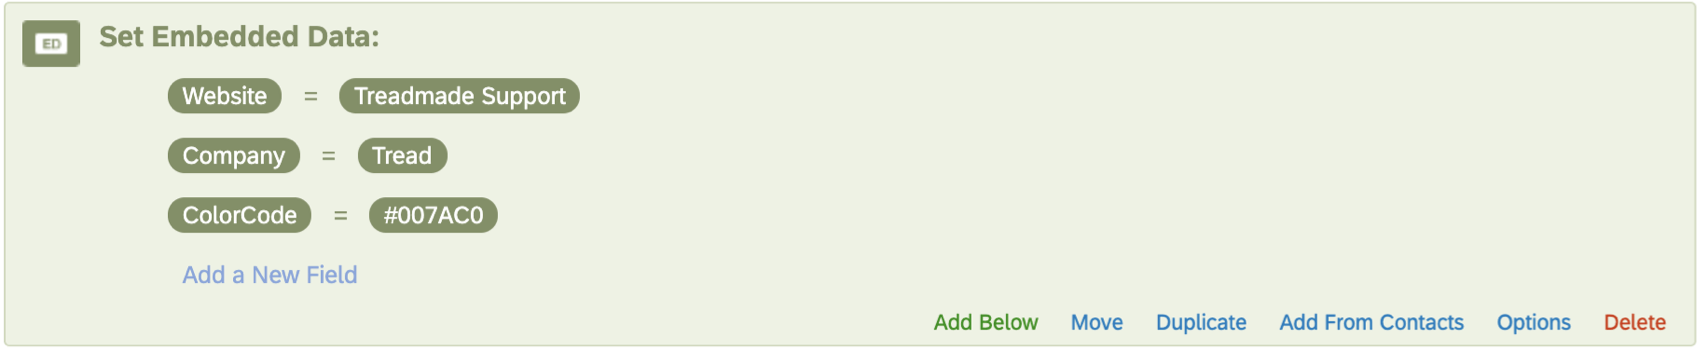
- Embedded Data: Add more embedded data fields to the survey flow. Qtip: If you’re trying to capture information from site visitors, make sure these embedded data fields are also reflected in the intercepts.

- Editing Questions: Customize the questions. Are there certain driver questions that your website focuses on more than the ones we provided? Do the answer choices make sense, especially in questions like “Primary Purpose of Visiting the Site,” or “How did you hear about us?” Qtip: See Creating Questions, Formatting Questions, Formatting Answer Choices, and Validation for more.Qtip: There are all kinds of question types to choose from. In general, we recommend sticking to simple multiple choice questions.
- Default Fields: Change certain fields determined during setup, such as the website and company name, by editing the embedded data in the survey flow.

- Translations: Add translations to your surveys as needed.
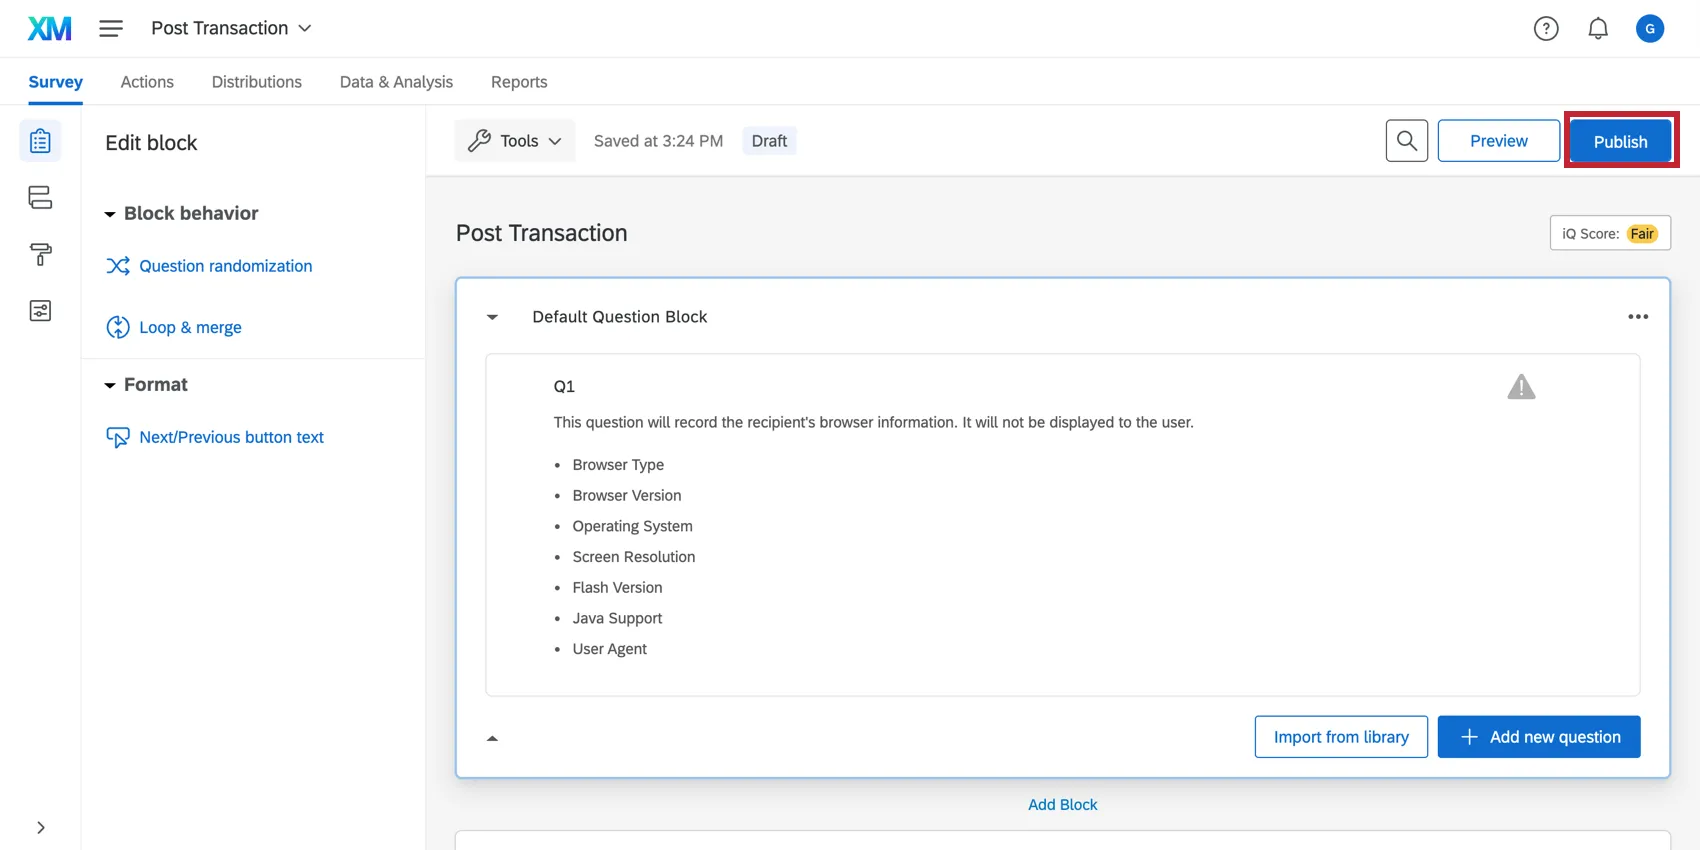
Make sure you preview your survey edits before you publish them. Always publish your surveys when you’re done editing them – this includes edits made to already live surveys.
Qtip: We recommend making sure all your surveys are finalized before you launch a program. For a guide to what edits are safe to make to surveys that have already collected data, see Testing/Editing Active Surveys.
Website Feedback for the Digital XM Solution for Commerce
The Digital XM Solution for Commerce comes with pre-made creative designs, intercept logic, embedded data, and sample rates. Click the Website Feedback project to take a look.
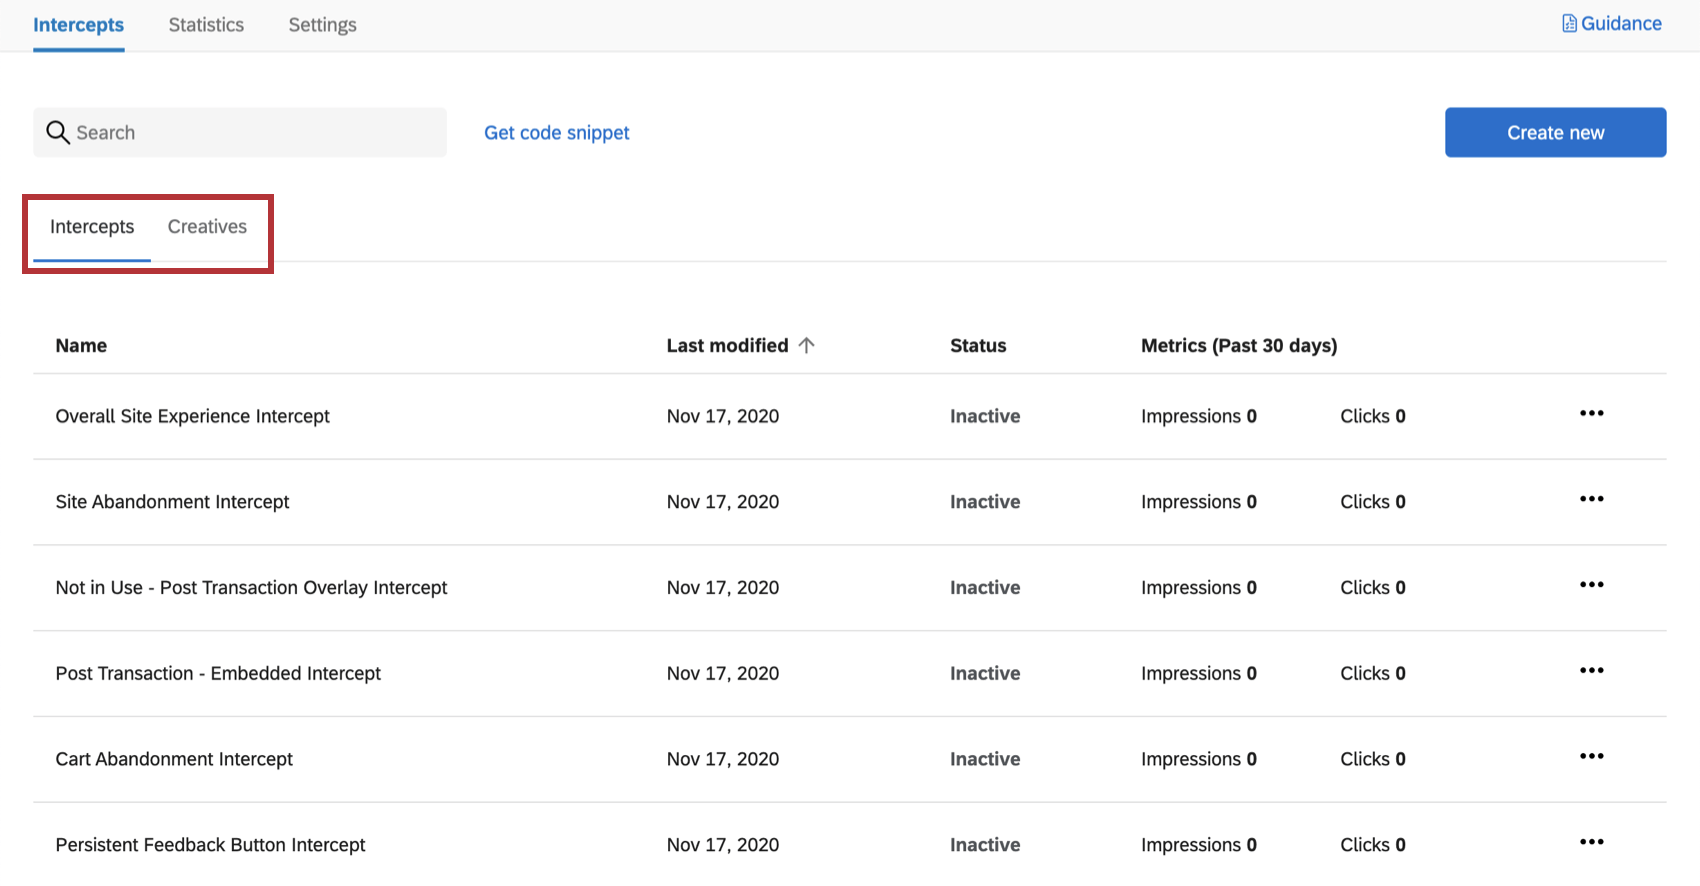
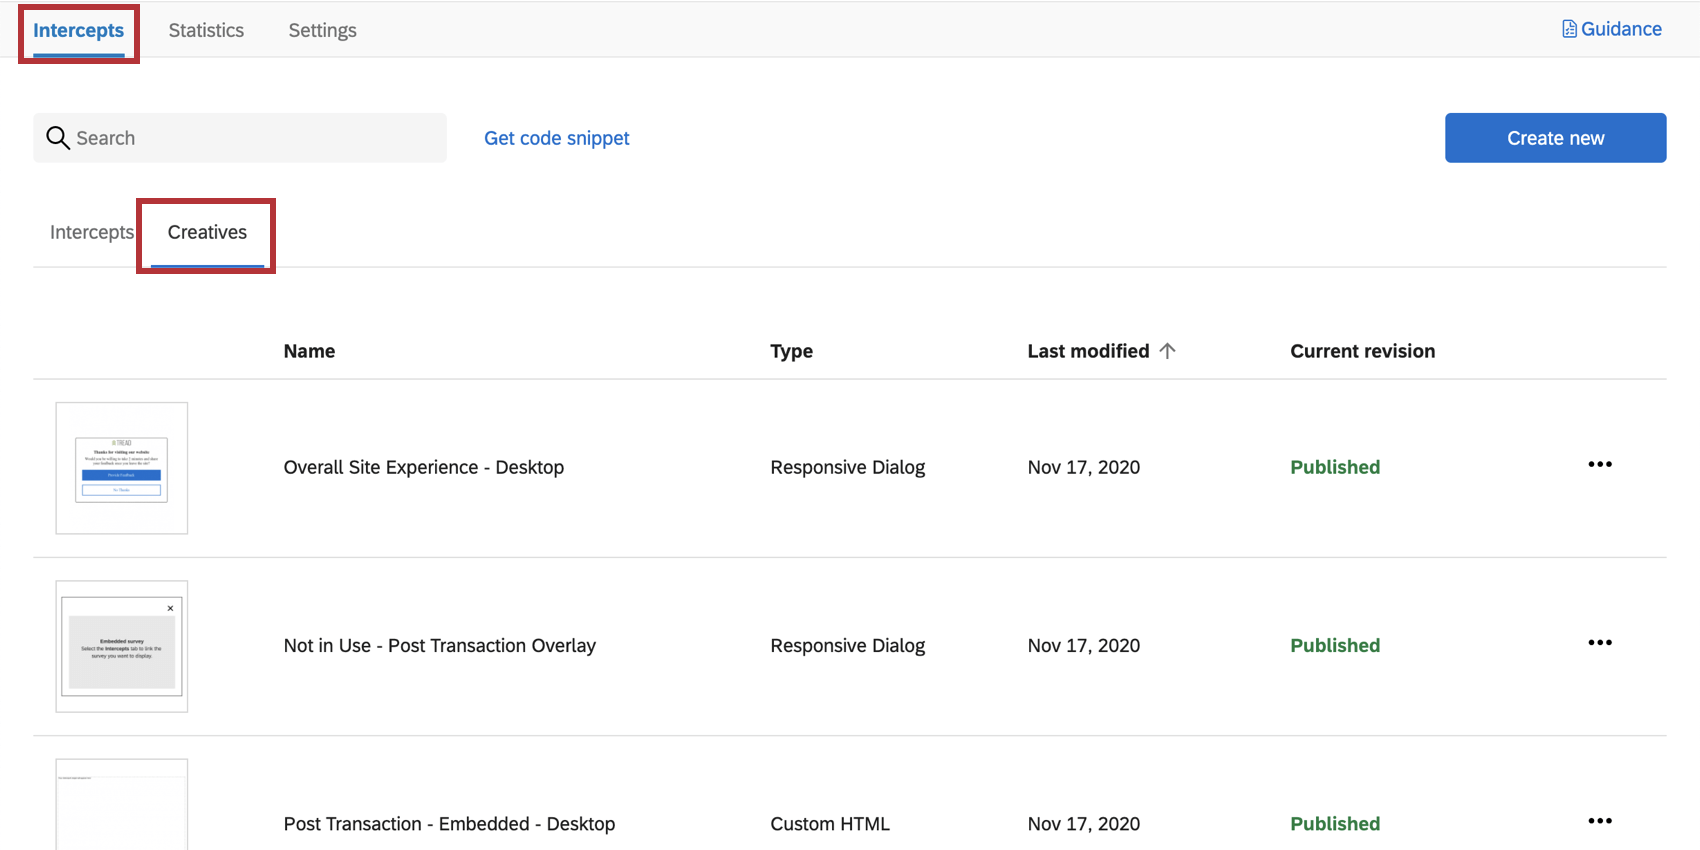
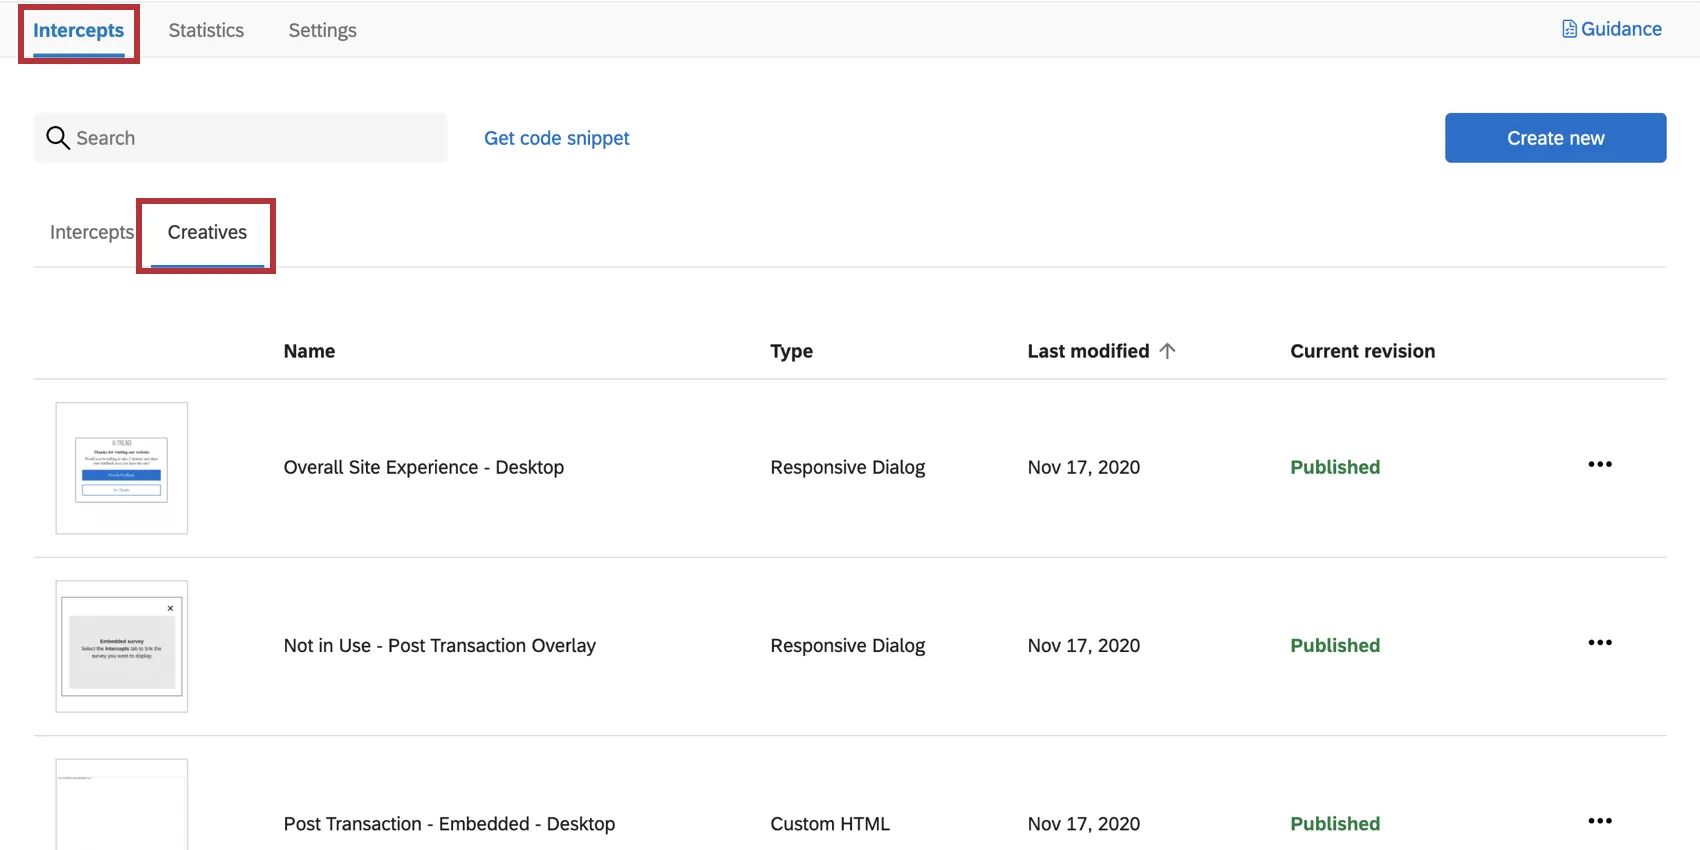
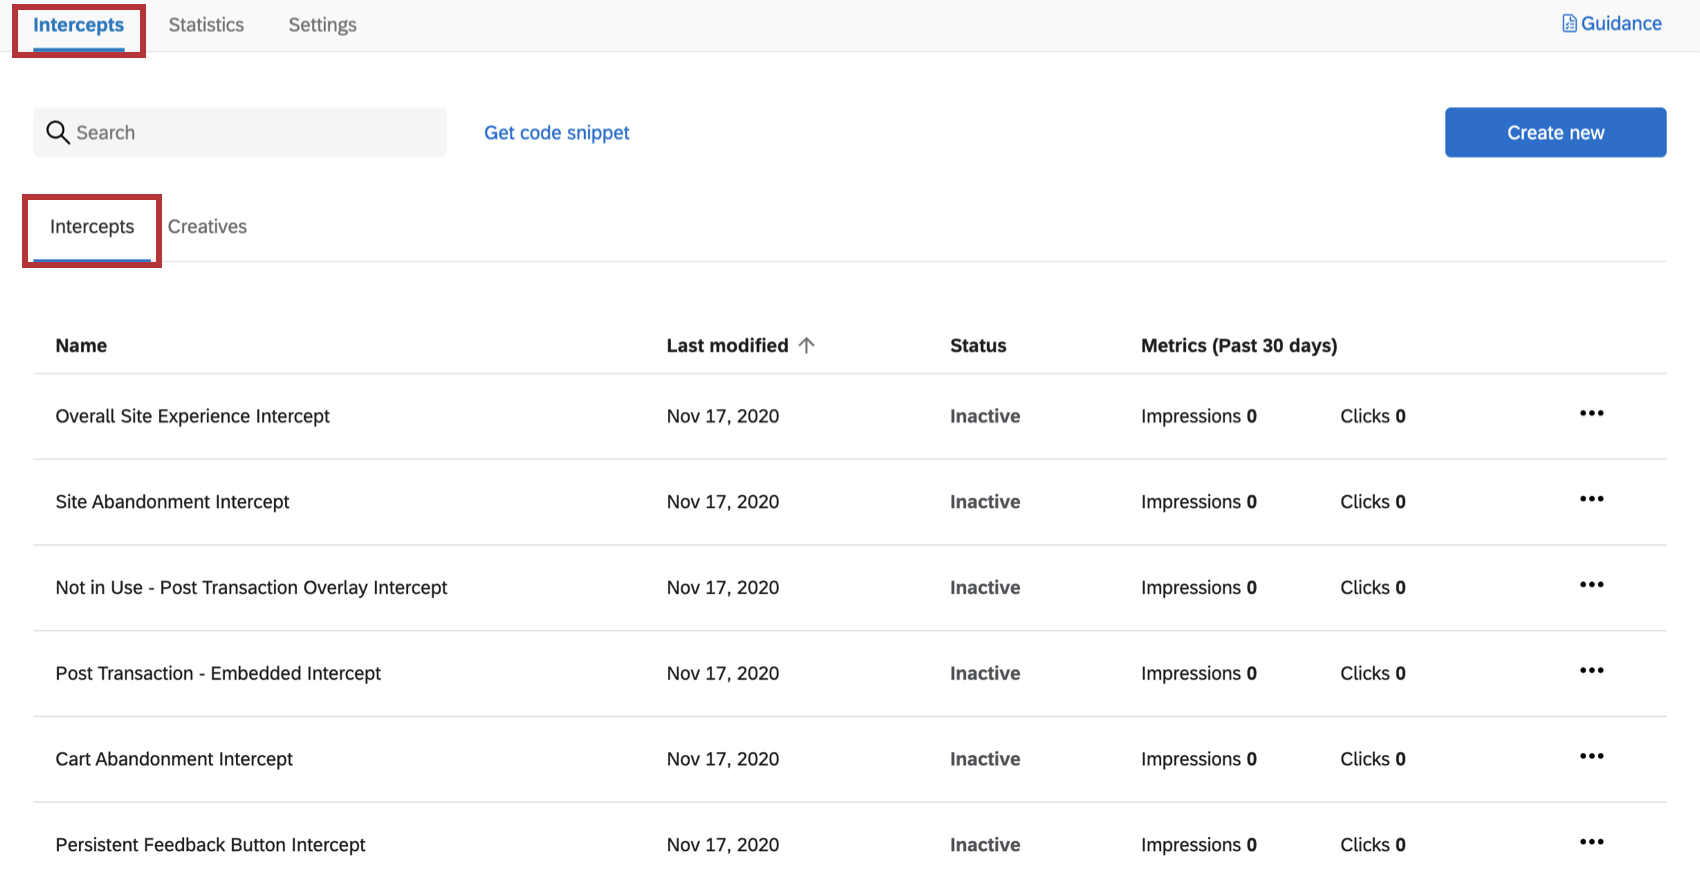
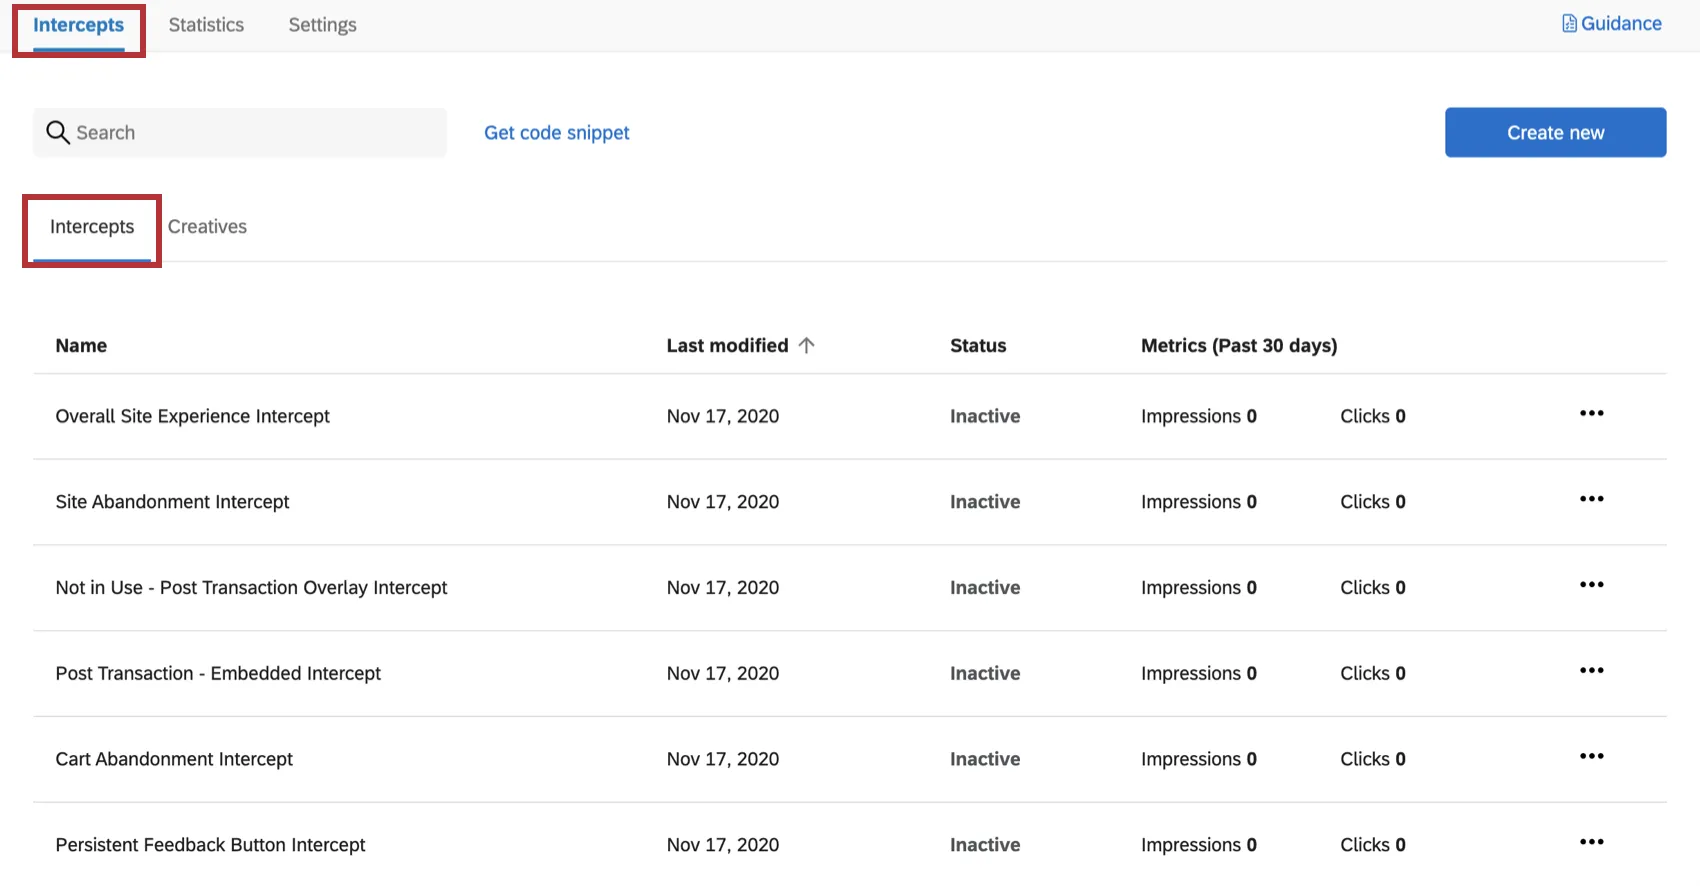
Within this project are creatives and intercepts, which you can switch between by using the Intercepts and Creatives tabs.

Each creative and intercept is named after the digital touchpoint it corresponds to. We’ll go over how to edit your creatives and edit your intercepts in the following sections.
Qtip: Creatives and intercepts with “Not in use” in their names are from options you didn’t select during the initial setup. That means you should not activate them. However, we still generated these for you in case you change your mind and feel comfortable customizing and launching them. Keep in mind that if you haven’t collected any data in your program, you can also reconfigure your setup to start over.
Review and Publish Creatives
Creatives are the appearance a digital touchpoint takes on. This includes aesthetic changes, like button colors, logos, and text, but it also includes how the touchpoint is oriented on the website, such as the side of the webpage the feedback button appears on, and more.
The Methodology section lists all the names of the creatives and intercepts involved in each project. Below, we’ll list the types of creatives being used; the linked support pages will cover editing options unique to those creative types. You can also see Editing Creatives Section for a general guide to editing creatives.
Qtip: As you edit your creatives, make sure the logos and colors look the way you want them to!
Qtip: Creatives and intercepts with “Not in use” in their names are from options you didn’t select during the initial setup. That means you should not activate them. However, we still generated these for you in case you change your mind and feel comfortable customizing and launching them. Keep in mind that if you haven’t collected any data in your program, you can also reconfigure your setup to start over.
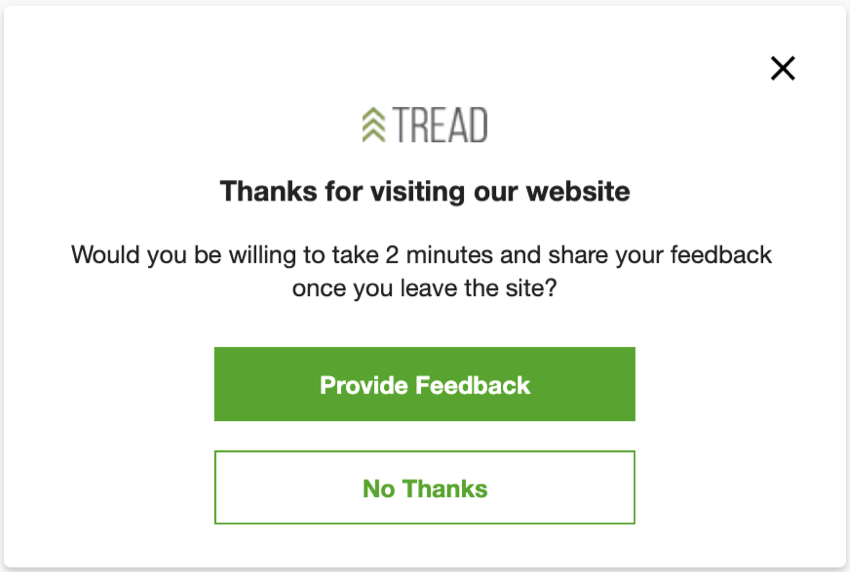
Overall Site Experience
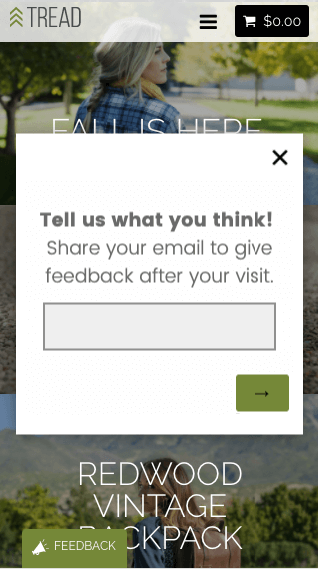
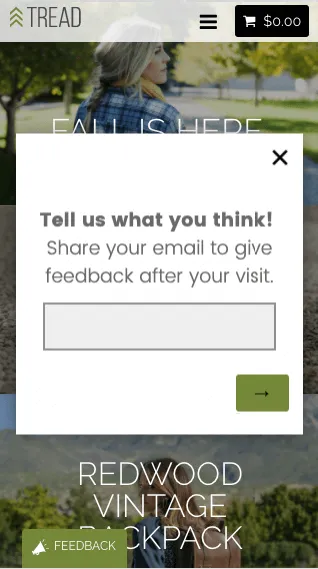
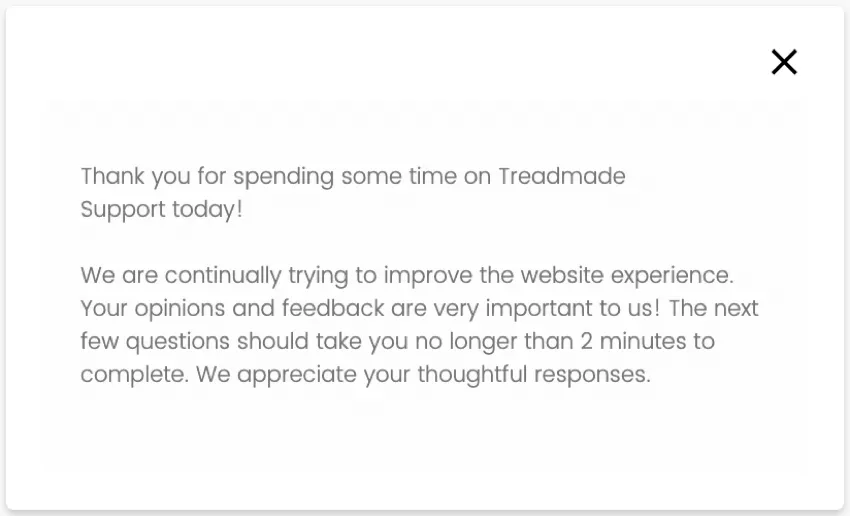
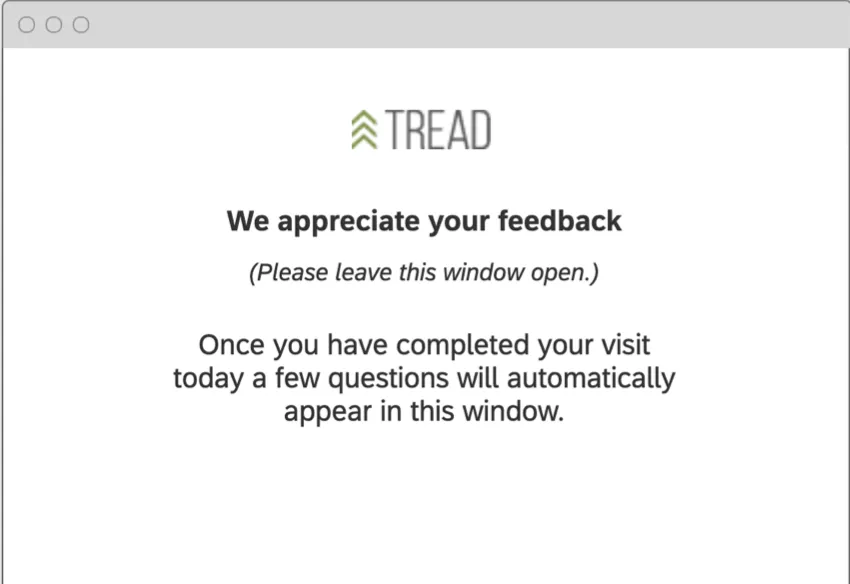
For desktop visitors, a responsive dialog window is shown that includes the Overall Site Experience survey. If they would like to participate, a pop under window loads and waits until they exit the browser. This uses the Opt In on Site Exit functionality.

For mobile visitors, an invite is shown that collects the visitor’s email address. An email is then sent to them that includes the Overall Site Experience survey.
For help getting the survey displayed in a window to look right, see Formatting Embedded Targets.
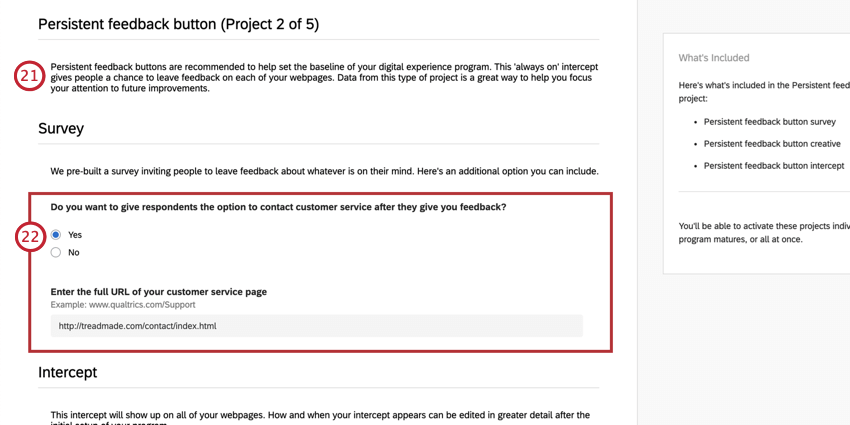
Persistent Feedback
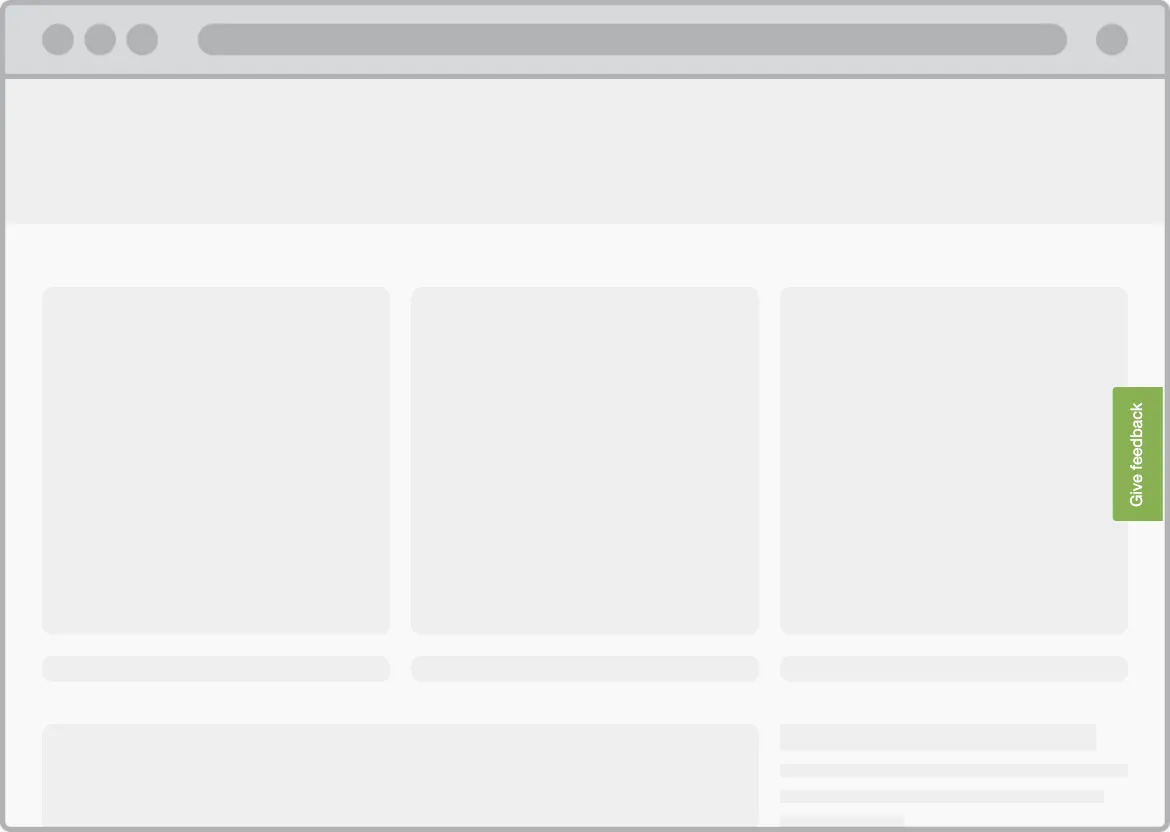
This is a feedback button that persistently is available across the website.
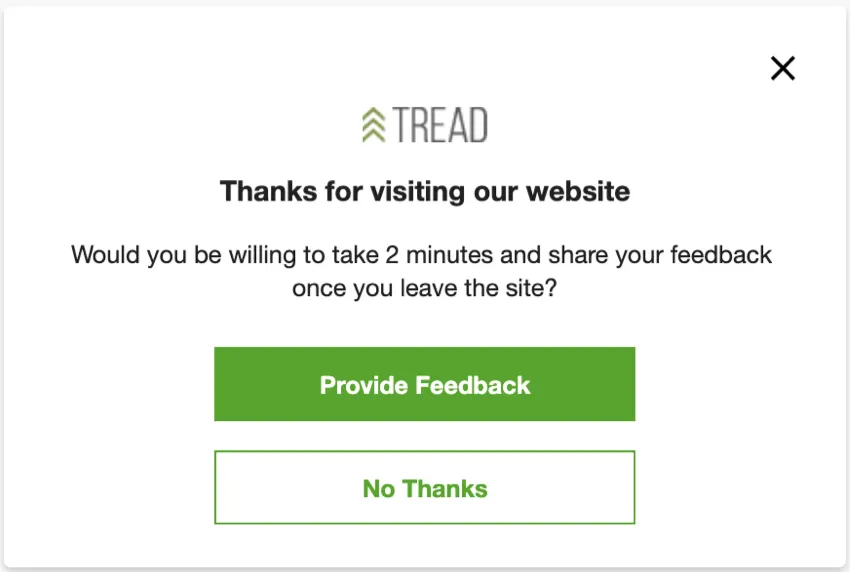
Site Abandonment

This is an info bar that loads when a website visitor moves to exit the website. This uses exit intent functionality.
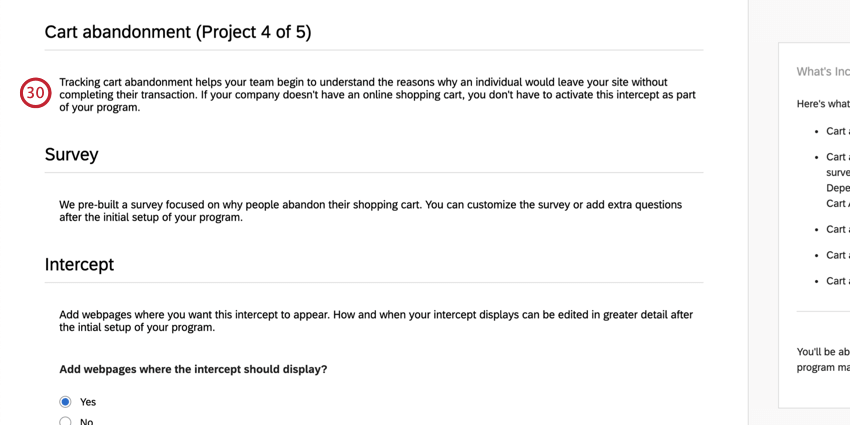
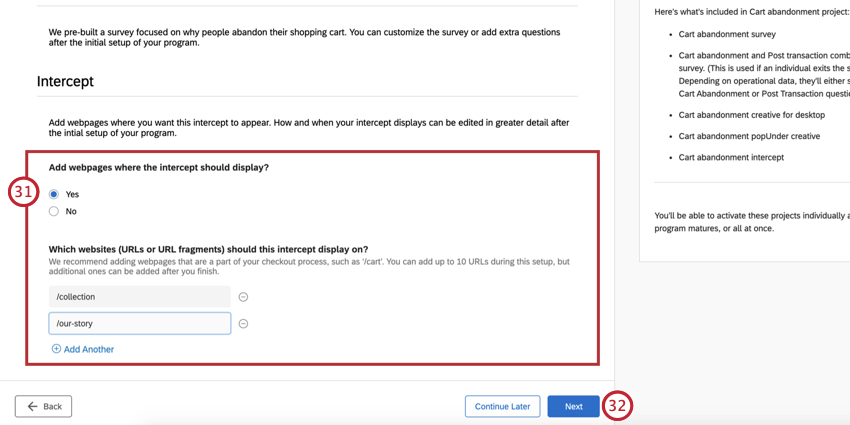
Cart Abandonment
This is a pop over that will load as a visitor begins to leave the website. They either can give feedback right then, and the Cart Abandonment survey will load, or they can select “I’m not done.” If they say they’re not done, a pop under window will load and wait until they completely exit the site. At that point, a Cart Abandonment and Post Transaction Combined survey will appear to dynamically show the visitor the most applicable questions.

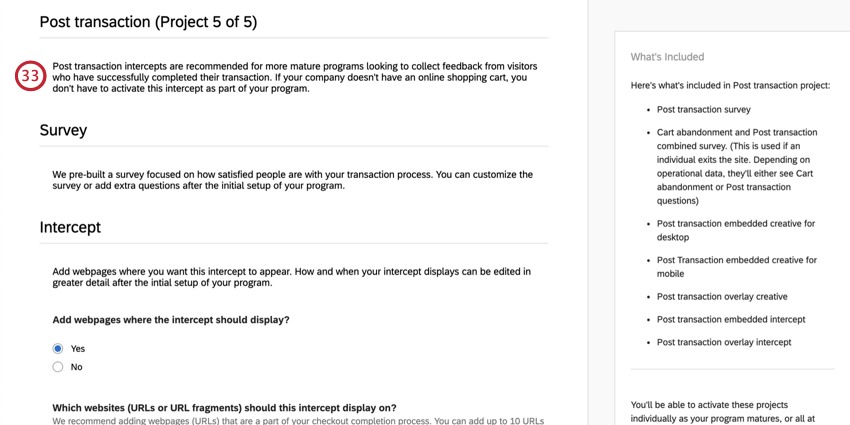
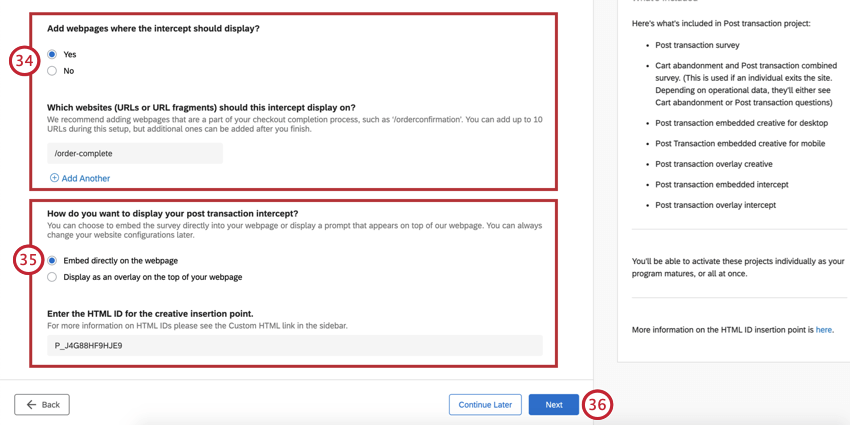
Post Transaction
This can either be done as an embedded survey within the webpage using a custom embedded feedback creative type, or as an overlay using responsive dialog. Both are built for your convenience, just use the option most applicable to your organization. If using the custom embedded option, be sure to populate the Creative Insertion Point (this is also covered during initial setup, so you don’t have to do this again).

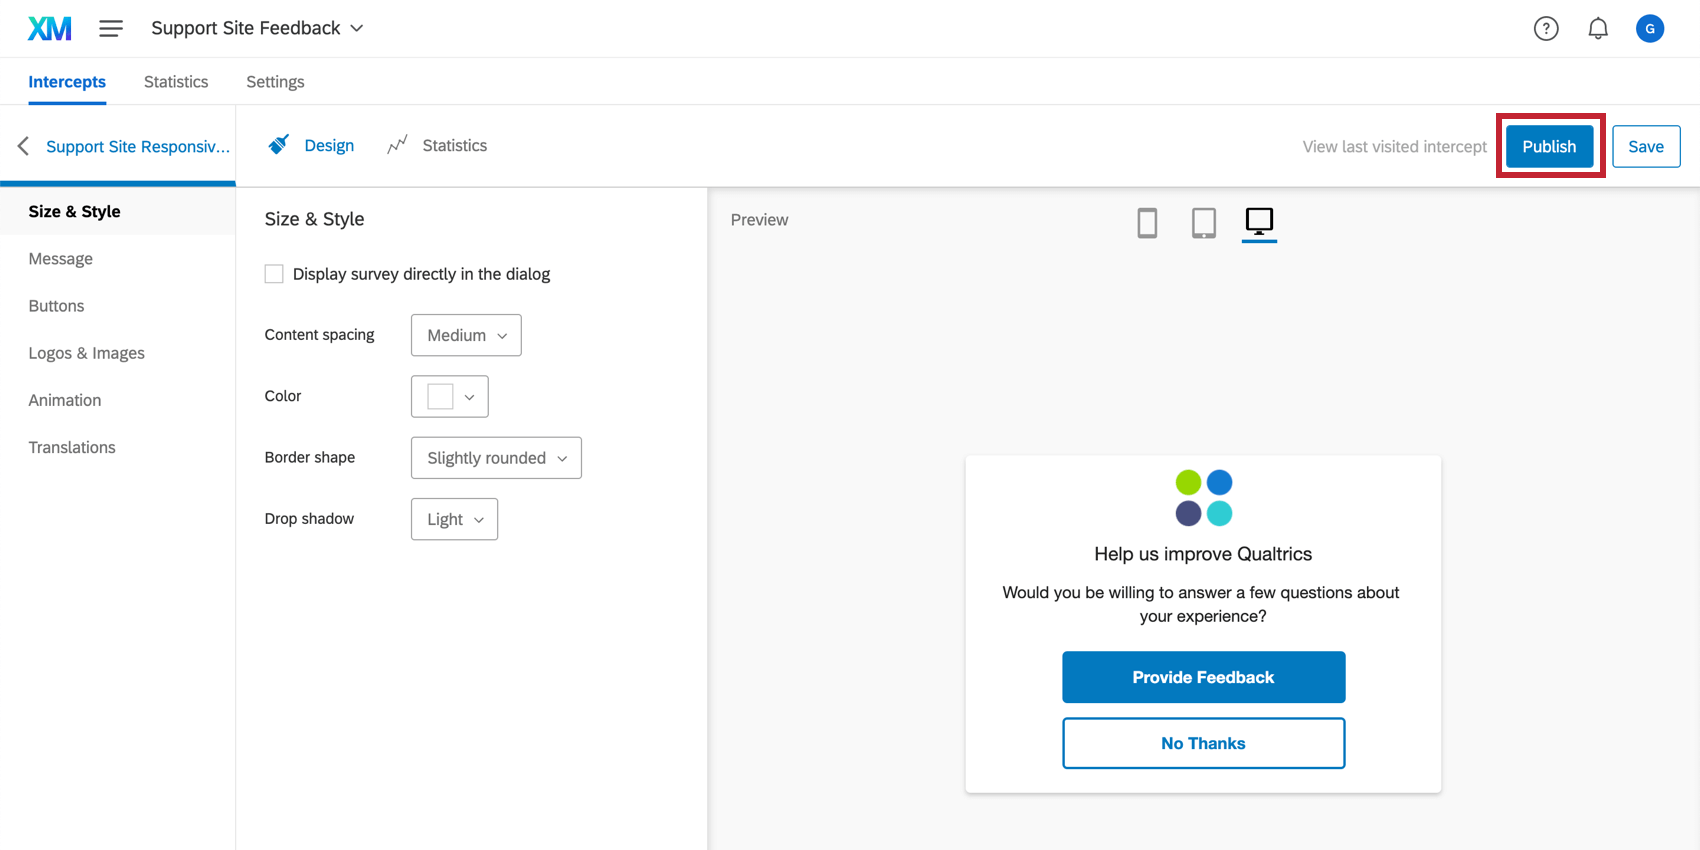
Publishing Creatives
If you make edits to your creatives, make sure you publish them so that they are pushed to the live code. Only changes that are published will display on your website once you have the code placed on your website.
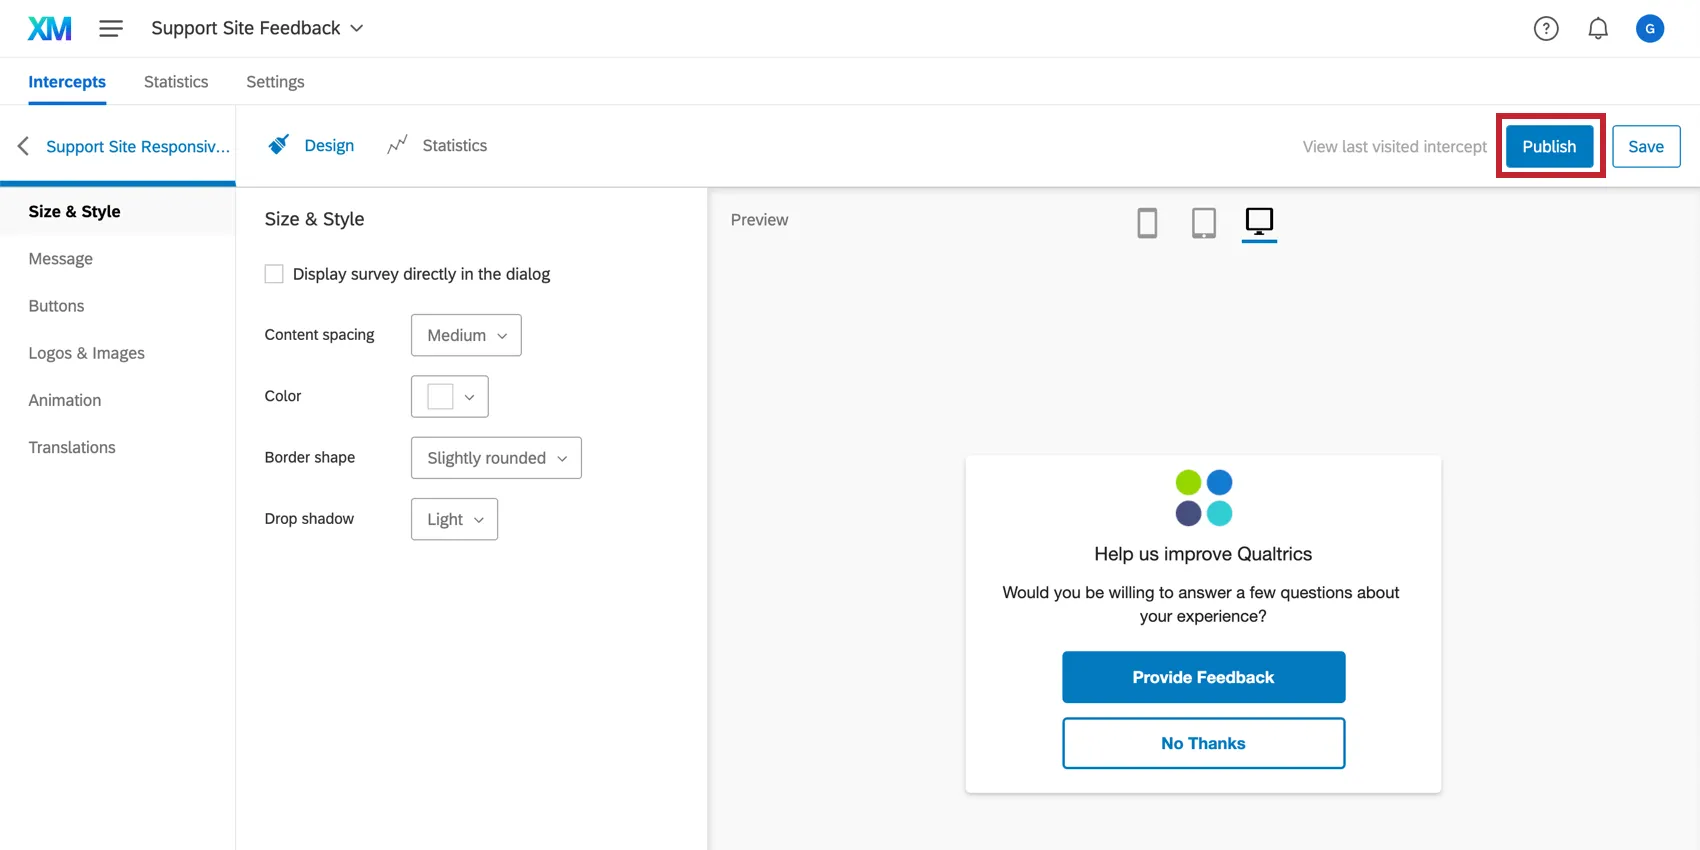
Qtip: If you’re happy with how the setup assistant made your creatives and don’t want to add any edits, you don’t have to press “Publish” again. All creatives are already published and ready to go live on your site, as soon as you finalize the corresponding intercepts. We’ll go over what this entails in the next section.
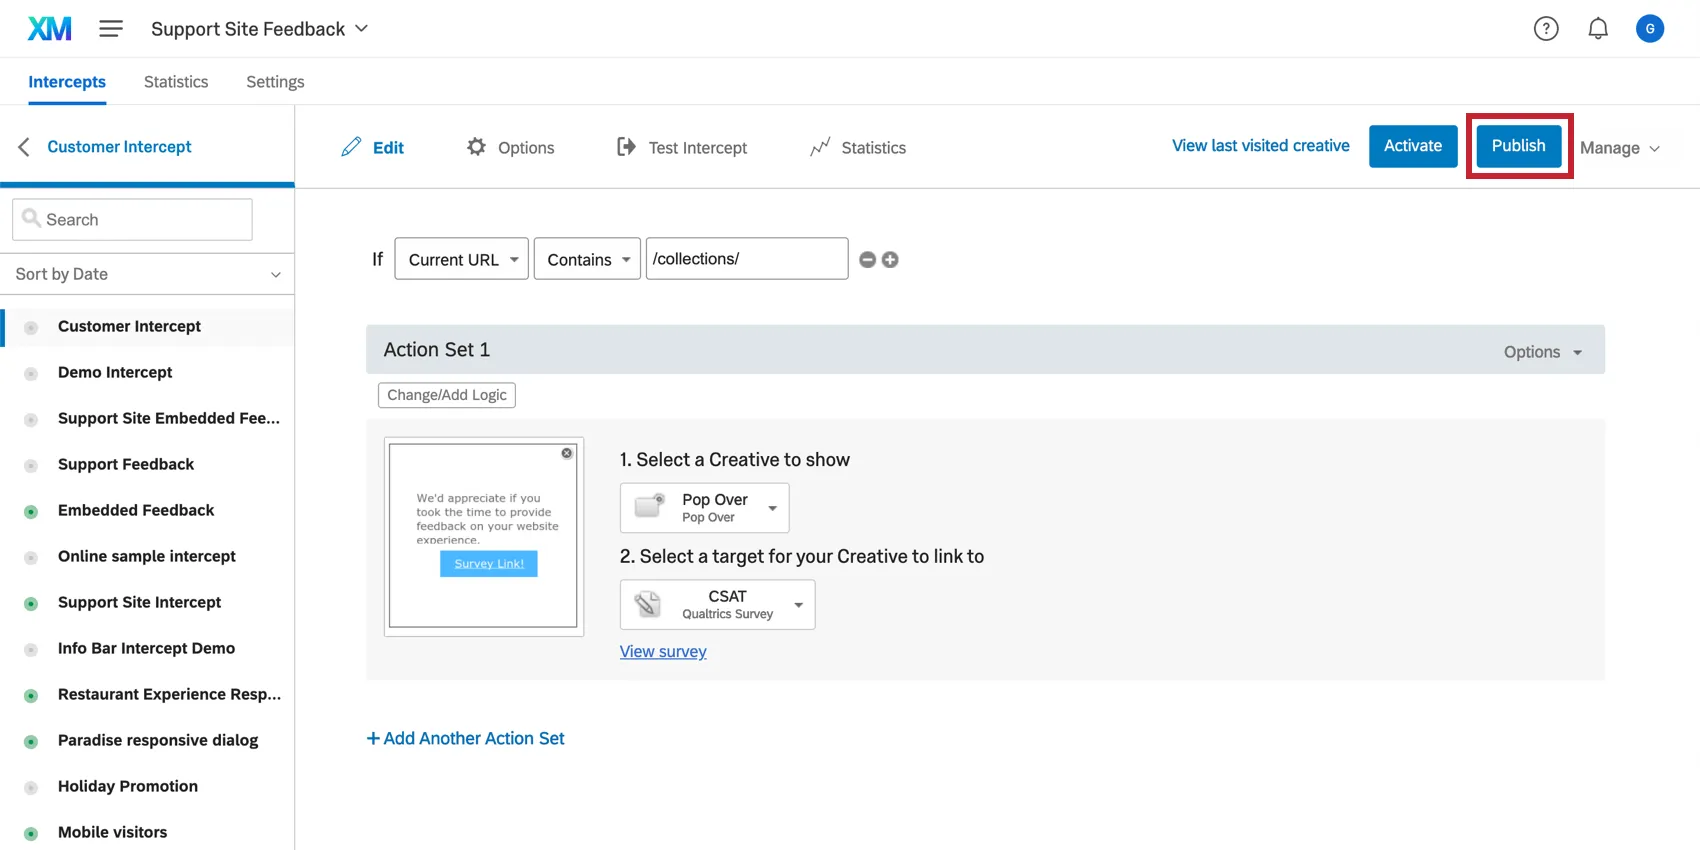
Review, Activate, and Publish Intercepts
Intercepts are the rules by which digital touchpoints appear to website visitors. That means the Intercepts tab is where you can edit the circumstances under which these touchpoints appear on your website. Here, we will also finalize the digital touchpoints.
Each intercept will be named after the digital touchpoint it corresponds to.
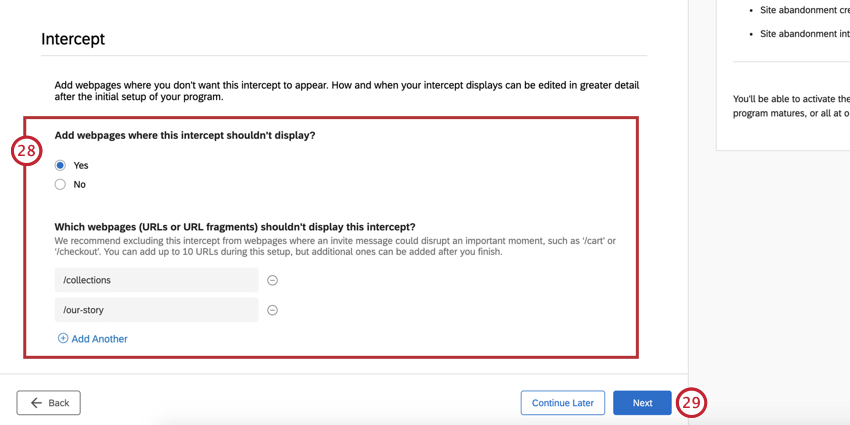
Once you click into an intercept, certain settings you configured during project creation will be automatically implemented, such as display rates, the URL(s) you want to display the touchpoints on, and the limit on how many days apart the same touchpoint can be showed to the same visitor.
By default, the targets will be already filled out. The target of an intercept is the website that the intercept should display in the creative, or take the website visitor to directly once clicked. Each of these targets corresponds to a pre-built survey included in the program, usually with the same name as the intercept.
Resources on Intercept Editing
When editing an intercept, think about how you want that specific touchpoint to behave towards website visitors. For more guidance on the options available to you, see:
- Setting Up Your Intercept: An introductory page the goes over top-level information on intercepts, and the types of edits you might want to make.
- Editing Intercepts: Step-by-steps on all the basics to intercept editing, from targets, to the rules under which they display (logic), and more.
Additional resources and advanced options:
- Multiple Action Sets
- Embedded Data in Website Feedback Qtip: Be careful when editing the pre-configured embedded data. If you remove or rename fields, you will not capture the desired information.
- Intercept Options
If you would like to test the edits you’re making without deploying them to your site, try testing the intercept.
Qtip: Remember to test on the correct URLs. If during project setup you said your intercept should only appear on “www.treadmade.com/home,” it won’t appear when you test it on other pages of your site.
Publishing and Activating Intercepts
When you have made edits to your intercepts, publish them.
When you are ready for your edits to be live on your website, activate your intercepts.
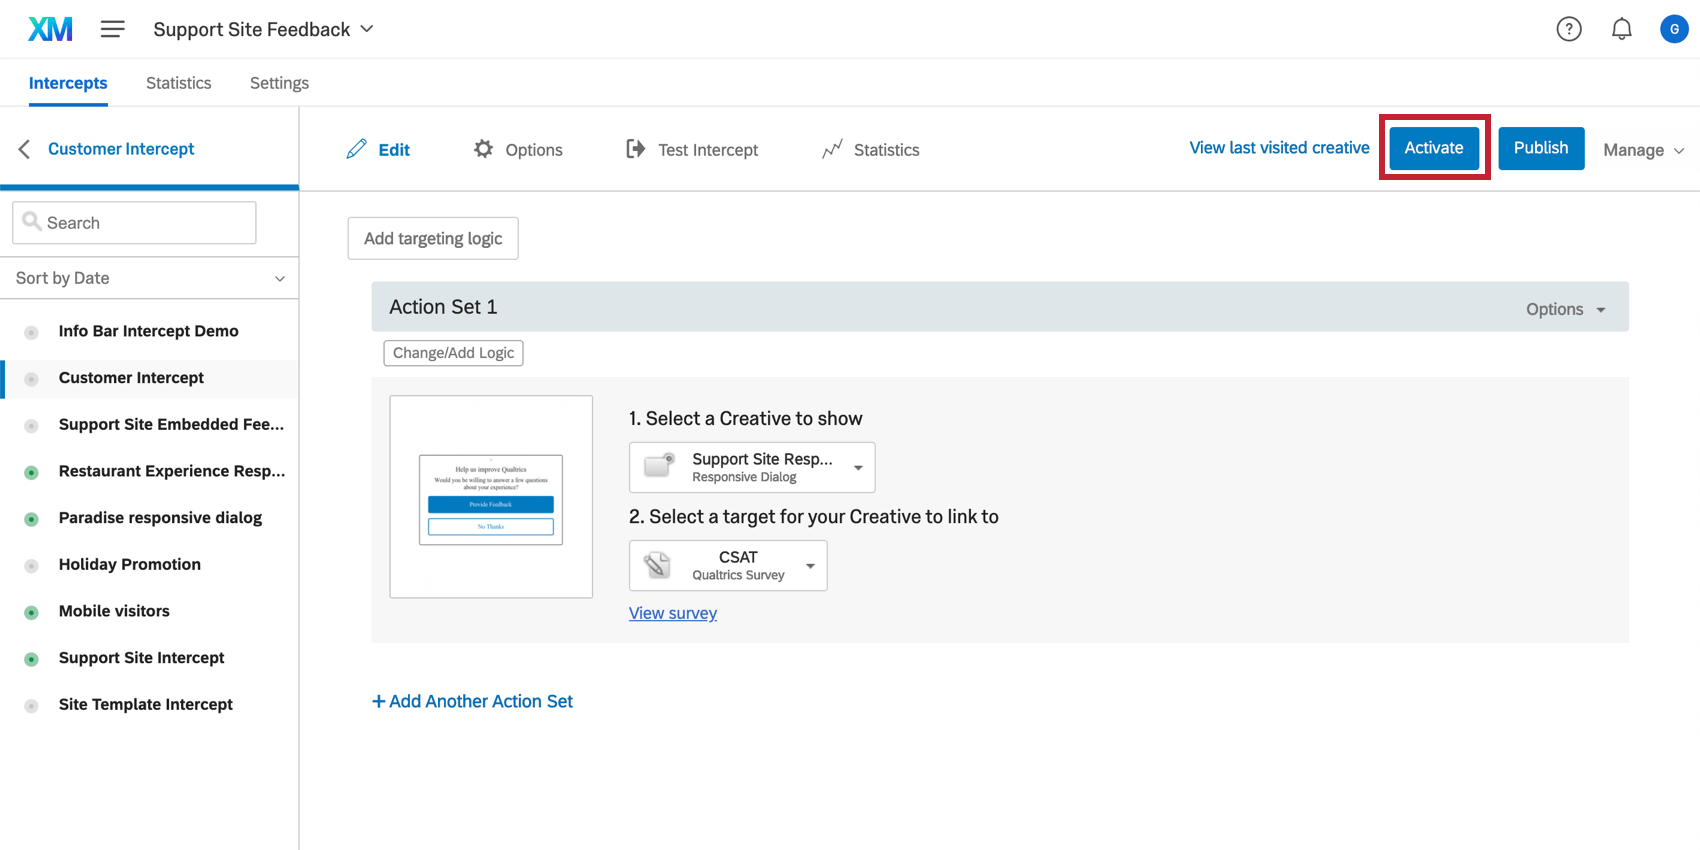
Make sure to publish every intercept you want to use. If you do not have a shopping cart feature on your website, you can skip the Cart Abandonment and Post Transaction intercepts.
Qtip: Creatives and intercepts with “Not in use” in their names are from options you didn’t select during the initial setup. That means you should not activate them. However, we still generated these for you in case you change your mind and feel comfortable customizing and launching them. Keep in mind that if you haven’t collected any data in your program, you can also reconfigure your setup to start over.
Qtip: Anytime you edit the intercepts going forward, you will only publish changes to push those changes to your website, because the intercepts are already activated. To disable one or both intercepts, you can deactivate them. See more on Activating, Publishing, & Managing Intercepts.
Deploying Code
Once you’re done customizing your creatives and intercepts, it’s time to generate the code so your IT / web development team can deploy everything to your website.
Qtip: Please remember that your intercepts must be activated to display the digital touchpoints on the website.
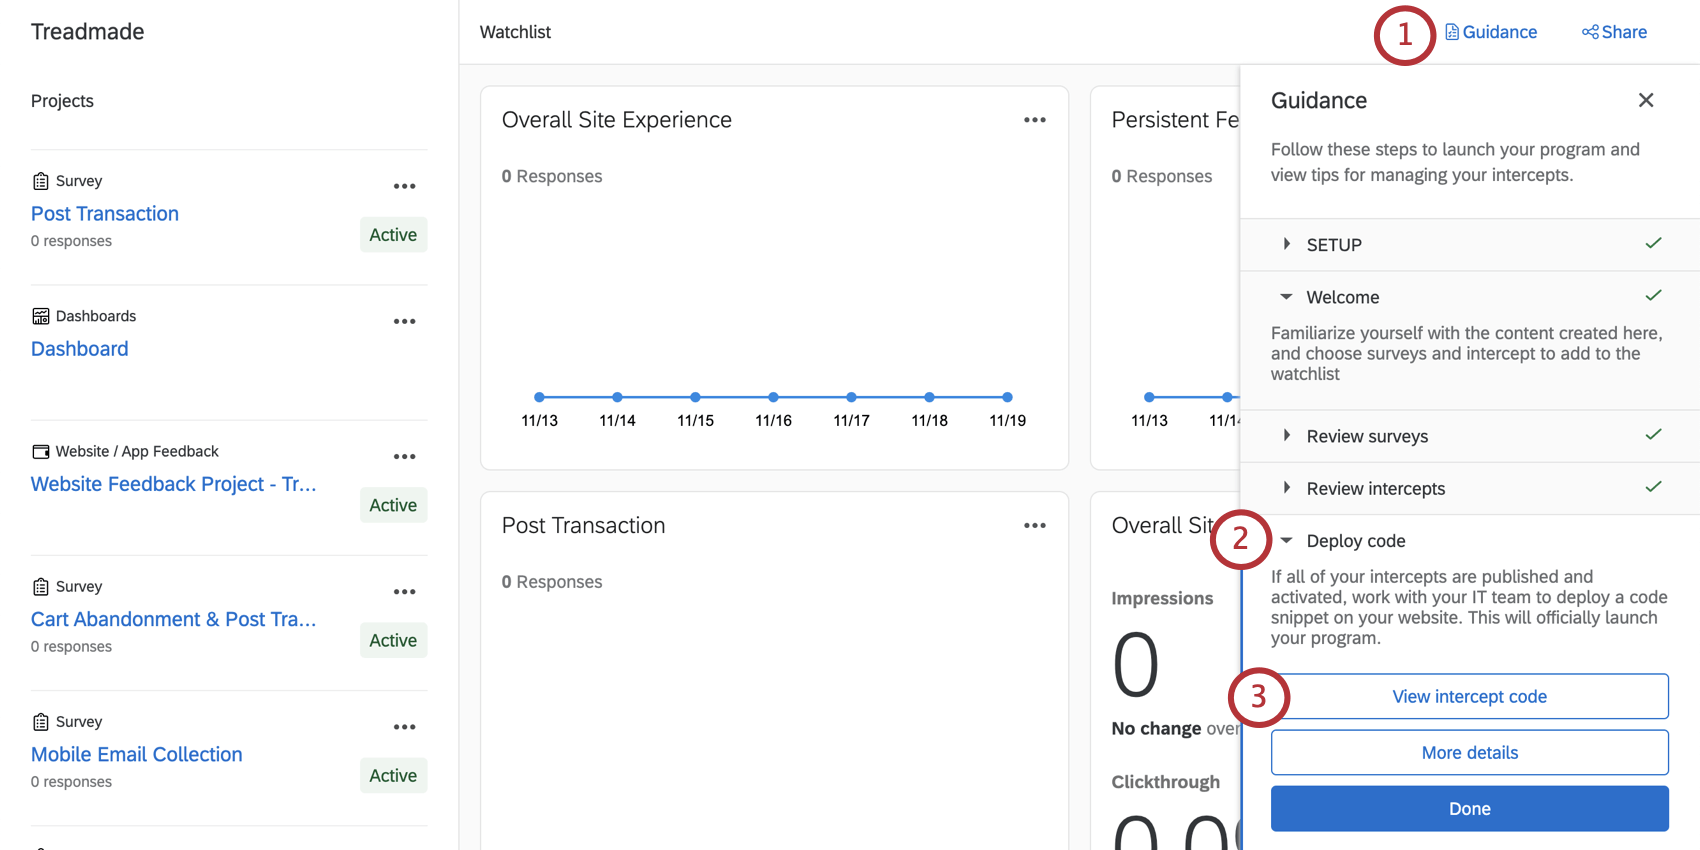
Qtip: If this button doesn’t appear, make sure the previous “Review intercepts,” “Review surveys,” and “Pick your projects” steps are marked as done.
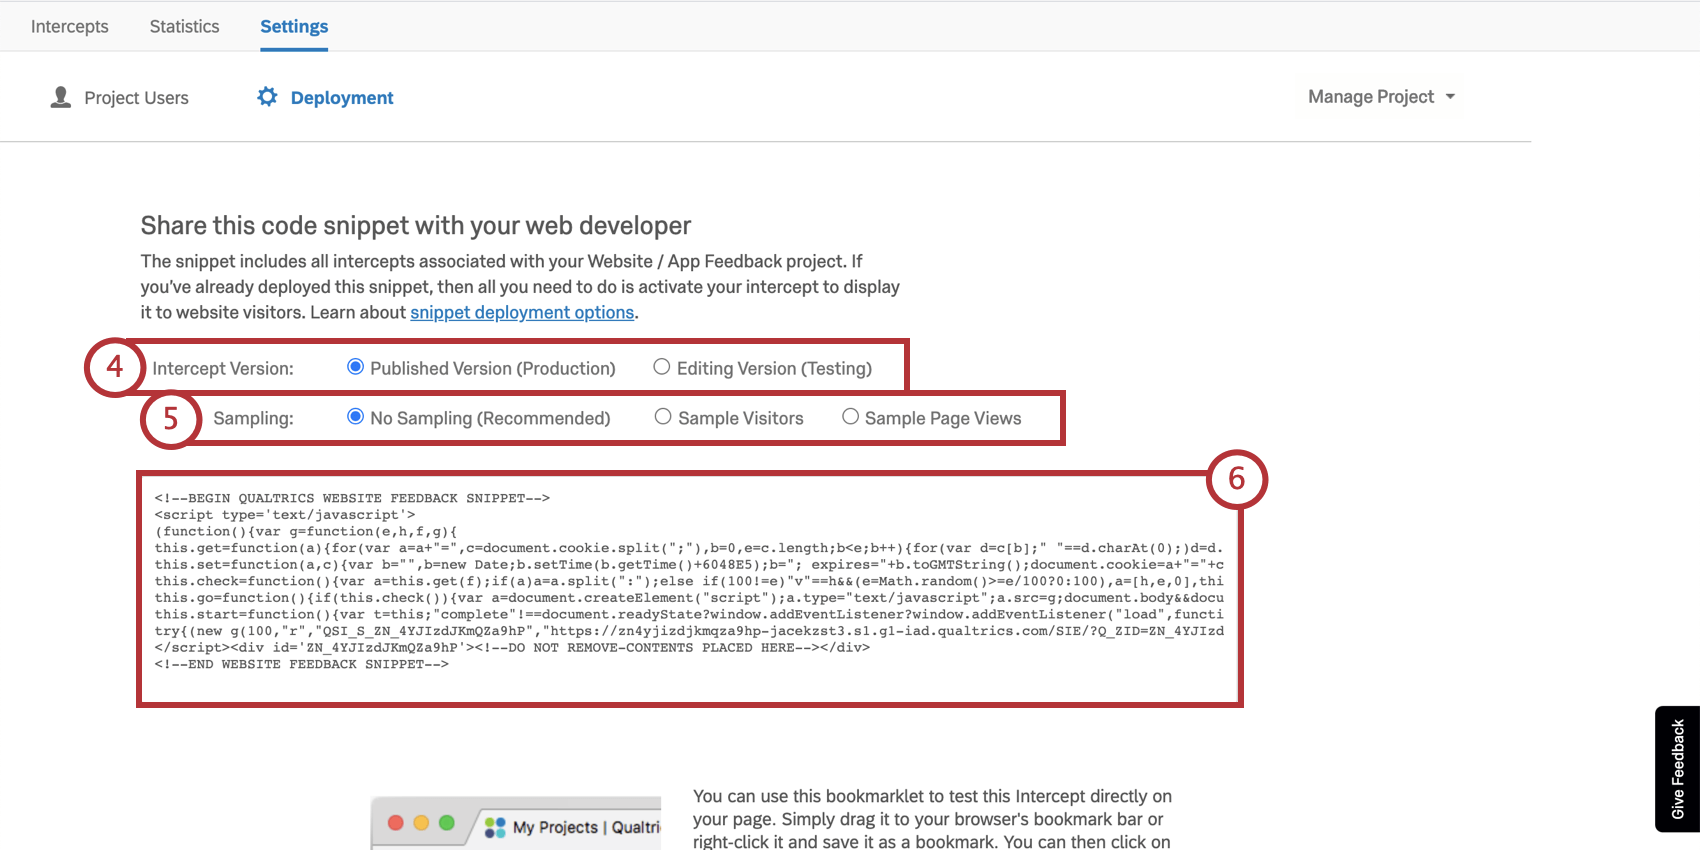
Qtip: We recommend saving this code in a plain text or TXT file to preserve formatting.
Qtip: Regardless of whether you decided to use both digital touchpoints, you will only need to generate one code.
Resources for Development Teams
We have a few resources that can help your development team, once they have the code:
Qtip: We recommend using a Tag Manager to expedite the deployment if you have one already.
Other Ways of Navigating to the Deployment Code
Do you need to grab the deployment code, but no longer see the View intercept code button? No worries. Here’s how you can find it:

Reviewing and Sharing the Dashboard
Qtip: Interested in adding industry benchmarks on your dashboard, so you can compare your programs’ performance to industry leaders? Try the XMI Customer Ratings – Digital benchmarks. For steps on adding these to a dashboard, see Benchmark Editor.
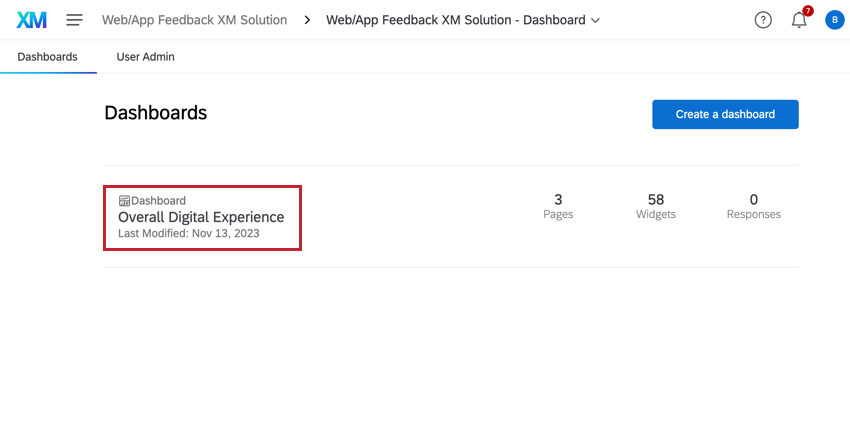
Premade Dashboard
Our XM Scientists have developed a special dashboard for this XM Solution. This dashboard gives an overview of the results, and is ready to share as soon as you have collected data. There is an executive summary and a page dedicated to each of the five digital commerce experiences this solution specializes in.
Qtip: If this button doesn’t appear, make sure the previous “Review intercepts,” “Review surveys,” and “Pick your projects” steps are marked as done.
Qtip: This dashboard will not generate charts and tables until you collect data. Try completing the survey through the preview button if you want to test what these dashboards look like with data. Remember you can always delete preview data later.
Qtip: Line charts may appear as a single point until you collect multiple weeks worth of data. This is because they are displaying trends over time, and don’t have enough data to display a trend yet.
Dashboard Editing
Qtip: The pre-made dashboard was developed by our top subject matter experts. We advise trying to keep your dashboard as similar to the original template as possible, and not making too many large-scale changes.
Check out these introductory pages to get started.
- Getting Started with CX Dashboards
- Step 1: Creating Your Project & Adding a Dashboard
- Step 2: Mapping a Dashboard Data Source
- Step 3: Planning Your Dashboard Design
- Step 4: Building Your Dashboard
- Step 5: Additional Dashboard Customization
- Step 6: Sharing & Administering Users
Qtip: Once you’ve uploaded all your dashboard users, you can easily send many / all users their login credentials.
Removing extraneous pages
There are certain pages of this dashboard you may not want to use, depending on the needs of your program – for example, if you do not have a digital shopping cart on your website, you probably did not run the Cart Abandonment or Post Transaction surveys. In that case, you can hide or delete pages as needed. Please note that when you delete dashboard pages, they are irretrievable, so do not delete pages unless you are totally sure you don’t need them.
See Removing a Page or Making a Private Copy.
Other Ways to Access the Dashboard
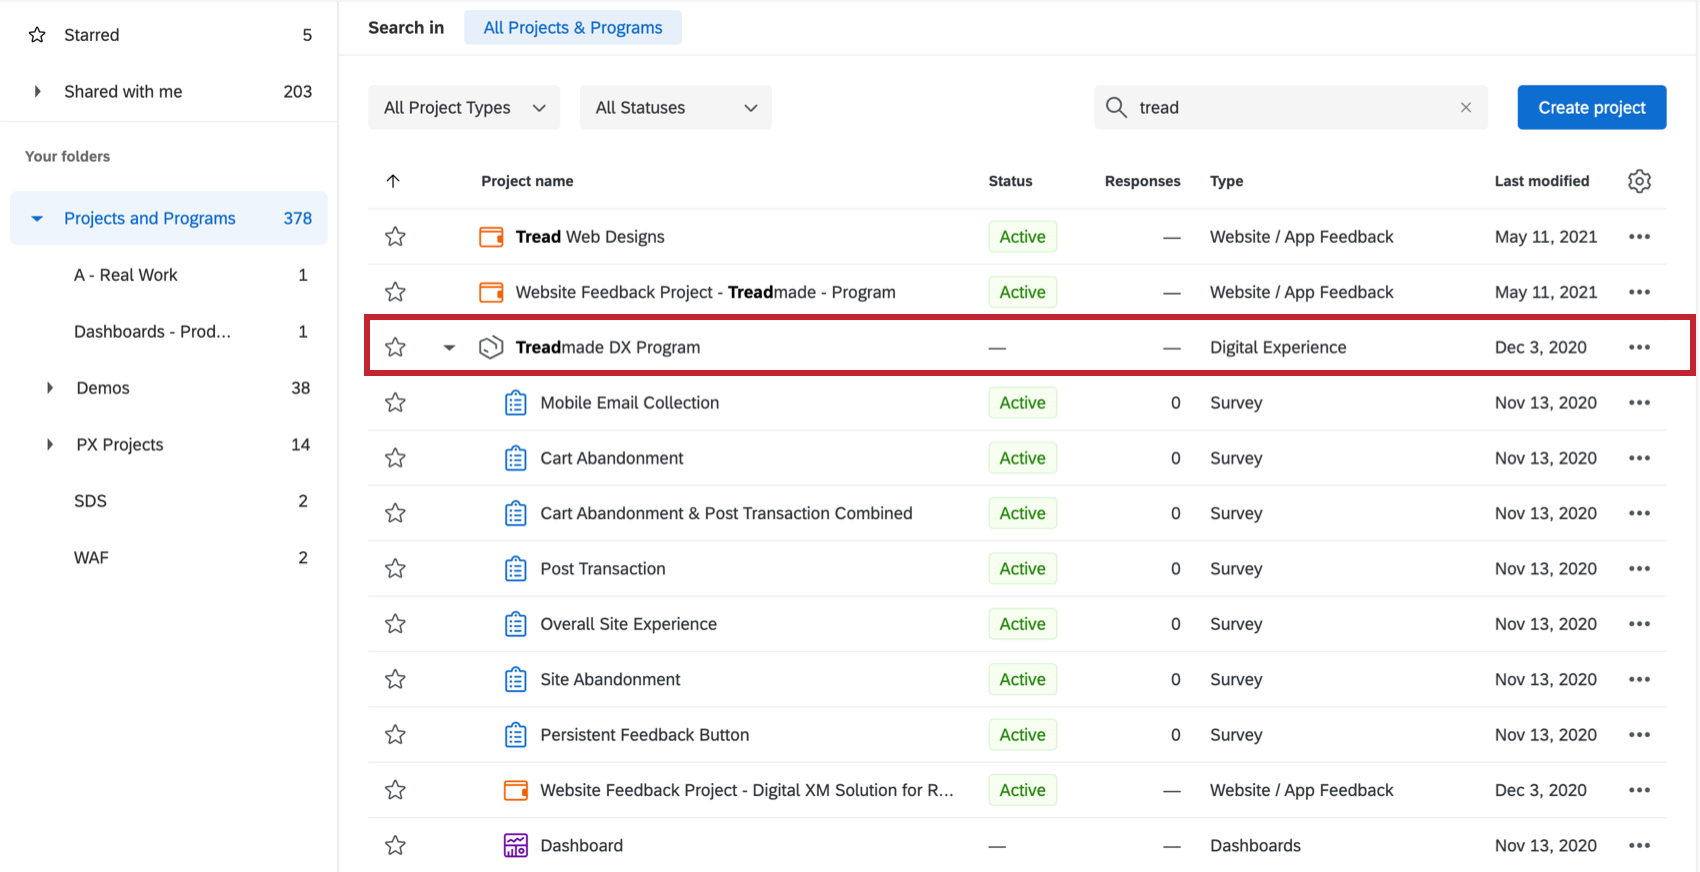
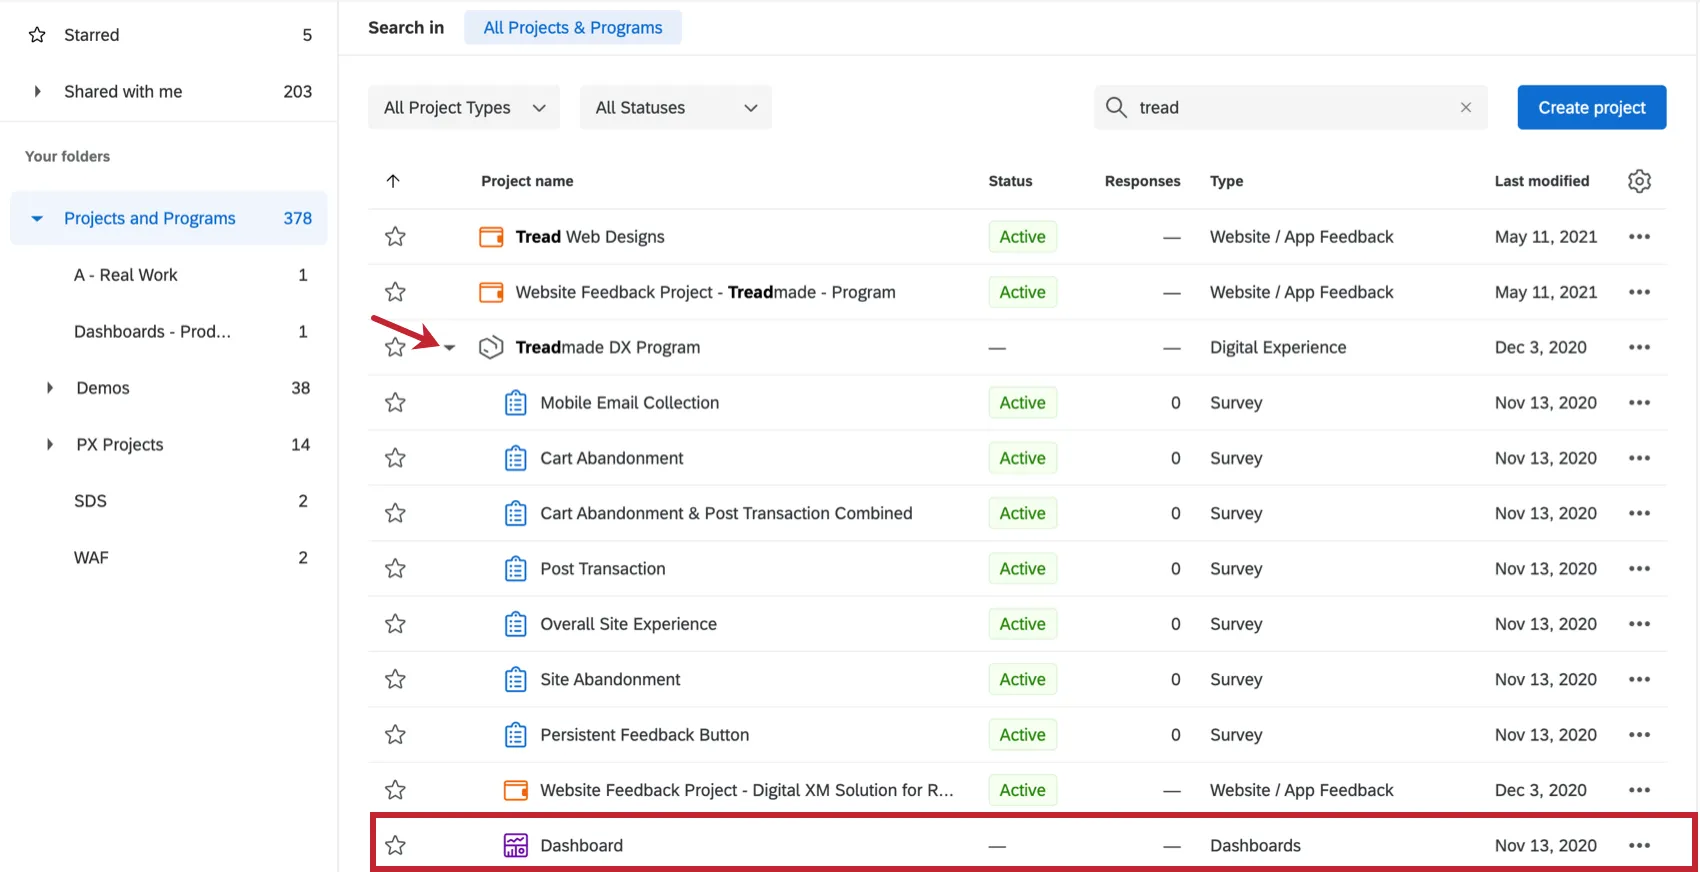
You can access your dashboard from the Projects page by expanding the program to see a list of all other projects inside it.
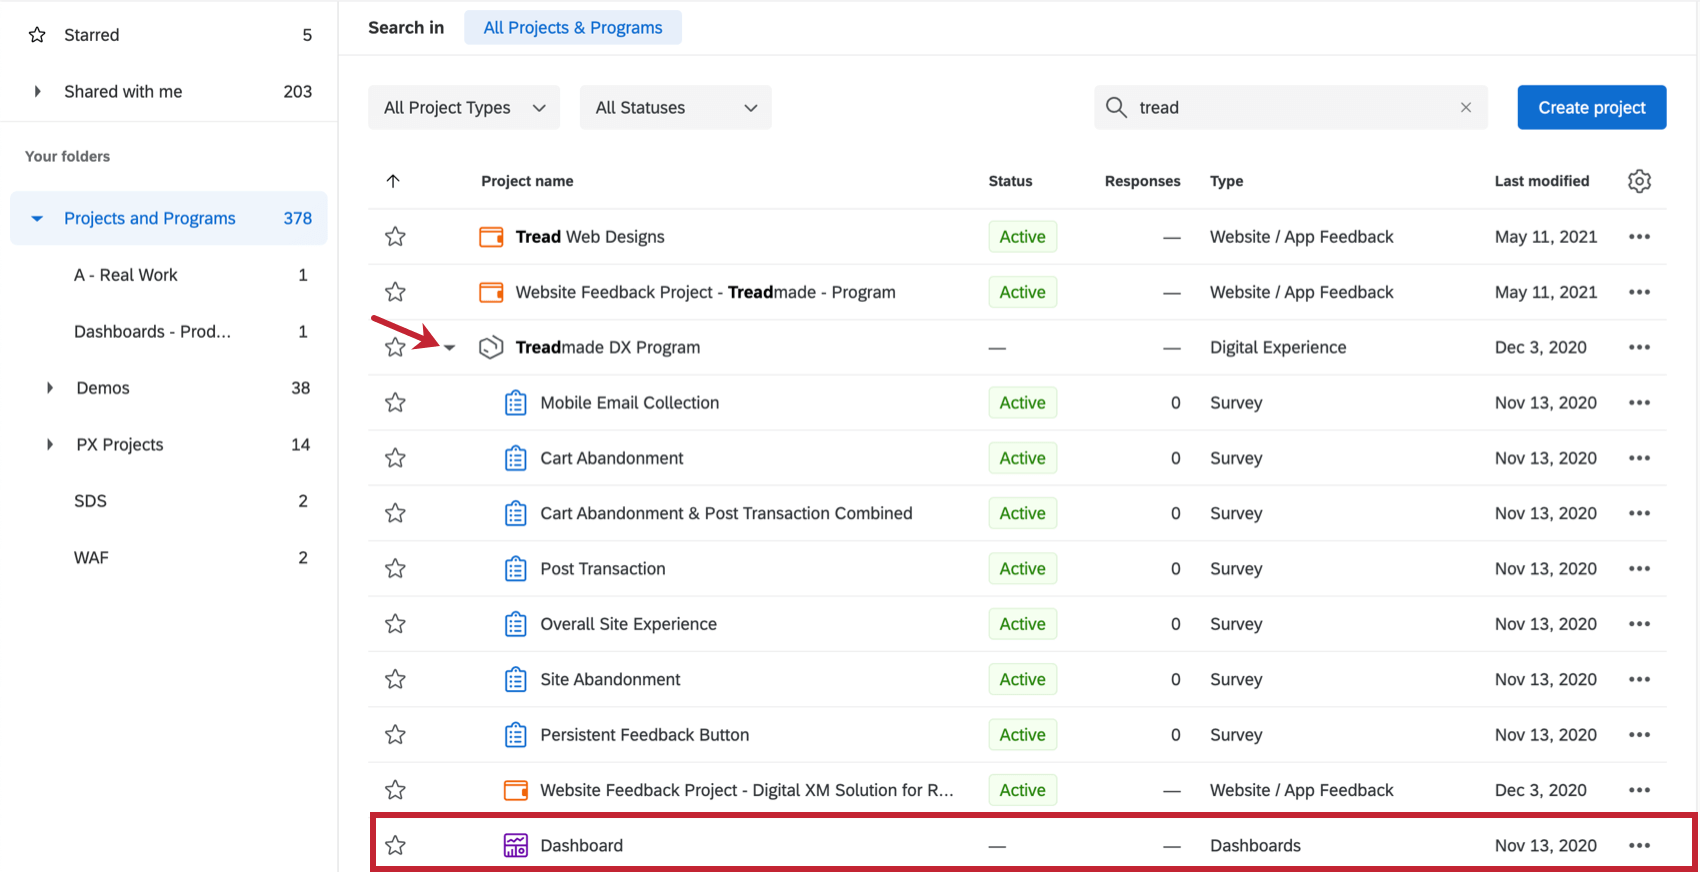
You can also access this dashboard from inside the Digital Experience program. It will be listed along the left as Dashboard.
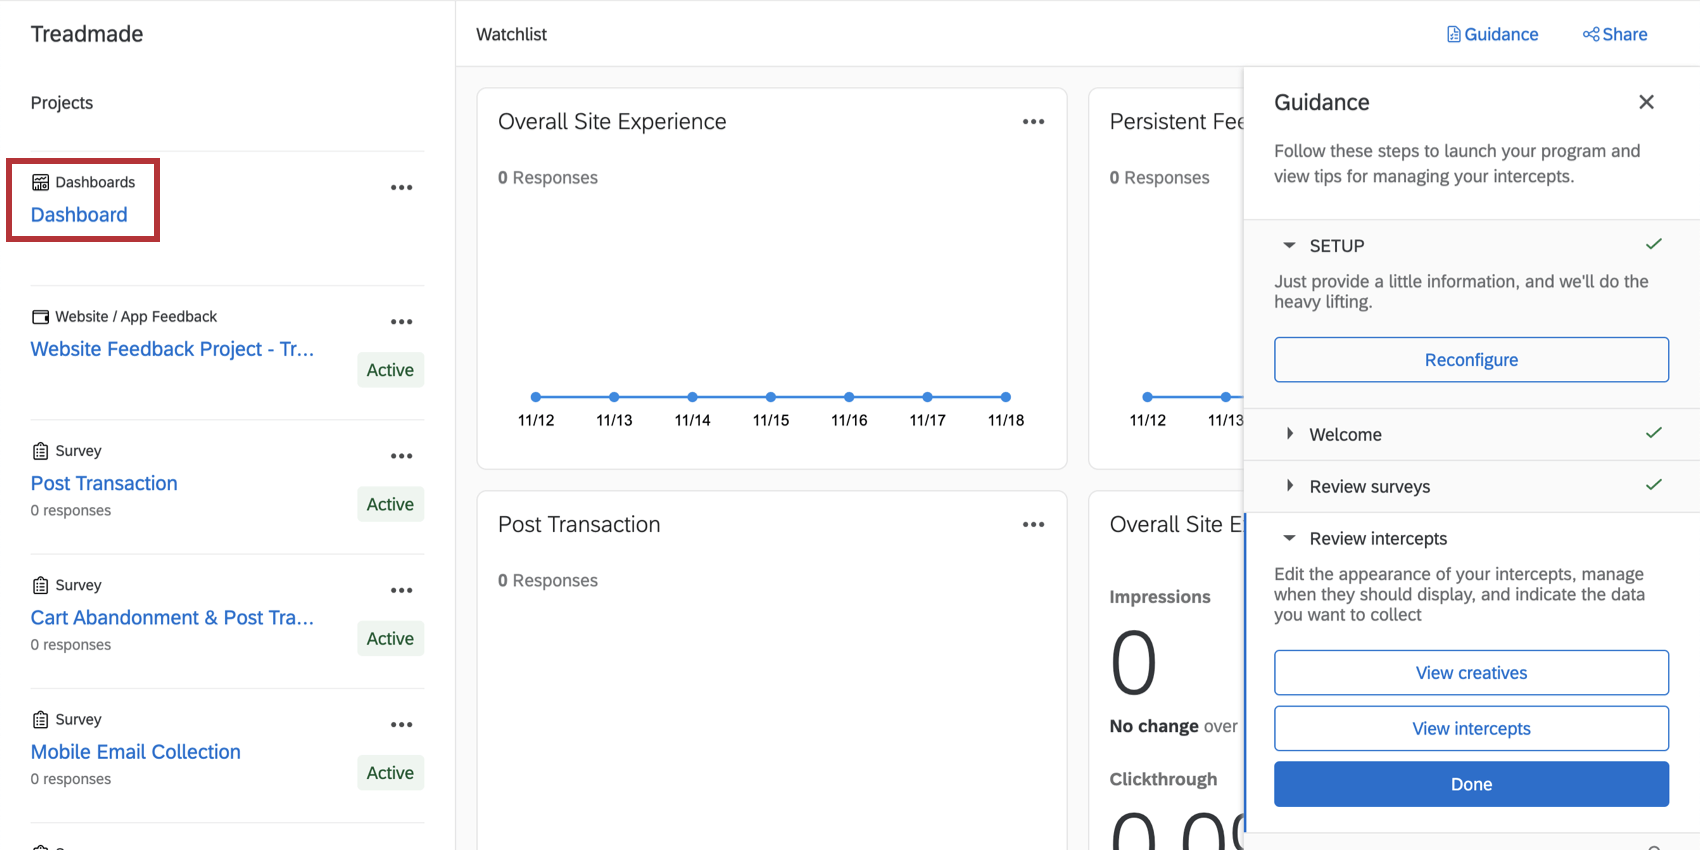
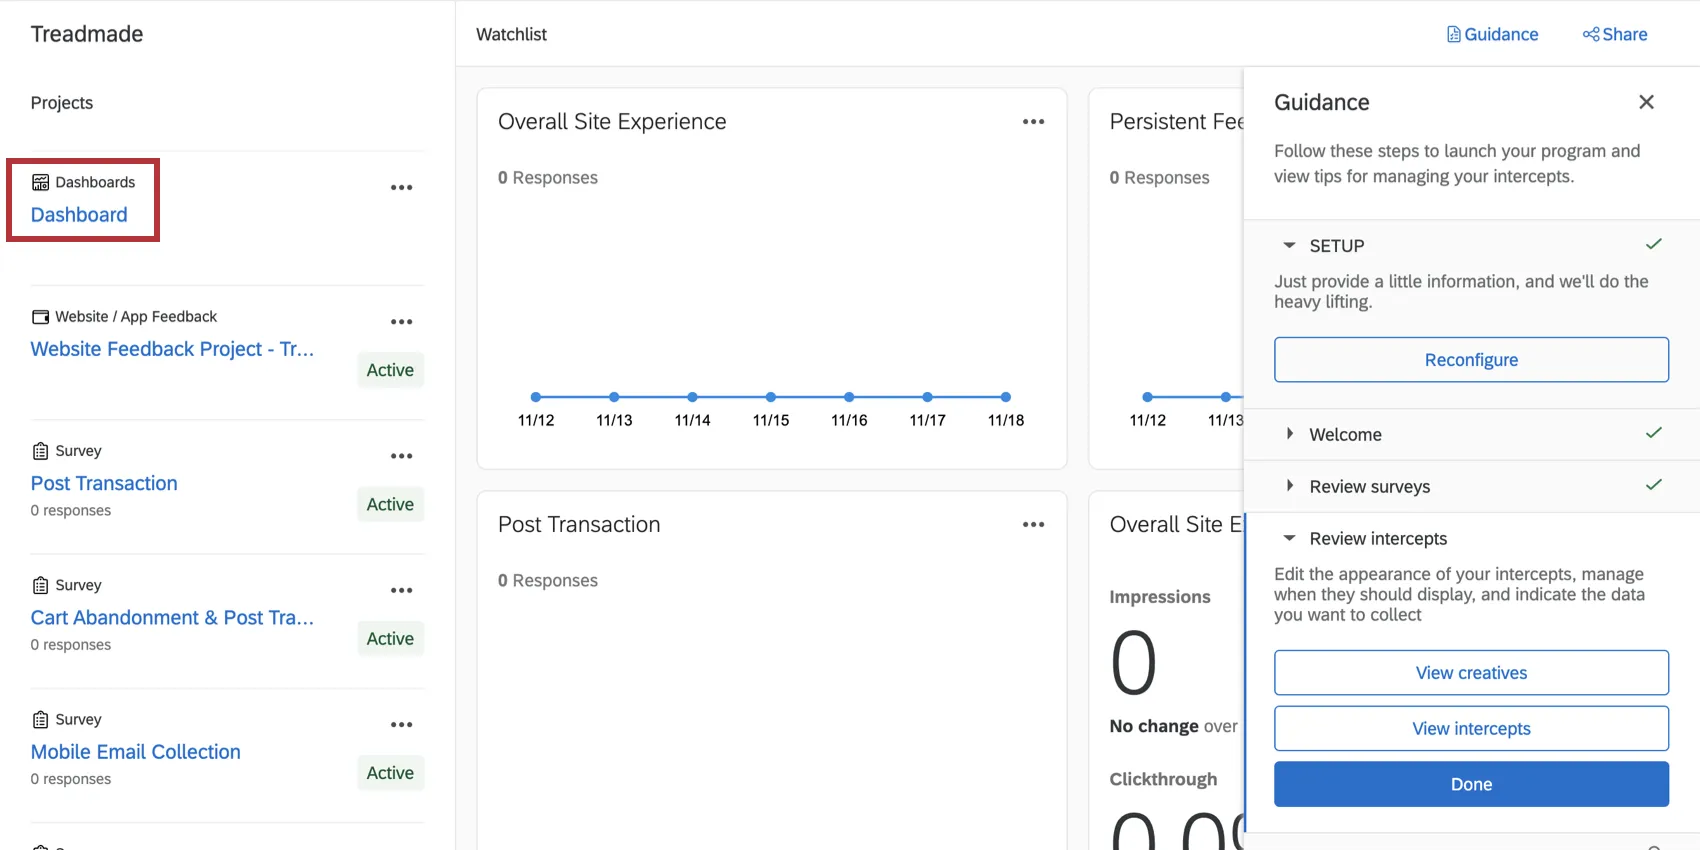
Once you click inside the dashboard project, you’ll see the pre-made dashboard. Click its name to view the data. You can also create new dashboards from this page as needed.

Warning: Do not delete the premade dashboard! If you do, it will not be retrievable, and you will have to make a new one from scratch.
That's great! Thank you for your feedback!
Thank you for your feedback!