
Assigning Randomized IDs to Respondents
Suite
Strategy & Research
Product
Qualtrics
What's on this page
About Assigning Randomized IDs to Respondents
Sometimes you will want to create a randomized ID for each of your respondents. This is useful if you are running a study with Amazon’s MTurk, or any other external service where you ask respondents to prove their completion with an ID.
This page will go how you can created a randomized ID, and then explain how you show this ID to a respondent.
Attention: Neither method described here checks against existing IDs. That means that there is a chance that more than one respondent can have the same ID. This is extremely rare, and the chances are decreased by making your IDs longer. For example, try to make IDs 10 to 12 digits long to ensure the chance of a repeat ID is negligible.
Using Embedded Data and Piped Text to Create an ID
Go to the Survey flow.
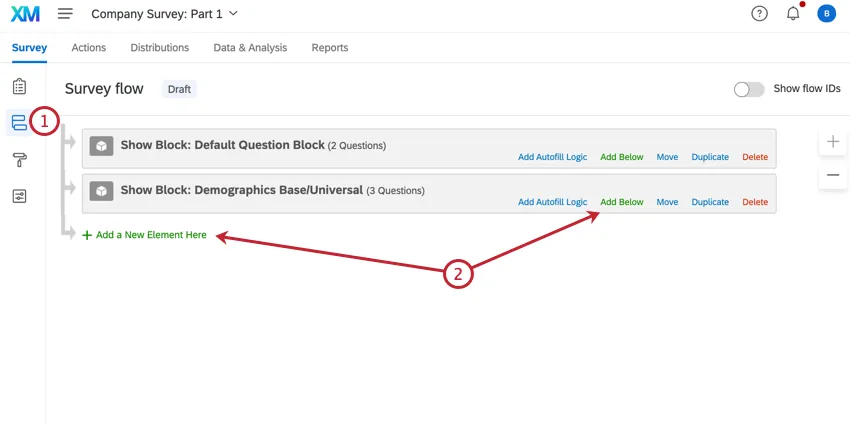
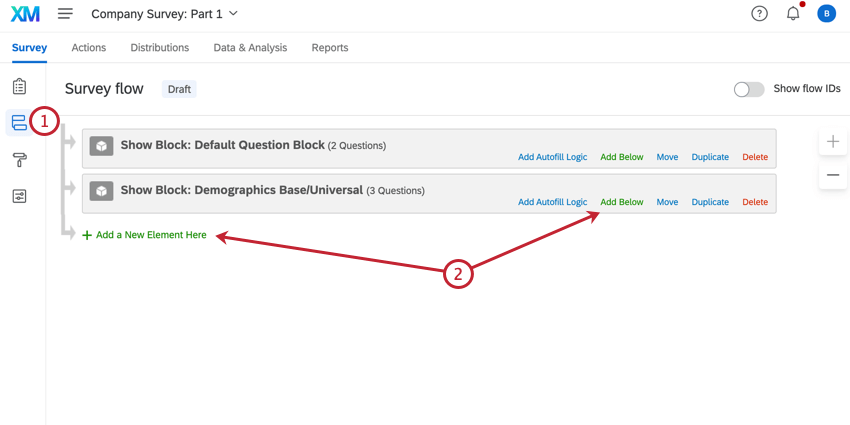
Click Add a New Element Here and or Add Below.
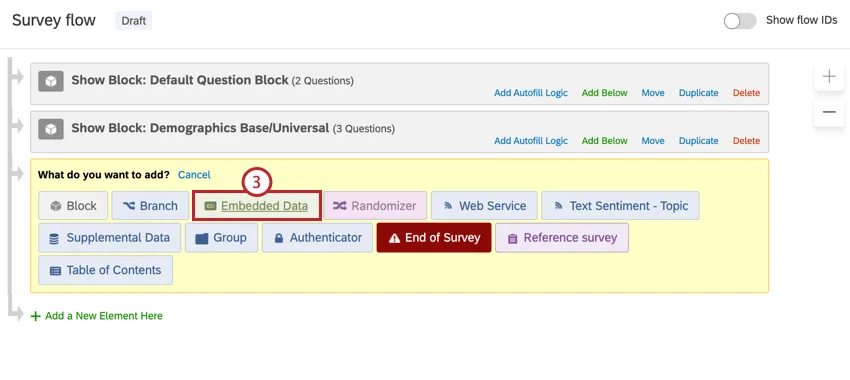
Select Embedded Data.

Name the embedded data Random ID.
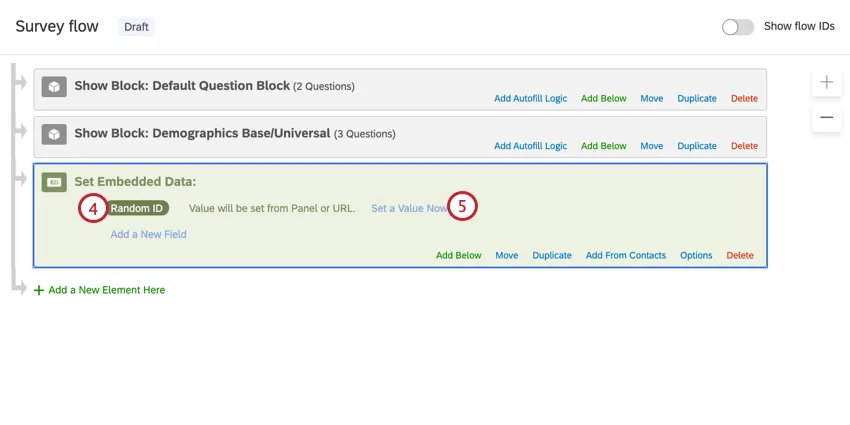
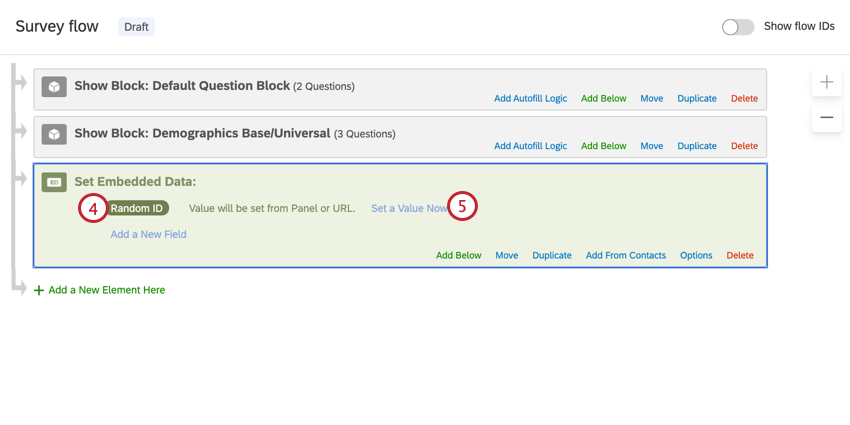
Click Set a Value Now.
Click the dropdown arrow, hover over Insert Piped Text, hover over Random Number, enter your minimum and maximum, and then click Insert. Your minimum and maximum should have the same number of digits.
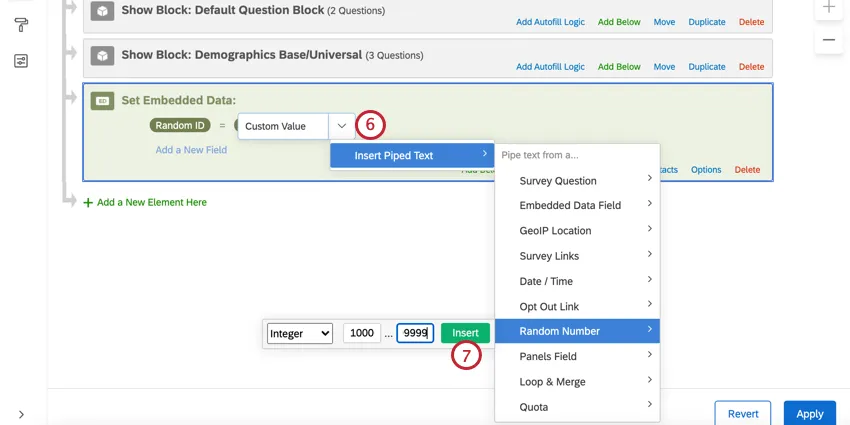
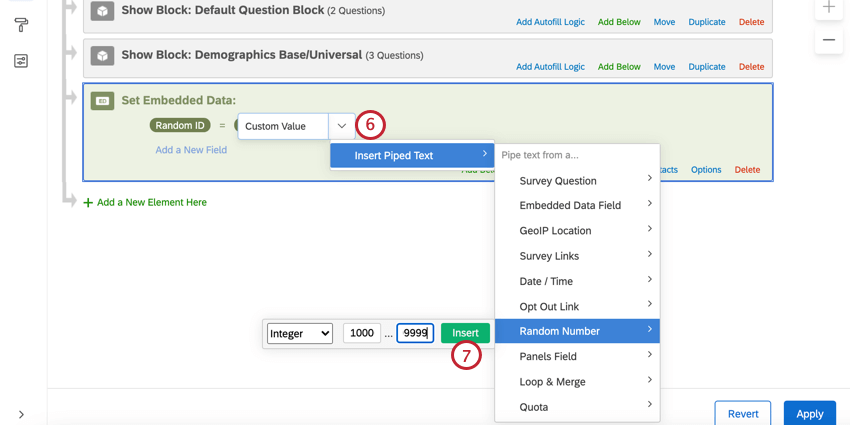
Example: For a 5-digit ID, your minimum is 10000 and your maximum is 99999.
Click Insert.
Click and hold down Move to drag the embedded data to the top of the survey flow.
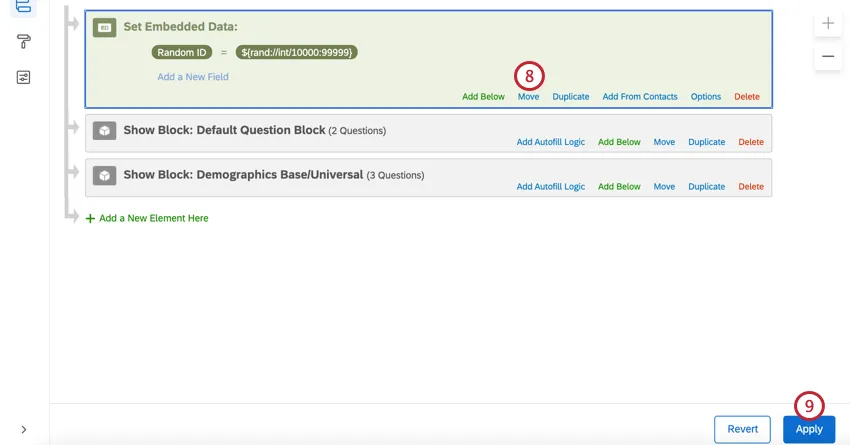

Click Apply.
Displaying the ID to Respondents
Qtip: Here we are using piped text to display the random ID to the respondent. Piped text can be used in many parts of the platform, but these are just a few of the most common.
Displaying in a Question
Click the question text to edit it.
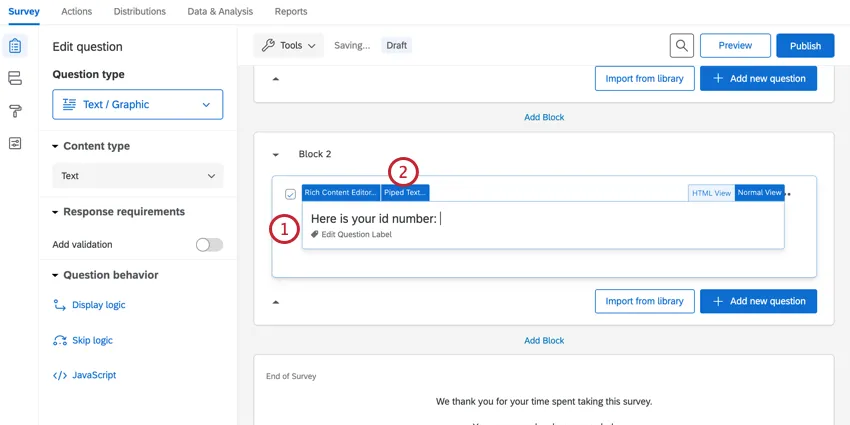
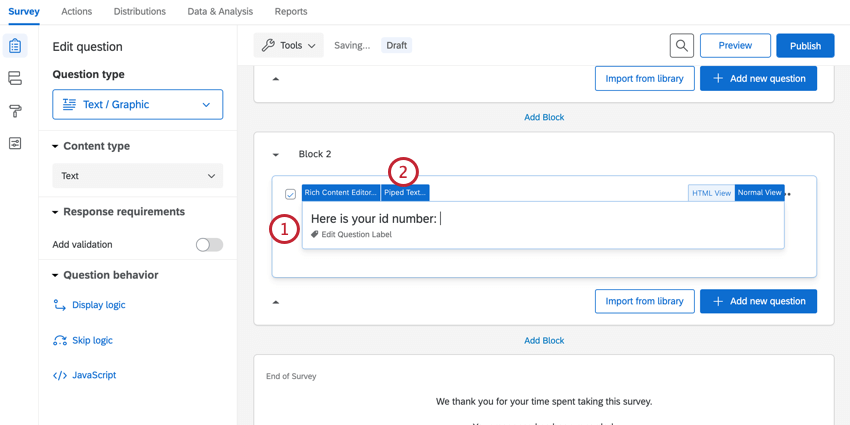
Click Piped Text.
Highlight Embedded Data Field.

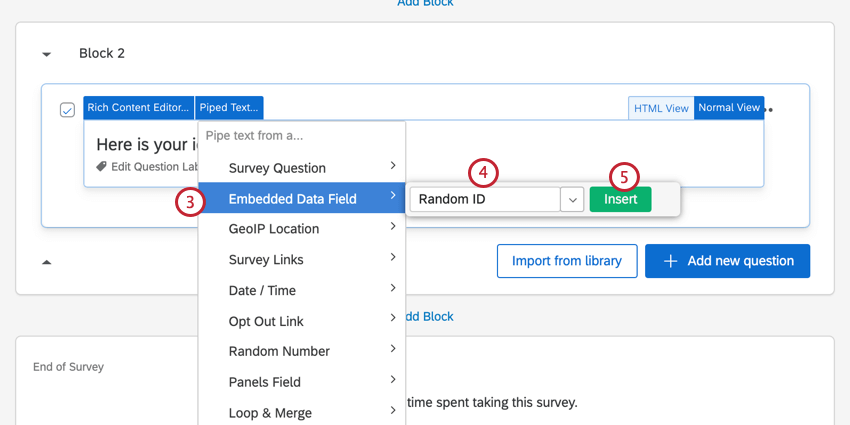
Attention: It is extremely important you select Embedded Data! If you select Random Number instead, you will create a NEW random number that will not be saved with the response data!
Type in the name of the embedded data that holds your IDs. You can also use the dropdown menu to select the field from a list.
Qtip: This is the name saved in the survey flow. If you used the exact same wording as the above example, this is Random ID.
Click Insert.
When respondents complete the survey, they will see their Random ID.

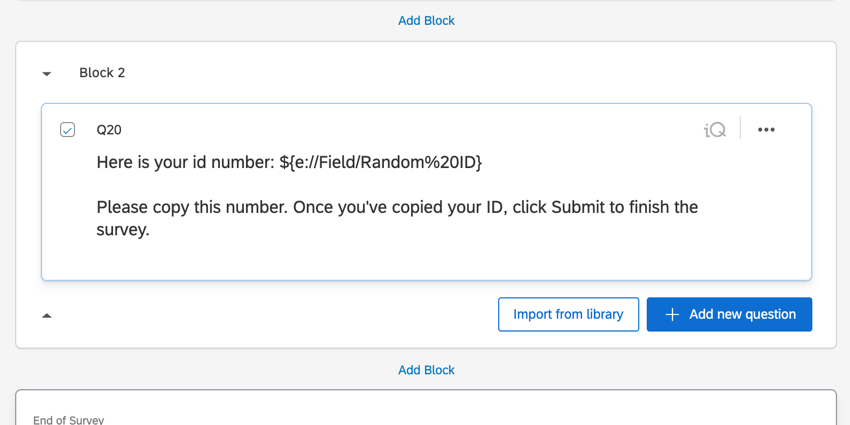
Qtip: In this example, we added additional instructions on what the respondent has to do with the ID. Because the survey is ending on a descriptive text question, we also want to instruct them to click the Submit button, or else their response might not be properly submitted.
Displaying in a Follow-Up Email
Attention: You must have emailed the survey to your respondents or asked them to provide an email address to use this option.
Go to Workflows.

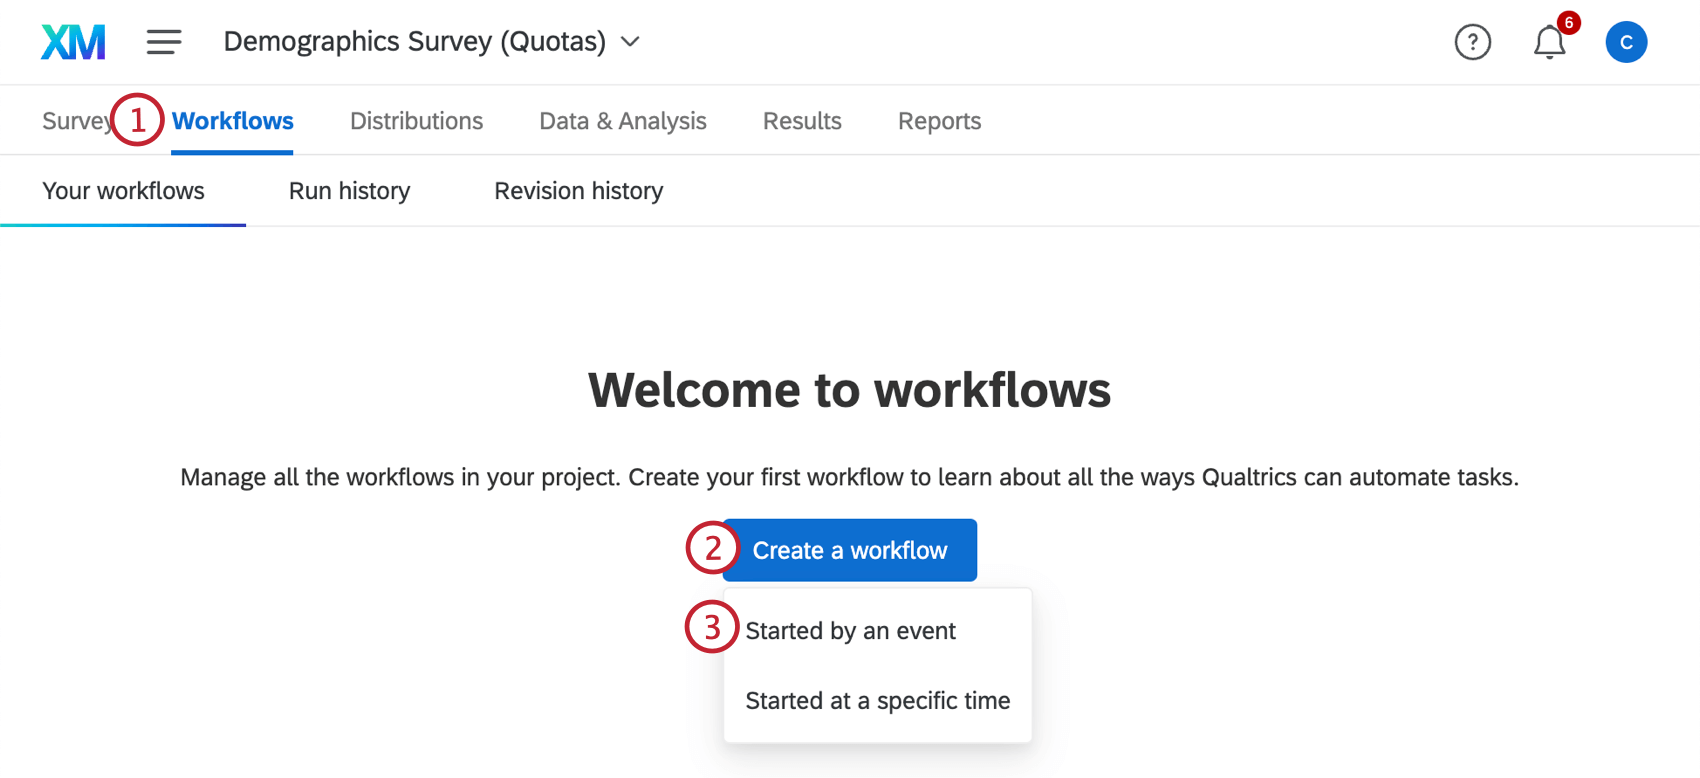
Click Create a workflow.
Select Started by an event from the dropdown menu.
Select Survey response as the workflow event.

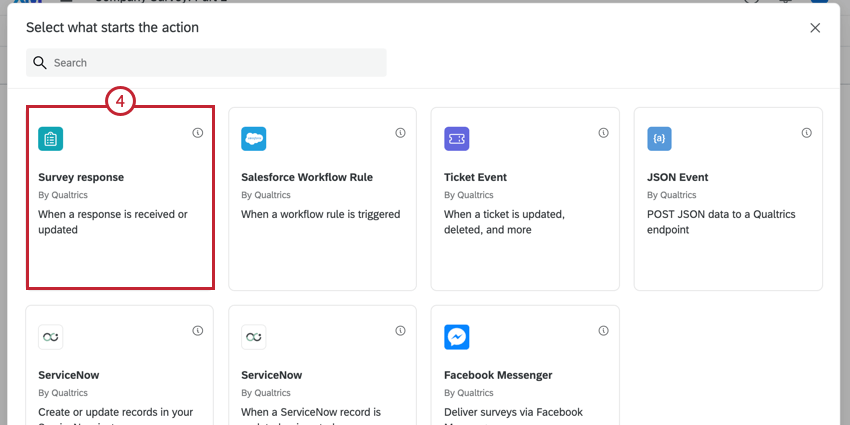
Check Response created in the window that appears.


Click Finish.
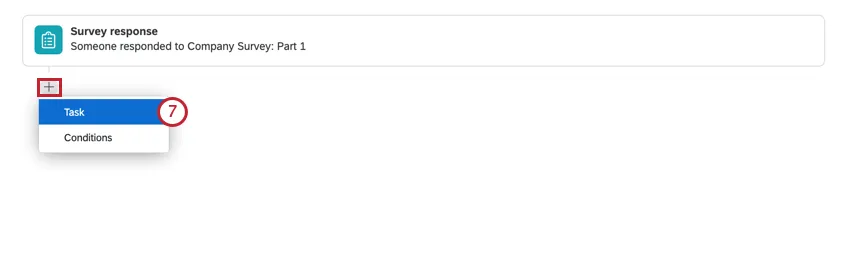
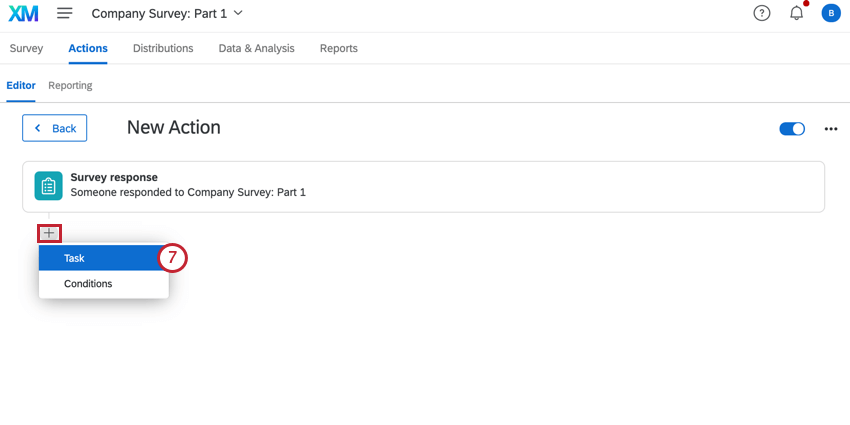
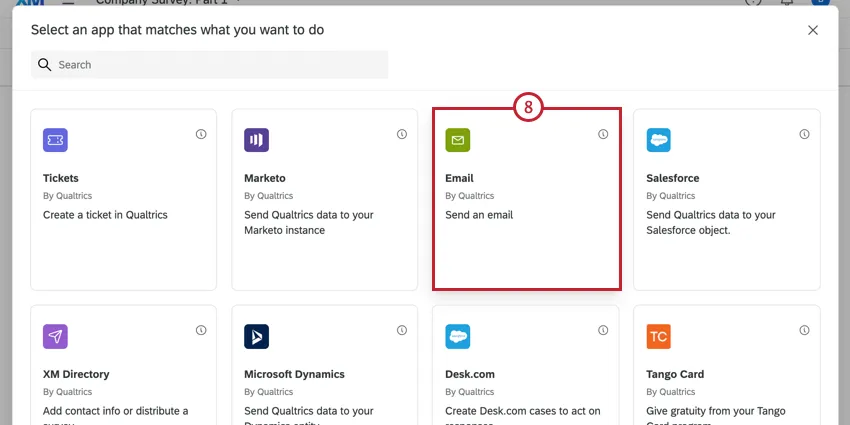
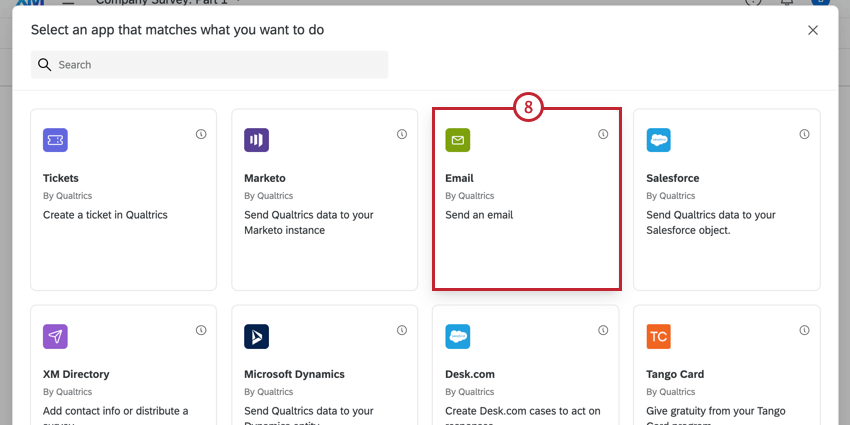
Click the plus sign (+) and select Task.
Choose Email.
In the Message field, click the piped text button, {a}.
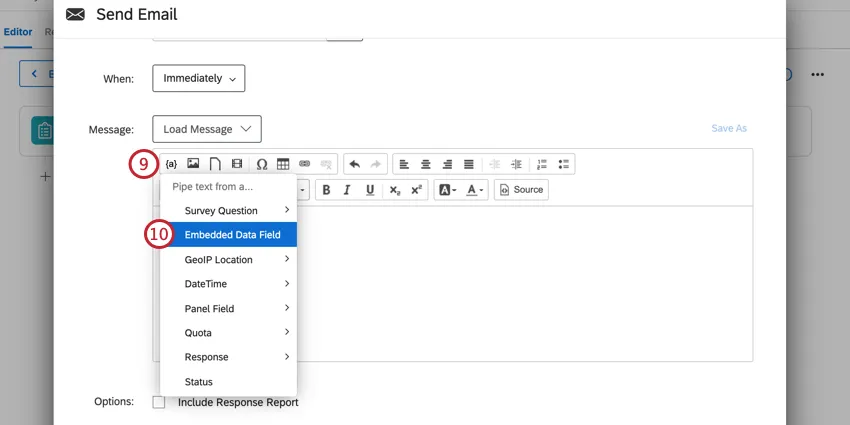

Select Embedded Data.
Attention: It is extremely important you select Embedded Data! If you select Random Number instead, you will create a NEW random number that will not be saved with the response data!
In the window that appears, type in the name of the embedded data that holds your IDs.
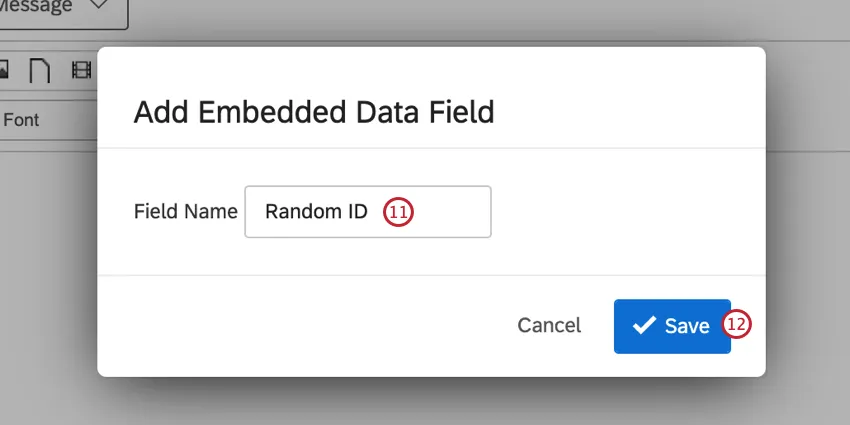

Qtip: This is the name saved in the survey flow. If you used the exact same wording as the above example, this is Random ID.
Click Save.
Next to the “To:” field at the top of your email, click the piped text button, {a}.
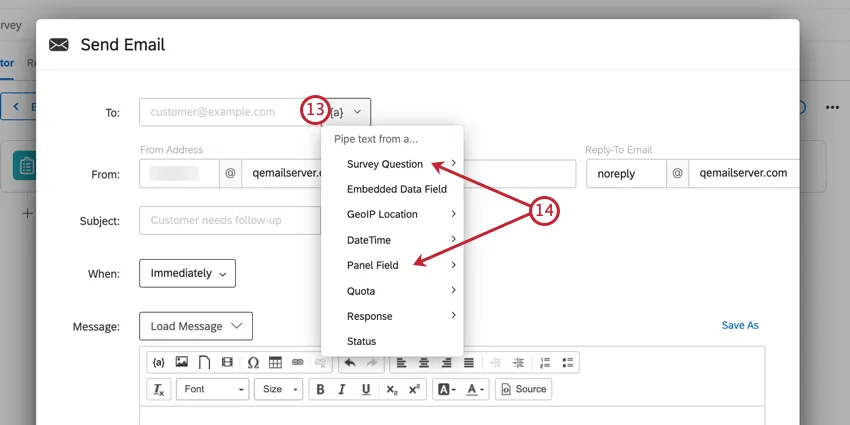
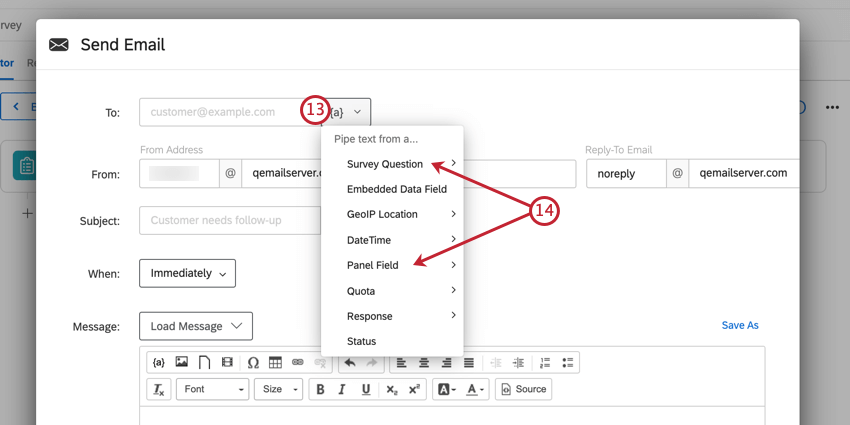
If you emailed the survey out initially, highlight Panel Field and select Recipient Email. If you asked the respondent to type their email, highlight Survey Question and select the text entry answer where you ask for an email address.
Click Save.
Qtip: Feel free to add whatever details you want to this email, such as a special Reply-To or From Name. Learn more on the email tasks page.
When respondents complete the survey, they will receive an email with their Random ID inside.
That's great! Thank you for your feedback!
Thank you for your feedback!