
Generating a HAR File
Suite
Customer Experience
Employee Experience
Strategy & Research
Product
Qualtrics
What's on this page
About Generating a HAR file
Sometimes, the Qualtrics SSO Support Team may request a HAR file to troubleshoot why an issue is occurring on your browser or network. A HAR file is a log of the network requests occurring in your browser. It’s important to generate the HAR file while the issue you’re experiencing is happening. Depending on the browser you use, the way you’ll download your HAR file is different. Below we walk you through how to generate a HAR file for different browsers.
Attention: If you generate your HAR file while logging into Qualtrics (i.e. while typing in your password on a login screen), the HAR file will contain your Qualtrics password. Please open your file in a text editor, search for “password,” and delete the password from the file before sending it to Support.
Attention: It’s important to generate the HAR file while reproducing the error. Before generating the file, read over the steps for your browser so you know when you need to reproduce the error.
Attention: While we show screenshots for generating a HAR file on a Mac, the steps for Windows are extremely similar. If you are using Windows, you can click the “F12” key on your keyboard to open up the Developer Tools in your browser.
Generating a HAR file in Chrome
Open Google Chrome and go to the page where the issue occurs.
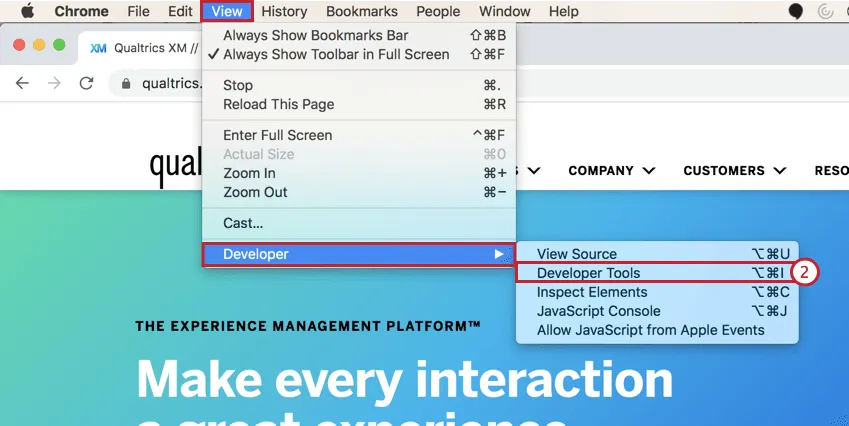
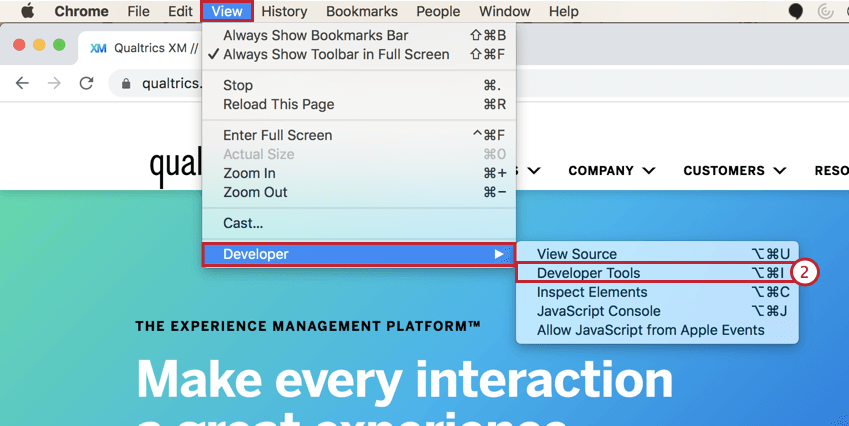
In the Chrome menu bar, go to View → Developer → Developer Tools.
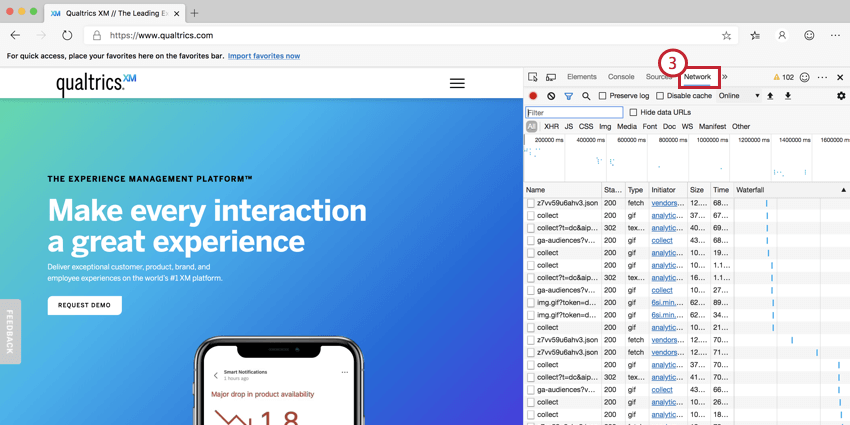
In the panel that opens, go to the Network tab.
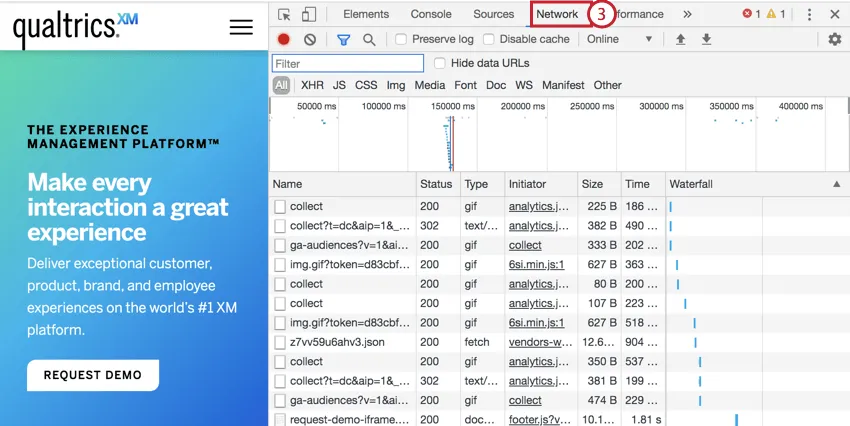
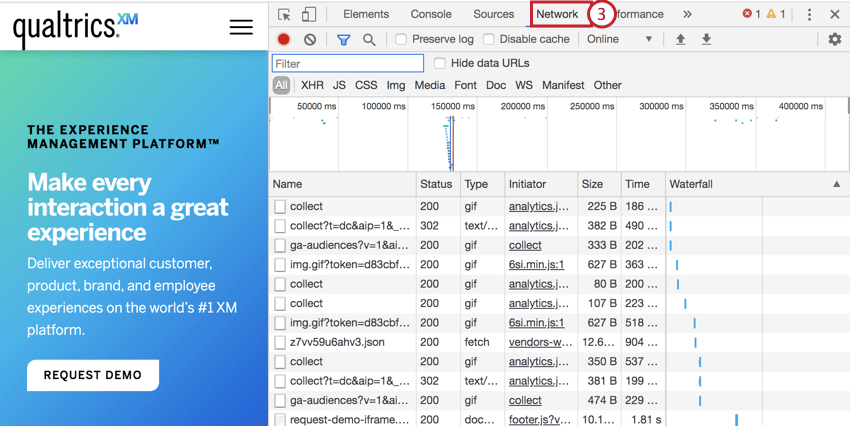
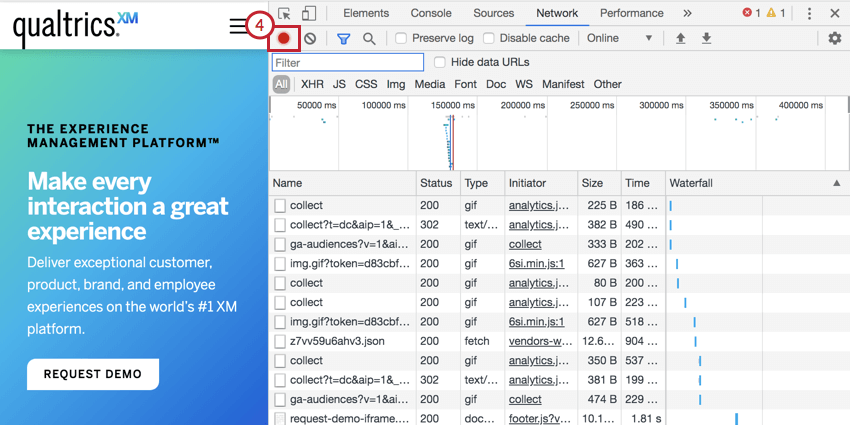
In the top left hand corner of the panel, there will be a round record button. Make sure it is red. If the button is grey, click it once to turn it red.

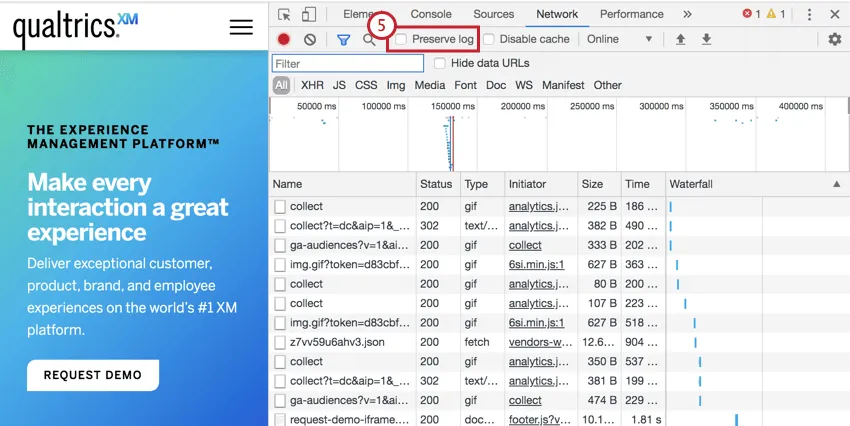
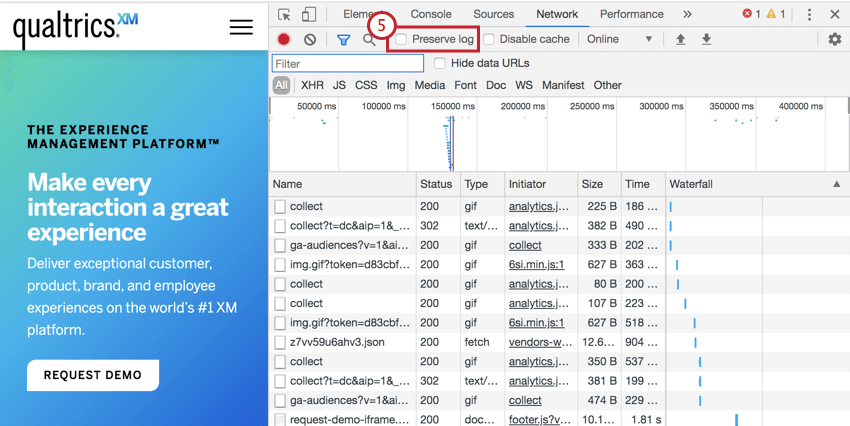
Check the Preserve log box.
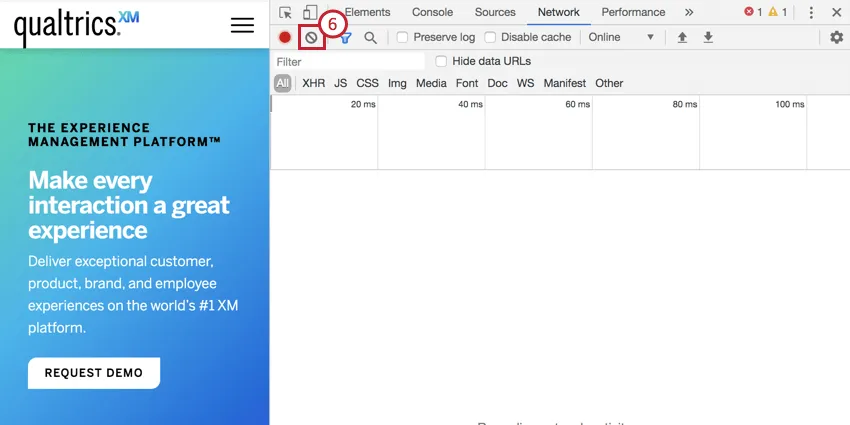
Click the clear button to clear out any existing logs.

Reproduce the issue to record the network logs.
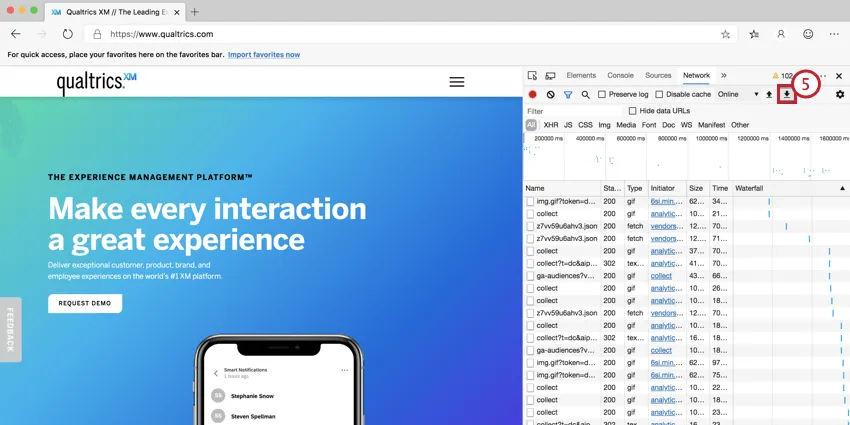
Once you’ve reproduced the issue, right click anywhere in the network logs and select Save all as HAR with content. Save this file to your computer.
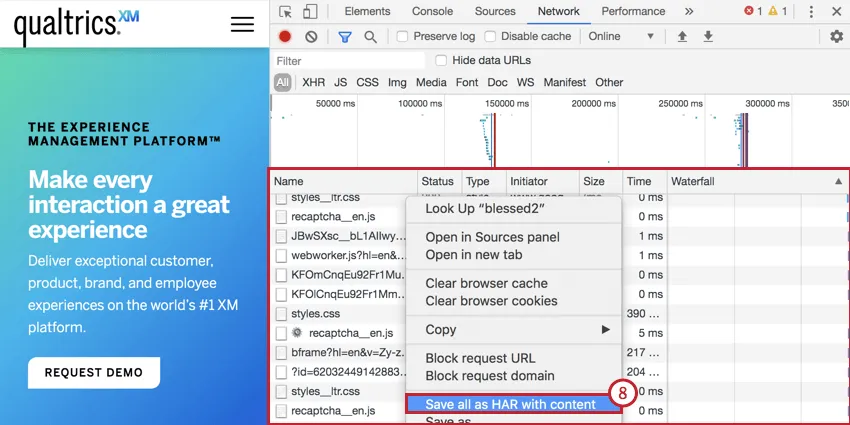
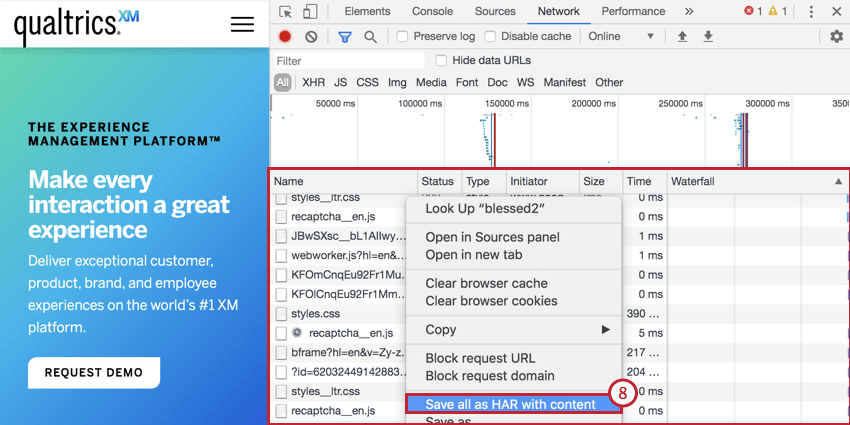
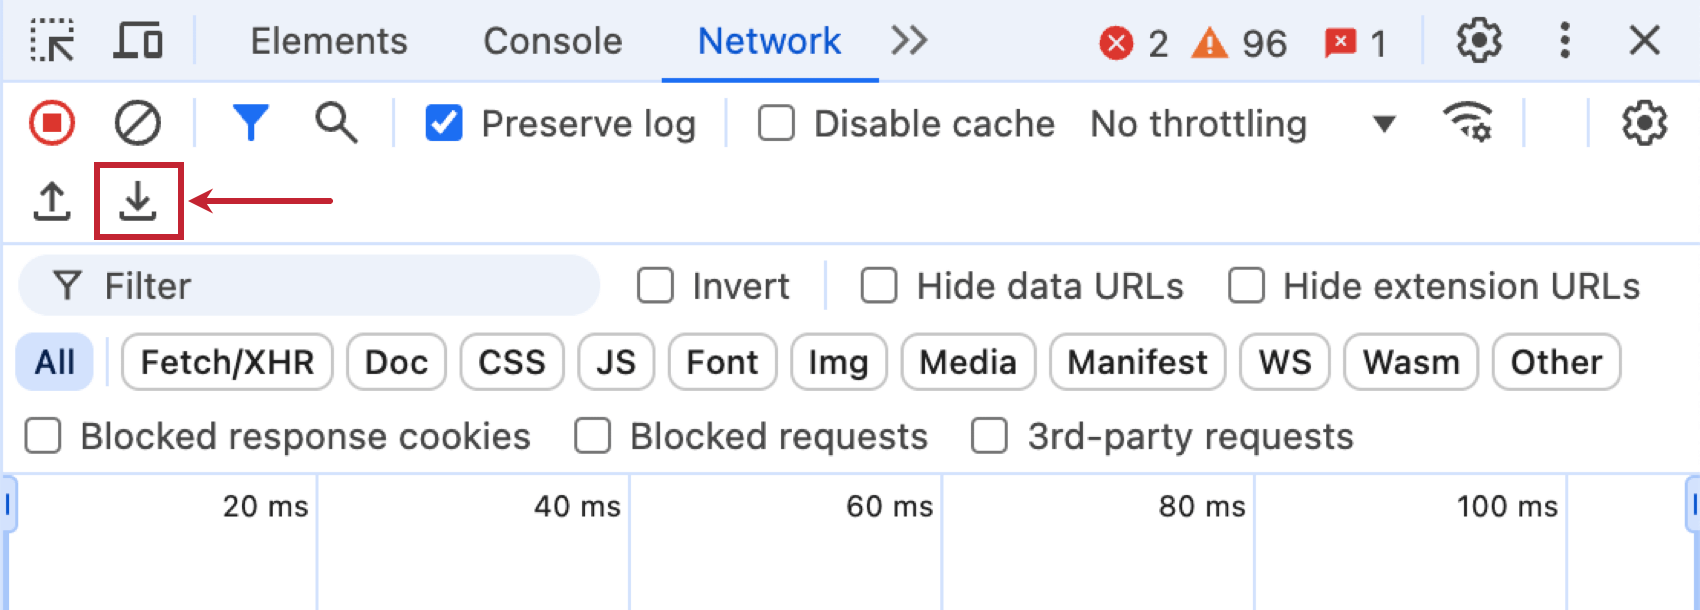
Qtip: If you are using Chrome version 130 or newer, the option to save as a HAR file has been moved to the top right corner of the Network tab.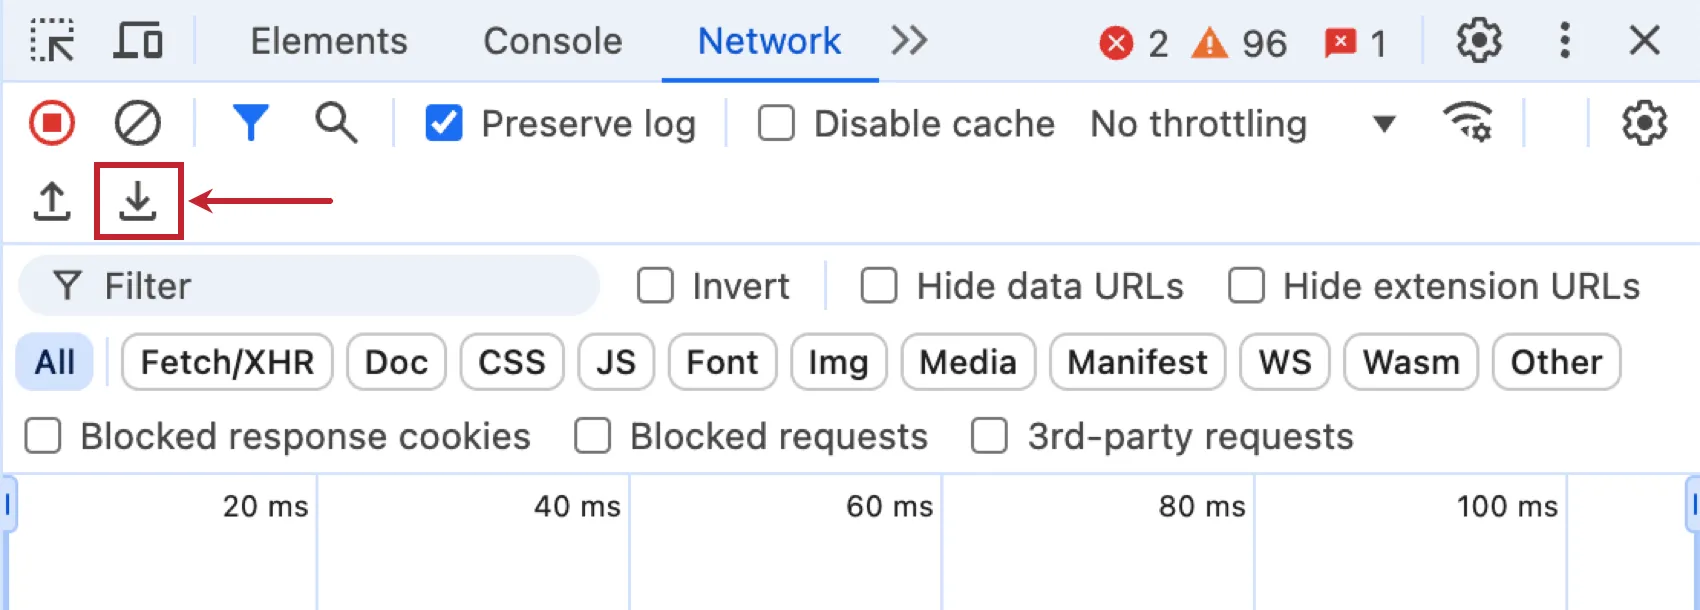
Generating a HAR file in Safari
Open Safari and go to the page where the issue occurs.
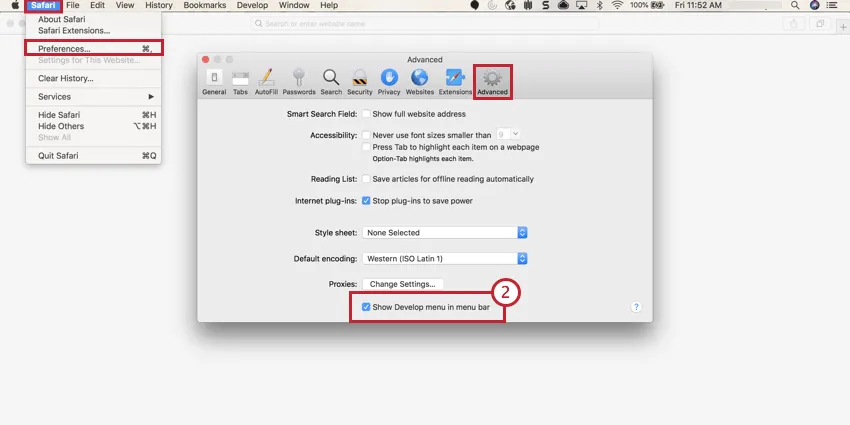
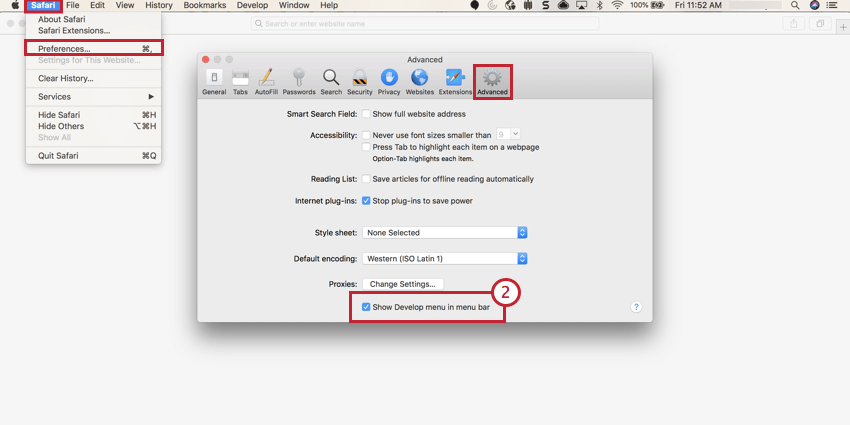
Ensure the Develop menu is enabled for Safari. To do this, go to Preferences → Advanced → Show Develop menu in menu bar.
Click Develop in the menu and select Show Web Inspector.


Click the Network tab.
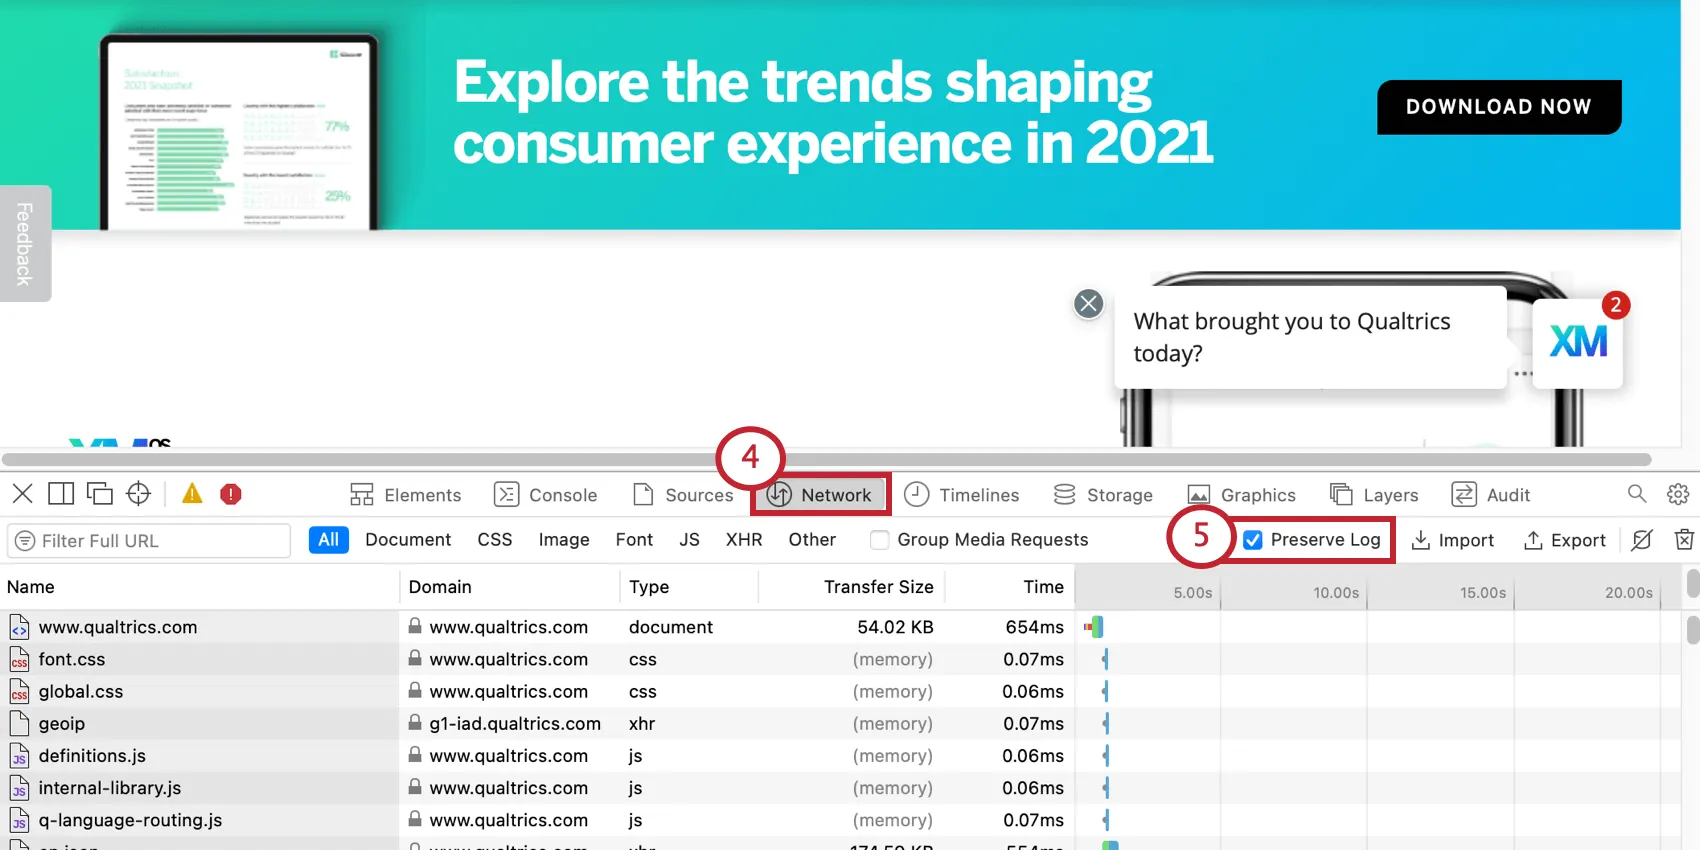

Select Preserve Log.
Recreate the issue.
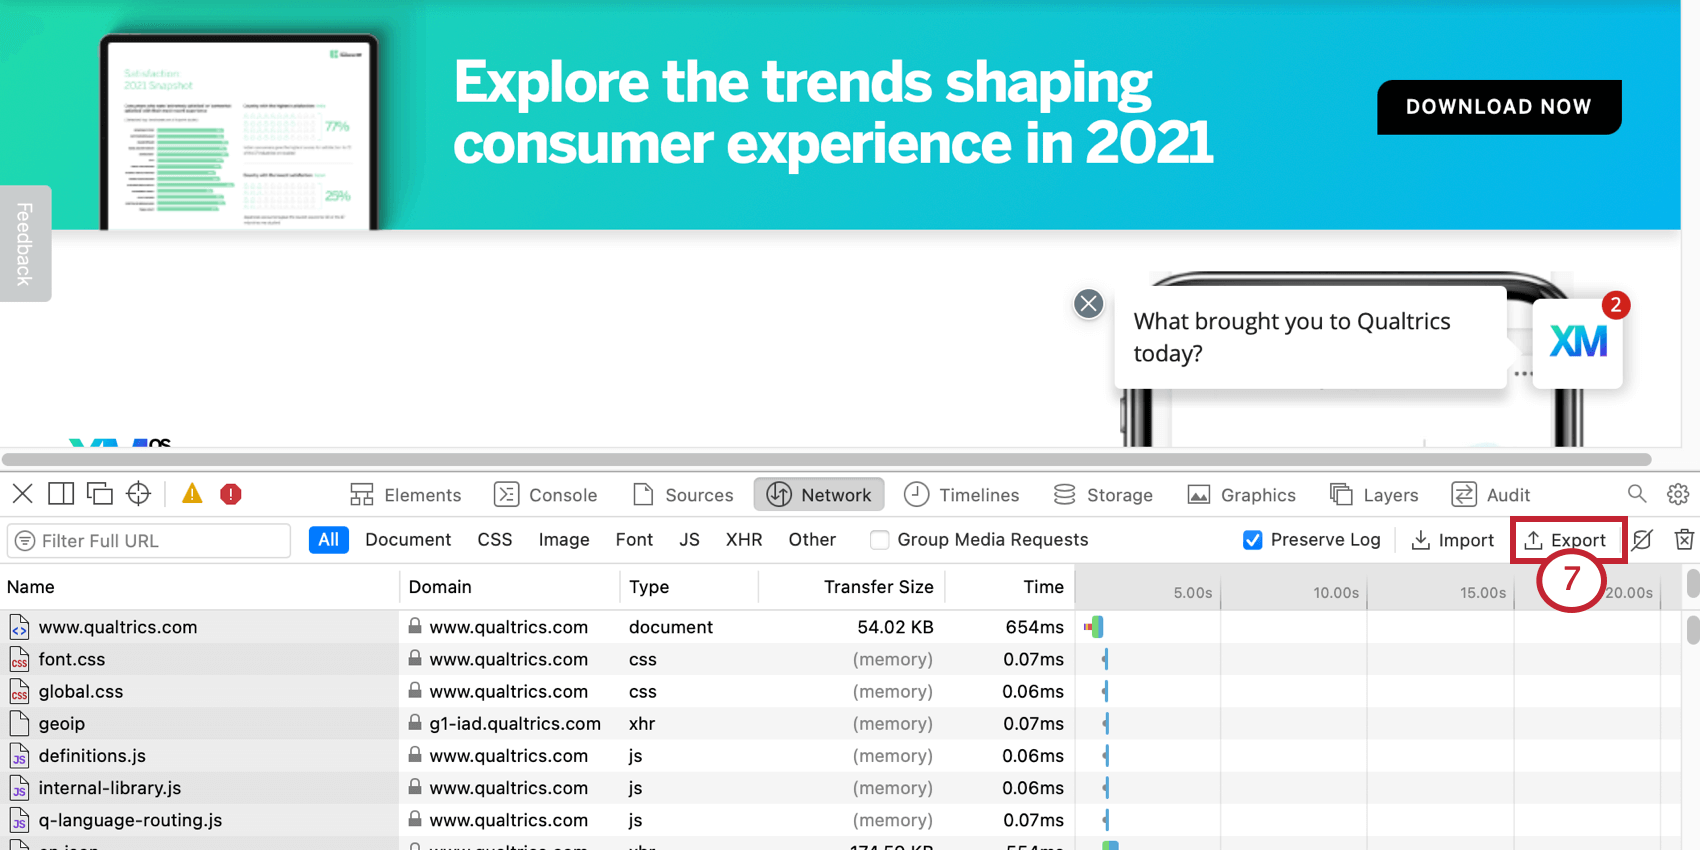
Click the Export and save the file to your computer.

Generating a HAR file in Firefox
Open Firefox and go to the page where the issue occurs.
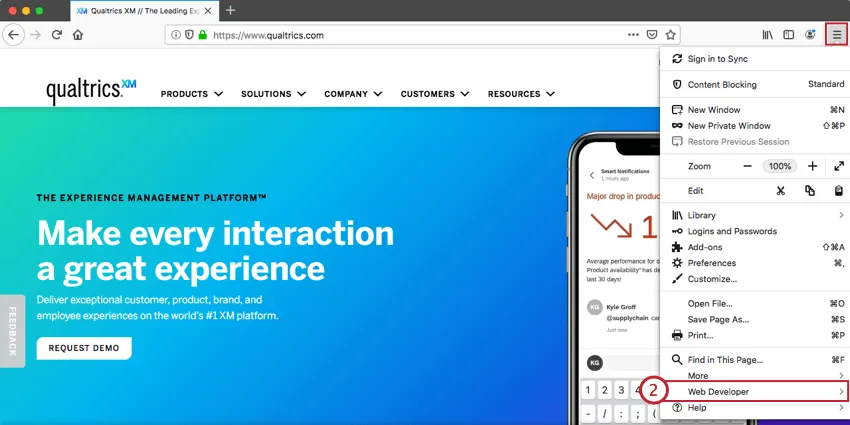
Click the menu icon and then select Web Developer. In the Web Developer menu, select the Network option.

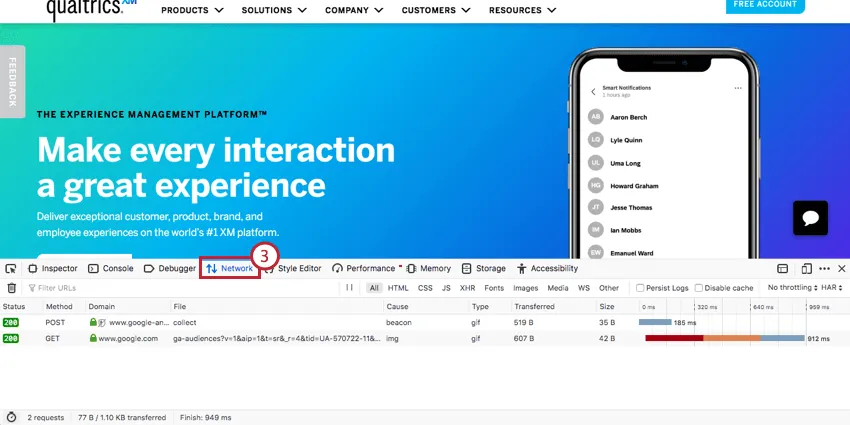
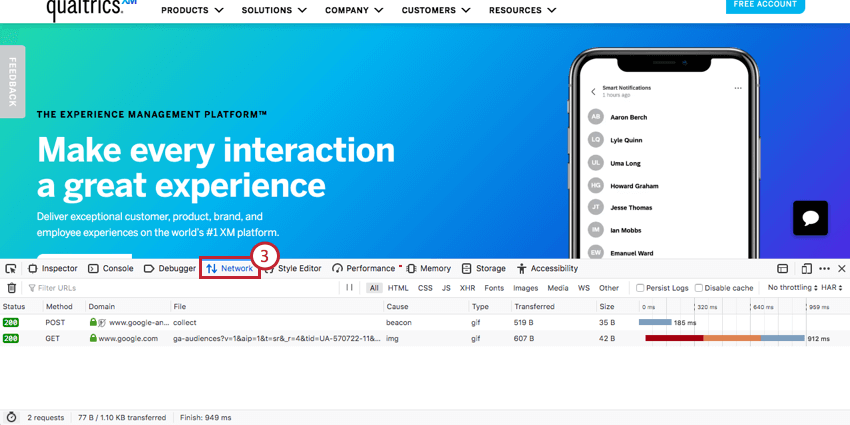
In the panel that appears, go to the Network tab.
Recreate the issue in your browser window. The panel will start recording when you perform actions in your browser.
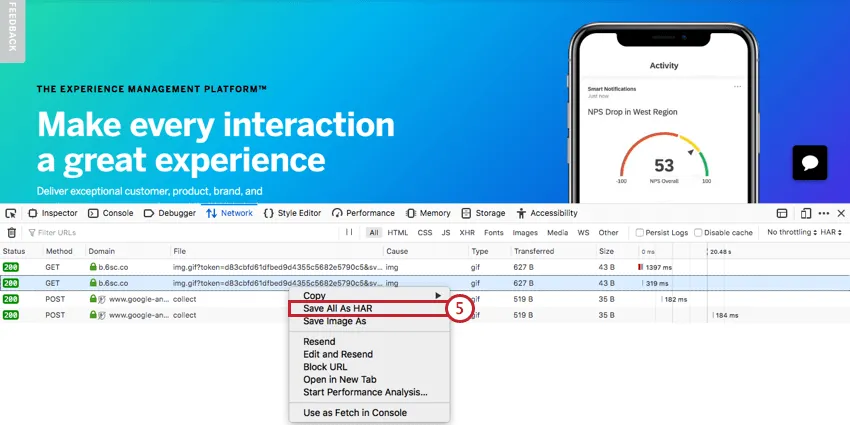
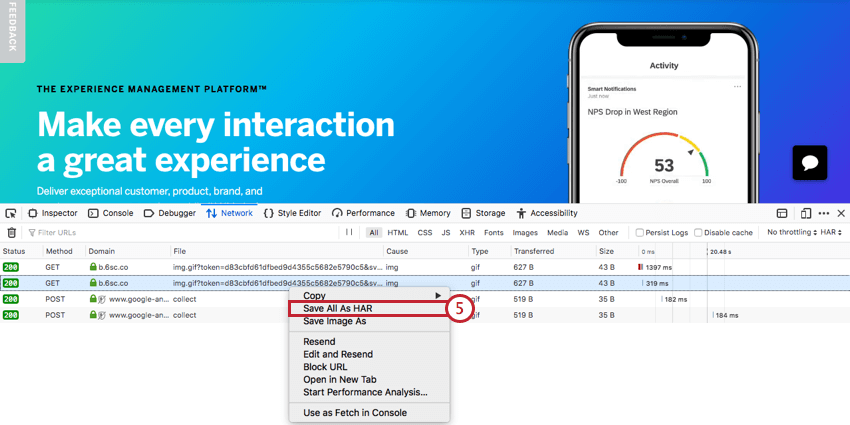
Right click anywhere in the table of network logs and select Save all as Har. Save this file to your computer.
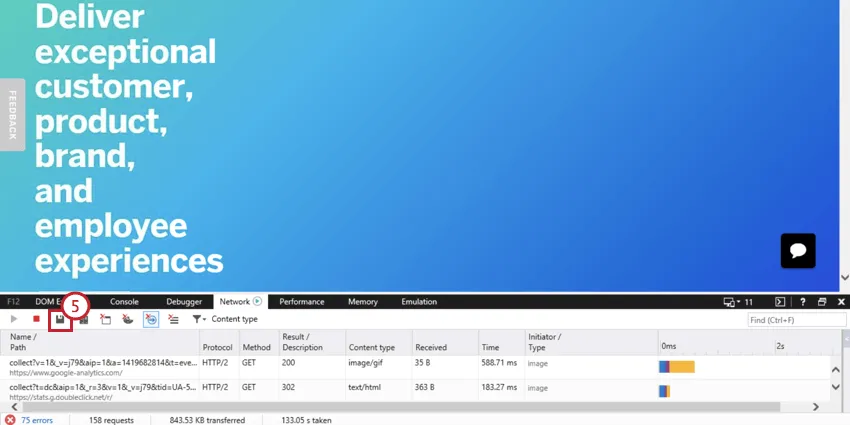
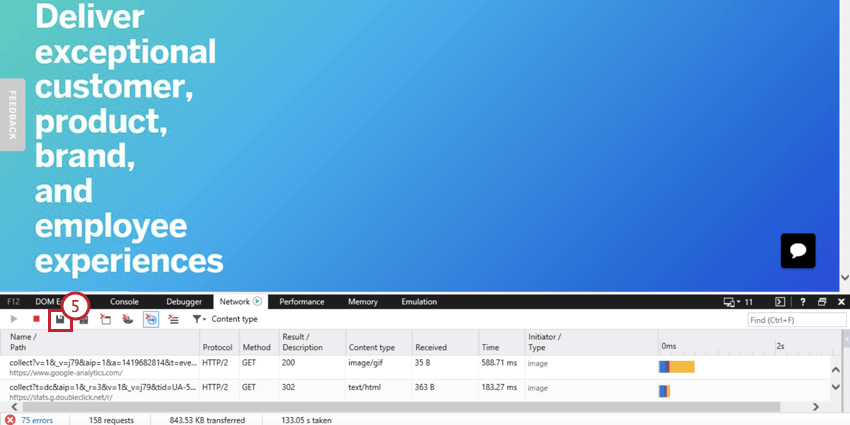
Generating a HAR file in Microsoft Edge
Open Microsoft Edge and go to the page where the issue occurs.
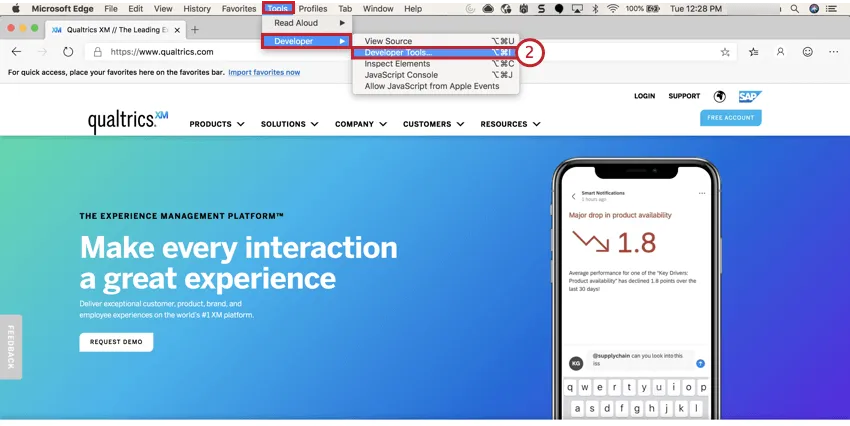
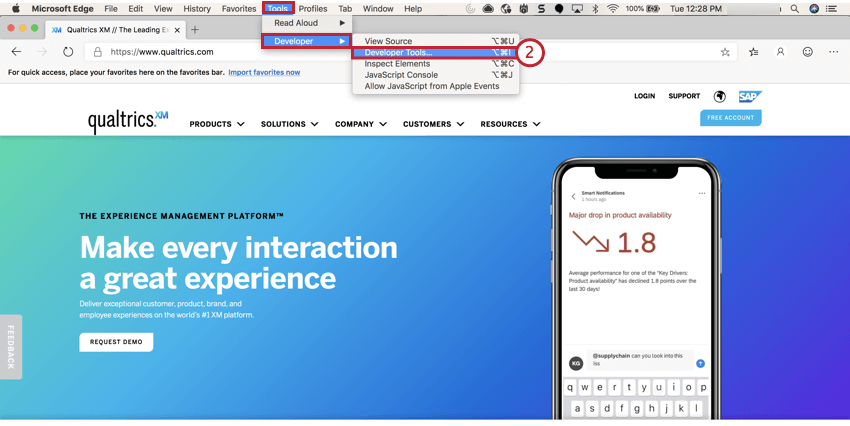
In the menu bar, go to Tools → Developer → Developer Tools.
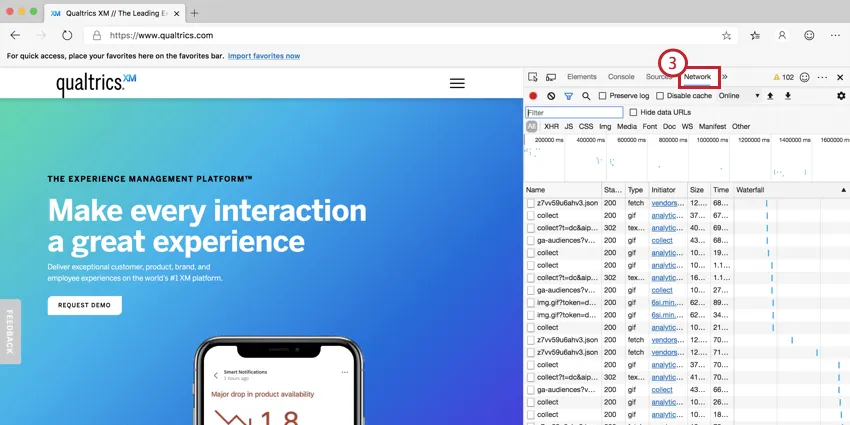
In the panel that opens, go to the Network tab.
Reproduce the issue in your browser.
Click the Download button (arrow pointing down) to download the HAR file to your computer.

Generating a HAR file in Internet Explorer
Open Internet Explorer and go to the page the issue occurs.
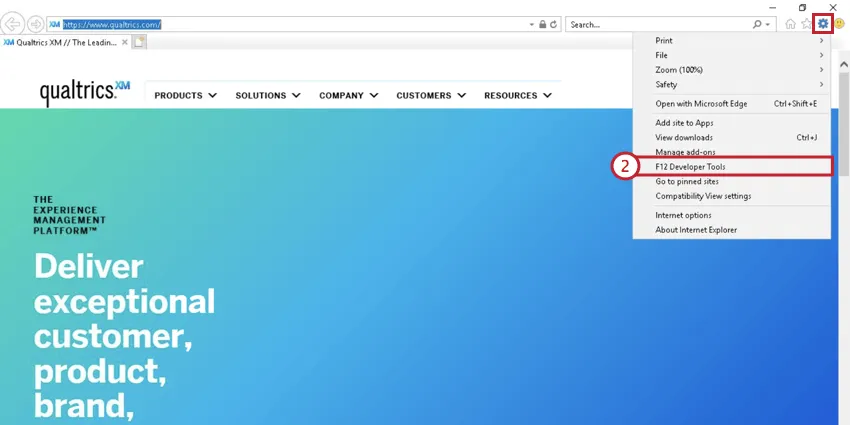
Click the Gear icon and select Developer Tools.

In the panel that opens, select the Network tab.

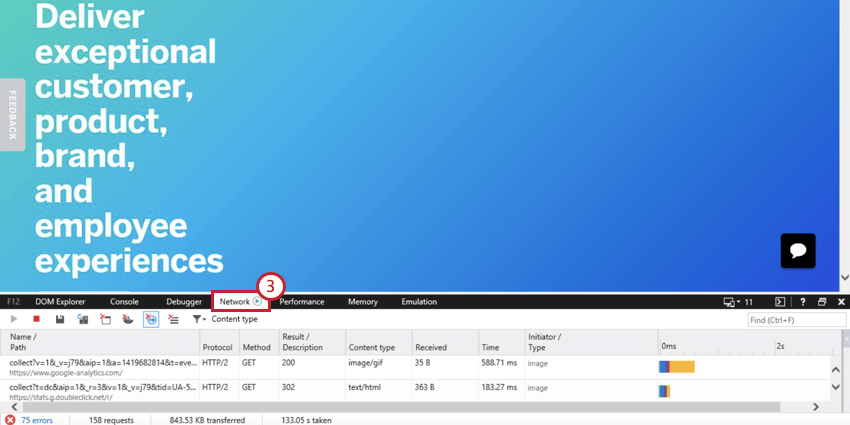
Reproduce the issue in your browser.
When finished, click the Export as HAR button.
Give your file a name and select Save.
That's great! Thank you for your feedback!
Thank you for your feedback!