-

Qualtrics Platform -

Customer Journey Optimizer -

XM Discover -

Qualtrics Social Connect
Filtering Inbound Data (Connectors)
About Filtering Inbound Data (Connectors)
You can filter the data you import into XM Discover. This allows you to only import the data that meets your filter conditions.
There are 4 different types of data filters:
- Connector filters: Connector filters are available for all data connectors. They allow you to define an expression that is either true or false which determines if data is imported.
- Record limits: Record limits allow you to set a maximum number of documents imported in 1 job.
- Source filters: Some connectors also allow you to add a source filter, which allow you to set up additional filters specific to that data source.
- Query configurations: Some connectors allow you to add a specific query that the data must match to be imported.
Connector Filters
Connector filters are available for all data connectors. They allow you to define a Boolean expression that determines if data is imported.
You can access a job’s connector filter when setting up the job for the first time, or by selecting Data Filter from the job options menu.
- Select Apply Connector Filter.
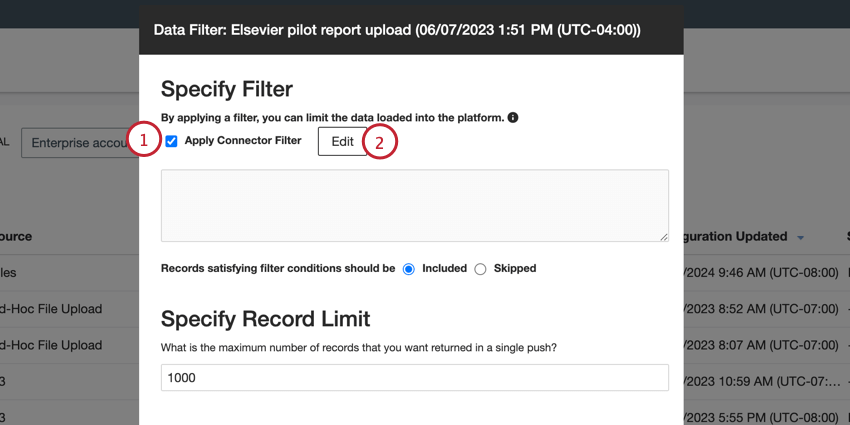
- Click Edit.
- Build your filter expression. When building your expression, only use Boolean functions. See the Building Expressions support page for more information on creating expressions.
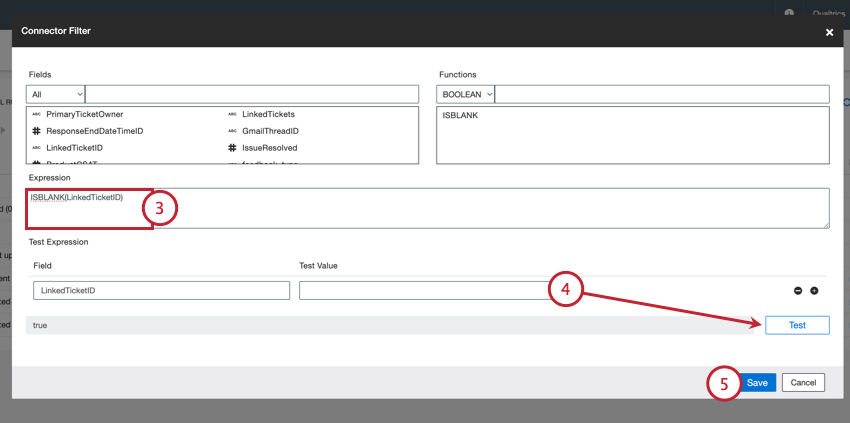 Example: In the above image, the expression “ISBLANK(LinkedTicketID)” was created, which evaluates the “LinkedTicketID” field for a value. Therefore, only data with a empty value for “LinkedTicketID” will be imported.Qtip: Use the “ISBLANK” and “CONTAINS” functions for connector filters.
 - Test your expression by entering sample values in the Test Value field and then clicking Test. The result will appear next to the Test button.
Qtip: Since you’re creating a Boolean expression, the result should be either “true” or “false.”
- When finished building your expression, click Save.
- Choose what you want to do with data that matches the expression:
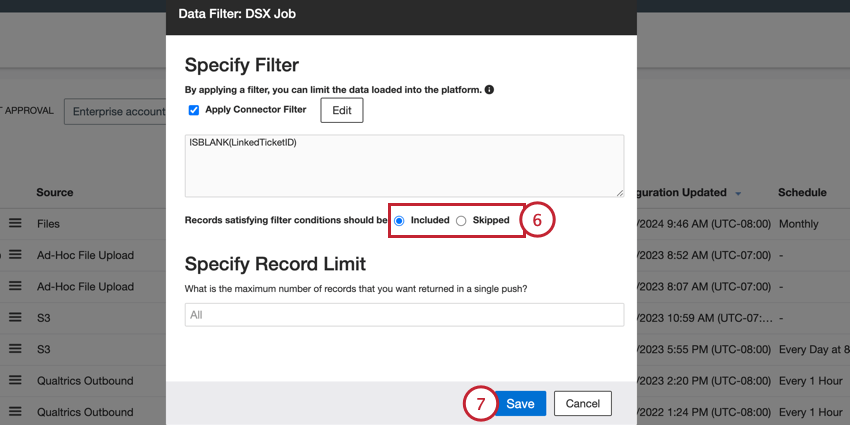
- Included: Records that match the expression will be imported.
- Skipped: Records that match the expression will not be imported.
- Click Save.
Record Limits
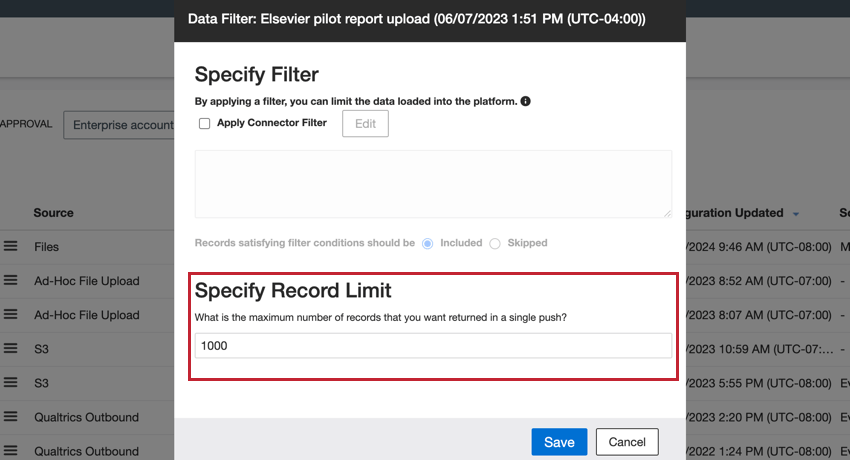
By default, there is no limit to the number of documents that can be processed in a single job run. Record limits allow you to set a maximum number of documents that can be processed in a single job.
You can access a job’s record limits when setting the job up for the first time, or by selecting Data Filter from the job options menu.
Then, enter a number in the Specify Record Limit box. To remove the limit and process all documents, enter “All” in this box.
Source Filters
Some connectors allow you to further filter their incoming data by specifying what data should be included or using one of the preconfigured filters.
The following connectors support source filters:
- Brandwatch inbound connector
- CFPB inbound connector
- Safer Products (CPSC) inbound connector
- Synthesio inbound connector
You can access your source filter when setting up a job for the first time, or you can edit the source filter for an existing job by selecting Data Source Filter from the job options menu. Follow the steps below to build your filter:
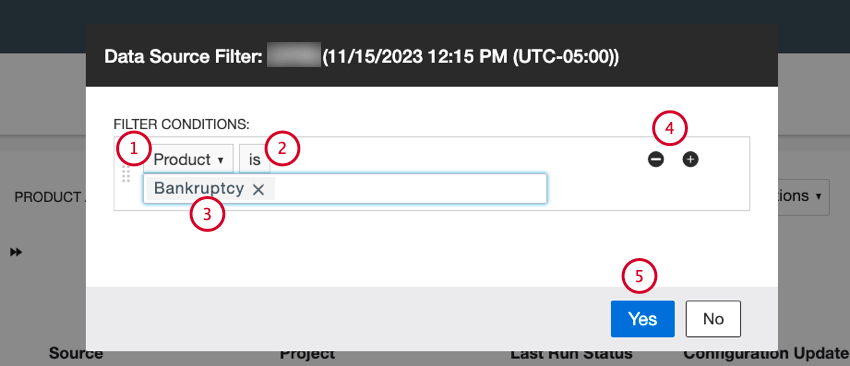
- Select the field you’d like to filter on.
- Select an operator for a filter condition. Choose “is” to include the values you specify, or choose “is not” to exclude the values you specify.
- Specify 1 or more values to use for the filter.
Qtip: If you have multiple values for a condition, they are separated by an implicit “or,” meaning a record needs to have only 1 of these values to meet the filter criteria.
- You can add conditions by clicking the plus sign ( + ) or remove conditions using the minus sign ( – ).
Qtip: If you have multiple filter conditions, they are separated by an implicit “and,” meaning all conditions must be true.
- Click Save.
Query Configurations
Some connectors let you set up a search query to load only the data that matches the query. This allows you to control which documents get uploaded into XM Discover via these jobs.
The following connectors support query configurations:
- Facebook inbound connector
- Khoros inbound connector
- Salesforce inbound connector
- Twitter inbound connector
You can access the query configuration when setting up a job for the first time, or you can edit the query configuration for an existing job by selecting Query Configuration from the job options menu.
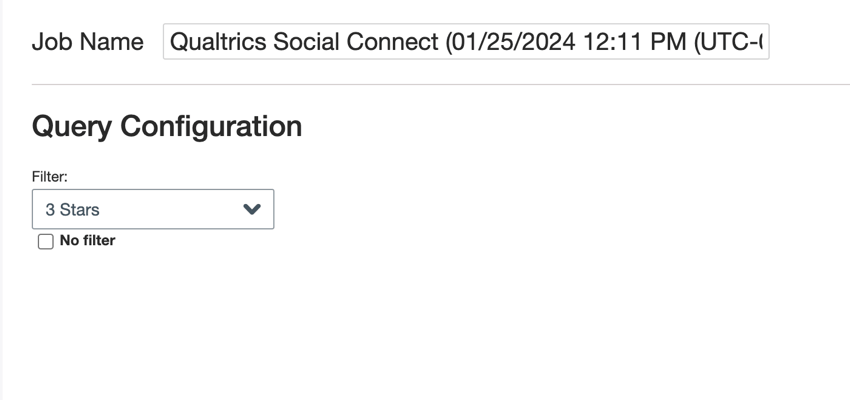
You can then set up the query for your job. The specific instructions for setting up a query vary depending on the inbound source. For example, QSC inbound queries allow you to select a filter from QSC, while Twitter inbound queries allow you to manually define a search term that must be included in the data. See the documentation for your inbound connection for specific instructions.