-

Qualtrics Platform -

Customer Journey Optimizer -

XM Discover -

Qualtrics Social Connect
Exporting Raw Conjoint Data
About Exporting Raw Conjoint Data
The Reports tab of a conjoint project gives you many helpful graphs to help you decide what to do with the results of your conjoint analysis. However, you can also use this tab to export raw data from your conjoint analysis.
Using this tool, you can export every respondent’s utility score for each level of each feature. You can also export the average utility, feature importance, and relative utility for each feature.
Export Individual Utilities
You can export the average utility scores for each respondent. Average utilities are the average calculation across respondents’ individual utility scores. In this export you will see how the respondent scored for each level of each feature.
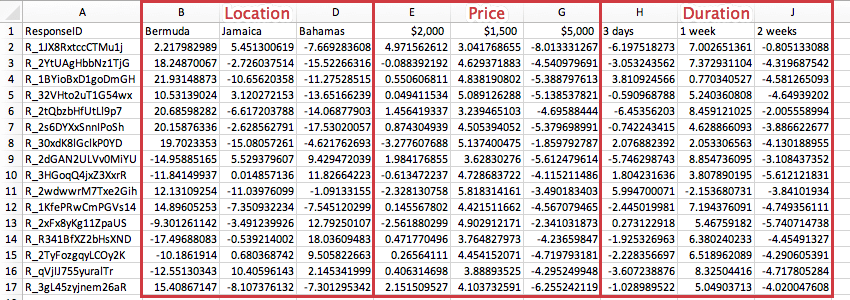
Each row is a different respondent, identified by a ResponseID. This field is a randomized ID that can be used to link conjoint data to non-conjoint data exported in the Data tab.
For each respondent, you get an average utility score for each of the levels. In this example, our conjoint is about vacation preferences. So for the features Location, Price, and Duration, there are columns for each level.
Exporting Individual Utilities
- Go to the Reports tab.

- Go to the Conjoint Analysis section.
- Click Export.
- Select your desired export format in the Individual Utilities column. You may export to CSV or TSV.
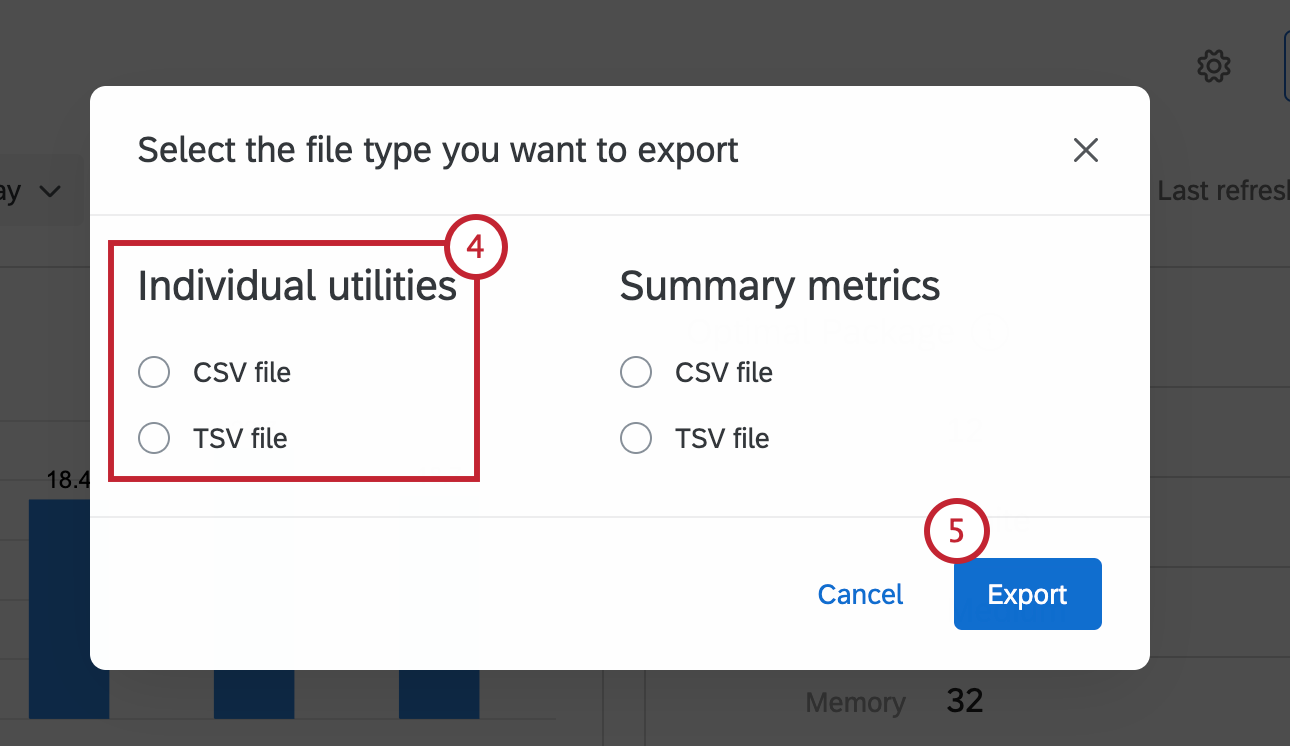
- When ready to export data, click Export.
Export Summary Metrics
When you export summary metrics, you are not exporting data for individual respondents, but summary data that will help you determine the best package to offer.
The export is a zipped folder with three CSV files inside:
- Average Utilities: The average calculation across respondents’ individual utility scores. The average utility will be listed for each level of each feature.
- Relative Utilities: The measurement of preference for each level of a feature. The greater a level’s relative utility value is, the more it enhances a package by being present.
- Feature Importance: The measurement of influence a feature has when the respondent is choosing their preferred bundle. The higher the score, the more weight it carries in the decision-making process. This data is listed by feature, not level.
Exporting Summary Metrics
- Go to the Reports tab.
- Go to the Conjoint Analysis section.
- Click Export.
- Select your desired export format in the Summary Metrics column. You may export to CSV or TSV.
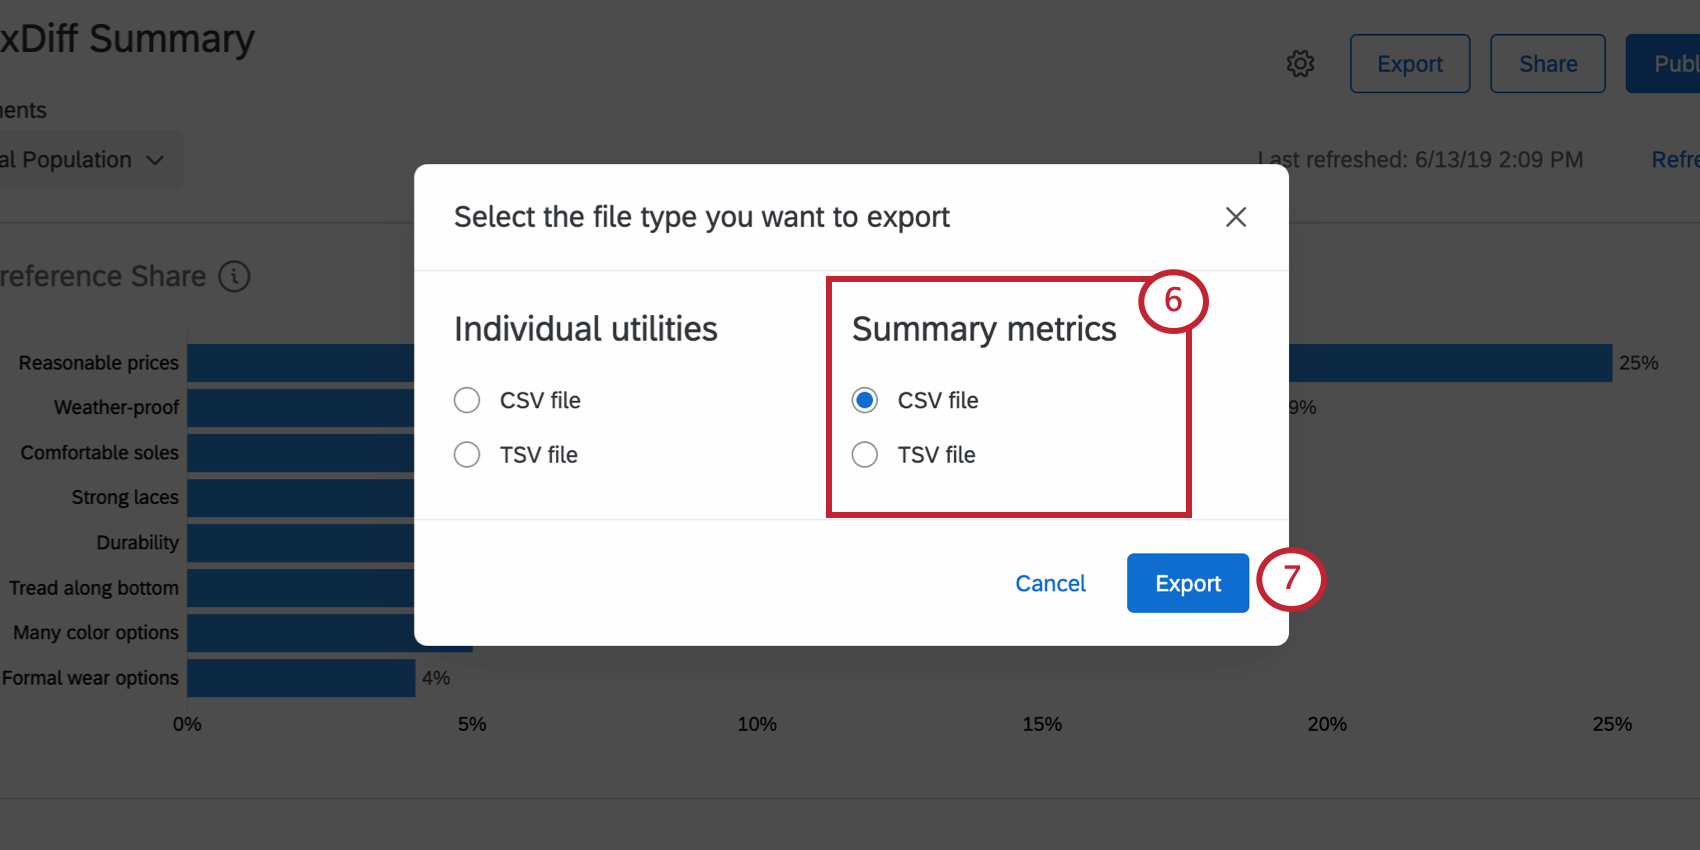
- When finished exporting data, click Export.
Segmentation and Exporting Data
If you have access to the Segmentation feature, you can use any data collected on respondent demographics to filter your exports. Click the Total Population dropdown and select a segment you’ve created to filter the data. Then when you export, it will only be data for the selected segment.

For more on setting up segments, see the Segmentation support page.