
Extract Employee Data from SuccessFactors Task
What's on this page
About Extract Employee Data from SuccessFactors
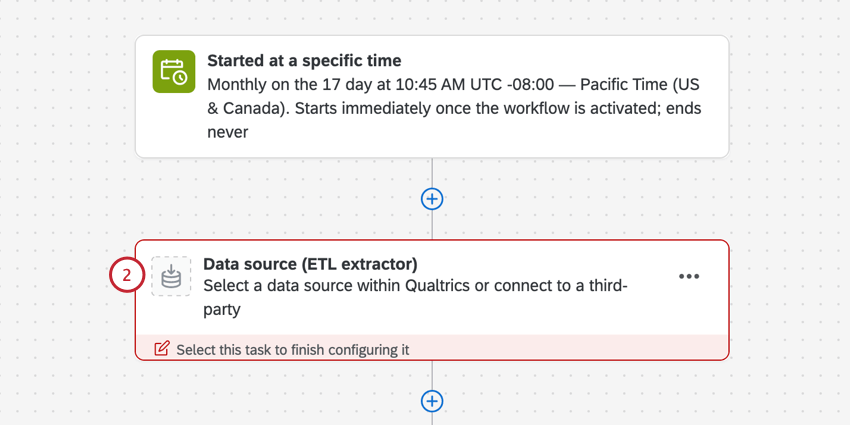
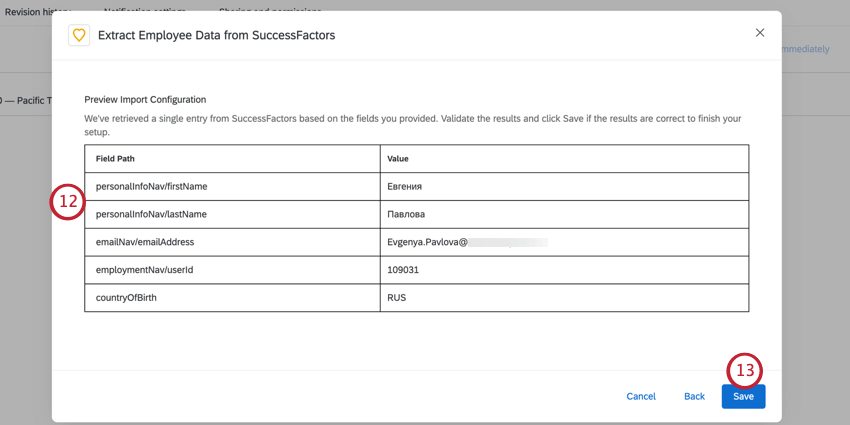
The Extract Employee Data from SuccessFactors task automates an employee data export from SuccessFactors. You can import core employee data (name, email, unique identifier), employee metadata (gender, role, department, etc), and org hierarchy data (manager, location) on a recurring schedule that you set. After your data is imported into Qualtrics, it needs to be saved using a data loader task, usually the load users into EX directory task.
Qtip: For information on general limits that apply to ETL workflows, see Workflow Limits. For any task-specific limits, refer to the information on this page.
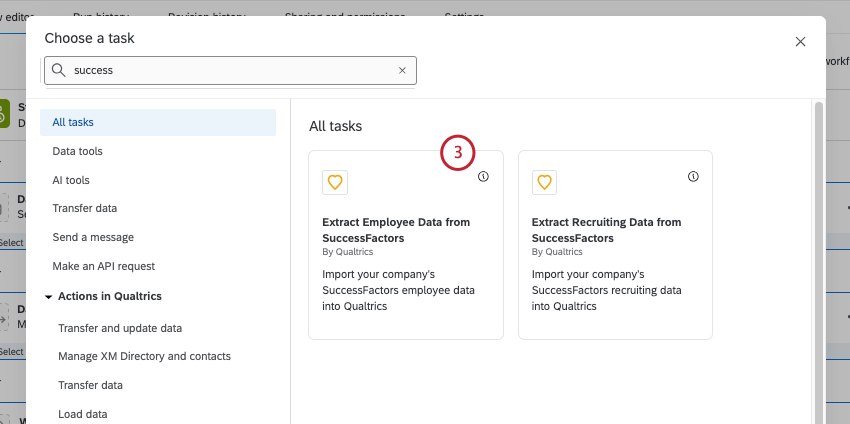
Setting Up an Extract Employee Data from SuccessFactors Task
Qtip: This task can only import Boolean and String fields from SuccessFactors.
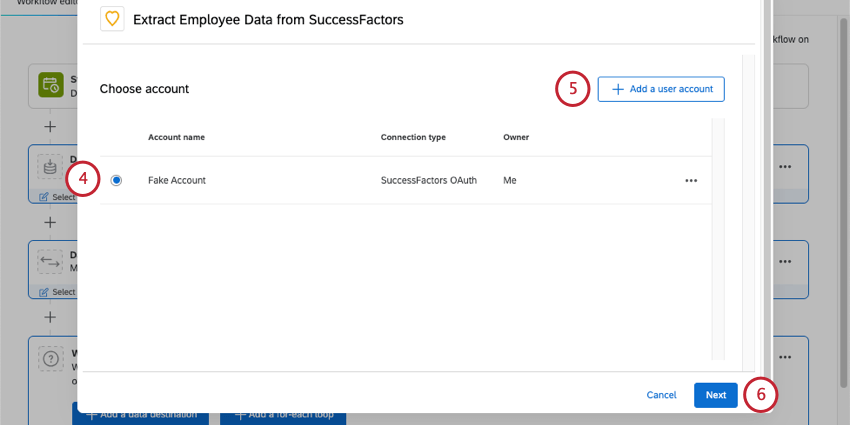
Qtip: After clicking Add new user account, you will be directed to enter your SuccessFactors account information. See finding your SuccessFactors account information for help finding the required fields.
Qtip: The Qualtrics platform does not support multiple employments for an individual participant from SuccessFactors. If a field has multiple values, the extractor will pull the value that has been the most recently modified. We currently do not support selecting any other values. Additionally, if you have multiple records for the same employee in SuccessFactors, the Basic Transform task must be used to filter out any values that are not the primary employment.
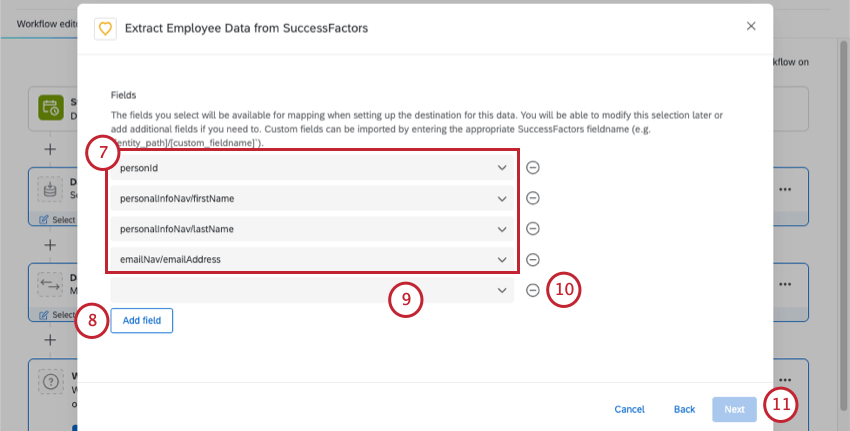
Qtip: Custom fields can be imported by entering the appropriate SuccessFactors fieldname (e.g., personal_information/custom_fieldname). Custom fields will not appear in search results as you type. Custom fields must have a “lastModifiedDateTime” subfield to be imported.
After setting up your SuccessFactors task, you must tell Qualtrics where to save your data with a data loader task. Usually, this is the load users to EX directory task.
Qtip: We recommend running your data through a basic transform task before sending it to a data loader task. This allows you to make sure your fields are in the right format for easy mapping in the loader task.
Qtip: If you’d like to test your workflow without impacting your live EX directory, you can use the load into a data project task instead. This allows you to test the workflow to make sure all fields are imported correctly before you start adding employees to your EX directory.
Finding Your SuccessFactors Account Information
Warning: Previous workflows did not require an API key or X.509 certificate to authenticate. By May 2022, you need to make sure all workflows extracting data from SuccessFactors are using an API key and X.509 certificate to authenticate. Instructions on how to configure this authentication can be found here. Communication will be sent to customers in advance of this change.
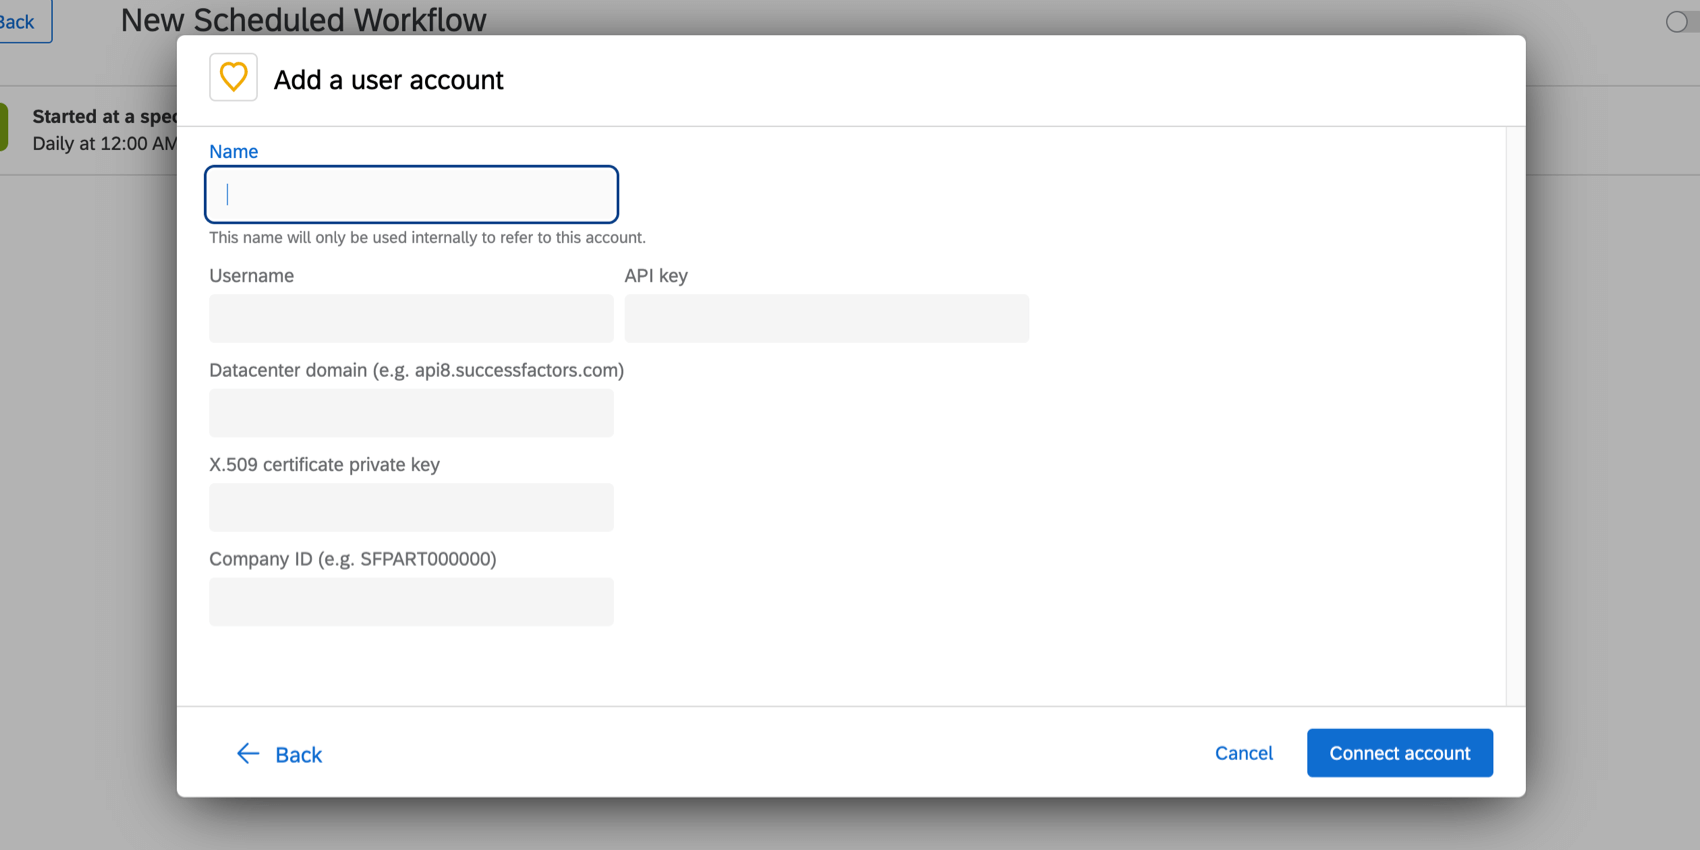
After clicking Add new user account, you will see a screen for you to enter the OAuth credentials from SuccessFactors. Visit our Configuring SuccessFactors Tasks with OAuth Credentials page for prerequisite information necessary for set-up.
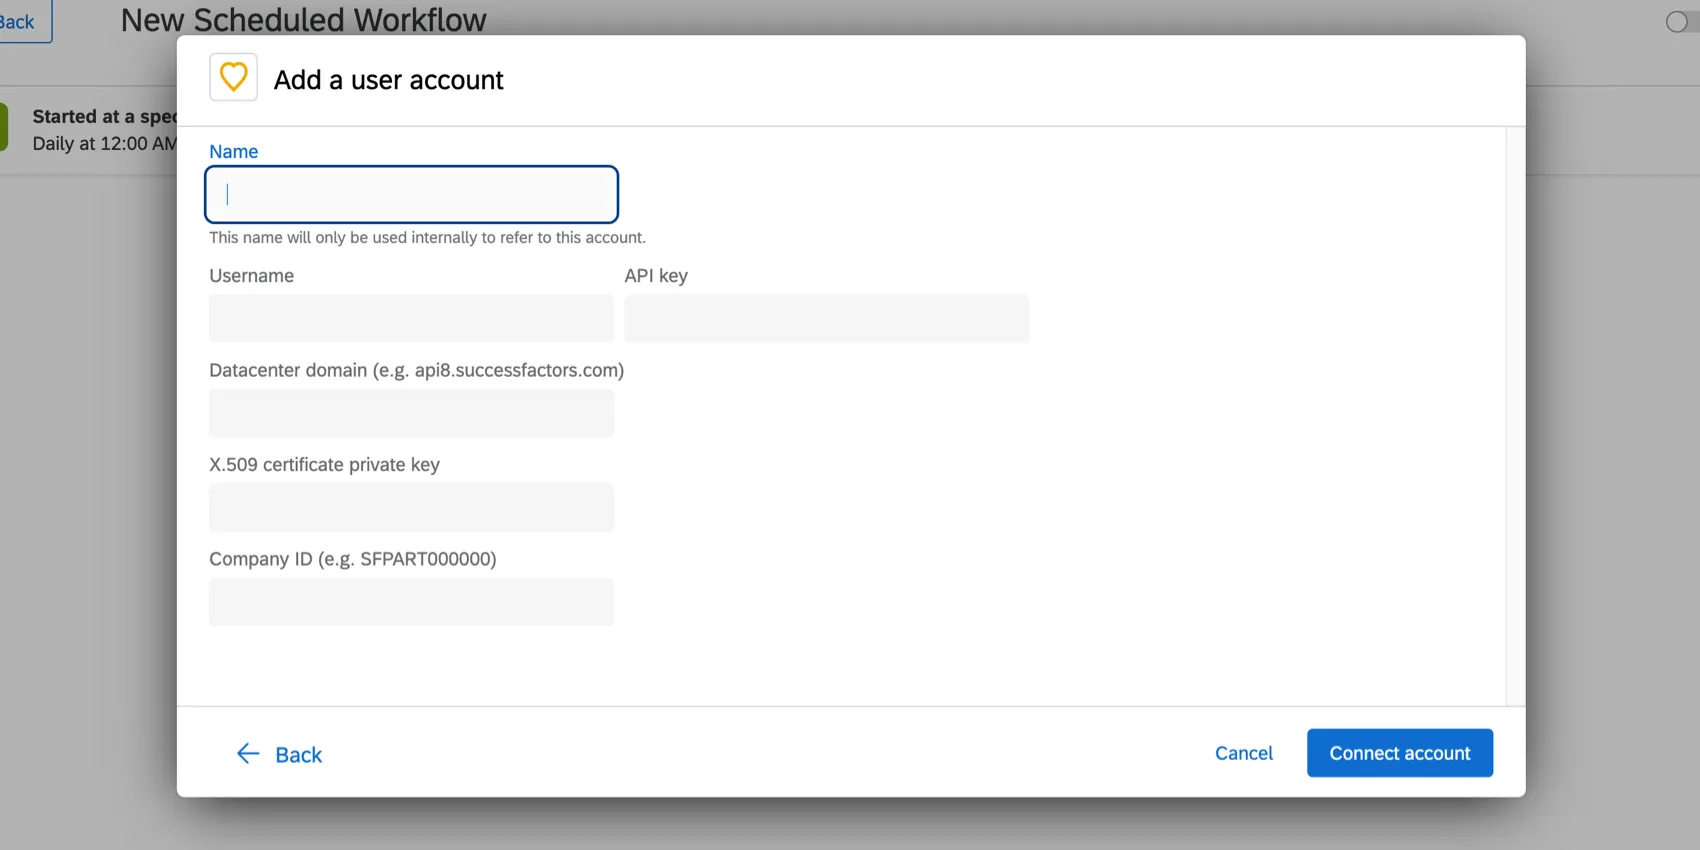
- Name: This is the label you give your account. This field isn’t used for authentication.
- Username: Your SAP User ID. Warning: Your username and your SAP User ID may be different. The User ID is case sensitive.

- API key, X.509 certificate private key: X.509 certificate authentication adds an additional layer of protection to your data. When you register an Oauth Client using this certificate, an API key will also be generated. Qtip: There are 2 options for generating the certificate and private key. You can generate your own certificate and private key, or SAP has an option to generate while registering the OAuth2 Client Application, which you can download from SuccessFactors. If you generate a private key, it must be in the PKCS8 format. For more information, please see SAP’s documentation.

For more details on this process, please see the following SAP documentation:
-
- Registering Your OAuth2 Client Application
- Creating an X.509 Certificate in SAP SuccessFactors
- Generating a SAML Assertion
- Requesting an Access Token
- Viewing the Validity of an Access Token Qtip: The last 3 documents in this list are intended for SuccessFactors admin users, or any other user with permission to create OAuth integrations. For additional help with certificate authentication, please contact SuccessFactors support.
- Datacenter domain: Your SuccessFactors domain. Qtip: Do not include the http:// in the URL.
- Company ID: Your SuccessFactors company ID.
You can find a few of these fields on your SuccessFactors login page:
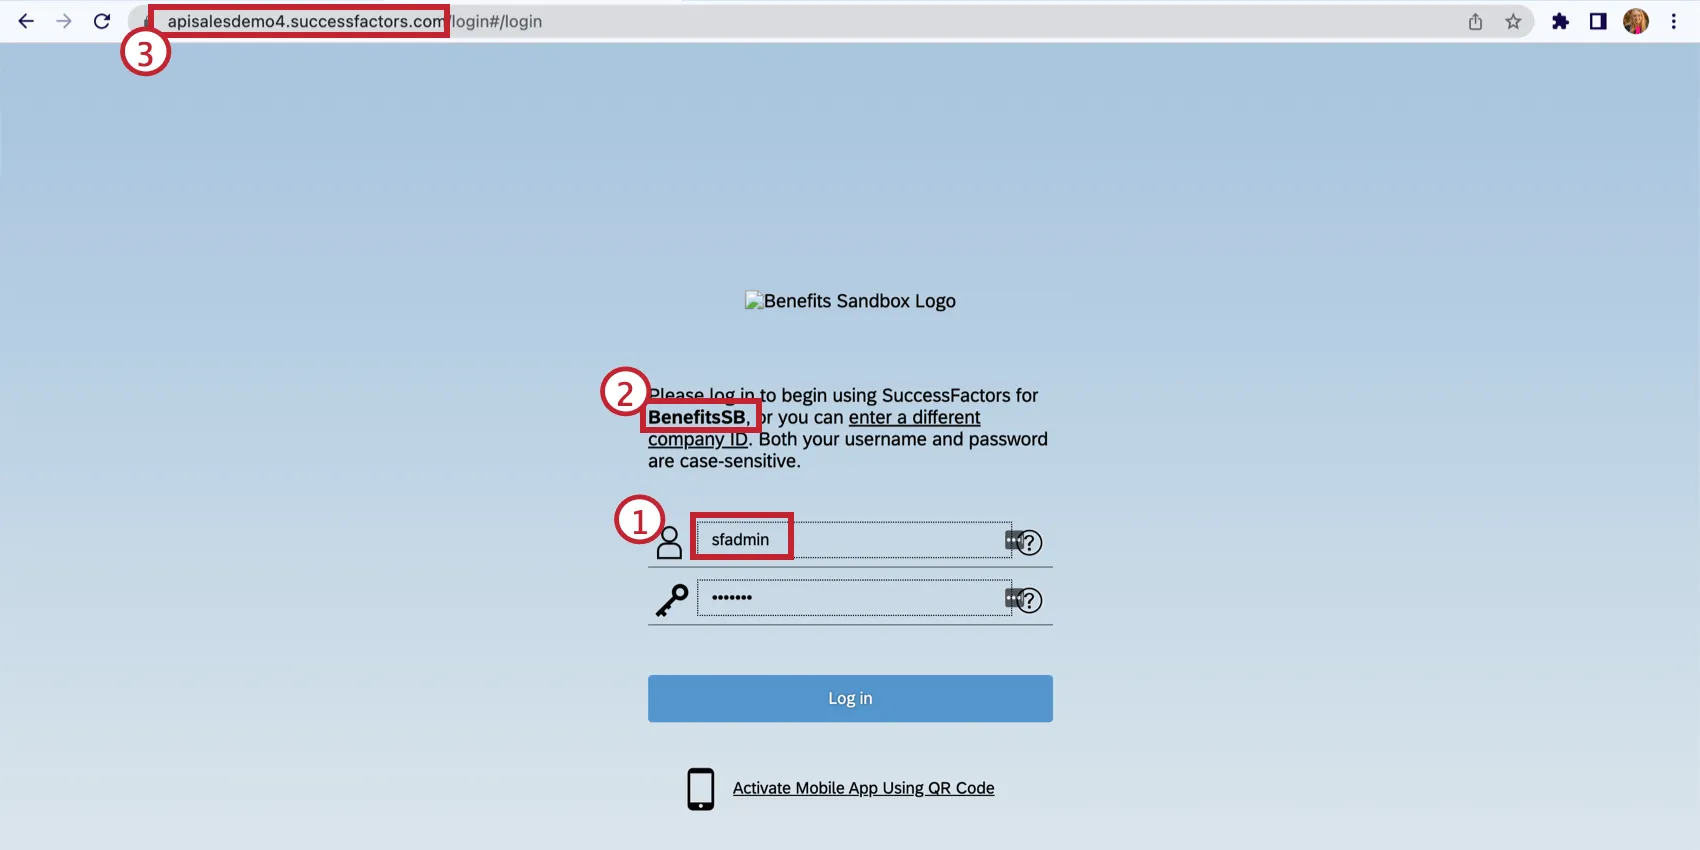
Warning: Your username and your SAP User ID may be different. The User ID is case sensitive.
Example: An example company ID is BenefitsSB.
Qtip: Do not include the http:// in the URL.
Example: An example datacenter domain is apisalesdemo4.successfactors.com.
If you need help accessing your SuccessFactors information, please see our Configuring SuccessFactors Tasks with OAuth Credentials page, or contact SuccessFactors support.
Troubleshooting SuccessFactors Tasks
To troubleshoot your workflow, head to workflows reporting and view the output of your workflow. If your workflow failed, this will contain information into why it failed.
Incorrect Account Credentials
See Configuring SuccessFactors Tasks with OAuth Credentials.
Imported Fields are Blank
The extract employee data from SuccessFactors task displays all non-custom fields associated with a SuccessFactors account, but it’s possible that the field selected in the task does not have information associated with it in SuccessFactors. Ensure that the field’s path you’ve selected matches a filled field in SuccessFactors. Note that some field names might be associated with multiple locations within SuccessFactors. For example, “/personal_information/created_by” and “address_information/created_by” are different fields!
Common Field Errors
This table lists common errors and their resolutions. These errors appear when previewing your imported data in the extract employee data from SuccessFactors task.
| Error Message | Resolution |
|---|---|
| Preview record request was successful, but zero results were received. | Contact SuccessFactors support about why zero records are being returned. |
| Unable to parse field path {{Field Path Here}} from response. Field path must be of type boolean or string. | This is a warning message indicating that the field path was not a Boolean or String in the preview record. Check the field type in the ODATA Dictionary in SuccessFactors. |
| Error encountered while fetching OAuth token from SuccessFactors: {{Error from SuccessFactors}}. | Credential error when requesting OAuth Token. The specific reason will be in the message from SuccessFactors. Known reasons: To resolve this error, update your credentials so that they are correct. See Configuring SuccessFactors Tasks with OAuth Credentials for more information. |
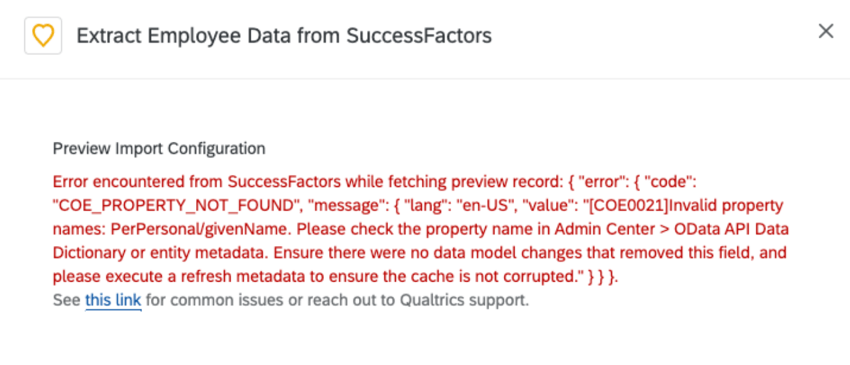
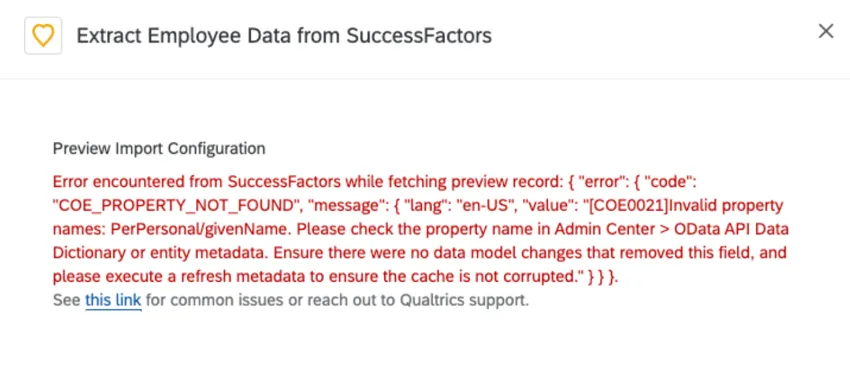
| Error encountered from SuccessFactors while fetching preview record: {{Error from SuccessFactors}}. | Error on OData API call from SuccessFactors. The specific reason will be in the message from SuccessFactors. This error happens because the Property cannot not found. See the “Property not found” subsection below for more information on resolving this error. |
| Unexpected internal error encountered while fetching preview record from SuccessFactors. | Internal error on Qualtrics’ side. Please contact Qualtrics Support. |
Property Not Found
If you are trying to import custom SuccessFactors fields, the format cannot be validated in our field dropdown. If you get an unexpected error in when previewing your import, such as “Invalid property names”, please check in SuccessFactors that the field path is correct.
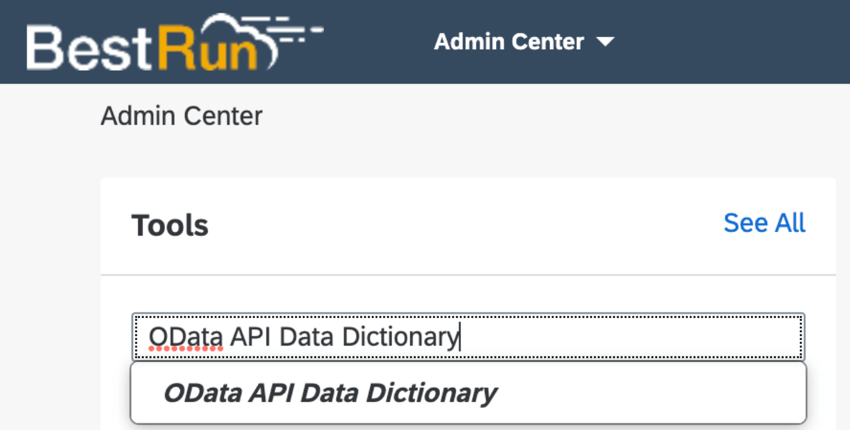
To look up a field, go to the Admin Center in SuccessFactors and then navigate to your OData API Data Dictionary.

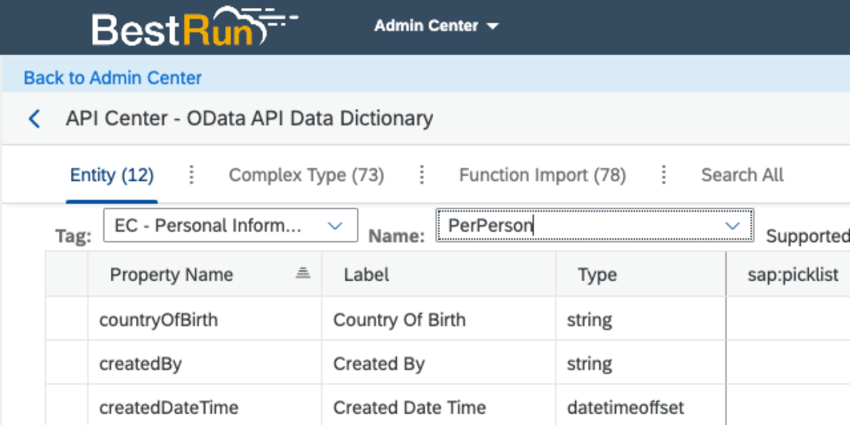
From here, go to the Entity tab, and look up the field you want to add. Confirm the field exists and that the field path matches what you’ve added in the Qualtrics Extract Employee Data from SuccessFactors task. In general, “PerPerson” is the base entity to start with to find the correct field path. If the field path is correct, and you are still running into the error, please reach out to SuccessFactors support for assistance.

FAQs
Do I have access to all extensions available through the Workflows templates?
Do I have access to all extensions available through the Workflows templates?
Is there a link to all Workflows events and tasks?
Is there a link to all Workflows events and tasks?
What are Workflows templates?
What are Workflows templates?
What are workflows? / Where are actions?
What are workflows? / Where are actions?
There are no changes to workflow functionality as part of this update.
How can I tell the difference between first party and third party extensions? Where do I go for support for either kind?
How can I tell the difference between first party and third party extensions? Where do I go for support for either kind?
How is the extraction criteria defined for this task?
How is the extraction criteria defined for this task?
- If your field configuration has not changed, Qualtrics uses the date and time of the previous extraction to filter the next OData query. Most entities in SuccessFactors contain a “lastModifiedDateTime” field and Qualtrics checks if this entity has been modified since the last extraction.
- If your field configuration did change, Qualtrics provides an option to perform a full extraction on the next run. To enable this, click the Reload the data link that appears in the chained loader task in the same workflow.
That's great! Thank you for your feedback!
Thank you for your feedback!