
Building a Consent Form
What's on this page
About Building a Consent Form
It’s common practice to ask for a respondent’s consent before sending them to the rest of the survey. Of course, if they decide they don’t want to participate, we want to end their survey session.
There are two ways to build a functioning consent form in Qualtrics. The first way is for users with more simple surveys. The second way is for users with more complex study designs.
Qtip: In addition to consent forms, these designs can be used to build Terms and Conditions, agreements, and other similar forms.
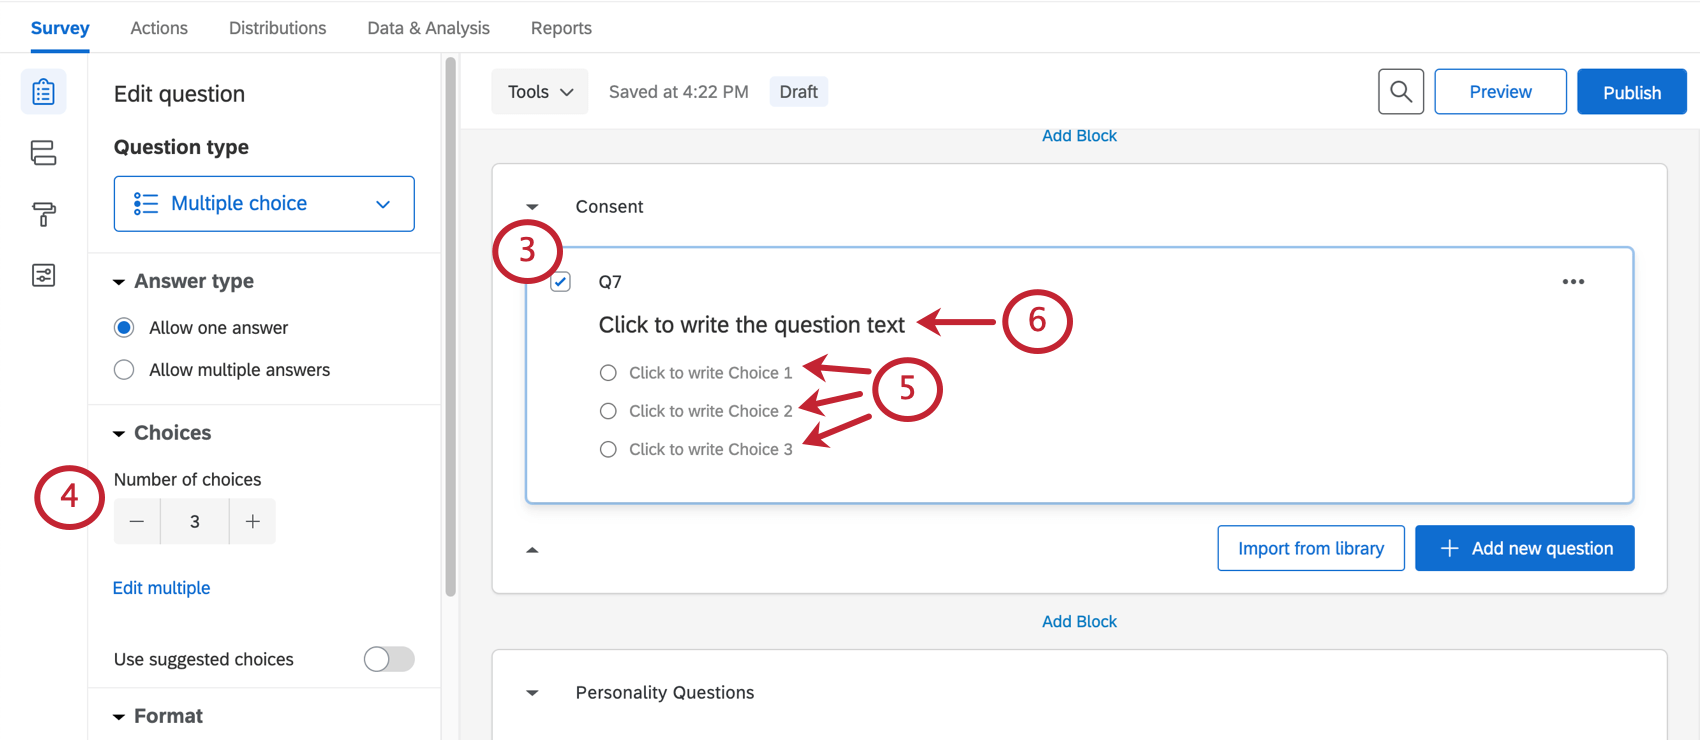
Building a Consent Form for a Simple Survey
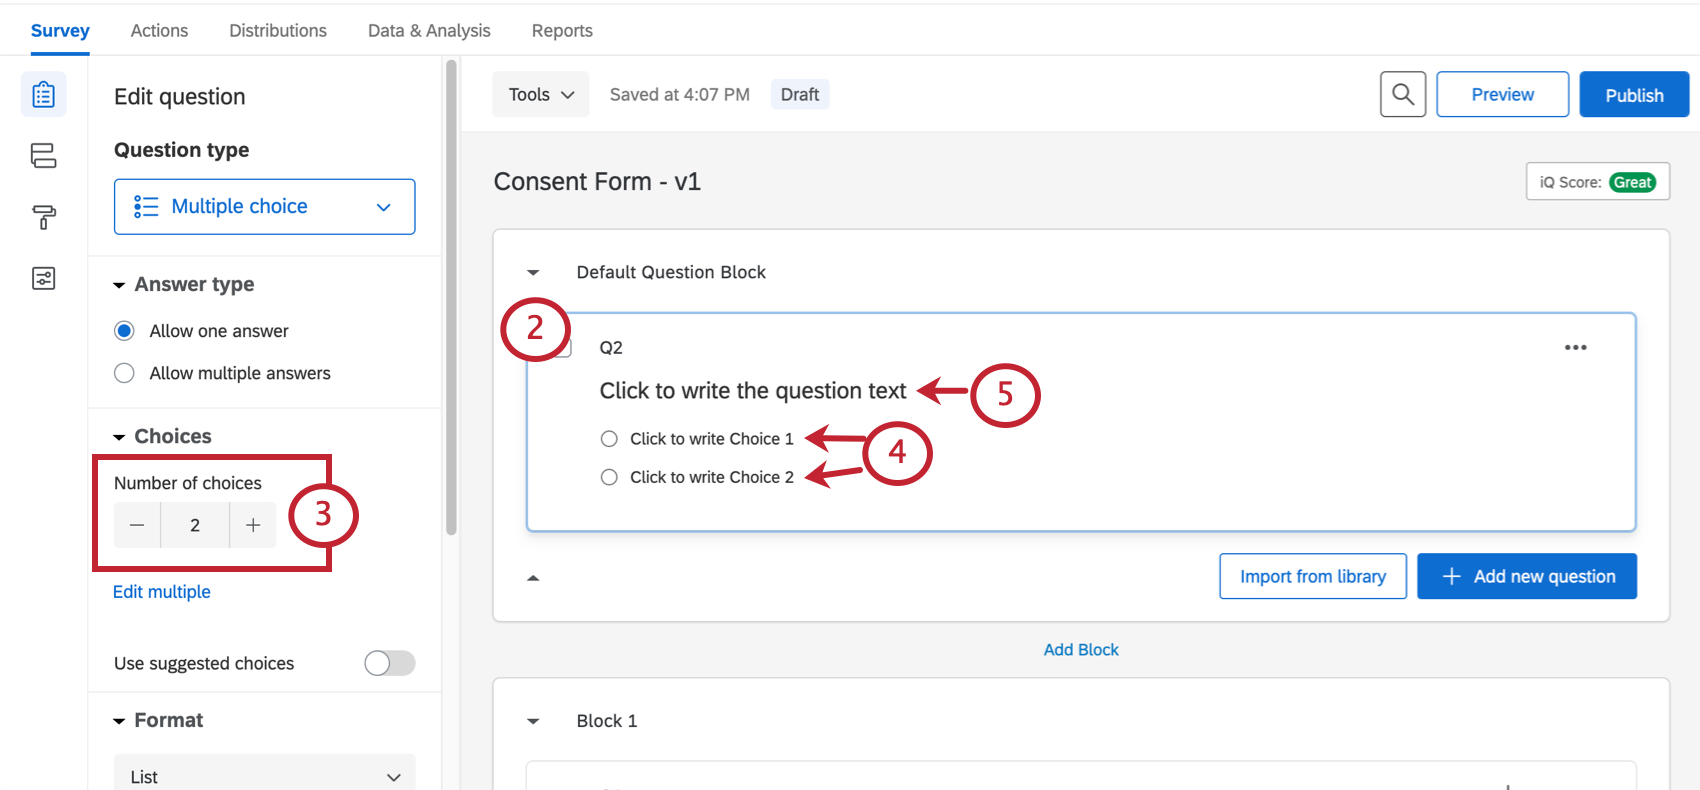
Is your survey fairly straightforward? Do you send all respondents through the same questions, or only hide a few here and there with display logic? If so, the consent form described in this section is the best one for you.
Qtip: Do you have a PDF or another file with your consent form already typed out? You can insert a downloadable file for your respondents.
Qtip: You don’t even need to add a page break between the consent question and the rest of the survey – Skip Logic automatically creates it for you.
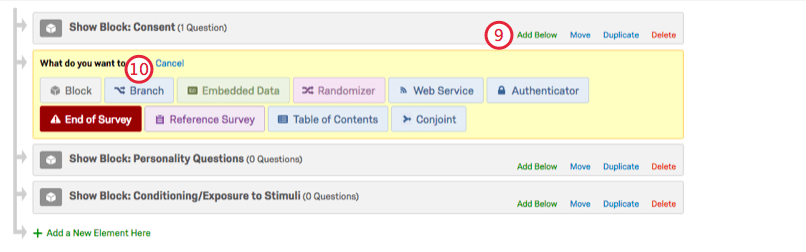
Building a Consent Form for an Advanced Survey
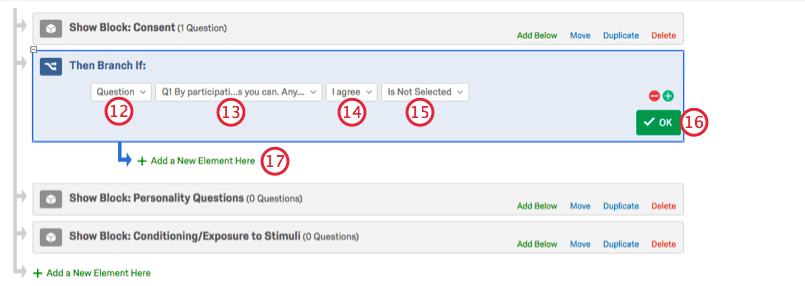
Are you doing A/B testing, or randomizing blocks of content? Are you sending respondents down entirely different paths based on answers they provided? Have you added screen-outs or customized end of survey messages based on what respondents answer? In that case, you should use the consent form described in this section.
Qtip: Click a block’s name to rename it. This can help you organize your content more efficiently. For example, in the image above, there’s a special block where all the personality questions go, and another where the study’s stimuli will be shown.
Qtip: Do you have a PDF or another file with your consent form already typed out? You can insert a downloadable file for your respondents.
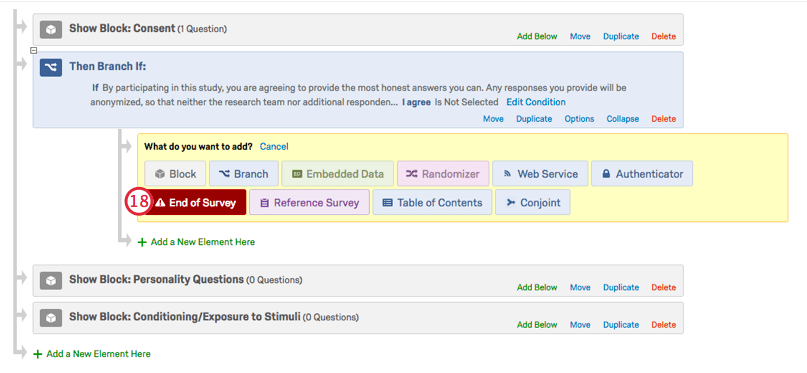
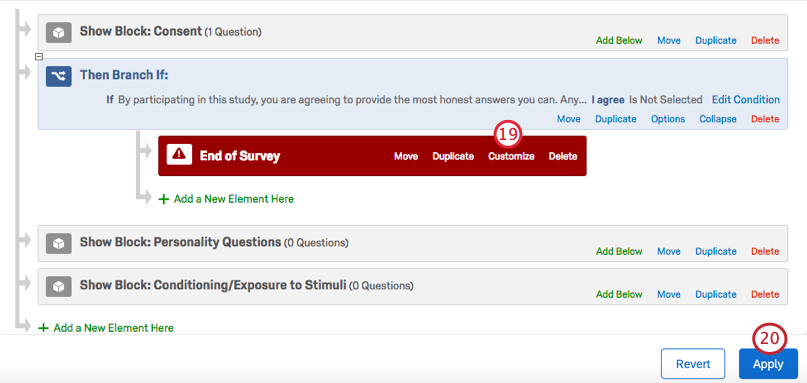
Qtip: See the End of Survey page for other customization options. For information on the Screen Out Management feature or Panel Company Integrations, see the linked support pages.
FAQs
Should I get consent from a Respondent to collect their personal data?
Should I get consent from a Respondent to collect their personal data?
It is also important to note that under GDPR, consent is one of a number of legitimate interests for processing data. Others include the need to process for the performance of a contract, the need to process in order to comply with a legal obligation, and the need to process in order to protect the vital interests of the data subject or another natural person. Full details can be found in Article 6 of GDPR.
GDPR requires Transparency with regard to the functions and processing of personal data – this is all about giving the individual control over how their data are processed.
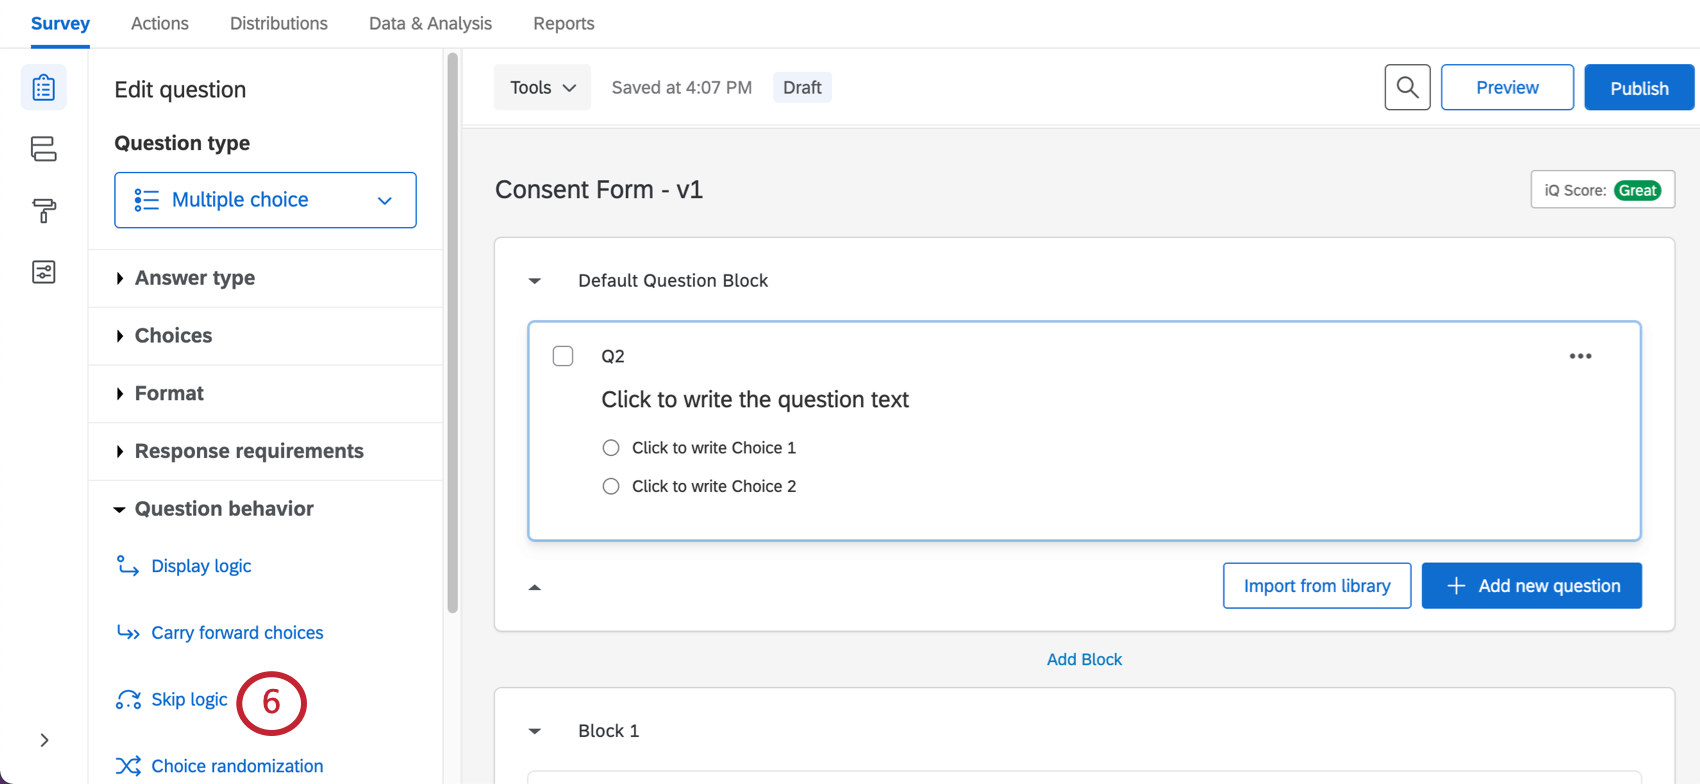
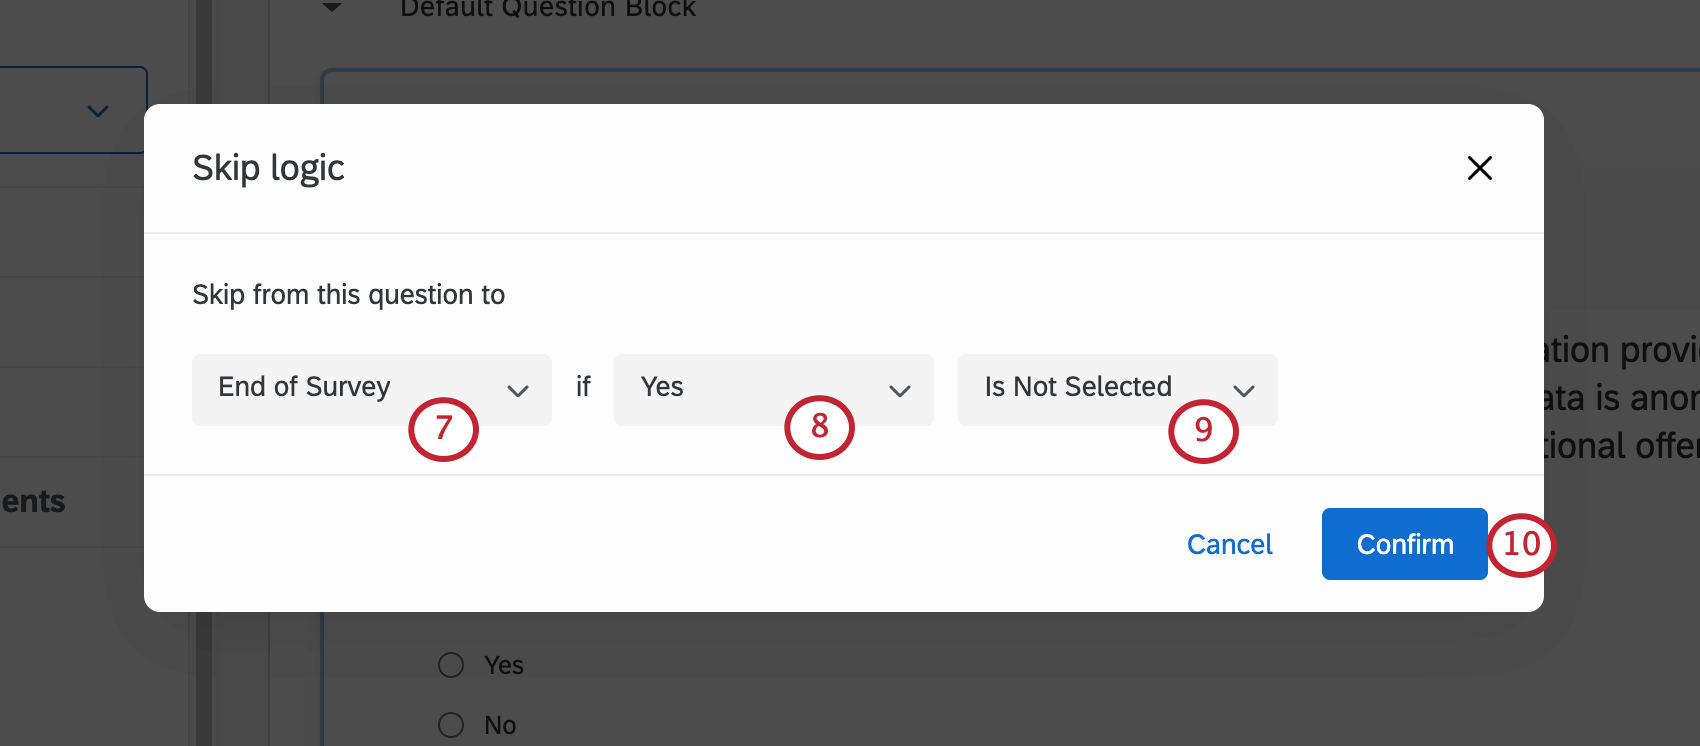
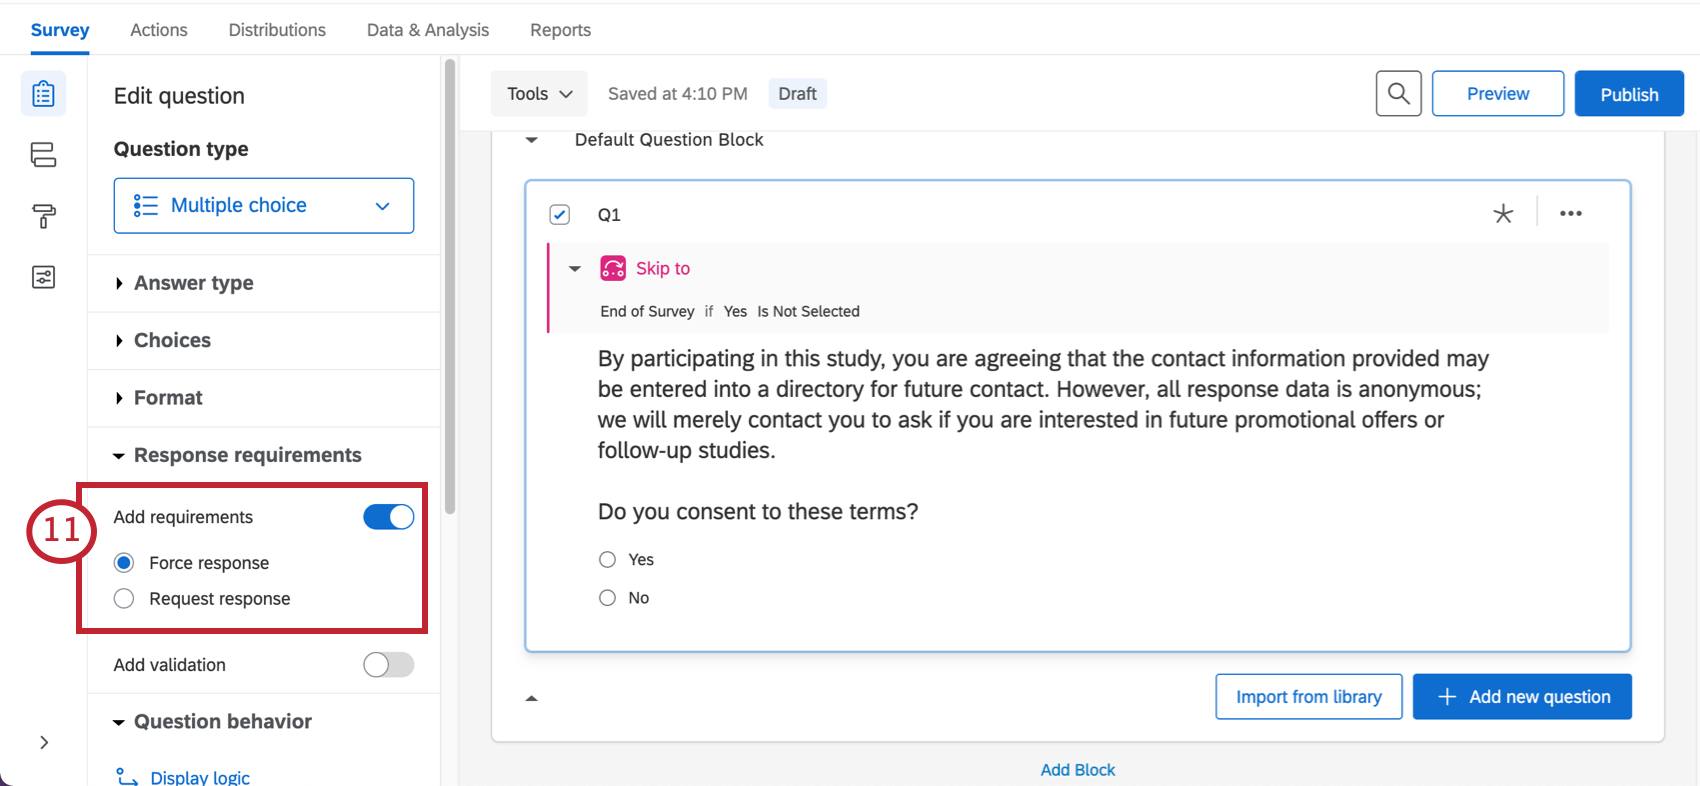
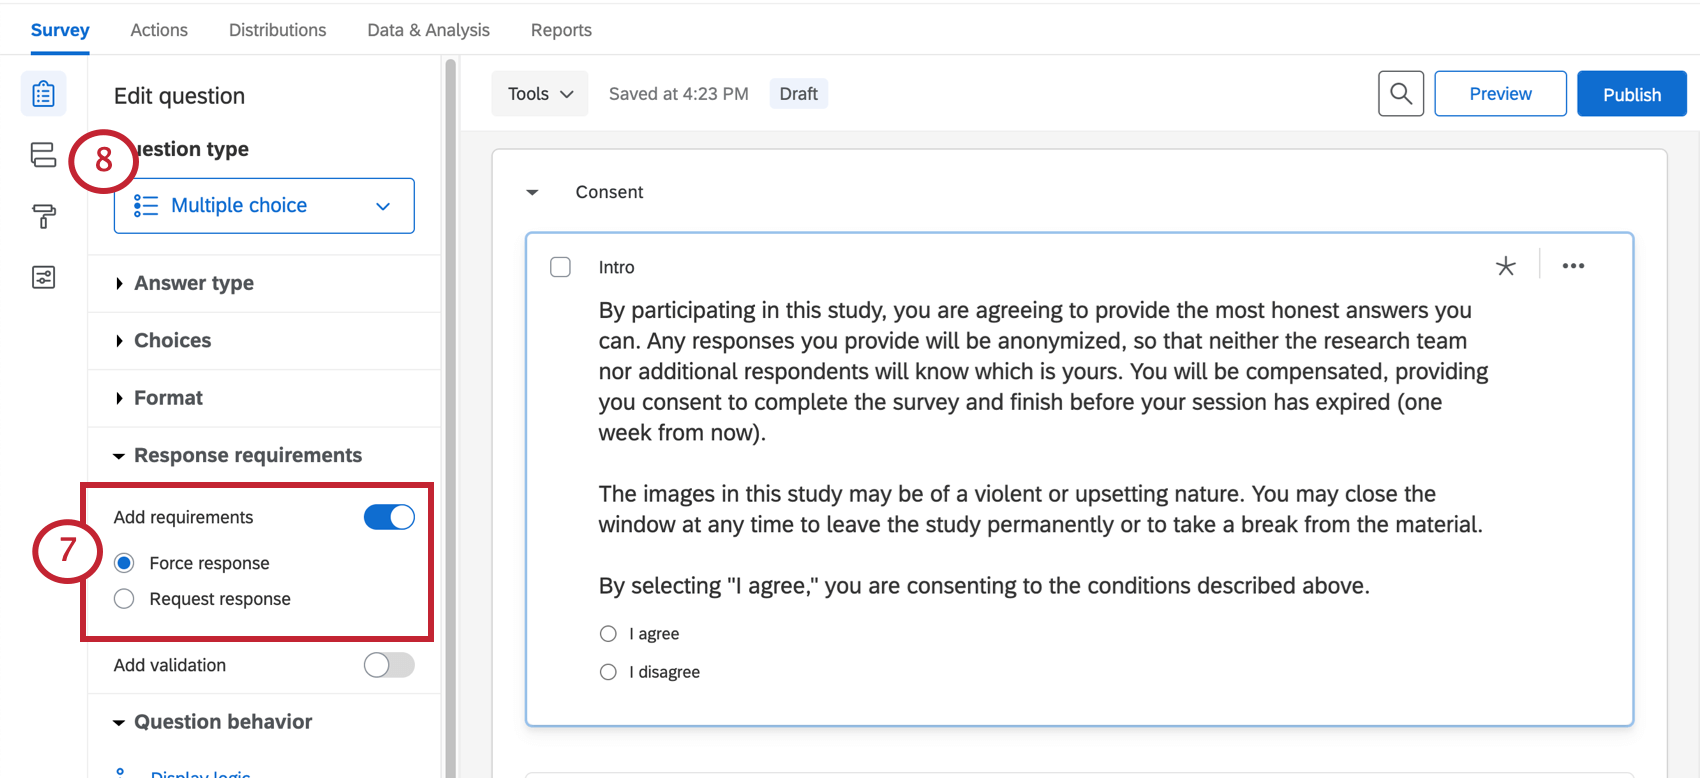
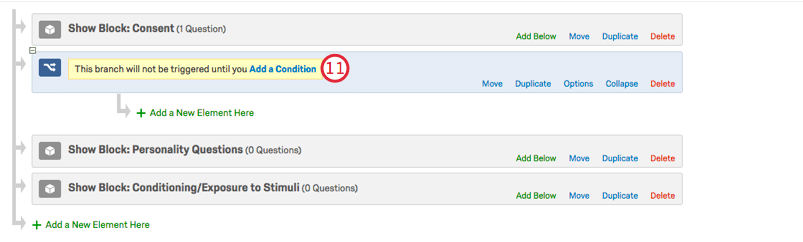
In the Qualtrics platform, you may easily create a multiple choice question to display a landing page and ask for consent. The Respondent can select Yes or No before they proceed with the rest of the survey. That response is recorded with the others, and may be used as evidence that the respondent did, indeed, consent. To ensure that the question is answered, select the Force Response option. If the Respondent chooses No, then add Skip Logic to the End of Survey so no data will be collected.
That's great! Thank you for your feedback!
Thank you for your feedback!