-

Qualtrics Platform -

Customer Journey Optimizer -

XM Discover -

Qualtrics Social Connect
Step 1: Creating Your Project & Adding a Dashboard (CX)
Permissions Required
You can only create Dashboard projects if:
- You are one of the following user types:
- Brand Administrator
- CX Administrator
- OR you have all the following permissions enabled:
- Customer Experience
- Use CX Dashboards
- Create CX Projects
- Manage CX Users (recommended)
If you cannot create dashboards and want these permissions adjusted, reach out to your Brand Administrator for help.
Creating Your First Dashboard
- Select Catalog from the global menu.
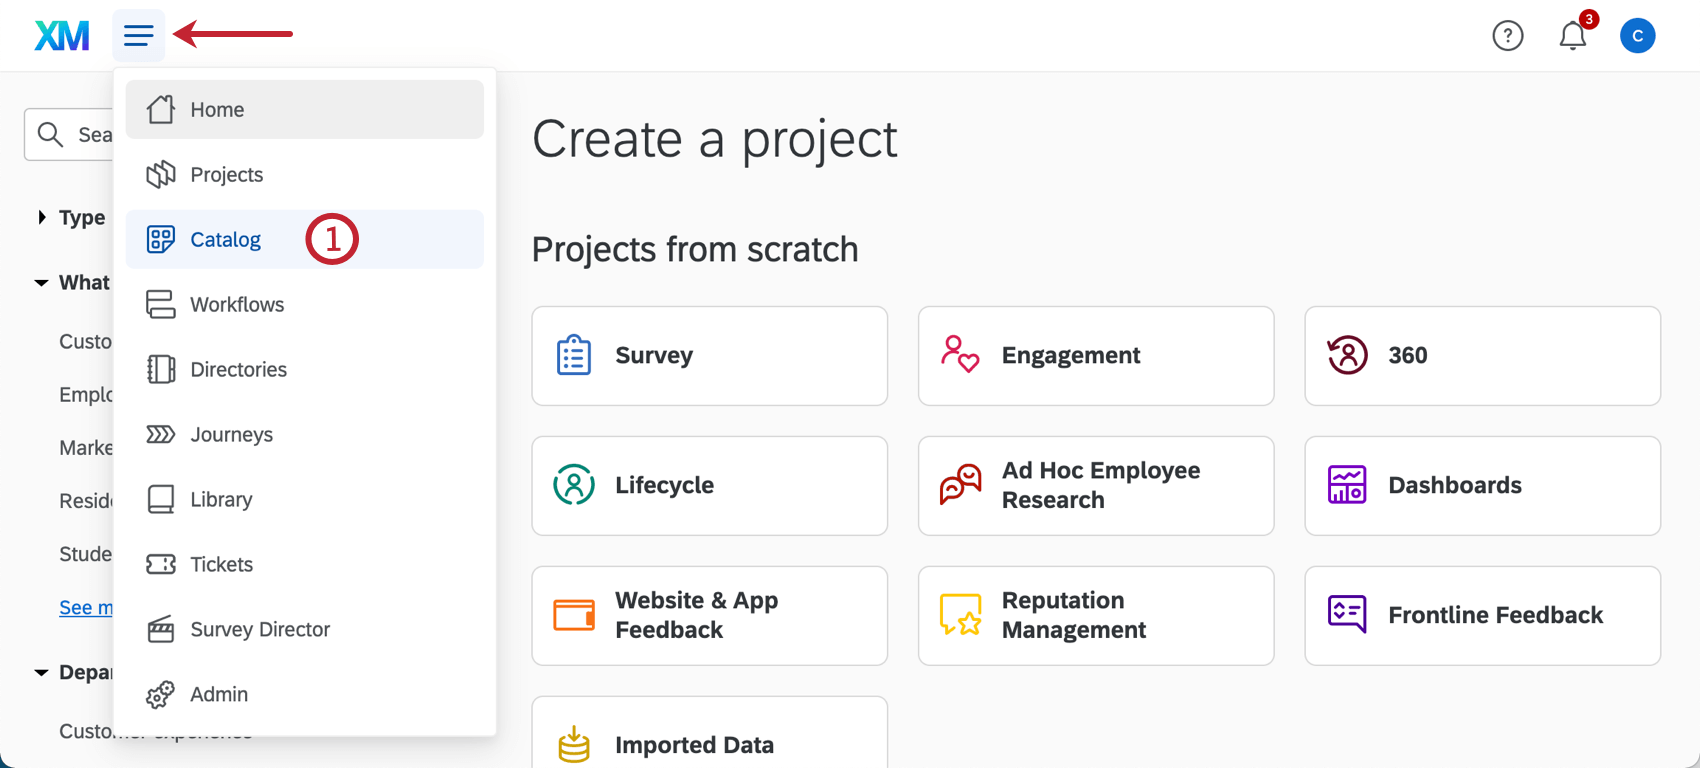 Qtip: A project can also be created from the Projects or Homepage.
 - Scroll, filter, or search as needed to find the correct project type.
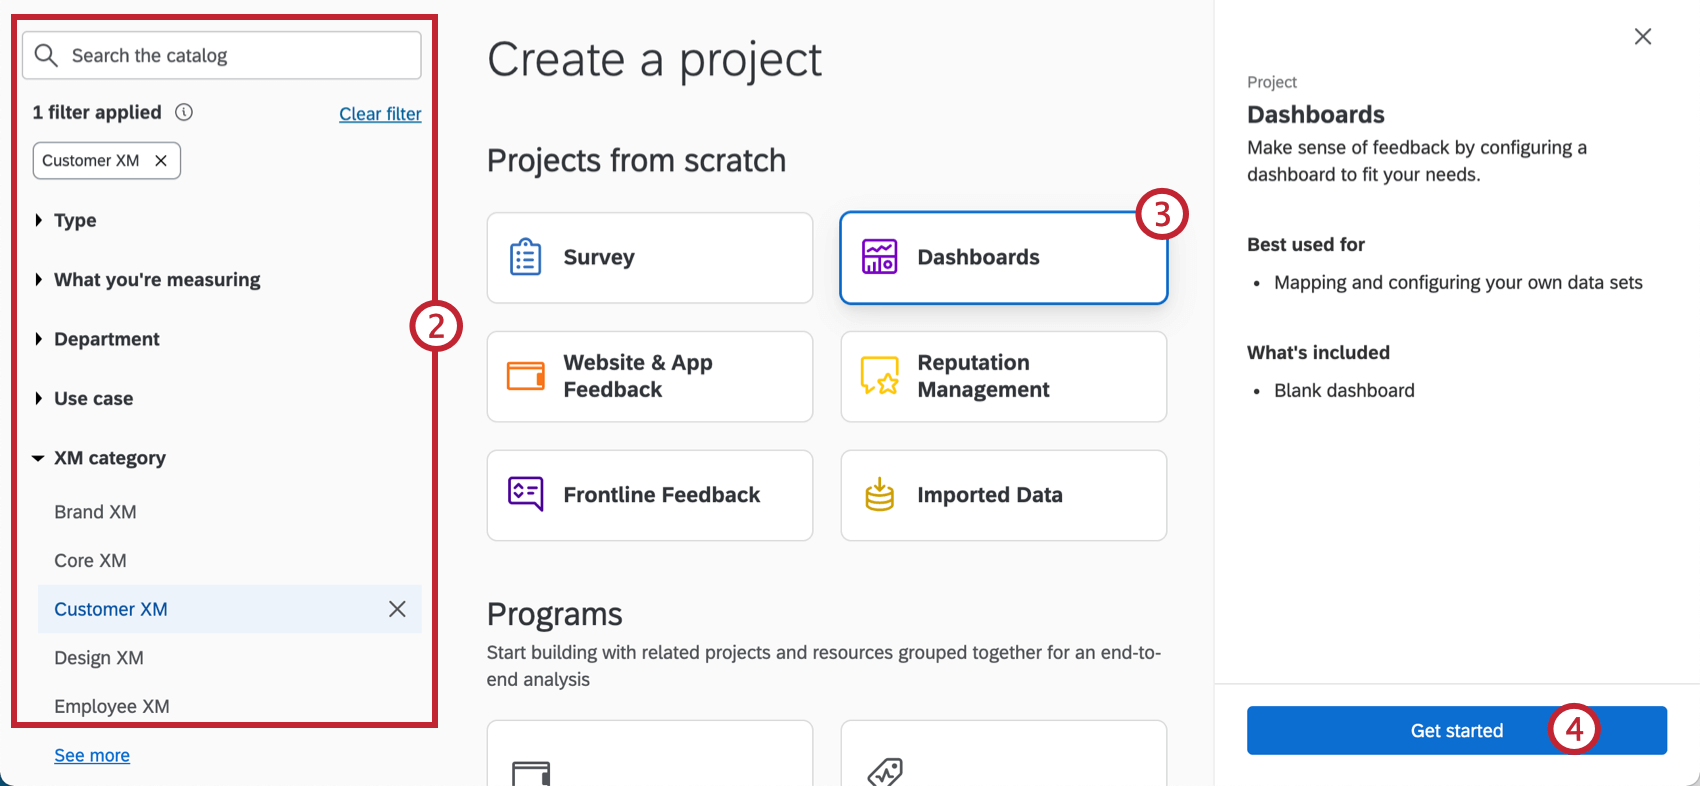
- Select Dashboards.
- Click Get started.
- Name this project. This should be centered more around a program or initiative the dashboard fits into, and less around what you want a specific dashboard to report. For example, we called ours “CX Program Insights” because it will encompass all the dashboards we want to make for our CX Program.
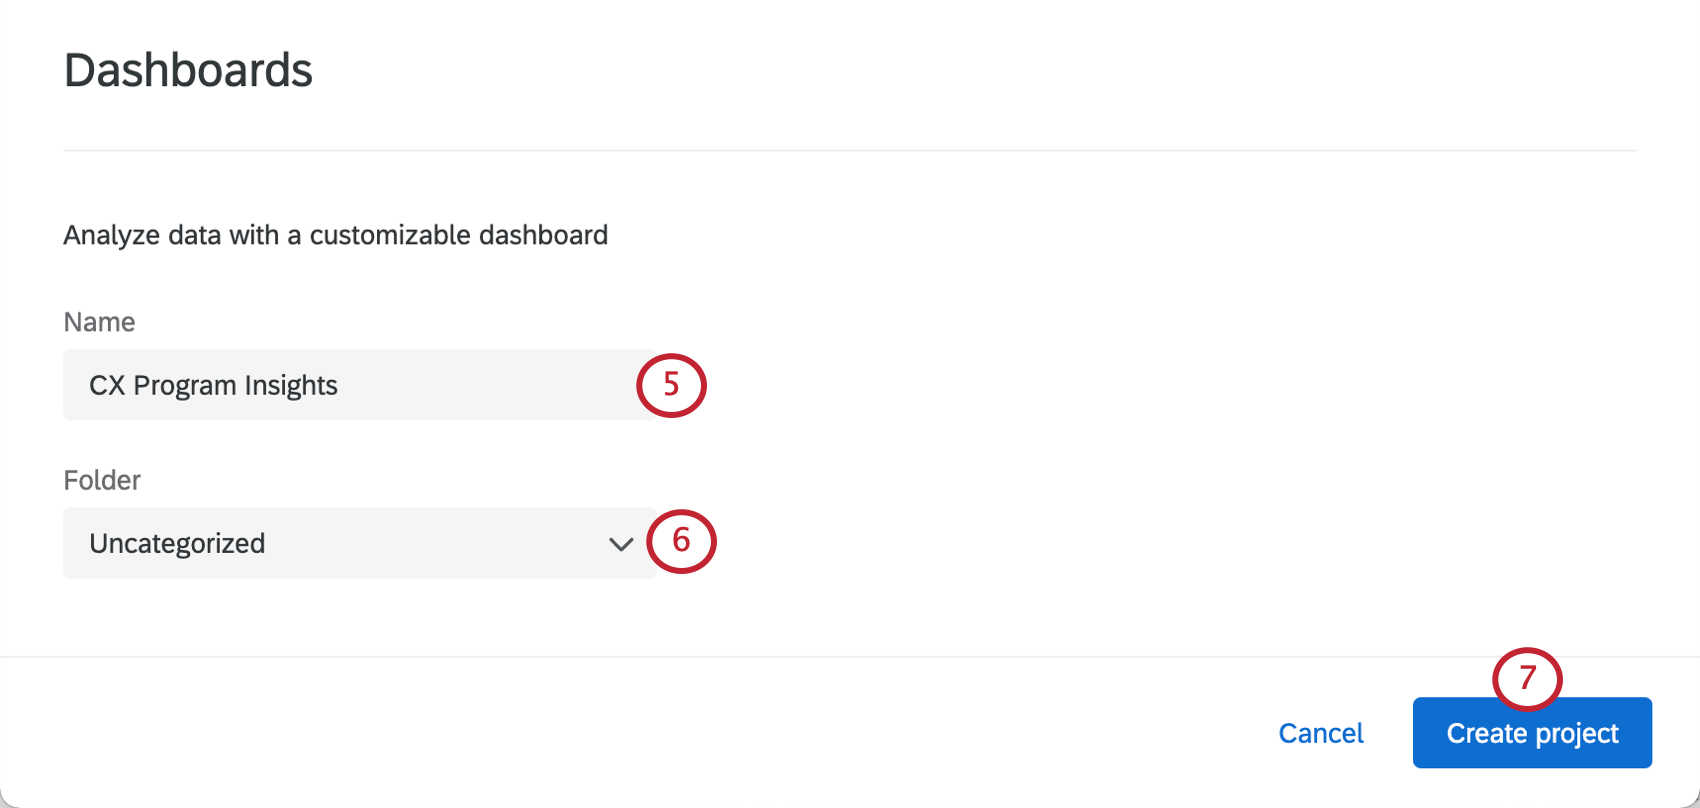 Qtip: You can always rename this later!
 - If desired, add this project to a folder.
- Click Create project.
- You’ll find yourself inside the Dashboards tab of your new project.
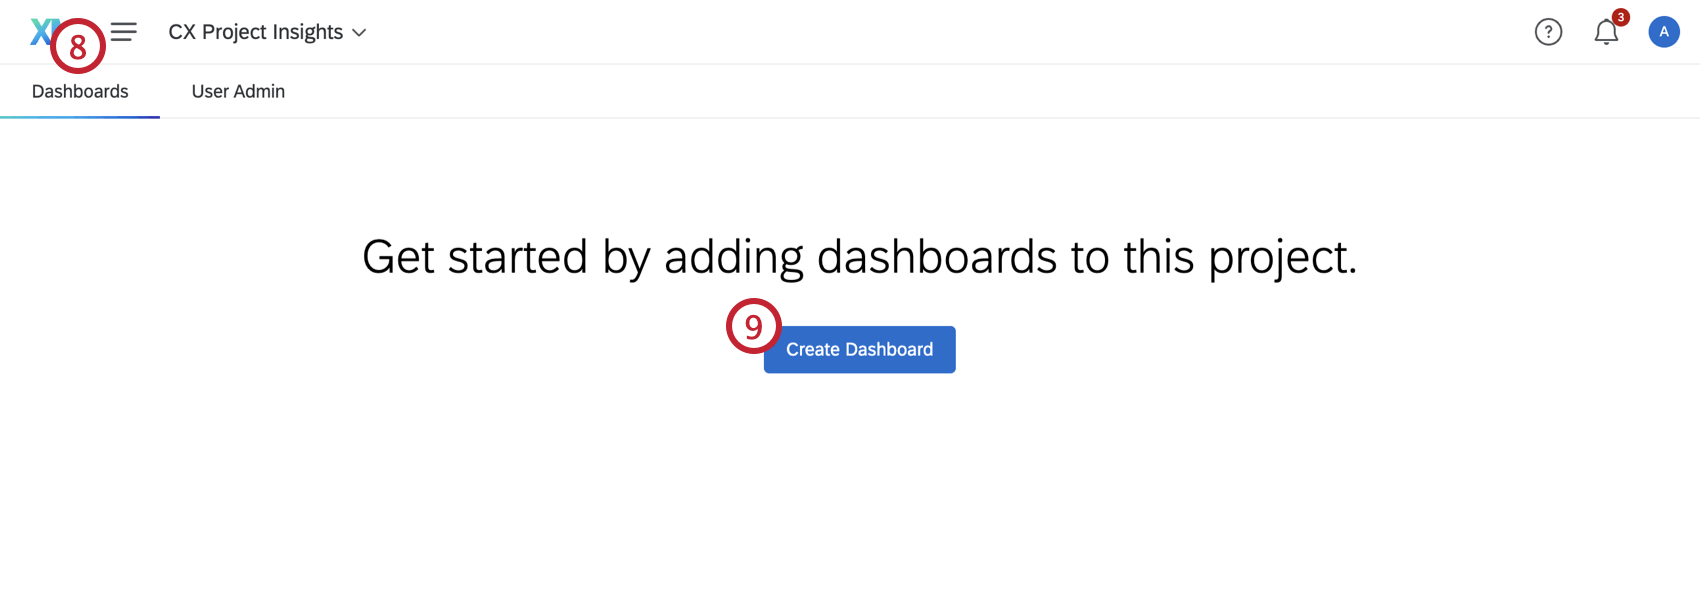
- Click Create Dashboard.
- Name the dashboard. This should reflect the kind of data you want to display. For example, we want to make a dashboard where managers can see their employees’ CSAT comments, so we called it CSAT Dashboard for Managers.
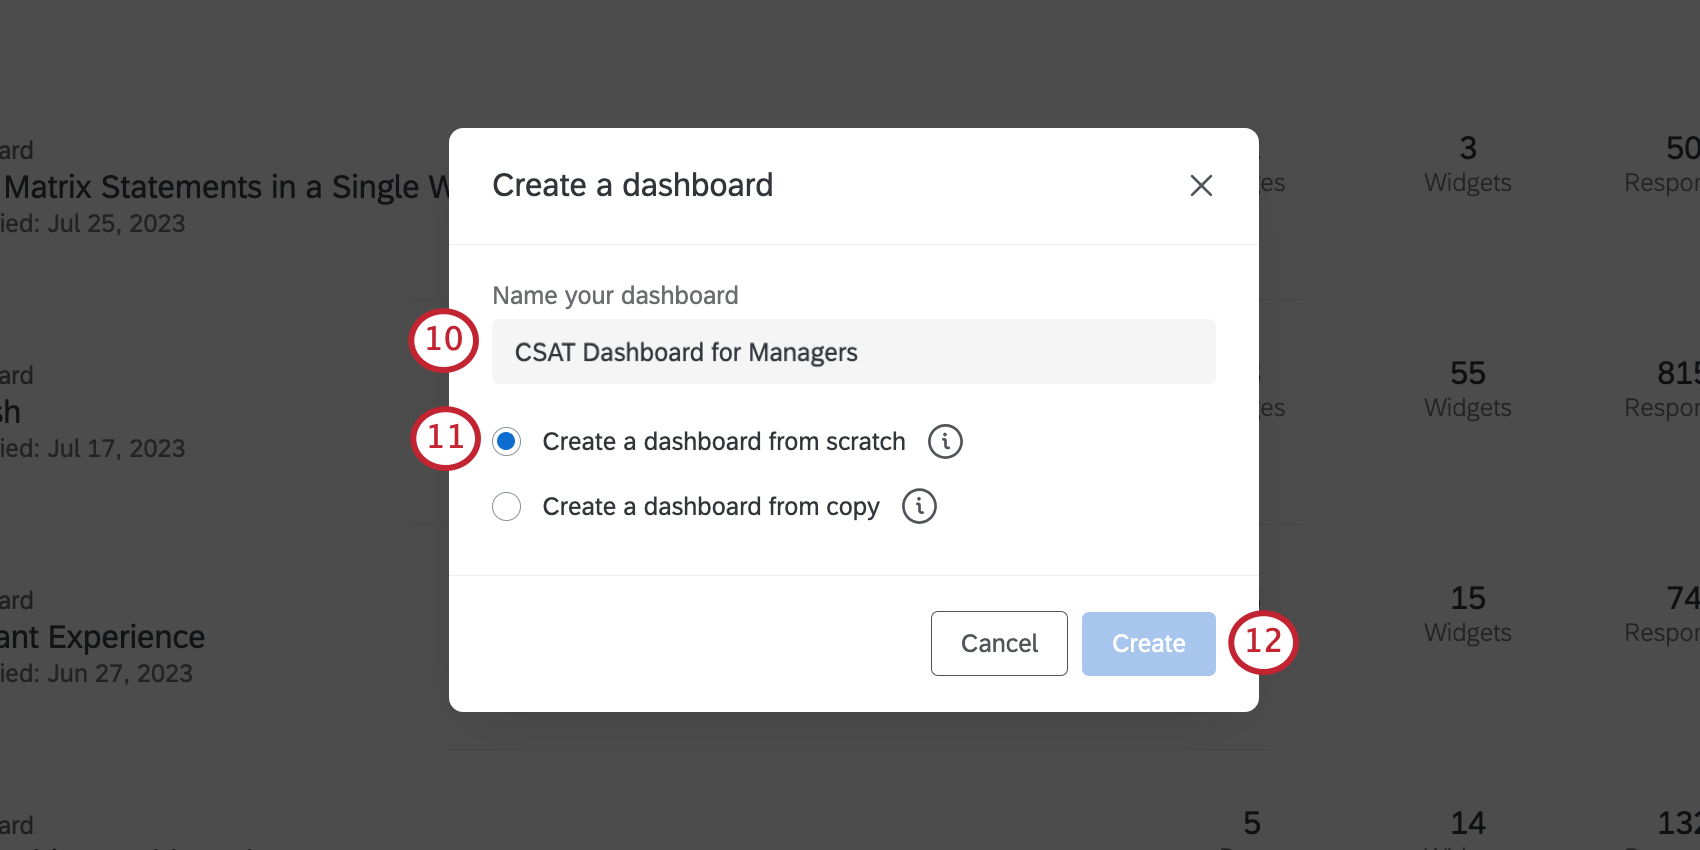
- For our purposes, leave Create a dashboard from scratch selected.
Qtip: To learn more about the other settings, see Managing Dashboards within a Project.
- Click Save.
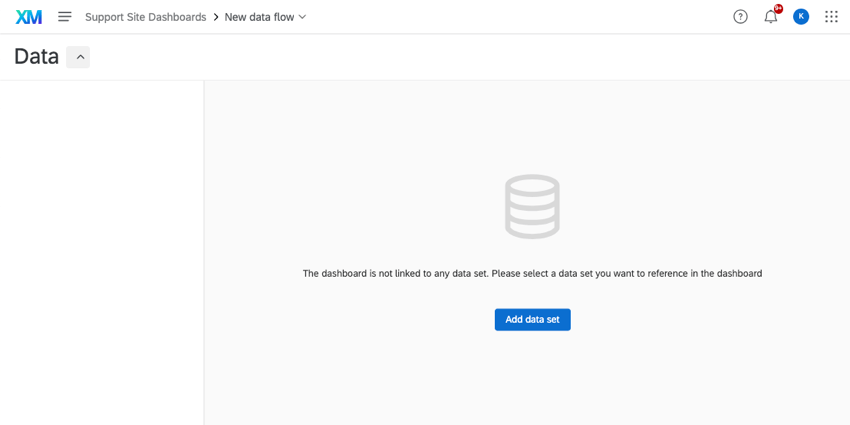
You will be transported to the Dashboard Data tab inside your dashboard, which is where you link up a data source to your dashboard. We’ll go over this in detail in the next page, Step 2: Mapping a Dashboard Data Source.
Dashboards Project vs. Dashboards in a Project
In the steps we just completed, you may have noticed that you didn’t create just one dashboard: you created a project with a dashboard inside it. But when do you decide to make a new project? When do you decide to just add more dashboards to the same project? It partially comes down to who you want to give access, and how much access you want to give them.
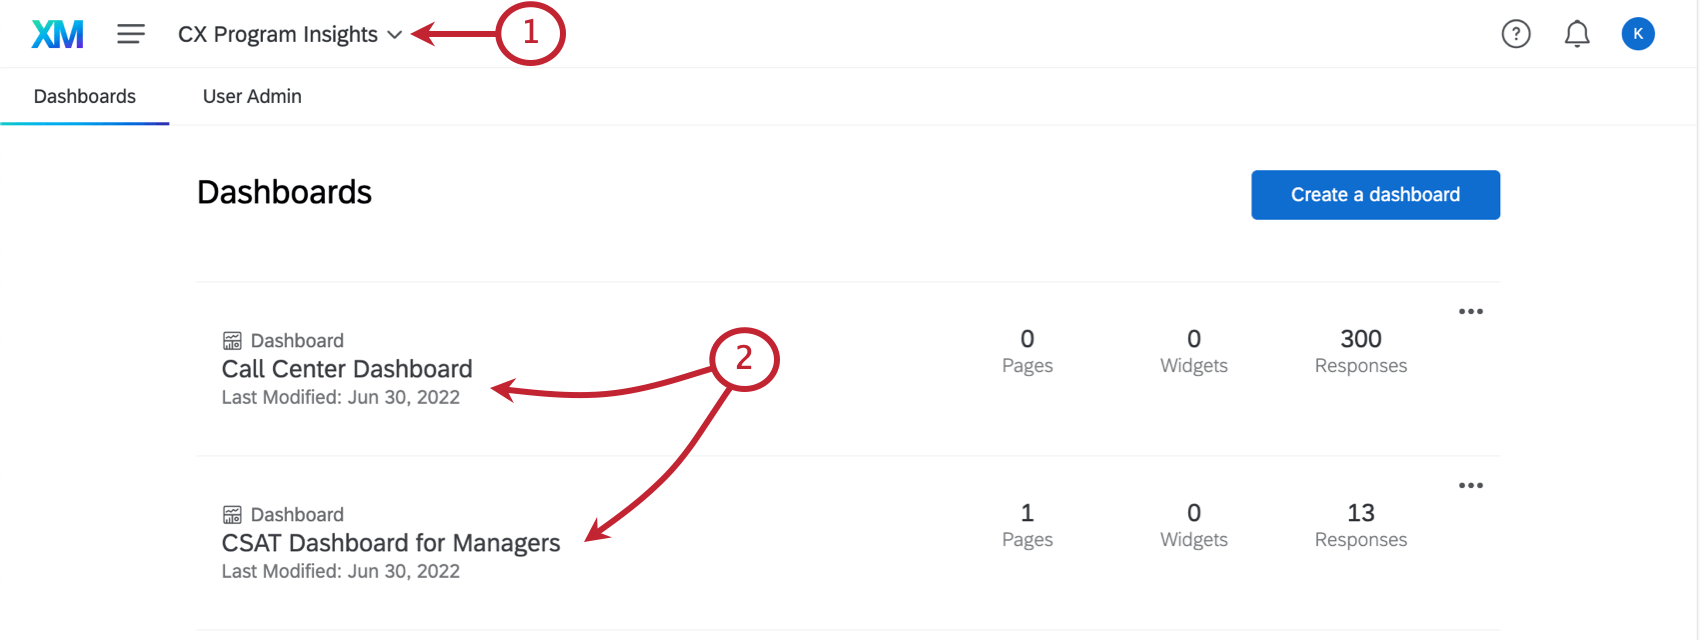
- CX Program Insights: The name of the overall dashboards project.
- CSAT Dashboard for Managers and Call Center Dashboard: Two dashboards inside that project.
Projects can only be created (or renamed, or copied, or moved, or deleted) by project administrators. But when it comes to the main dashboard stuff – editing widgets, filtering pages, making your fields perfect, and all the theming and ticket data and other settings – anyone can be given that access, regardless of whether they’re an administrator. What’s more, this latter group of people (called dashboard users) can be set up to have restricted access to data or even view-only capabilities. Project administrators will always have full editing capabilities and cannot be assigned restricted access.
It’s ultimately your choice when to make a new project and when to add a dashboard to an existing project. Projects are often a larger organization tool for your dashboards. Similar dashboards should probably live in the same project. (Although you can always move dashboards between projects if you change your mind later.) It’s also worth noting that you can create multiple pages on a dashboard, and restrict users’ access by these pages of a dashboard. We’ll discuss this more in the lesson on sharing.
Example: Your CX Program consists of two main initiatives: customer support experience, and website (digital) experience. Because of this, you create two dashboards projects: Customer Support and Digital.
- The Customer Support project has three dashboards inside it.
- A dashboard that shows managers feedback that customers provided on support interactions, which they can filter by employee.
- A second dashboard with general information on the support tickets the team has taken in the last 30 days – their priority, their status, how fast they were resolved, and so on.
- A third dashboard for the support representatives themselves, so they can see how they’re doing on key metrics.
- The Digital project has two dashboards in it.
- A dashboard showing feedback the customers submitted on the website.
- A dashboard for managers showing the website’s performance in key feedback surveys, broken out over time.
Navigating Dashboards on the Projects Page
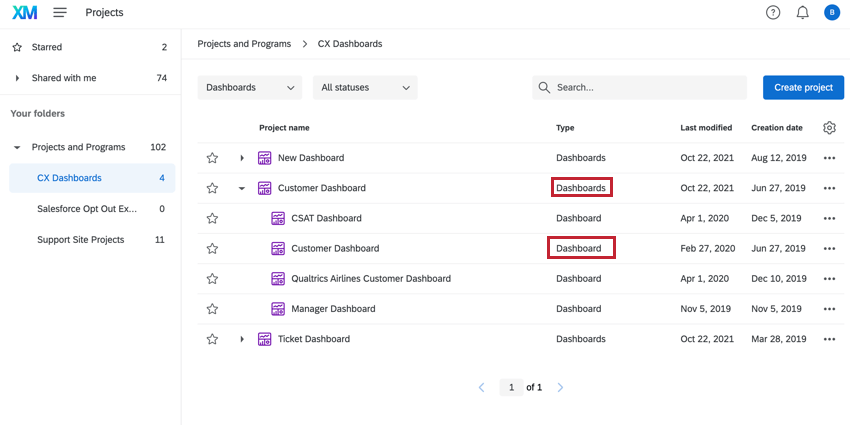
The Projects Page displays your dashboards projects and each individual dashboard you have access to. You can expand a dashboards project to see all dashboards within that project by clicking the arrow next to the dashboards project’s name.
Your dashboard project type is Dashboards while a specific dashboard within that project is a Dashboard. Any dashboards that have been shared with you will be a Dashboard (shared).
You can take various actions on your dashboards and their projects from the Projects page by clicking the three dot menu for that dashboard. The options available to you depend on the type of dashboard you select.
- Dashboards project options: The following project actions are available for dashboards projects:
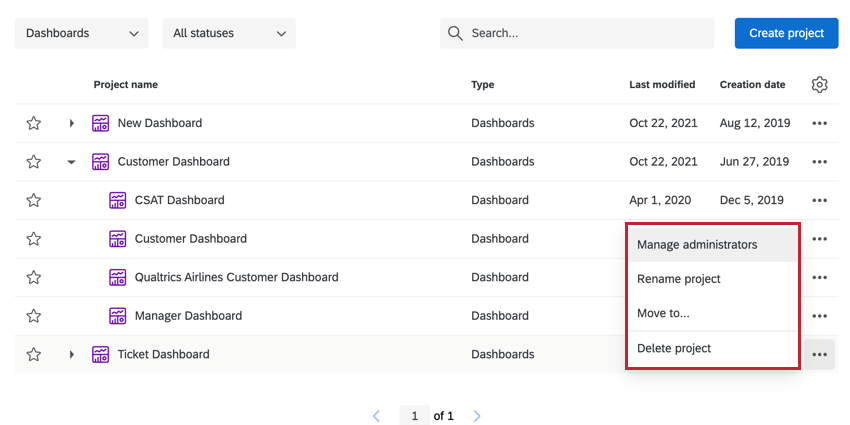
- Manage administrators: Add and remove project administrators.
- Rename project: Rename your CX dashboards project.
- Move to: Move the CX dashboards project to a new folder.
- Delete project: Delete the CX dashboards project. This is irreversible.
- Individual dashboard options: The following project actions are available for an individual dashboard:
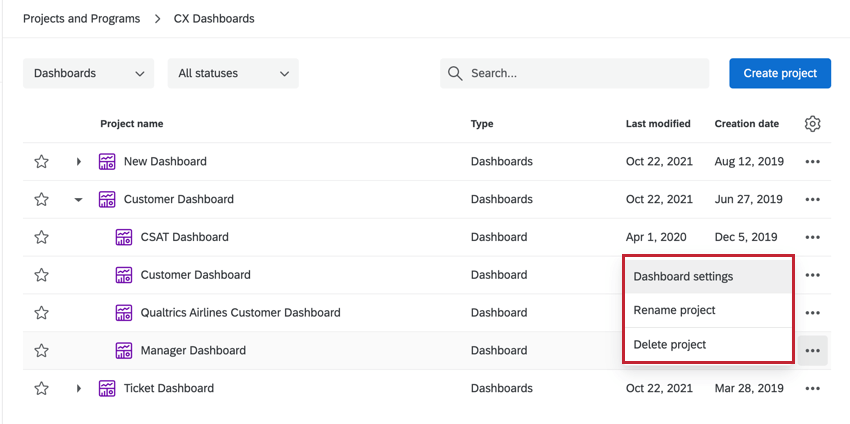
- Dashboard settings: Brings you to the dashboard’s settings to change field mapping, dashboard theme, and more.
- Rename project: Rename your CX dashboard.
- Delete project: Delete the CX dashboard. This is irreversible.