
Organization Hierarchy Inbound Connector
What's on this page
About the Organization Hierarchy Inbound Connector
Attention: To use this feature, your organization will need its own SFTP server. Qualtrics offers SFTP servers for customer use through our Professional Services team. There is a cost associated with this service; however, we guarantee that these servers are compatible with Qualtrics. For more information, please contact our Professional Services team.
Organization hierarchies allow you to upload your organization structure to XM Discover to improve data analytics, user personalization, and data access control. You can use the organization hierarchy inbound connector to upload and update organization hierarchies.
Qtip: Organization hierarchies work the same regardless of where (Studio or Connectors) they are created or maintained.
Preparing an Organization Hierarchy File
Before you can set up an organization hierarchy inbound job, you must make sure your organization hierarchy data is in the proper format and contains your organization structure.
Organization hierarchies can be uploaded using a CSV or Excel (XLS or XLSX) file.
See the Best Practices for Organization Hierarchies for examples and formatting guidelines for each file type.
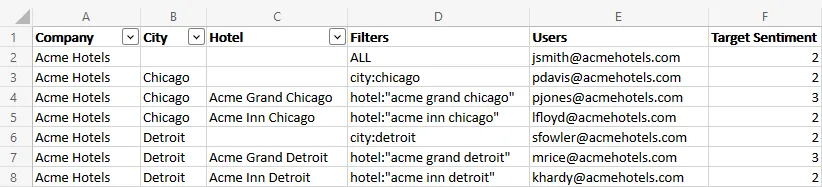
Example: Below is an Excel file showing an example organization structure for a hotel company.
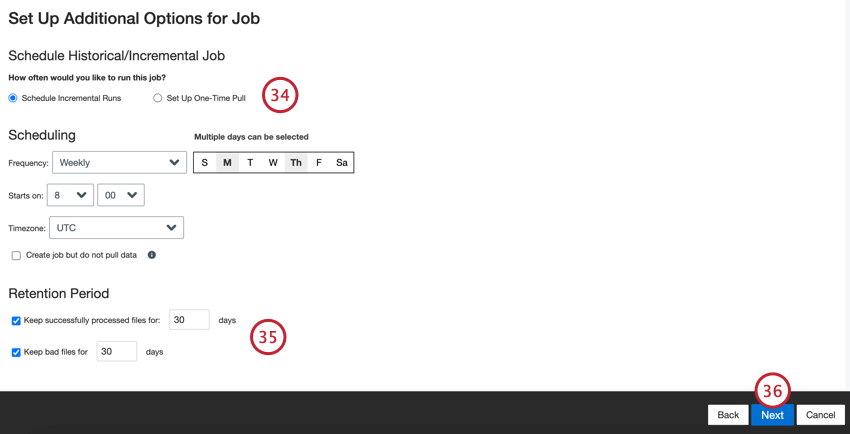
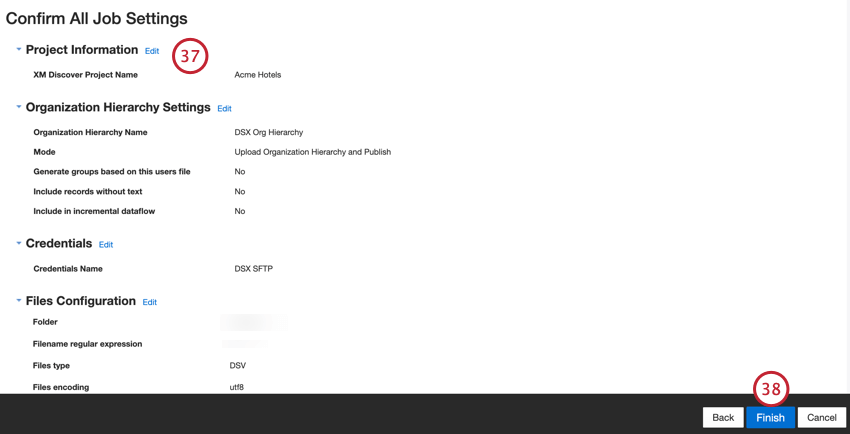
Setting Up an Organization Hierarchy Inbound Job
Qtip: The Manage Jobs permission is required to use this feature.
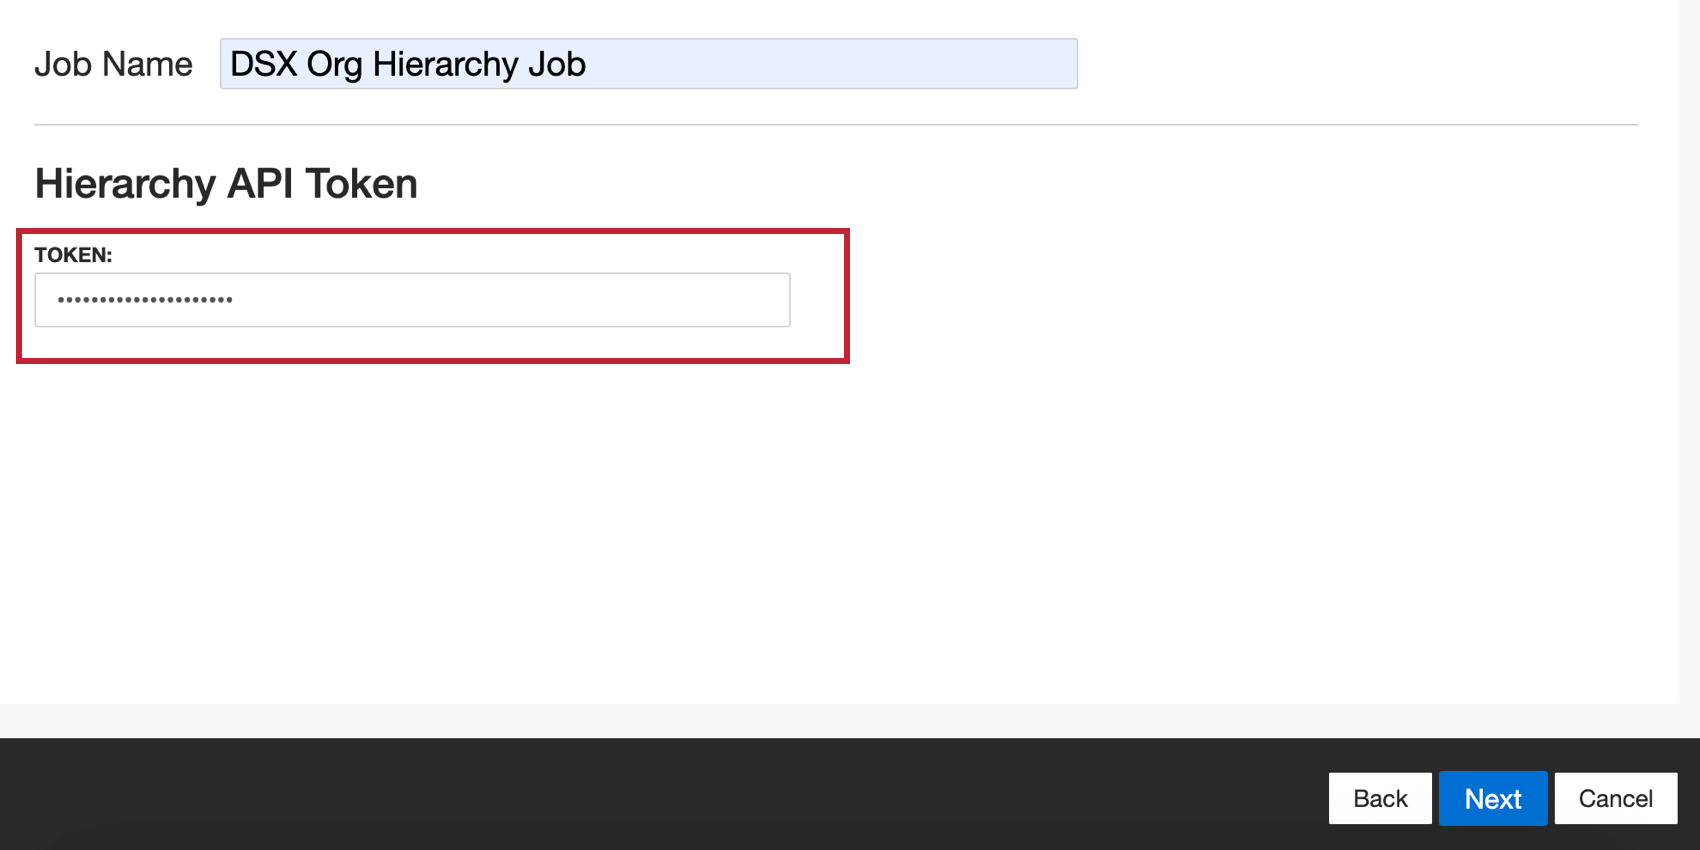
Follow the steps below to set up an organization hierarchy inbound job. This setup requires you to generate a Hierarchy API token in Studio, which is recommended before completing the steps below.

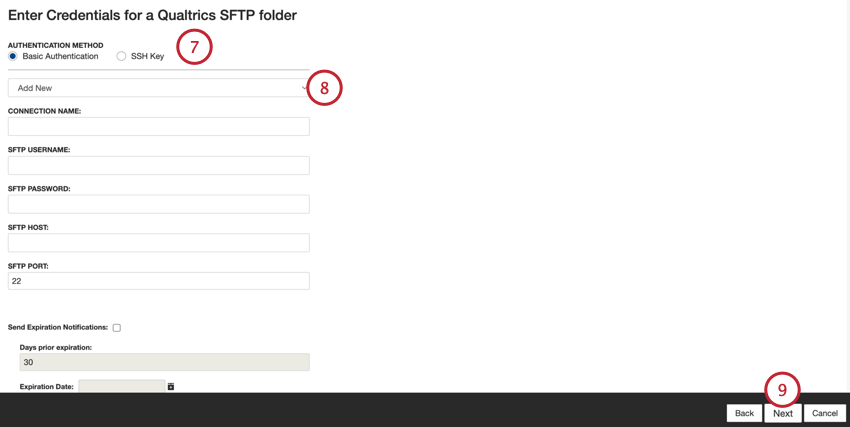
- Basic Authentication: Connect using a username and password.
- SSH Key: Connect using a Secure Shell (SSH) key that you provide, or a key provided by Qualtrics.
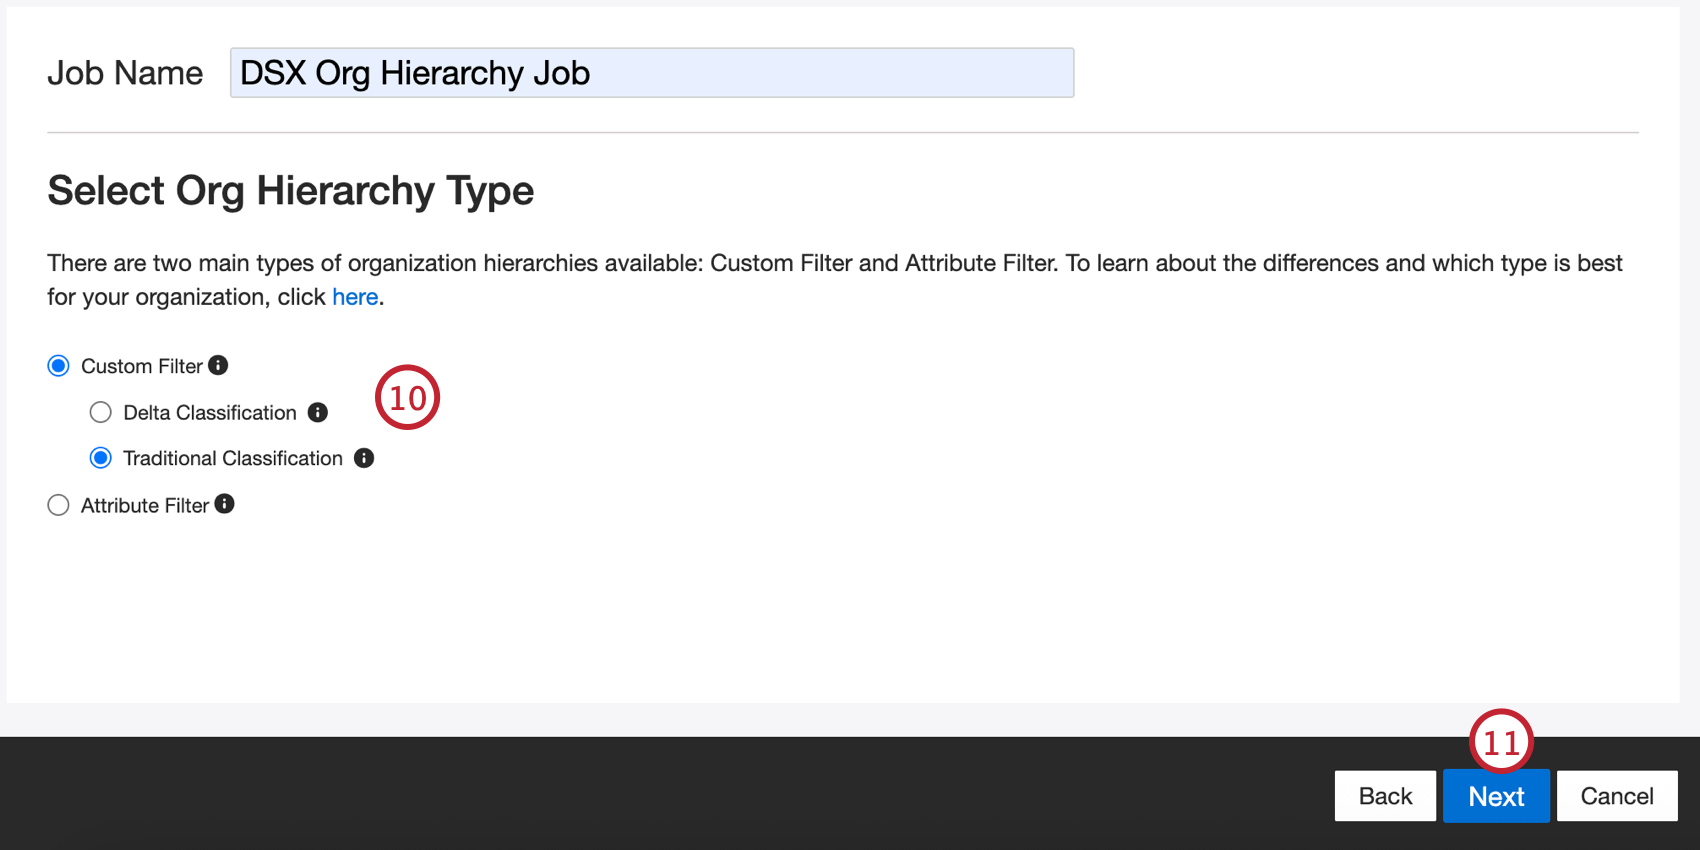
- Custom Filter
- Delta Classification
- Traditional Classification
- Attribute Filter Qtip: Hover over the information icon next to the hierarchy name to learn about it and its use cases.

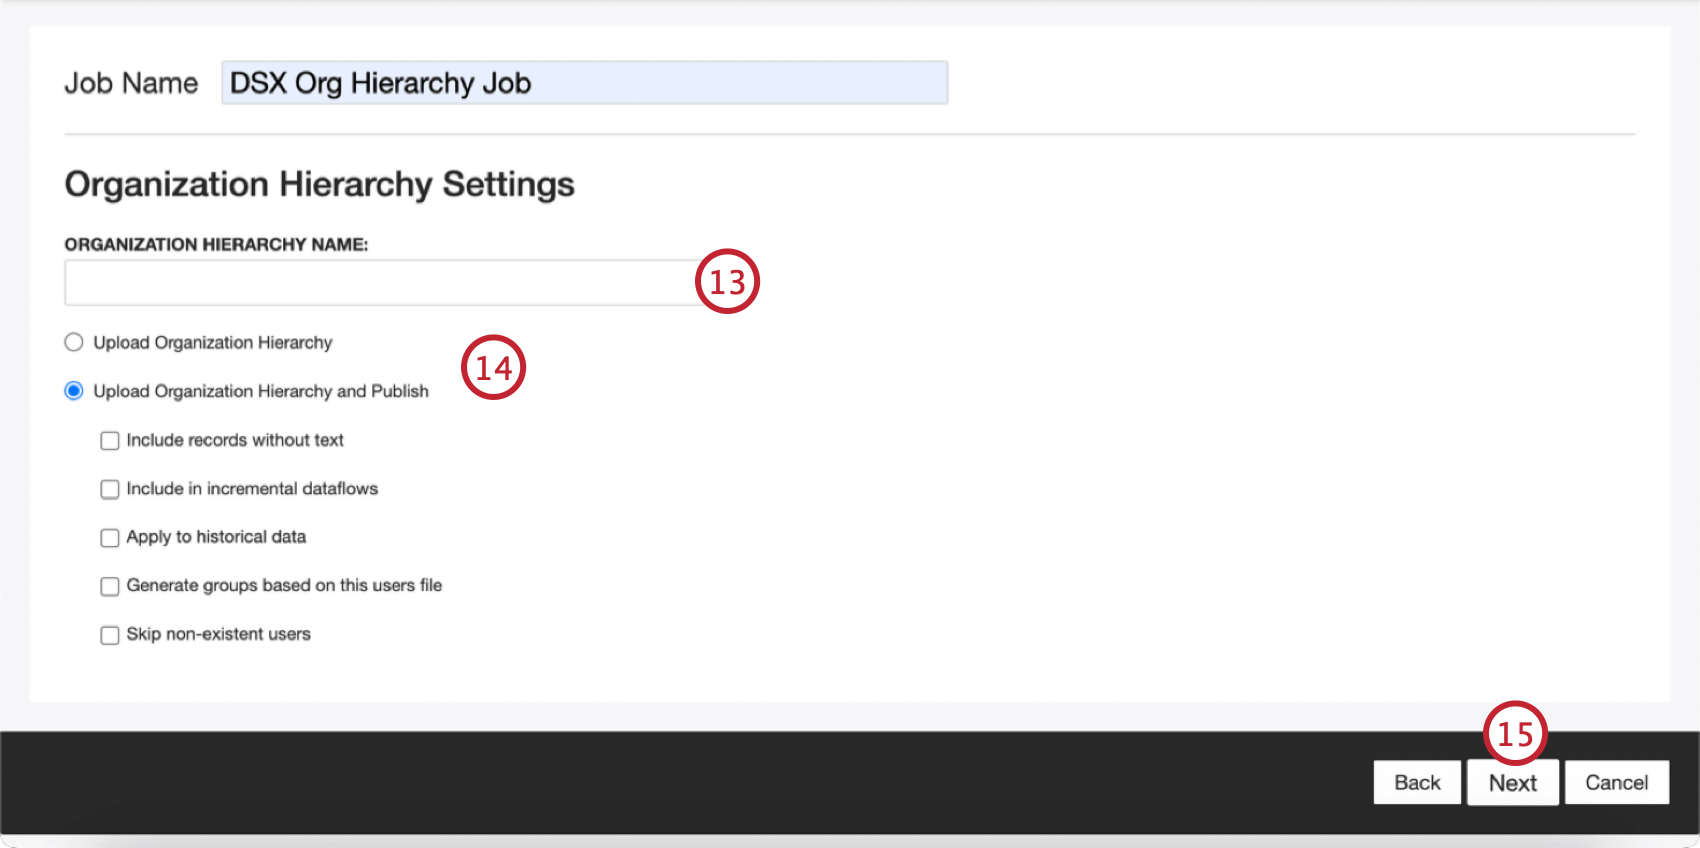
Qtip: You can update an existing hierarchy by making sure the name you enter here matches the existing hierarchy name exactly.
- Delta Classification
- Upload Organization Hierarchy: Create and activate an organization hierarchy. By default, the activated organization hierarchy is unpublished and will only enable dashboard personalization. When enabled, the following suboptions are also available:
- Generate groups based on this users file: Create groups based on the organization hierarchy file.
- Skip non-existent users: Skip users that do not correspond to existing Discover users.
- Upload Organization Hierarchy: Create and activate an organization hierarchy. By default, the activated organization hierarchy is unpublished and will only enable dashboard personalization. When enabled, the following suboptions are also available:
- Upload Organization Hierarchy and Publish: Create, activate, and publish an organization hierarchy. Publishing an organization hierarchy enables you to group data by its levels. This is a prerequisite for peer and parent reporting and target and variance reporting. This also creates a hidden category model to support additional use cases. The model mirrors the structure and filters of the organization hierarchy. When enabled, the following suboptions are also available:
- Include records without text: Include records with empty verbatims in your organization hierarchy.
- Include in incremental dataflows: Include the organization hierarchy in incremental dataflow Qtip: If you expect that publishing an organization hierarchy will conflict with other dataflows, we recommend deselecting this option. The model that gets created and subsequently classified will not block other dataflows if this option is disabled.
- Apply to historical data: Apply the organization hierarchy to historical data.
- Generate groups based on this users file: Create groups based on the organization hierarchy file.
- Skip non-existent users: Skip users that do not correspond to existing Discover users.
- Traditional Classification:
- Upload Organization Hierarchy: Create and activate an organization hierarchy. By default, the activated organization hierarchy is unpublished and will only enable dashboard personalization. When enabled, the following suboption is also available:
- Generate groups based on this users file: Create groups based on the organization hierarchy file.
- Upload Organization Hierarchy and Publish: Create, activate, and publish an organization hierarchy. Publishing an organization hierarchy enables you to group data by its levels. This is a prerequisite for peer and parent reporting and target and variance reporting. This also creates a hidden category model to support additional use cases. The model mirrors the structure and filters of the organization hierarchy. When enabled, the following suboptions are also available:
- Include records without text: Include records with empty verbatims in your organization hierarchy.
- Include in incremental dataflows: Include the organization hierarchy in incremental dataflow Qtip: If you expect that publishing an organization hierarchy will conflict with other dataflows, we recommend deselecting this option. The model that gets created and subsequently classified will not block other dataflows if this option is disabled.
- Generate groups based on this users file: Create groups based on the organization hierarchy file.
- Upload Organization Hierarchy: Create and activate an organization hierarchy. By default, the activated organization hierarchy is unpublished and will only enable dashboard personalization. When enabled, the following suboption is also available:
- Attribute Filter
- Skip non-existent users: Skip users that do not correspond to existing Discover users.

- Delimiter-separated “flat” Files
- Excel Files (XLS, XLSX)

- File encoding: Choose the file’s encoding system (UTF-8, ASCII, etc)
- Delimiter character: Enter the character used to delimit data entries. By default, this is a comma for CSV files.
- Enclosure character: Enter the character that encloses data entry. Leave this field blank if “No enclosure” is selected.
- No enclosure: Enable this option if your file does not contain enclosure characters.
Qtip: When choosing a folder path, you can click on a folder icon to expand that folder. Click on the folder name to select that folder, and then click Ok when done.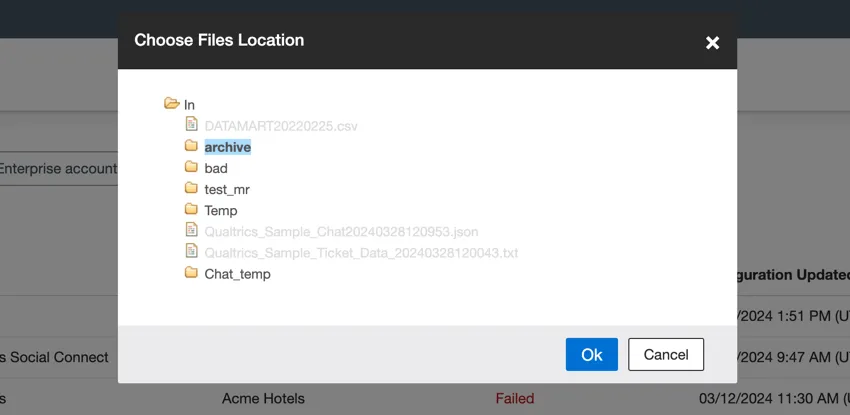

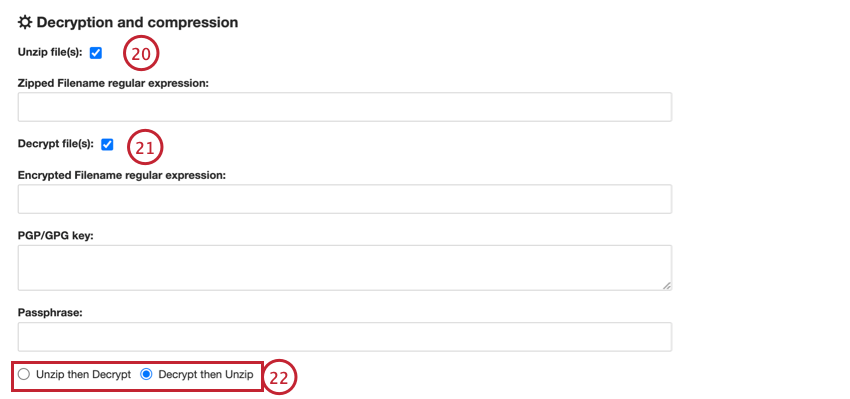
- Encrypted Filename regular expression: Enter the filename regular expression for files that should be decrypted.
- PGP/GPG key: Enter the PGP/GPG key used for encryption.
- Passphrase: Enter the passphrase for decryption.
- Unzip then Decrypt: Files are decompressed and then decrypted.
- Decrypt then Unzip: Files are decrypted and then decompressed.
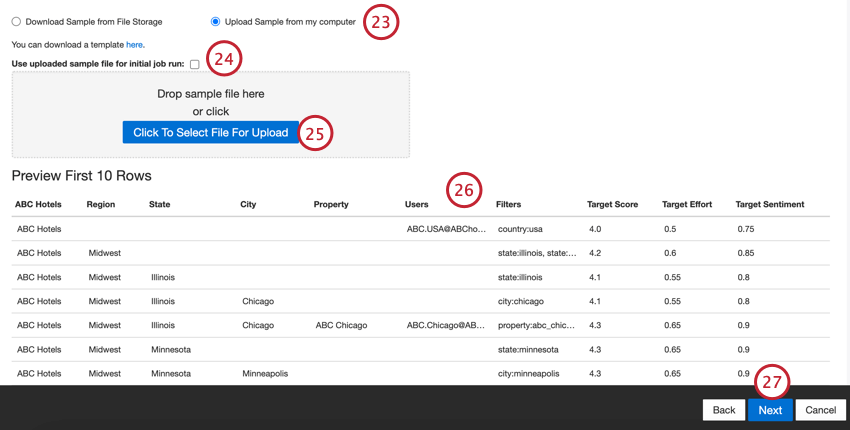
- Select Download Sample from File Storage if the sample file is saved on your SFTP server.
- Select Upload sample from my computer if the sample is saved to your computer. Qtip: If needed, you can download a template file by clicking the here link displayed in the job setup.
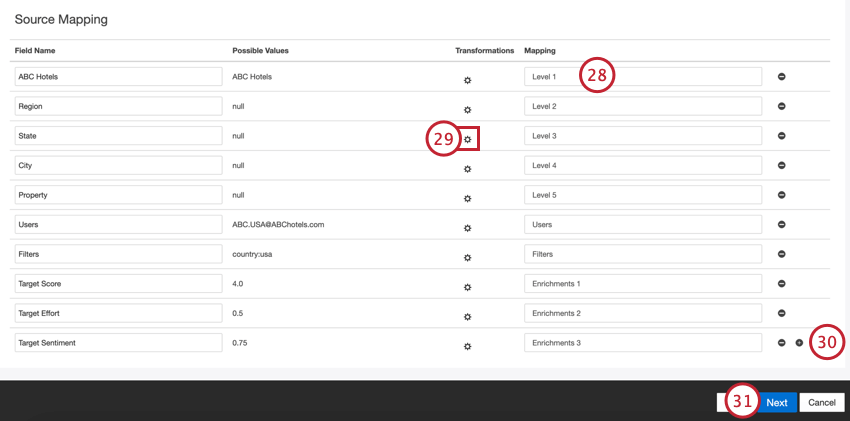
- Level 1 to Level 10: Define the structure of your hierarchy. The maximum number of hierarchy levels is 10.
- Users: Map the users to your hierarchy.
- Filters: Define the filters for your hierarchy.
- Enrichments: Create enrichment parameters for your hierarchy. The maximum number of enrichments is 6.
That's great! Thank you for your feedback!
Thank you for your feedback!