-

Qualtrics Platform -

Customer Journey Optimizer -

XM Discover -

Qualtrics Social Connect
Jobs Page Overview
About the Jobs Page
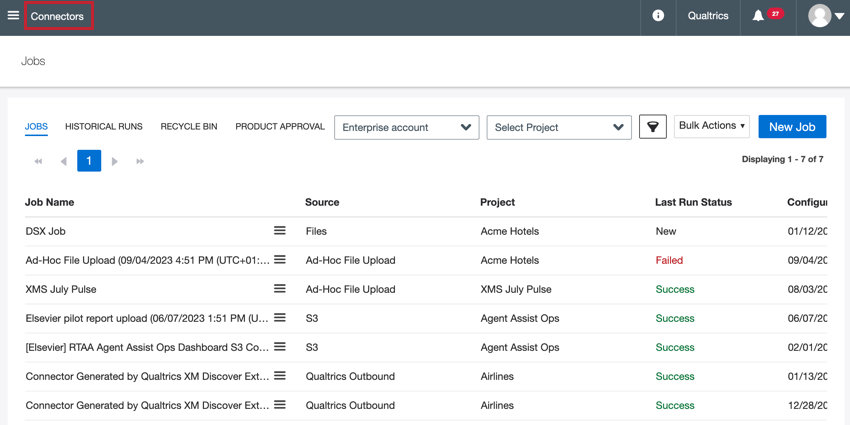
The Jobs page in XM Discover allows you to configure and manage the jobs that import and export data to and from XM Discover. Click the Connectors link in the top left corner of your account to go to the Jobs page.
The Jobs page contains the following subsections:
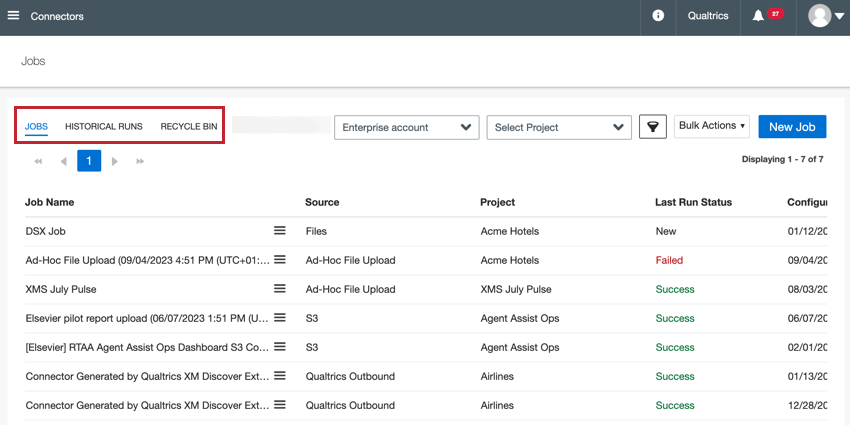
- Jobs: Manage existing jobs and create new jobs.
- Historical Runs: View past job runs.
- Recycle Bin: Restore or permanently delete any deleted jobs.
Sorting & Filtering Jobs
You can sort the displayed jobs by clicking on the column name that you want to sort by.
You can also filter the displayed jobs based on custom criteria:
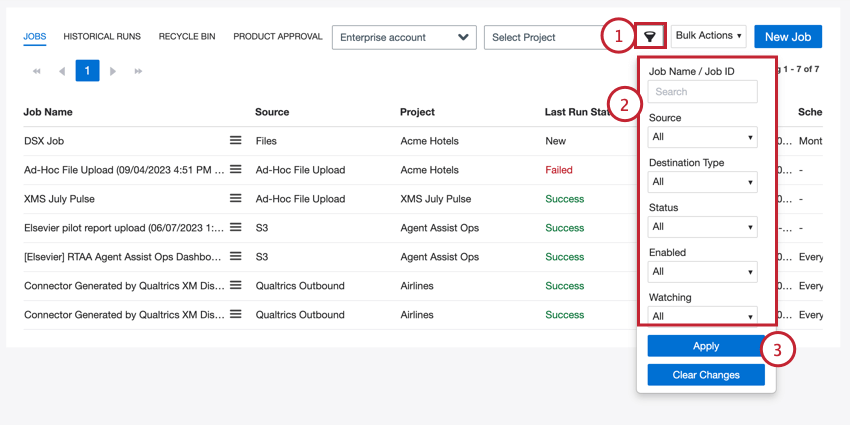
- Click the filter icon at the top of the page.
- Add your filter criteria. You can filter by:
- Job Name / Job ID: Enter the name or job ID of a specific job.
- Source: Choose the specific Connector sources.
- Destination Type: Choose the destination type (project or staging table).
- Status: Select the desired status.
- Enabled: Choose enabled or disabled jobs.
- Watching: Select jobs that are watched or are not being watched.
- Click Apply.
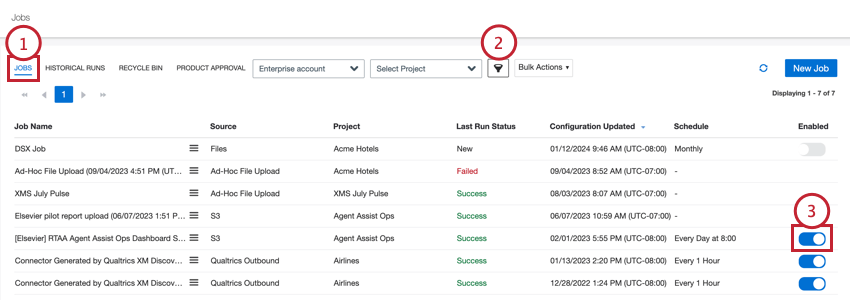
Jobs Tab
The Jobs tab of the Jobs page lists all of the jobs that you have permission to see. You can manage any of the jobs listed here, or create new jobs for any Connectors you have available.
The Jobs tab displays the following information about your available jobs:
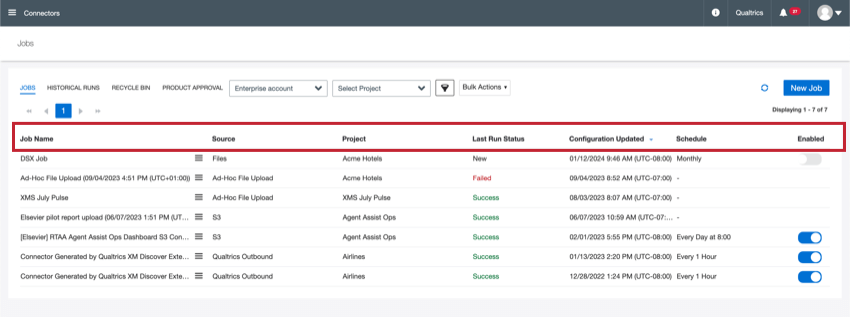
- Job Name: The name of the job.
Qtip: Click the job name to view the job summary.
- Source: The job’s data source.
- Project: The name of the XM Discover project into which data is uploaded.
- Last Run Status: The status of the job’s most recent run. For details, please see Job Statuses.
Qtip: Click the job status to view details about the job’s most recent run.
- Configuration Updated: The time of the most recent job update. By default jobs are sorted by this column with most recently updated jobs at the top.
- Schedule: The current schedule for the job. An empty schedule means the job is not scheduled to run.
- Enabled: A toggle that lets you temporarily disable or enable a job.
Historical Runs Tab
The Historical Runs tab of the Jobs page allows you to view past job runs. This tab displays the following information about your historical job runs:
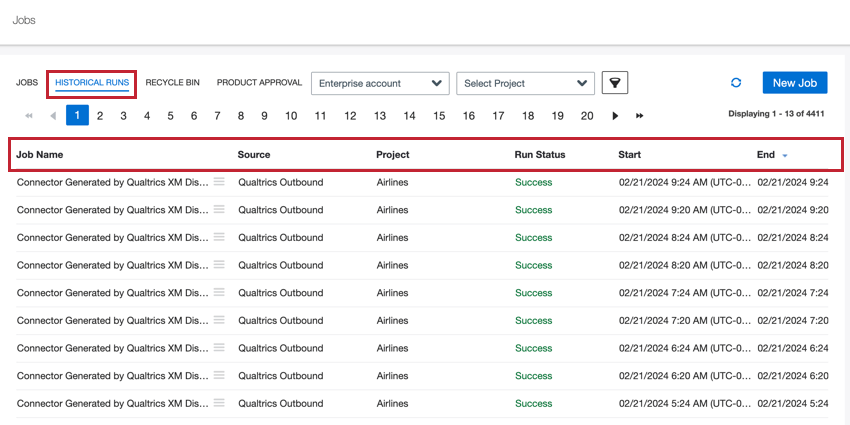
- Job Name: The name of the job.
Qtip: Click the job name to view the job summary.
- Source: The job’s data source.
- Project: The name of the XM Discover project into which data is uploaded.
- Run Status: The job’s status.
Qtip: Click the job’s status to view more details about the job.
- Start: Upload session start time.
- End: Upload session end time.
- Duration: Upload session duration.
Recycle Bin Tab
The Recycle Bin tab contains any jobs you’ve deleted. From this tab, you can:
- Permanently delete a job
- Restore a job
- Extend a job’s holding period (delay it from being permanently deleted).
When viewing the deleted jobs in this tab, the following information about the jobs are available:
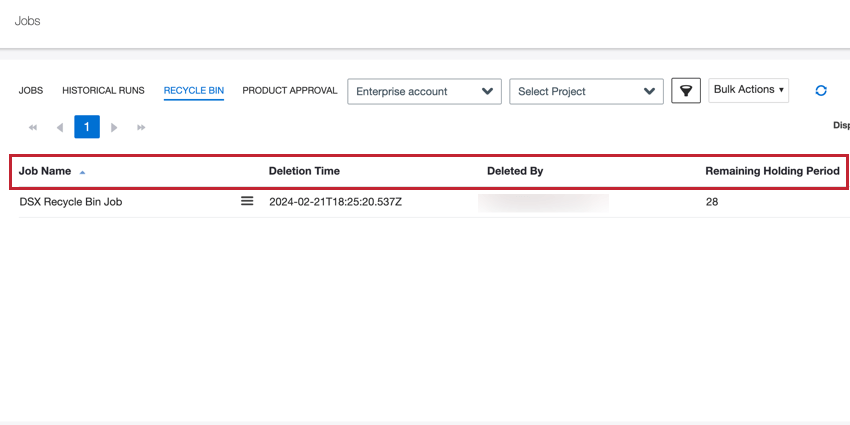
- Job Name: The name of the job.
Qtip: Click the job’s name to view the job summary.
- Deletion Time: The time the job has been deleted.
- Deleted By: The user who deleted the job.
- Remaining Holding Period: The number of days the job will remain in the recycle bin until being permanently deleted.
Creating a Job
To upload data from a particular source, you need to create a job for the corresponding Connector. You can create multiple jobs uploading data from the same source with different parameters, such as pulling different types of feedback or running on different schedules.
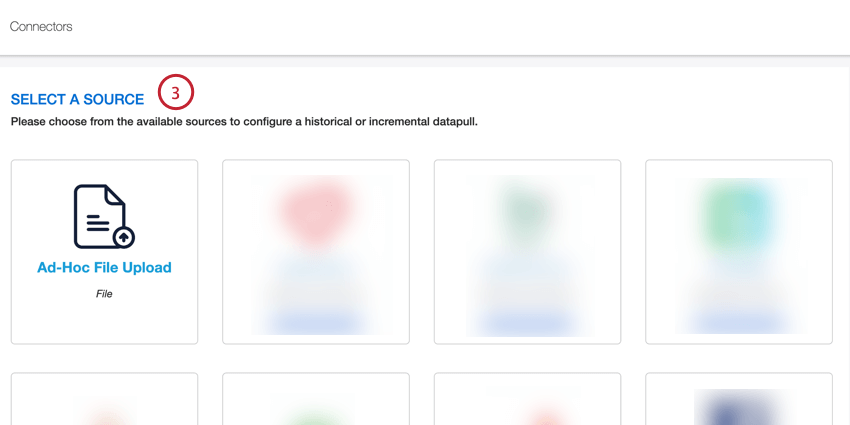
To create a job:
- Choose the project you want to create the job in.
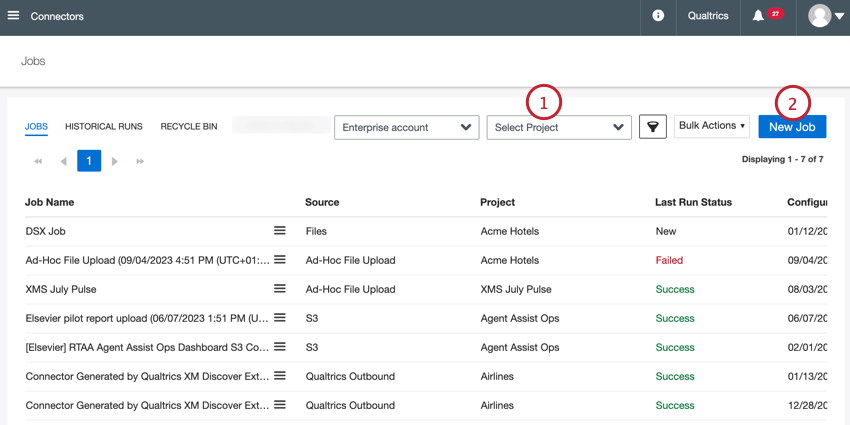
- Click New Job.
- Choose the Source Connector that contains the data you want to import.
 Qtip: Contact your Discover Representative if you have questions about what connectors are available for your license. If you don’t have your representative’s contact information, you can contact the Discover Support Team instead.
 - The remaining steps depend on your specific Connector. See the documentation for your selected Connector for more information. Below are the most commonly used Connectors:
Enabling & Disabling Jobs
You can enable or disable a job at any time. By default, jobs are enabled when they are created.
- Navigate to the Jobs tab.
- If needed, filter for the job you want to enable or disable.
- Toggle the Enabled switch on or off.
Qtip: You can’t disable ad-hoc upload jobs since they are a one-time occurrence.
When a recurring job is disabled, it will no longer run on its defined schedule. You can still retrieve data for a disabled job and it will remain disabled until manually enabled by following the above steps.
Job Statuses
Connectors jobs can have different statuses that represent the job’s progress. This section will cover the different statuses and what they can tell you about that particular job run.
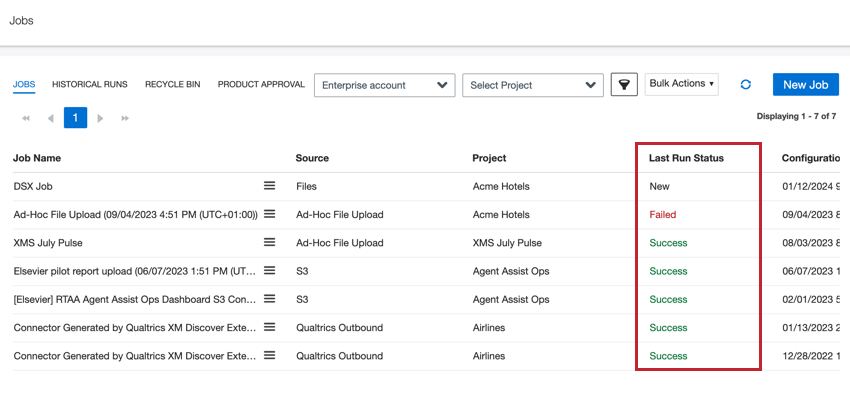
The following statuses are available:
- New: A new job that has not run yet.
- Success: All available records were pulled successfully and no duplicates were found.
- Success (with Skipped): All available records were pulled successfully, but some duplicates found and skipped.
- Partial Success: All available files were processed and one or more files have not processed successfully. Click the status to view and download statistics on all processed files, including files that failed to process.
Qtip: This job status is only available for files connector jobs.
- In Progress: A job is in the process of pulling records. Click the to monitor the running job’s progress and view statistics on processed records.
- Queued: A job is scheduled to run.
- Failed: There was a problem with the job or it has been terminated. When a job fails, all of its watchers are notified. Click on the status to view an error message about why the job failed.
- Destination Unavailable: There was a problem connecting to the Designer instance hosting the target project. A job with this status restarts periodically. If all of the retries are unsuccessful, then the job status changes to “Failed.”
- Service Failure: There was a problem connecting to the external service. A job with this status restarts periodically. If all of the retries are unsuccessful, then the job status changes to “Failed.”
- Timed Out: A job took too long to complete so it was stopped. A job with this status restarts periodically. If all of the retries are unsuccessful, then the job status changes to “Failed.”
- Validating Attributes: A job is in the process of validating attributes. This check aims to confirm that all the attributes are mapped correctly before data is ingested into XM Discover. If attribute validation fails, the job status will change to “Failed” and remain disabled until the attribute issue or conflict is resolved.
- Waiting for Attributes Validation: A job is waiting for attributes validation.
- Terminating: A job is in the process of being terminated.
Job Options
There are a variety of options available to you to manage your existing jobs. Different jobs have different options available to them.
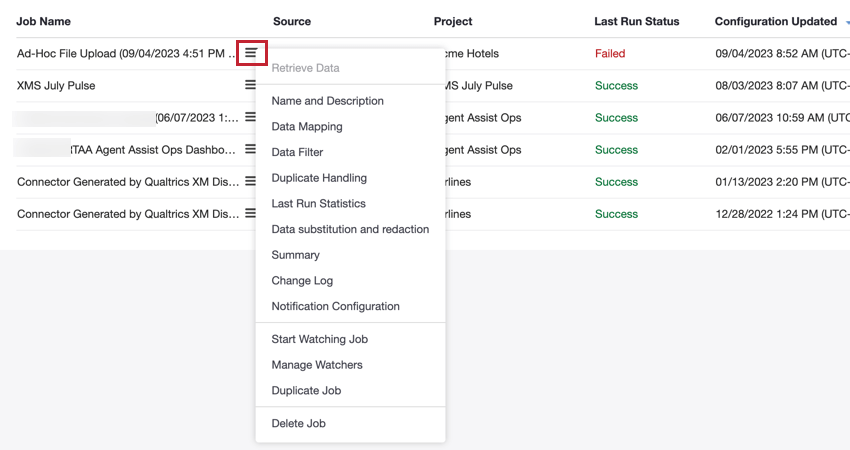
See the Job Options support page for an overview of every available option.