
Managing Custom Solutions
What's on this page
About Custom XM Solutions
XM Solutions guide users through the creation of a project with premade content. Custom XM Solutions are made specifically to meet the needs of your organization, and are locked so that users can’t make changes to the survey or reports.
If you’re an administrator in a Qualtrics license, Custom XM Solutions are there to help you ensure users on your license are only using pre-approved company material in their Qualtrics projects. For example, this can be valuable if you want to make sure your Employee Experience program’s standards are met or legal and privacy requirements are accounted for.
This support page focuses on how administrators can request or maintain Custom XM Solutions.
Getting a Custom XM Solution Made for Your Organization
Custom XM Solutions can be created for you by one of our teams at Qualtrics, such as Implementation or Engineering Services. We will work with you to develop what the solution’s survey and report should look like, and once it’s complete, make it available in the catalog for your team members to use.
If you’re interested in purchasing Custom XM Solutions, please reach out to your Account Executive.
Changes to Custom XM Solutions
Since they were created to serve as standardized templates, you cannot edit Custom XM Solutions directly. Further customization to existing Custom XM Solutions will need to be added by our team here at Qualtrics.
If you’d like to make changes to Custom XM Solutions your company owns, Brand Administrators can reach out to their Technical Success Manager to learn more about the Implementation Services required.
Qtip: If you are an end-user rather than a Brand Administrator, it is important to remember that Custom XM Solutions are meant to help you comply with a standard set by your company. Brand Administrators may not pass your change request to the Qualtrics team if it does not fit your company’s policy.
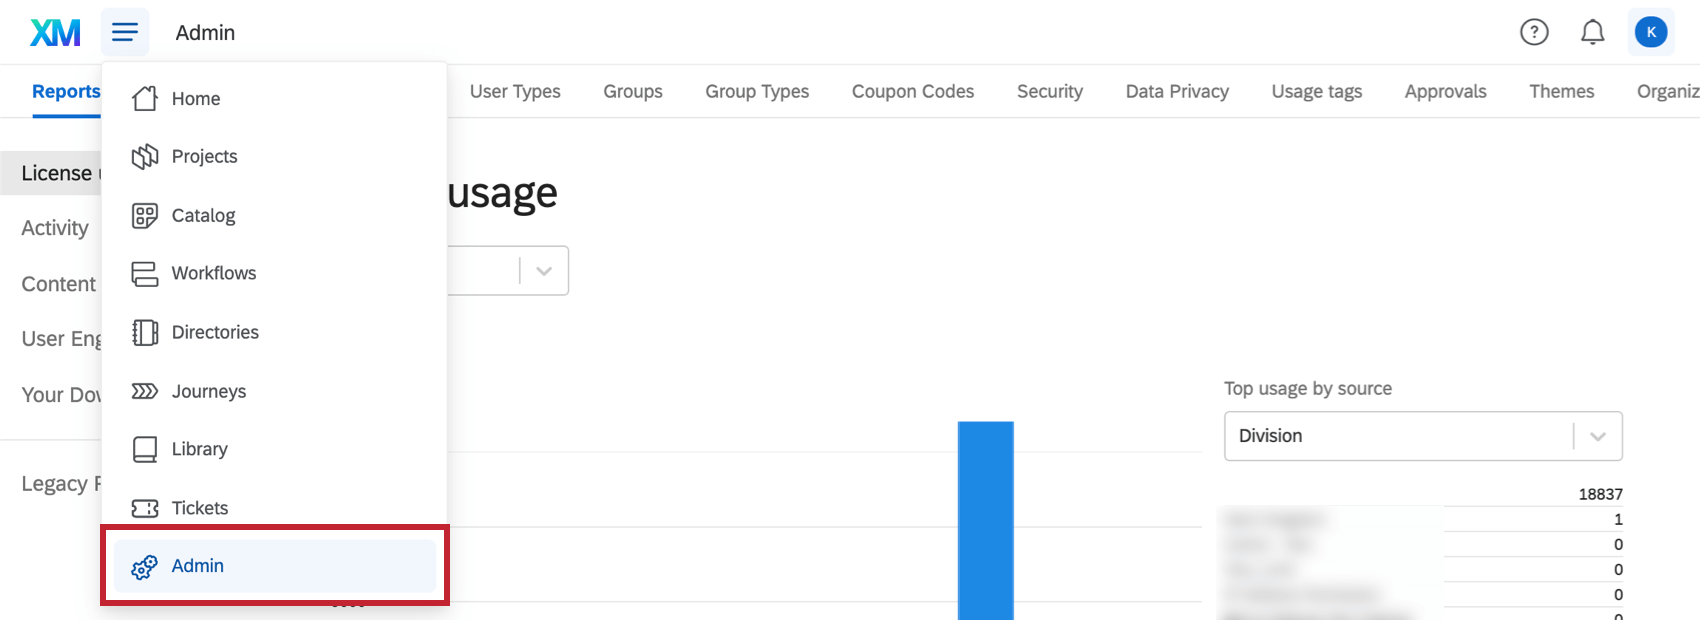
Managing User Access to Custom XM Solutions
Once a Custom XM Solution has been created for your organization, a chosen Brand Administrator(s) can control which users have access to these solutions, and what they’re allowed to do with them.
Qtip: To start, only Brand Administrators specified during the implementation phase will have access to the administrative permissions described here.
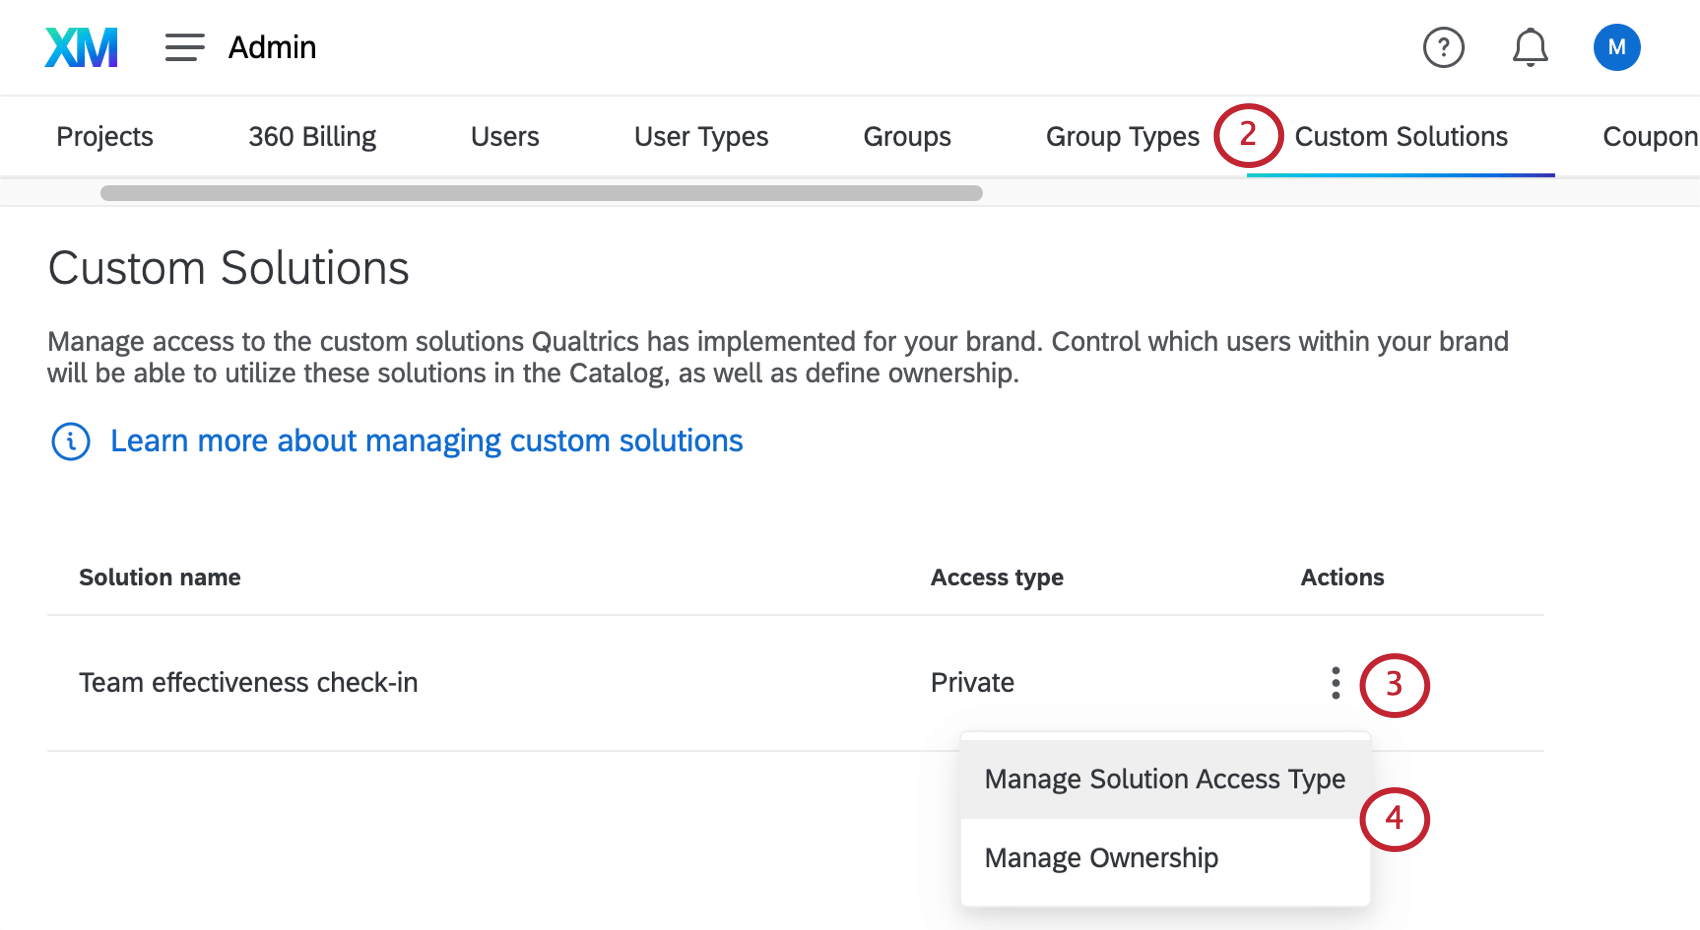
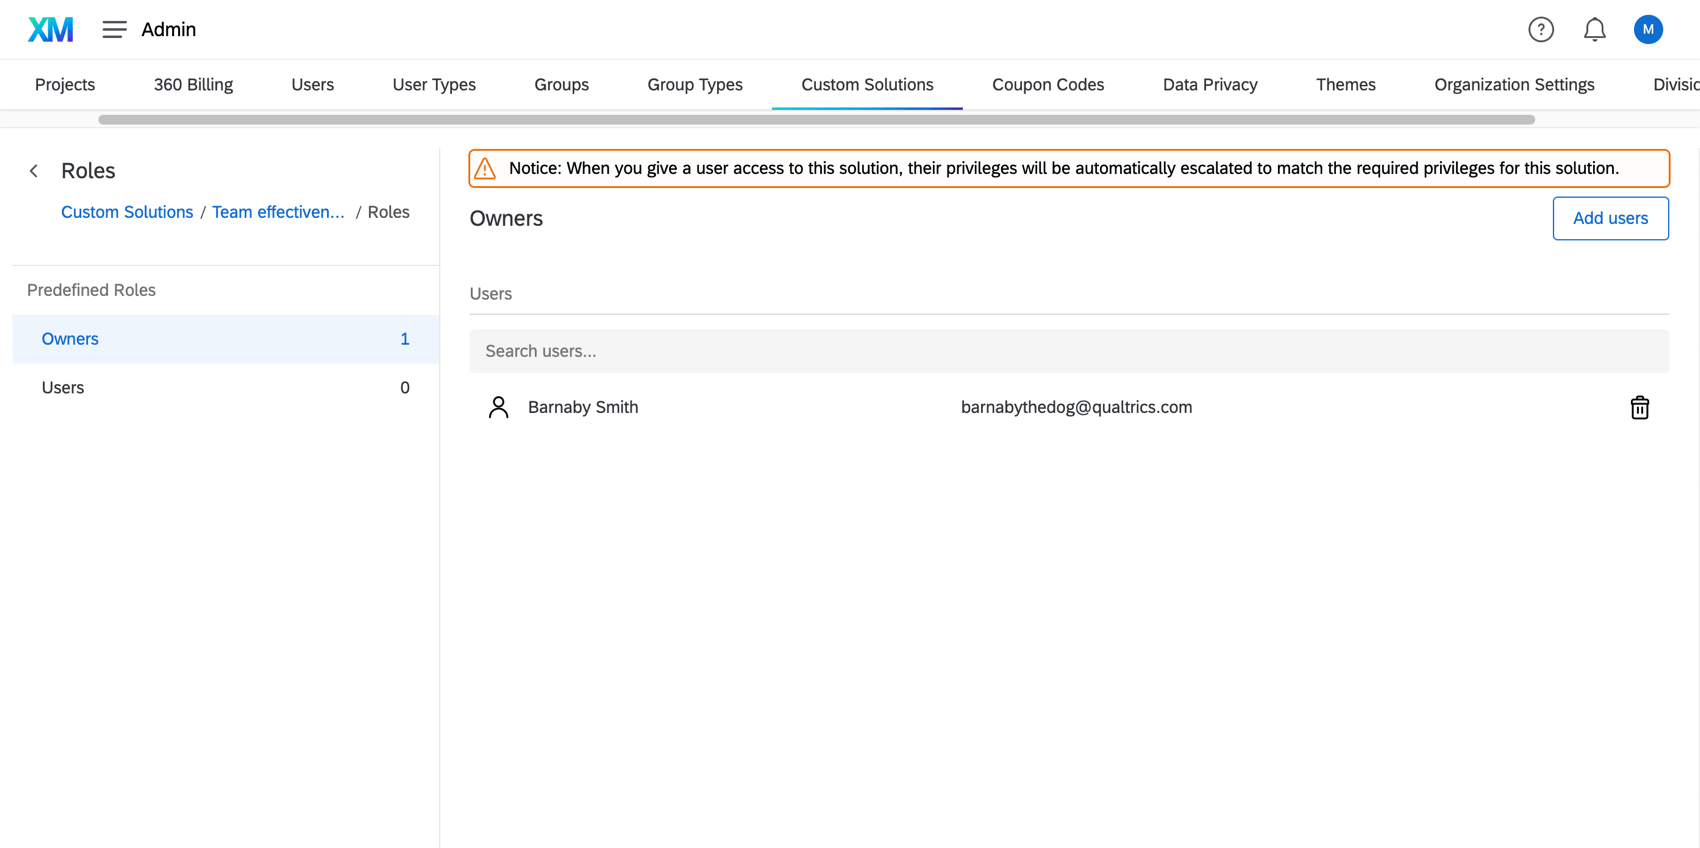
Manage Ownership
Specify who should be able to use the Custom XM Solution, and what level of access they should have over it.
Select a role from the left. Your options are:
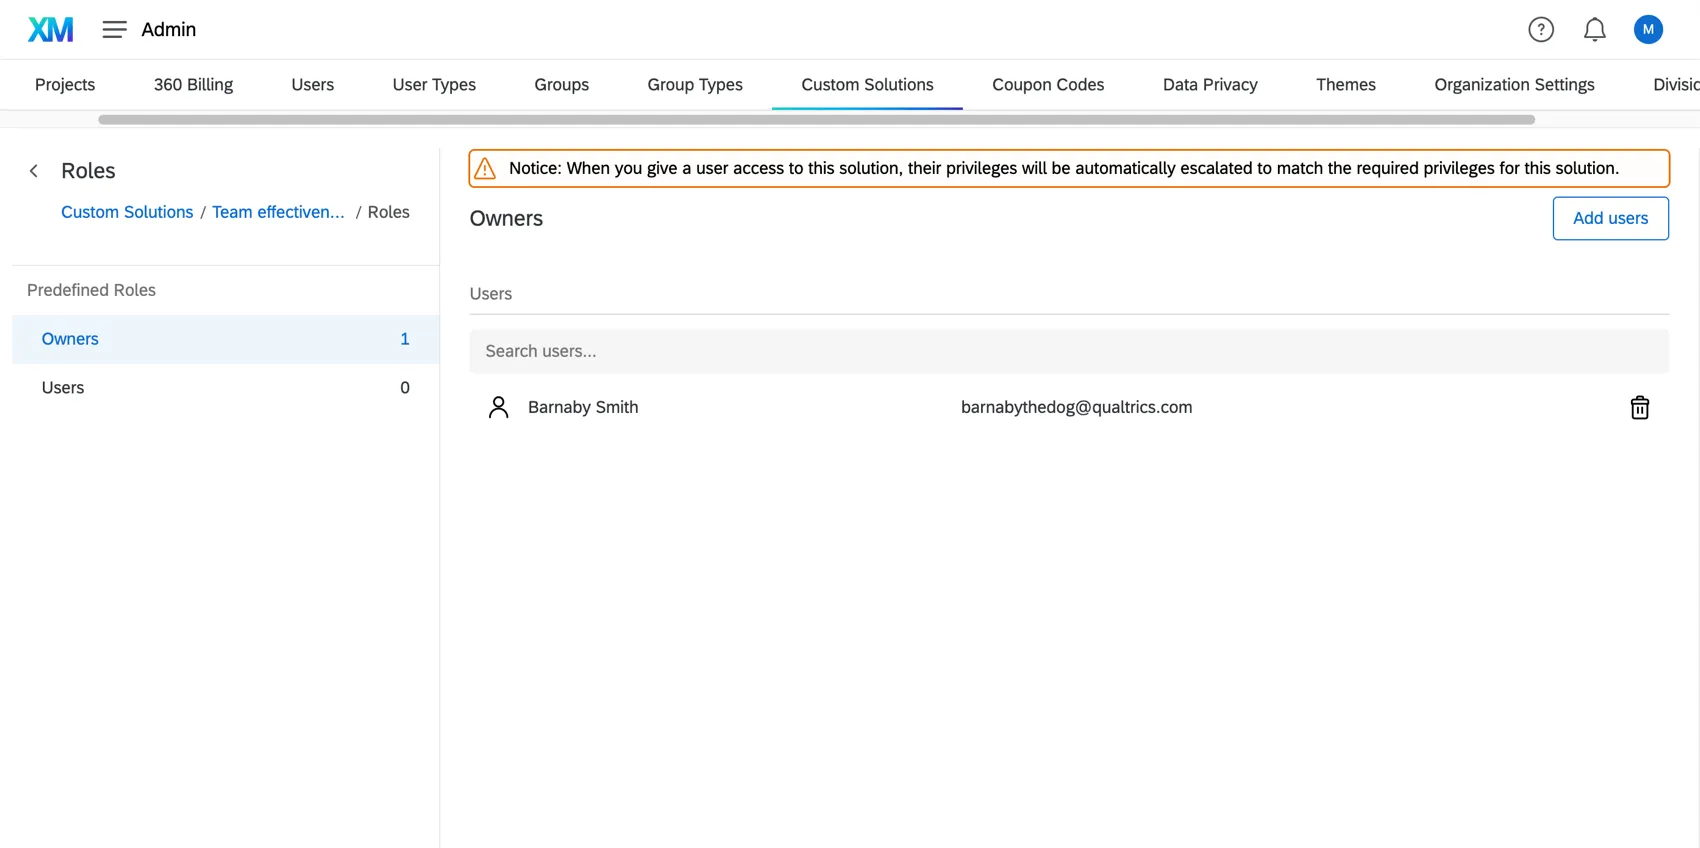
- Owners: Those who have administrative access to the solution. They can control who else has access to the Custom XM Solution.
- Users: Those who can create, distribute, and otherwise use the solution, without controlling who has access to it.
Click Add users to add additional users to your selected role. You can only choose existing Qualtrics users with accounts in your license.
You can also search for users in a role using the search bar at the top, or remove users from a role using the trashcan icon to the right of their name.
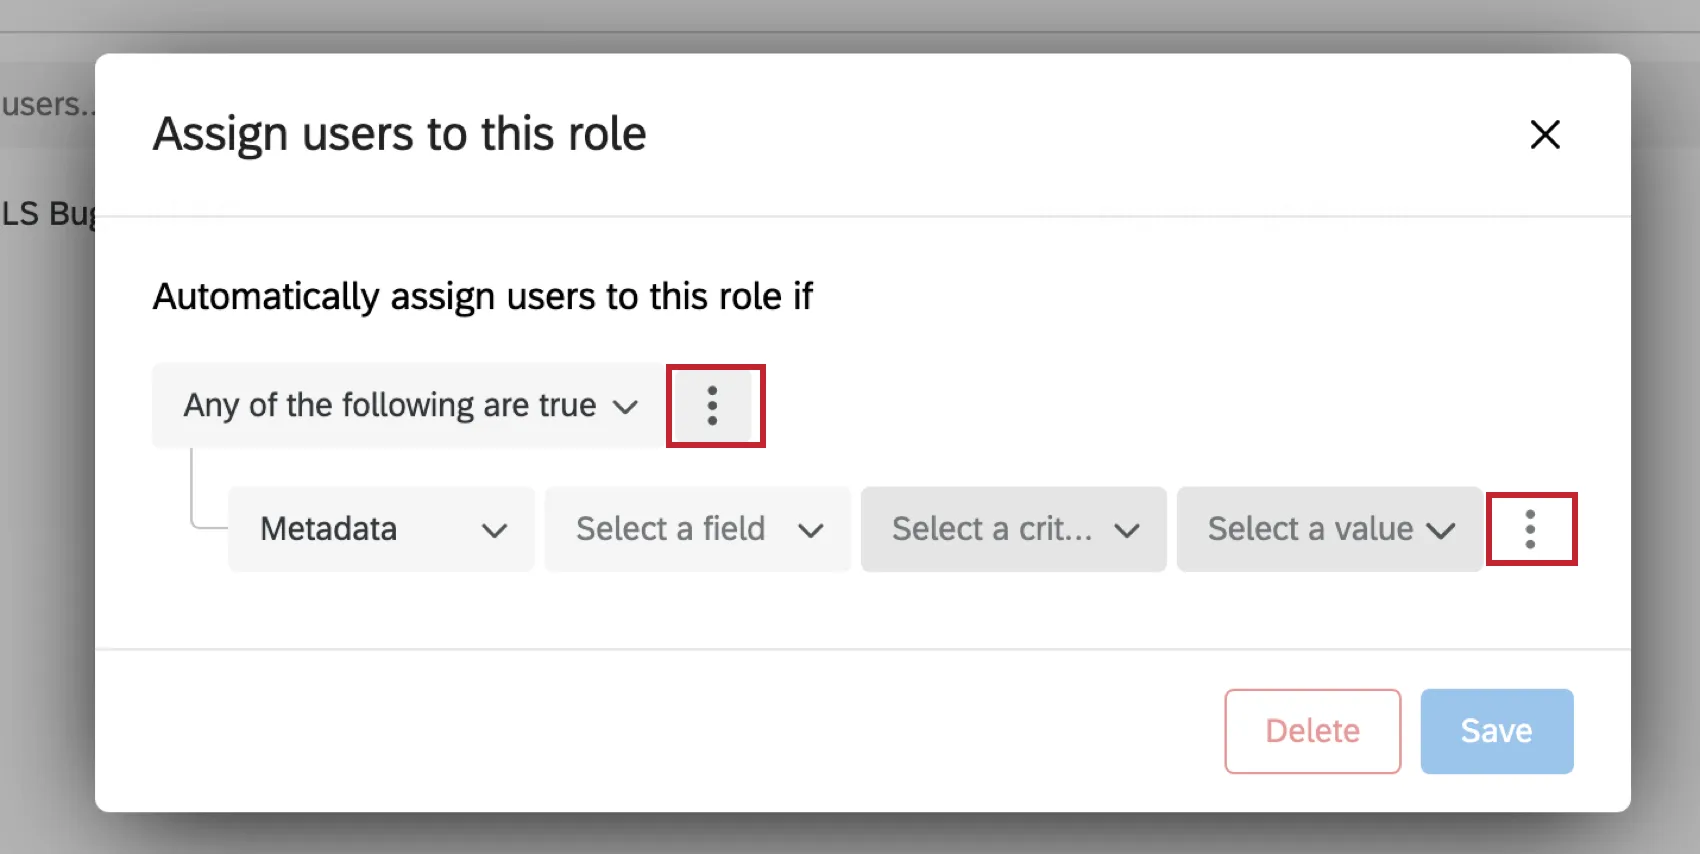
Automatic Role Enrollment
Automatic role assignment is a one-time event that automatically adds users who satisfy the set criteria. Upon saving, all users matching this criteria will be added to the custom solution. This automation will continue to run every 12 hours bringing in any new users that match the criteria.
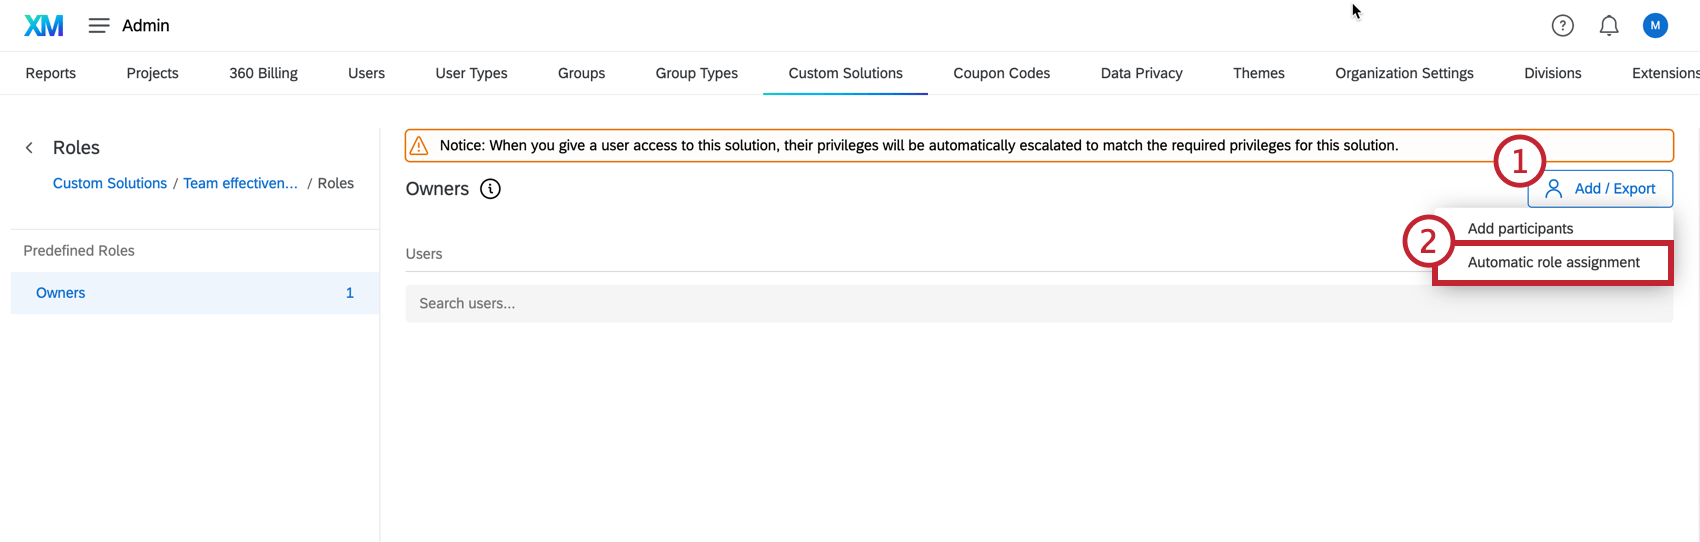
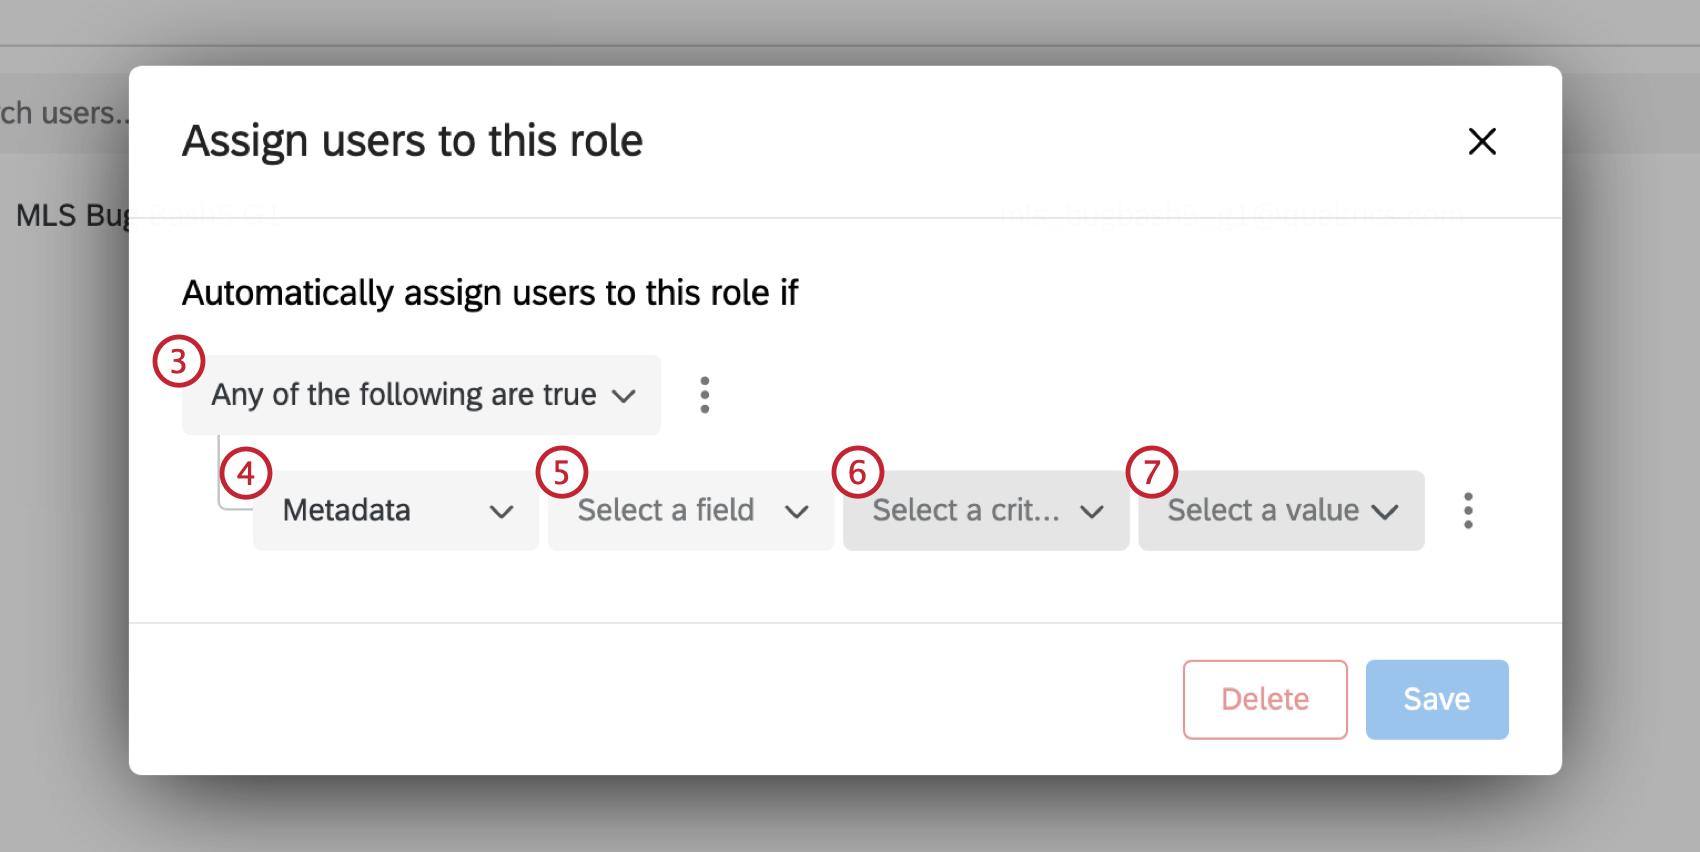
Qtip: To add more conditions or condition sets, select the dots on the right side of the first dropdown or the dots on the right side of the nested conditions.
Manage Solution Access Type
Choose how you would like to control access to this solution. People with access to this solution will find it in their catalog.
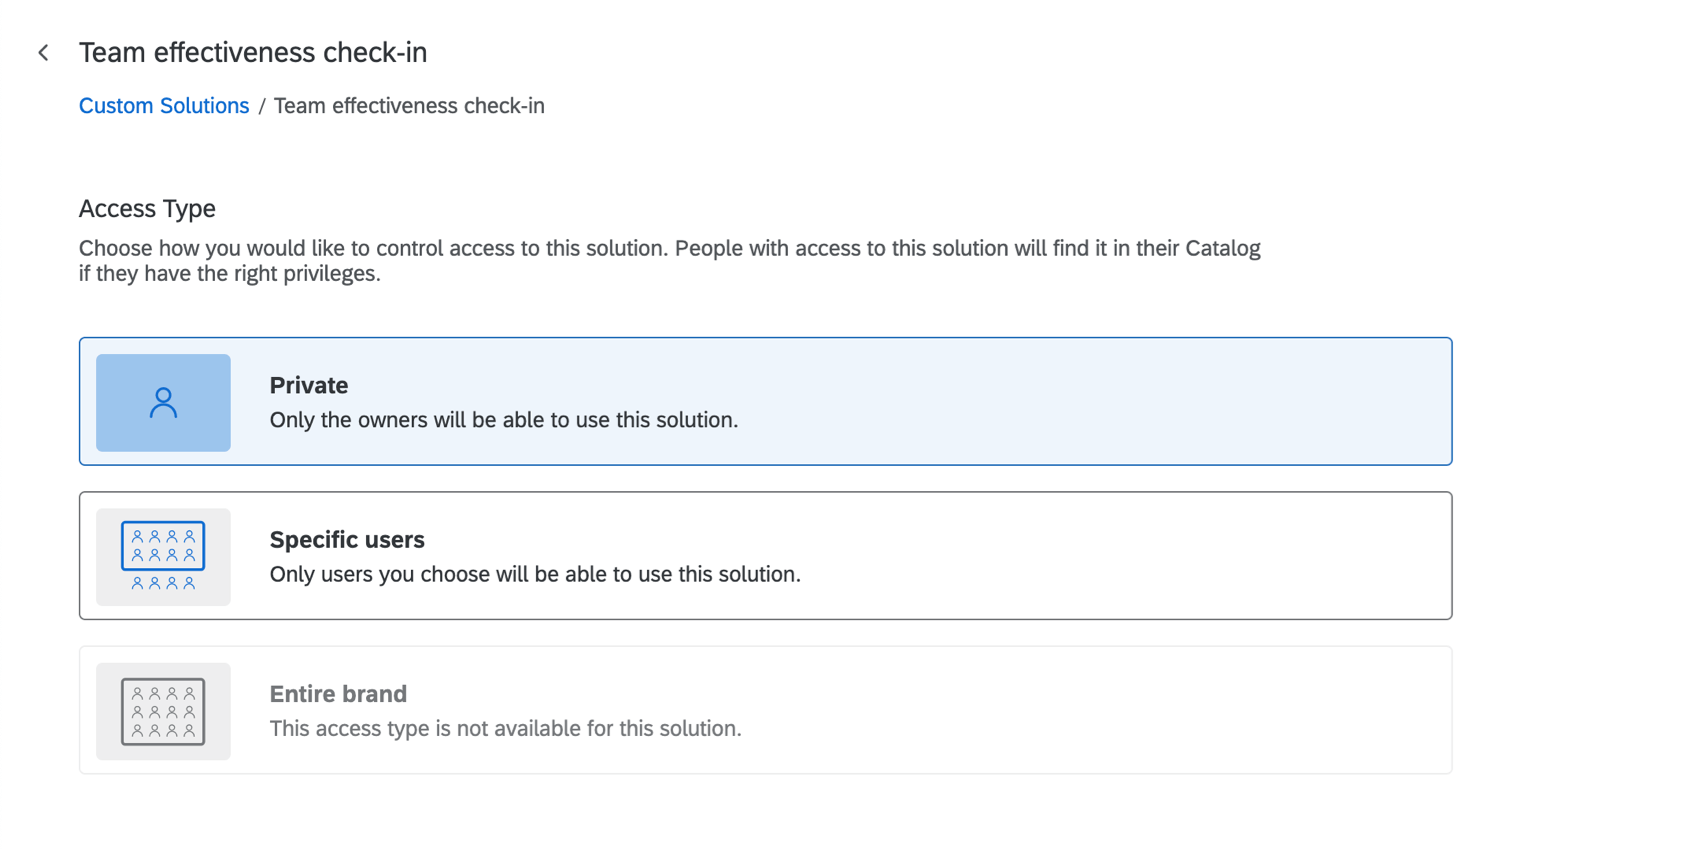
- Private: Only users indicated as owners will be able to use the solution. An “owner” is anyone who has administrator access to the feature; owners can control who has access to the Custom XM Solution. Qtip: You can distinguish between owners and other users when you Manage Ownership.

- Specific users: Owners won’t be the only kinds of users who can use these solutions; instead, you can specify users you want to be able to create, distribute, and view dashboards for this solution, although these users will not have administrative access.
- Entire brand: The entire brand will be able to use the solution. Only “owners” will have administrative access.
Attention: Users will not be automatically given the permissions shown here. Make sure you adjust your users’ individual or user type permissions so they can get access to this solution.
FAQs
How can I tell if a project is a Custom XM Solution?
How can I tell if a project is a Custom XM Solution?
What do I do if I want to edit a Custom XM Solution or its report?
What do I do if I want to edit a Custom XM Solution or its report?
How do I manage who’s able to create a Custom XM Solution from the catalog?
How do I manage who’s able to create a Custom XM Solution from the catalog?
Can I add participants or a hierarchy to my Custom XM Solution?
Can I add participants or a hierarchy to my Custom XM Solution?
Can I email a Custom XM Solution to a contact list?
Can I email a Custom XM Solution to a contact list?
That's great! Thank you for your feedback!
Thank you for your feedback!