
Conjoint & MaxDiff Segmentation
What's on this page
About Segmentation
Maybe your brand is more popular with soccer moms, so it’d be most valuable to please them. Maybe you’re trying to figure out what millennials want so you can break into that market. Segmentation is a method that helps you narrow down the preferences of different “segments” of the population. Rather than conducting a conjoint analysis and using one package to suit the needs of your entire respondent pool, or conducting a maxdiff analysis and making trade-offs based on the needs of your entire respondent pool, segmentation allows you to figure out what different populations want from your products.
Preparing the Survey
Before you can use segmentation, you have to make sure that the survey of your conjoint or MaxDiff project is asking the right questions. This means you need to set up certain features before you collect data.
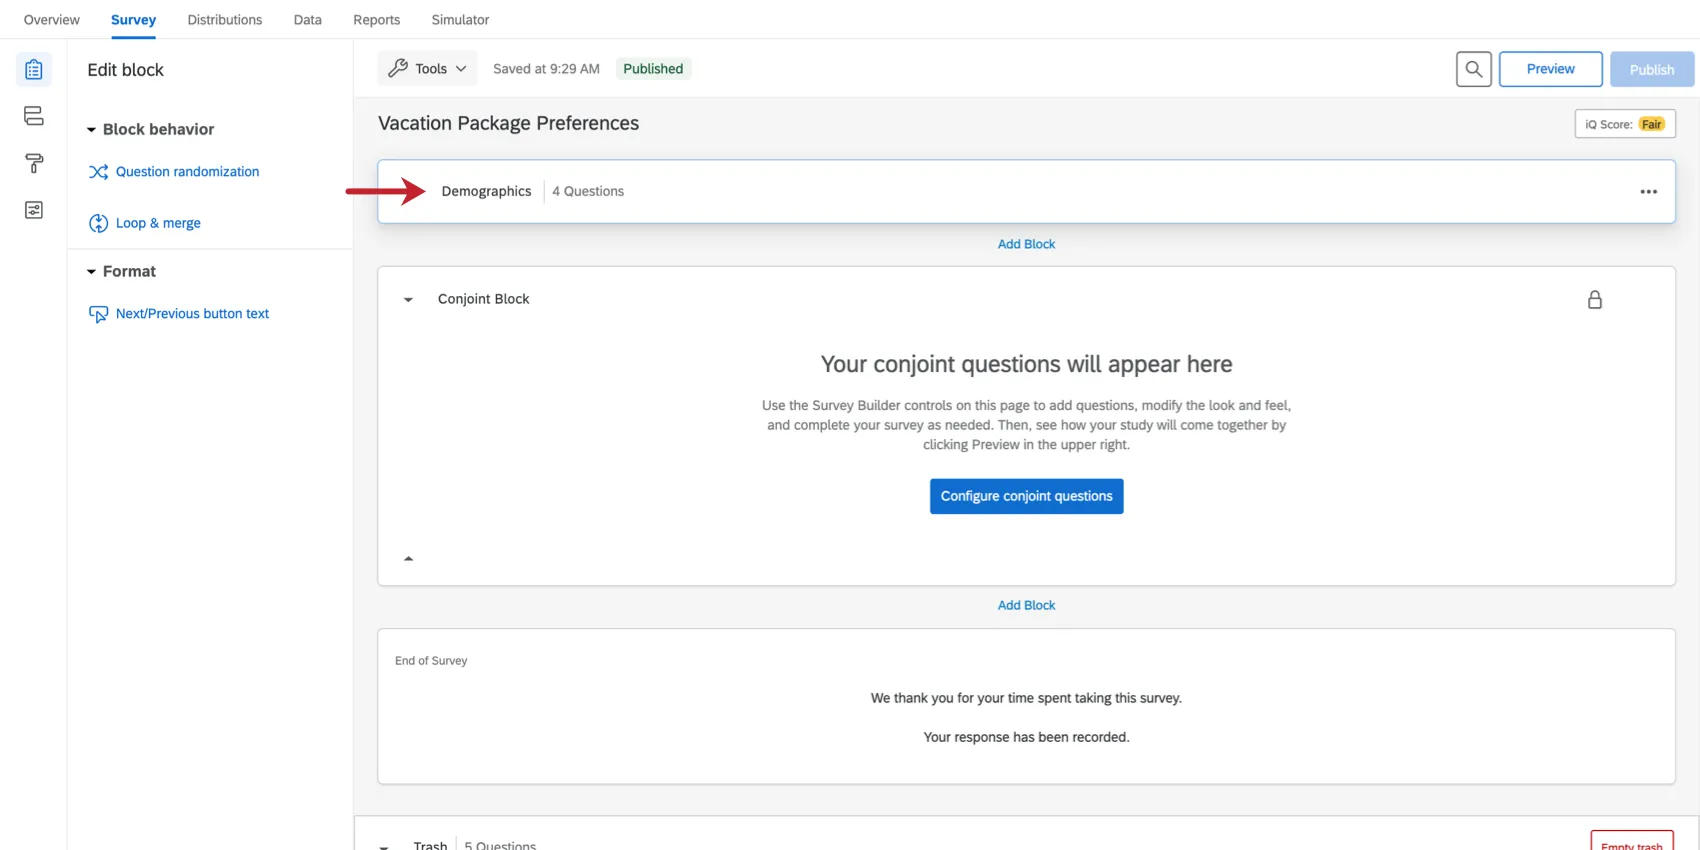
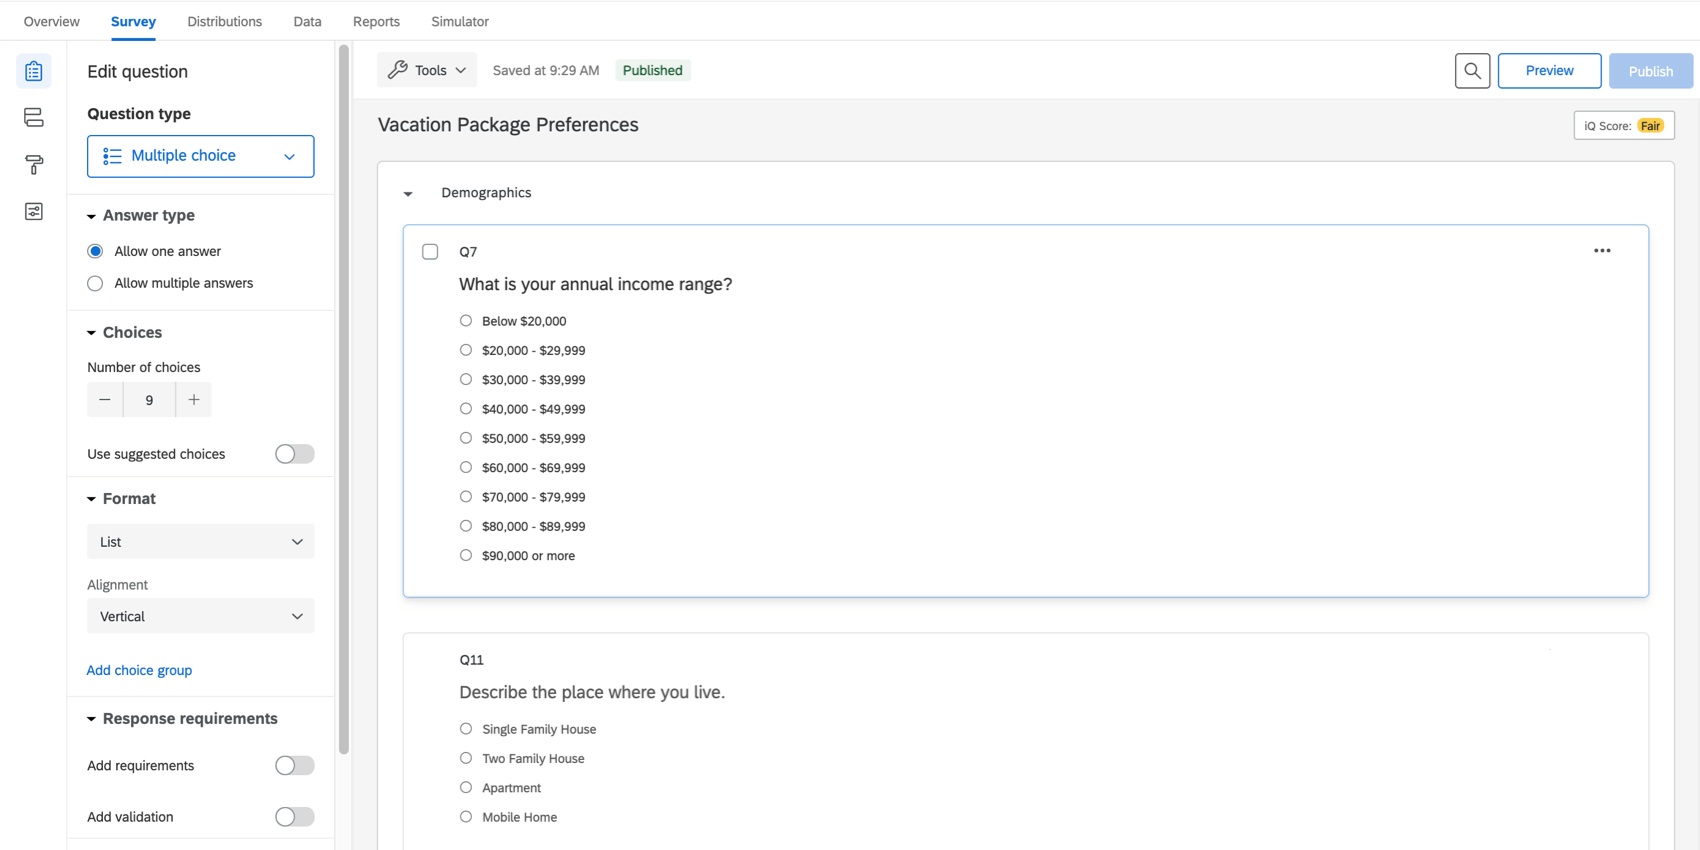
In the Survey tab, make sure you’ve added questions to a non-conjoint/maxdiff block. In the example below, the Demographics block has a question on age, the number of people in the respondent’s household, and more.
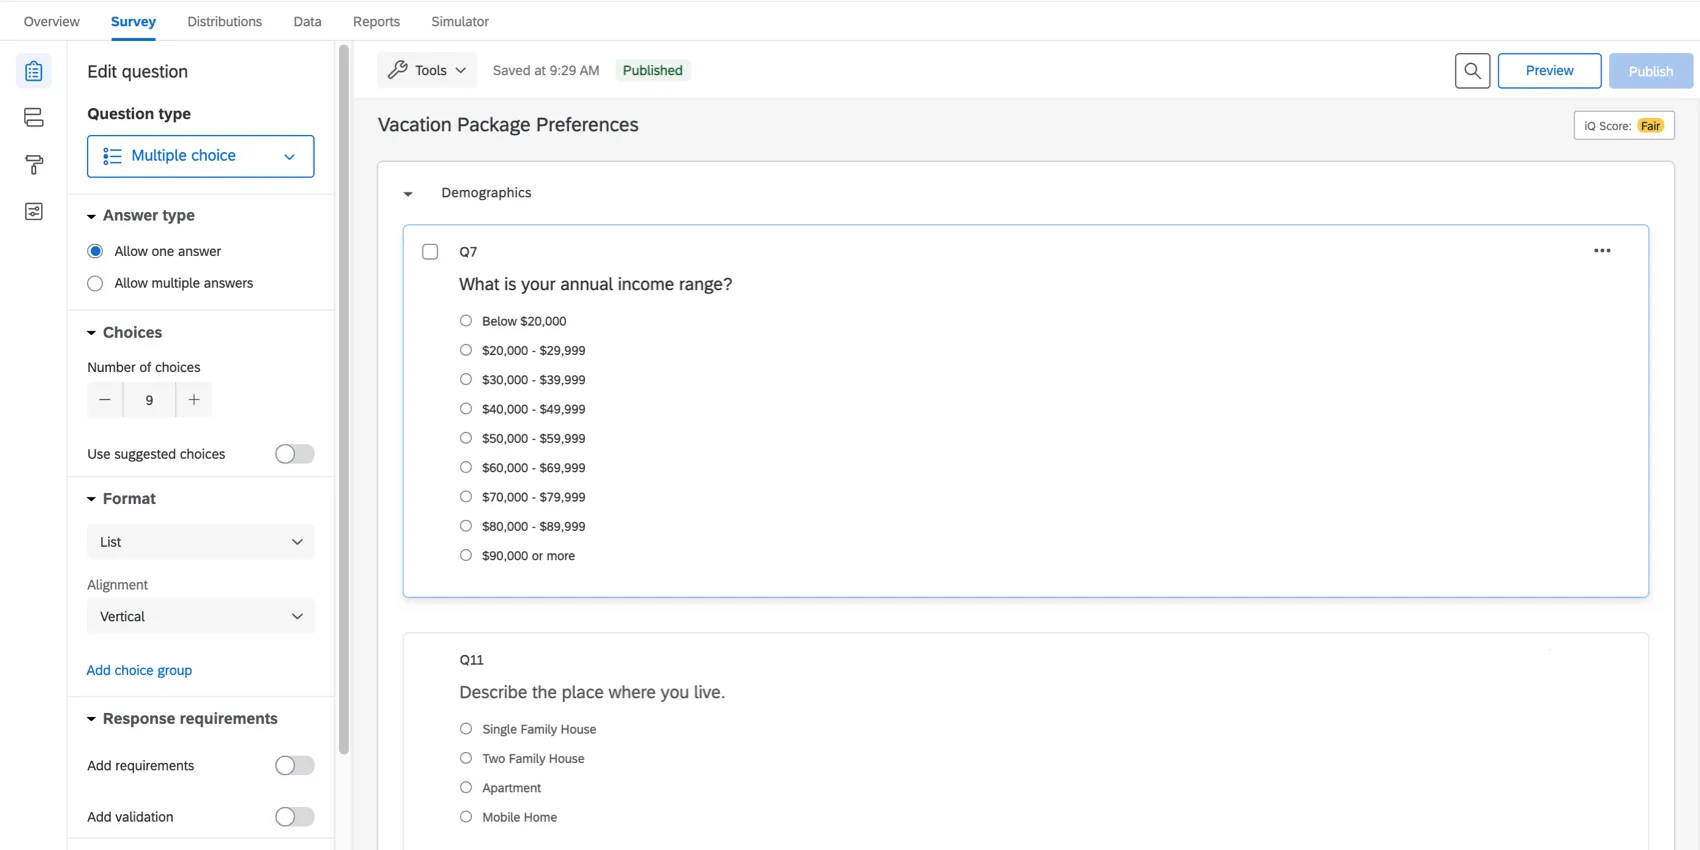
The Demographic block is located right above the conjoint block, although you can move it as desired.
Attention: You can build segments using single and multiple answer multiple choice questions. This is because they offer a finite selection of choices that can be easily analyzed. You can also use embedded data and some survey metadata, such as start date, IP address, recipient information, and more.
Once you’re finished adding questions, don’t forget to publish.
Managing Segments
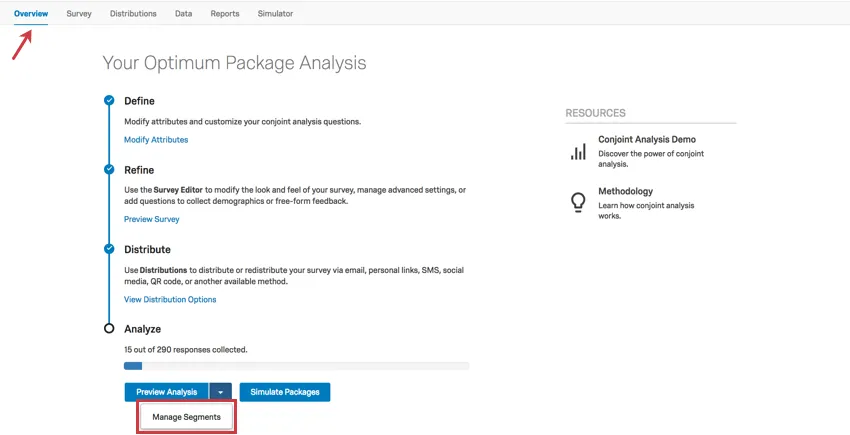
Segments can be created from two places:
- On the Overview tab, in the dropdown next to the Preview Analysis button.
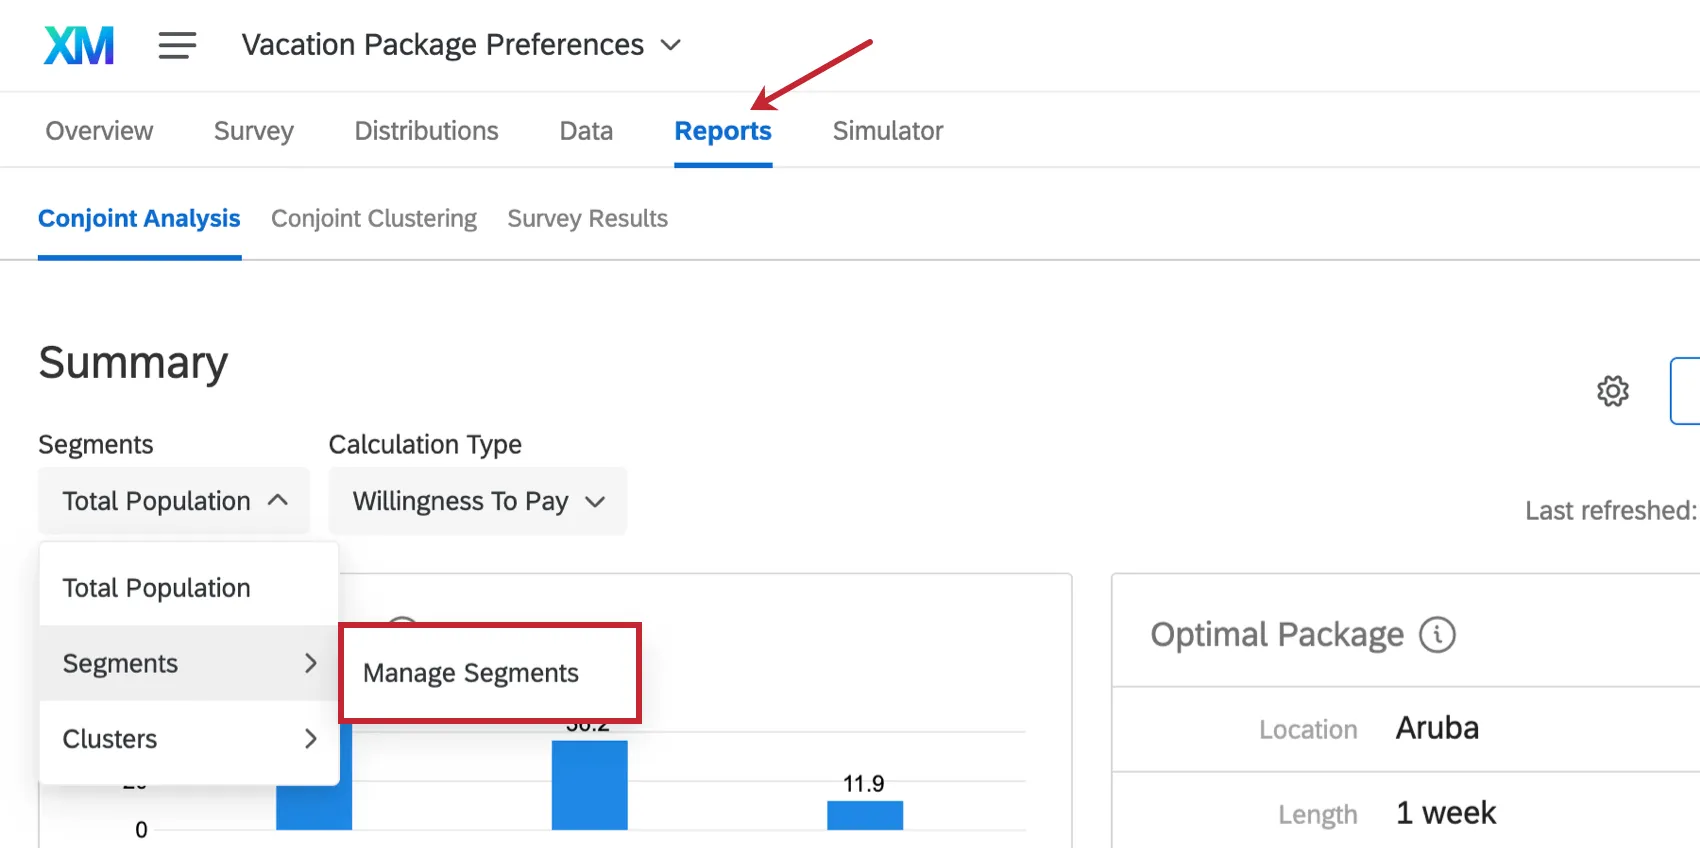
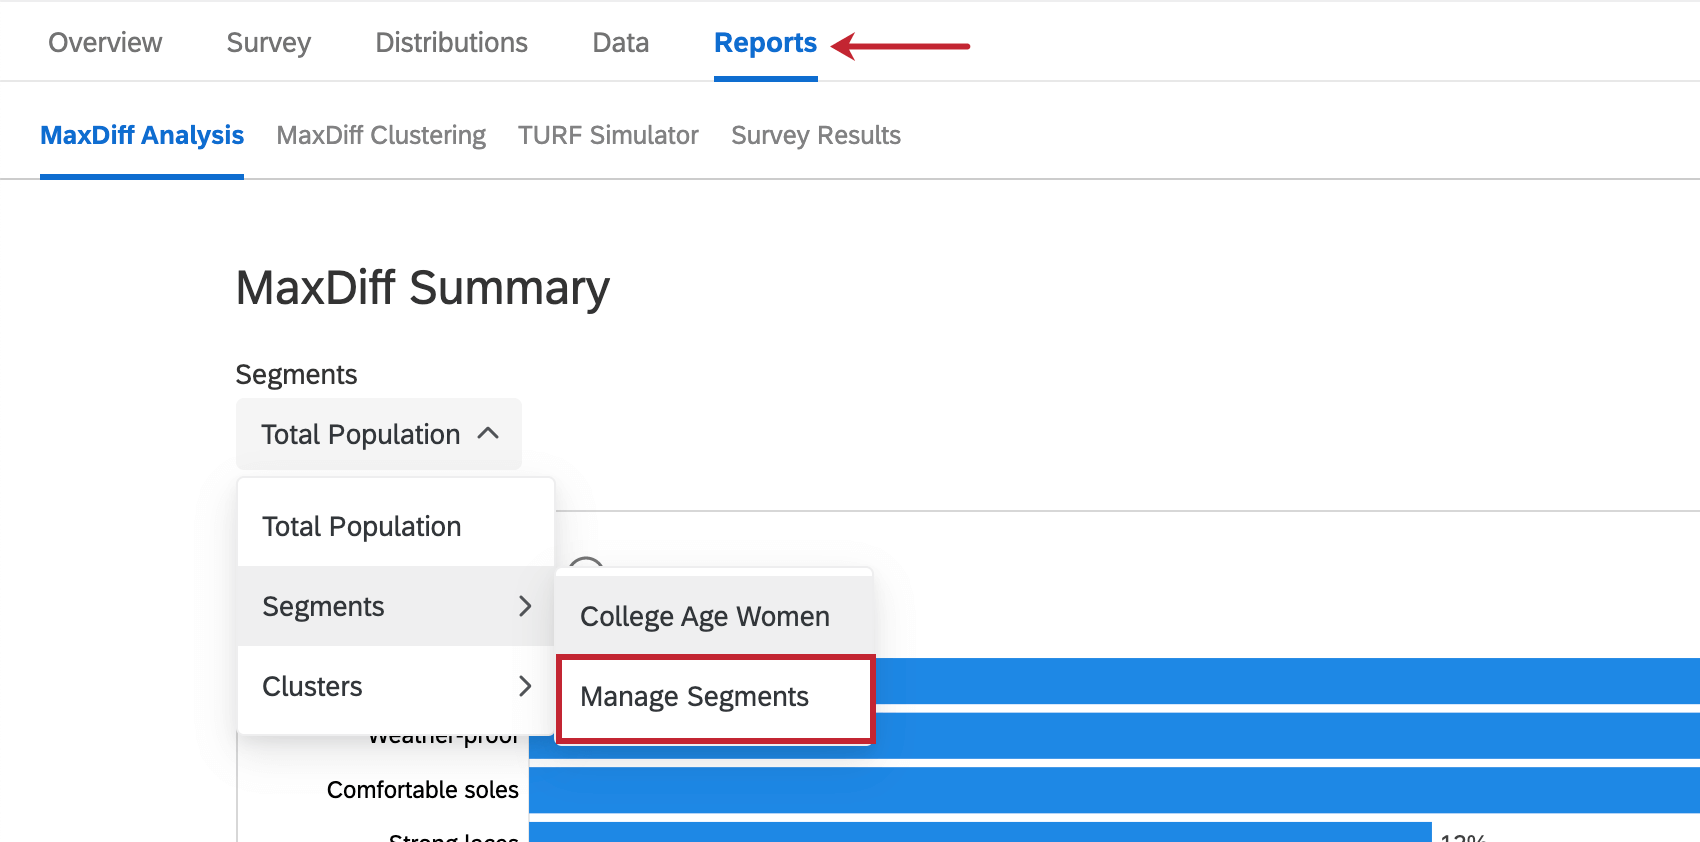
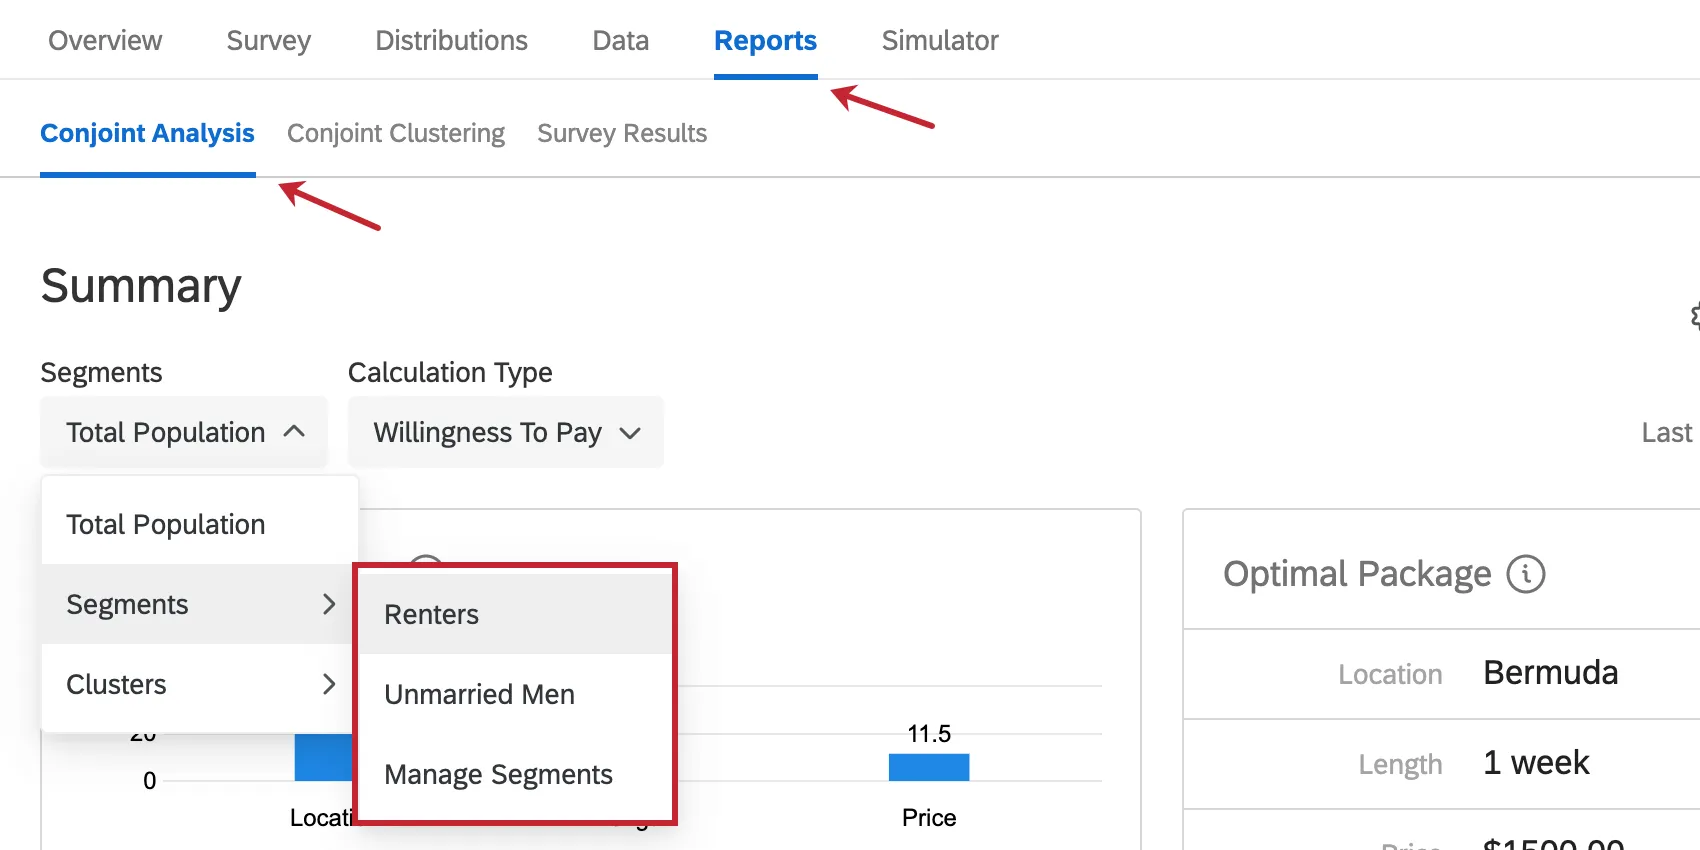
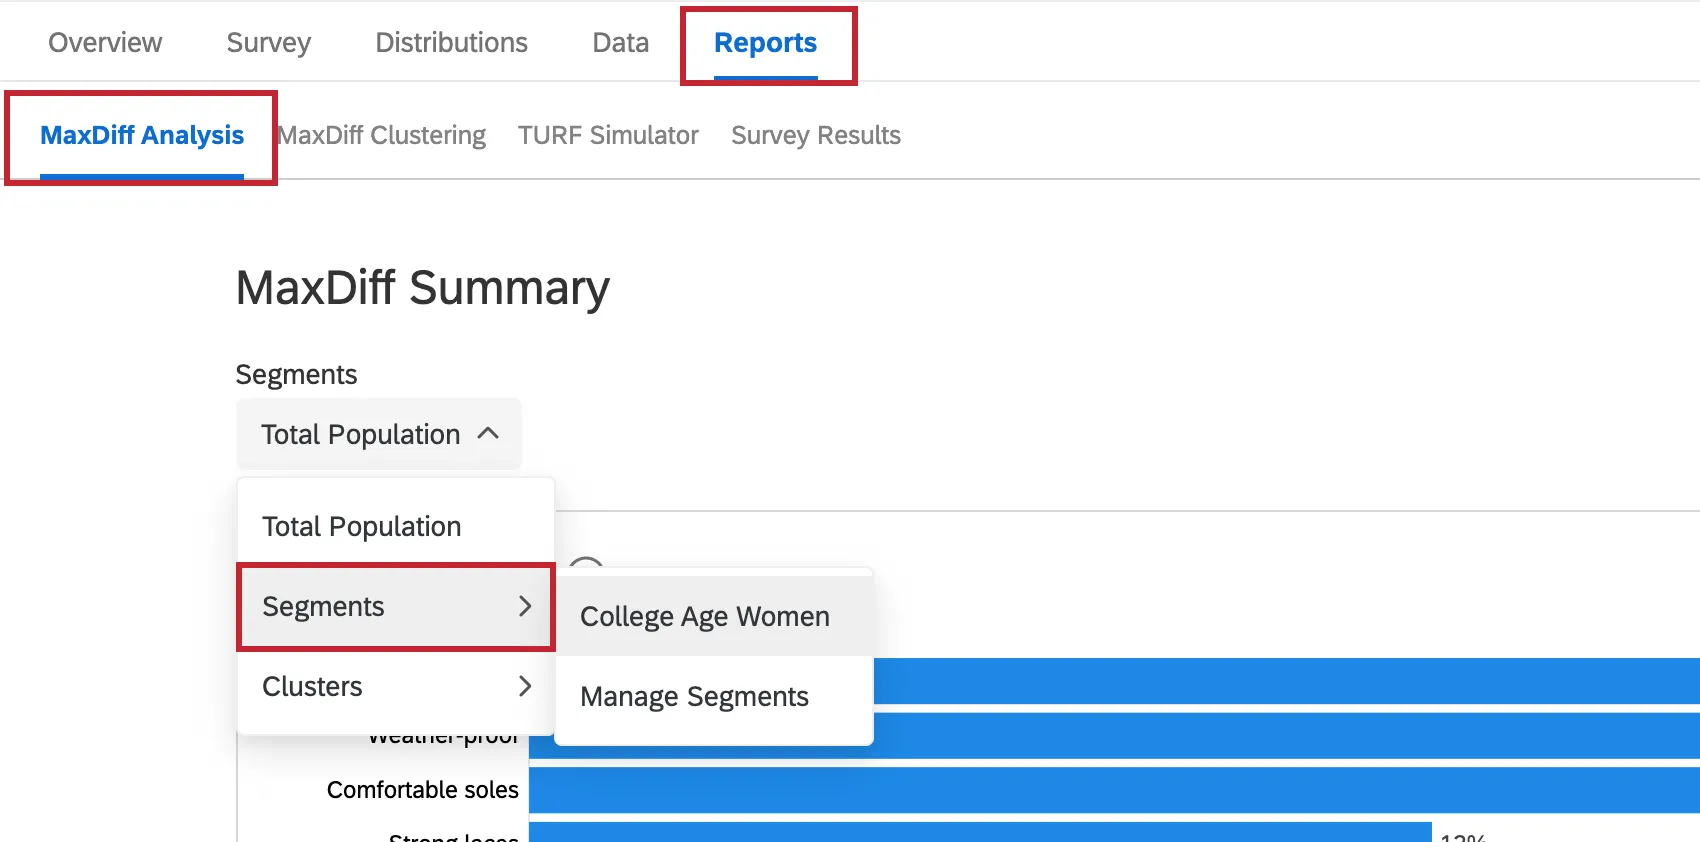
- On the Conjoint Analysis / MaxDiff Analysis section of the Reports tab, under the Total Population dropdown.


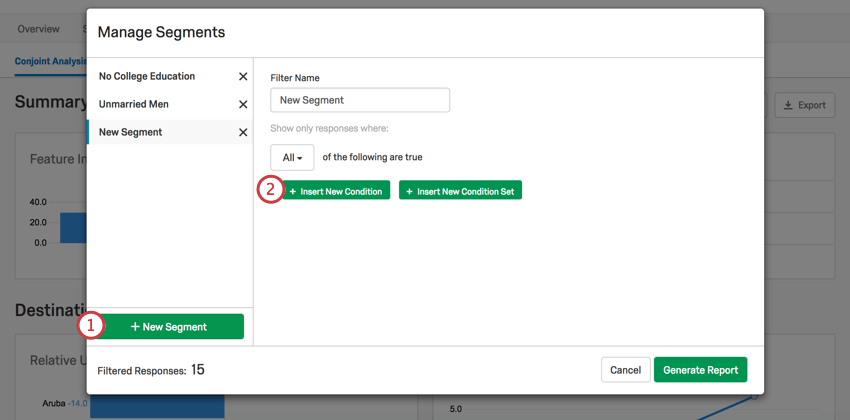
Click Manage Segments to create a new one or edit an old one.
Once the Manage Segments window is open, you will be able to add the conditions under which someone belongs to a segment and name these segments for convenience.
Qtip: You can create up to 12 segments in your conjoint or MaxDiff project.
Building a Simple Condition
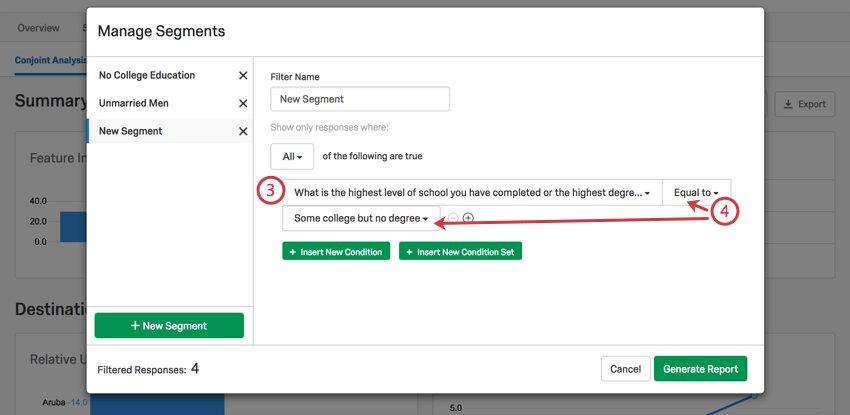
Example: Let’s say you want to filter by respondents who have been to college, but not finished. In your survey, you asked for the highest degree the respondent achieved. If the question is “What is your highest level of education,” then you’d set the value to “Equal to Some college but no degree.” (See screenshot in Step 3.)
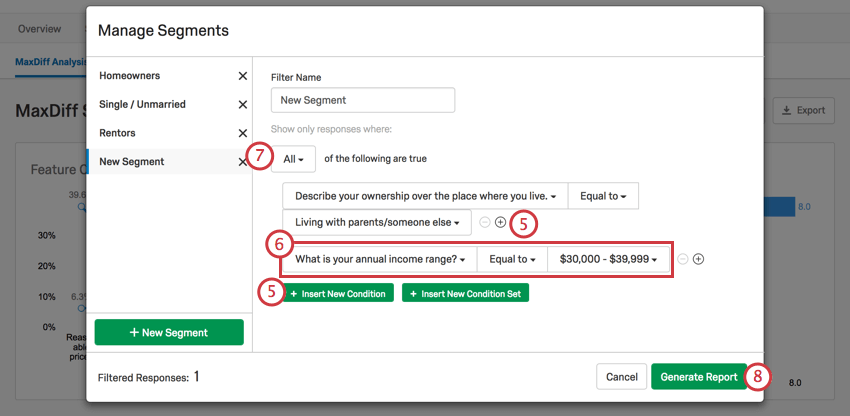
Building Advanced Conditions
When building conditions, the “All” and “Any” options allow you to decide how the conditions you’ve created should be combined. You can also nest condition sets to create advanced logic. For more on these functions, see the linked pages below:
Applying Segments
Qtip: Every time you refresh the page, or leave and come back, the segment is removed. Use the dropdown to apply it again.
Conjoints
Once you’ve created segments, you can apply this in two different places in a conjoint. On the Reports tab, you can apply segments to your Conjoint Analysis Results to see how package preferences differ for this population. Click the Total Population dropdown to select another segment.
You can also apply segments to the simulator. Any segments you create will be available to those you’ve shared the simulator with, too.
MaxDiff
On the Reports tab, you can apply segments to your MaxDiff Analysis Results to see how package preferences differ for this population. Click the Total Population dropdown to select another segment.
That's great! Thank you for your feedback!
Thank you for your feedback!