
Generating a Parent-Child Hierarchy (EX)
What's on this page
Qtip: This page describes functionality available to Engagement and Pulse projects, but not Lifecycle or Ad Hoc Employee Research projects. For more details on each, see Types of Employee Experience Projects.
About Parent-Child Hierarchies
Parent-Child hierarchies are the most commonly used kind of hierarchy. They are the best option if your HR data is formatted so you have a list of employees’ IDs and the managers each employee reports up to.
Qtip: Not sure what type of hierarchy fits your HR data best? Check out a basic comparison of your options on the Hierarchies Basic Overview page.
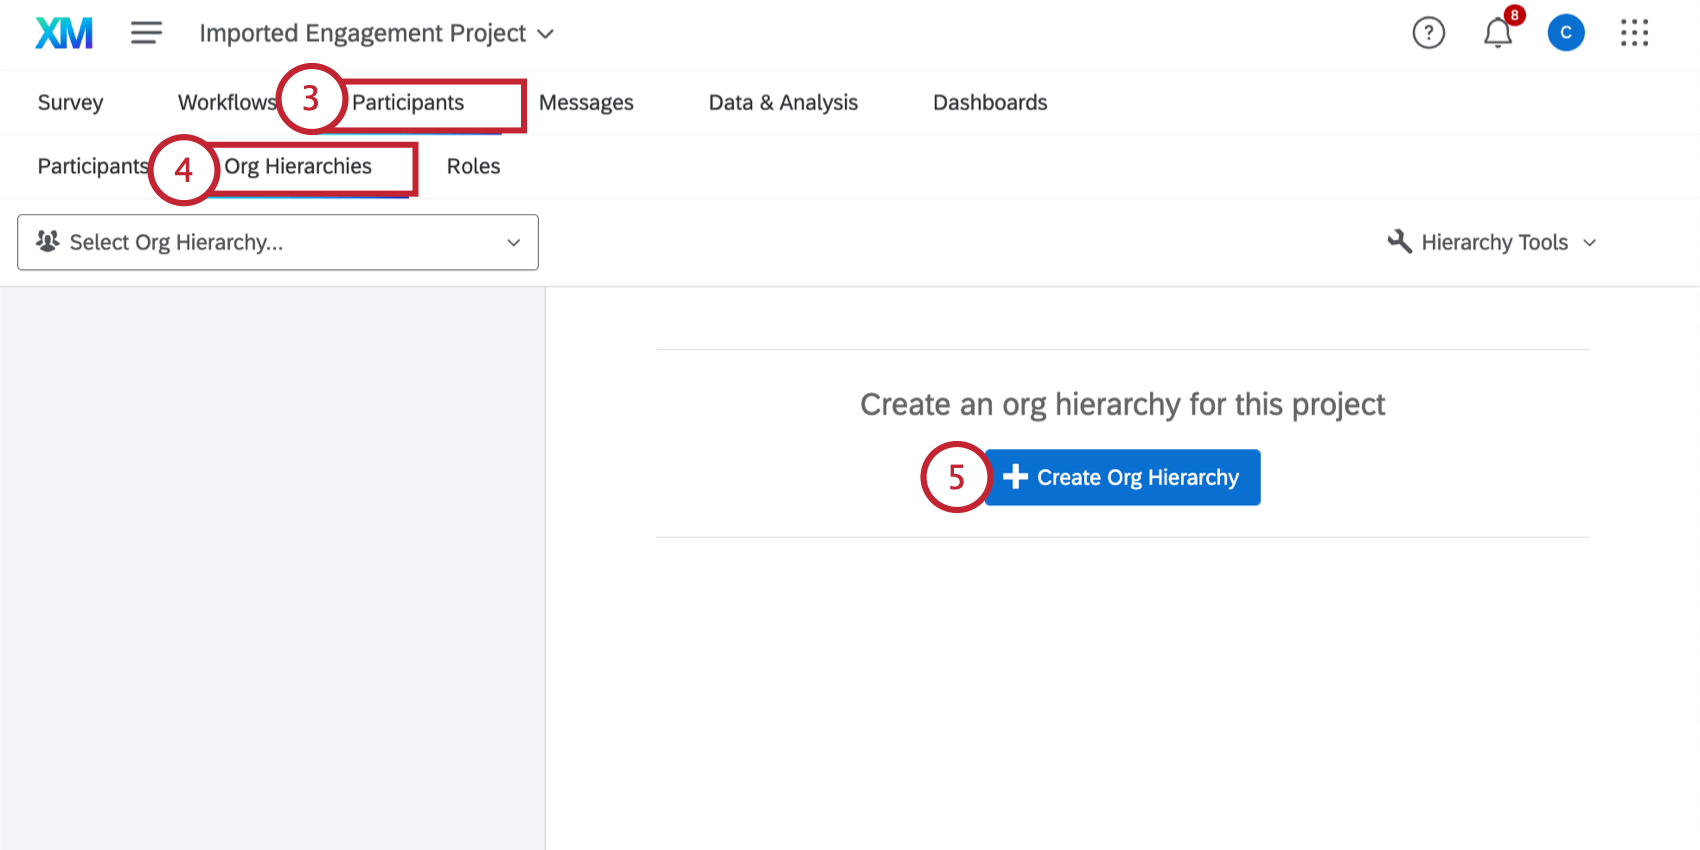
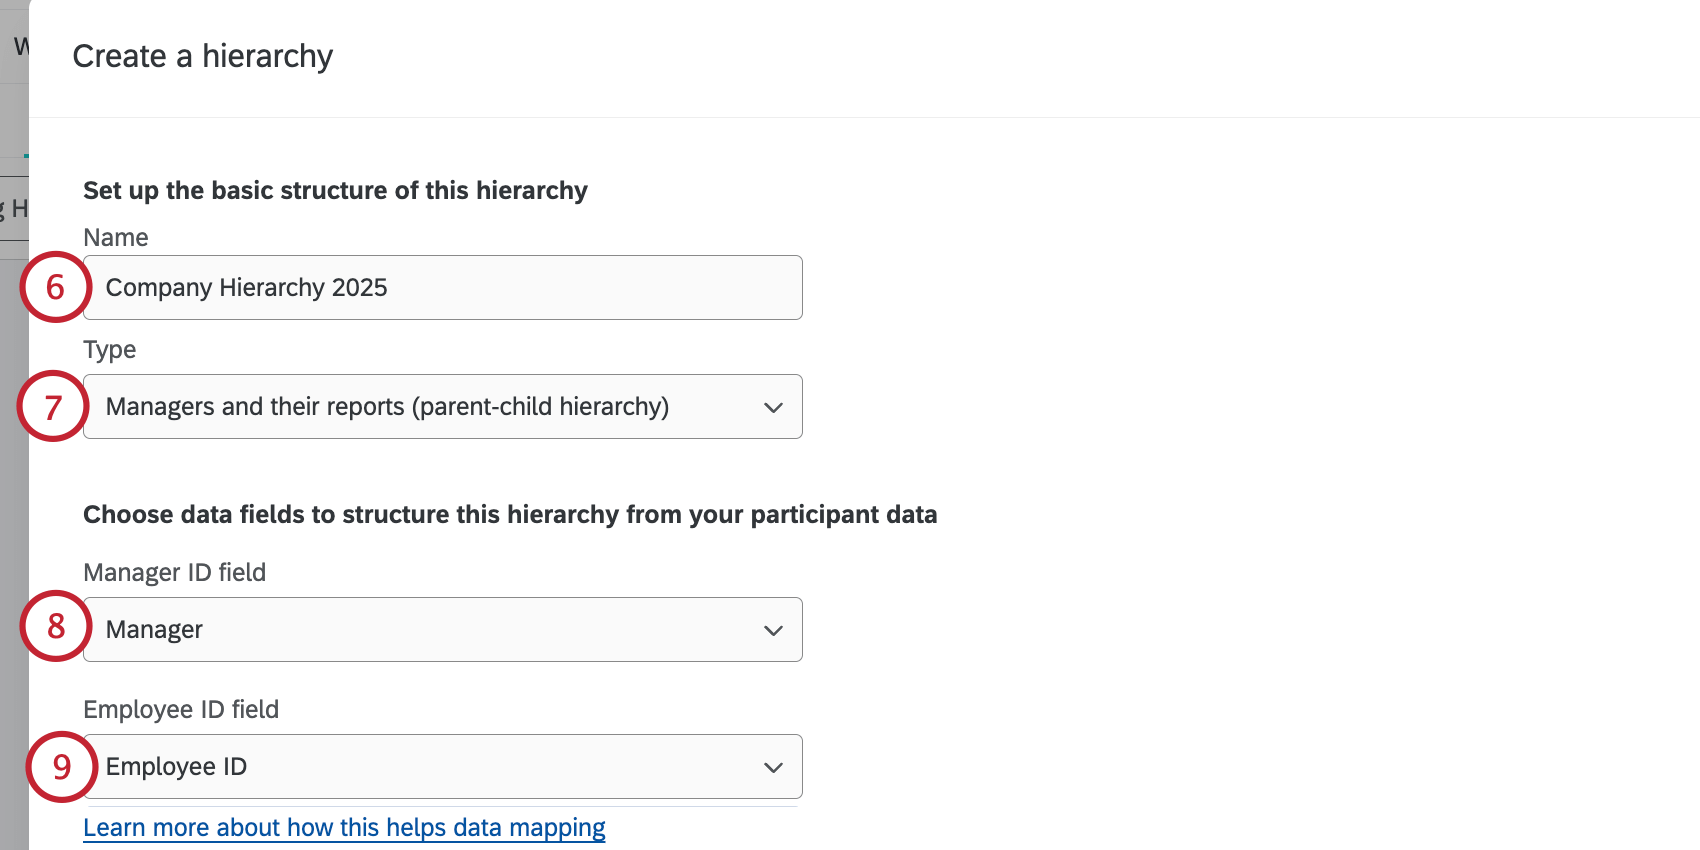
Generating a Parent-Child Hierarchy
Warning: You may have up to 10 hierarchies in a project. Once you reach 7 hierarchies, you will receive a warning that you’re approaching the hierarchy limit. If you have 10 hierarchies, you will not be able to create another without deleting a hierarchy.
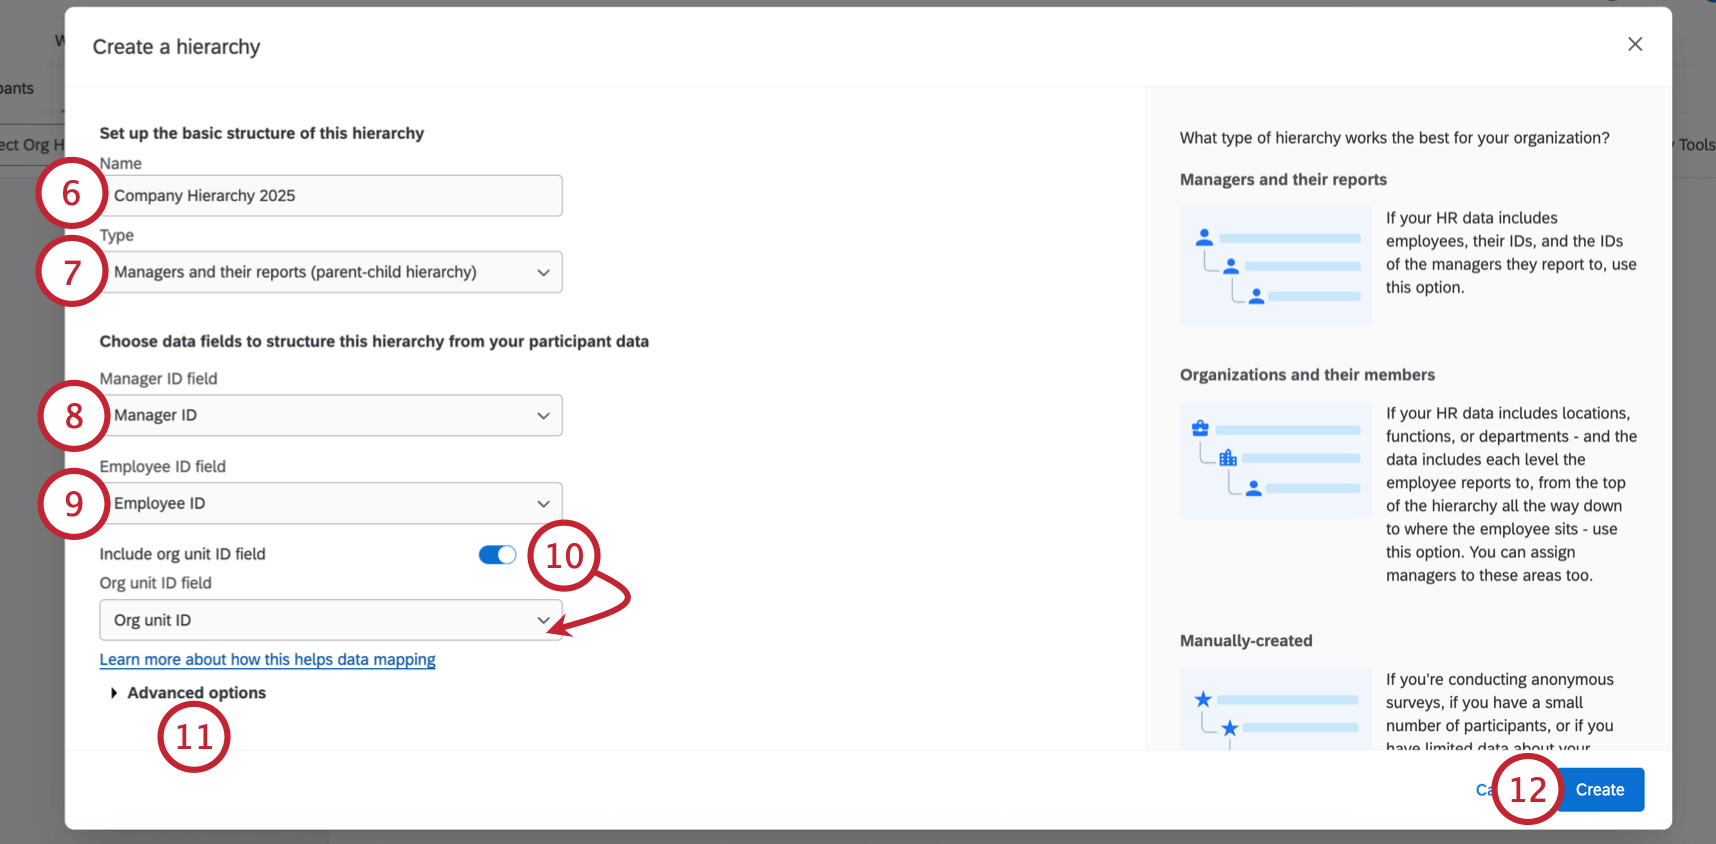
Qtip: Employee ID field, Manager ID field, and any other field where you are entering metadata must match the original participant file you uploaded. This means spelling, spacing, and capitalization must be exactly the same!
Qtip: To generate a parent-child hierarchy, the option Include direct reports in the org hierarchy must be enabled. This option is enabled by default when creating a new parent-child hierarchy. If you don’t know or don’t want to include the identity of your direct reports, then disable this option to generate a skeleton hierarchy.
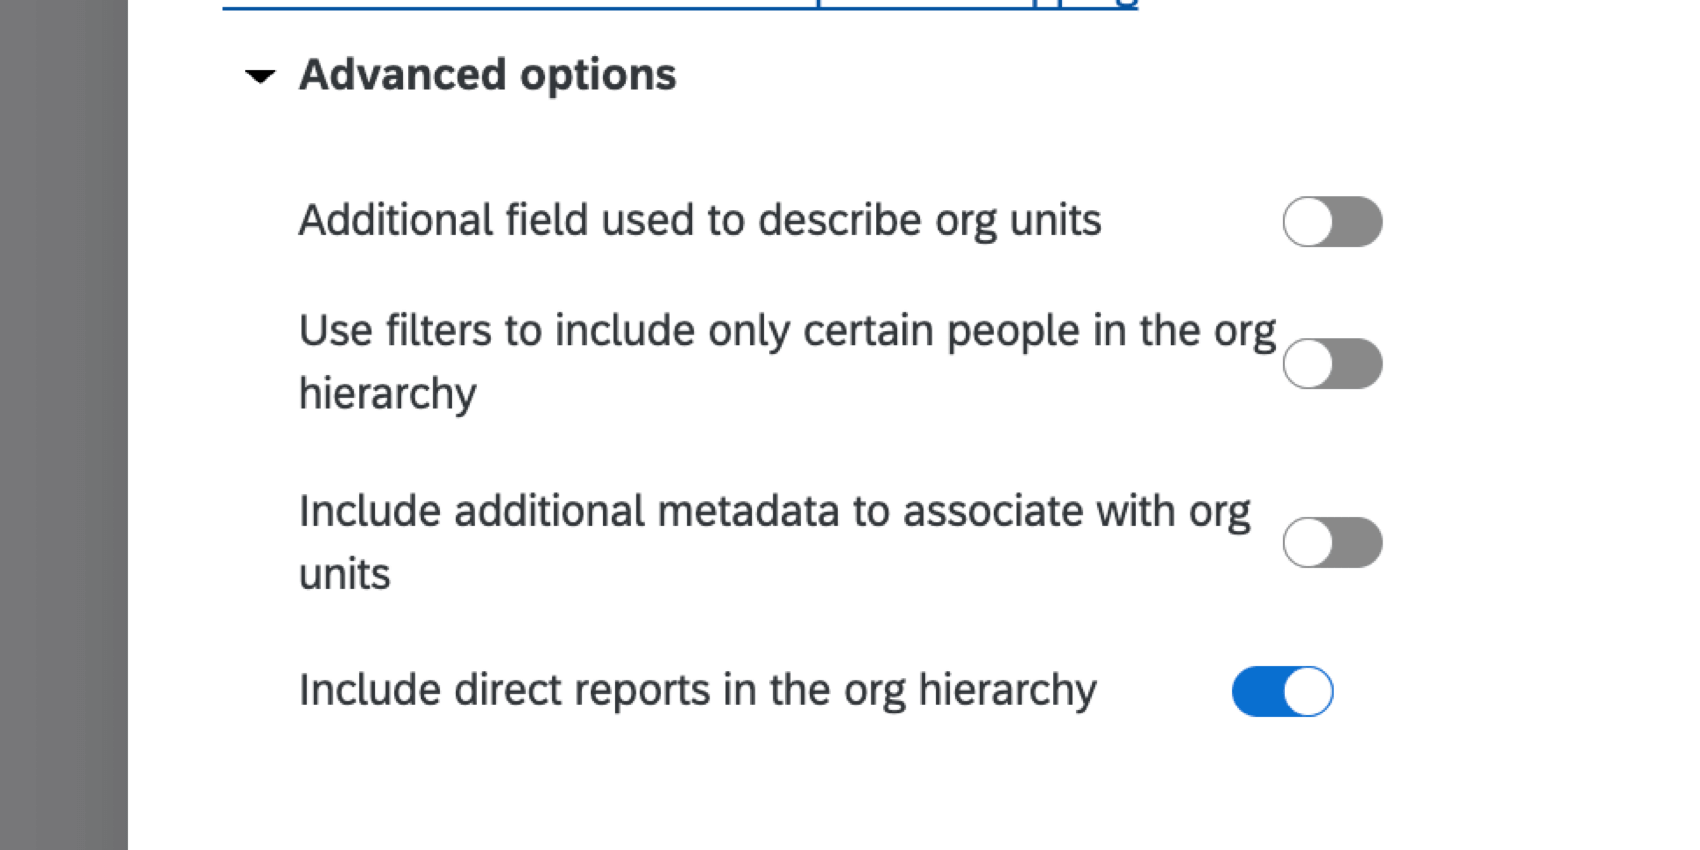
Advanced Options
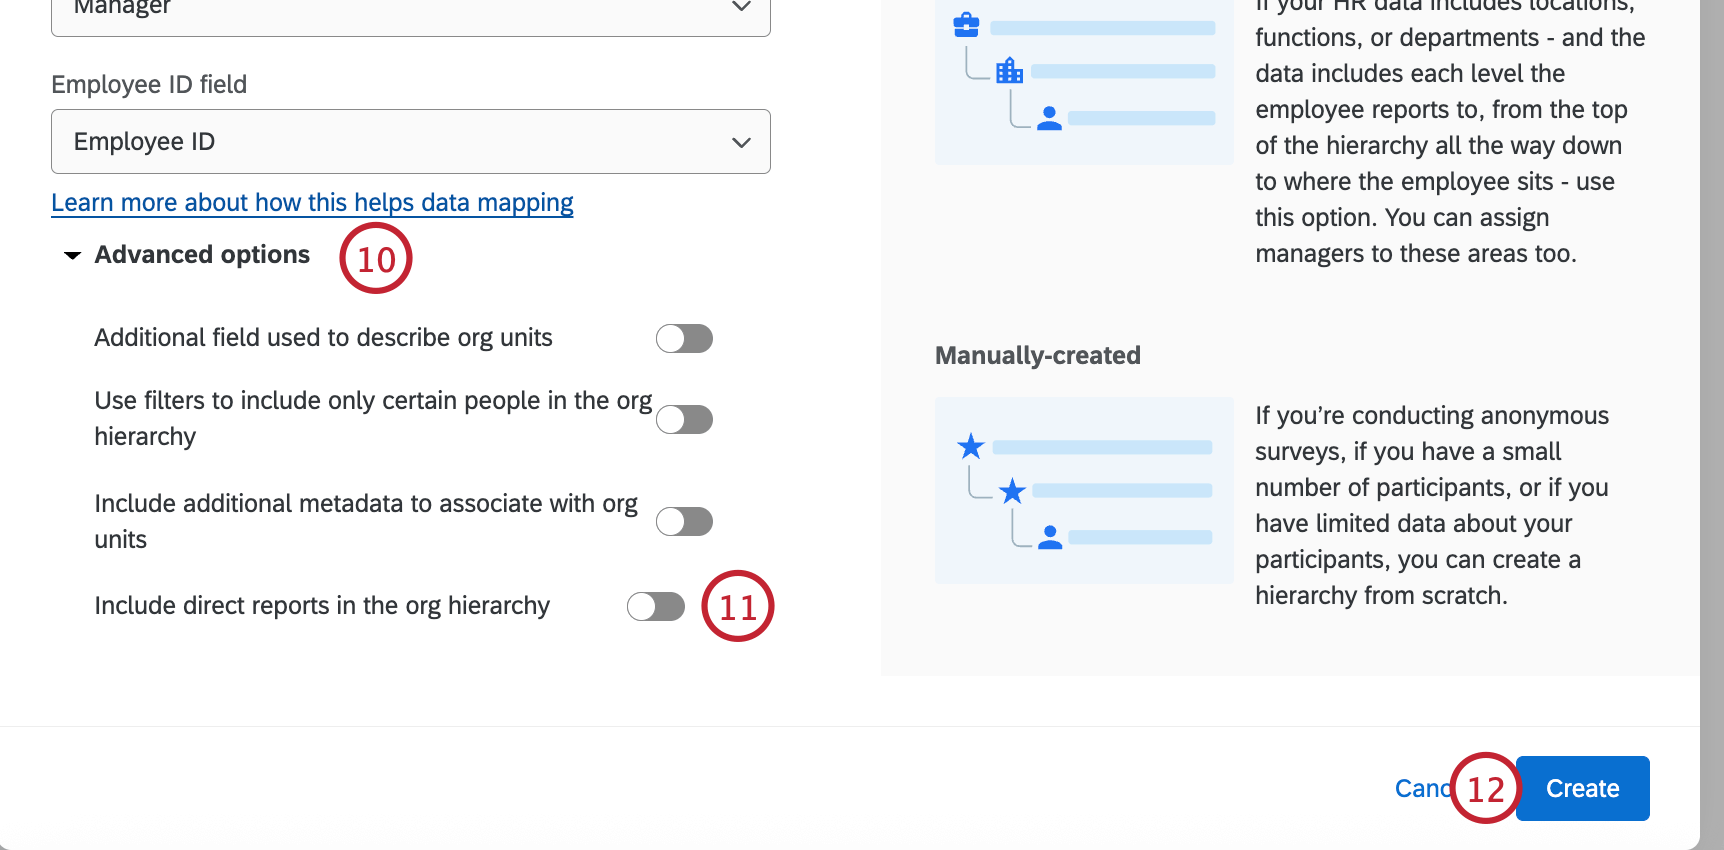
If you click Advanced options, you will have several additional options when building your hierarchy.
Additional field used to describe org units
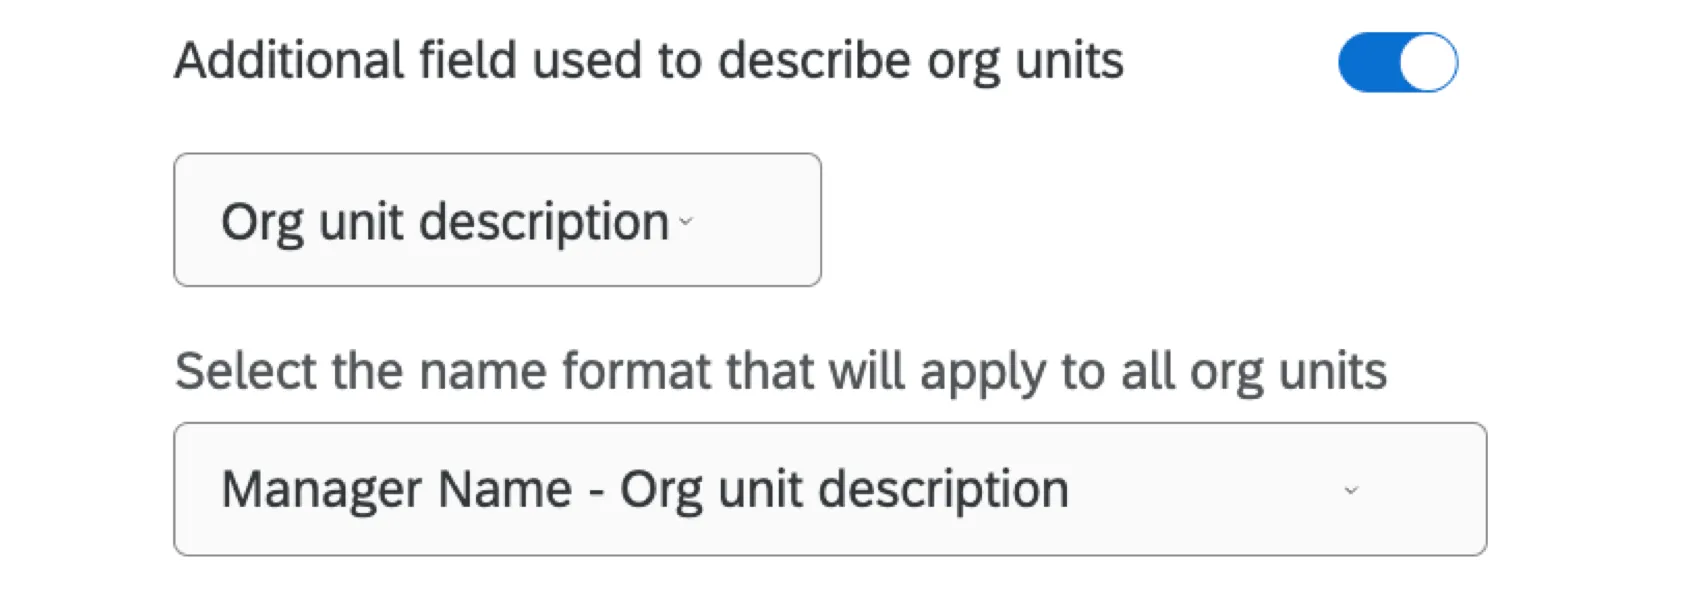
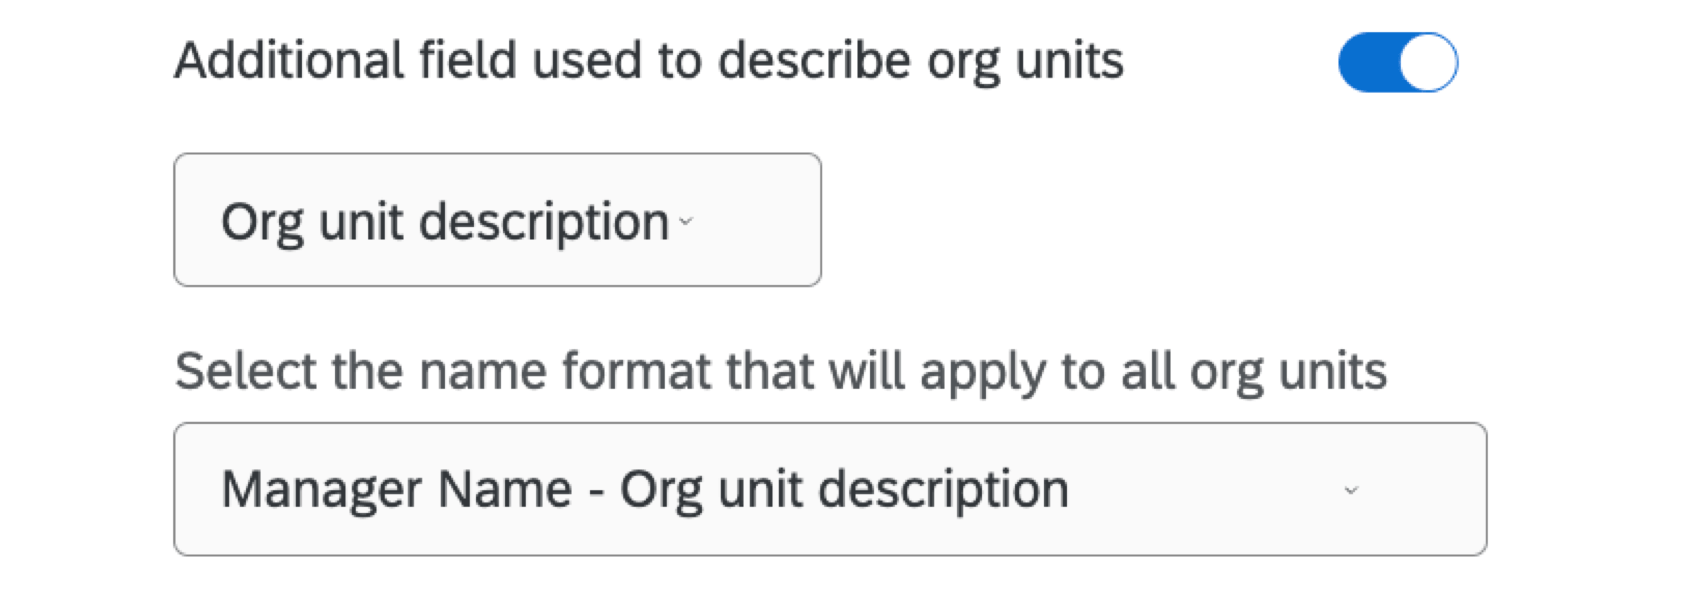
The Additional field used to describe org units allows you to add a description to the units in your org hierarchy. Once enabled, you can then choose the following:
- Org unit description field: Choose the Org Unit Description field that contains your org unit descriptions.
- Unit name format: Select the naming format you’d like applied to unit names.
Qtip: Your participant file must contain the Org Unit Description field if you’d like to use this setting.
Use filters to include only certain people in the org hierarchy

The Use filters to include only certain people in the org hierarchy allows you to limit the people included in the hierarchy based on a metadata value. Once enabled, you can then select a metadata field and determine the criteria for a participant to be included in the hierarchy.
In the example above, only participants from a certain hiring date are being included in the hierarchy.
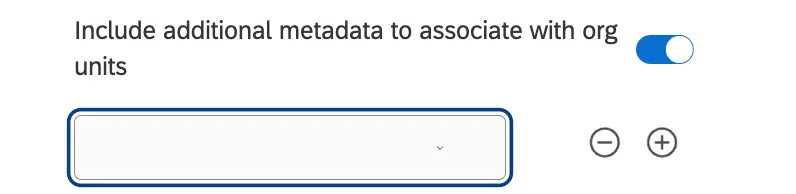
Include additional metadata to associate with org units
The Include additional metadata to associate with org units allows you to specify other metadata to include with your units. This metadata must match all members of the same organizational unit. You can add and remove fields by clicking the plus ( + ) and minus ( – ) signs next to the field dropdown.
Example: Your units are determined by manager. A field like “Manager phone number” or “Department name,” which would be the same for each employee in the same unit, would go here.
Qtip: You cannot select fields that are already being used for org hierarchy generation (e.g., ManagerID, EmployeeID). You also cannot select fields that are already being used to configure other org hierarchies in your project. Any fields already being used as additional metadata for another hierarchy in your project will not show up in the field dropdown.
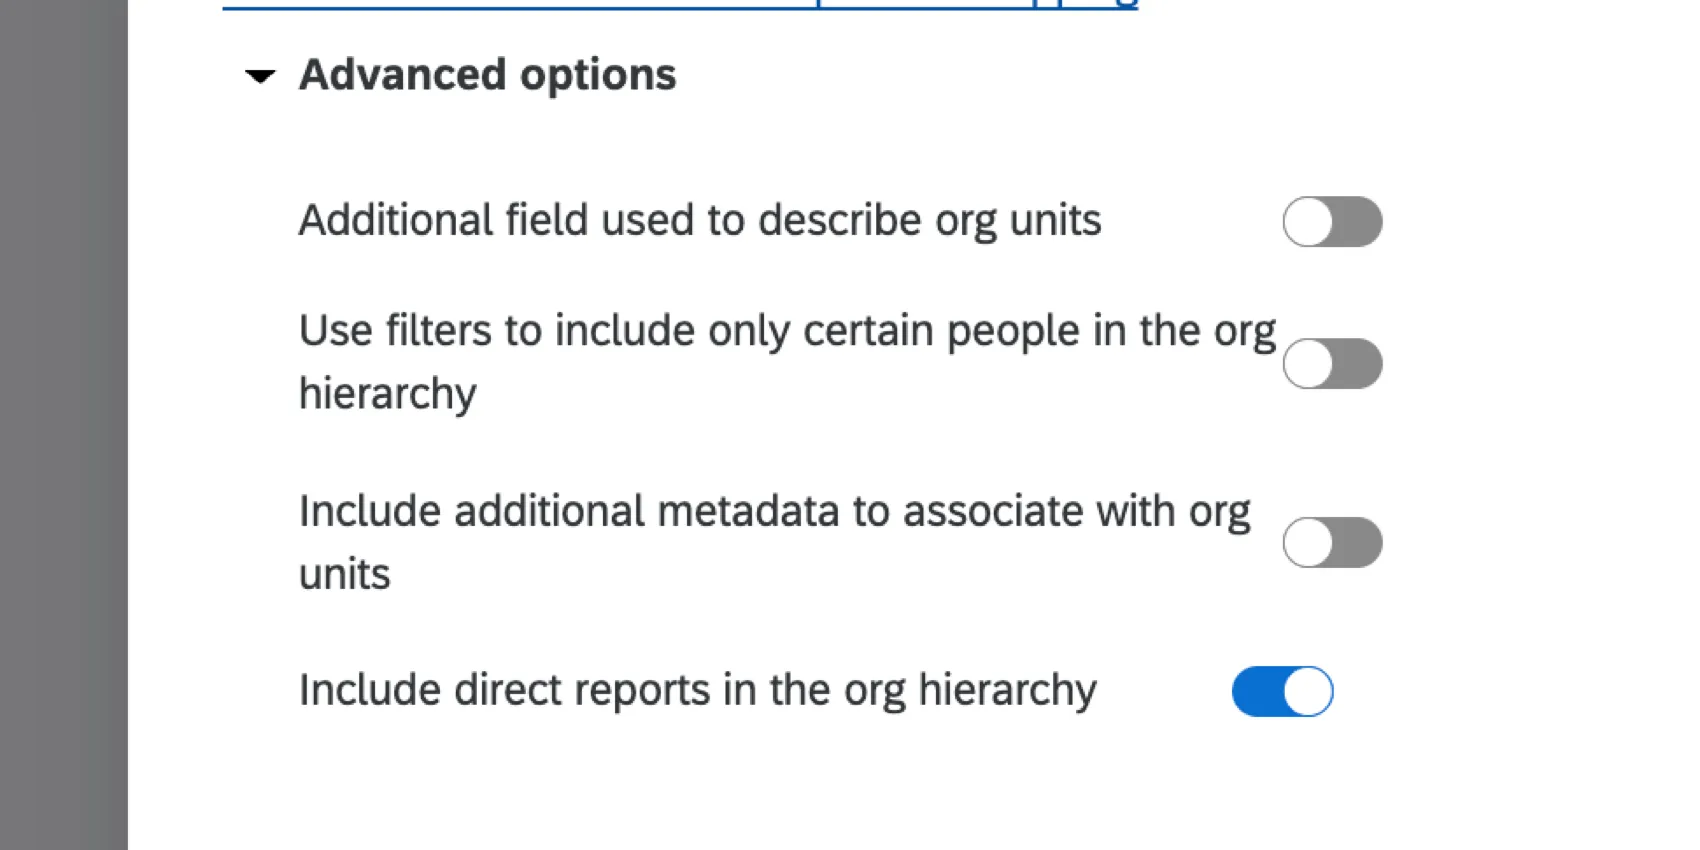
Include direct reports in the org hierarchy

The Include direct reports in the org hierarchy option determines if org hierarchy units contain direct reports or not. This setting controls the type of hierarchy that is created:
- Enabled: When enabled, a parent-child hierarchy will be created.
- Disabled: When disabled, a skeleton hierarchy will be created.
Generating a Skeleton Hierarchy
Skeleton hierarchies are different from other hierarchies because they are built around the managers in your company, not their direct reports. In this design, you know exactly who your managers are, but do not know or necessarily want to include the identities of all of their direct reports. For this reason, skeleton hierarchies are often paired with engagement surveys distributed via anonymous link.
Any engagement survey paired with a skeleton hierarchy should use the Org Hierarchy question type, so employees can identify the manager they belong to. When the time comes to view data in the dashboards, managers can then view their teams’ data because the question has helped link the correct direct reports to the units of the organization to which they belong.
Qtip: Employee ID field, Manager ID field, and any other field where you are entering metadata must match the original participant file you uploaded. This means spelling, spacing, and capitalization must be exactly the same!
Qtip: This is where you add your Org Description metadata so your units will come out by name instead of by Unit ID number.
FAQs
I've already uploaded my participant file and collected data, but I need to make a change to my hierarchy. How do I do this?
I've already uploaded my participant file and collected data, but I need to make a change to my hierarchy. How do I do this?
I want to set up my Parent-Child hierarchy to use unit names rather than assigning manager names to hierarchy units. How do I do this?
I want to set up my Parent-Child hierarchy to use unit names rather than assigning manager names to hierarchy units. How do I do this?
I uploaded my participant list and generated a Parent-Child hierarchy. I received an error message that reads “Circular Dependencies.” Why did I receive this message and how do I fix this?
I uploaded my participant list and generated a Parent-Child hierarchy. I received an error message that reads “Circular Dependencies.” Why did I receive this message and how do I fix this?
I uploaded my participant list and generated a Parent-Child hierarchy. Why do I see some units labeled “Unknown Manager” and how do I fix this?
I uploaded my participant list and generated a Parent-Child hierarchy. Why do I see some units labeled “Unknown Manager” and how do I fix this?
What's the maximum number of hierarchies I can have in my project?
What's the maximum number of hierarchies I can have in my project?
Can I use the same metadata field to build multiple org hierarchies in the same project?
Can I use the same metadata field to build multiple org hierarchies in the same project?
If you’d like to use the same field to build multiple hierarchies, you will need to duplicate the field and use the duplicate to build your additional hierarchies. For example, instead of only including the columns UniqueIdentifier and Manager ID with every participant, you can also include columns named EmployeeID2 and ManagerID2, which you'll use to build a second, separate hierarchy.
How do I make sure that leading zeroes are included in my CSV/TSV file?
How do I make sure that leading zeroes are included in my CSV/TSV file?
Thankfully, there are solutions to ensure your leading zeroes are not removed. If you add this formatting to your file, be careful not to re-open the CSV before importing it to Qualtrics, or you may lose your formatting.
Can I automate changes to my Engagement org hierarchy?
Can I automate changes to my Engagement org hierarchy?
To learn more about automating employee directory changes, see Load Users into EX Directory.
That's great! Thank you for your feedback!
Thank you for your feedback!