-

Qualtrics Platform -

Customer Journey Optimizer -

XM Discover -

Qualtrics Social Connect
Using the Qualtrics App in Salesforce
About Using the Qualtrics App in Salesforce
The Qualtrics App in Salesforce lets you send Qualtrics surveys, view survey responses, and view CX dashboards from within Salesforce. For information installing and managing the Qualtrics app in Salesforce, see Managing the Qualtrics App in Salesforce.
Sending Surveys via Salesforce
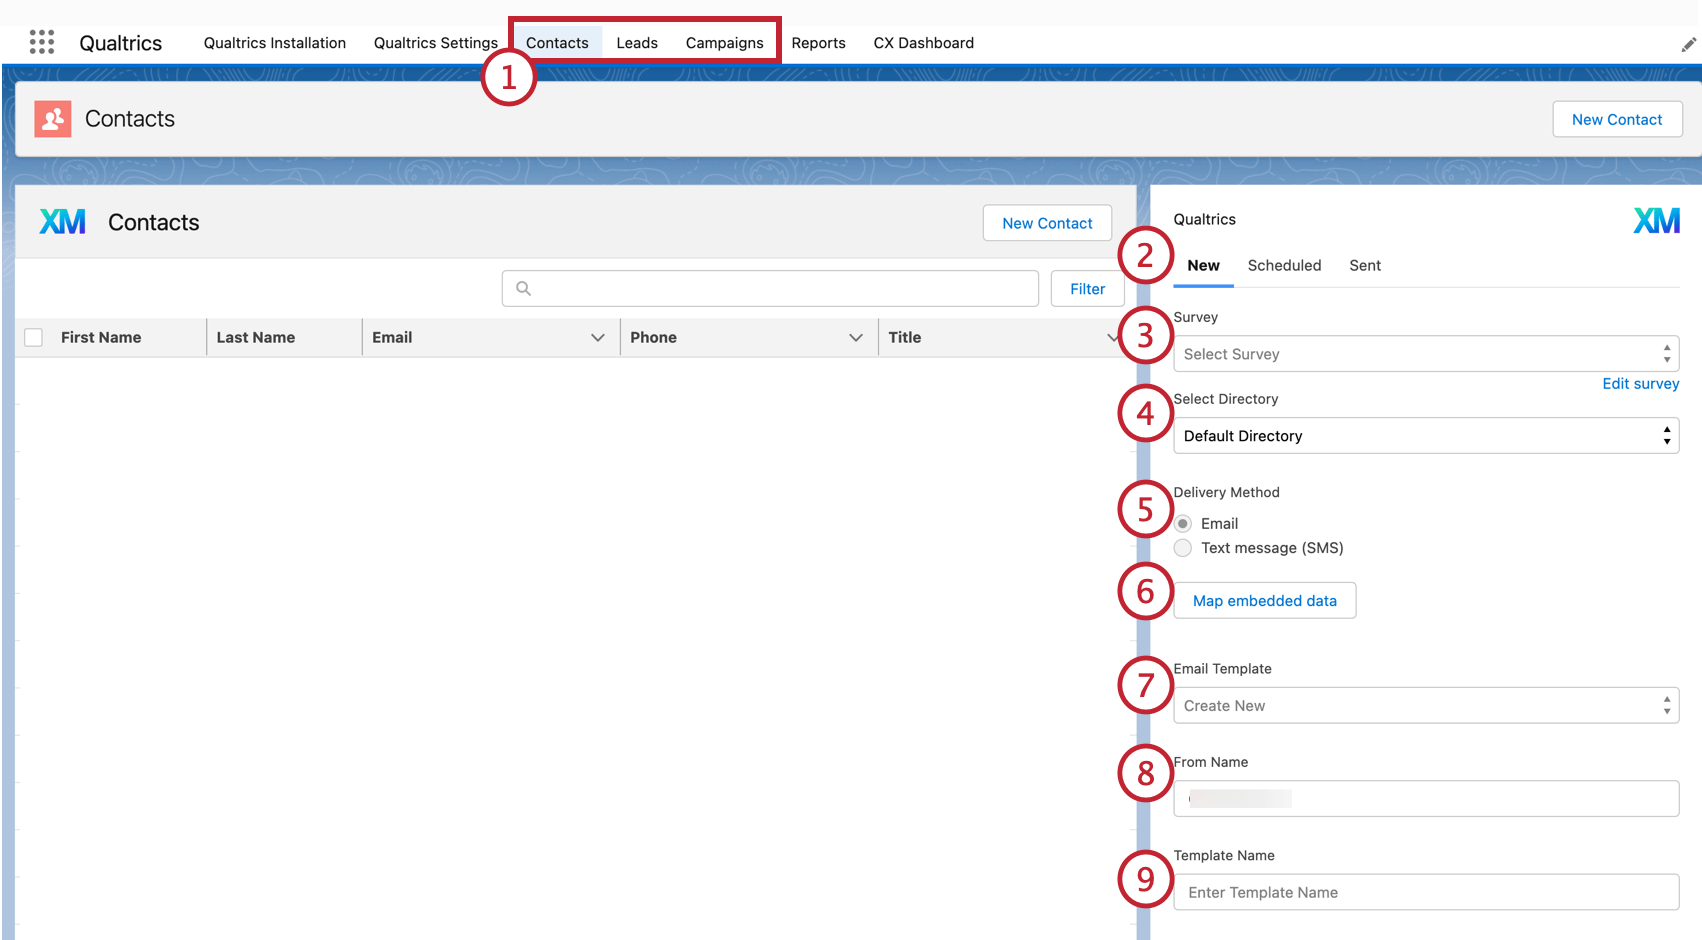
With this app, you can send both email surveys and SMS surveys to people via Salesforce. You can send your surveys from the Contacts, Campaigns, and Leads records and pages, provided they’ve been enabled in the installation process.
Sending Email Surveys
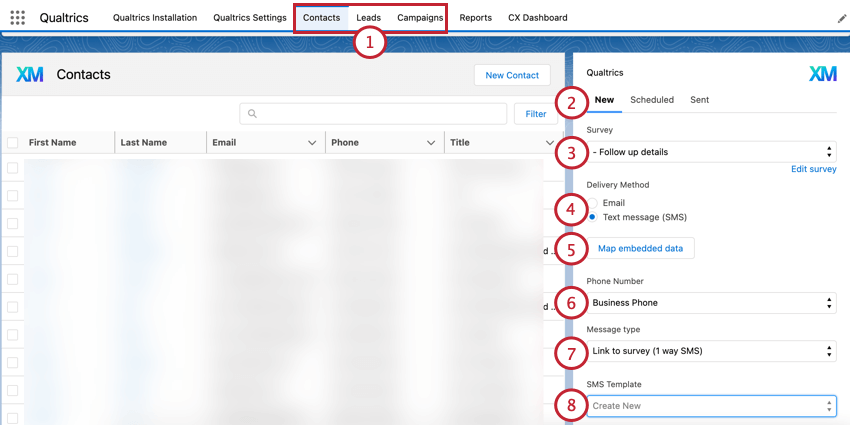
- In the app, go to the Contact, Leads, or Campaign to which you’d like to send your survey.
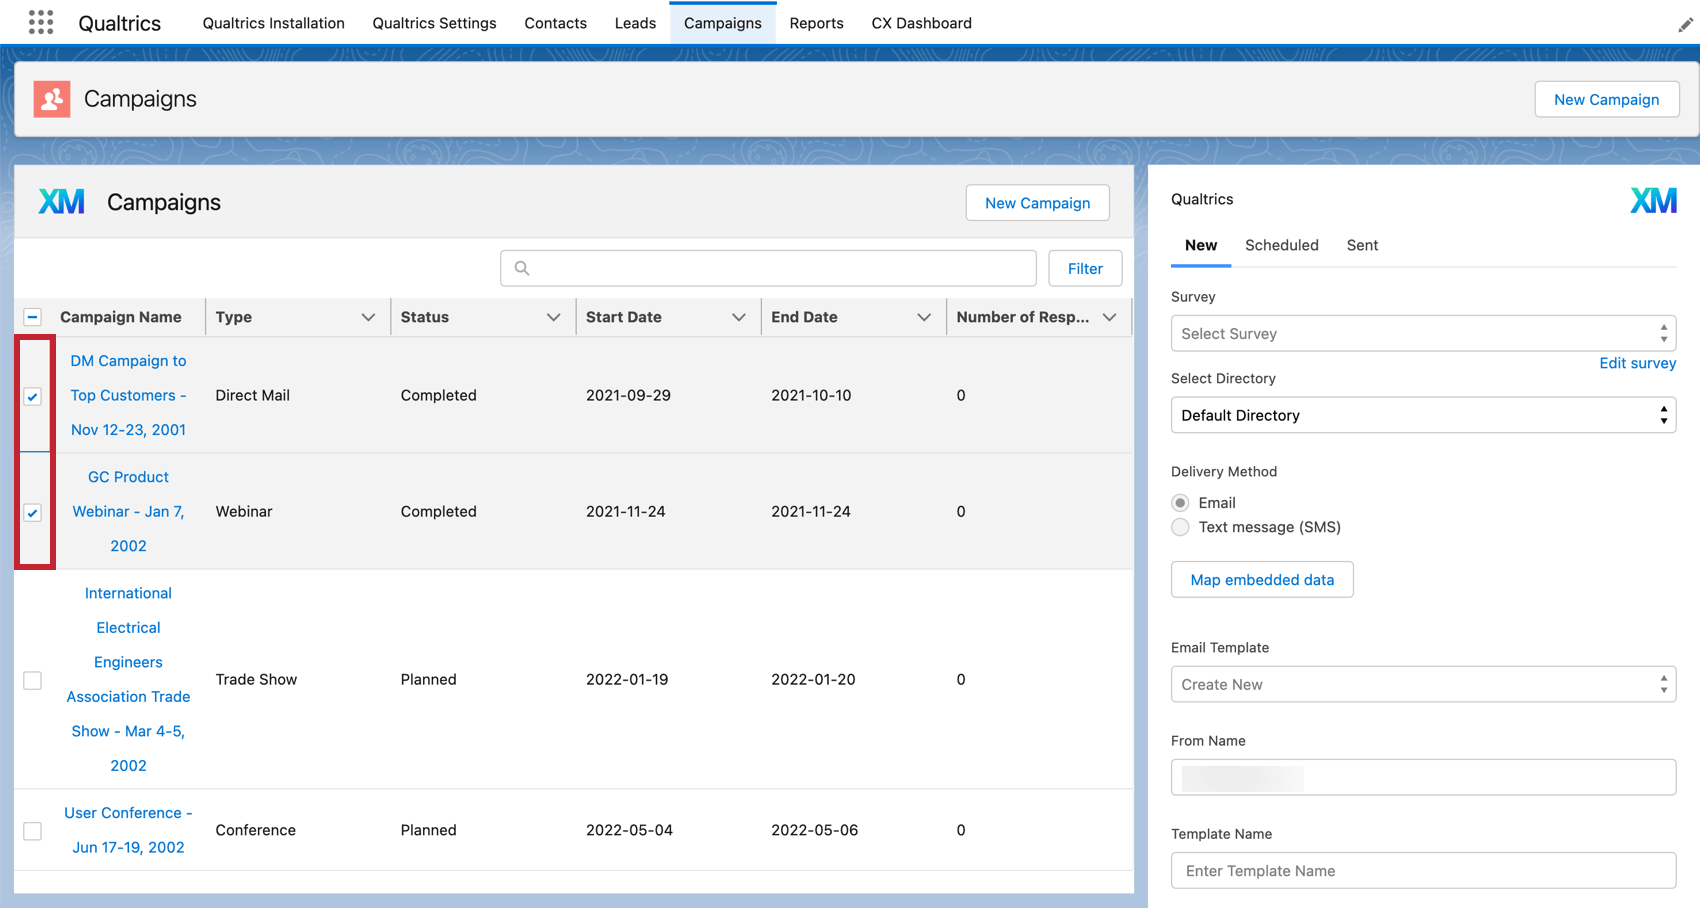
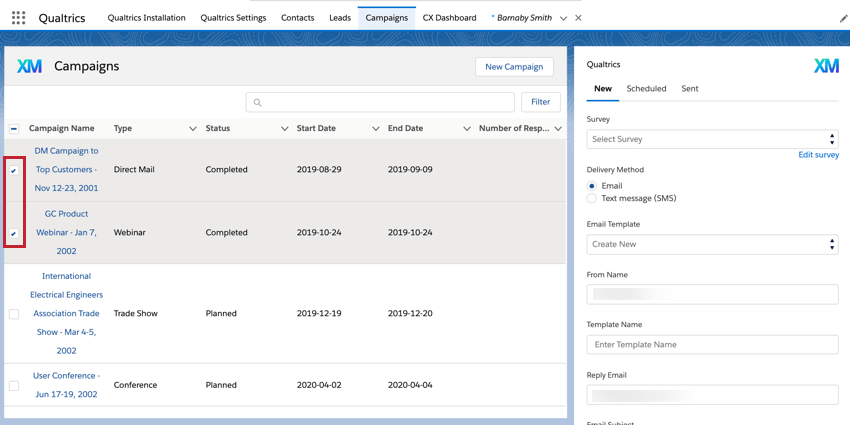
 Example: You can send your survey from the page itself (i.e. the Contacts page), or from a specific Contact record (as pictured above). If distributing from a page, you need to select which records will receive the survey. In the below example, we’ve selected two different Campaigns to receive the survey from the Campaigns page.
- Select New in the distribution widget.
- Choose the survey you’d like to distribute.
Qtip: Click Edit survey to be brought to Qualtrics for editing your survey.
- Choose the directory you’ll be using from your Qualtrics survey distributions.
- Select Email as the Delivery Method.
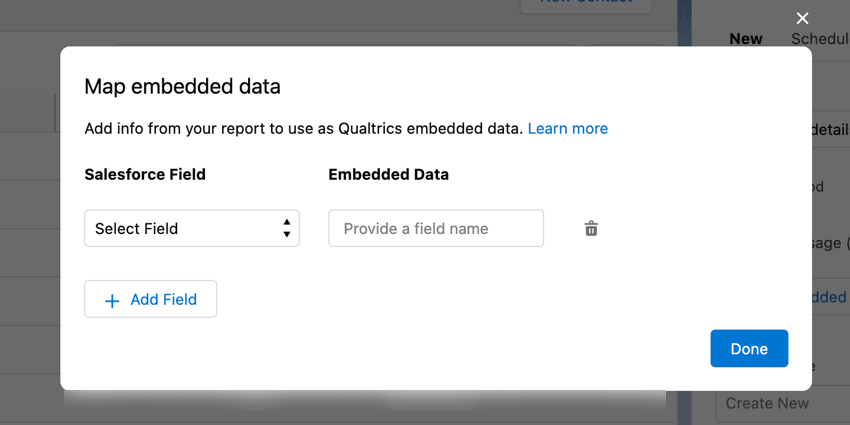
- Click Map embedded data to save Salesforce field data as embedded data in Qualtrics.
Qtip: To map embedded data, use the dropdown menu to choose the Salesforce field and type the Qualtrics embedded data field name. Make sure to add these embedded data fields to your survey flow to save them with the survey response data!
- Choose an email template that will be the body of your email. If you do not already have an email template to use, then select Create New.
- Enter the From Name. This is the name that appears in your recipient’s inbox.
- Give your template a name so you can reuse it again in the future. If you selected an existing email template in step 5, you will not have this field.
- Enter the Reply Email. This email will receive any replies to your email invitation.
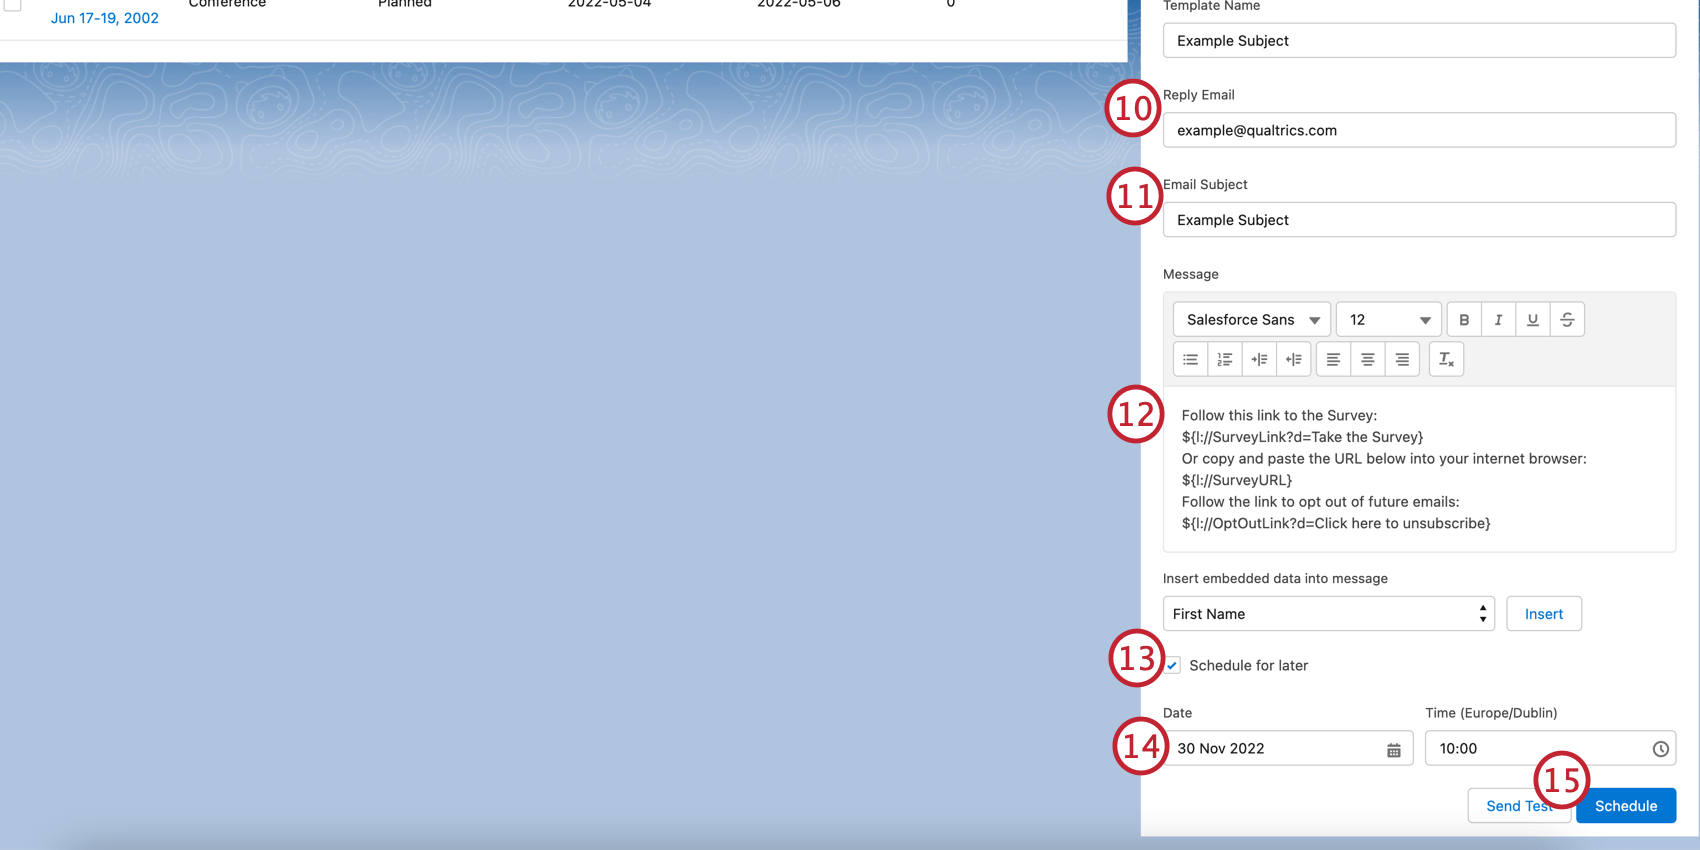
- Enter the Email Subject. This is the subject line of the email.
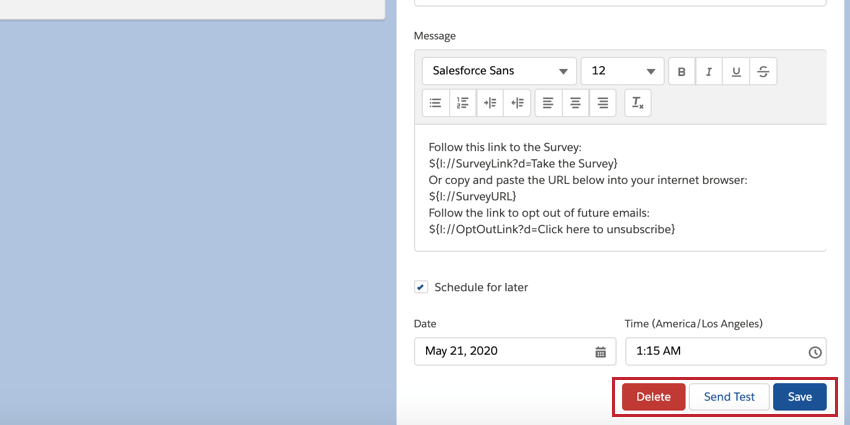
- Configure the body of your email in the Message box.
Qtip: Do not remove the Piped Text from the email body, as the Piped Text turns into your survey links when the email sends.
- To send your email at a future time, click Schedule for later. If you’d like to send your email immediately, skip to step 14.
- Use the Date and Time boxes to select when the email will send.
- Click Schedule to schedule the email. This button will say Send Now if you did not choose to schedule your email for later.
Sending SMS Surveys
- In the app, go to the Contact, Lead, or Campaign to which you’d like to send your survey.
 Example: You can send your survey from the page itself (i.e. the Contacts page), or from a specific Contact record (as pictured above). If distributing from a page, you need to select which records will receive the survey. In the below example, we’ve selected two different Campaigns to receive the survey from the Campaigns page.
- Select New.
- Choose the survey you’d like to send.
Qtip: Not all surveys can be sent via 2-way SMS. See this support page for more information on designing your survey if you want your survey to be taken via 2-way SMS.
- Select Text message (SMS) as the Delivery Method.
Qtip: If this option is grayed-out, that means you don’t have access to SMS surveys. Reach out to your Brand Administrator and request they enable the Use SMS Distributions permission for your account.
- Click Map embedded data to save Salesforce field data as embedded data in Qualtrics.
Qtip: To map embedded data, use the dropdown menu to choose the Salesforce field and type the Qualtrics embedded data field name. Make sure to add these embedded data fields to your survey flow to save them with the survey response data!
- Choose the Phone Number that the survey should be sent to. Since records in Salesforce can have multiple phone numbers, you’ll need to select which phone number will receive the survey.
- Choose the Message Type. This determines how your respondents take the survey:
- Link to survey (1 way SMS): The respondent receives a text message that contains a link to your survey, which they complete in their mobile device’s web browser.
- Direct text replies (2 way SMS): The respondent takes the survey via text message by replying with their answers.
Qtip: If you select 2 way SMS, skip to step 10.
- If you selected 1 way SMS, select the SMS Template, which is the text message invitation your respondents will receive for taking the survey. If you have not created any templates, select Create New.
- If you’re creating a new template, give the template a name so you can reuse it in the future. If you selected an existing template in the previous step, continue on.
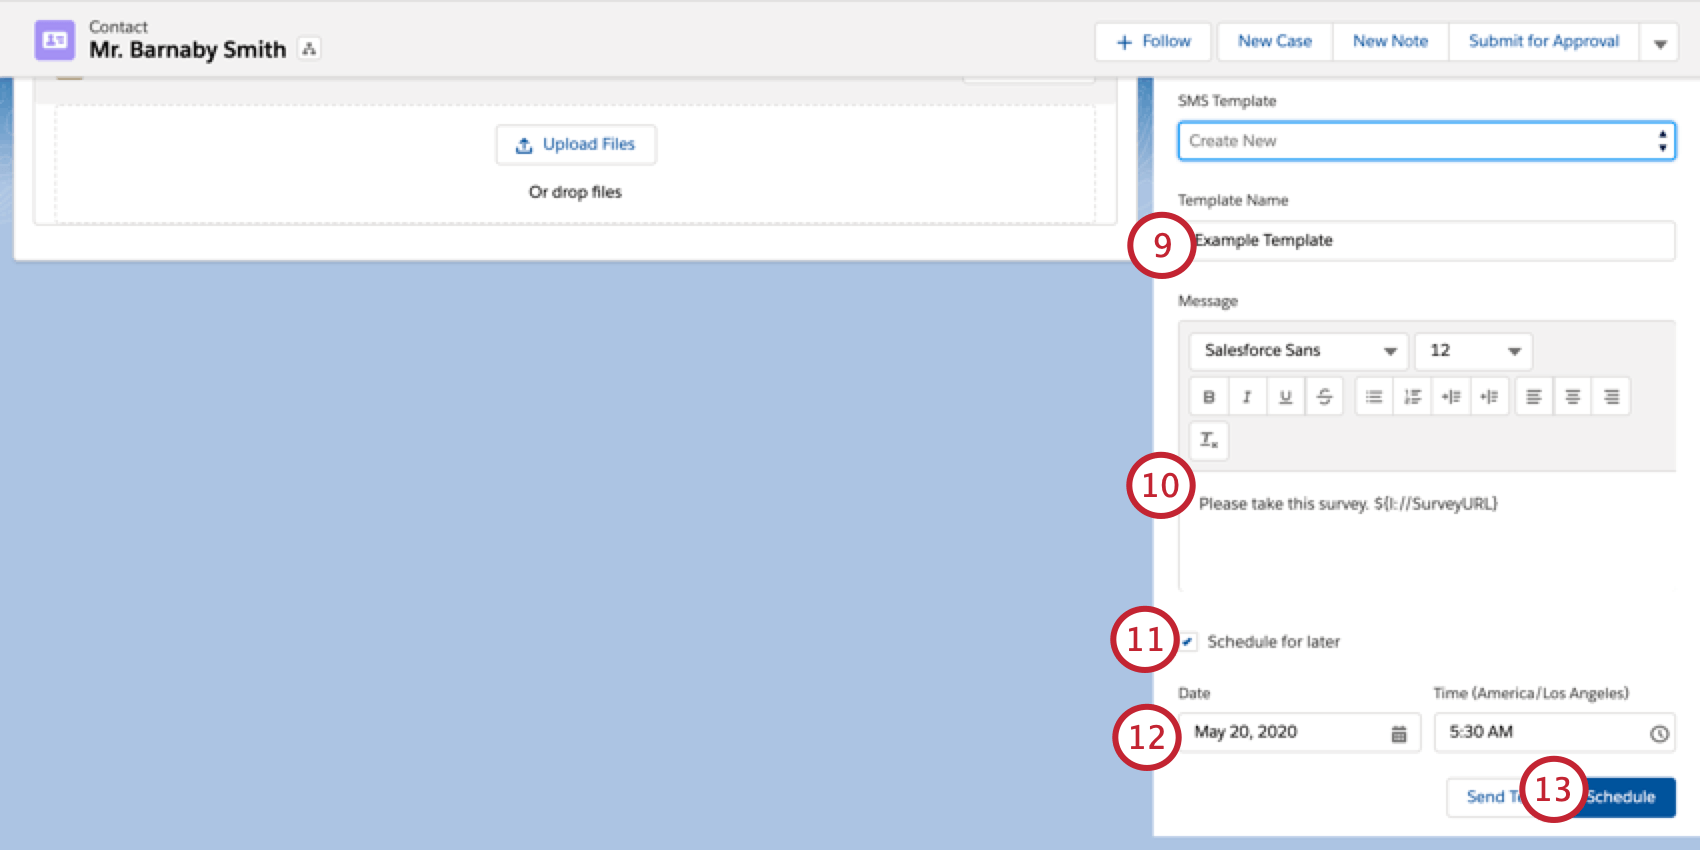
- Configure the body of your text message in the Message box.
Qtip: Do not remove the Piped Text from the text message body, as the Piped Text turns into your survey link when the text message sends.
- To send your text message at a future time, click Schedule for later. If you’d like to send your text message immediately, skip to step 12.
- Use the Date and Time boxes to select when the text message will send.
- Click Schedule to schedule the text message. This button will say Send Now if you did not choose to schedule your text message for later.
Viewing Sent Distributions
In addition to sending emails via Salesforce, you can view information about your past distributions, such as how many people received the survey, any records with missing contact information, and any responses that are associated with the distribution. To view your sent distributions, go to the Sent tab of the survey widget. To view information about a specific distribution, click View More next to the distribution you’re interested in.

After clicking View More, you’ll see a window that show more information about your distribution:
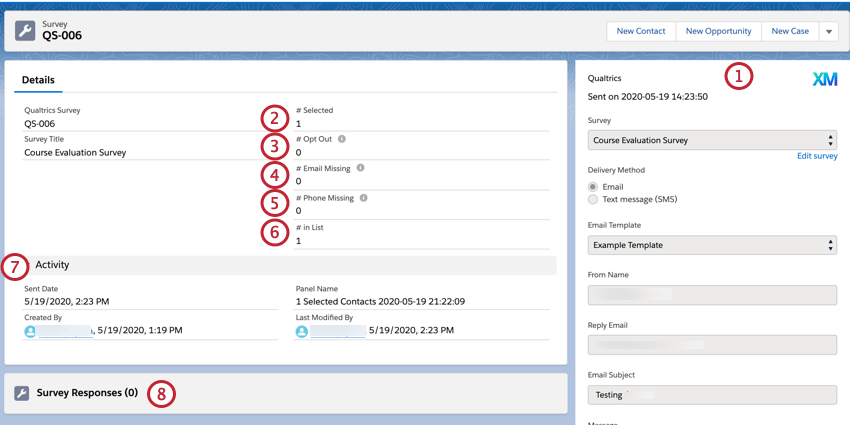
- On the right hand side, you can see all of the details of your distribution when setting it up, such as what survey was sent, the distribution method, the message that was sent, and more.
- # Selected is the number of records that were selected to receive the distribution. This number can include respondents who did not actually receive a survey invite, such as if their contact information is missing, or if they’ve opted out.
- # Opt Out is the number of records who did not receive an email since they fulfilled the survey exclusion criteria. See Additional Settings for more information about survey exclusion criteria.
- # Email Missing is the number of records who did not have a valid email address for receiving the distribution. If you sent an SMS survey, this number will be 0 for your distribution.
- # Phone Missing is the number of records who did not have a valid phone number for receiving the distribution. If you sent an email survey, this number will be 0 for your distribution.
- # in List is the number of records in the contact list that were actually sent the distribution.
- The Activity section will show you when the distribution sent, the associated panel name, what user created the distribution, and what use last modified the distribution.
- As responses come in, they’ll be visible in the Survey Responses section. See the below section about viewing responses for more information about mapping your responses for viewing in Salesforce.
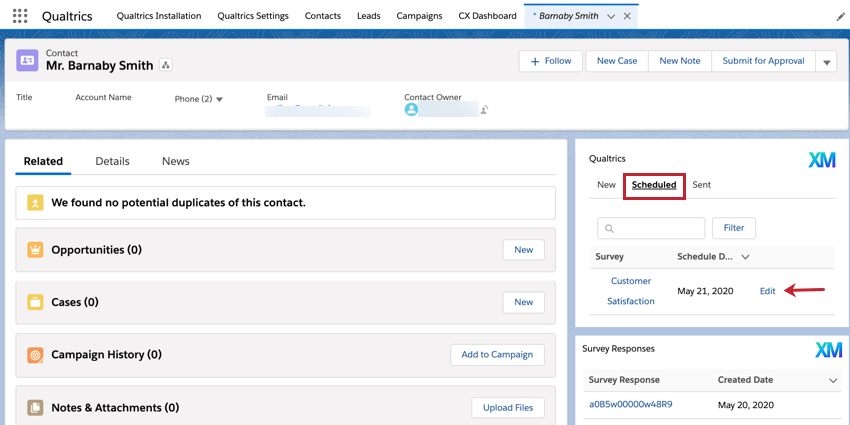
Editing & Deleting Scheduled Distributions
After scheduling a distribution to send on a future date, you can edit the details of the distribution, or cancel it all together. To edit a scheduled distribution, select the Scheduled tab and then click Edit next to the distribution.
You can then edit any details of your distribution, such as what survey sends, when the distribution sends, the associated message, and more. Once you’re finished editing, you can click Save to save your changes. If you’d like to preview your changes, click Send Test and enter either your phone number or email address, depending on the distribution type. If you want to delete your distribution altogether, click Delete.
Viewing Responses in Salesforce
Before responses appear in Salesforce, you need to map your responses back to Salesforce. You will need to perform these steps for every survey you want to send via the Salesforce App.
- Navigate to the Survey flow of the survey you’d like to distribute.
- Click Add a New Element Here.
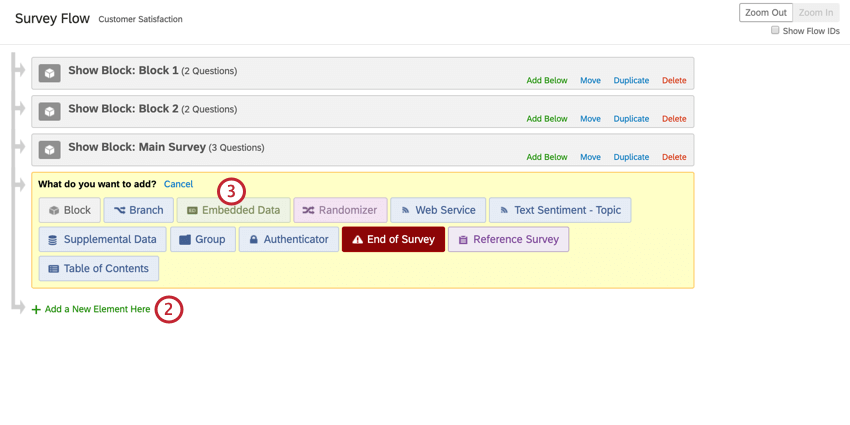
- Select Embedded Data.
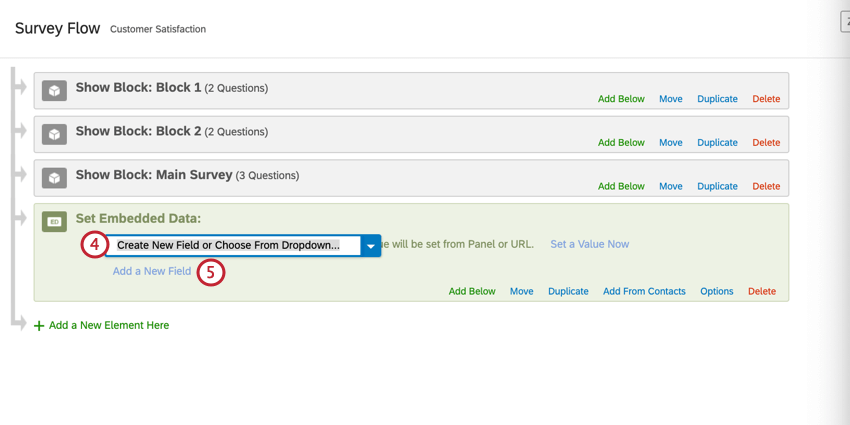
- Type the name of one of your Salesforce fields.
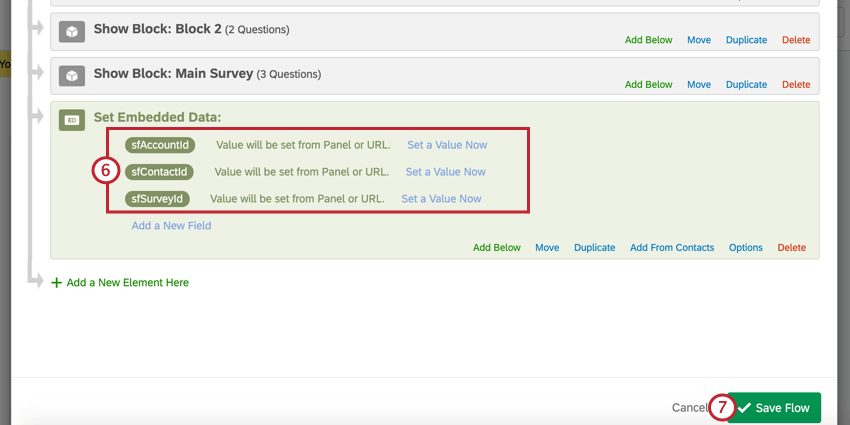
Spelling and capitalization matter! You should add at least these three required fields:- sfAccountId
- sfContactId
- sfSurveyId
- Click Add a New Field to add additional fields. Repeat this until you have added all your desired fields.
Qtip: The three fields above are the ones required to make the response appear in Salesforce while linking it to the correct record. You can add any additional Salesforce fields you’d like to appear with the response. For example, if you’re linking the responses to a Lead, you’ll want to map the sfLeadId field.
- At a minimum, your Embedded Data element should contain these three fields: sfAccountId, sfContactId, and sfSurveyId.
 Qtip: If you plan on using these fields in logic, you should move the element to the top of your survey flow.
 - Click Save Flow.
- Navigate to the Workflows tab of the survey you’d like to distribute.
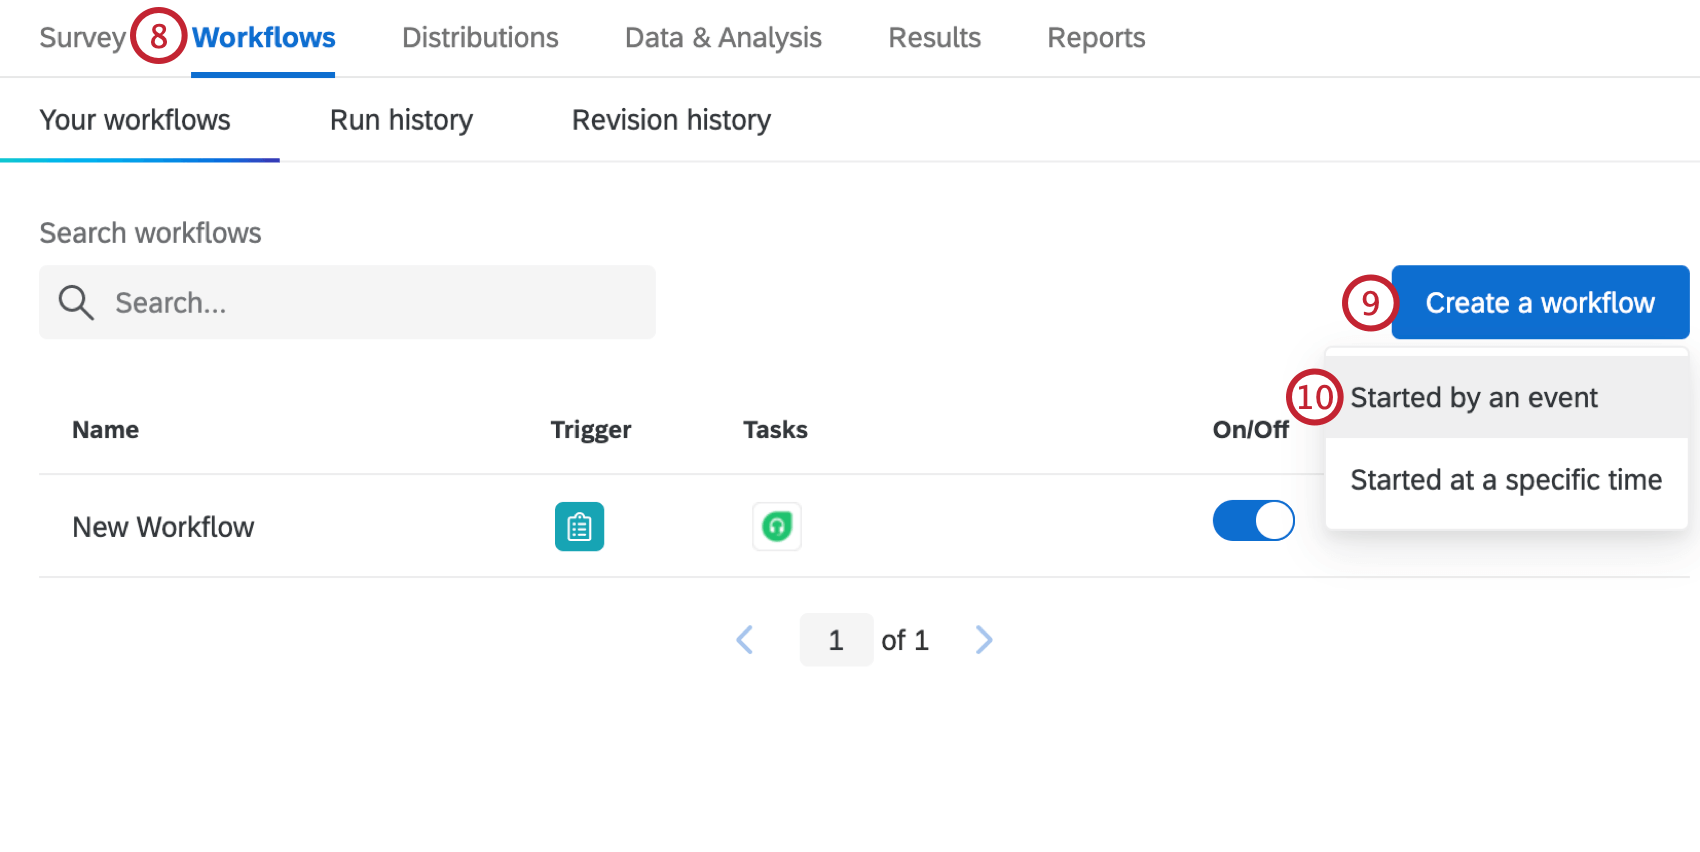
- Click Create a workflow.
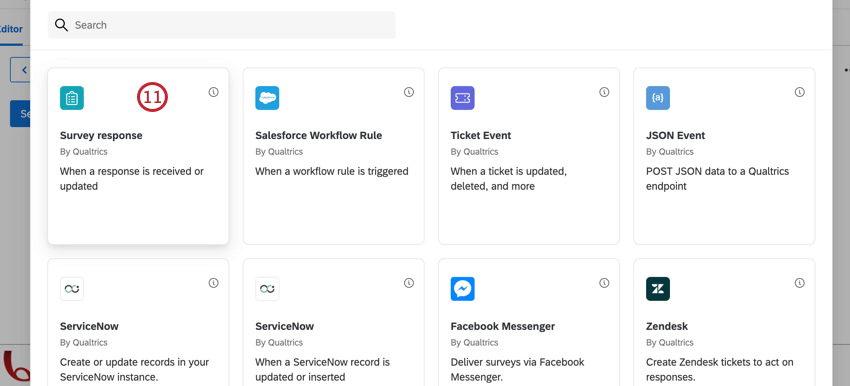
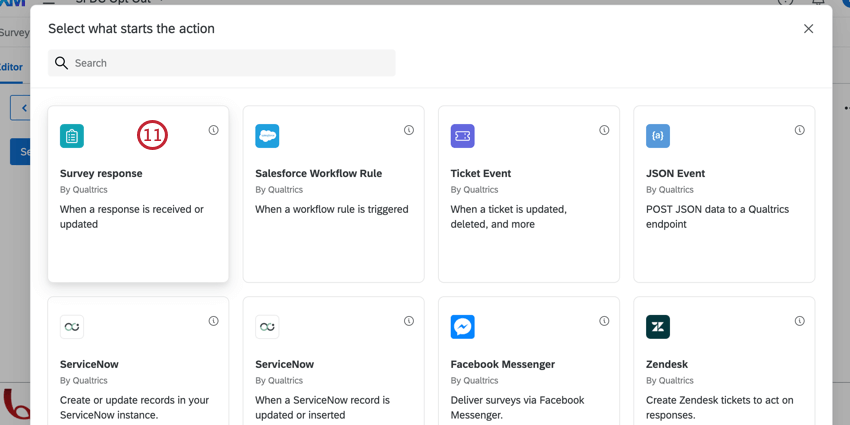
- Select Started by an event.
- Choose the Survey Response Event.
- Select Newly created responses.
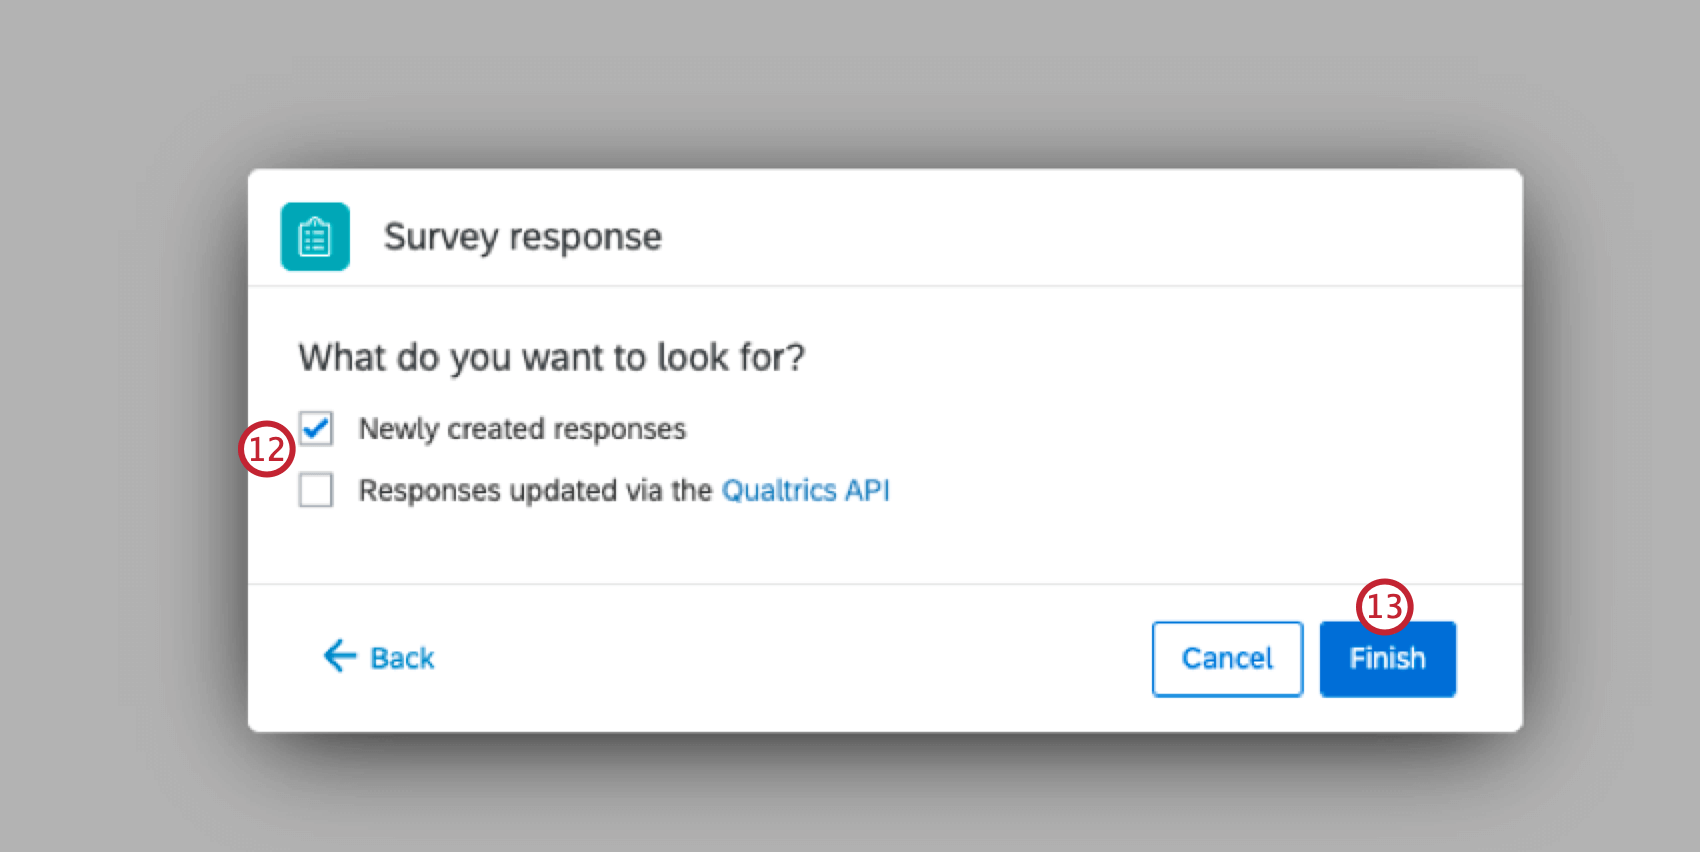
- Click Finish.
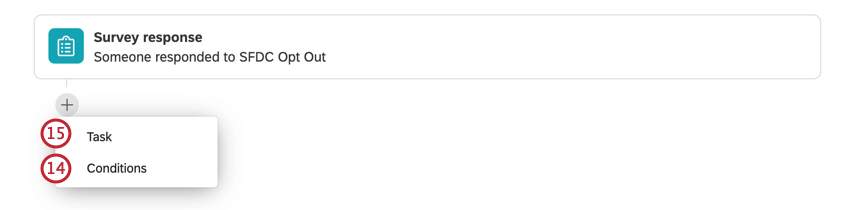
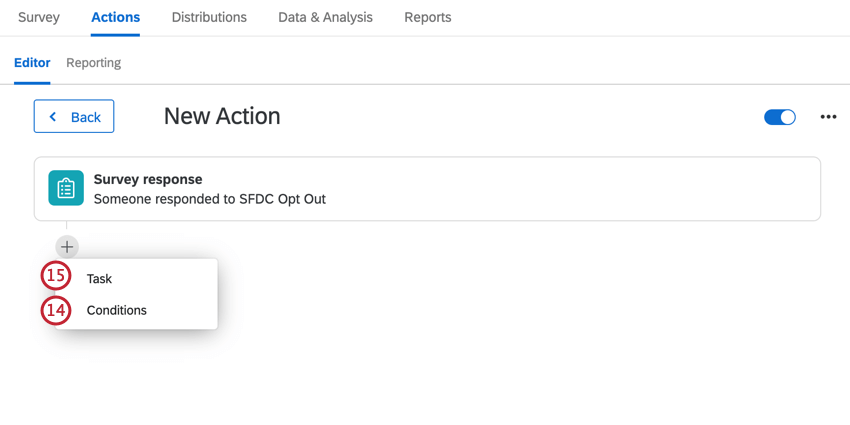
- If desired, click the plus sign ( + ) and then Conditions to add conditions to your workflow. Conditions determine when the workflow fires. For help building conditions, see Using Logic.
 Example: For example, let’s say I only want to map responses that indicated they were dissatisfied. I can add a condition so that the workflow will only fire when the respondent indicated they were dissatisfied in the survey.
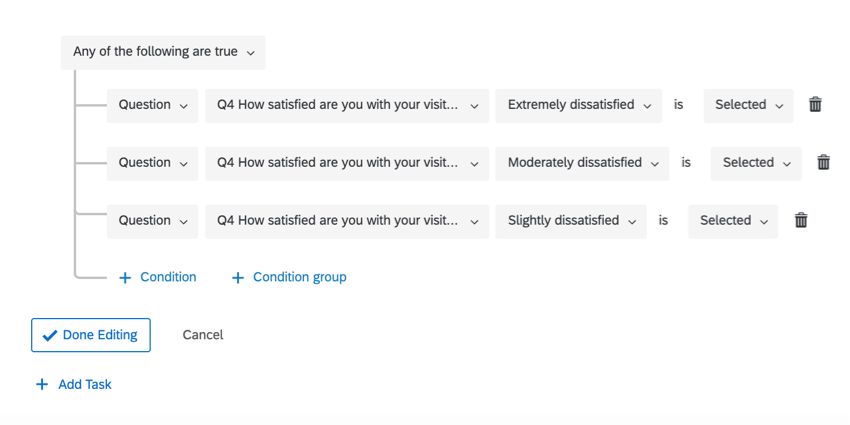
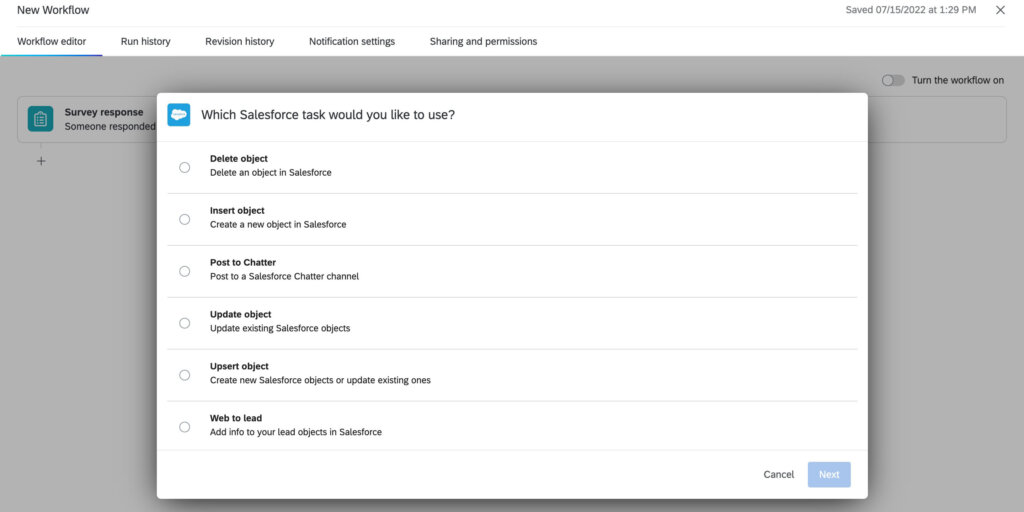
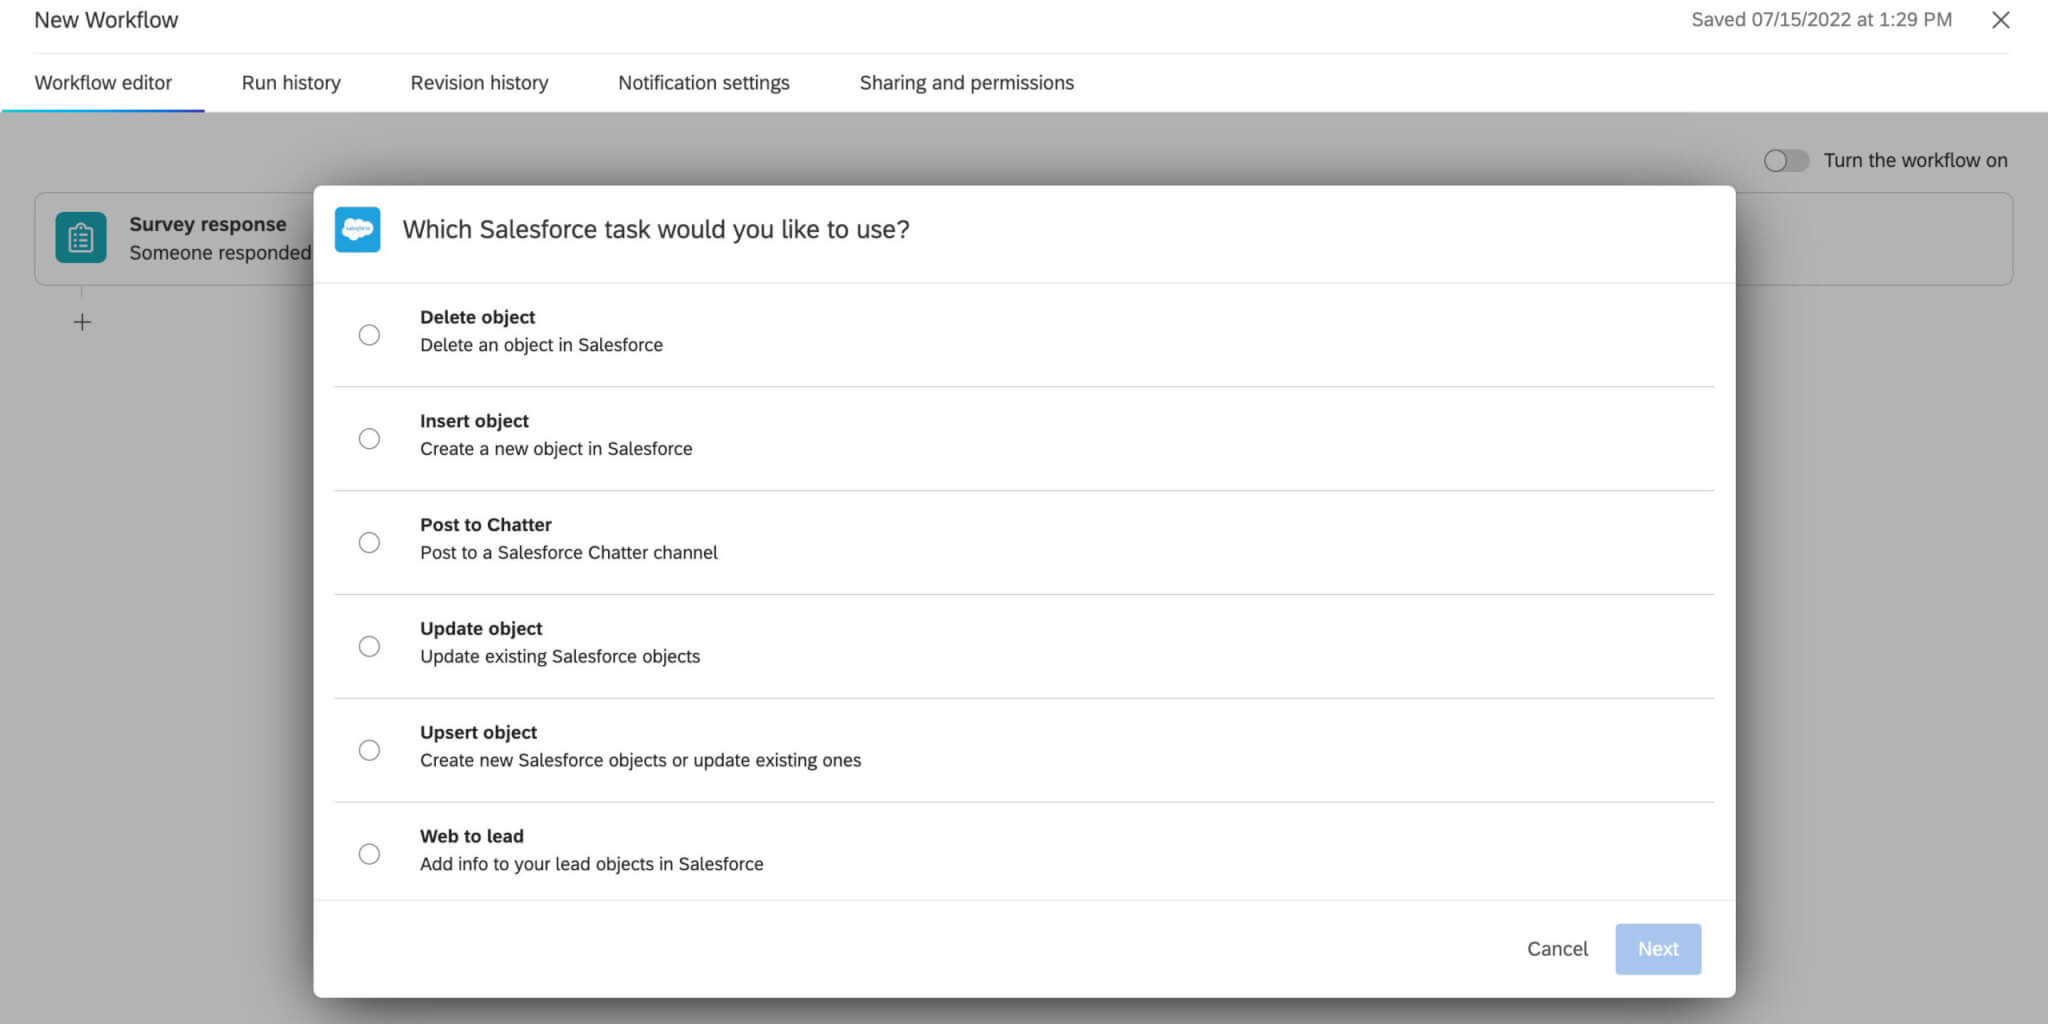
- Click the plus sign ( + ) and then Task.
- Select the Salesforce task.
 Qtip: Most of the time, you’ll connect to a Production Account. Sandbox Accounts are usually used for testing purposes only. After selecting the type of account to add, you’ll be brought to the Salesforce login screen to login to your Salesforce account. Once you log in, you’ll be redirected back to the task to complete the setup.
 - Choose the option that corresponds to what you want to happen with your Qualtrics data on the Salesforce side.
- Select the salesforce account you would like to use for this task.
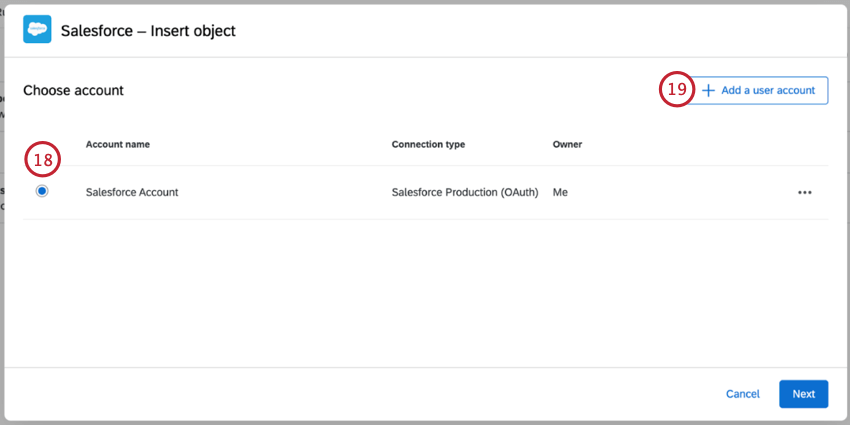
- If you are connecting to a new account click Add a user account. You will be redirected to Salesforce for authentication.
- Select the type of Salesforce object you’re using.

- Select the Salesforce field you would like information to upload to.
- Use {a} to pipe in the corresponding data from a survey question, embedded data, or survey metadata (response ID, recorded date etc).
- Select “Add a new field” to add more fields to map from the survey into Salesforce.
- Click Save.
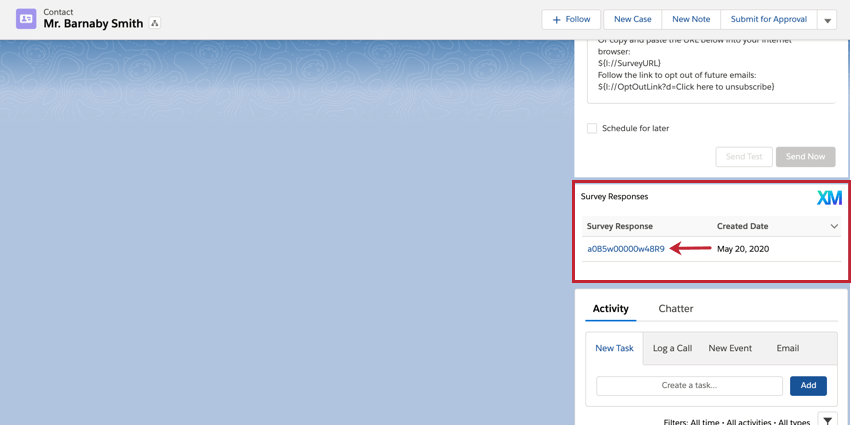
Now, when a respondent takes your survey, this data will be sent to Salesforce, and you can review the response from your Salesforce Contacts or Lead record pages. Click a specific survey response to pull up more information about the response. The fields you mapped to Salesforce will be available in when viewing the response in full.
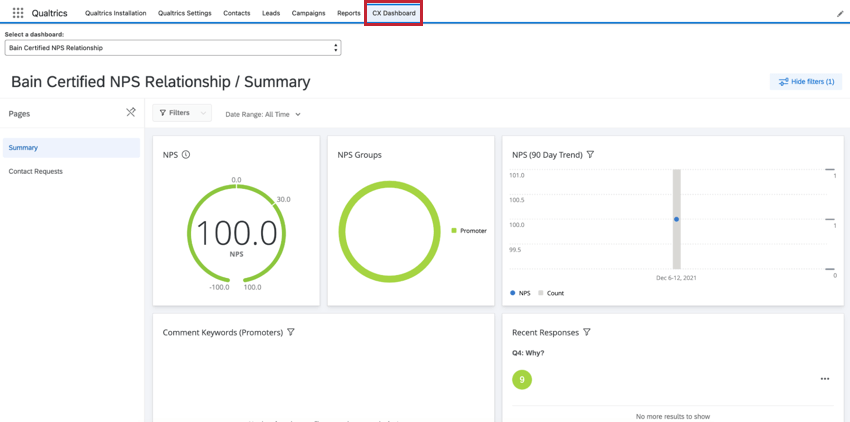
Viewing CX Dashboards in Salesforce
To view your CX dashboards in Salesforce, go to the CX Dashboard tab. For more information about CX Dashboards in general, see our Getting Started with CX Dashboards resources.
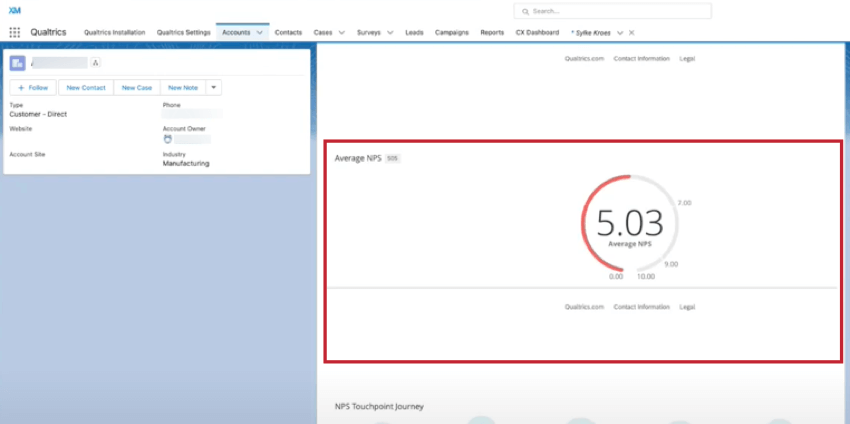
Viewing Filtered Embedded Widgets in Salesforce Records
To view filtered embedded widgets in Salesforce records, open the object record page in Salesforce. From here you can see the filtered widget with information specific to the record you have open.
Additional App Settings
The Qualtrics App contains some additional settings for you to configure, such as survey exclusion rules and disconnecting your Qualtrics account.
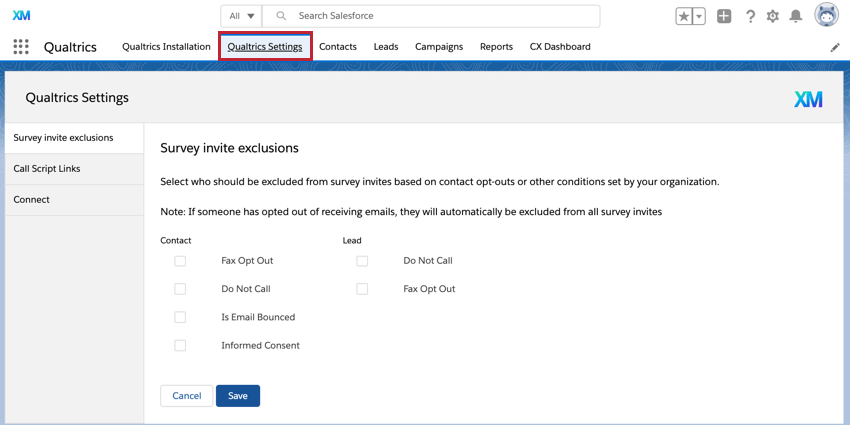
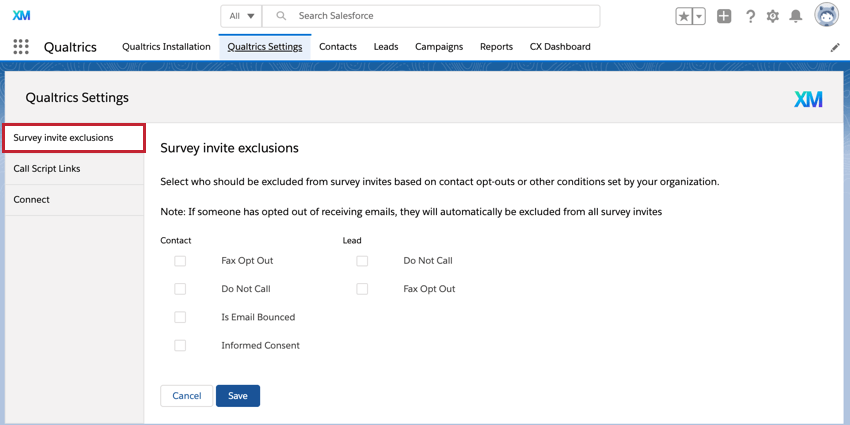
Survey Invite Exclusions
The Survey invite exclusions tab lets you choose if certain records should be excluded from receiving Qualtrics surveys, based on contact-opt outs or other conditions set by your organization.
For contacts, you can base exclusions on the following fields:
- Fax Opt Out
- Do Not Call
- Is Email Bounced
- Informed Consent
For Leads, you can base exclusions on the following fields:
- Do Not Call
- Fax Opt Out
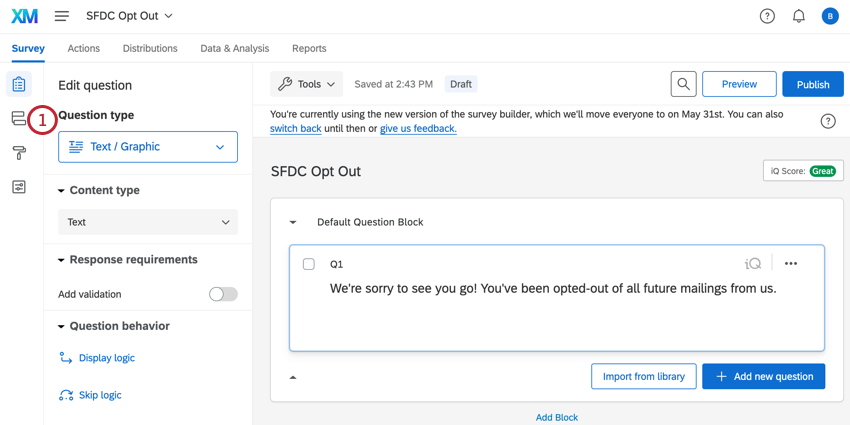
If a record has a value of “true” for a field that you’ve enabled here, then the record will not receive your survey invite.
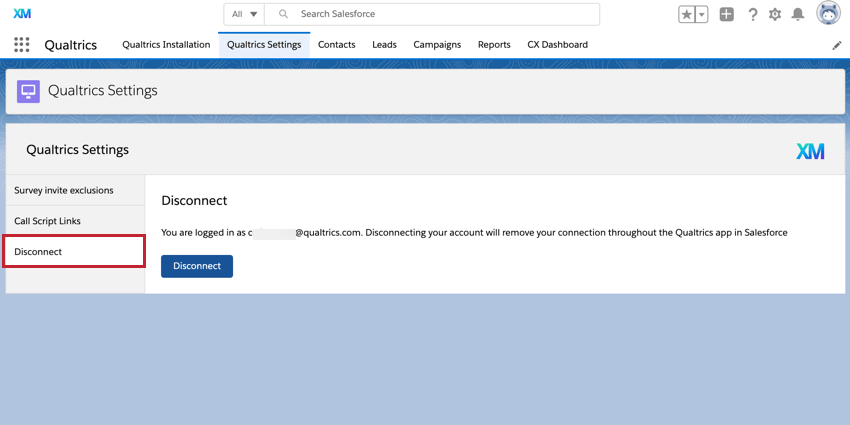
Disconnecting Your Qualtrics Account
To unlink your Qualtrics and Salesforce accounts, go to the Disconnect tab and then click Disconnect.