-

Qualtrics Platform -

Customer Journey Optimizer -

XM Discover -

Qualtrics Social Connect
Searching & Filtering Directory Contacts
About Searching and Filtering Directory Contacts
Finding contacts in the directory is made easier by searching and filtering. You can use a simple search to find the desired person, or you can build incredibly complex searches to be saved and re-used for later.
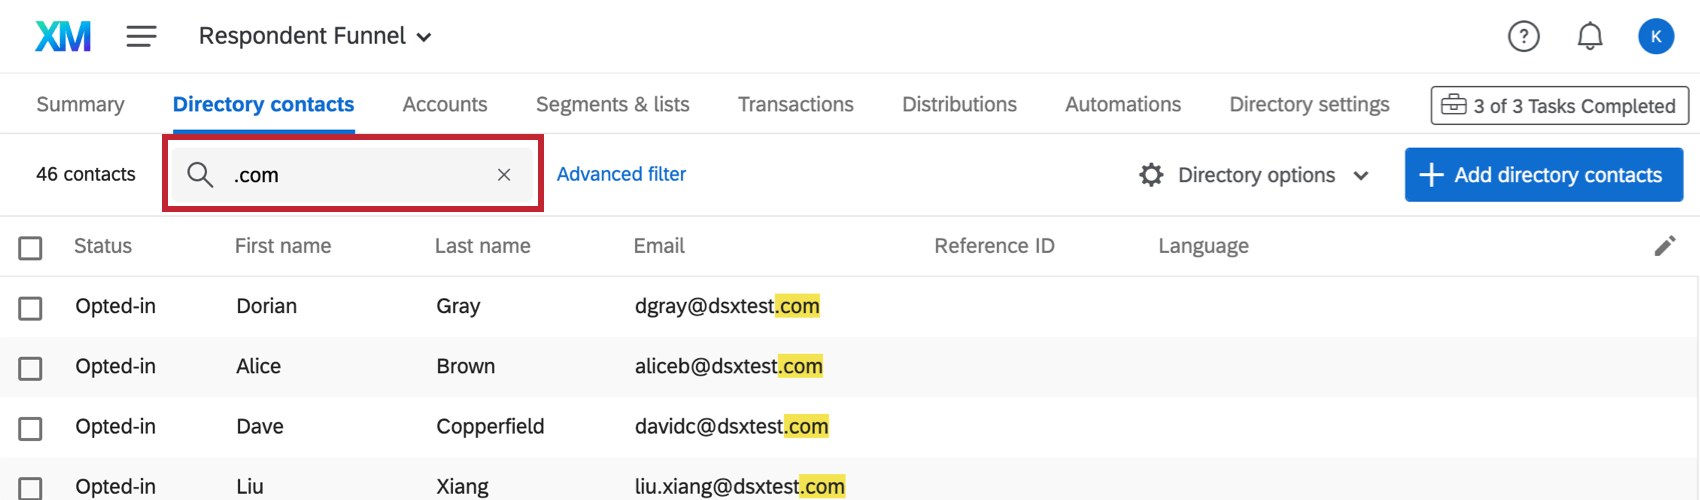
Searching Contacts
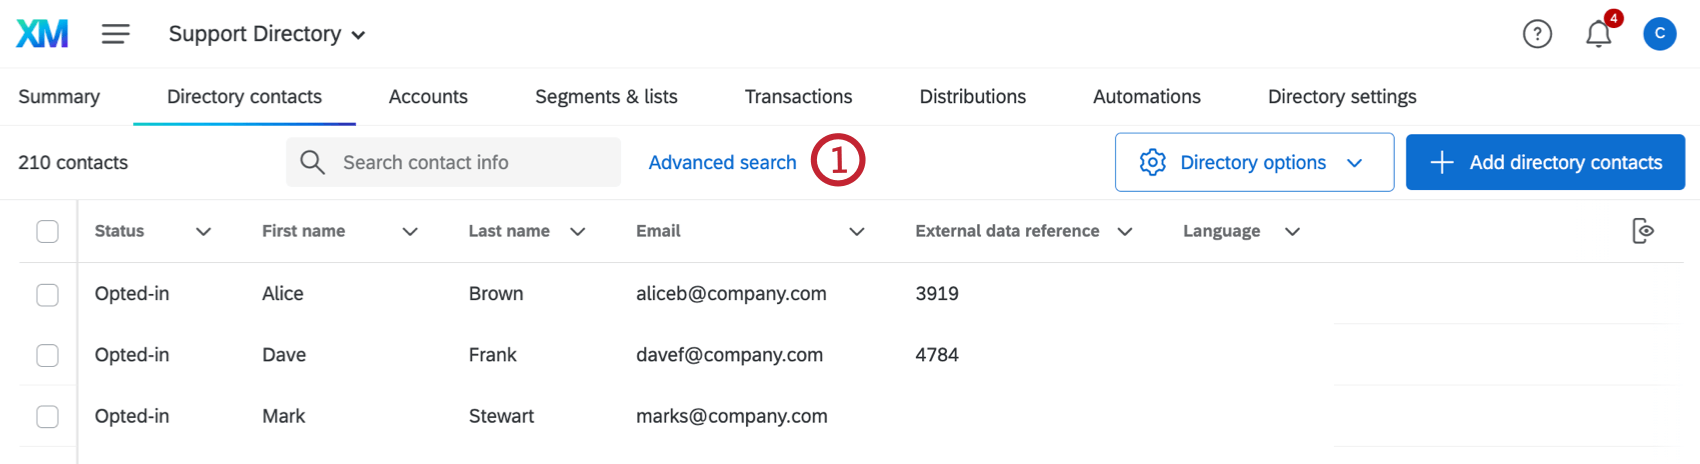
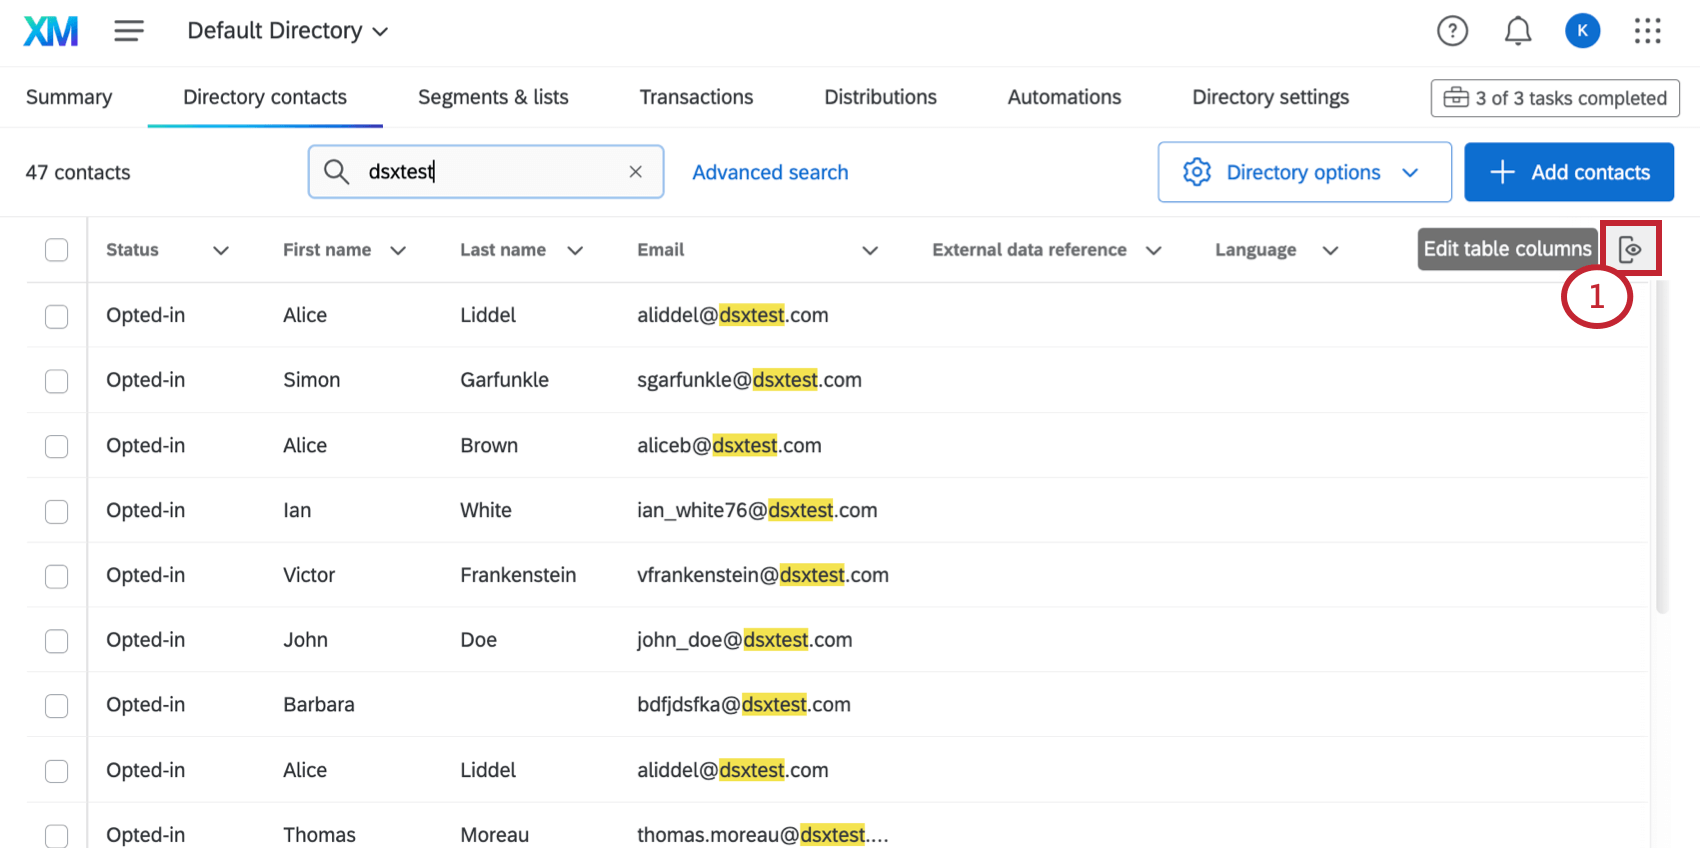
You can search contacts using the search bar on the upper-left. Type in a search term and press Enter on your keyboard to search. Click the X next to a search term to clear it from the search bar.
When filtering your directory, there are many fields you can choose from to narrow down your search.
You can search by these default fields:
- First Name
- Last Name
- External Data Reference
- Phone Number
If you have edited one of these columns out by default, the search bar will still look through these fields, and temporarily add a column for the applicable term when a match is found.
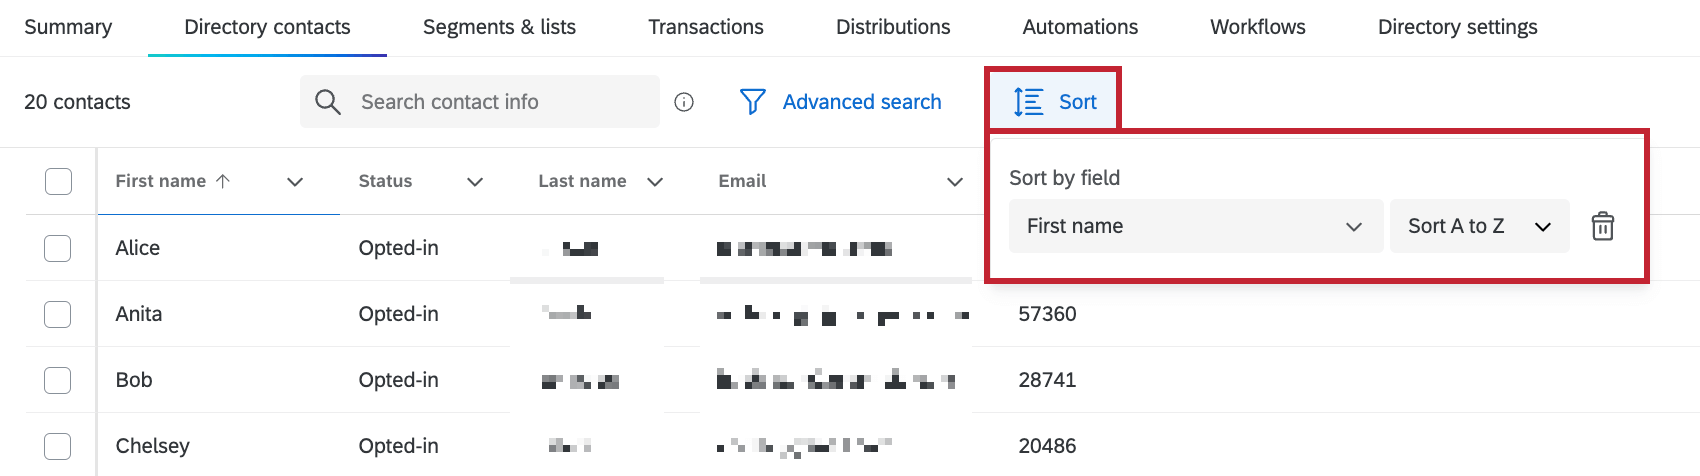
Sorting Contacts
You can sort contacts by clicking Sort in the upper-left. Select a directory field to sort your contacts by that field. Use the dropdown next to the field name to change the sort to ascending or descending. Click the trashcan icon to remove the sort.
When sorting your directory, you can choose from the following fields, as well as any embedded data fields that exist within your directory.
Contact Information:
- First Name
- Last Name
- External data reference
- Phone number
- Language
- Status
- Last modified
- Created
Contact Statistics:
- Last email
- Last invite received
- Last response
- Total emails
- Total invites
- Total responses
- Response rate
- Average response time
If you have removed the column you’re sorting by from your table of contacts, you can still sort by it, and a column for the selected term will be added.
Adding a Filter
- Click Advanced search next to the search bar.
- In the first field, decide what kind of information you’d like to filter by.
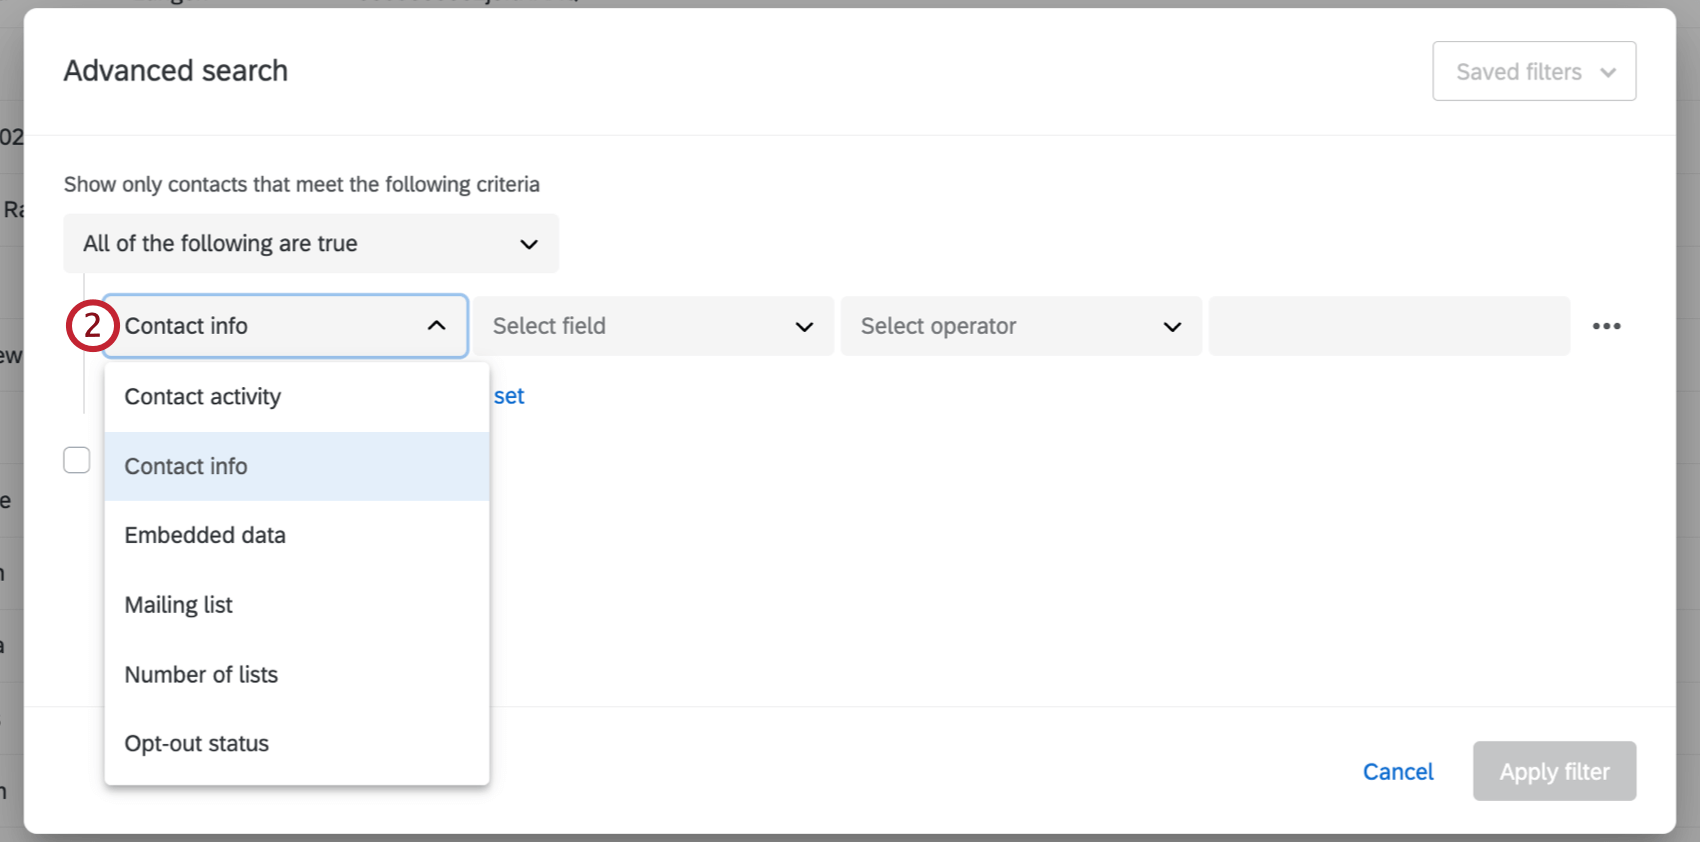
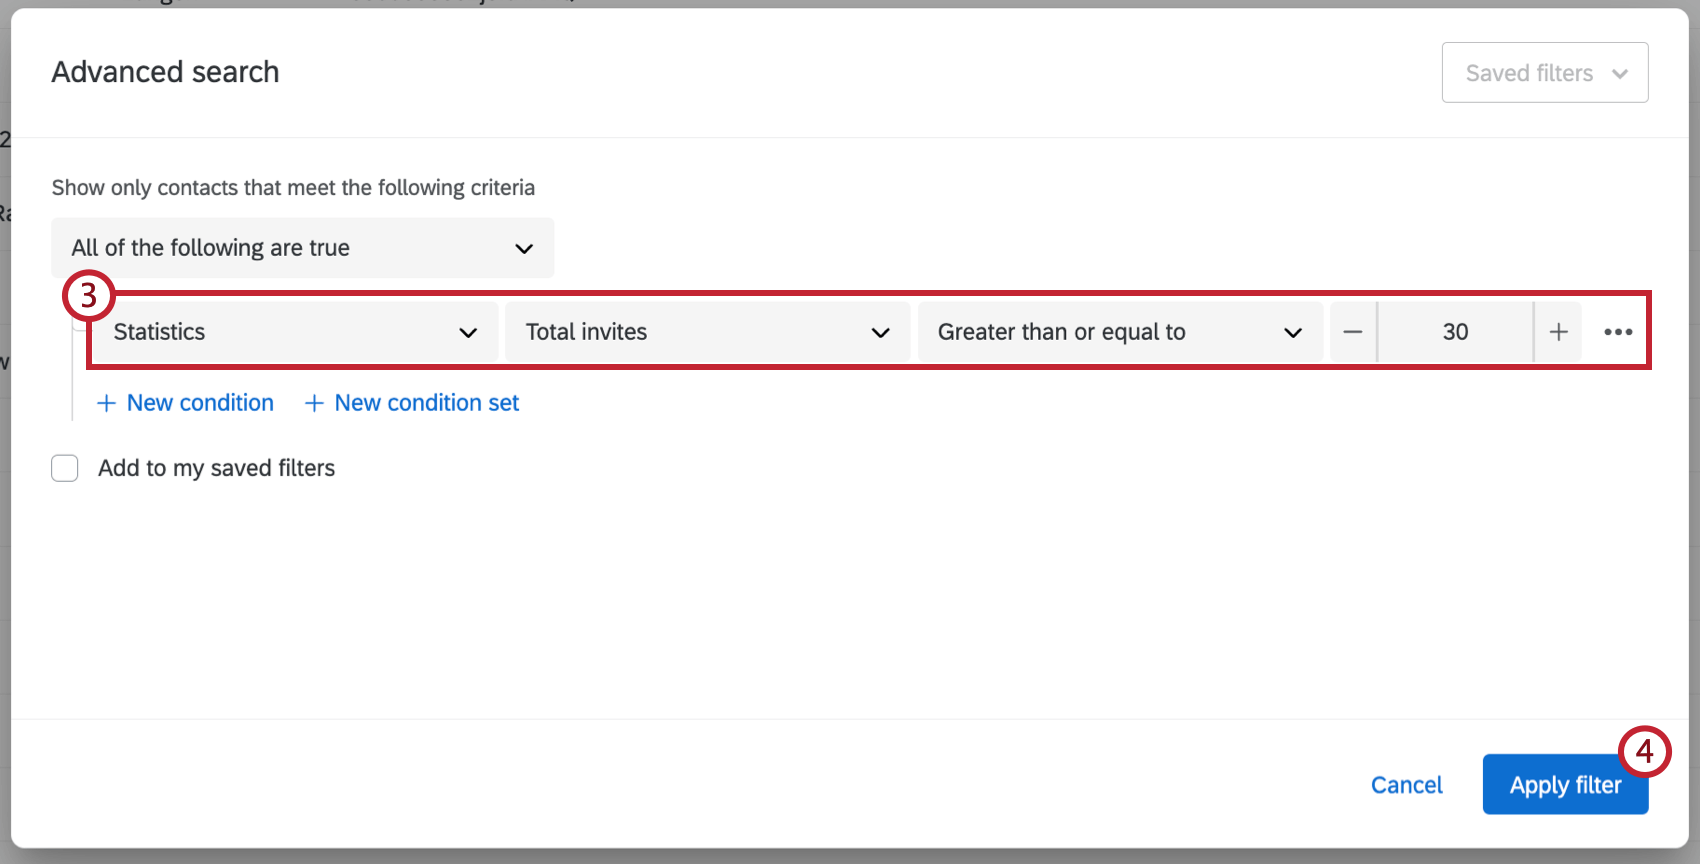
- Fill out the following fields according to your desired filter.
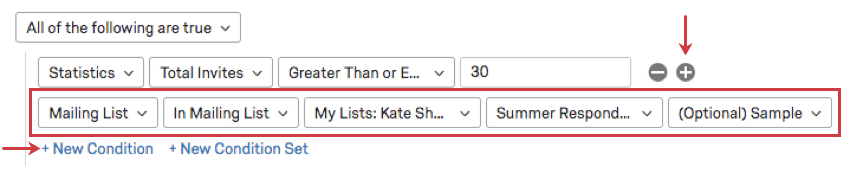
Example: Here, I only want contacts who have received 30 or more survey invites. So my next fields say “Total Invites Greater Than or Equal to 30.”
 Qtip: If your greater than/less than filters are not displaying correctly, be sure to check the value type. Only numbers and decimals can be used as values in greater then/less than filters.
 - When you’re done, click Apply Filter.
AI-Generated Search
AI-generated searches within your directory allow you to automatically generate complex search criteria using simple text prompts. You can also search your contacts using vague prompts.
- Click Advanced search next to the search bar.
- Enter a text prompt in the search bar.
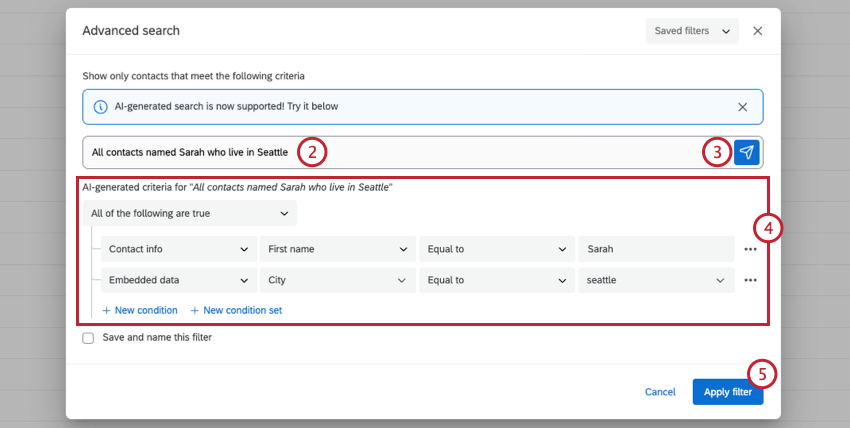
- Press Enter on your keyboard, or click the send icon.
- Search criteria will automatically be generated based on the text you enter. Review the criteria and make any necessary adjustments.
- If you’re satisfied with the search criteria, click Apply filter.
All and Any Sets
You add statements to your condition by clicking New Condition, or by highlighting over the previous condition and clicking the plus sign (+).
Whenever you have more than 1 condition, you’ll need to decide how the conditions are connected to each other. Do both conditions need to be met (e.g., a response must be from a particular month AND for a specific manager to be included)? Or does only one of the conditions need to be true (e.g., data may be included in the report if it was collected either in the Northeast OR the Southeast)?
Conditions linked by an AND conjunction are called ALL condition sets (i.e., “only show data where ALL of these conditions are true”). Conditions linked by an OR conjunction are called ANY condition sets (i.e., “only show data where ANY of these conditions are true”).

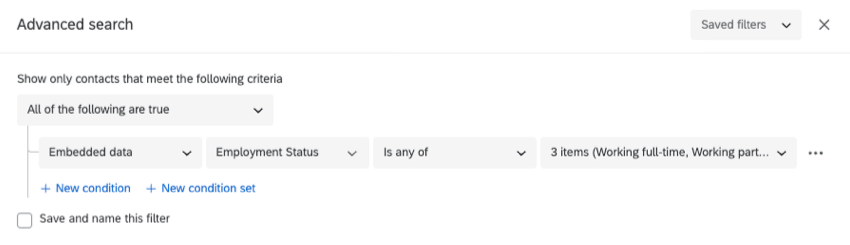
Is Any Of
You can use the “Is Any Of” operator when building a search to eliminate the need to build complex condition sets. With this operator you can select multiple values for your search criteria. Contacts that have any of your selected values will be returned.
Condition Sets
Conditions within the same Condition Set are all indented the same amount and are beneath the same ALL/ANY header.
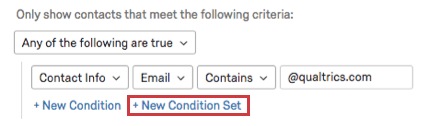
You can create new condition groups by clicking New Condition Set. This will nest a new condition set under the condition set you’re currently working on.
At any point, you can delete an entire condition set by hovering over the ANY/ALL header and clicking the minus sign (–). Note that this deletes all conditions nested underneath, including additional condition sets!
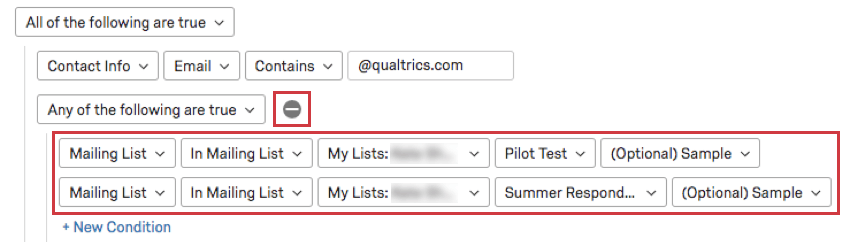
Nesting Logic
Nesting condition sets allows you to create more advanced criteria to filter your data by.
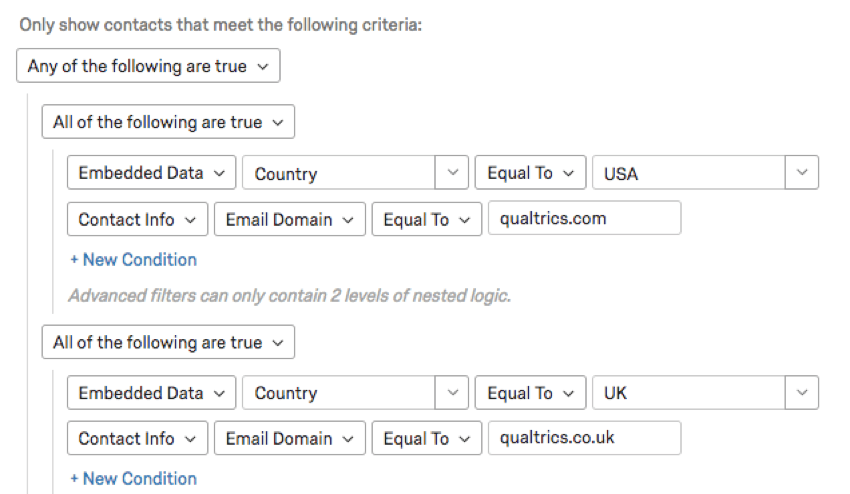
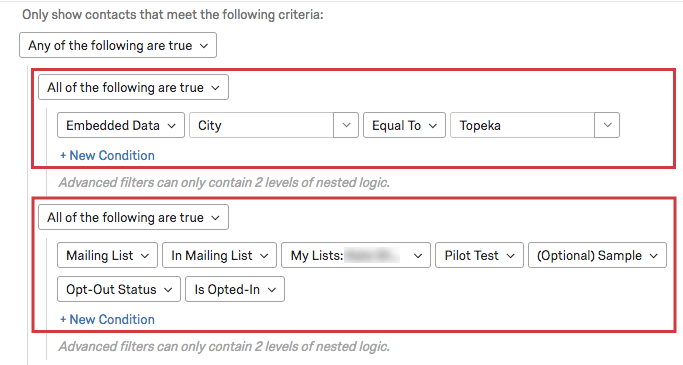
This report will only include responses from people who are from the USA and have a qualtrics.com email address OR who are from the UK and have a qualtrics.co.uk email address.
In the above example, the very outermost group is an ANY group. People are either one thing OR they’re another. Nested within that ANY group are 2 ALL groups:
- People who are from the USA and have a qualtrics.com email address
- People who are from the UK and have a qualtrics.co.uk email address
Essentially, you’ll make a new condition set every time you want to switch from an ANY to an ALL (and vice versa).
With this structure, it is therefore very important to consider which type of group (ALL or ANY) is your very outermost group before you start adding conditions and nesting. The question to ask is whether, at the highest level, you are looking for responses that meet all necessary conditions (ALL group) or are you looking for responses that meet one or more of possible conditions (ANY group).
Nesting Basics
- Clicking New Condition will add a new statement within the same condition set.
- Clicking New Condition Set will nest a new condition set under the one you’re working on.
- Click the minus sign (–) next to a statement to delete it.
- Clicking the minus sign (–) to the right of a condition set’s header will delete the whole group and everything inside it, so be careful!
- To nest ANY/ALL headers directly above each other, like in the examples above, delete the condition just below the header.
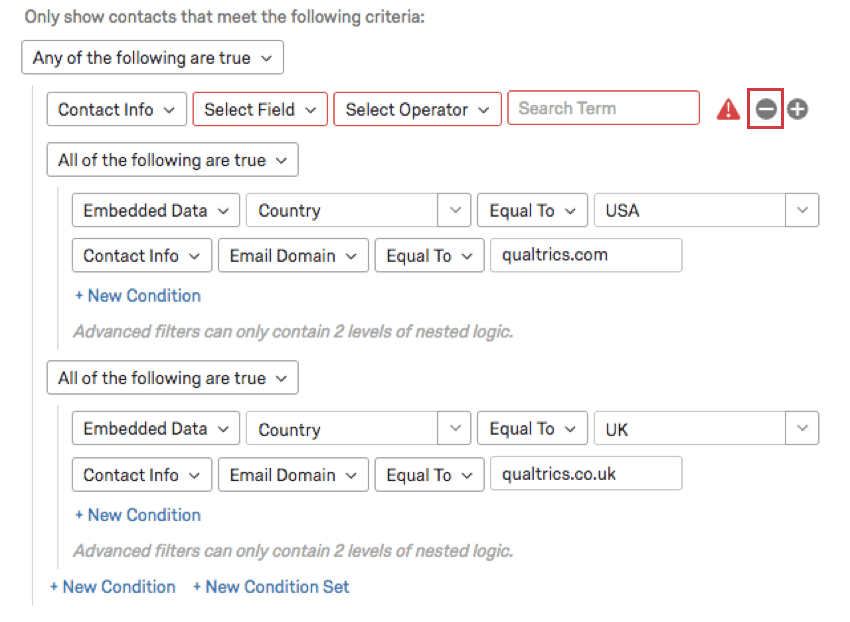
- You can only do 2 levels of nesting.
Saving Filters
While you’re creating a filter, you can save that filter to use again later.
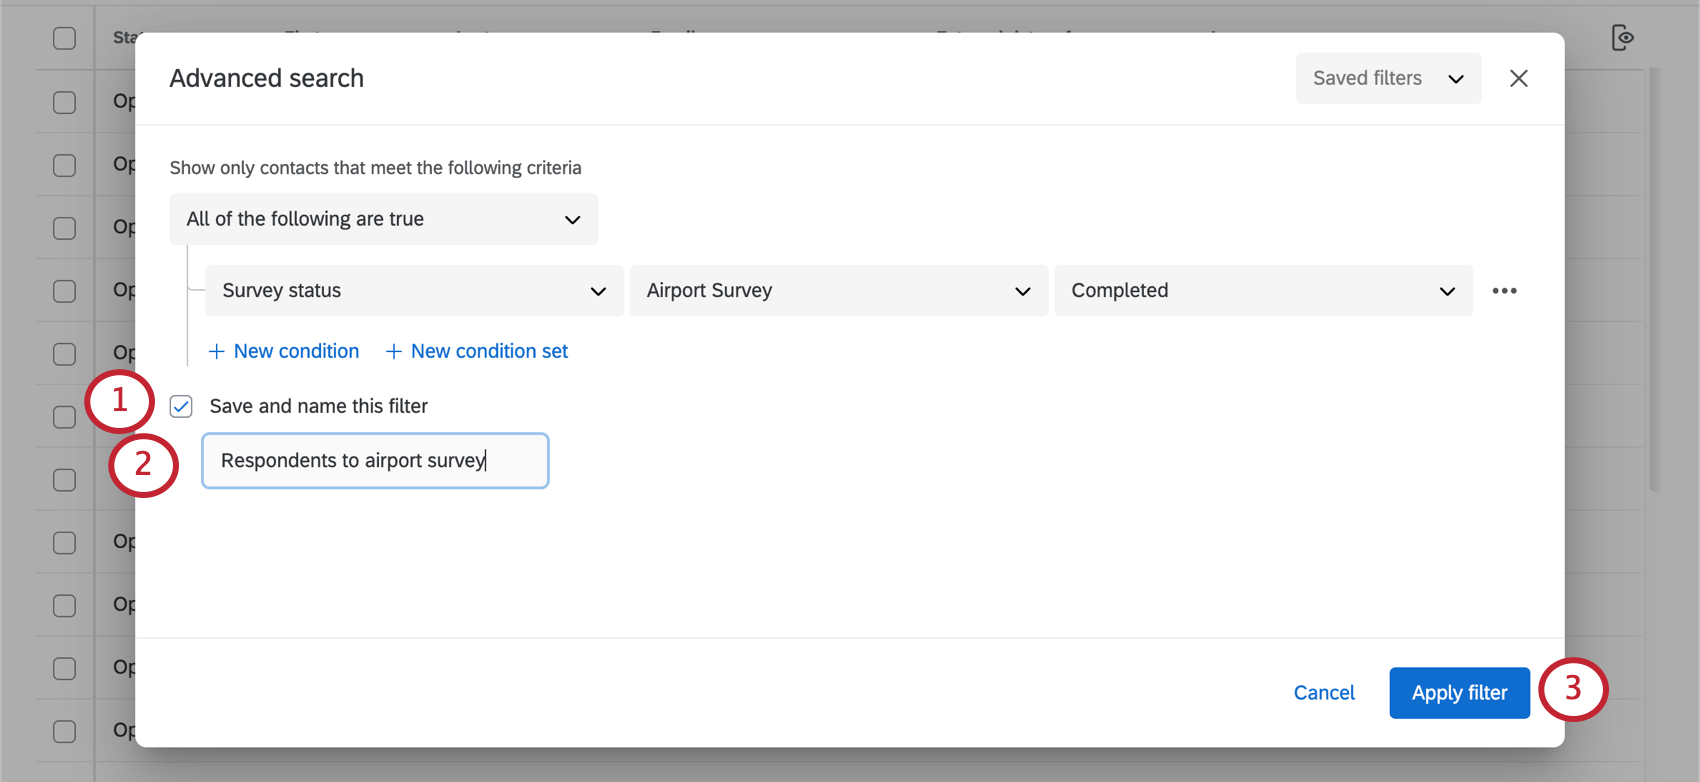
- Select Save and name this filter.
- Name the filter.
- Click Apply filter.
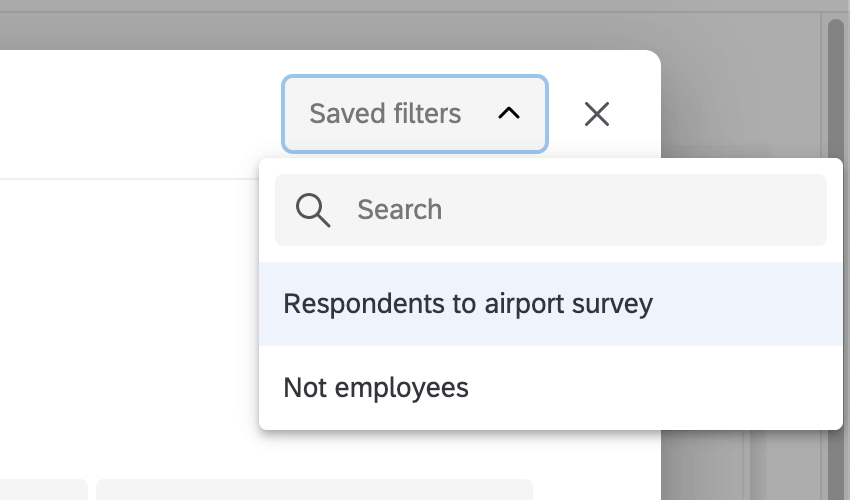
Once your filters are saved, you can access them from the Saved Filters dropdown in the upper-right corner.
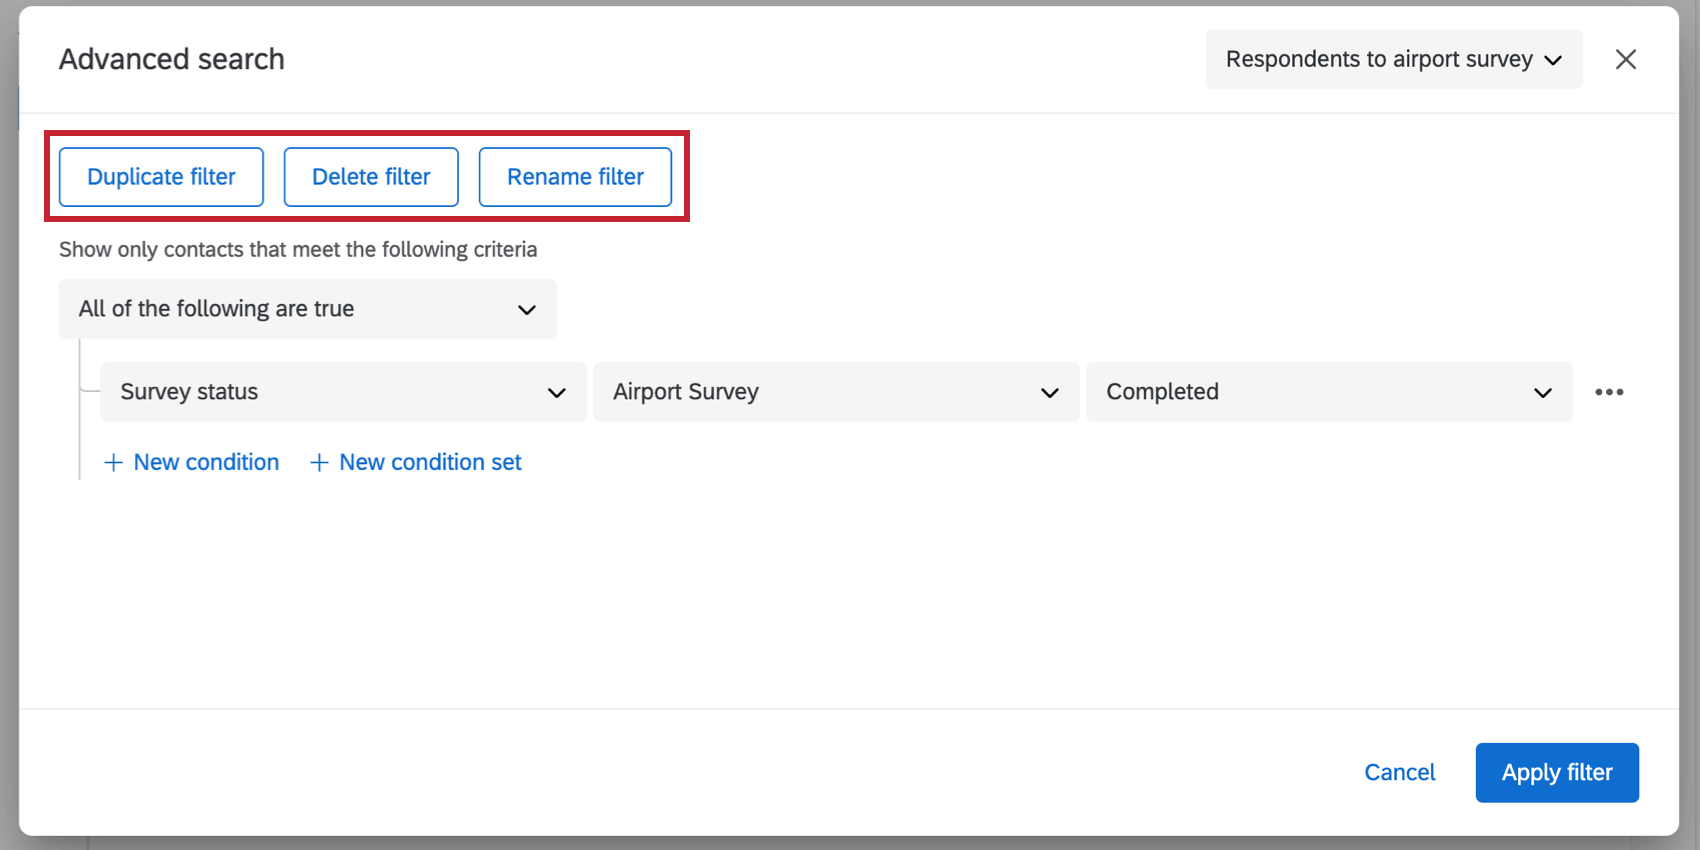
When you have a saved filter applied, you can also choose to duplicate it, delete it, or rename it.
Removing Filters
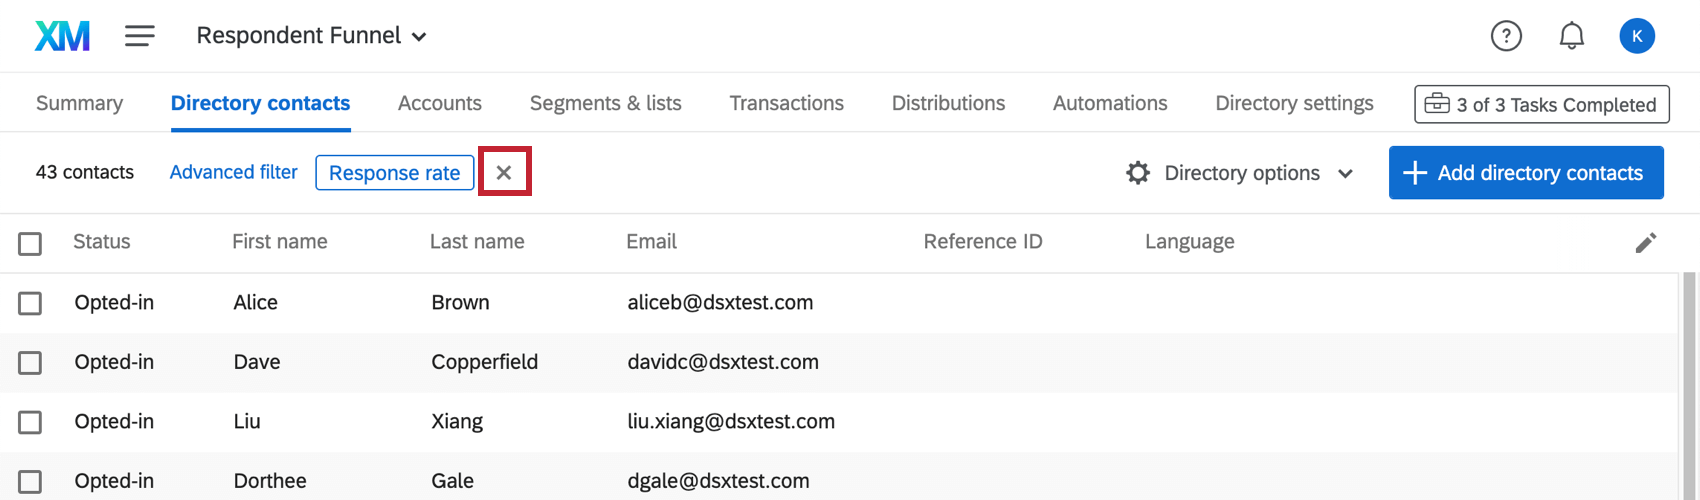
Once you’ve applied a filter, you can remove it by clicking the X next to it. Or, if you prefer, you can click the name of the filter to change the criteria.
Choosing Which Contact Info Columns to Display
You can change the default columns of contact information that are included in all mailing lists, segments, samples, and the directory.
- Once inside the directory or a mailing list, click the edit icon.
- Search and click fields on the left to add them to the list of columns you want to include.
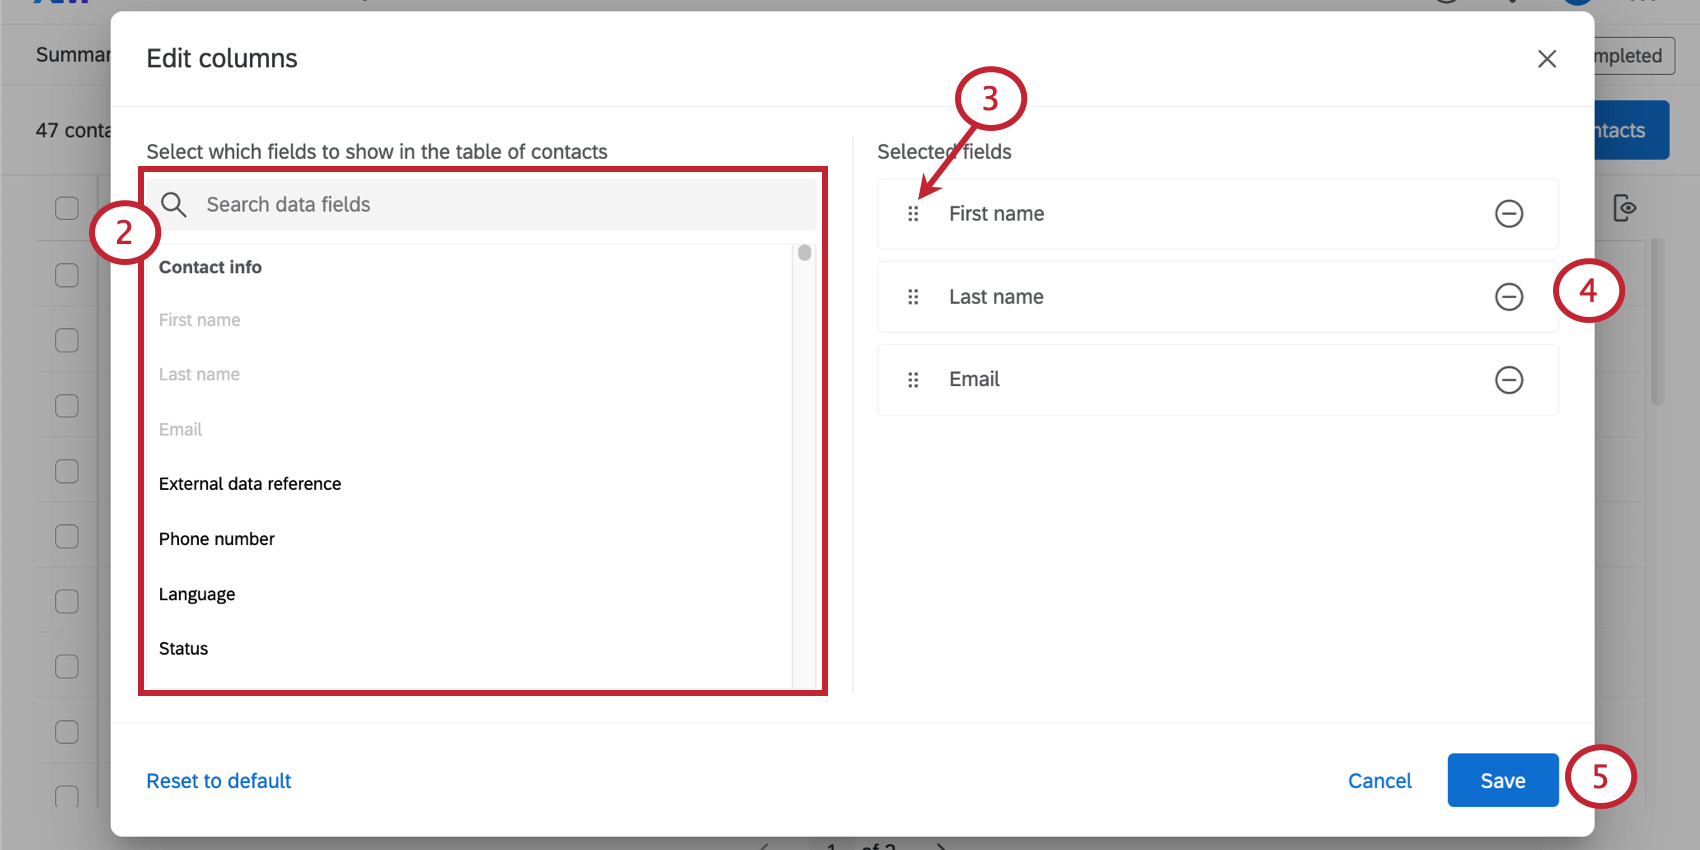
- Click the dot icon to drag and drop items in order.
- Click the minus sign ( – ) next to a field to remove it from the list of columns.
- Click Save when you’re done.
Columns you can include
- Status: Whether the contact is opted into or out of the mailing list / directory.
- First Name and Last Name: The first and last name of the contact.
- Email: The email address of the contact.
- Reference ID: The External Data Reference column you filled out when uploading a mailing list.
- Language: The 2-letter language code that specifies what language messages the respondent should receive, in the event you upload translations for your emails.
- Created: When the contact was first uploaded to the directory.
- Last Modified: When the contact was last modified. This includes updates to contact data and embedded data for the contact.
- Phone Number: The phone number of the contact.
- Average Response Time: The average time it took the respondent to complete each survey invite they were sent, in minutes. This includes all responses they completed from surveys sent from mailing lists throughout the directory.
- Last Email: The last time an email was sent to this address. This includes emails sent to the contact from different mailing lists. Emails that were sent but bounced are counted, but emails that failed to send are not counted. This is the last email sent from any mailing list in the directory.
- Last Invite Received: The last survey invite (not reminder, thank you, or non-survey email) that was sent to this address. This includes emails sent to the contact from different mailing lists. Emails that were sent but bounced are counted, but emails that failed to send are not counted. This is the last invite sent from any mailing list in the directory.
- Last Response: The last survey response this contact completed. Only complete responses, not incomplete responses or responses in progress, are included. This is the last response sent from any mailing list in the directory.
- Response Rate: The percent of invites the contact is sent that they actually complete. The percentage is shown as a ratio, so 50% become 0.5. Only complete responses, not incomplete responses or responses in progress, are included. This is a directory-wide response rate, not just for survey responses sent from the selected mailing list.
- Total Emails: The total number of emails that have been sent to the contact from any mailing list in the directory. This includes invites, reminders, thank yous, and emails without survey links.
- Total Invites: The total number of invites (not reminders or thank you emails) that have been sent to this contact from any mailing list in the directory.
- Total Responses: The total number of survey responses the contact has completed, regardless of which mailing list in the directory the survey invitation was sent to.
- All embedded data listed in the brand
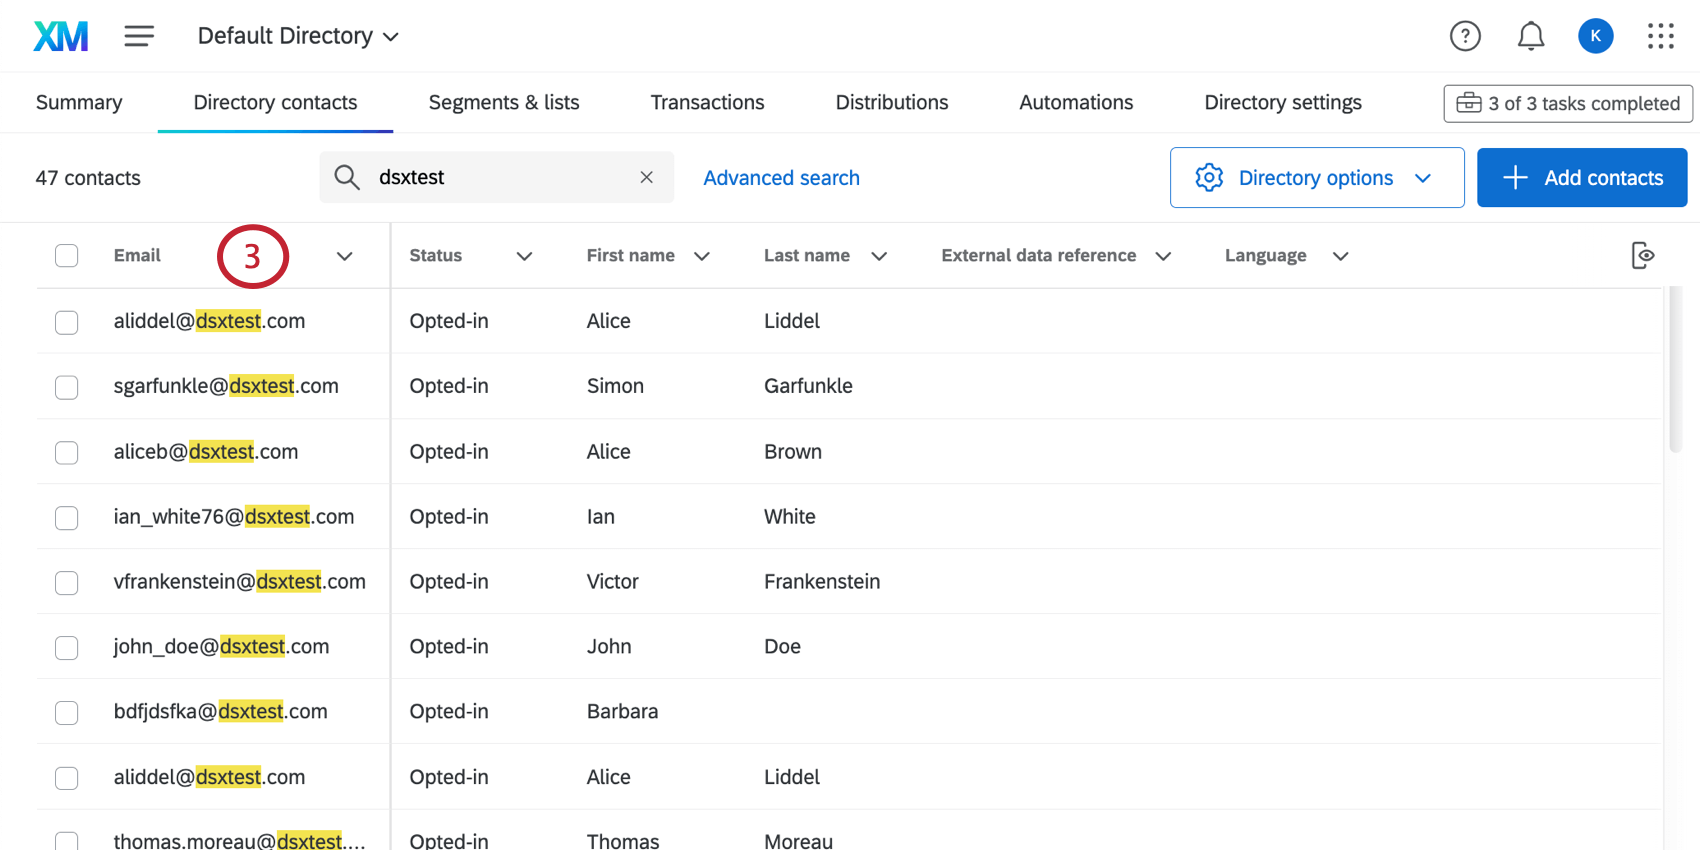
Pinning columns
You can pin a column to automatically move it to the front of the list.
- Click the arrow next to the column you want to pin.
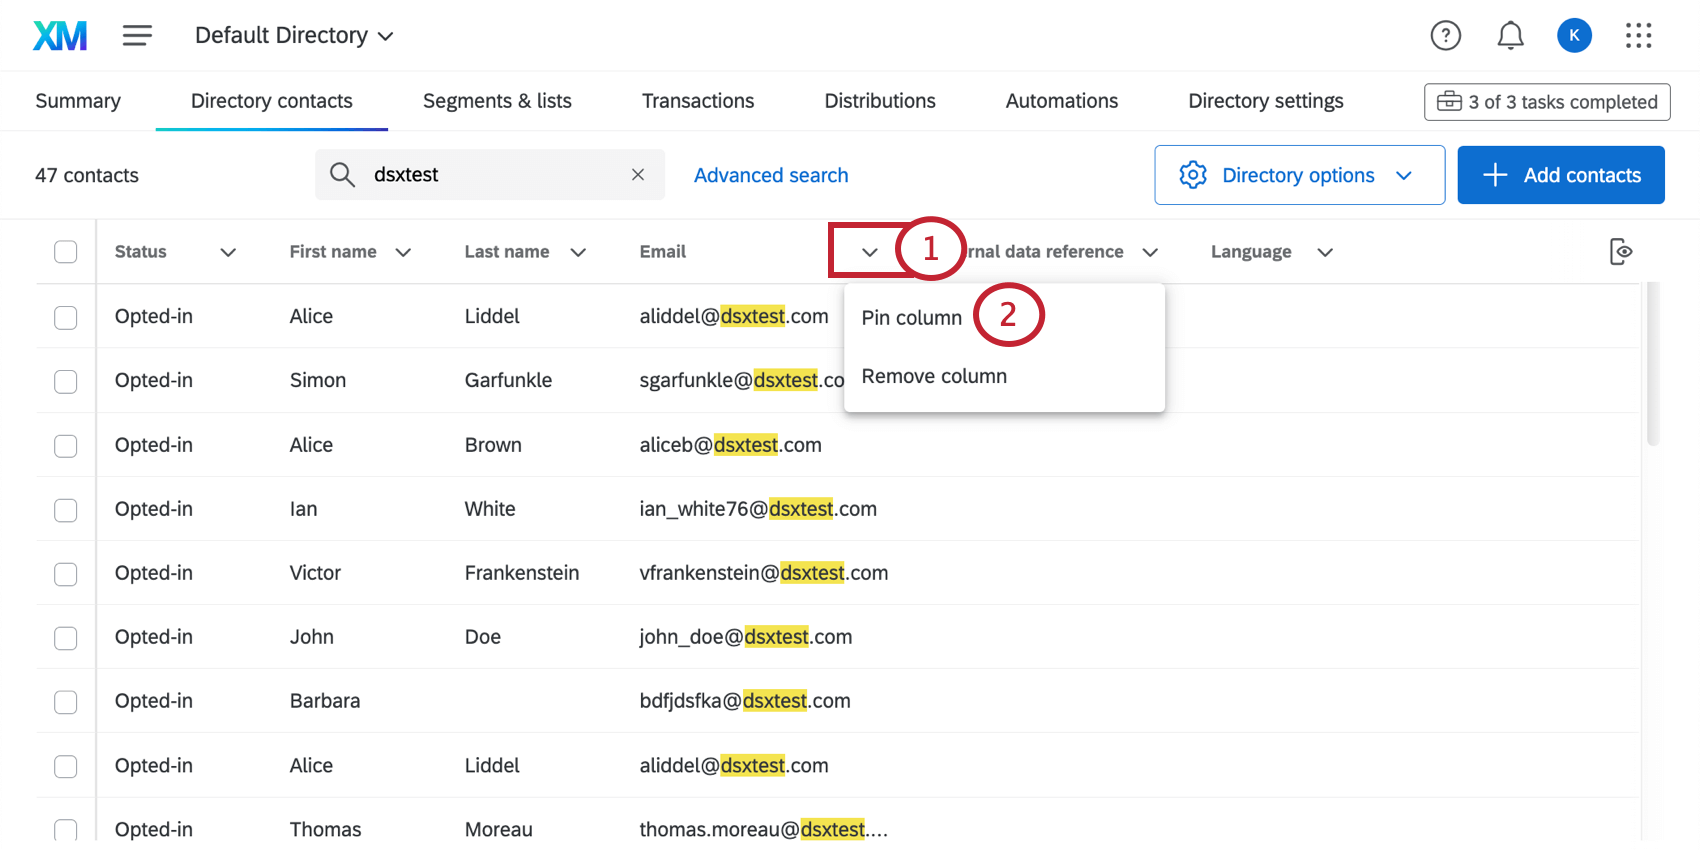
- Click Pin Column.
- Note how the column moves and is divided from the previous columns.
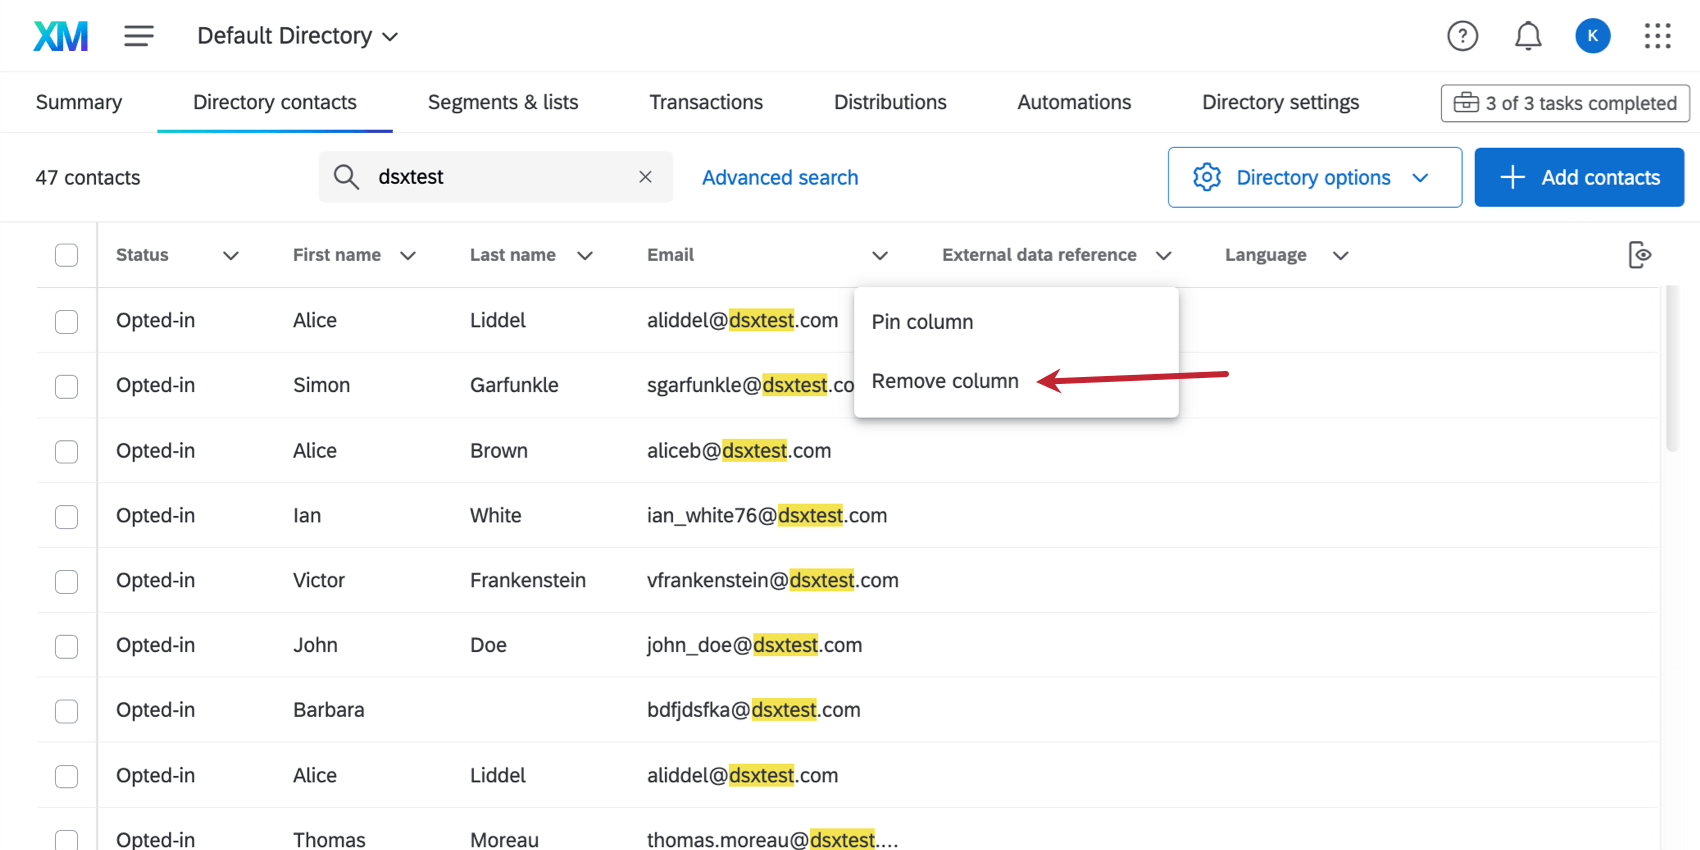
Removing columns
You can remove a column in the editor, but you can also remove a column by clicking the arow next to the header and selecting Remove Column.