-

Qualtrics Platform -

Customer Journey Optimizer -

XM Discover -

Qualtrics Social Connect
XM Directory Roles
About XM Directory Roles
Do you have multiple directories and want to give access to some directories for certain users, and different directories for other users? This can be accomplished using role-based access control with XM Directory. With this feature, Brand Administrators can choose which specific users have access to which directories, as well as grant certain users admin permissions over specific directories.
Necessary Brand Permissions
Before you can use this feature, your brand must have the Manage Directory Roles permission enabled. To have this permission enabled, please contact Account Services. You must also have this permission enabled on a user level to enable and configure roles – to get this enabled, reach out to your Brand Administrator.
Enabling Directories to Use Roles
Before you can create roles, you need to choose which directories can be controlled by roles.
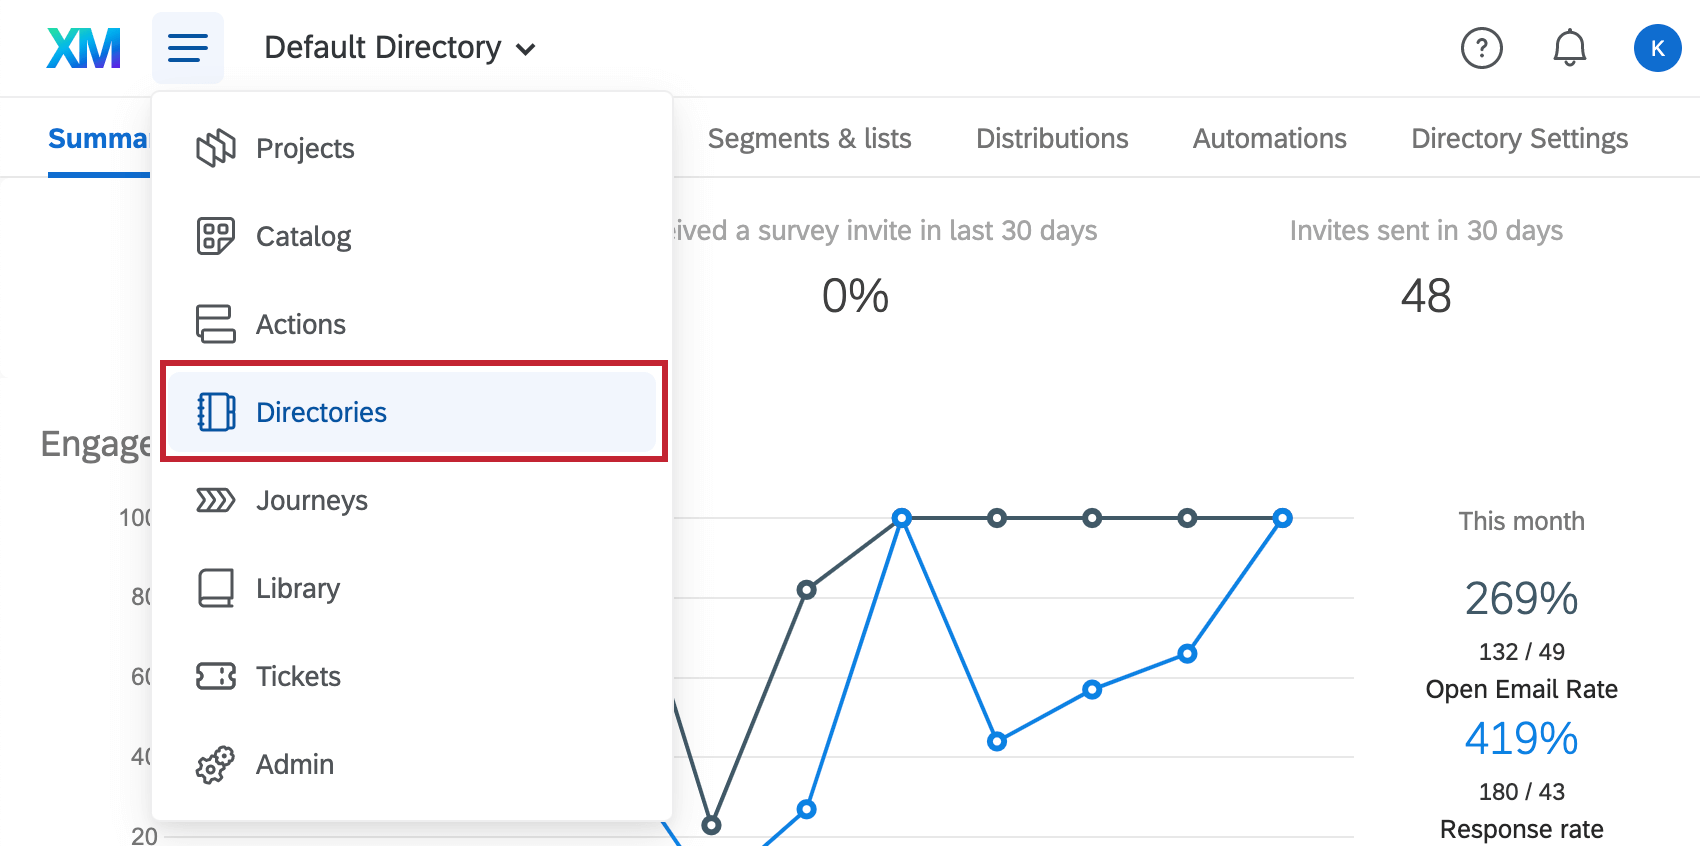
- Navigate to the XM Directory by clicking Directories.
- Select a directory using the dropdown menu.
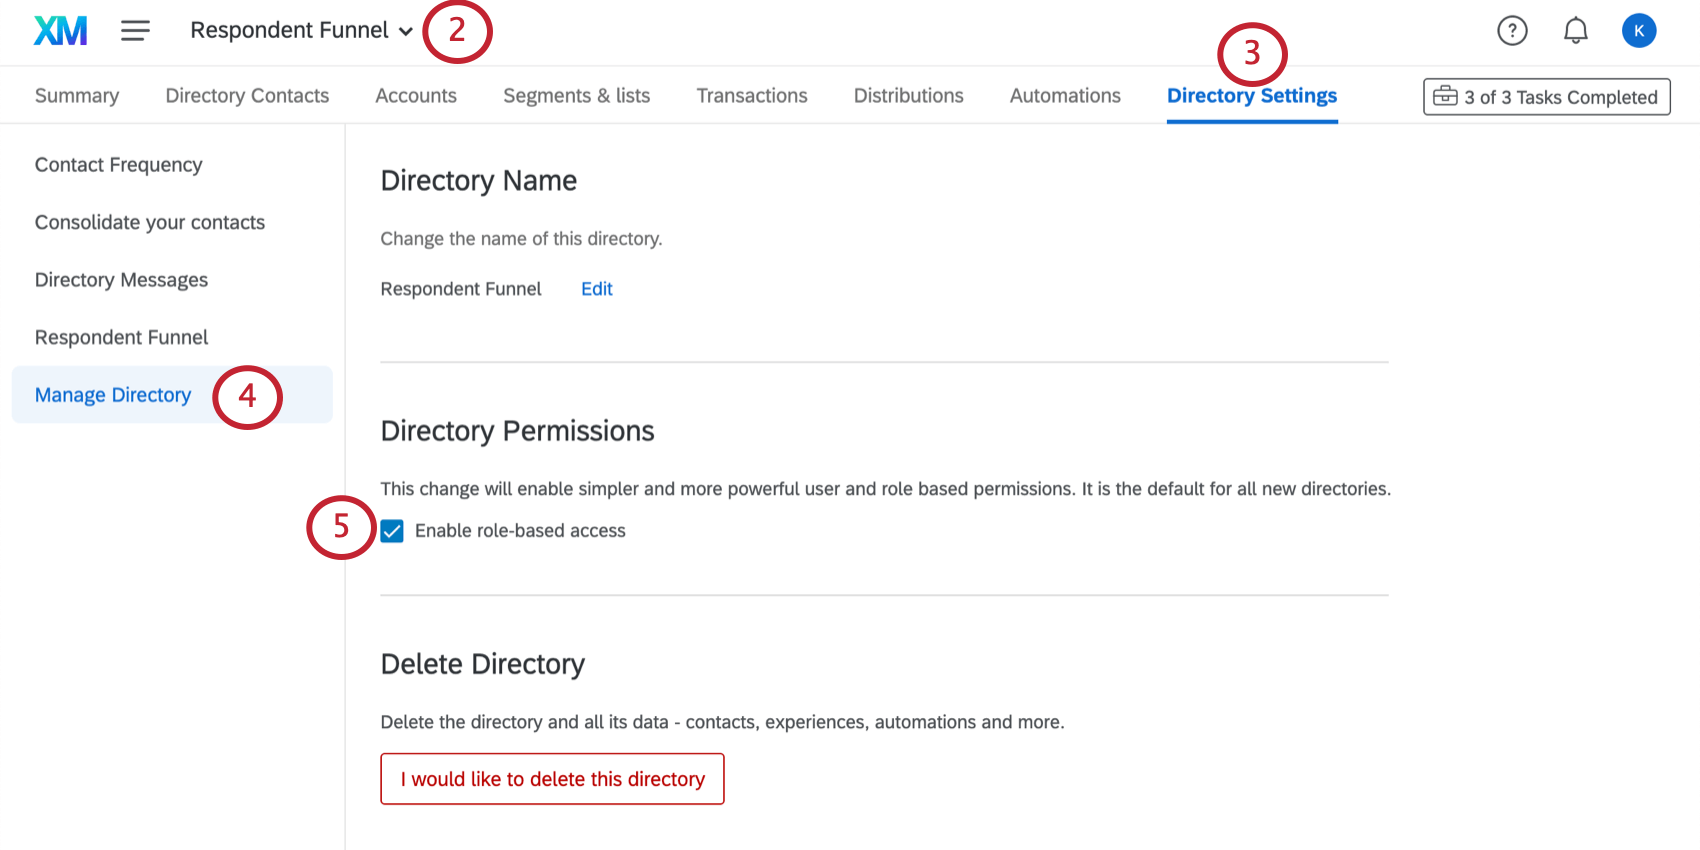
- Click Directory Settings.
- Select Manage Directory.
- Turn on Enable role-based access.
Creating Directory Roles
Qtip: For each directory in your license, we recommend having two roles.
- One role is basic access to the directory, and allows users to distribute to lists or add contacts without necessarily giving them access to the directory settings (renaming or deleting the directory, contact frequency rules, deduplication rules, etc.). This role will have most of your users in it and will have “Manage Directory” disabled.
- The second role is administrative access, the users who have access to the directory and can edit the options found in the Directory Settings tab. This role will have fewer users in it (possibly only yourself) and will have “Manage Directory” enabled.
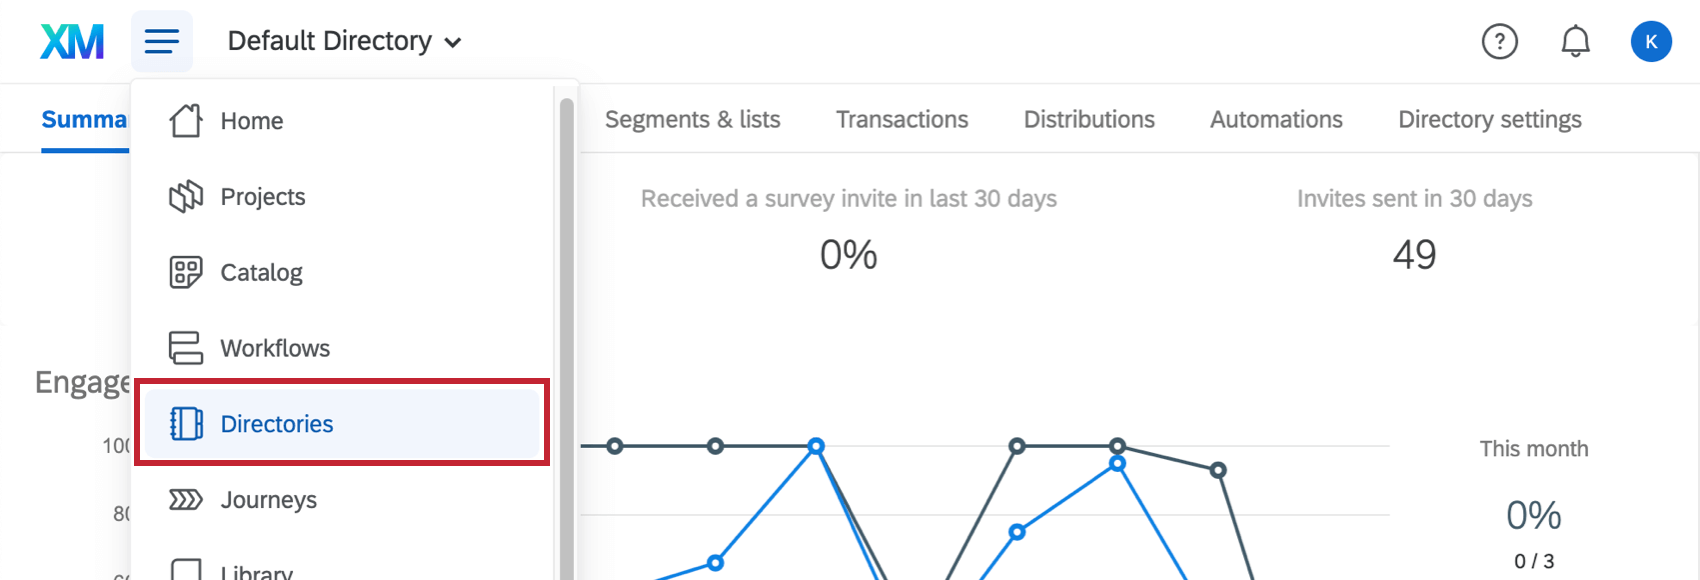
- Navigate to the XM Directory by clicking Directories.
- Click on the name of the currently selected directory
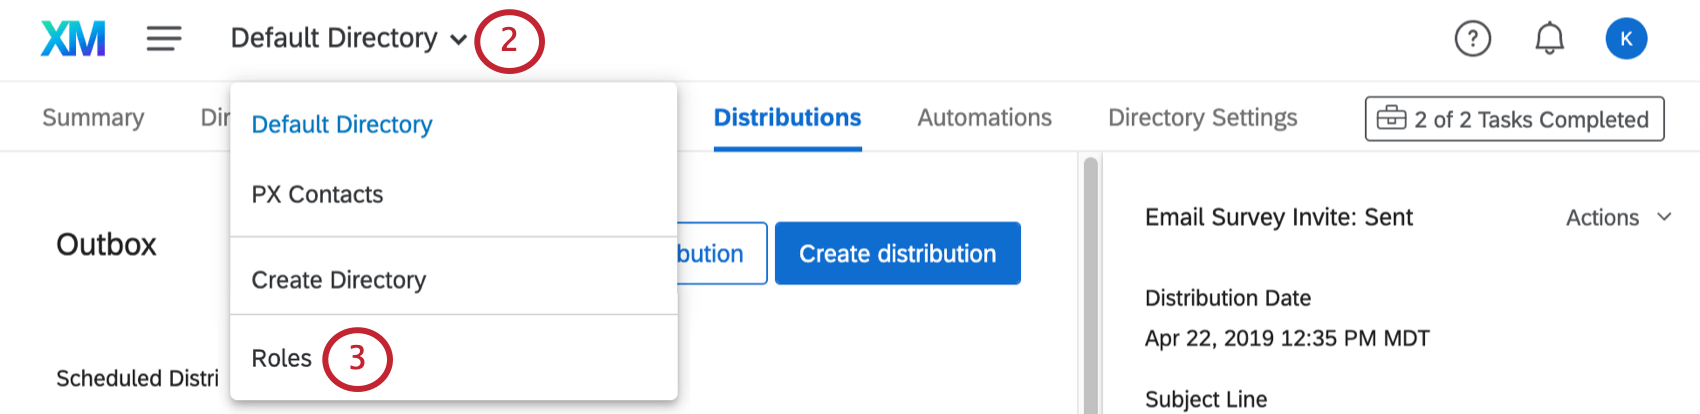
- Select Roles.
- Click Create a role.

- Give your role a name.
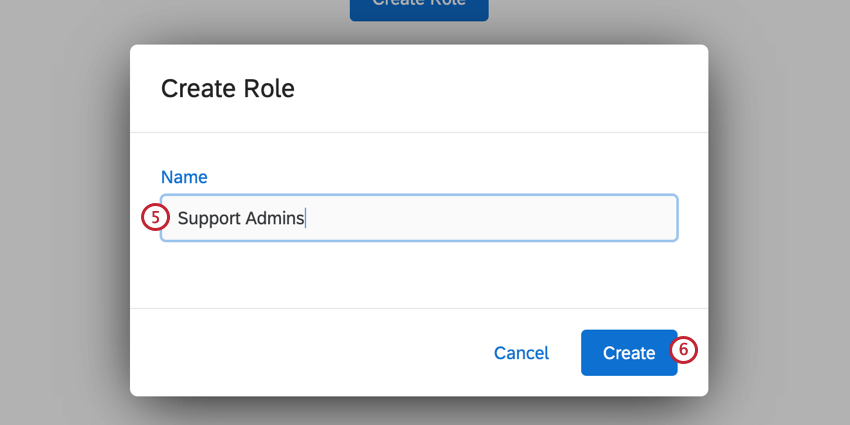
- Click Create.
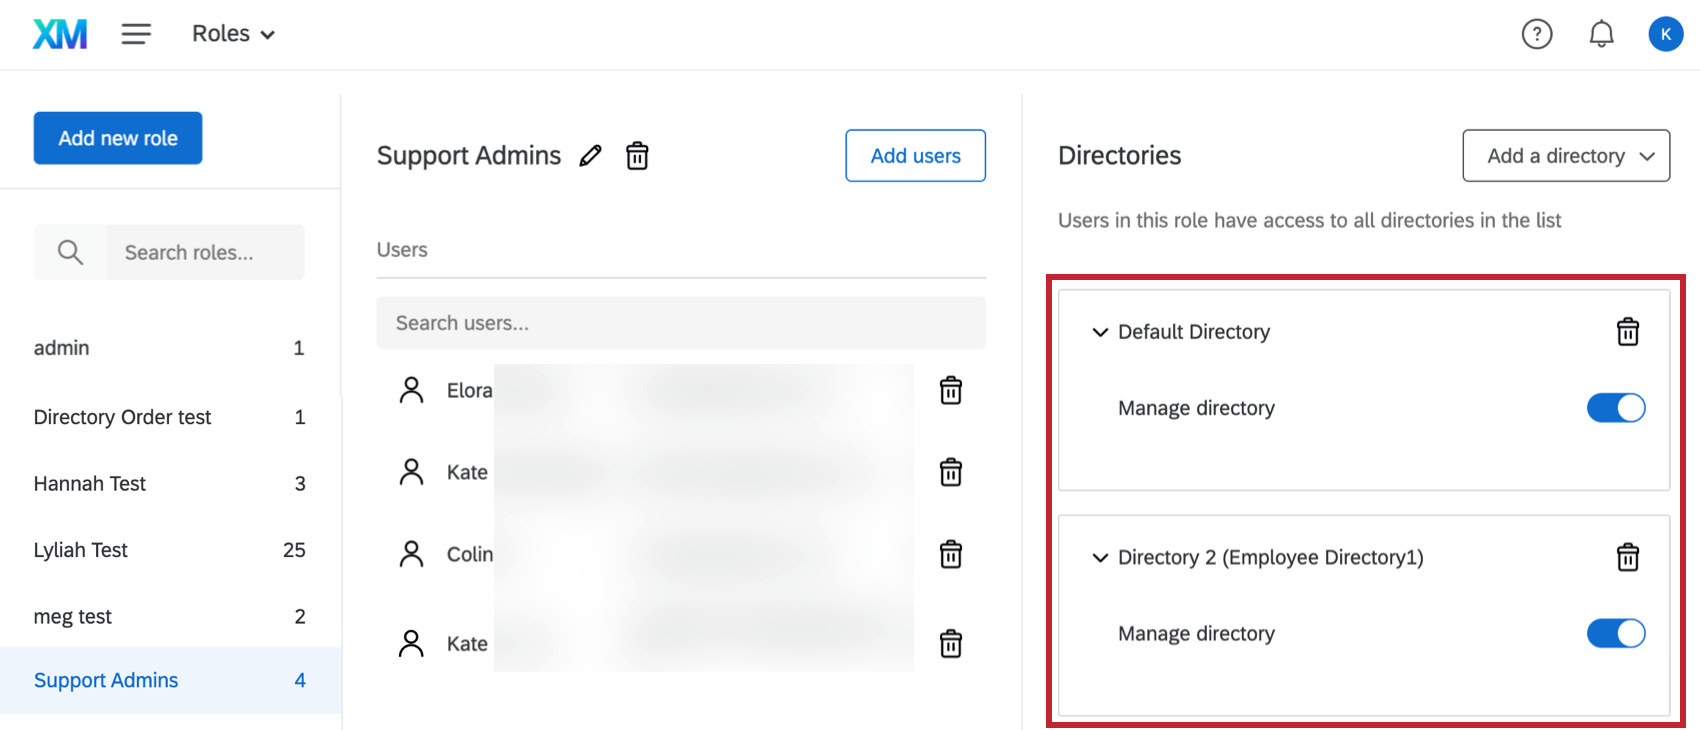
- Click Add a directory and select the directory you want this role to have access to. Users will be able to create and edit mailing lists as well as send emails in this directory.
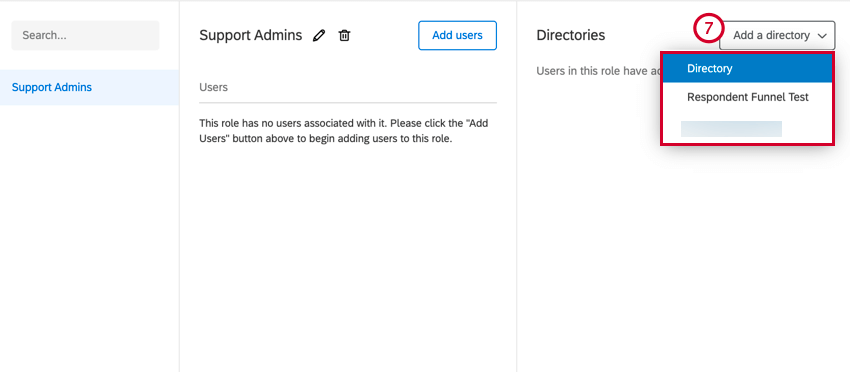 Qtip: If you don’t see your desired directory here, then that directory has not been enabled for role based access. See Enabling Directories to Use Role-Based Access to learn how to enable your directory.Qtip: You can add multiple directories to one role.
 - If desired, determine the additional directory privileges this role has by enabling or disabling the following option:
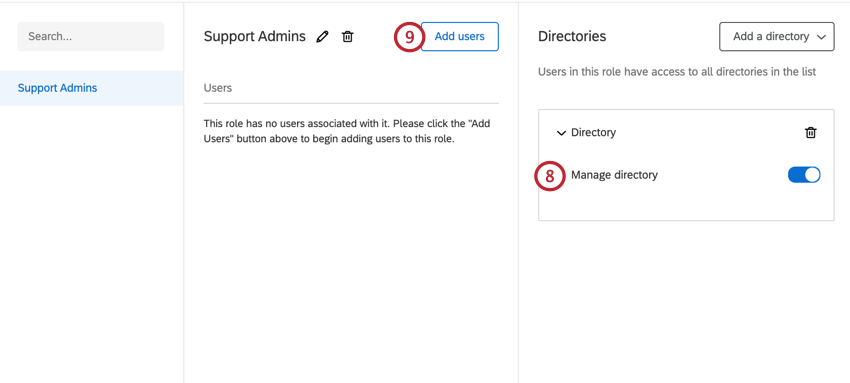
- Manage directory: When enabled, this privilege gives users administrative access to the directory. This means that in addition to having access to the Directory Contacts tab, they will have the ability to access the directory settings, which includes contact frequency rules, duplication settings, directory messages, directory names and settings, and respondent funnel access. When Manage directory is disabled, the users added to the role can still send distributions and create mailing lists, but they will not be able to access the entire directory or its settings.
Qtip: Outside of roles, you can use administrative permissions to limit access to features like automations for individual users, groups, or divisions.
- Manage directory: When enabled, this privilege gives users administrative access to the directory. This means that in addition to having access to the Directory Contacts tab, they will have the ability to access the directory settings, which includes contact frequency rules, duplication settings, directory messages, directory names and settings, and respondent funnel access. When Manage directory is disabled, the users added to the role can still send distributions and create mailing lists, but they will not be able to access the entire directory or its settings.
- Click Add Users to add users to the role.
- Search for users by typing their email.
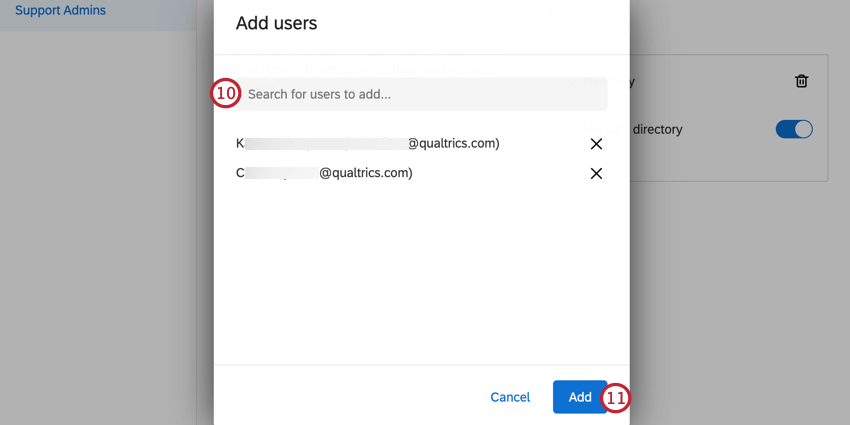
Qtip: You can add multiple users to a role.
Attention: Make sure that you give yourself access to the role. If you enable role-based access for a directory and do not add yourself to the role, then you will lose access to the directory! - When finished, click Add.
Managing & Deleting Directory Roles
After you create your role, you can change the role privileges and which users are in the role at any time. You can also rename your role or delete the role entirely if needed.
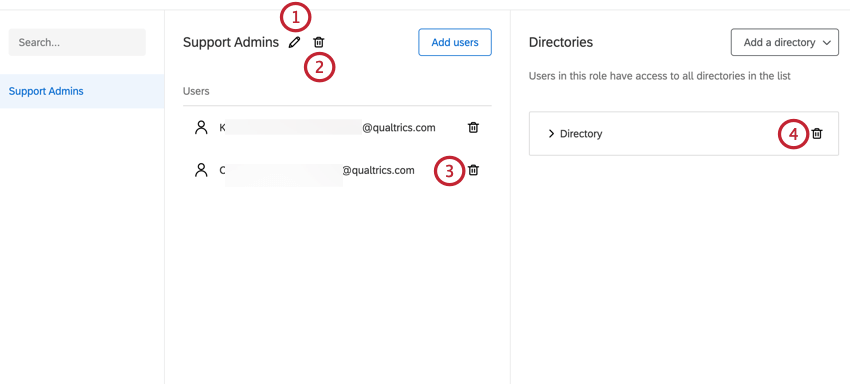
- Click the pencil icon next to your role name to edit it.
- Click the trash can icon next to your role name to delete it.
Qtip: Once a role is deleted, it is irretrievable!
- Click the trash can icon next to a user to remove them from the role.
- Click the trash can icon next to a directory name to remove the directory from the role.
Platform vs. Role-Based Permissions
There are two ways to give users access to directories: through platform permissions and through role-based permissions. This section explains each the differences between these permissions.
- Platform Permission: The individual user permissions found in the Admin page.
- Role-Based Permission: The permissions granted to a user via XM Directory roles. These permissions are applicable to directories that have role-based access enabled.
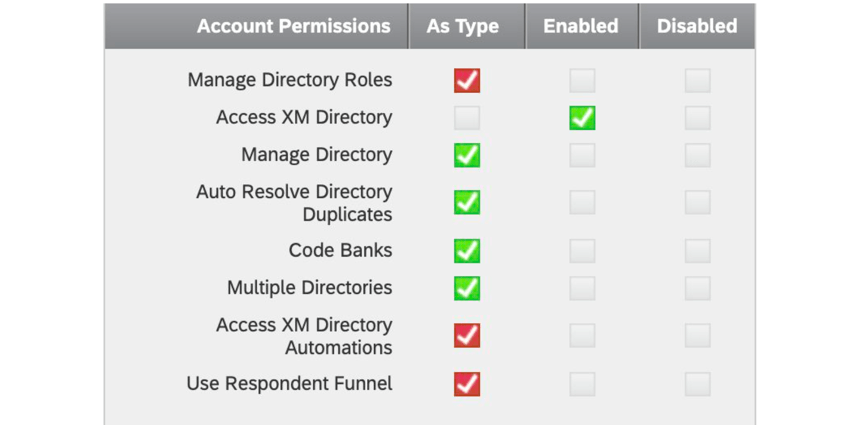
Explanation of Permission Types
- Platform “Manage Directory Roles” permission: A user with the Manage Directory Roles permission can enable and disable role-based access for directories. The user can also access the roles configuration to view and edit roles for directories where role-based access is enabled.
- Platform “Access XM Directory” permission: A user with the Access XM Directory permission will be able to create and edit mailing lists and use the distribution features on all directories where role-based access is disabled.
- Platform “Manage Directory” permission: A user with Manage Directory permission will be able to access the directory admin features such as directory contacts and directory settings on all directories where role-based access is disabled. This user will be able to view and edit directory contacts, access mailing lists, directory-level summaries and settings.
- Role-Based “Manage Directory” permission disabled: A user with the Manage Directory role-based permission disabled can still create and edit mailing lists and use the distribution features for directories, so long as the directory uses role-based access and the user has been added to a role with access to the directory.
- Role-Based “Manage Directory” permission enabled: A user with the Manage Directory role-based permission will be able to access the advanced and management features for directories where role-based access is enabled and the user has been added to a role with access to the directory. This user will be able to view and edit directory contacts, access mailing lists, directory-level summaries and settings.
Manage versus Access Directory
| Manage Directory | Access Directory | |
| Full access to view and edit all contacts in the directory | Yes | No |
| Contacts uploaded by this user automatically added to the central directory | Yes | Yes |
| Distribute to contacts not added/uploaded by the user | Yes | No |
| Central contact frequency and deduplication rules apply to the contacts they upload via their own lists | Yes | Yes |
| See, edit, and distribute to automatic enrollment lists created from the directory that are shared with them | Yes | Yes |
| Create Contact Lists | Yes | Yes |
| Add Contacts | Yes | Yes |
| Add Transactions | Yes | Yes |
| Remove Contacts they have uploaded | Yes | Yes |
| Remove Contacts they have not uploaded | Yes | No |
| Change Contact Frequency Rules at the Directory Level | Yes | No |
| Change Identity Resolution at the Directory Level | Yes | No |
| Configure Respondent Funnel | Yes | No |
| Create a Transaction Group | Yes | Yes |
| Distribution to List | Yes | Yes |
| Distribution to Transaction Group | Yes | Yes |
| Access Transaction APIs | Yes | No |
| Run XMD Task (load/distribute) | Yes | No |