-

Qualtrics Platform -

Customer Journey Optimizer -

XM Discover -

Qualtrics Social Connect
Creating & Managing Multiple Directories
About Multiple Directories
XM Directory allows you to have multiple directories at a time. This is helpful for situations where you need to create separate groups of contacts with different directory-wide settings.
Only Brand Administrators are able to create and manage multiple directories.
Creating Multiple Directories
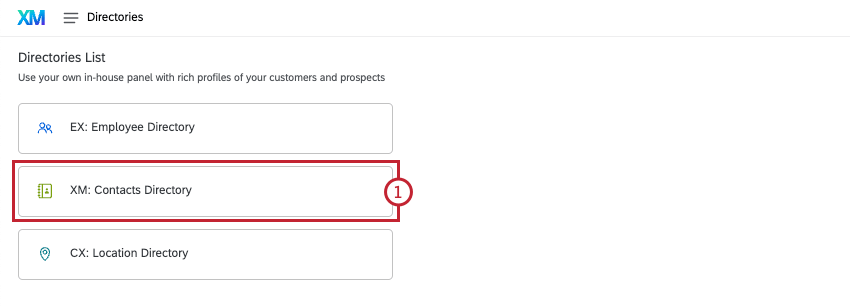
- Go to the Directories page and select Contacts Directory.
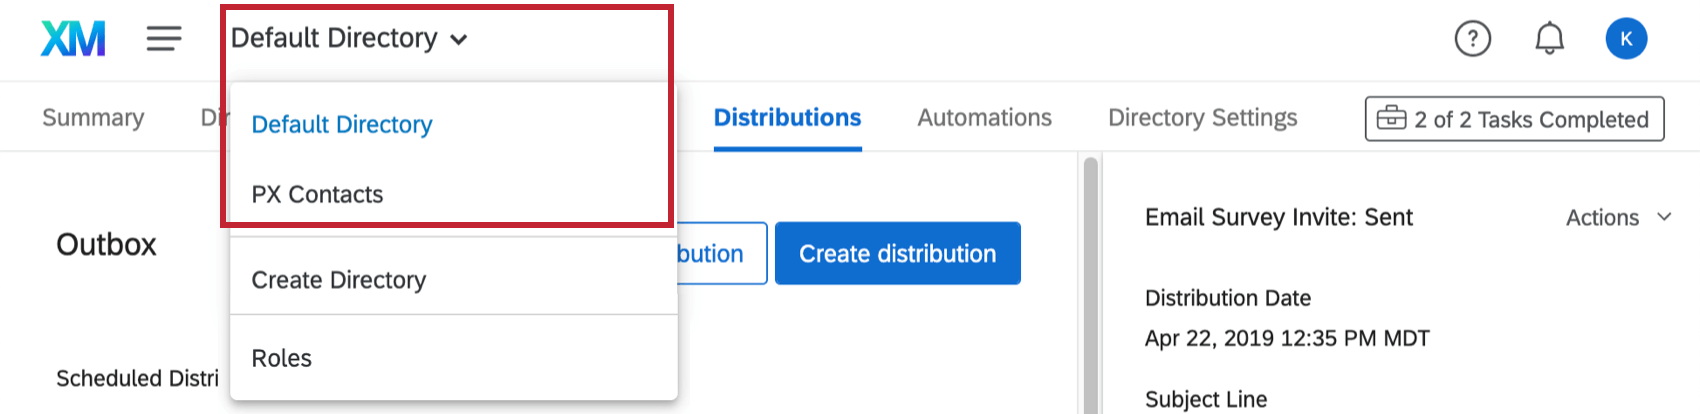
- Click the directory dropdown at the top.
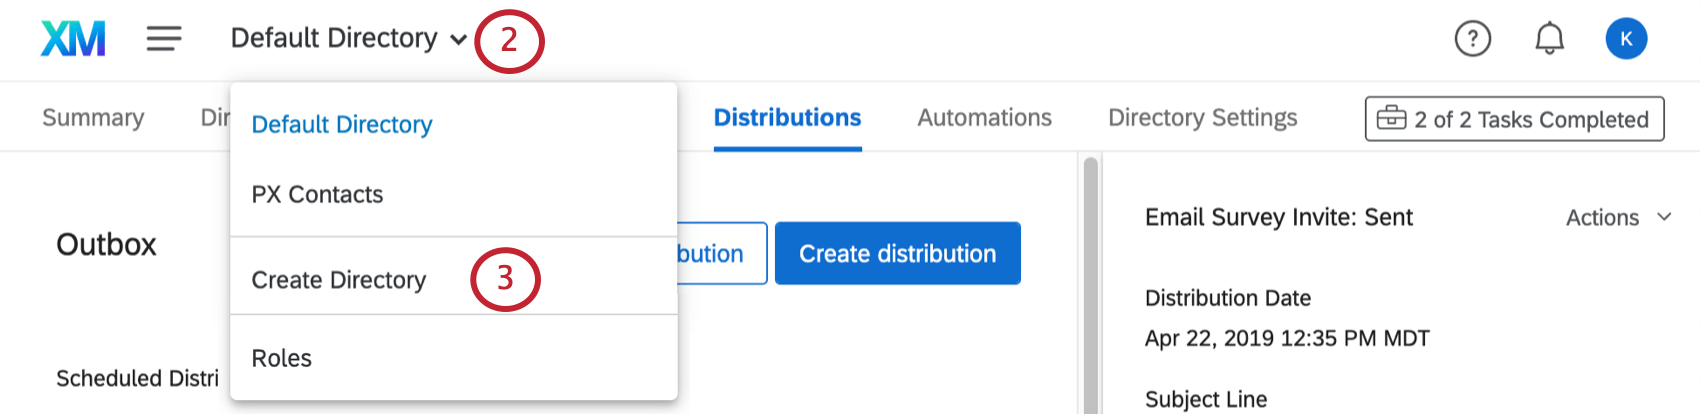
- Click Create Directory.
- Name your new directory.
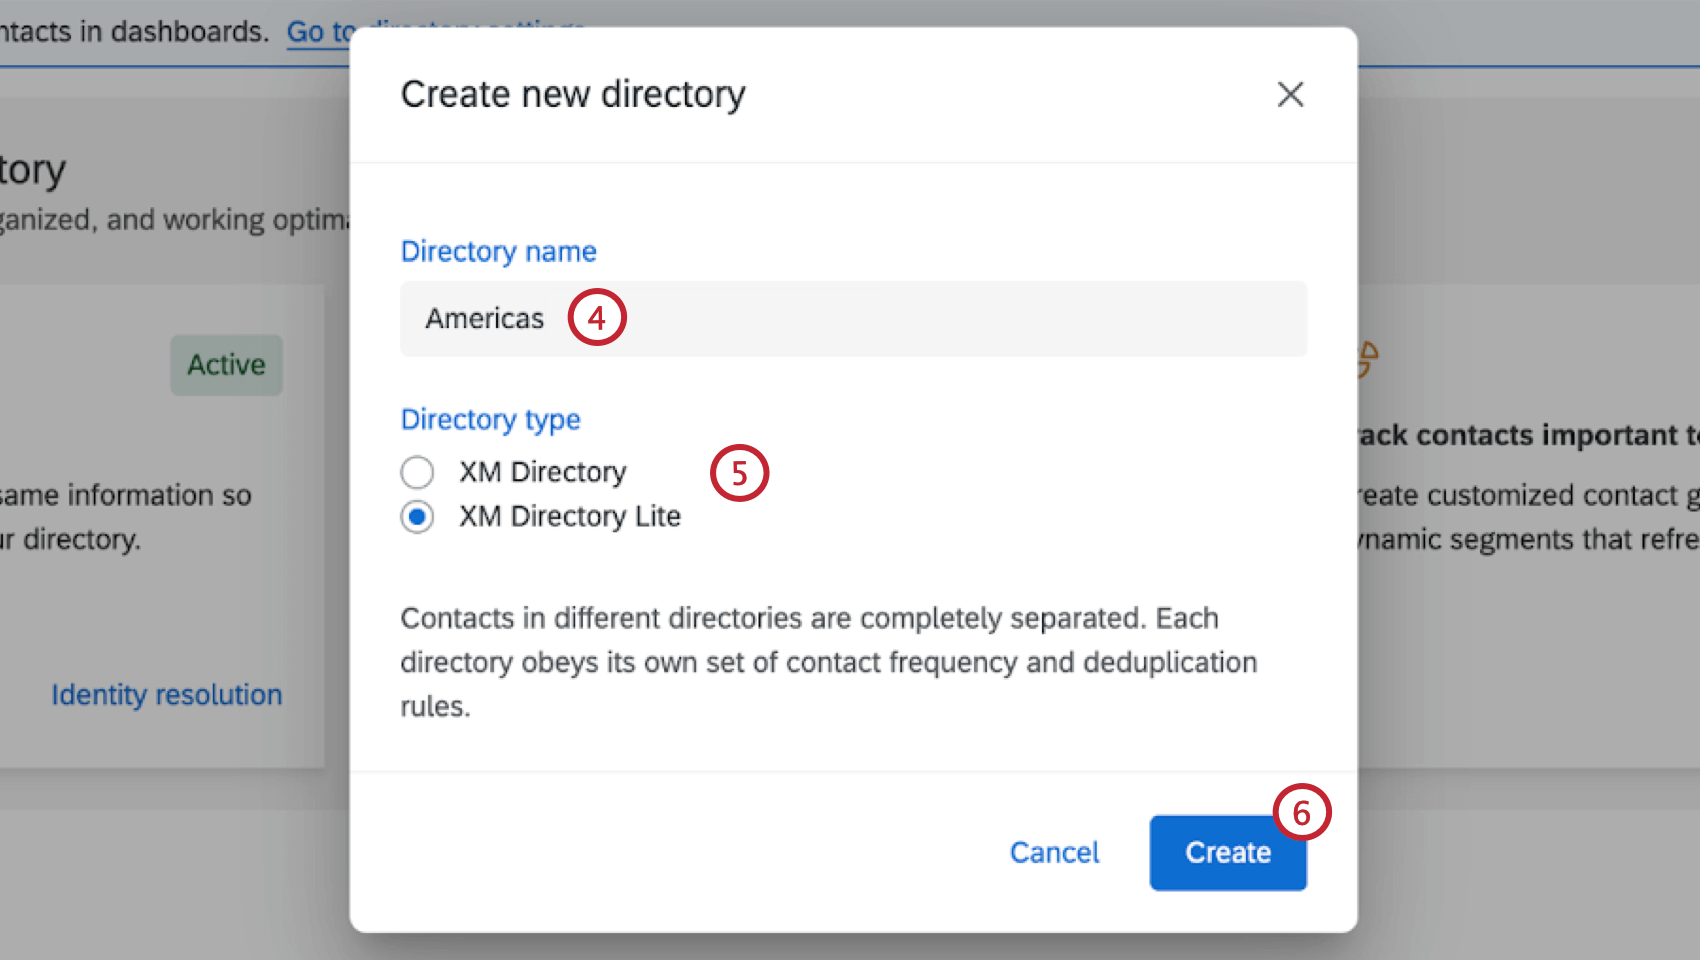
- Select the type of directory you want to create:
- XM Directory: An organization-wide directory with rich profiles of your contacts. Contacts in the directory can be viewed by anyone with directory access. With this type of directory, you can create contact frequency rules, build dynamic segments, merge duplicate contacts, and more.
- XM Directory Lite: A decentralized directory made up of mailing lists. Contacts can only be viewed by users who created the mailing list they are in or who have had access shared with them. With this type of directory, contacts in each list are completely separate from contacts in other lists.
- Click Create.
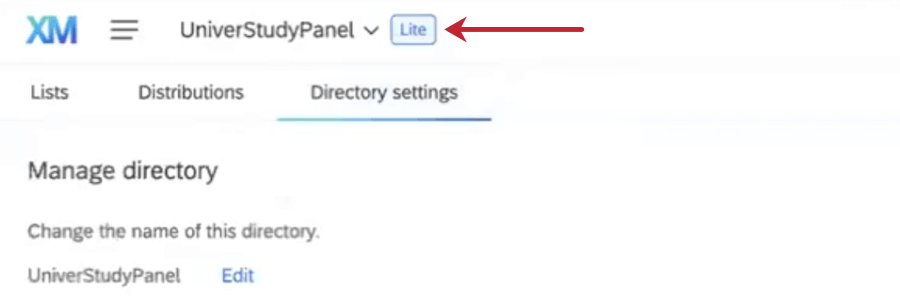
Qtip: Once created, XM Directory Lite directories will have a Lite flag to distinguish them.
Determining Which Users Have Access to Each Directory
You can determine which users have access to each directory in your license. You can even determine whether or not this directory access should be admin-level, allowing certain users to manage the directory’s settings.
To learn more, see our XM Directory Roles support page.
Editing Different Directories
You can navigate between directories using the directory dropdown menu at the top of the page.
Once inside a directory, you can make edits in each of the tabs just as you normally would. However, when editing one directory, you have absolutely no effect on the others. This means contacts and mailing lists uploaded in one directory only exist in that directory, and directory settings, such as contact frequency rules or duplicate contact consolidation, are unique to each directory.
Renaming a Directory
- Go to Directory Settings.
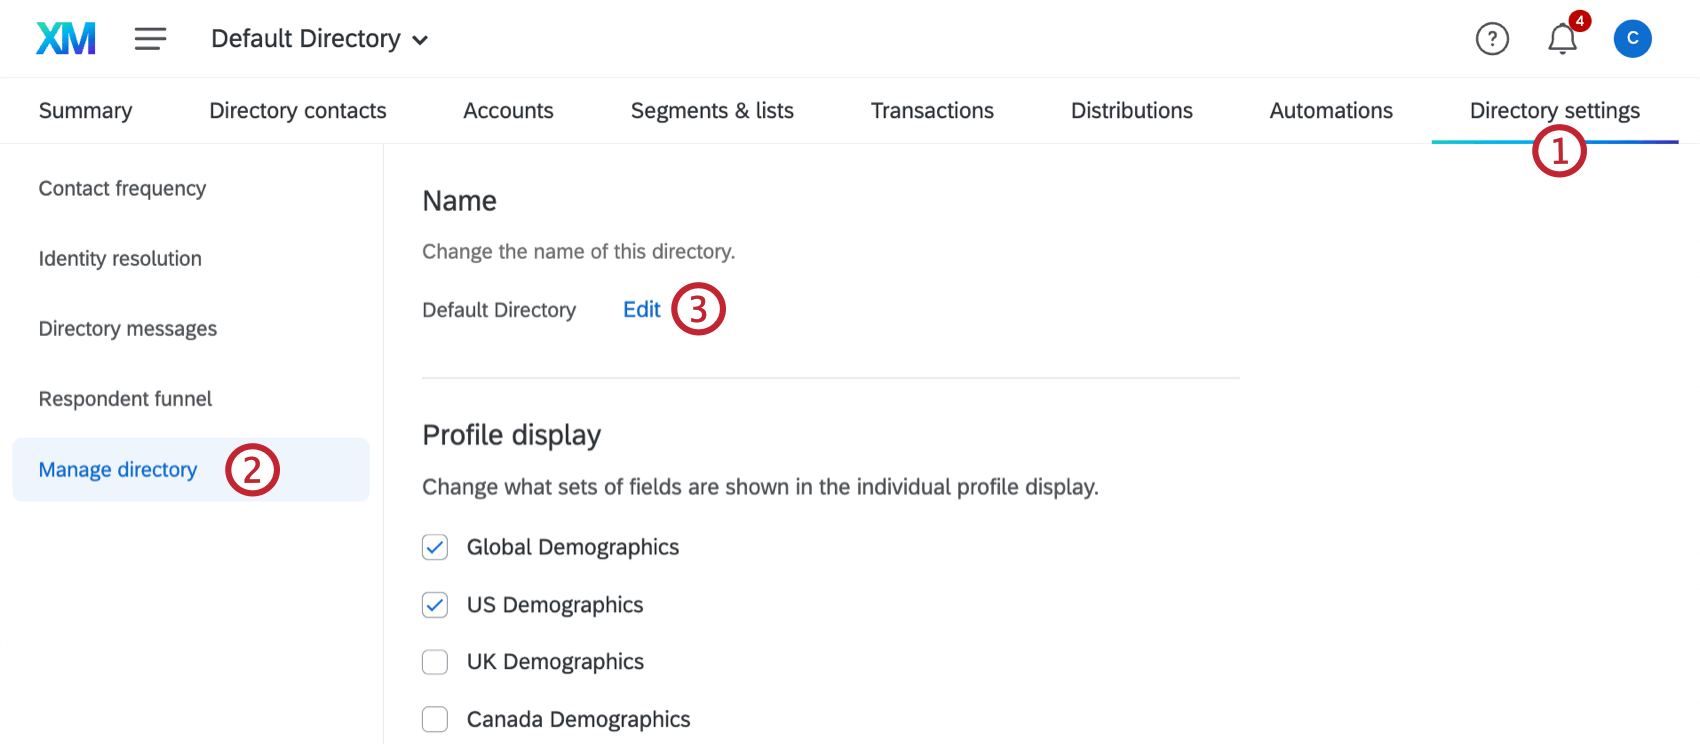
- Select Manage Directory.
- Click Edit.
- Type a name.
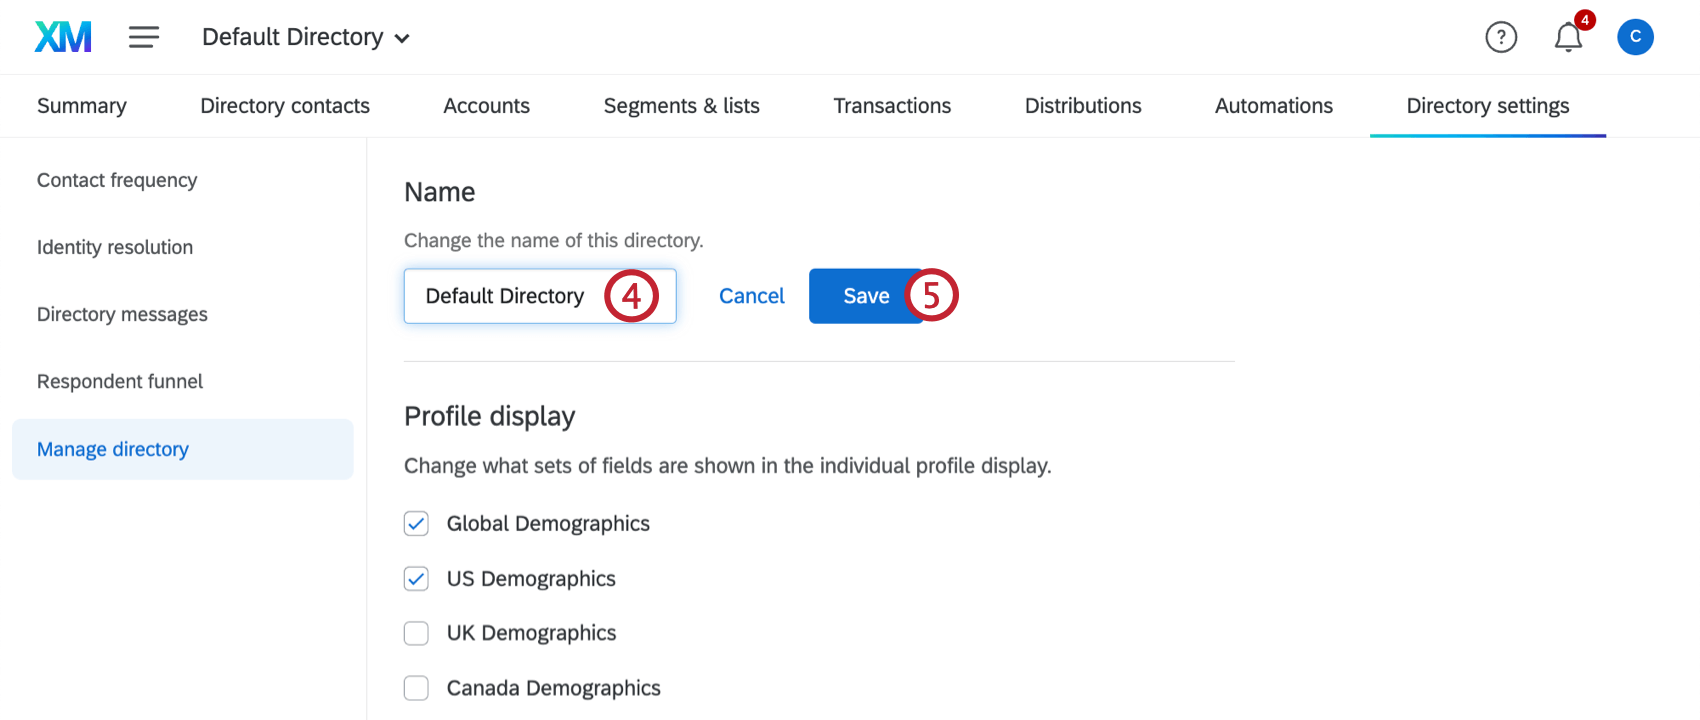
- Click Save.
ENABLING PRIVATE DATA IN LISTS
- Go to Directory Settings.
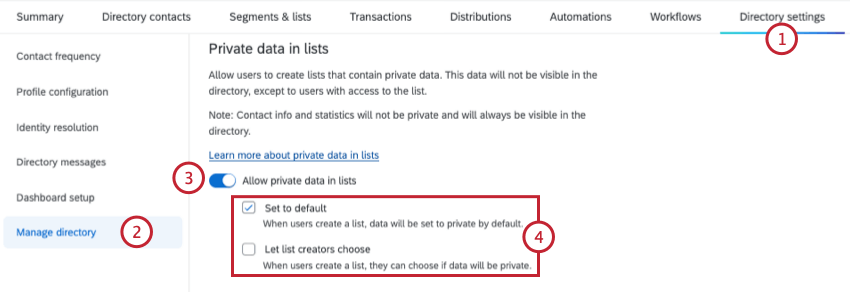
- Select Manage Directory.
- Enable Allow private data in lists.
- Select how you want private data to be handled in lists:
- Set to default: When users create a list, data will be set to private by default. If this is the only option selected, all new lists will have private embedded data by default.
- Let list creators choose: When users create a list, they can choose if data will be private. If this is the only option selected, users can choose whether new lists have private data or not.
Qtip: You can select both options, 1 option, or neither. If neither option is selected, list creators will be able to choose if list data is private.Qtip: If this setting is disabled after lists are created with private data, that data will still be private, but no new lists can be created with private data.
Changing the Profile Display
- Go to Directory Settings.
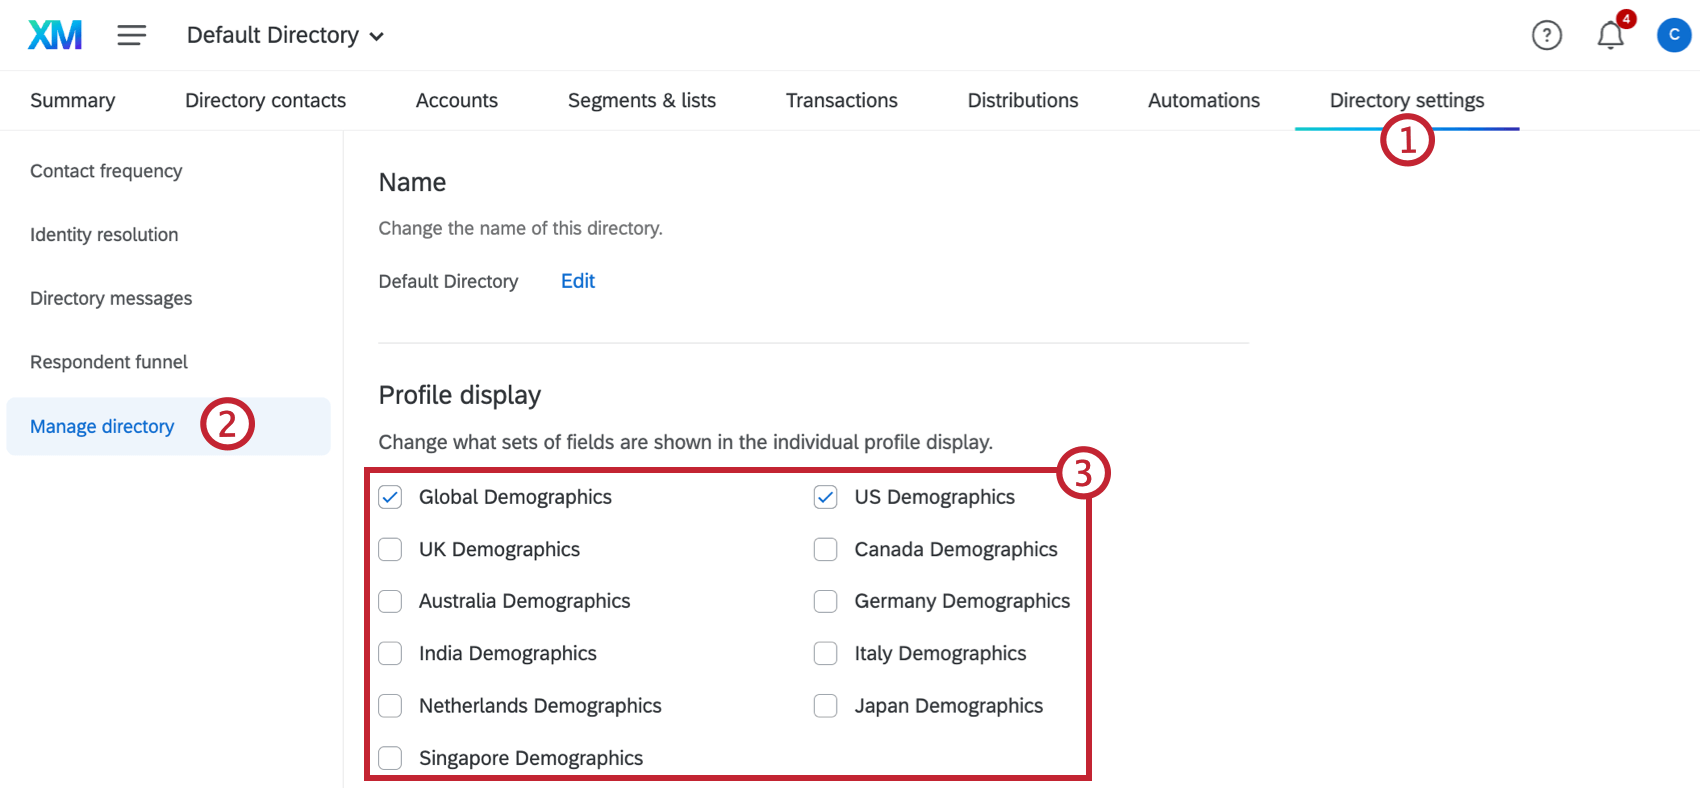
- Select Manage Directory.
- Use the checkboxes to select the sets of demographic fields you want to display in individual contact profiles.
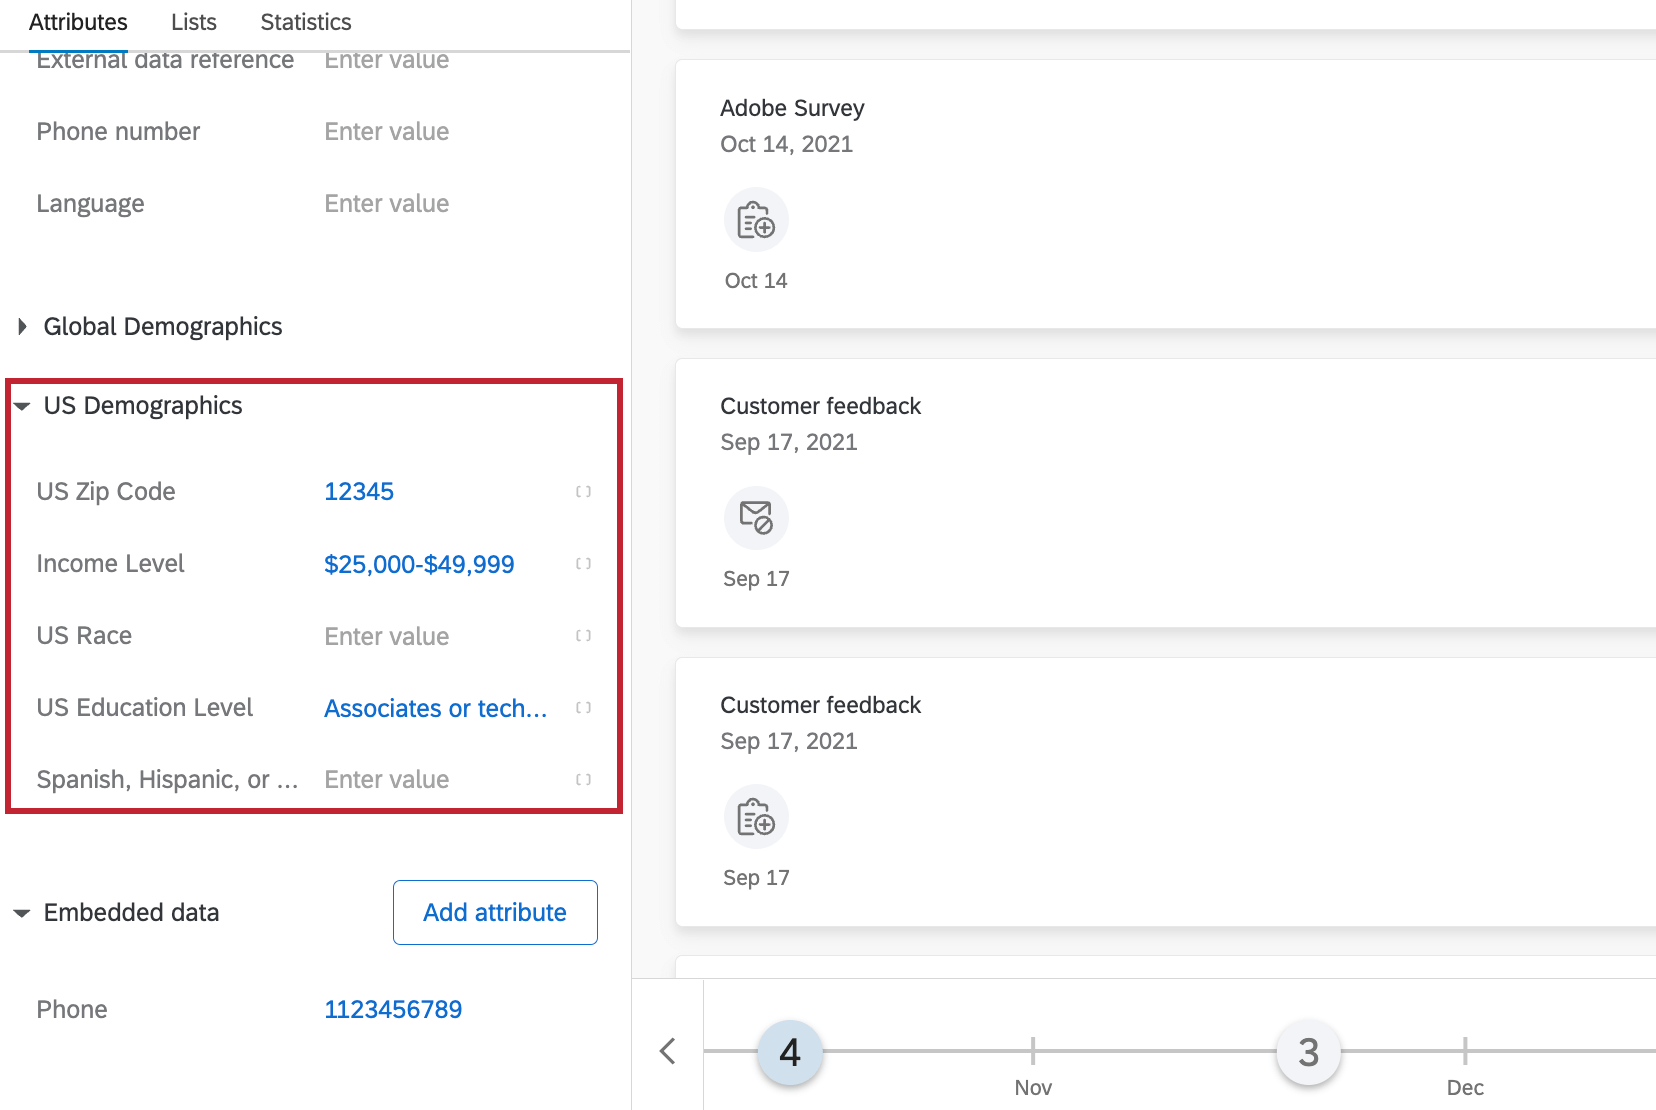
Qtip: You can add values to these fields manually, or you can use certified questions to collect this information in your surveys and automatically map it back to XM Directory.Example: If you select US Demographics, a US Demographics section will be added to all your contact profiles.
Loading Survey Status History
- Go to Directory Settings.
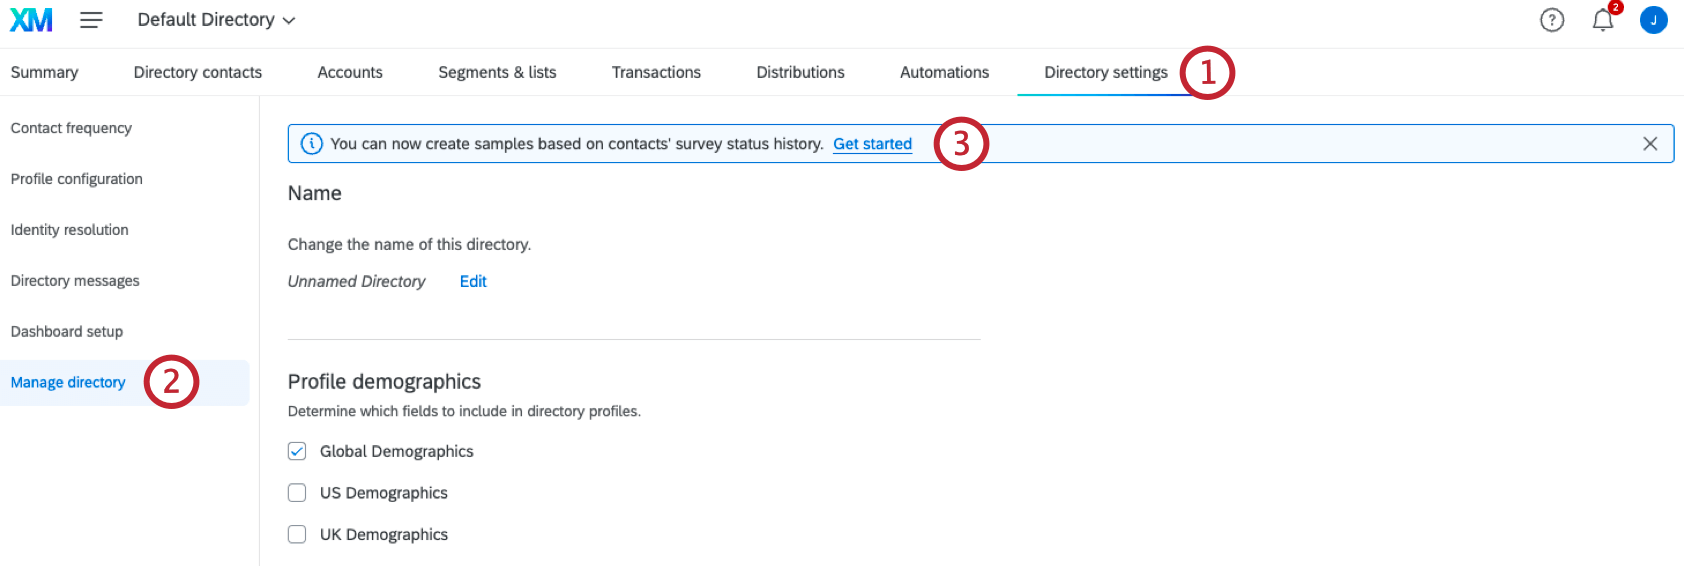
- Select Manage Directory.
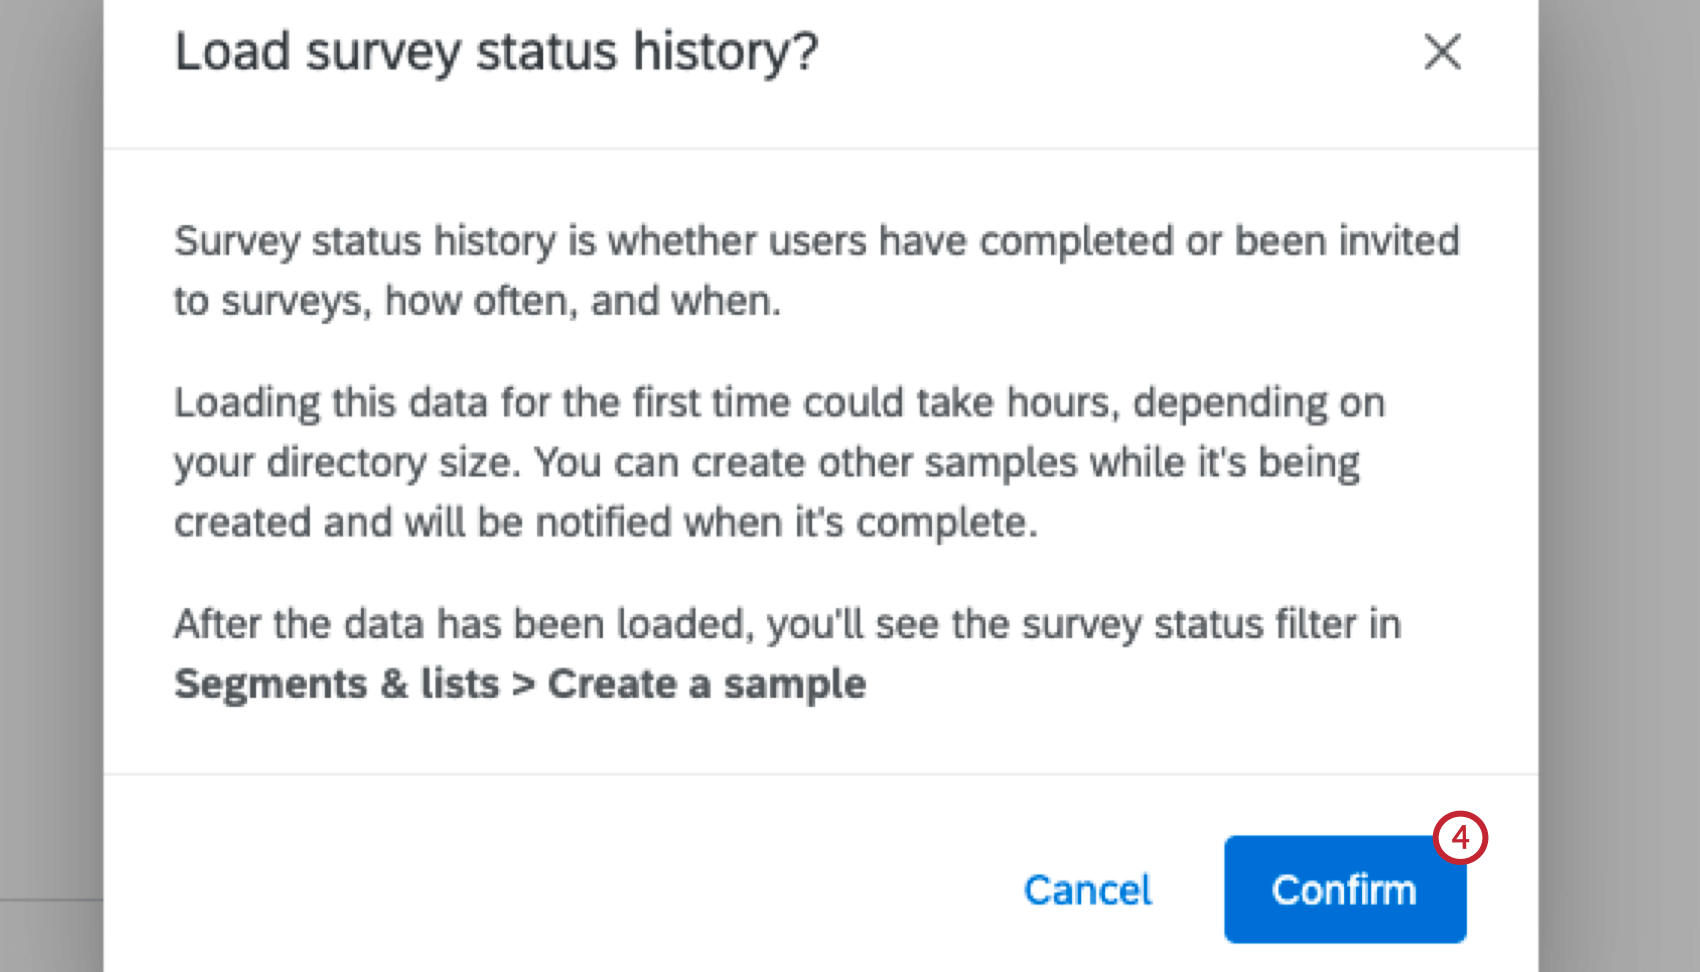
- At the top, next to “You can now create samples based on contacts’ survey status history”, click Get started.
- Select Confirm.
Deleting Directories
- Select the directory you’d like to delete from the dropdown.
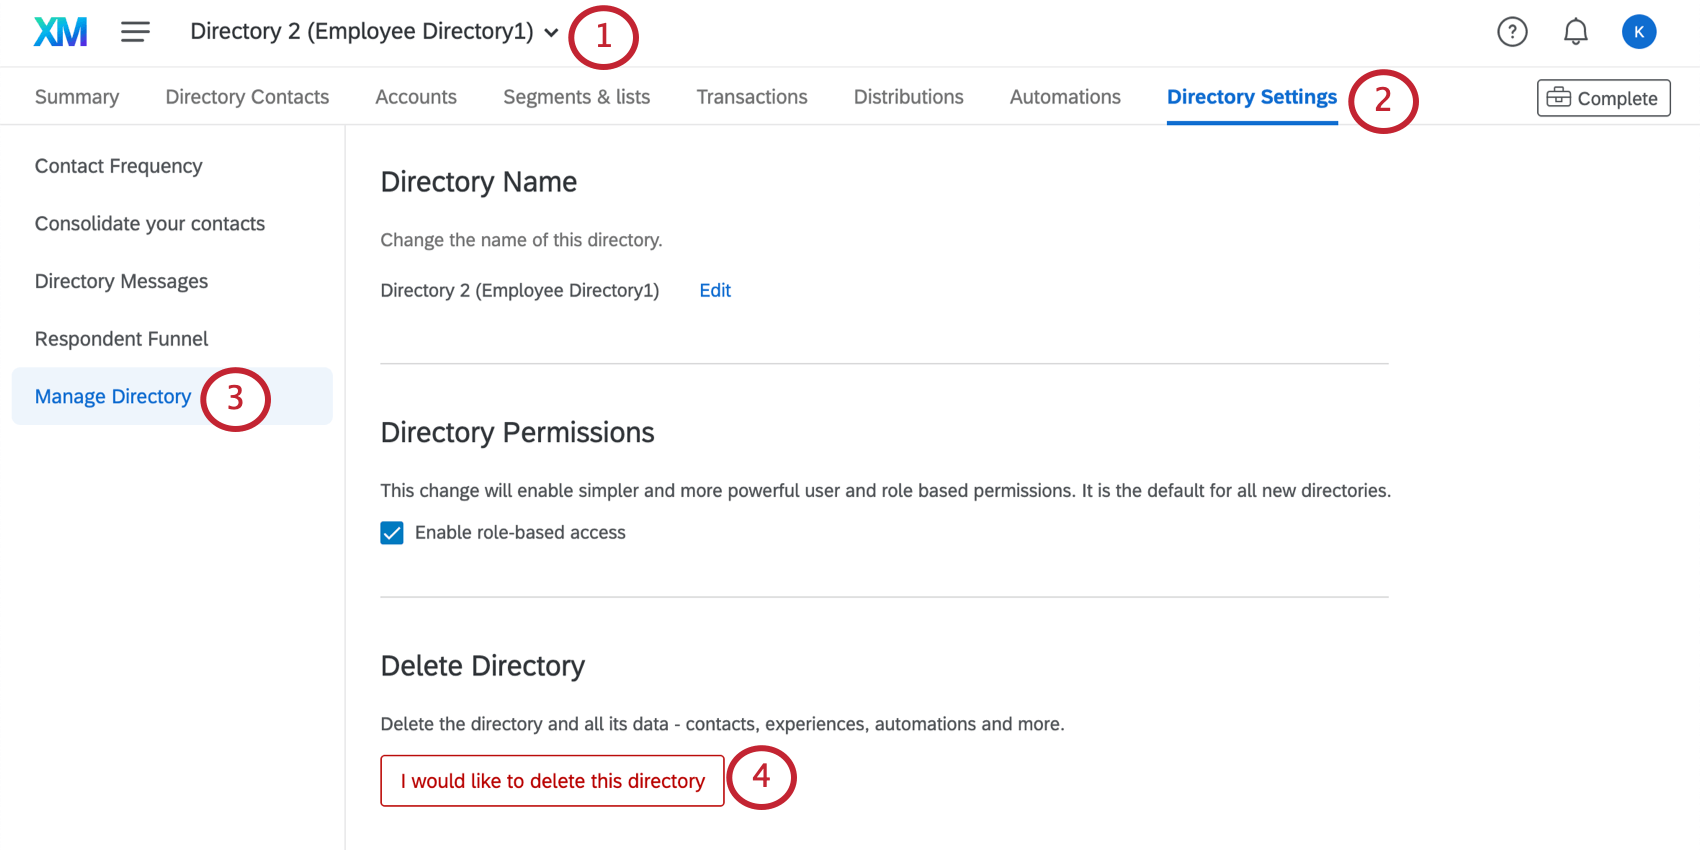
- Go to Directory Settings.
- Select Manage Directory.
- Click I would like to delete this directory.
- Read the options carefully. Select both checkboxes.
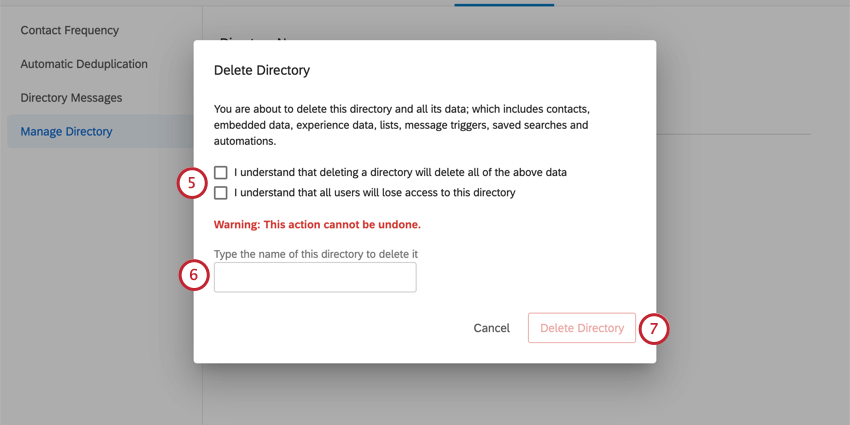
- Type the name of the directory.
- Click Delete Directory.
Distributing from Your Directories
You can distribute to a mailing list in any directory you have access to from the Distributions tab of your directory.
- Go to the Directories page and select Contacts Directory.
- Select your directory.
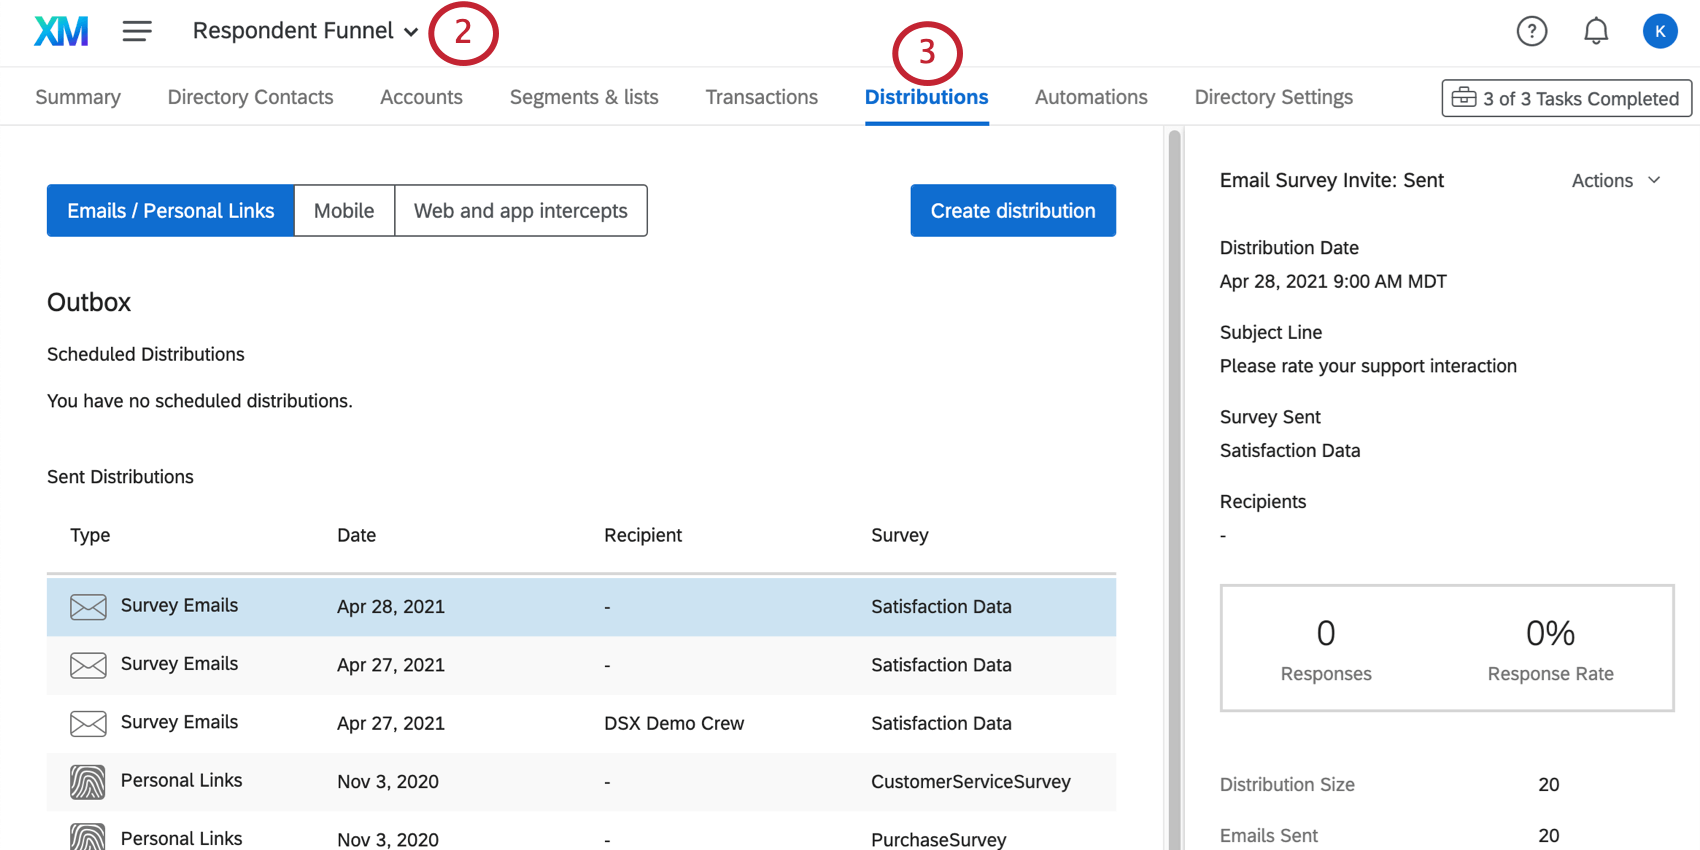
- Go to the Distributions tab.
To learn more about your distribution options, see the Send Emails in XM Directory, Export Unique Links in XM Directory, SMS Distributions in XM Directory, WhatsApp Distributions, or Web and App Feedback Distributions in XM Directory support pages.
Qtip: You can distribute to mailing lists in any directory two ways:
- The Distributions tab in the directory (shown above)
- The Distributions tab in the survey