
Outbox (XM Directory)
What's on this page
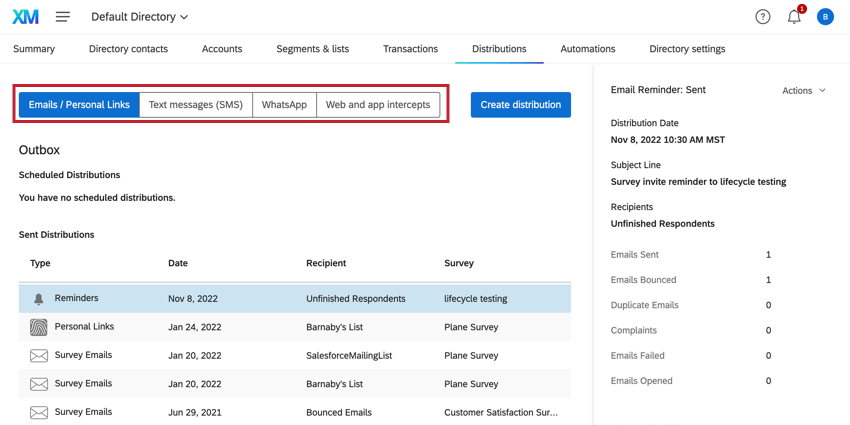
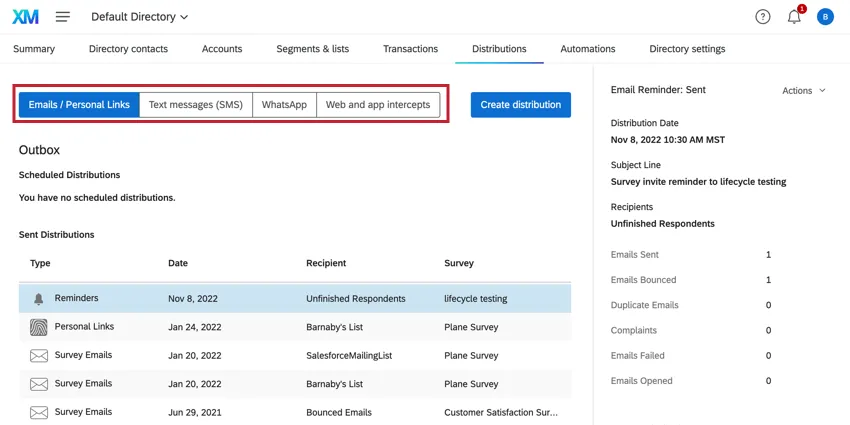
About the Outbox
The outbox contains all kinds of helpful information about distributions you’ve sent through XM Directory in the past. Here, you can cancel or edit future distributions, keep track of email bounces, and much more.
The outbox can be reached by clicking the Distributions tab.
Sections of the Outbox
Depending on the types of distributions you are able to send, your outbox might be divided into different sections.
- Emails / Personal Links: Where you can find information on past and in progress email and unique link distributions.
- Text messages (SMS): Where you can find information on past and in progress SMS.
- WhatsApp: Where you can find information on past and in progress WhatsApp.
- Web and app intercepts: Where you can find a list of Website & App Feedback projects that have been connected to your directory. The information available in the outbox and the means of management are slightly different for intercepts than they are for other types of distributions; see Managing Website and App Feedback Distributions in XM Directory.
Qtip: You will only have sections for types of distributions you are allowed to send. If you’re a Brand Administrator and you’re interested in learning more about other distribution methods, reach out to Account Services. Once you have access to certain features, you can control who in your license can use them by adjusting user, group, or division permissions.
Distribution Information
When you click on a distribution, a menu on the right reveals additional information about that distribution.
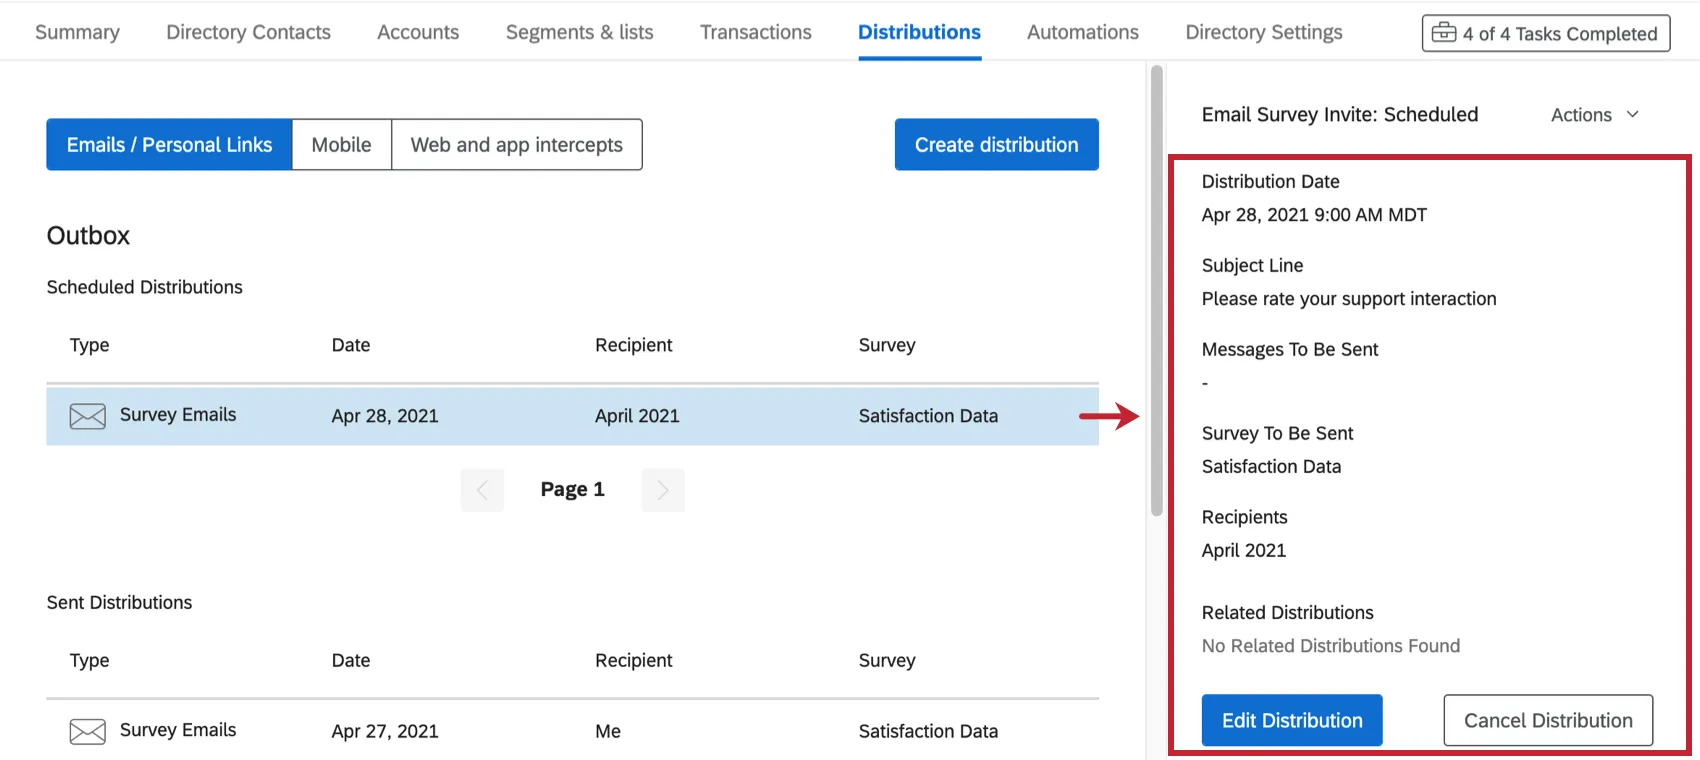
Scheduled Distributions
Scheduled Distributions displays distributions you have scheduled that have not been sent yet.
- Distribution Date: The date the distribution is scheduled to be sent.
- Subject Line: The subject of the email.
- Messages To Be Sent: The number of messages to be sent. Should add up to the number of unique contacts in the mailing list.
- Survey To Be Sent: The name of the survey to be linked in the emails.
- Recipients: The name of the sample, mailing list, segment, transaction group, or individual contact the distribution is being sent to.
- Related Distributions: If any reminders or thank yous are being sent, they will be listed here by the name of the distribution. If you are viewing a scheduled reminder or thank you, the survey invitation will be listed here.
- Edit Distribution: Click this to edit the distribution, including the recipients and the message content.
- Cancel Distribution: Click this to stop the distribution from being sent out.
Scheduled reminders and thank yous have the same information in their distribution information menu, except “Messages To Be Sent” and “Survey To Be Sent.”
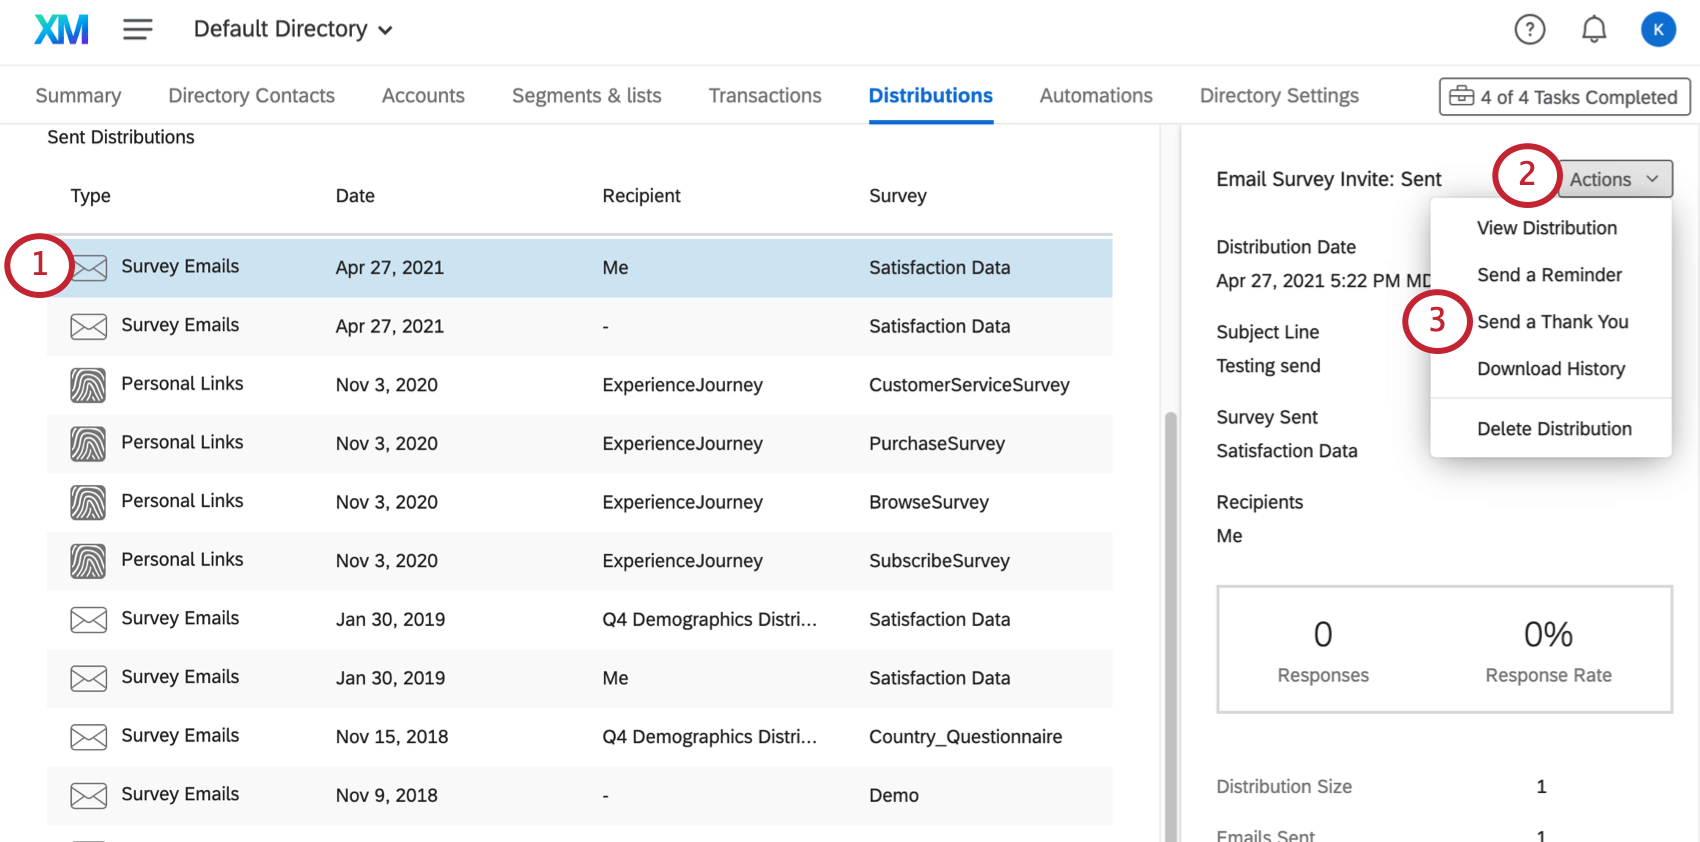
Sent Distributions
Sent Distributions contains all distributions sent in the past and all personal links.
- Distribution Date: The date the distribution was sent.
- Subject Line: The subject of the email.
- Survey Sent: The name of the survey linked in the emails.
- Recipients: The name of the sample, mailing list, segment, transaction group, or individual contact the distribution is being sent to.
- Responses and Response Rate: The number of responses received and the percentage of contacts who responded.
- Distribution Size: How many contacts are in the mailing list, sample, segment, or transaction group.
- Emails Sent: The number of emails that have left the Qualtrics server. Qtip: Once an email has left our server, we cannot guarantee that the email will not be affected by any filters or blocklist set up on the opposing end.

- Emails Skipped: The number of respondents (emails) that were not delivered because of contacts which have already received the maximum number of emails or invitations within the time frame established by your Brand Administrator. Qtip: The maximum number of emails or invitations limit can only be set with XM Directory through the use of Contact Frequency Rules.
- Emails Bounced: The number of emails that did not reach the recipient’s inbox. This could be for a number of reasons; see Distribution Statuses for more details.
- Duplicate Emails: The number of duplicate emails. See Distribution Statuses for more details.
- Complaints: The number of times a recipient from the mailing list clicked ‘Report Spam’ (or equivalent). See Distribution Statuses for more details.
- Emails Opened: The number of contacts who have opened the email in their inbox.
- Surveys Started: The number of surveys where the recipient has at least clicked on the link, but hasn’t submitted the survey.
- Surveys Completed: The number of recipients who have submitted the survey.
- Related Distributions: If any reminder or thank you emails are being sent, they will be listed here by the name of the distribution. If you are viewing a scheduled reminder or thank you, the survey invitation will be listed here.
Basic emails (emails without a survey) display the same information, excluding information linked to surveys. This means information on the surveys completed and started, response rate, and response count are not included.
Personal links display the same information excluding the name of the survey and information related to emails (e.g., numbers of bounces and skipped emails).
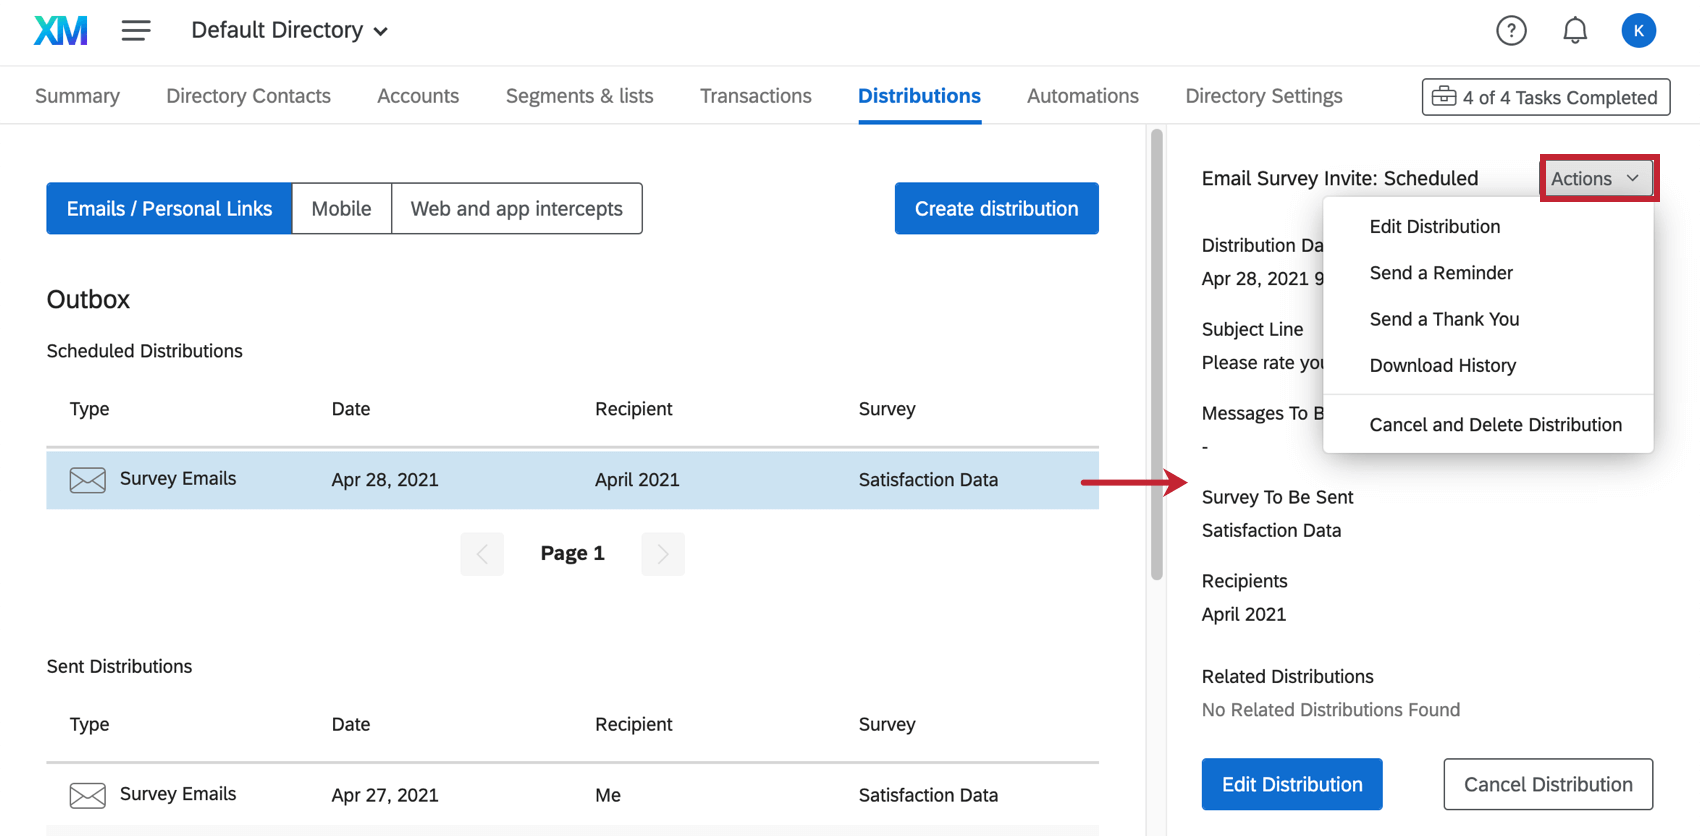
Distribution Actions
In the upper-right corner of the distribution information menu is the Actions button. The possible actions vary based on the type of distribution.

Scheduled Emails
- Edit Distribution: Click this to edit the distribution, including the recipients and the message content.
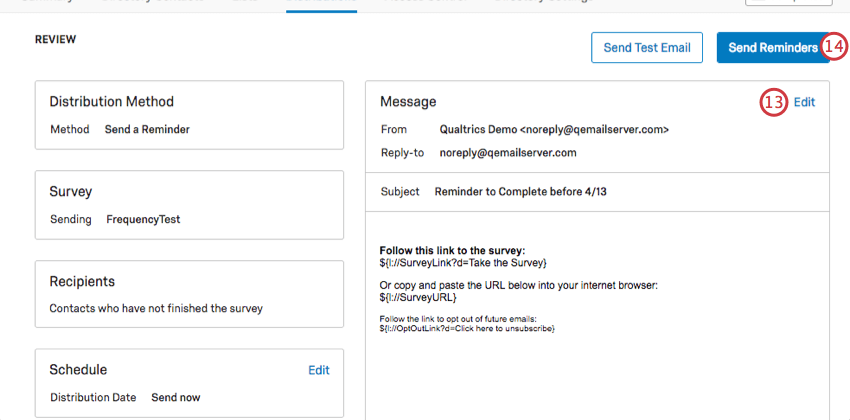
- Send a Reminder: Send an email reminding unfinished respondents to complete the survey.
- Send a Thank You: Send an email thanking finished respondents for completing the survey.
- Download History: View the distribution history.
- Cancel and Delete Distribution: Click this to stop the distribution from being sent out.
Scheduled emails that are not survey invitations only have the Edit and Cancel options.
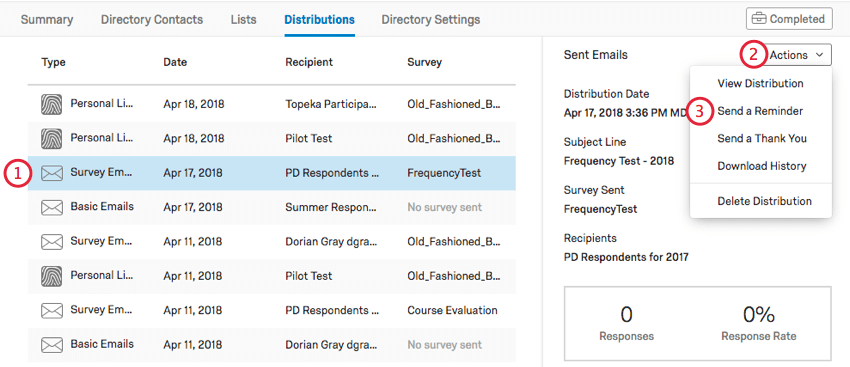
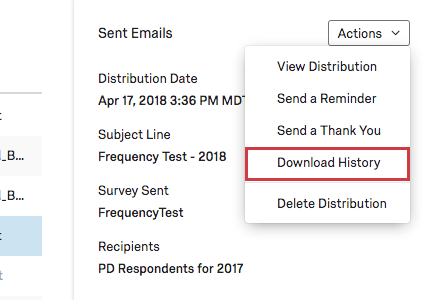
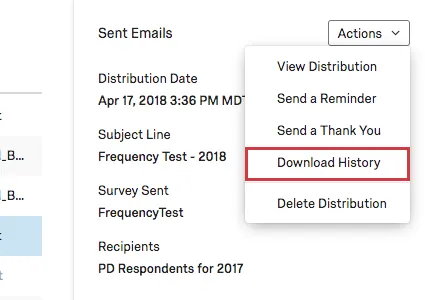
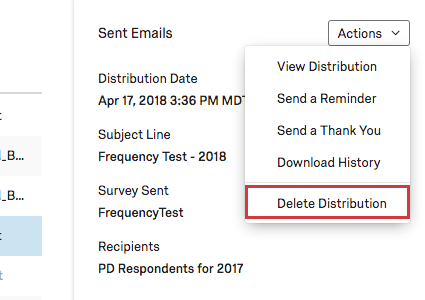
Sent Emails
- View Distribution: View the email that was sent.
- Send a Reminder: Send an email reminding unfinished respondents to complete the survey.
- Send a Thank You: Send an email thanking finished respondents for completing the survey.
- Download History: View the distribution history.
- Delete Distribution: Click this to delete all history of the distribution. This will not delete the survey responses.
Sent emails that aren’t invitations do not have reminder and thank you options.
Personal links only have Download History and Delete Distribution.
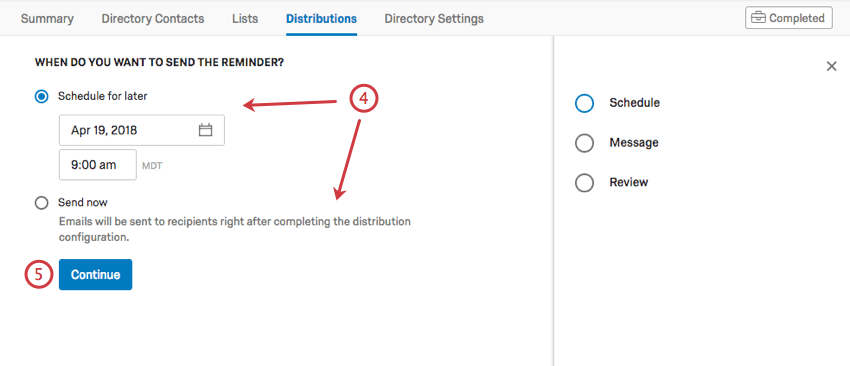
Send a Reminder
To help increase response rates, you can follow up with respondents who haven’t completed their survey by sending a reminder email. Reminder emails are only sent to participants who have not yet completed their survey and include the same individual link for that recipient’s survey session. If the participants have already started the survey, they will continue where they left off.
Reminders can only be sent to email and SMS invitations. 2-way SMS and other distribution methods are not compatible with reminders. Email invitations must contain an individual link to qualify.
Qtip: If you accidentally schedule it for later, you can make edits to the distribution, including cancelling it or changing when it goes out. Once a distribution is sent, it cannot be retrieved.
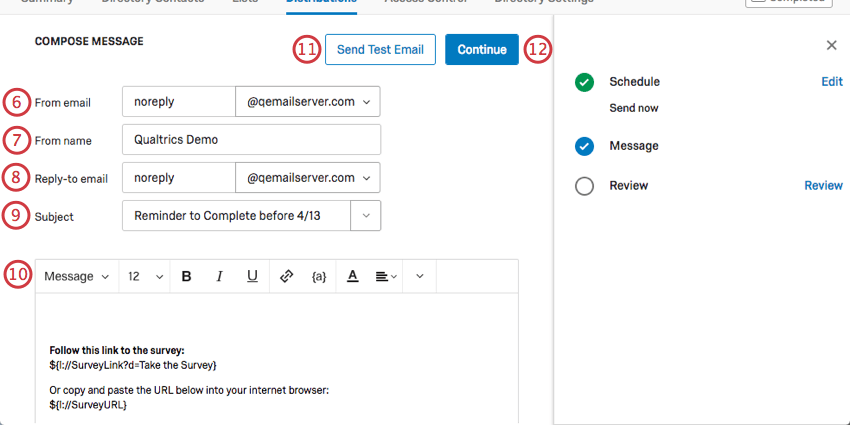
Qtip: You can use whatever name you want (e.g., MyCompany@qemailserver.com) but the domain has to be a Qualtrics-approved one. This improves your email’s legitimacy and decreases the chances it’ll bounce. If your organization has a custom email domain set up, this will also appear as an option.
Qtip: See our section on Customizing Emails.
Send a Thank You
To show your respondents how much you appreciate their participation, you can send them a thank you email. These emails are only sent to respondents in your distribution who have submitted their survey.
Thank you emails can only be sent to email and SMS invitations. 2-way SMS and other distribution methods are not compatible with thank you emails. Email invitations must contain an individual link to qualify.
Qtip: Rather than sending all thank you emails at once, you can set up your survey options to automatically send individual thank you emails as respondents complete the survey.
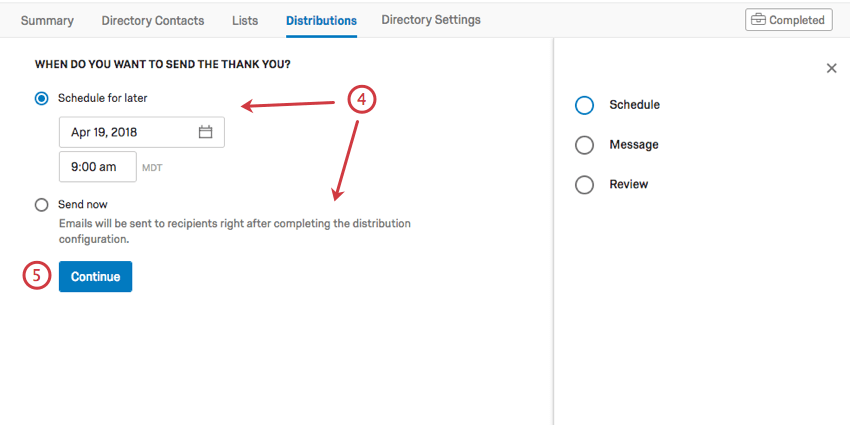
Qtip: If you accidentally schedule it for later, you can make edits to the distribution, including cancelling it or changing when it goes out. Once a distribution is sent, it cannot be retrieved.
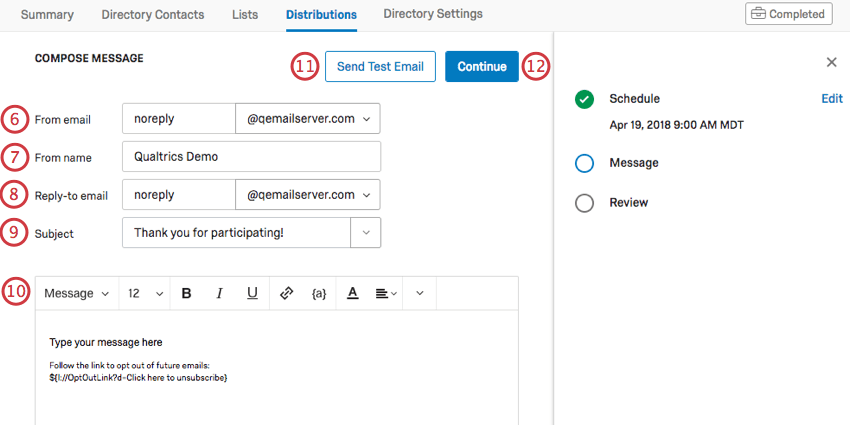
Qtip: You can use whatever name you want (e.g., MyCompany@qemailserver.com), but the domain has to be a Qualtrics-approved one. This improves your email’s legitimacy and decreases the chances it’ll bounce. If your organization has a custom email domain set up, this will also appear as an option.
Qtip: See our section on Customizing Emails.

Download History
You can download a spreadsheet containing survey links and statuses, in addition to other information about the respondent. Just click the distribution you desire to see the history for, Actions, then Download History.
Qtip: This option is available for survey invites, reminders, thank you emails, SMS invitations, and WhatsApp distributions.
Columns
The list of columns that can be downloaded in the history are the same whether the distribution was sent using XM Directory or not. For a list of columns included in this export, see Downloading the Distribution History.
Distribution Statuses
When reading the distribution history, there are a number of values you may see in the “Status” column. These statuses are the same whether the distribution was sent using XM Directory or not. See Distribution Statuses for more details.
Cancel & Delete Distribution
Warning: Once a distribution is deleted, it is irretrievable.
You can delete distributions under the Actions menu.

- Deleting a distribution that is scheduled for the future:
- Cancels that distribution.
- Deleting a distribution that was sent in the past:
- Erases the distribution from your outbox. This will prevent you from performing any actions on it, including sending reminder or thank you emails.
- Removes the distribution from contacts’ touchpoint timeline.
- No responses will be removed from surveys recorded with this distribution.
- No mailing lists, samples, or contacts are deleted.
FAQs
What’s XM Directory? / Where’s Target Audience?
What’s XM Directory? / Where’s Target Audience?
That's great! Thank you for your feedback!
Thank you for your feedback!