
ServiceNow Event
What's on this page
About ServiceNow Events
The ServiceNow event allows you to begin workflows in Qualtrics based on when a record is updated or inserted in ServiceNow. For example, an IT ticket is closed which updates a record in ServiceNow, beginning a workflow in Qualtrics to send a feedback survey to the employee who filed the original ticket.
Attention: In order to set up a new ServiceNow event, you must have sufficient ServiceNow permissions set up. Otherwise, when saving the event, you will receive an error message (sys_rest_message, sys_rest_message_headers, sys_rest_message_fn, and/or sys_script), and the event will not be created. You will need permissions to both read and write within ServiceNow tables.
Please contact your ServiceNow administrator if you are unsure whether you have these permissions or require additional permissions to set up a Qualtrics ServiceNow event.
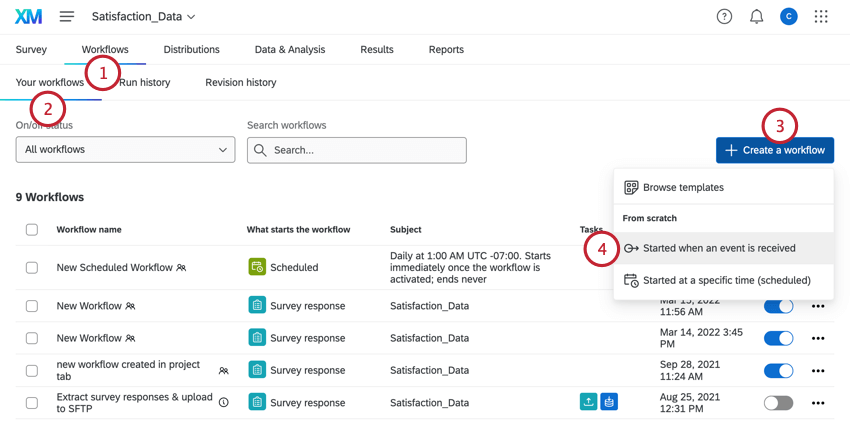
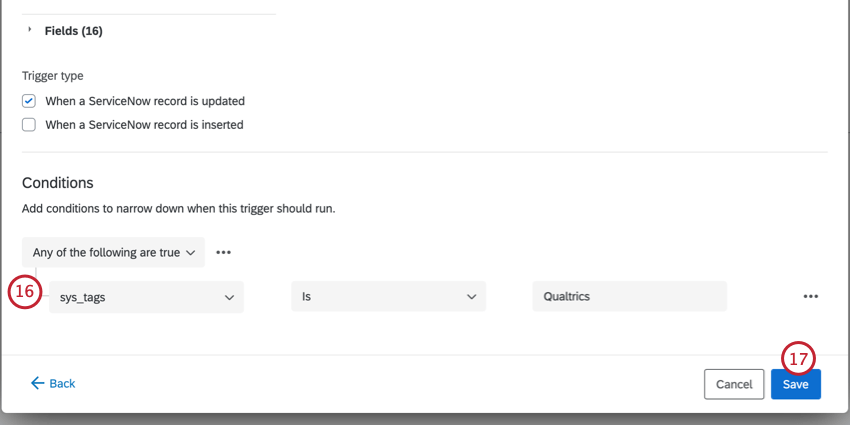
Setting Up a ServiceNow Event
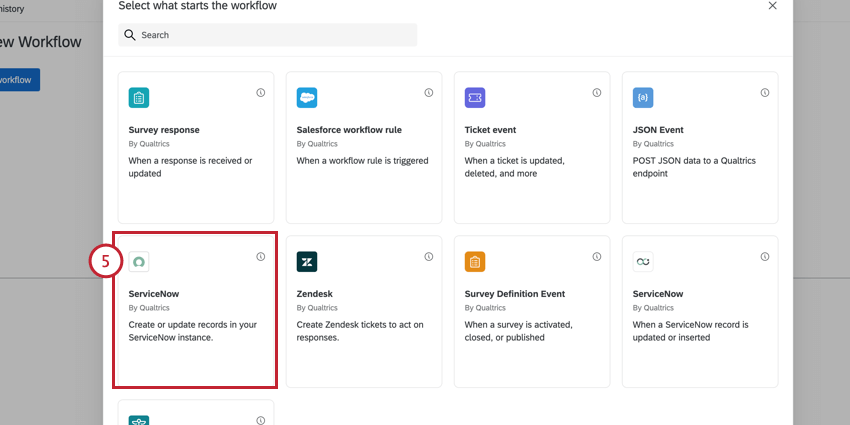
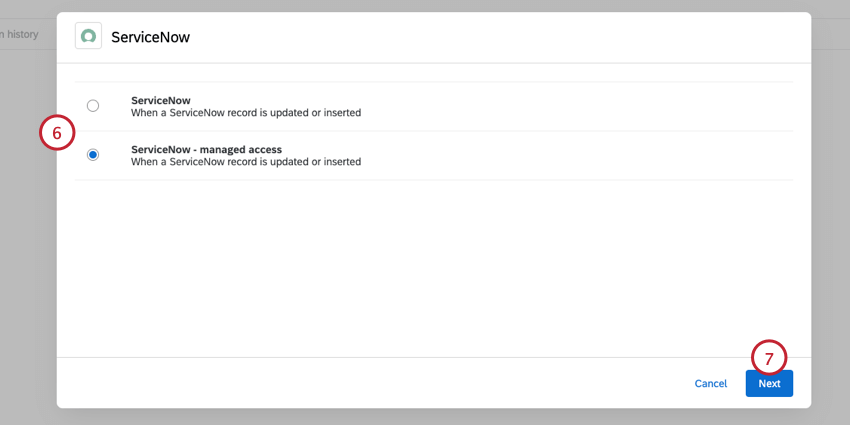
- ServiceNow: This option allows any ServiceNow user in your license to base their Qualtrics workflows on any table they have access to. Attention: The ServiceNow option has been replaced by the managed access option. This version of the integration is no longer supported.

- ServiceNow – managed access: This option allows only authorized ServiceNow users to use authorized tables in their Qualtrics workflows. This access is managed with the Qualtrics Connection Manager.
Attention: The creator of the workflow must have access to the ServiceNow credentials used in the ServiceNow task for the workflow to run properly.
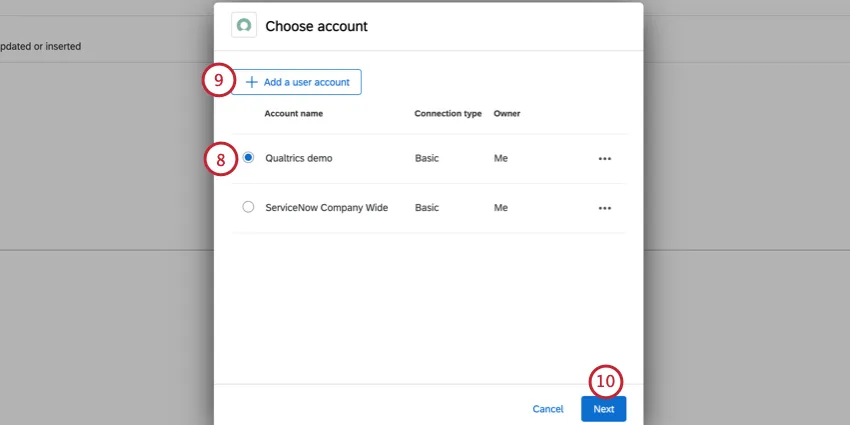
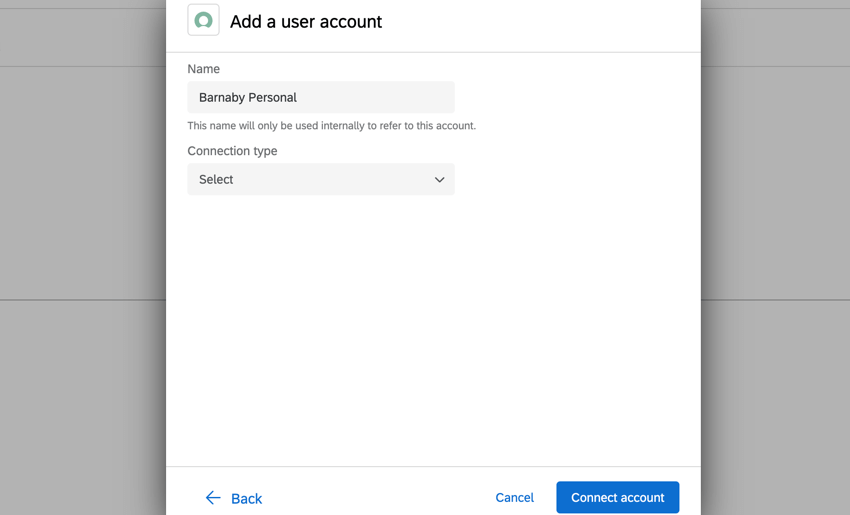
Qtip: When adding a new account, you must give it a name so you can identify it in the future. Then, choose your connection type and finish setting up the connection. If connecting via OAuth, see this support page.

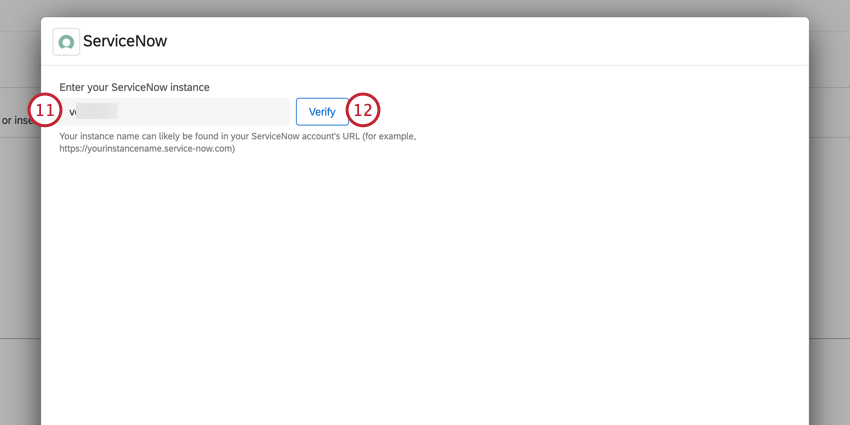
Example: For example, if you login to ServiceNow at abc123.service-now.com, then you will enter “abc123” in this box.
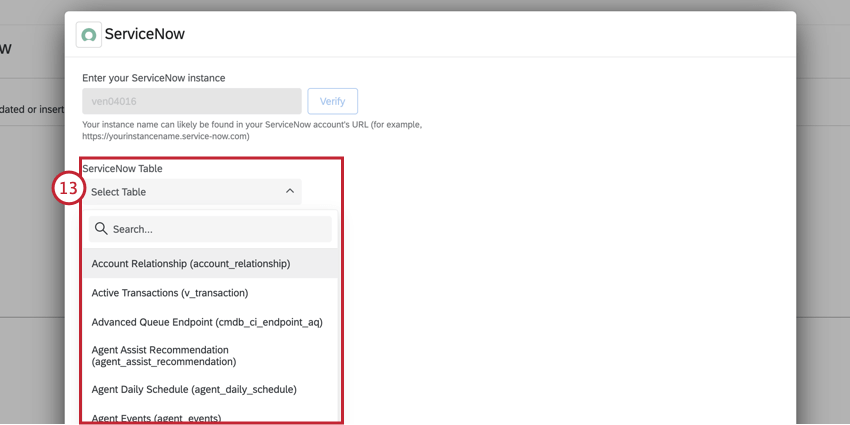
Qtip: If you selected “ServiceNow – managed access” in step 6, then you will only be able to choose tables that you have been given access to via the Qualtrics Connection Manager in ServiceNow (if it has been installed).
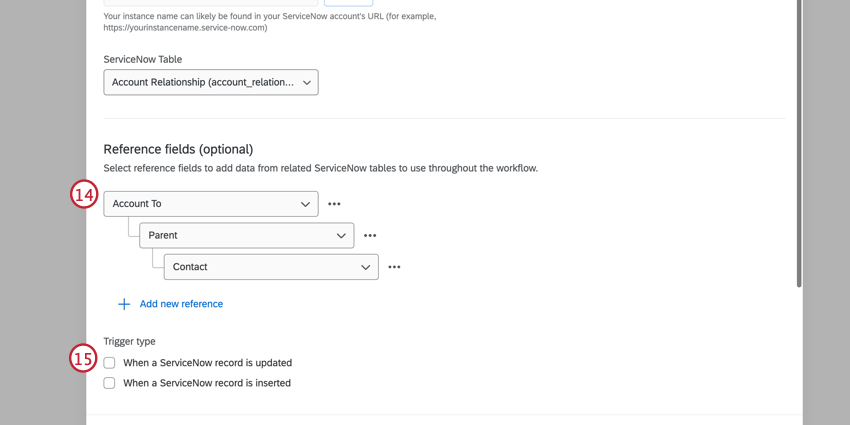
Qtip: All fields added to the reference field section of the event can be used as conditions and available in tasks within the workflow. This can be helpful if you want to reference this data via piped text in an email task, for example. Reference fields cannot be used as a filter.
Qtip: These conditions are evaluated before the event triggers. For general information on formatting condition logic, see Creating Conditions. Note that you can still add conditions later in your workflow to determine when your task fires.
Example: For example, you can use an Update XM Directory Contacts Task to send a follow-up survey when a record in ServiceNow is updated.
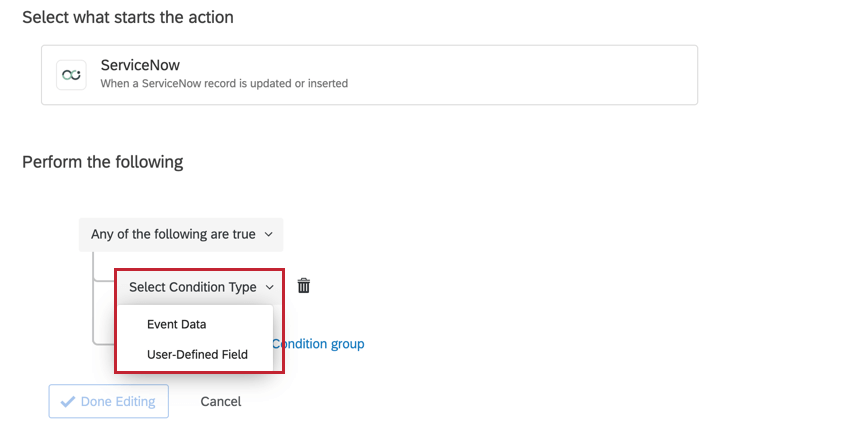
Conditions for ServiceNow Events
When using a ServiceNow event to start your workflow, you can base your workflow conditions on the following:
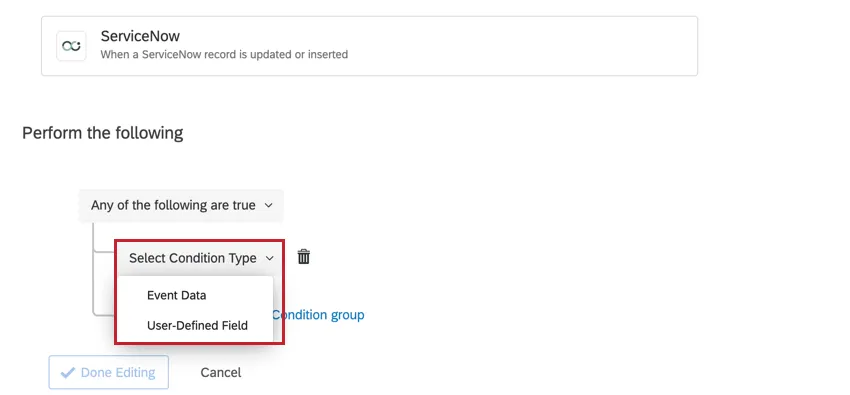
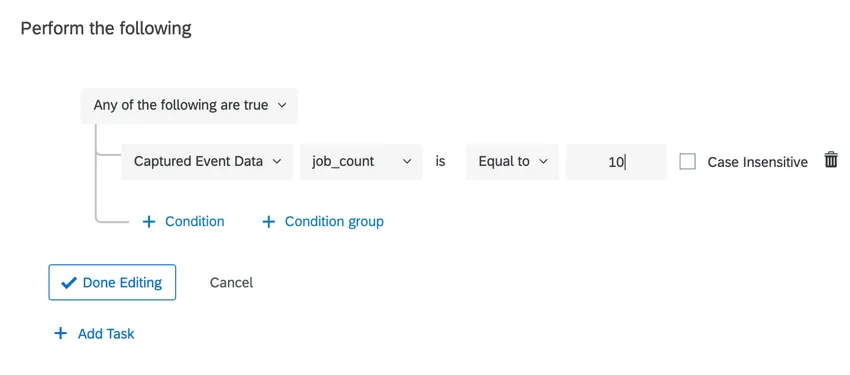
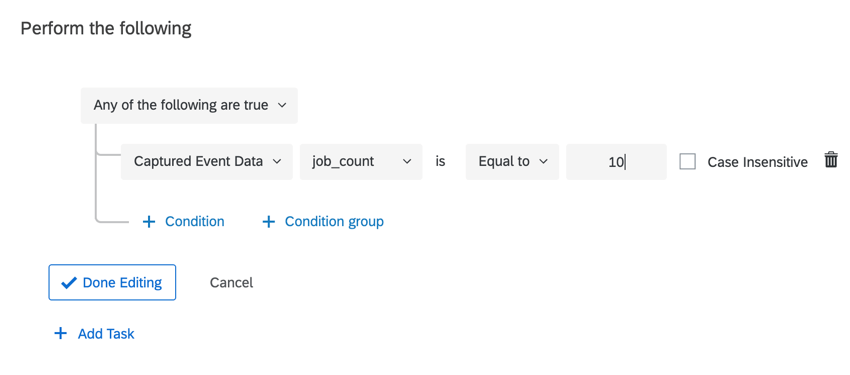
- Event Data: Base the condition on one of the fields included from ServiceNow. The available fields will depend on the table you selected during the event setup. Example: In this example, the workflow will trigger when the updated record has a job_count equal to 10.

- User-Defined Field: This field is not used in conditions.
Setting up a Qualtrics Spoke for ServiceNow
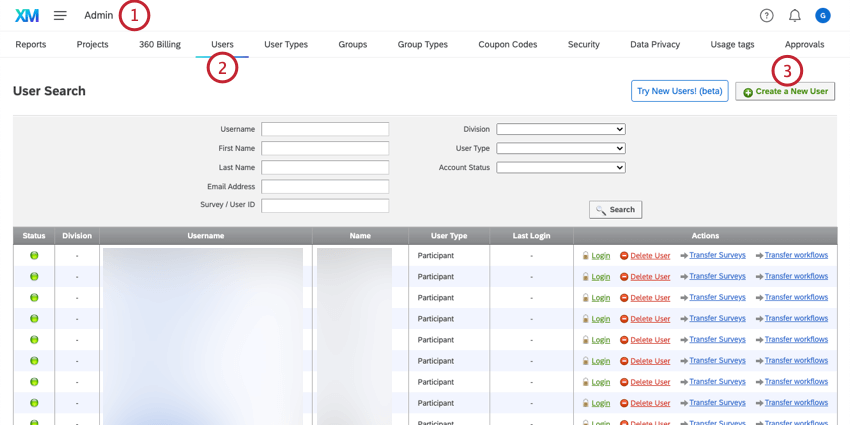
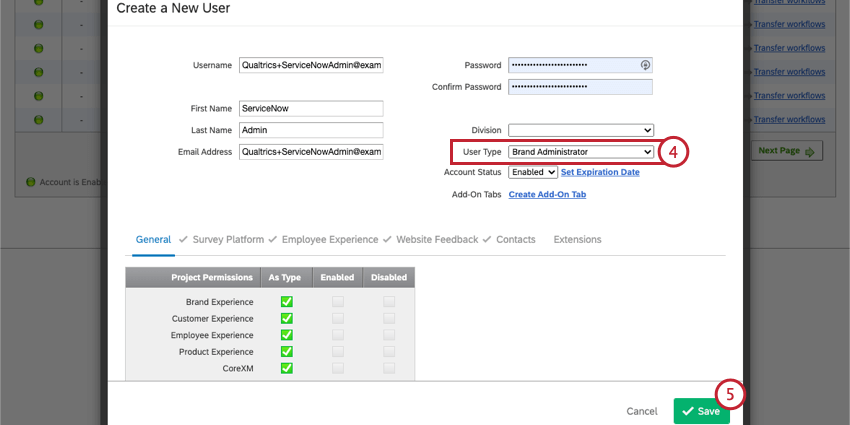
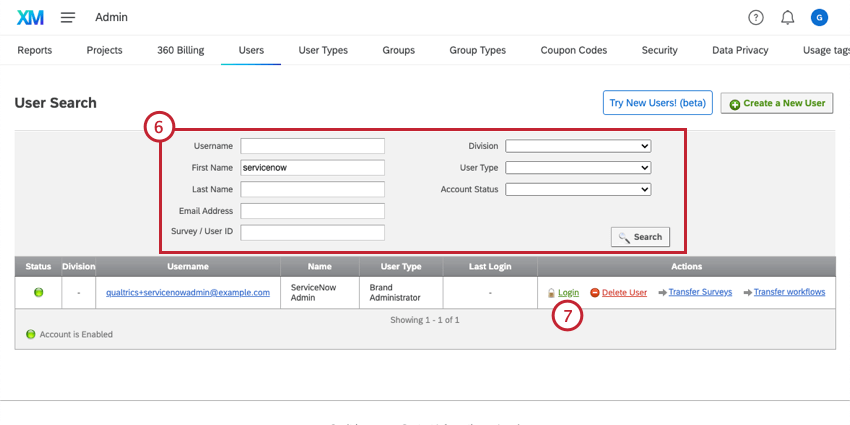
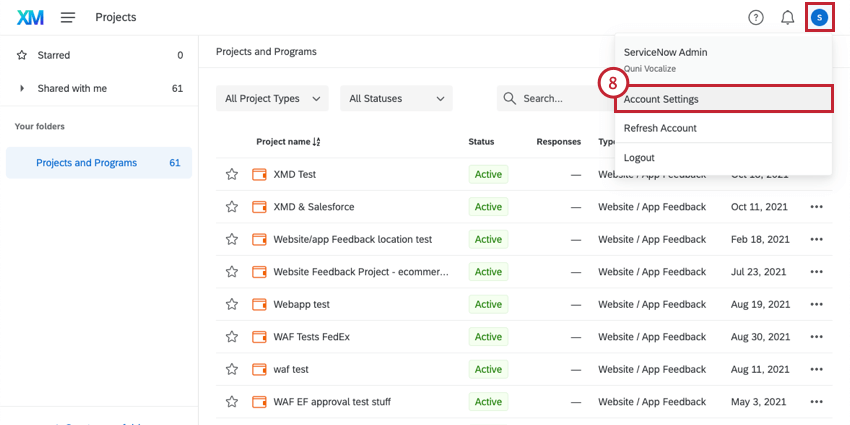
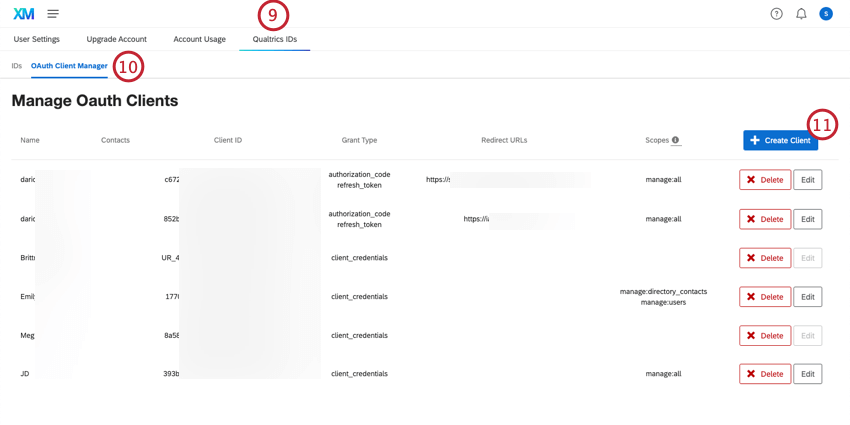
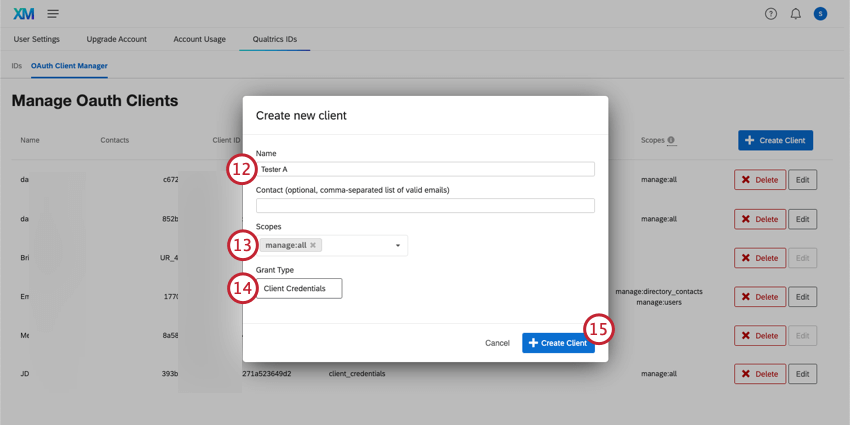
Sometimes, you may want to create additional ServiceNow administrators within Qualtrics. By granting Qualtrics users additional permissions, you can allow them to help run the ServiceNow instance at your organization.
Attention: You must be a Brand Administrator in order to create a new ServiceNow administrator.
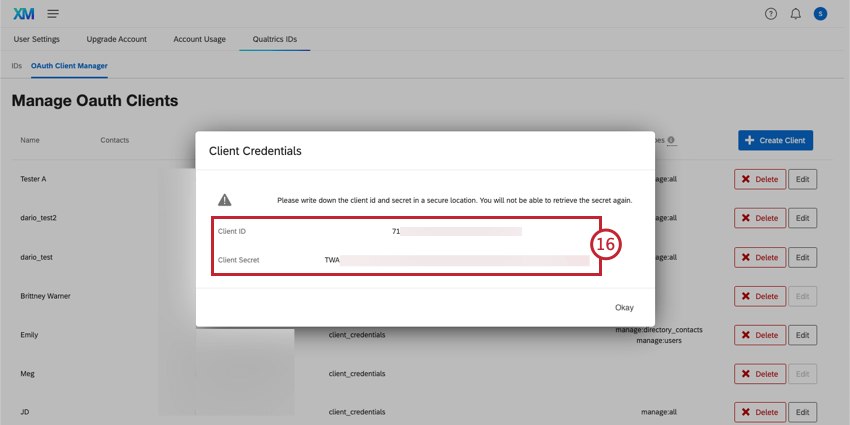
Attention: You must write these generated tokens down and keep them in a secure location. You will not be able to retrieve the Client Secret after closing this window.
Qtip: For more information, visit the ServiceNow documentation for Setting Up the Qualtrics Spoke.
Qualtrics Connection Manager
A ServiceNow admin can download a Qualtrics app that allows them to manage user access to ServiceNow data for building Qualtrics workflows. You can limit which tables users have access to, the actions available to them for each table, and view the workflows that use your ServiceNow tables.
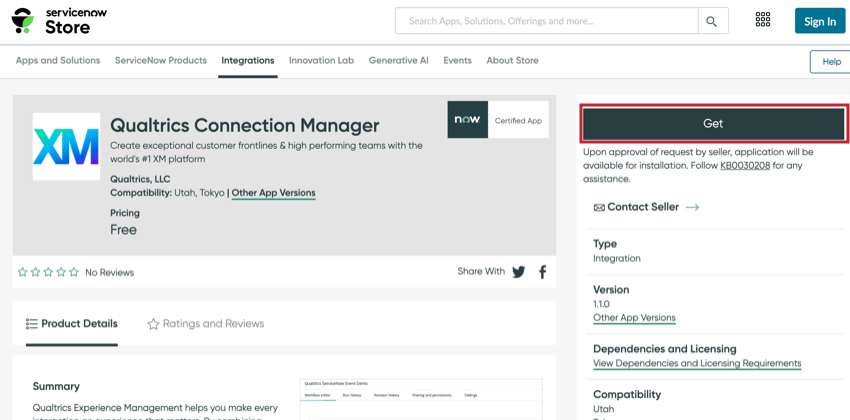
Downloading the App
To download the app, search for the Qualtrics Connection Manager in the ServiceNow app store. Once you’ve found the app, click Get to download the app.
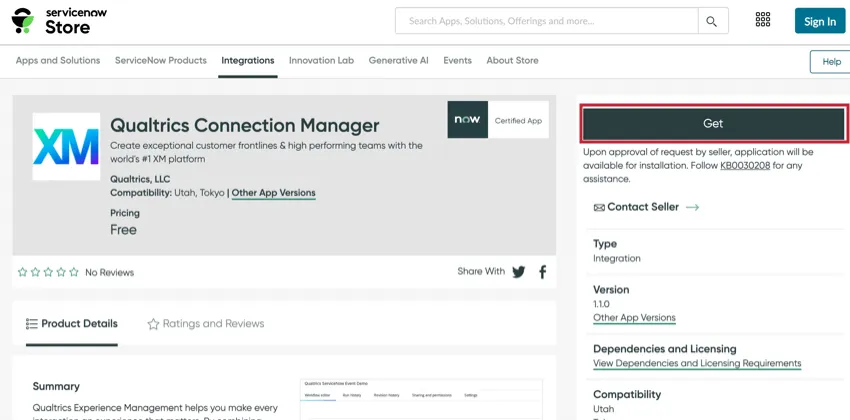
Qtip: Check out the Installation Guide linked in the ServiceNow app store for information about the required ServiceNow permissions to use this app.
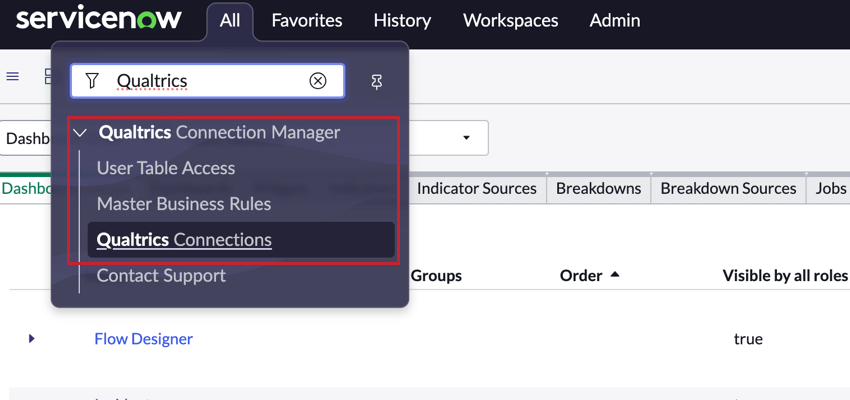
Accessing the App
After downloading the app, search for the Qualtrics Connection Manager using the All menu in the top left corner. You can then navigate to the different sections of the app:
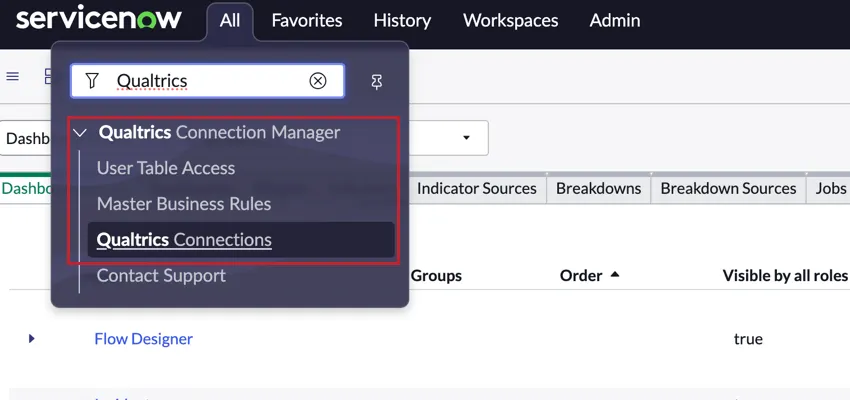
- User Table Access: Give ServiceNow users access to tables to use in the Qualtrics workflows.
- Master Business Rules: Set up business rules to allow tables to be used in Qualtrics workflows and to automatically revoke user access when their permissions change.
- Qualtrics Connections: View the different workflows that use your ServiceNow tables.
- Contact Support: A link to this support page. Please log into the Customer Success Hub if you need to contact Qualtrics Support.
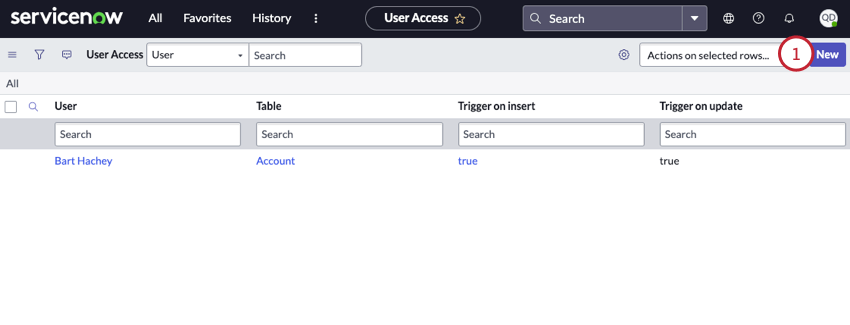
User Table Access
The User Table Access section allows you to give users access to certain ServiceNow tables so they can reference them in their Qualtrics workflows. To give a user access to a table:
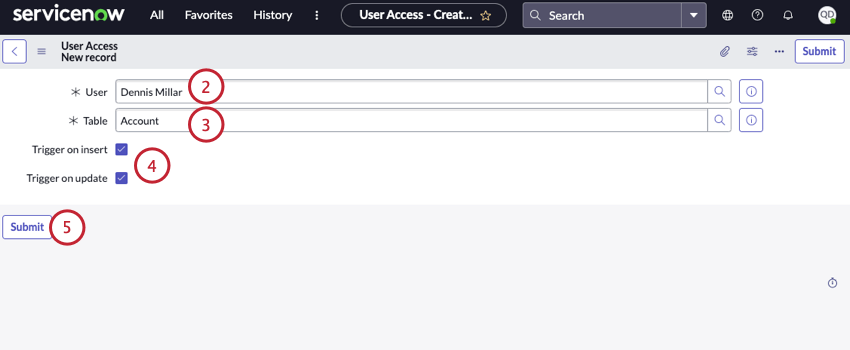
- Trigger on insert: Allows the user to choose record inserts as a trigger type when setting up the ServiceNow event in Qualtrics.
- Trigger on update: Allows the user to choose record updates as a trigger type when setting up the ServiceNow event in Qualtrics.
Qtip: To give a user access to multiple tables, you must repeat the steps above for each table.
You can remove access for a user by following the below instructions:
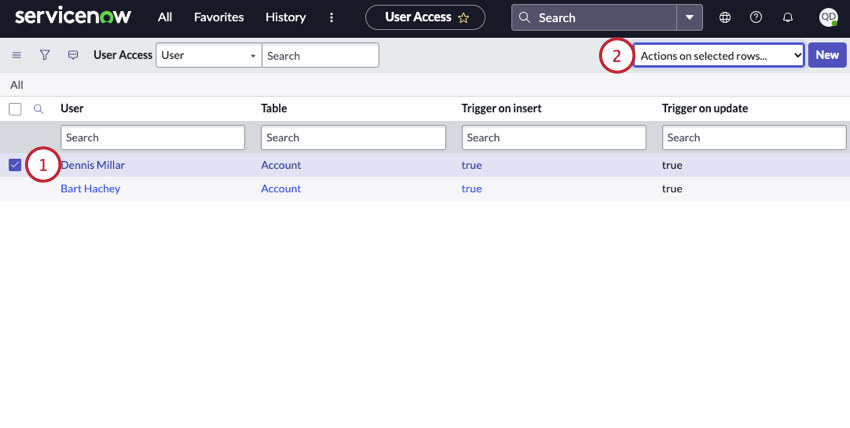
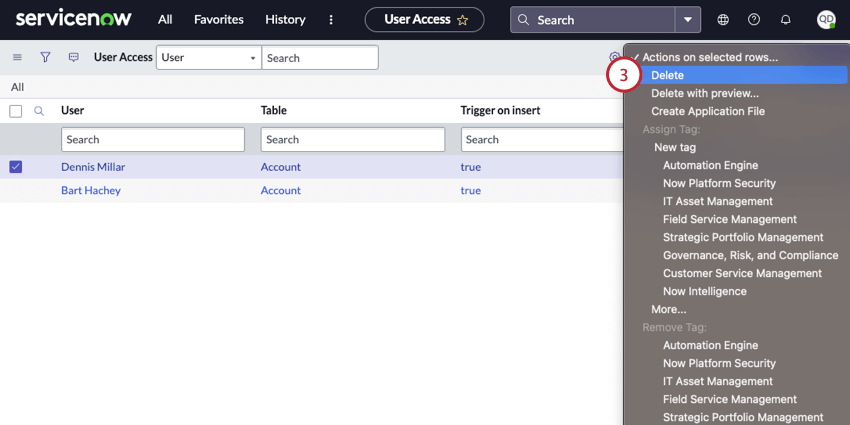
When you remove table access for a user, any workflows that the user set up to use this table will no longer trigger. Additionally, the workflows will be removed from the Qualtrics Connections section of the app.
Master Business Rules
Qtip: You must be in the Qualtrics Connection Manager application to perform these actions.
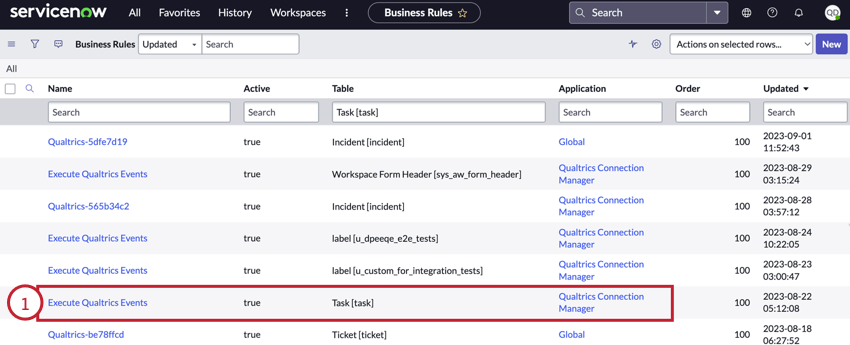
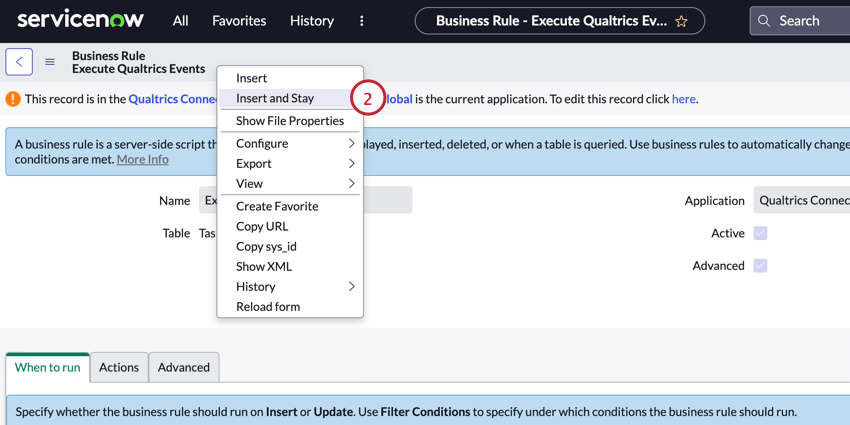
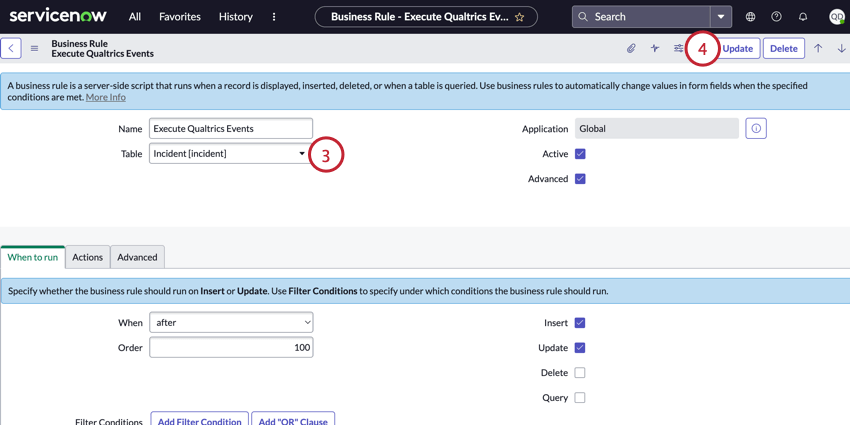
You must set up a master business rule for each table you wish to use in your Qualtrics workflows. This rule allows the table to trigger events in Qualtrics.
Qtip: If you set up a rule for a parent table, then all child tables are also included.
Qtip: If you do not see this option, double check your ServiceNow application and make sure you’re in the Qualtrics Connection Manager.
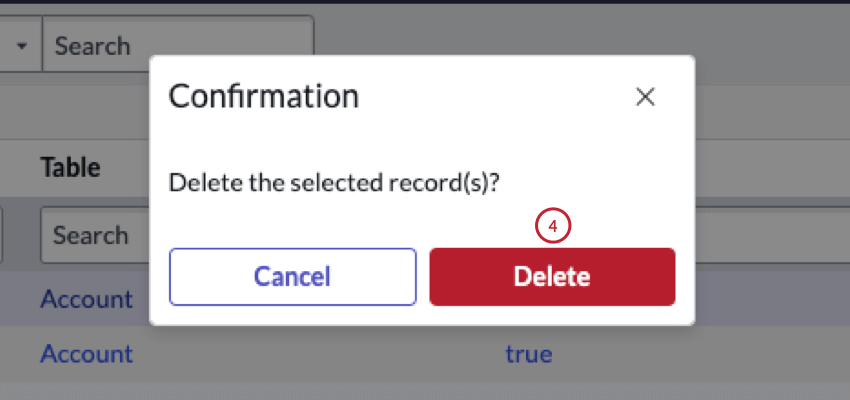
Qtip: You can delete a master business rule to revoke access to that table for all users. To delete a master business rule, click on the rule and then select Delete in the top right corner of the page. Any workflows that used this table will no longer trigger, but workflows will be still be visible from the Qualtrics Connection section of the app.
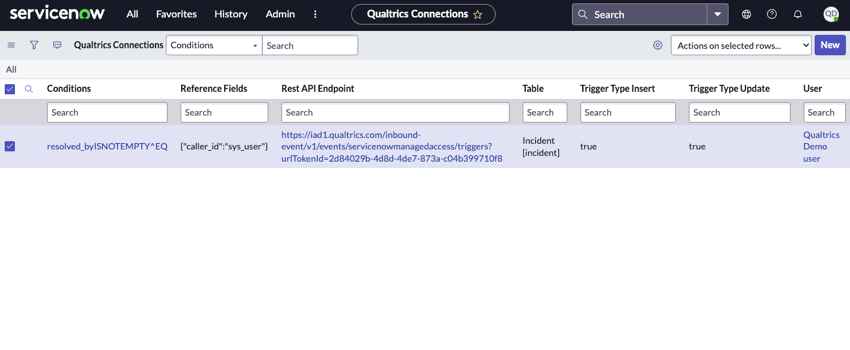
Qualtrics Connections
The Qualtrics Connections section allows you to view information about each Qualtrics workflow that uses your ServiceNow data. This section contains a table that shows the following information about each workflow:
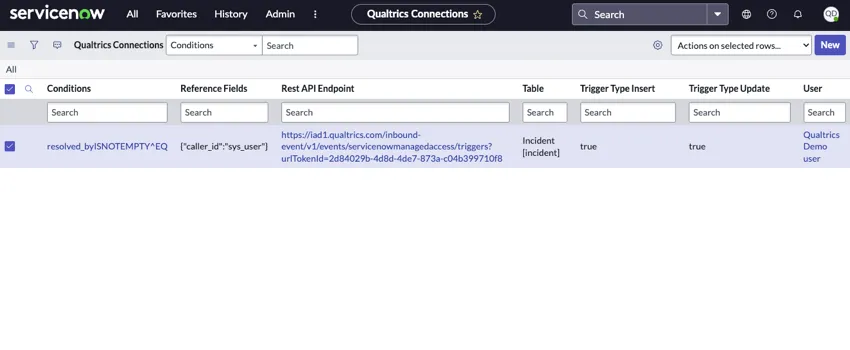
- Conditions: A description of the conditions in the ServiceNow event, if conditions were set up. Qtip: This field is for the conditions that are set up within the ServiceNow event itself. Conditions later in your workflow will not appear here.

- Reference Fields: A description of the reference fields in the ServiceNow event, if reference fields were selected.
- Rest API Endpoint: The API endpoint used for the ServiceNow event.
- Table: The name of the table used in the ServiceNow event.
- Trigger Type Insert: Indicates if the workflow runs when records are inserted.
- Trigger Type Update: Indicates if the workflow runs when records are updated.
- User: The ServiceNow user who owns the workflow.
FAQs
Do I have access to all extensions available through the Workflows templates?
Do I have access to all extensions available through the Workflows templates?
Is there a link to all Workflows events and tasks?
Is there a link to all Workflows events and tasks?
What are Workflows templates?
What are Workflows templates?
What are workflows? / Where are actions?
What are workflows? / Where are actions?
There are no changes to workflow functionality as part of this update.
How do I add or remove an extension from my Qualtrics account?
How do I add or remove an extension from my Qualtrics account?
That's great! Thank you for your feedback!
Thank you for your feedback!