
Editing Contacts in a Mailing List (XMD Lite)
What's on this page
About Editing Contacts in an XM Directory Lite List
Once you’ve created your mailing list, you may need to edit the members of the list. You can edit their information, opt them out of emails, track their interactions with surveys you’ve sent, and more.
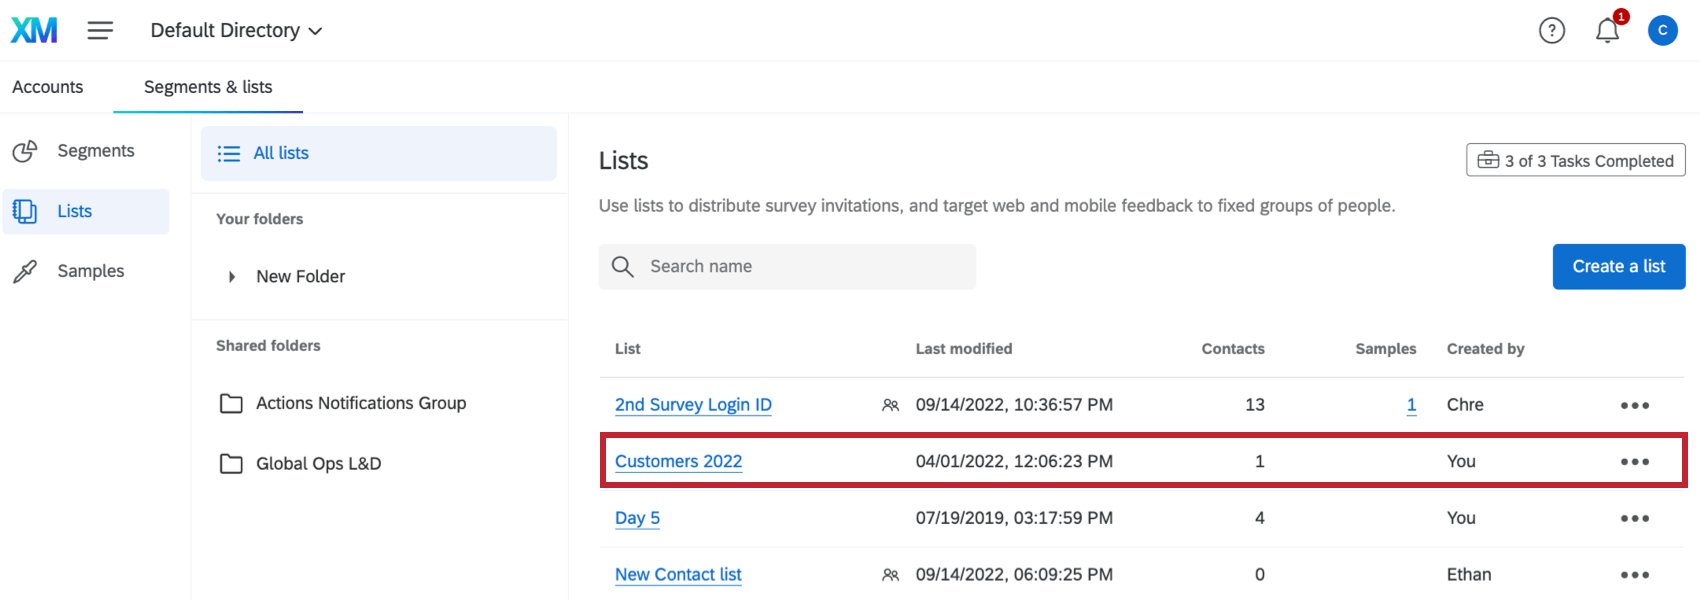
To get started, simply click on the mailing list you’d like to edit.

Attention: This support page only covers how to edit contacts in XM Directory Lite.
Contact Information
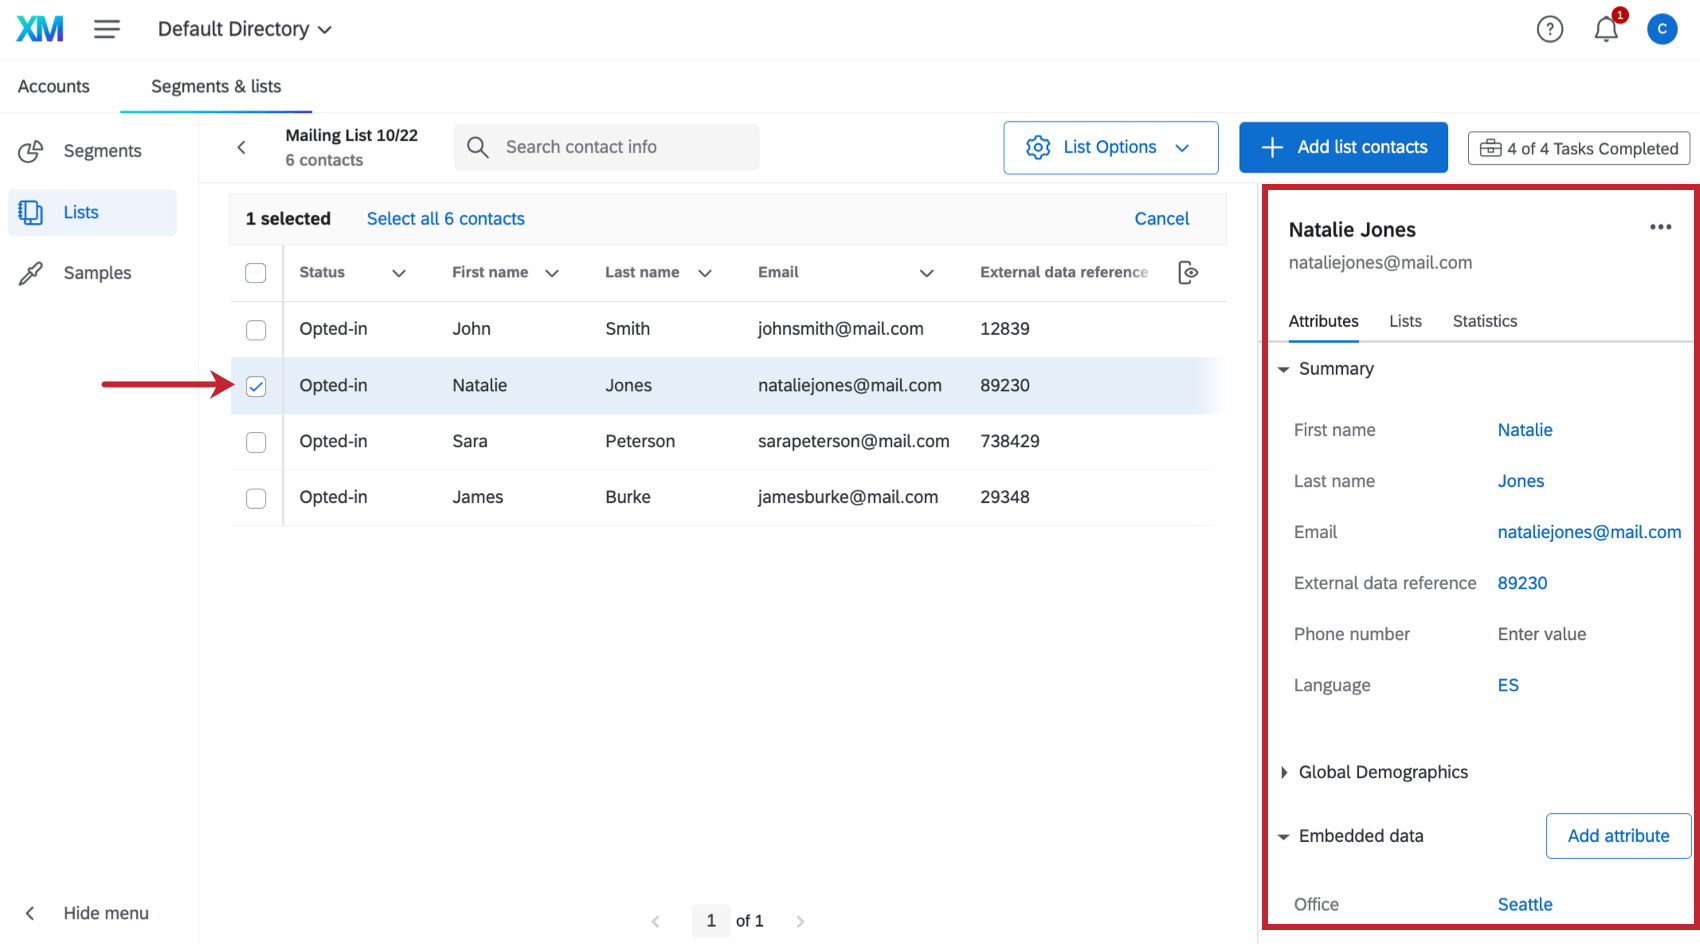
For each contact in your list you can view their contact fields, like name and email. When you select a contact, a menu opens to the right containing additional information about them.

ATTRIBUTES
This section contains editable contact information. The Opted In status refers to whether the contact is opted in to receive emails from the mailing list.
This section also contains embedded data saved to the contact. Here the values can be edited by highlighting or clicking into them. Clicking Add attribute allows you to add a new embedded data field and its value.
LISTS
This section displays all the lists and samples the contact belongs to. Here you can remove or opt out the contact from any list they are in.
STATISTICS
This section contains information on the number of times the contact has been sent invites, and when. This information only applies to invitations sent to this mailing list. If the contact belongs to another mailing list, those statistics will be excluded here.
Contact Actions
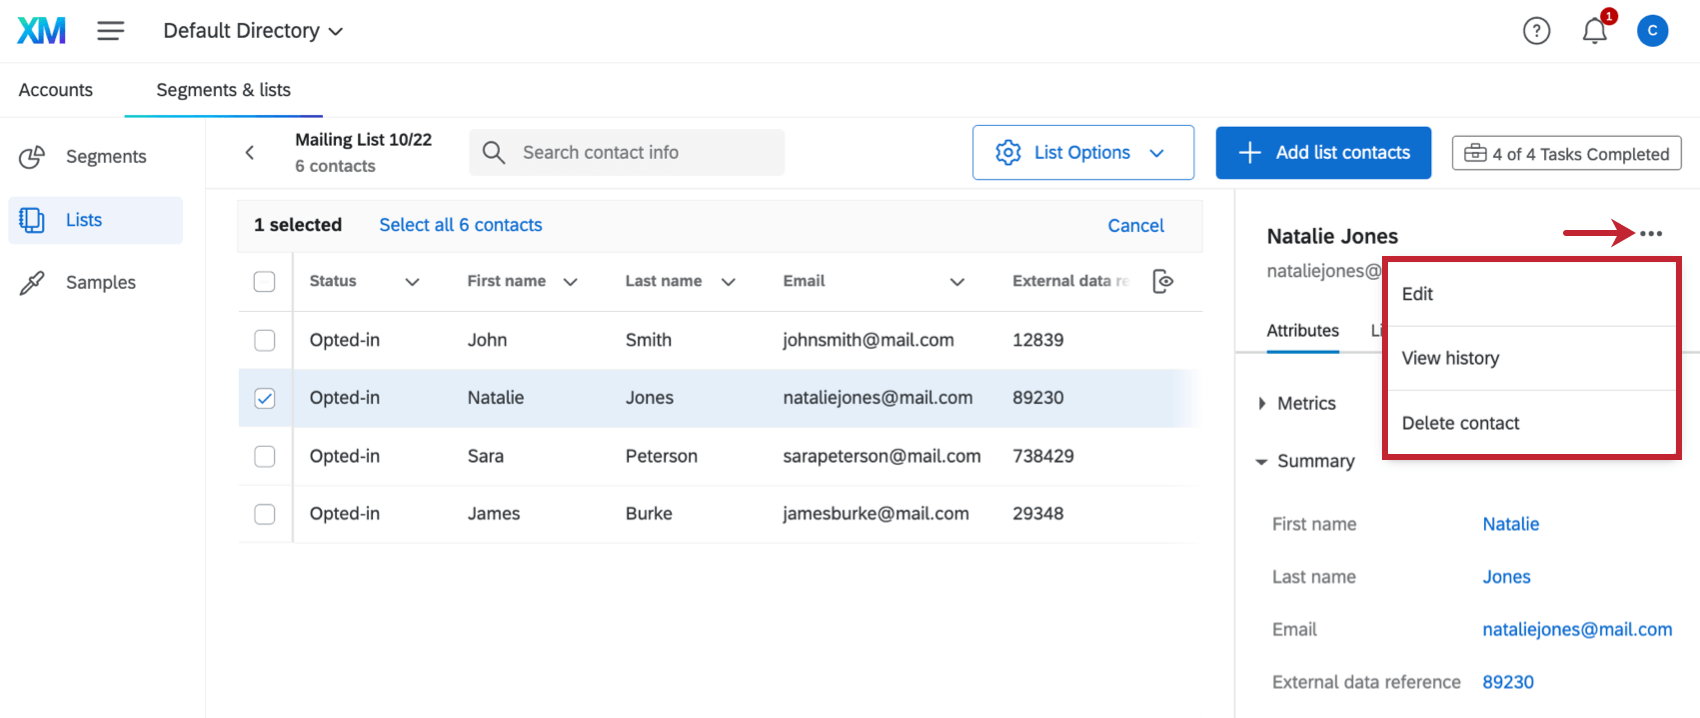
If you click on the 3 horizontal dots next to the name of the contact, you can edit their information, view their history, or delete them. You can also edit multiple contacts in the list by selecting contacts with the checkboxes along the left and then selecting the three dots on the far-right.
ACTIONS FOR A SINGLE SELECTED USER

- Edit: Edit the contact details, such as name, email address, and embedded data.
- View history: See distribution and survey response history for the contact. Qtip: Both the Response History and the Email History provide information specific to the mailing list. If a contact is in another mailing list, and that list is sent surveys, those emails will not show up in the history. For more information on the email statuses you see here, go to Distribution Statuses.

- Delete contact: Delete the contact permanently from all mailing lists. Attention: Deleting a contact will invalidate any distributed individual links for that contact. If the respondent tries to access a survey using a link that is tied to their deleted contact, they will receive an error message saying: “The URL is incorrect. Please double check the URL and try again.”

ACTIONS FOR MULTIPLE SELECTED USERS
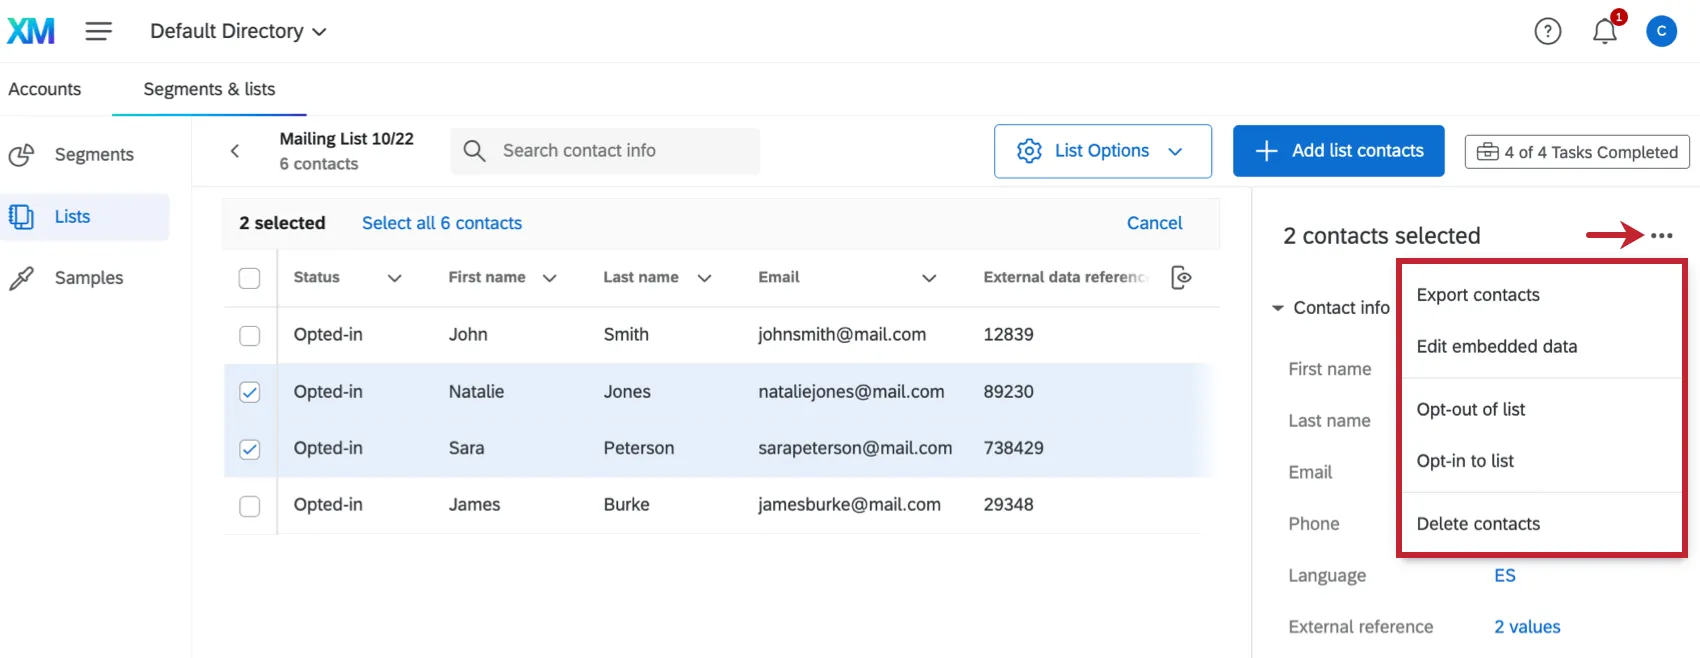
- Export contacts: Allows you to export the selected contacts.
- Edit embedded data: Edit the embedded data for the selected contacts. See Edit Embedded Data for more information.
- Opt-out of list/Opt-in to list: Opt the selected contacts in or out of the list.
- Delete contacts: Delete the contacts permanently from all mailing lists. Attention: Deleting a contact will invalidate any distributed individual links for that contact. If the respondent tries to access a survey using a link that is tied to their deleted contact, they will receive an error message saying: “The URL is incorrect. Please double check the URL and try again.”
Changing Subscription Status in Lite Lists
In this section, we’ll show you how to opt a contact into or out of a specific contact list in XM Directory Lite.
Opting a single contact into or out of a list


Opting multiple contacts into or out of a list


List Options
The List Options button in the top-right corner allows you to perform the following actions to your mailing list:
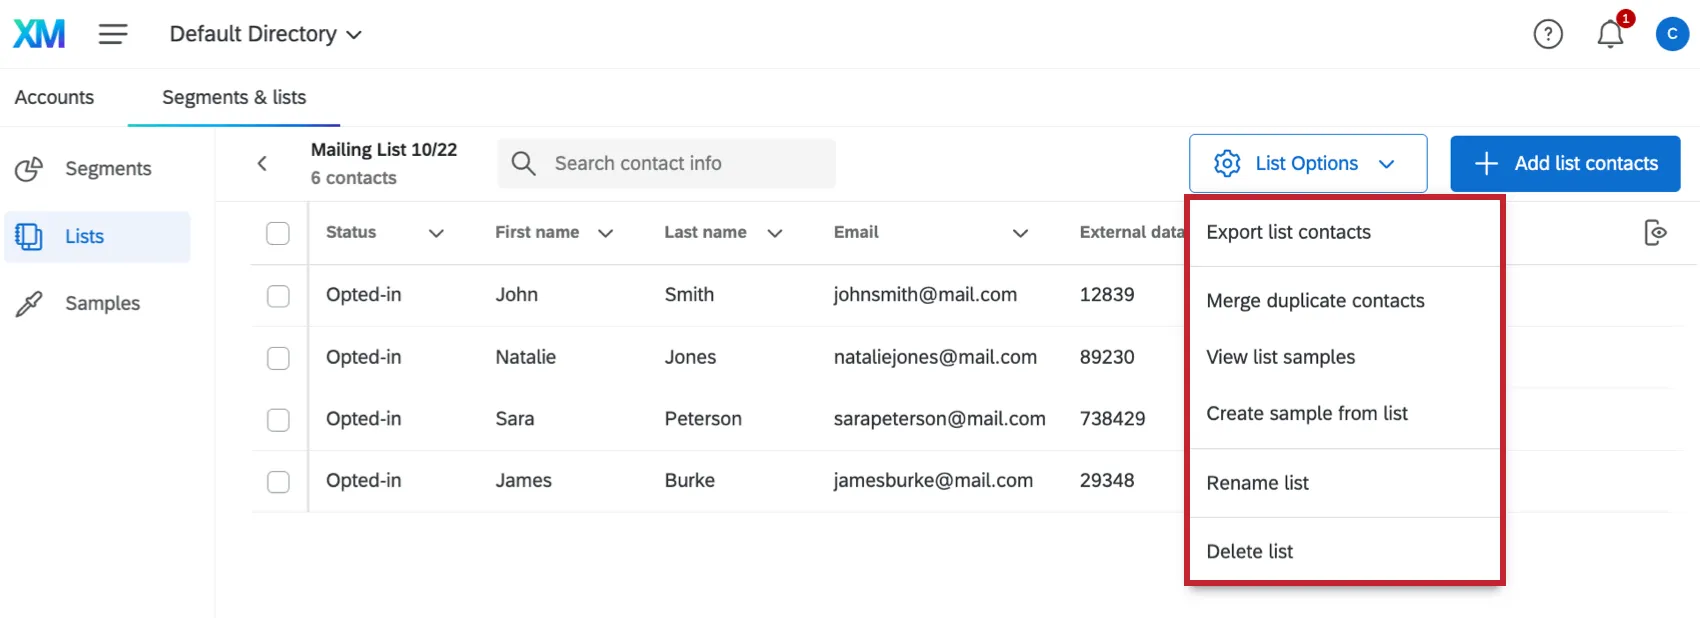
- Export List Contacts: Download a list of your contacts. You can choose which file type, whether to export contact stats, and whether to export the Embedded Data. See Export List Contacts for more information on available options. Qtip: It doesn’t matter which contacts are selected. All contacts in the list will be included in the export.
- Merge Duplicate Contacts: Sometimes you may accidentally add the same email address to a mailing list multiple times. You can merge those duplicates together with this option. See Merge Duplicate Contacts for more information.
- View List Samples: View a list of the samples you’ve created for this mailing list. Click on a sample to be taken to it.
- Create Sample From List: Create a subgroup of members from your list to which you can send surveys.
- Rename List: Rename your list.
- Delete List: Delete your list. When a list is deleted, the contacts will still exist in any other lists they’ve been added to. See Delete List for more information.
Editing Contact Info Columns
You can change the default columns of contact information that are included in all mailing lists and in the directory. See Editing Contact Info Columns for more information.
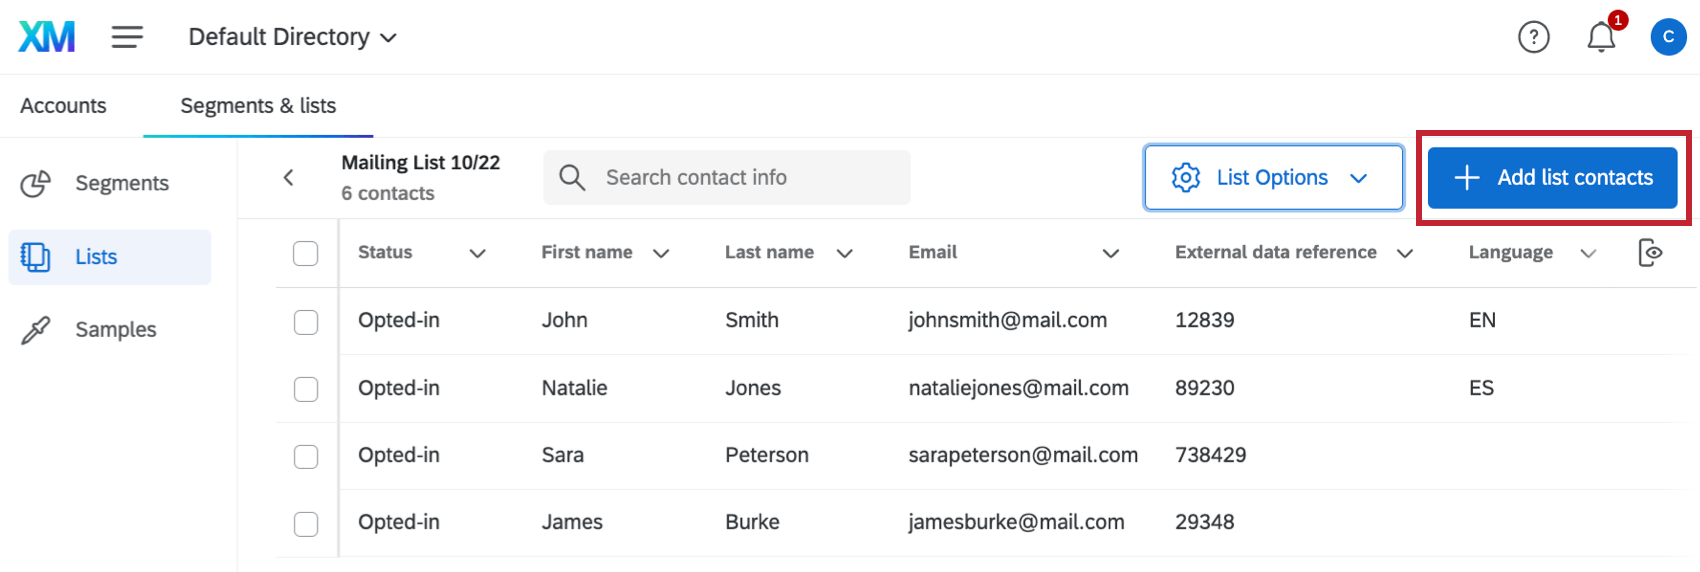
Adding New Contacts
You can add new contacts the same way you first placed contacts in your list by clicking Add list contacts. See XM Directory Lite Basic Overview for step-by-step instructions for adding contacts manually or importing contacts from a file.

Merging Duplicates
Sometimes you may accidentally add the same email address to a mailing list multiple times. You can merge these duplicates together based on their email addresses. See Merge Duplicate Contacts for step-by-step instructions.
Tasks
When generating a sample or exporting a contact list (tasks that may take time), a tasks icon will appear next to the Add list contacts button.
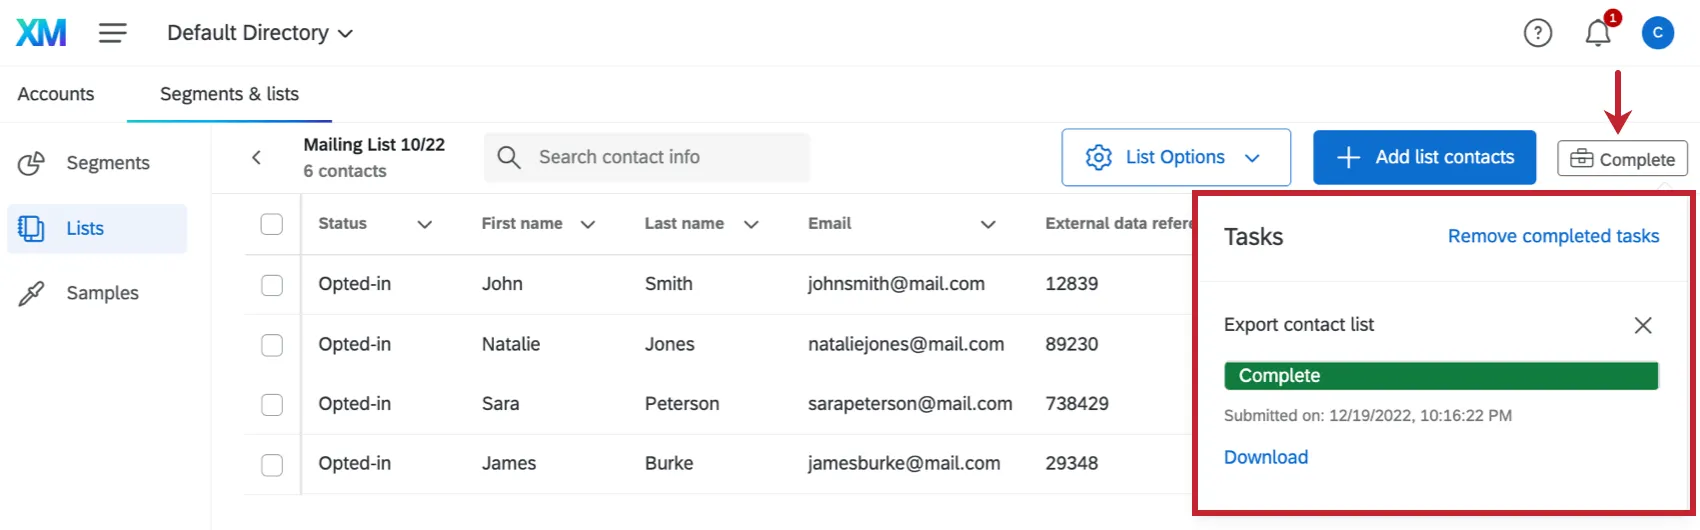
While these jobs are running, you can leave the page and work in other sections. When you return to the Directories page, you can check on the job’s progress or view the finished task.
FAQs
How can I add extra information to my contact list (gender, city, department, etc.)?
How can I add extra information to my contact list (gender, city, department, etc.)?
How do I update multiple members of my contact list at the same time?
How do I update multiple members of my contact list at the same time?
Can I add information to a contact list after I have sent out my survey?
Can I add information to a contact list after I have sent out my survey?
- If you change the recipient email address, a new email is not sent, but all future emails (new invitations, reminders, etc.) will go to the updated address.
- If the respondent has already opened their survey, their survey and collected data will not update with the new information. They will have to be sent a new link.
- If the respondent has not yet opened their survey, their survey will update with the new information.
If I accidentally added the same person in my contact list twice, will they get two emails?
If I accidentally added the same person in my contact list twice, will they get two emails?
If someone unsubscribes from one of my contact lists, will they automatically be unsubscribed from all my other contact lists?
If someone unsubscribes from one of my contact lists, will they automatically be unsubscribed from all my other contact lists?
How do I modify an existing list of contacts?
How do I modify an existing list of contacts?
How do I quickly modify just one contact without exporting the entire list?
How do I quickly modify just one contact without exporting the entire list?
If your topmost menu says "Directories" instead of "Contacts," then as soon as you click on a contact, the fields you can edit open to the right. Click on any of these fields to start editing them.
How do I opt someone out of a contact list? I don't want them to receive emails from this list anymore.
How do I opt someone out of a contact list? I don't want them to receive emails from this list anymore.
You can also change a contact's subscription status in the product. See this page.
How can I tell if I have XM Directory or XM Directory Lite?
How can I tell if I have XM Directory or XM Directory Lite?
For admins, being able to tell whether or not you have XM Directory Full or XM Directory Lite on your license is easy. Admins of XM Directory have access to many more features than the average XM Directory Lite user, including the Summary tab, the Directory Contacts tab, and Directory Settings.
However, even if you’re not an admin, you can often tell whether you have XM Directory Full or XM Directory Lite in one of the following ways: If you’re still not sure which feature you have, reach out to a Brand Administrator. Brand Administrators who are unsure can reach out to their Account Executive or Account Services.
That's great! Thank you for your feedback!
Thank you for your feedback!