-

Qualtrics Platform -

Customer Journey Optimizer -

XM Discover -

Qualtrics Social Connect
User Groups
About User Groups
As a Brand Administrator, you can use groups to allow 2 or more users to share projects, graphics, files, and messages in libraries. Users within groups can also share contact lists in their Contacts page. Groups can include everyone in your organization, everyone in a specific division, or only specific users that you manually select.
Groups administration can only be accessed by Brand and Division Administrators in the Admin page.
Creating New Groups
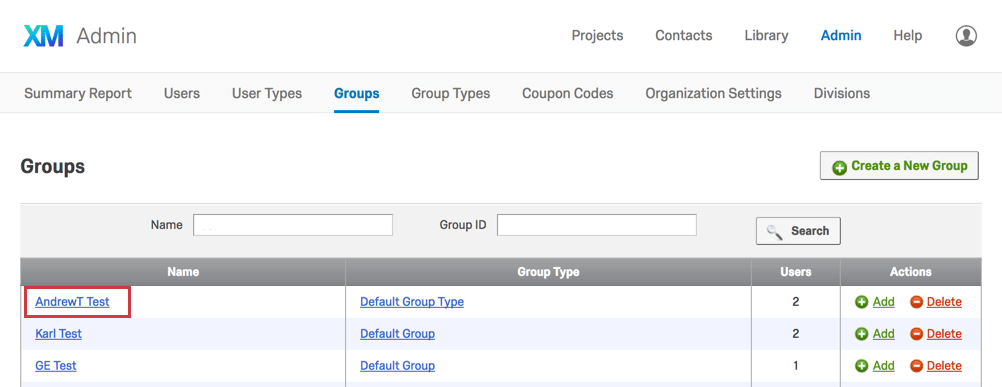
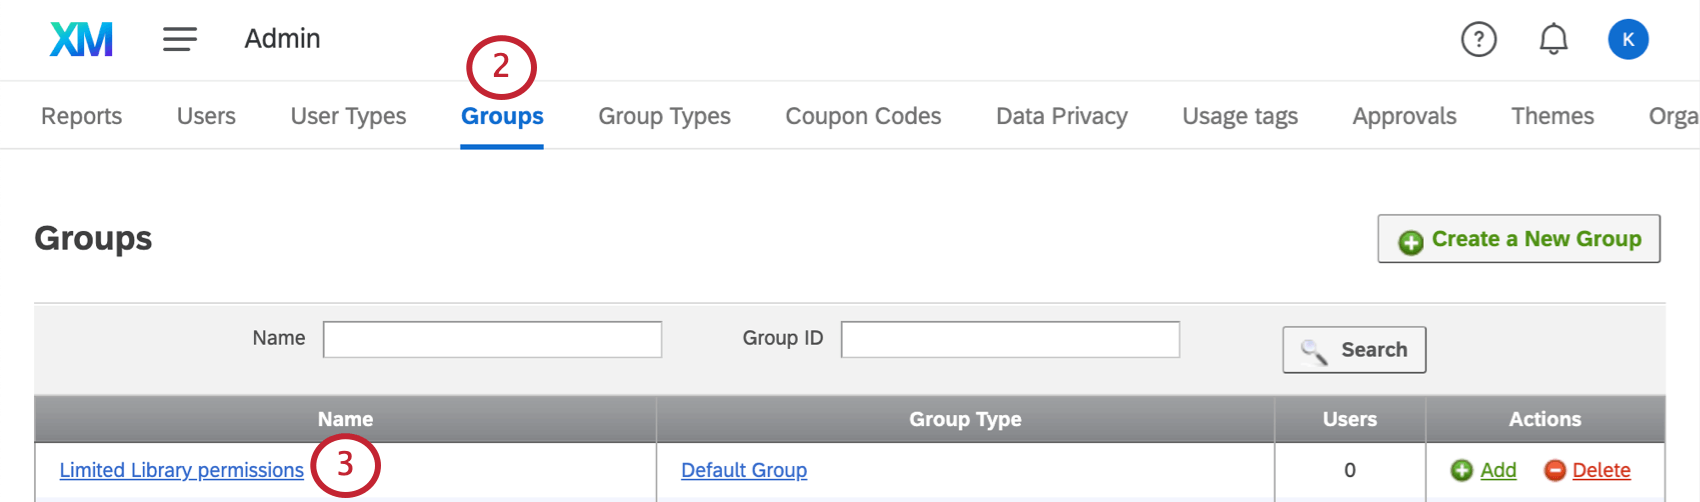
- Navigate to the Admin page.
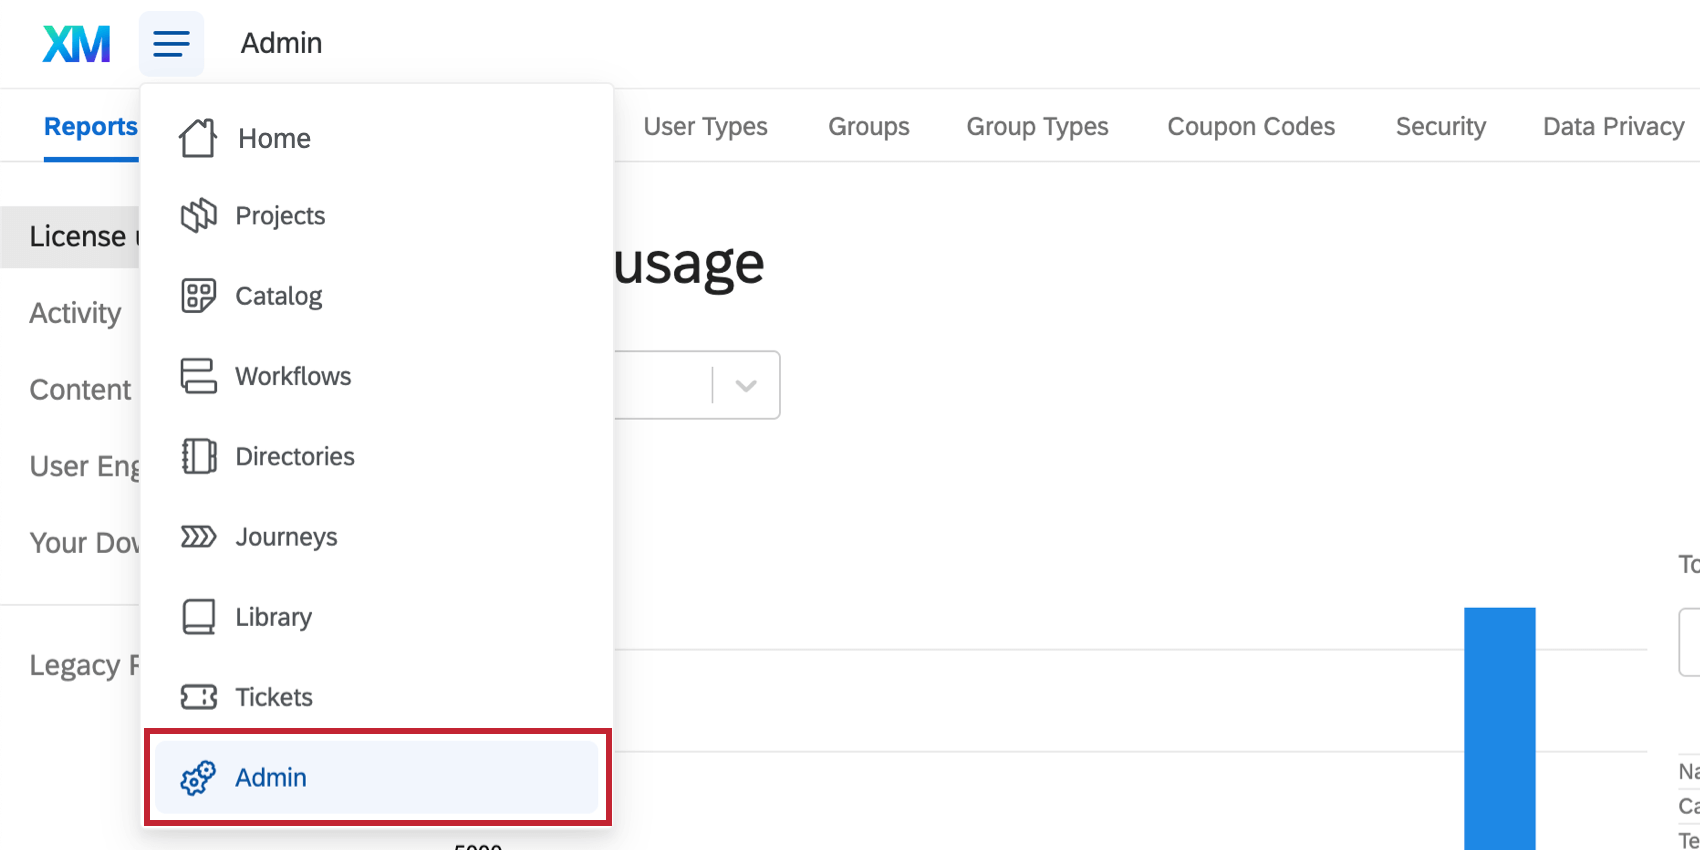
- Select Groups.
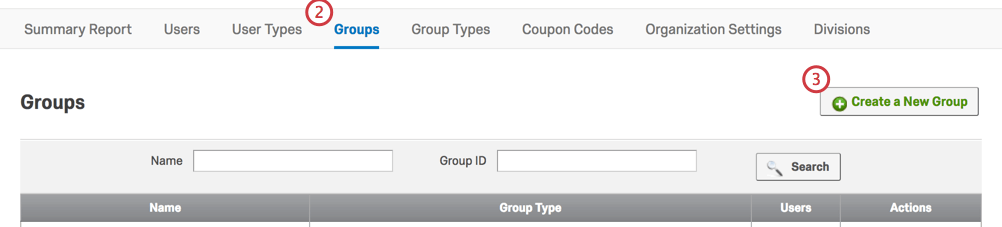
- Click Create a New Group.
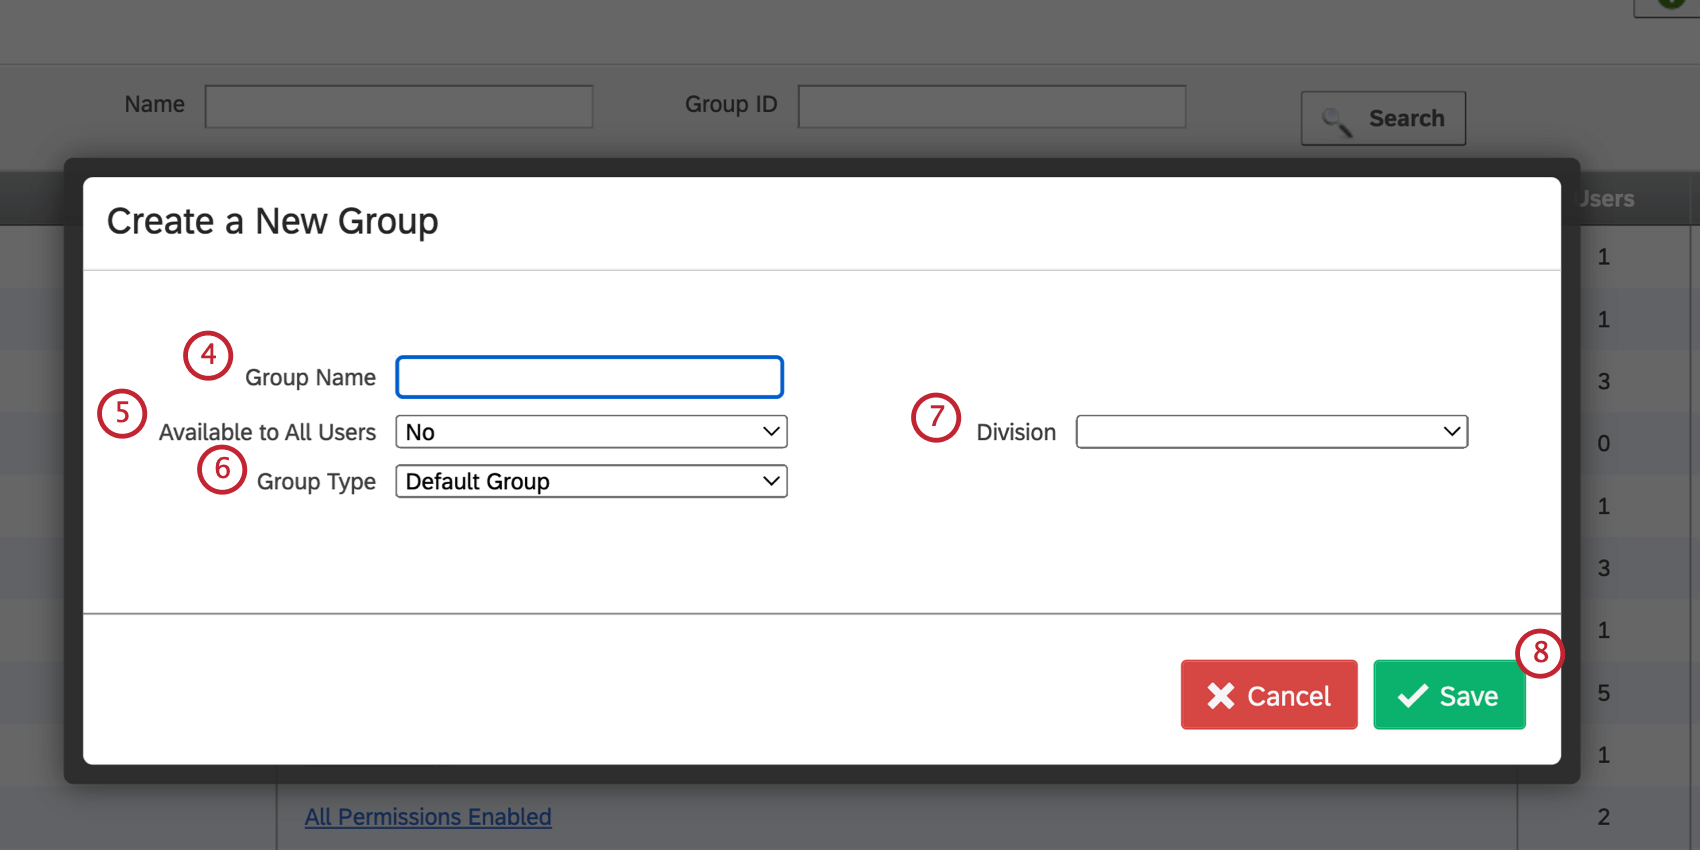
- Enter the Group Name.
 Qtip: Your group name should not contain any special characters – this includes characters that are not numbers or the English alphabet.
 - Set who the group is available to.
Qtip: For this brand and For this division mean that all users in your organization or specified Division, respectively, will automatically be able to access the group content. No means an administrator will need to manually add specific individuals to the group.
Qtip: The Available to All Users permission also applies to Project Approval settings.
- If a group has the Available to All Users permission set to For this brand, and this group is selected as the Approver group, then all users in the brand will appear in the Select approver list when publishing a survey.
- If a group has the Available to All Users permission set to For this brand, and this group is selected as the Survey owner group, then all users in the brand will need approval before publishing a survey.
- In contrast, if a group has the Available to All Users permission set to No, then only users in this group will appear as approvers or need their surveys approved.
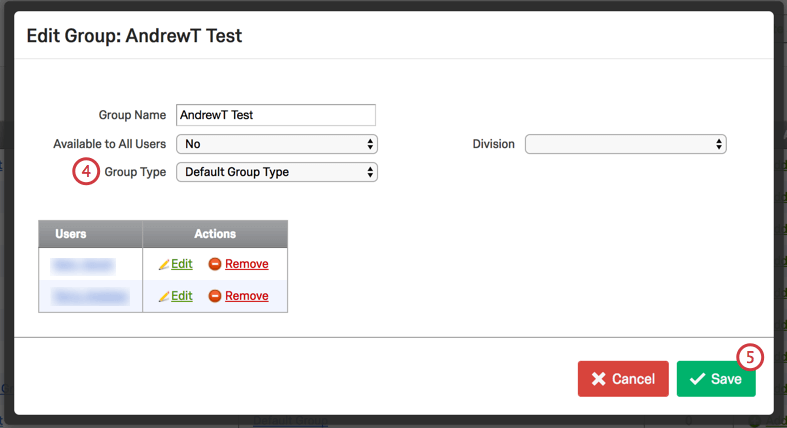
- Select the Group Type.
Qtip: The group type determines what group members are allowed to do with content owned by the group. In most cases, you can just use the default group type. If you’d like to restrict the group’s permissions, you can create a new group type.
- Select a Division.
- Click Save.
Manually Adding Users to a Group
If you haven’t made your group available to all users in your brand or a specific division, you will need to add users manually.
To add users to a Group
- Navigate to the Admin page.
- Select Groups.

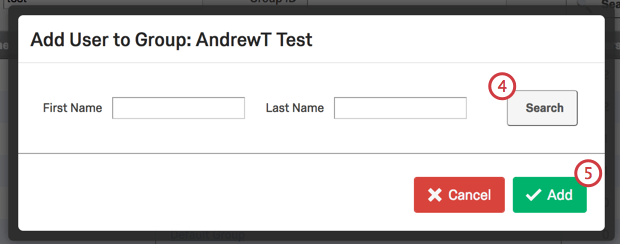
- To the right of the group name, click Add.
- Search for the user you would like to add, and then select the applicable user.
 Qtip: You can select multiple users by holding Ctrl or Cmd when you click. To select 2 users and everyone in between, hold Shift and click the first and last user.
 - Click Add.
Giving a User Additional Group Permissions
Brand Administrators can edit the user’s group access permissions. This is useful if you want to give special access for a user to add and modify group content beyond that given to the other group members.
To modify a Group member’s permissions
- Add the user to the group. This is necessary even if the group is available to all users.
- Click on the name of the group.
- Click Edit to the right of the user’s name.
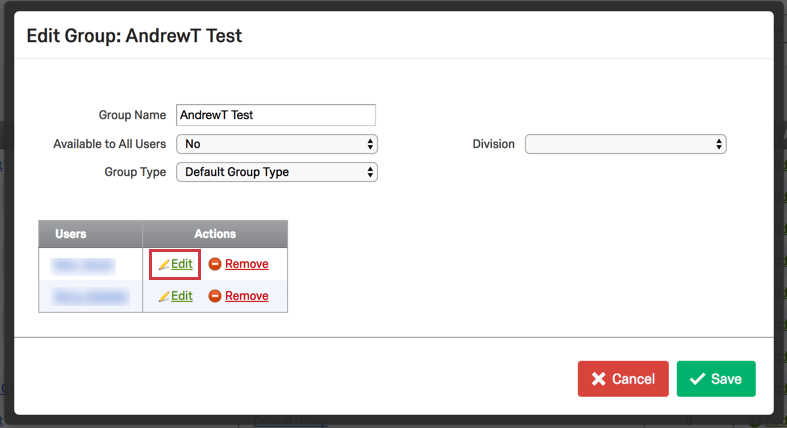
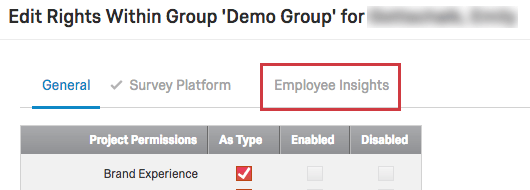
- Click the checkboxes to set the permissions that will apply to this user.
 Qtip: When a user is added manually to a group, the permissions selected will determine what the user is allowed to do with content owned by the group. These permissions will override the group type permissions for that user.
 - Click Save.
Group Types
Group types, similar to user types, are sets of permissions that determine what a user is allowed to do with content owned by a group. The group type permissions will apply to all group members, unless otherwise specified for an individual member.
To create a new Group Type
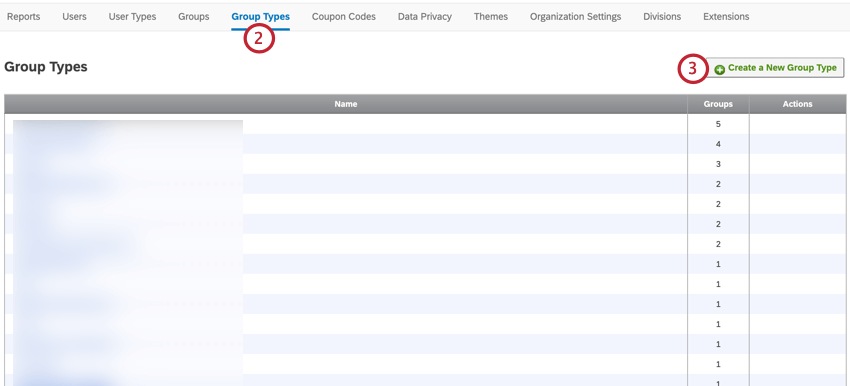
- Navigate to the Admin page.
- Select Group Types.
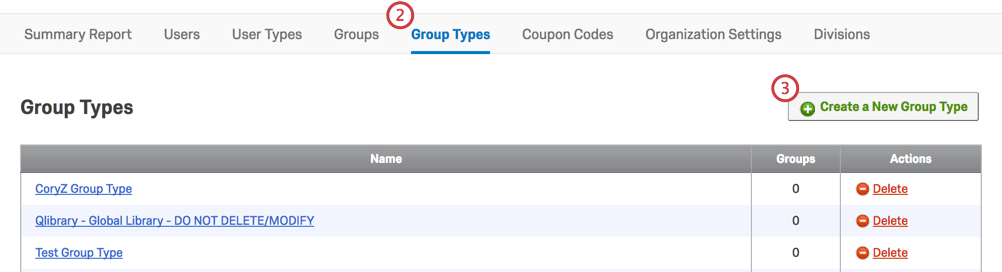
- Click Create a New Group Type.
- Name the group type and click the checkboxes to enable/disable permissions as desired.
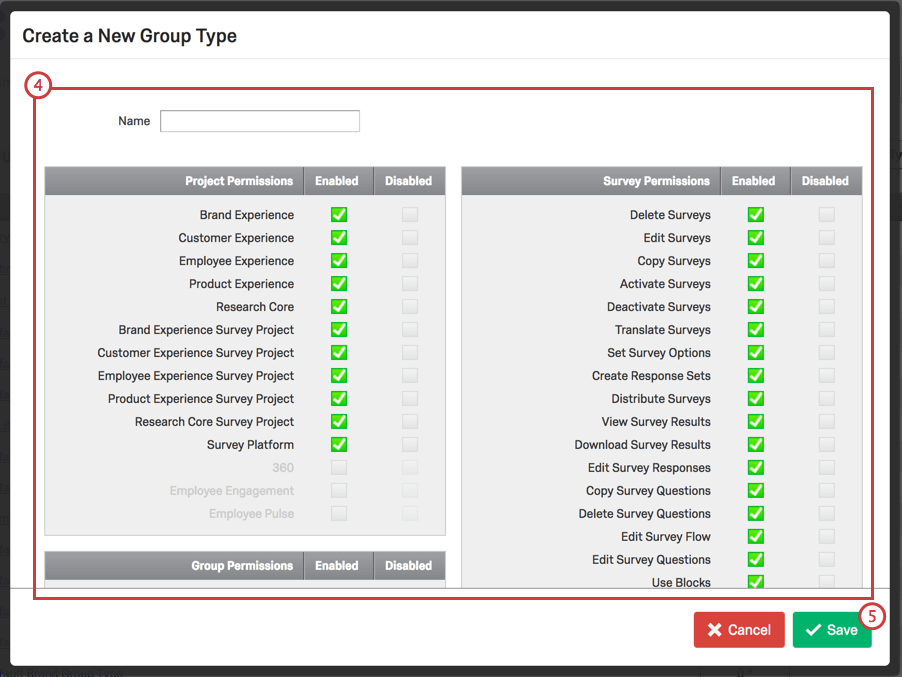
- Click Save.
Once saved, your group type will now be in your list of available group types. This list also includes all default group types.
To apply a Group Type
- Navigate to the Admin page.
- Select Groups.
- Click the name of the group.
- Select the Group Type from the dropdown menu.
- Click Save.
Deleting Groups or Group Types
To delete a group or group type, click Delete in the Actions column for the specific one you would like removed.

Using User Groups
To learn how to share a survey with a group, follow the steps on the Sharing a Project support page.
You can also copy surveys, graphics, files, and messages to group libraries. You can find these instructions on the Library page.
To find instructions on how to share a contact list with a group, navigate to the Sharing Lists section of our Searching, Sorting, & Organizing Mailing Lists & Samples page.
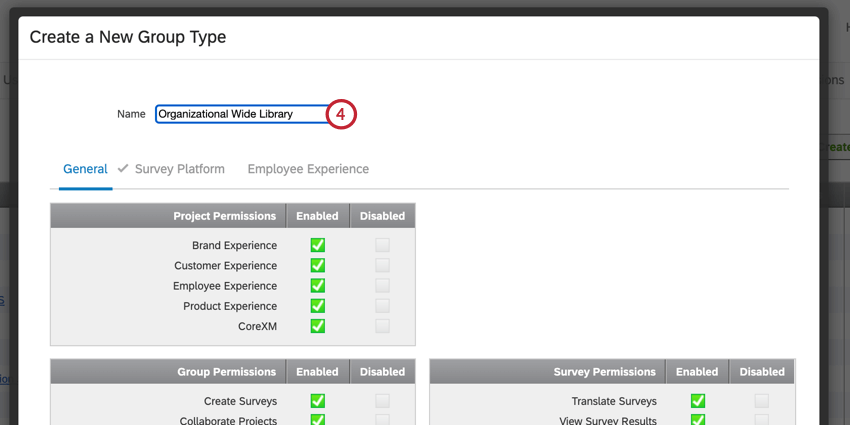
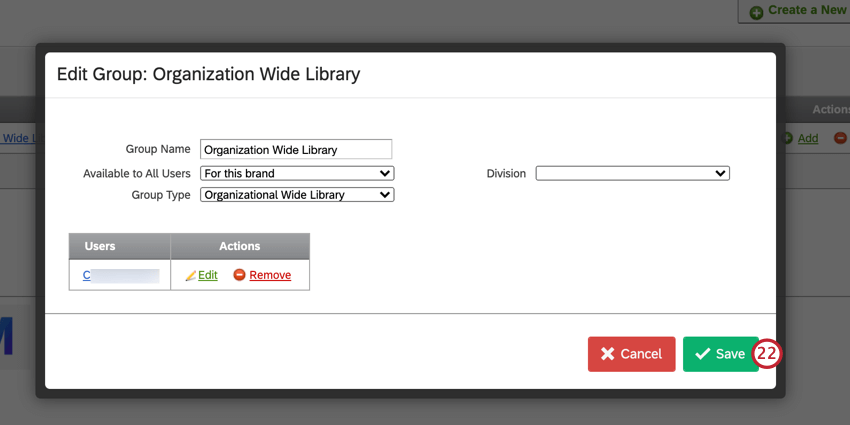
Creating an Organization Wide Library
It’s often useful to create an organization wide library for all of your Qualtrics users to share. Here, you can store assets for your users to use when building surveys. When setting up your organization wide library, you can limit which users can upload new content, while still giving all users access to the content in the library.
- Navigate to the Admin tab.
- Go to Group Types.
- Click Create a New Group Type.
- Give your group type a name.
- In the Library Permissions section of the General tab, enable all permissions that begin with “Use Library” and disable all permissions that begin with “Manage Library”.
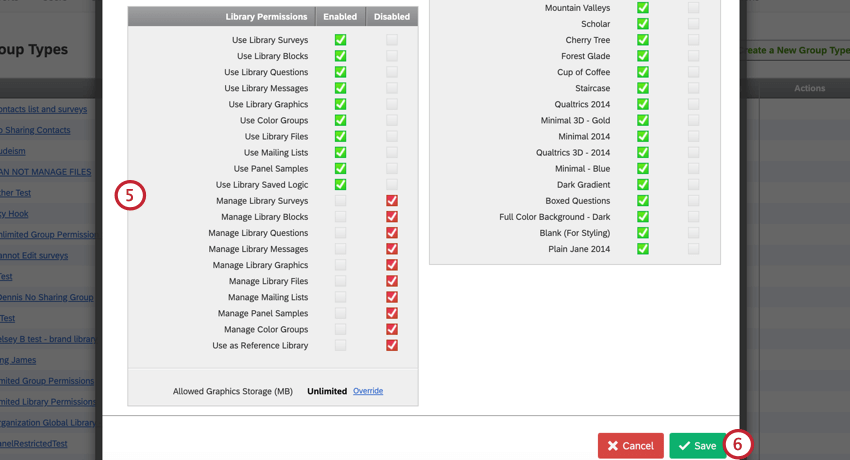
- Click Save.
- Navigate to the Groups tab.
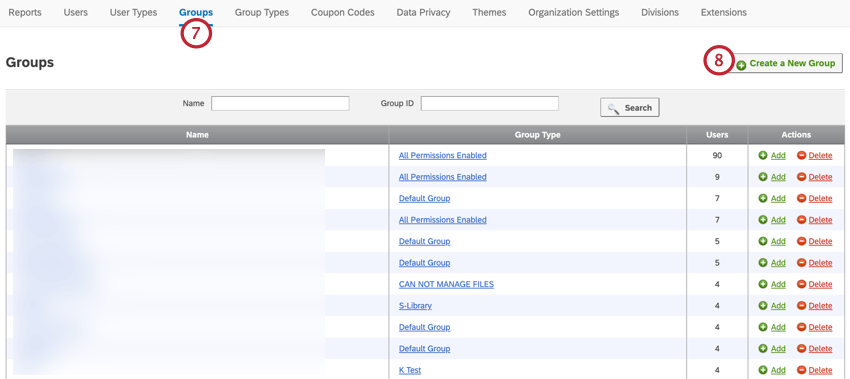
- Click Create a New Group.
- Give your group a name. This is the name that your users will see when selecting the group library.
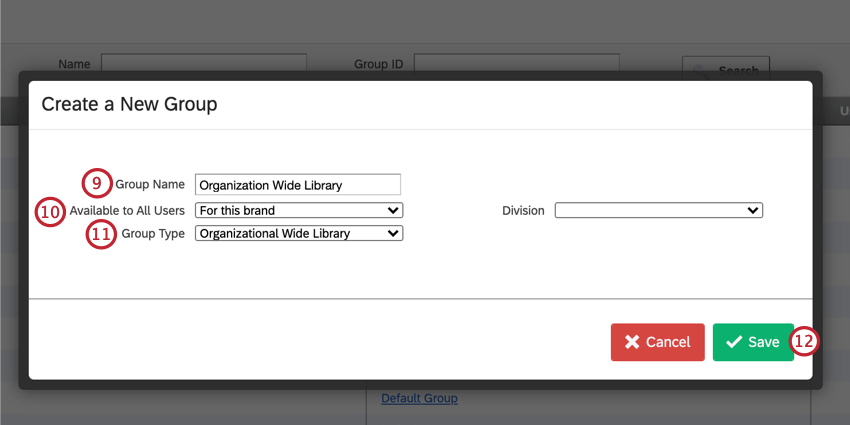
- Select For this brand for the Available to All Users field.
- Select the Group Type you created earlier.
- Click Save.
- To add users to manage the library content (i.e. users who can add and remove group content), go to your newly created group and click Add.
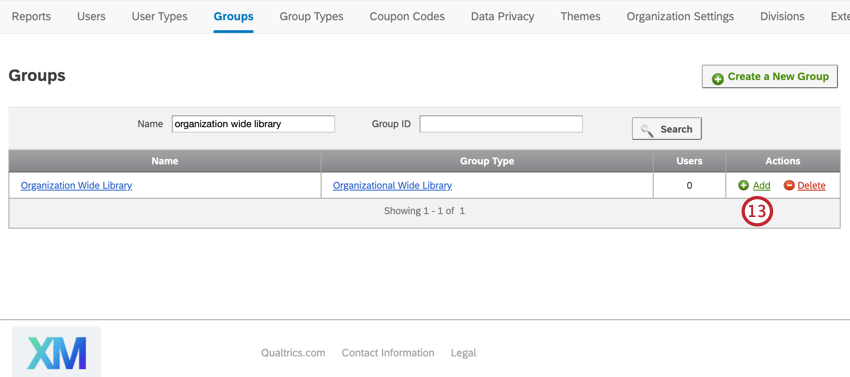
- Search for users by first name or last name.
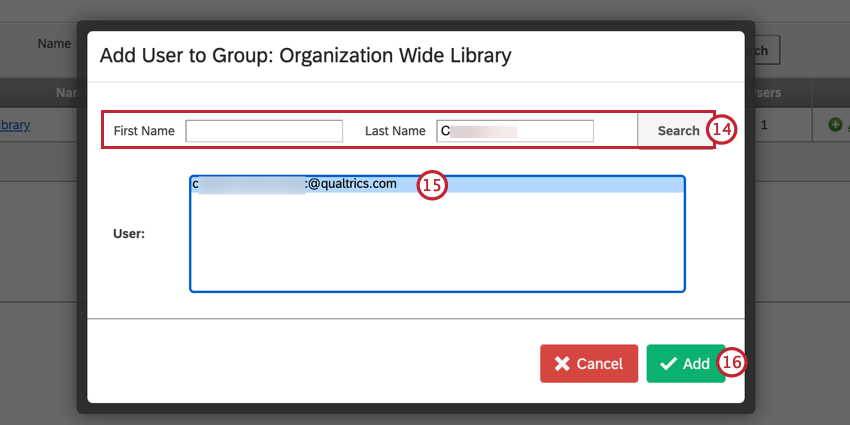
- Select the user(s) you want to manage group content.
- Click Add.
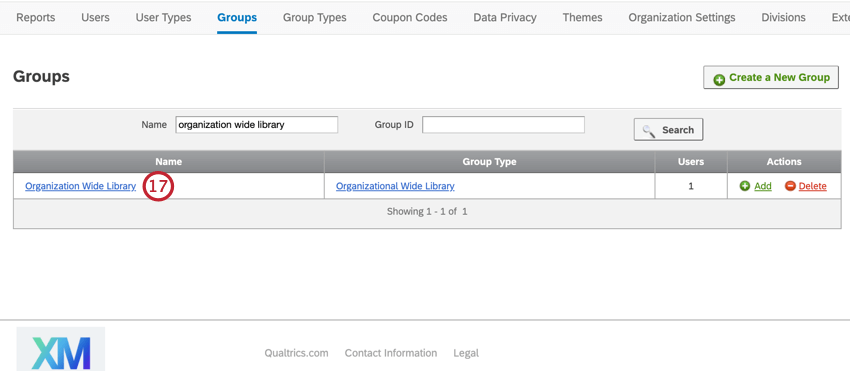
- Click your group name.
- Click Edit next to one of the users in your group.

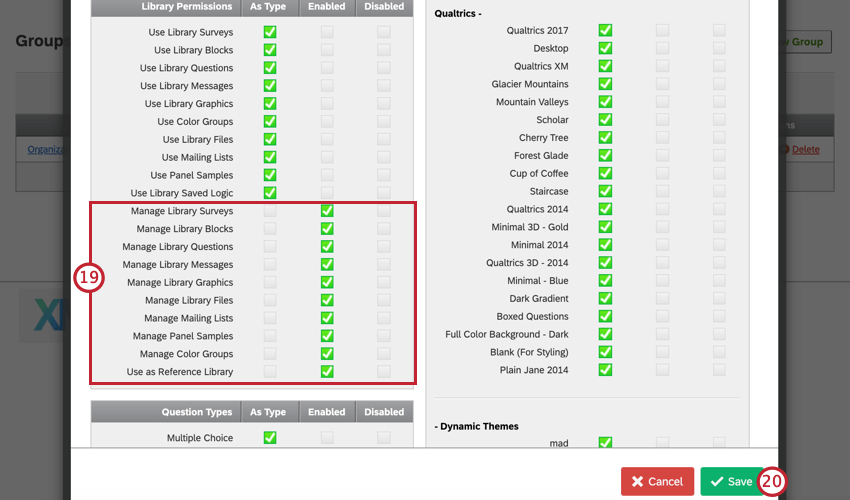
- In the Library Permissions section of the General tab, enable the “Manage Library” permissions. These permissions allow the user to upload and remove content from the library.
- Click Save.
- Repeat steps 18 through 20 for all users in the group.
- When finished, click Save.
With the above setup, the group library is available to everyone in your organization, but only a limited set of users can actually upload content to the library. However, any user in your license can make use of the content uploaded to the library.
Best Practices
Some examples of practical user groups are:
- Instances where you would like users to share projects, graphics, files, and messages in libraries
- Create an organization wide library for collaboration across all of your users
- Organization wide libraries are excellent for certain applications; however, having groups that are specialized for various teams prevents everyone from seeing everything & can allow for a more structured & organized program
When building groups, keep in mind these important considerations:
- Groups are not intended to be used for user permission control outside the scope of a given project/collaboration effort, for that user types would be recommended
- If everyone is leveraging the global library for all tasks/storage purposes it can become cluttered and difficult to navigate