
Integrating with Gainsight
What's on this page
About Integrating with Gainsight
Gainsight is a customer success platform for enhancing customer engagement, improving retention, and driving expansion.
You can integrate your Qualtrics account with Gainsight to pass data between platforms and trigger a Qualtrics workflow based on events in Gainsight. For example, if a customer completes an onboarding journey which is tracked in Gainsight, you can send them a follow-up survey via Qualtrics asking them about their onboarding experience.
Attention: Custom coding features are provided as-is and require programming knowledge to implement. Qualtrics Support does not offer assistance or consultation on custom coding. You can always try asking our community of dedicated users instead. If you’d like to know more about our custom coding services, please contact your Qualtrics Account Executive.
Step 1: Creating an Authentication Header
To set up the connection with Gainsight, you’ll need a basic authentication header. This header is a Base64 encoded string that contains your Qualtrics username and your API token separated by a colon. To create the header:
Attention: If you already have an API token, do not generate a new one.
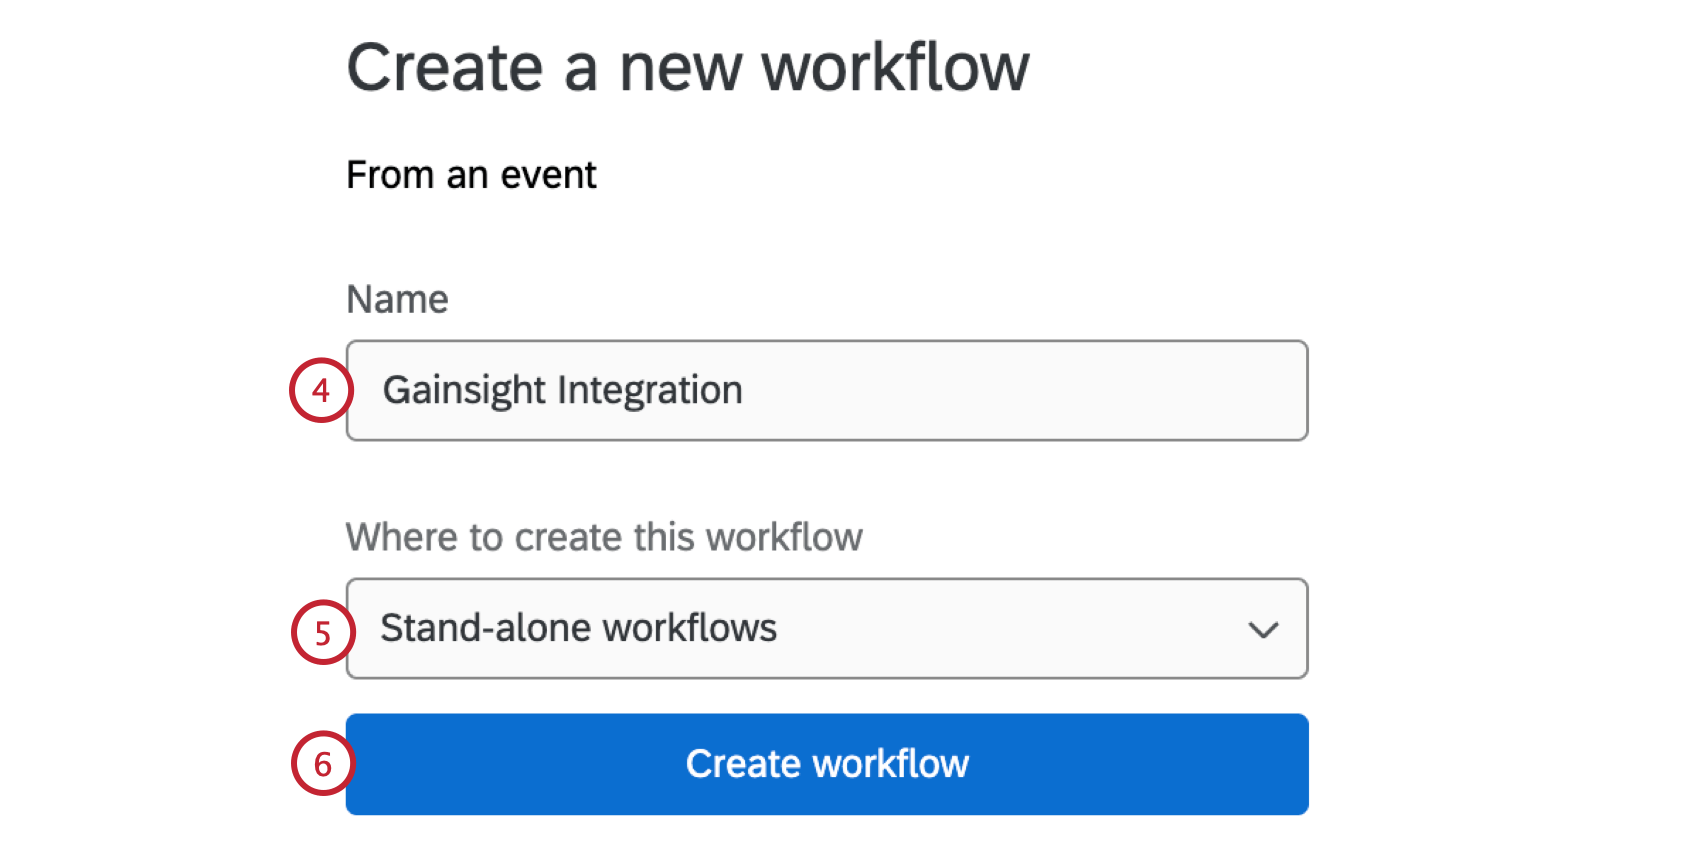
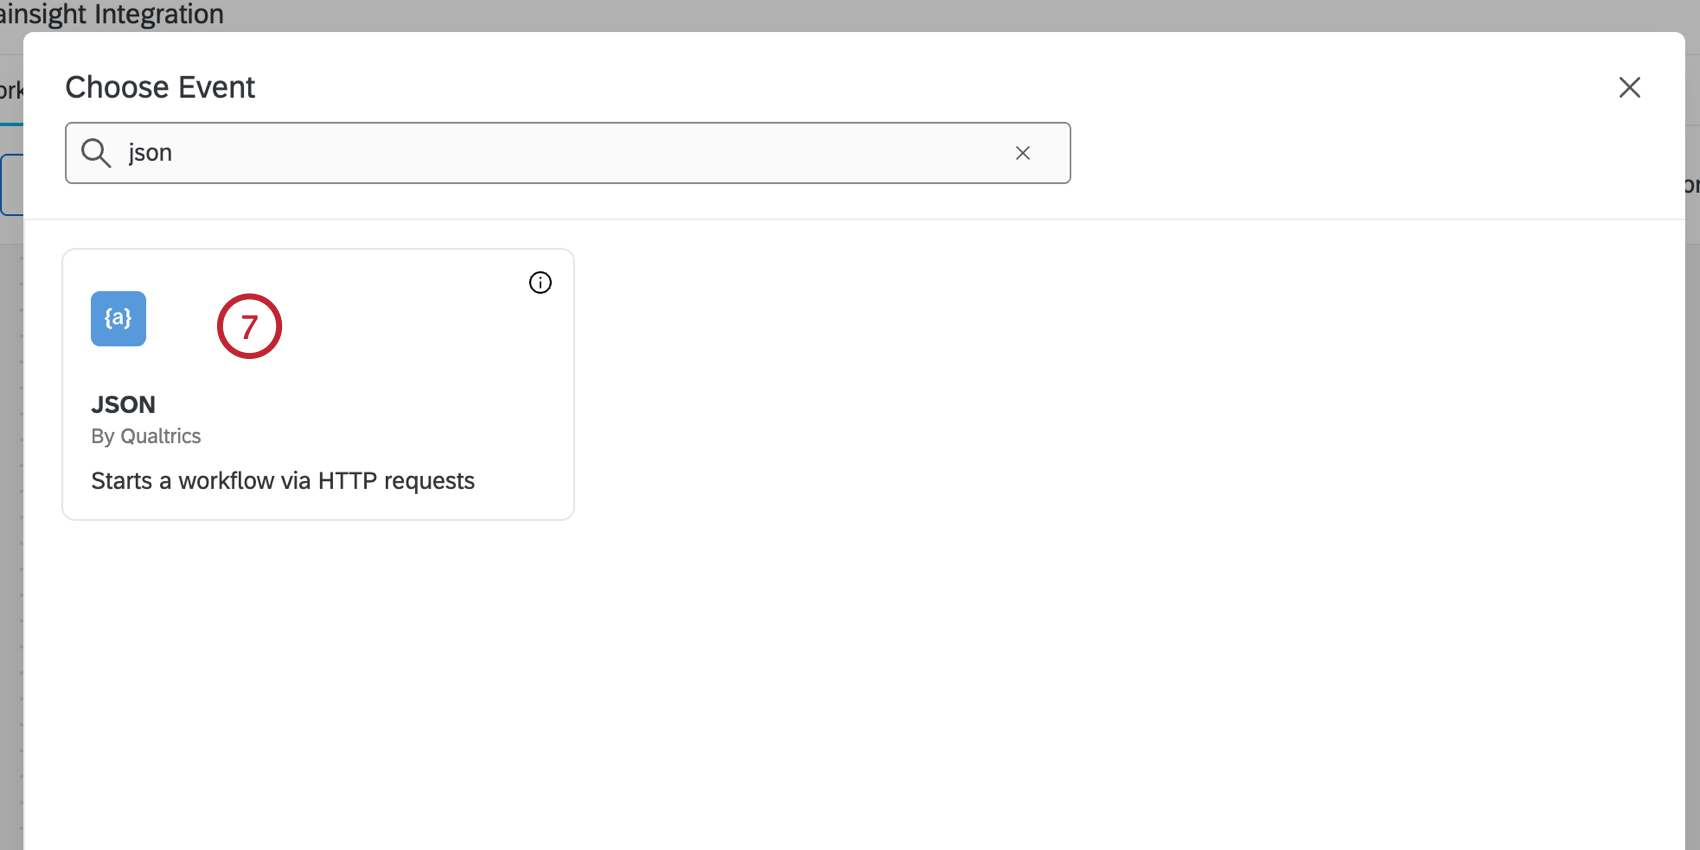
Step 2: Setting up a JSON Event
Next, create a new Qualtrics workflow to receive data sent from Gainsight. This workflow can be used purely as a trigger, or it can also ingest data that may be useful in later workflow steps.

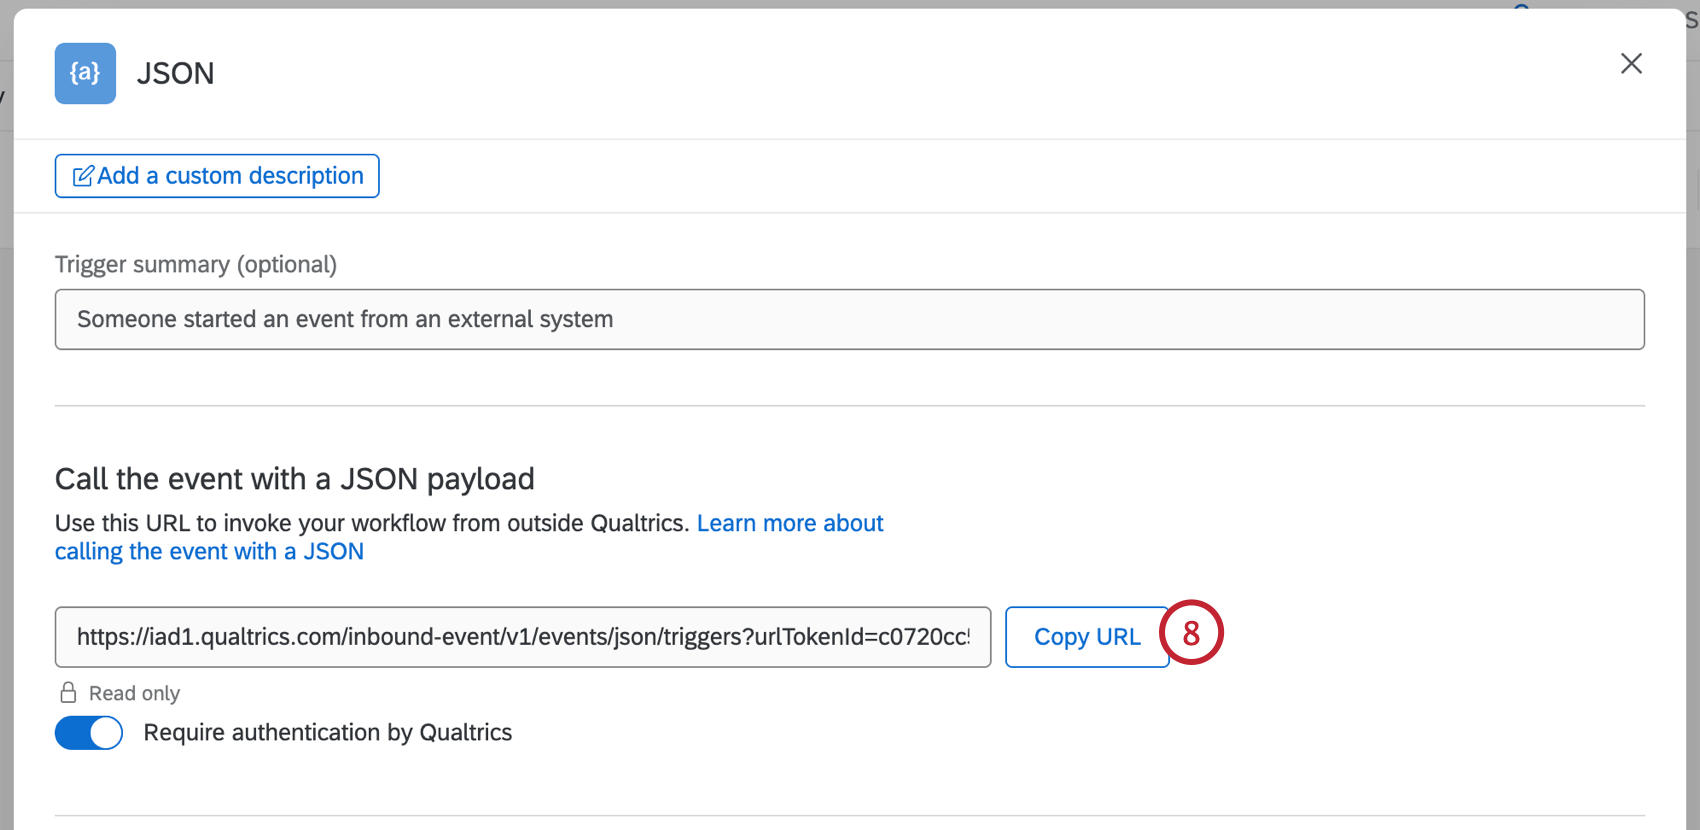
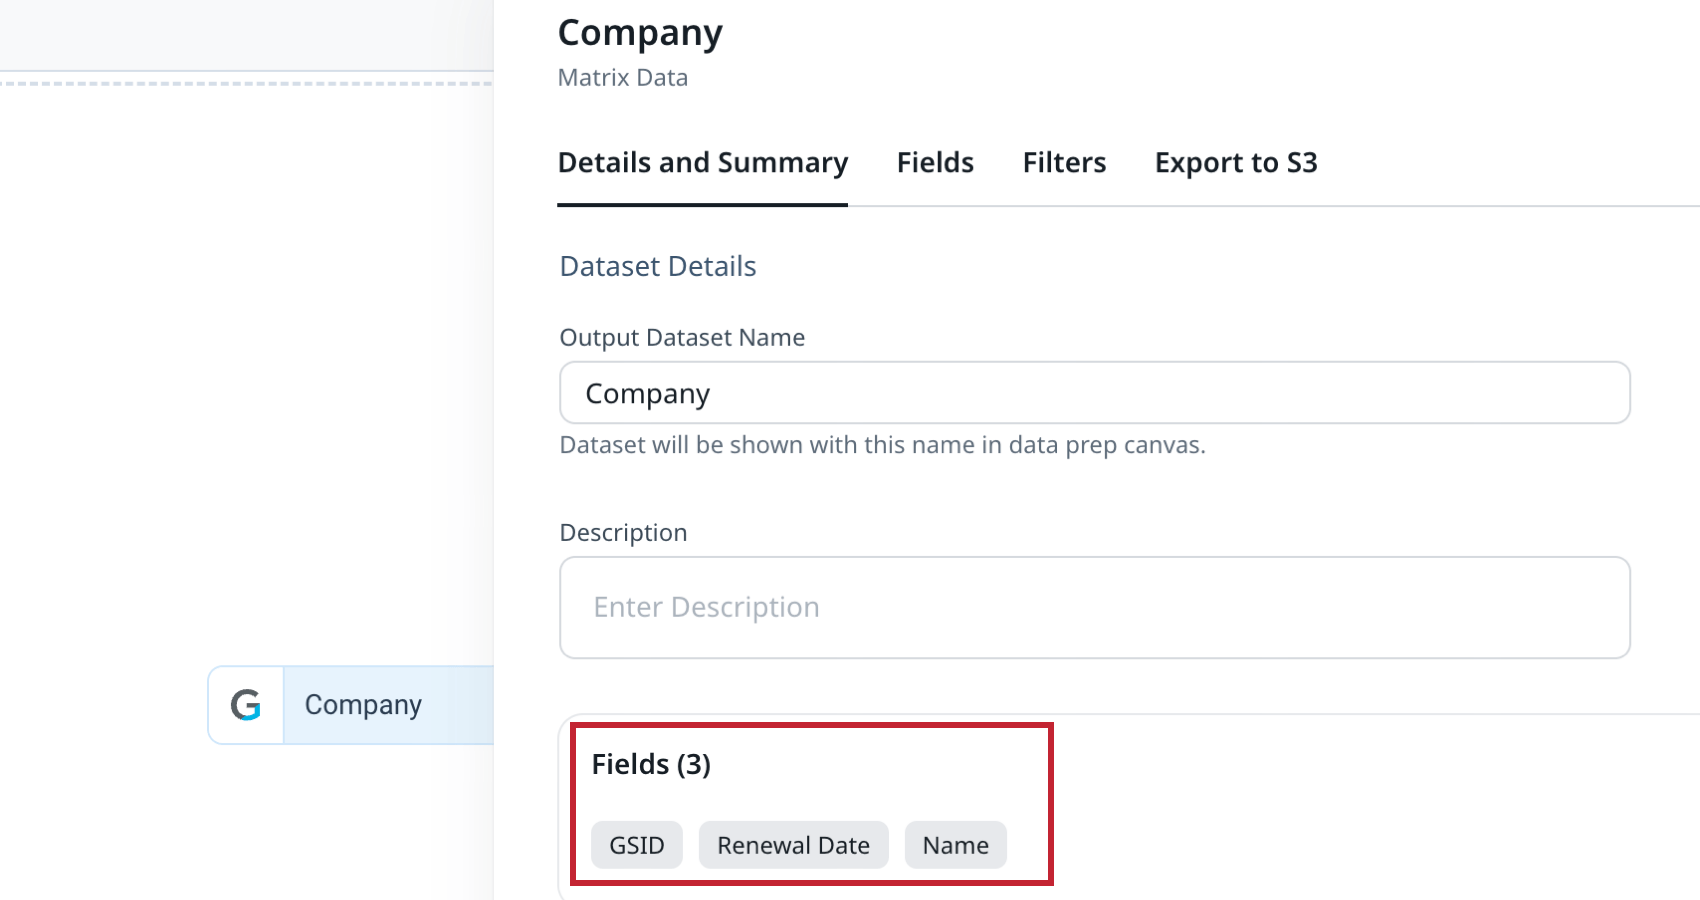
At this point, the JSON event created in the steps above can be used to set up the integration and to trigger other tasks in the workflow. If you simply need to start your workflow, you can skip the additional steps below and save the JSON event. However, if you want to pass additional data to Qualtrics from Gainsight (for example, “Company GSID” or “Renewal Date”), then you must add those fields into the JSON event:
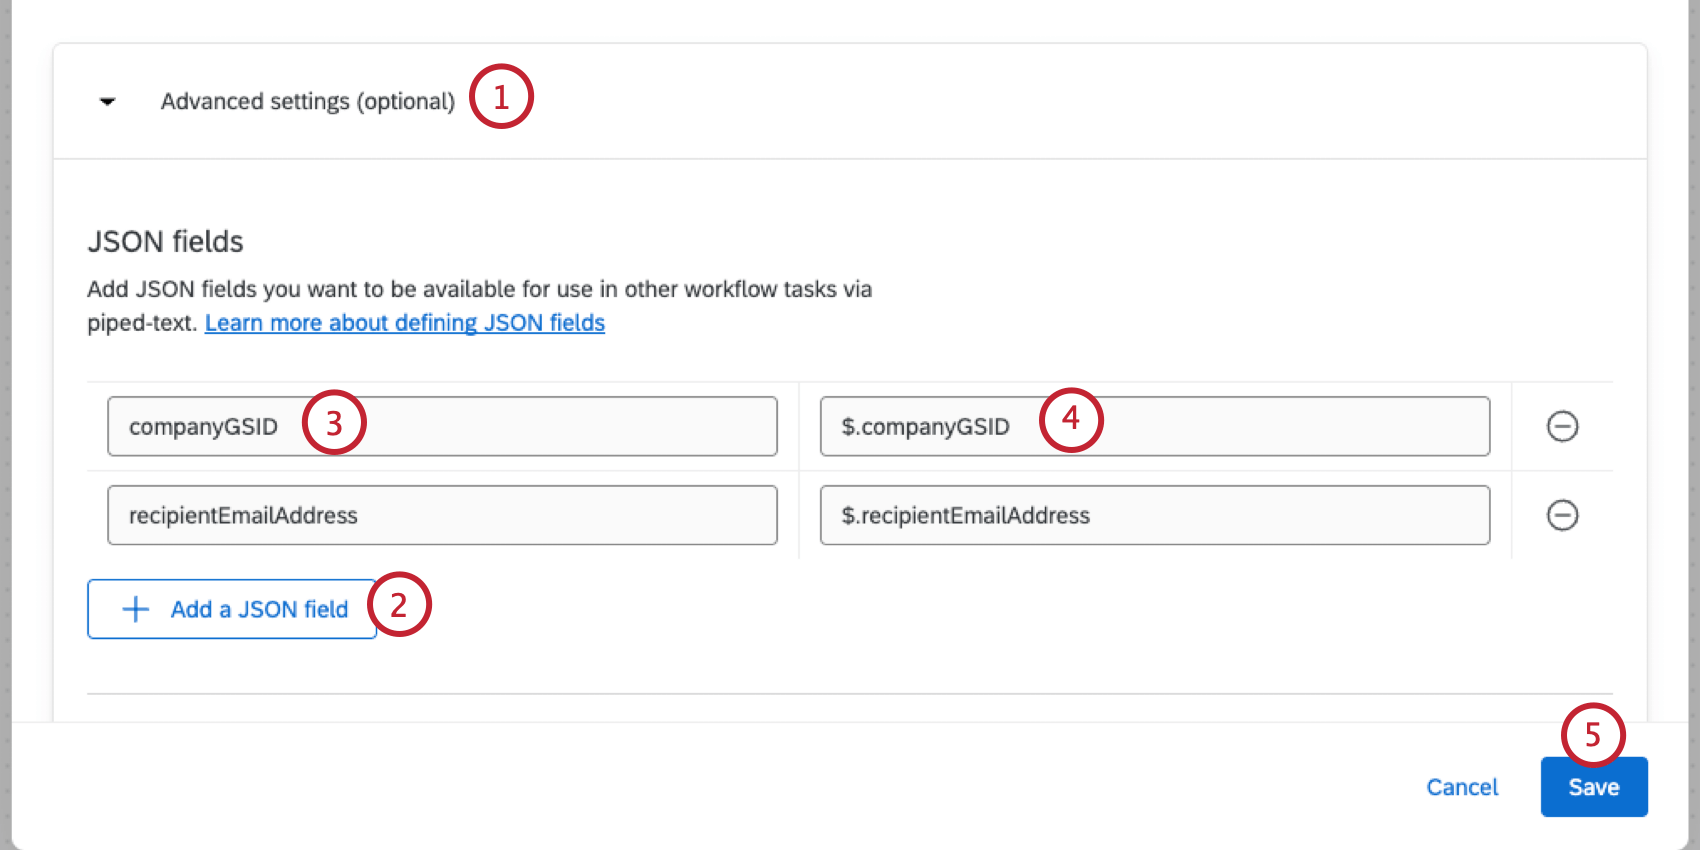
These JSON fields will now be available in subsequent workflow tasks as “Event Data: User-Defined Field”. They can be accessed via the piped text menu, {a}.

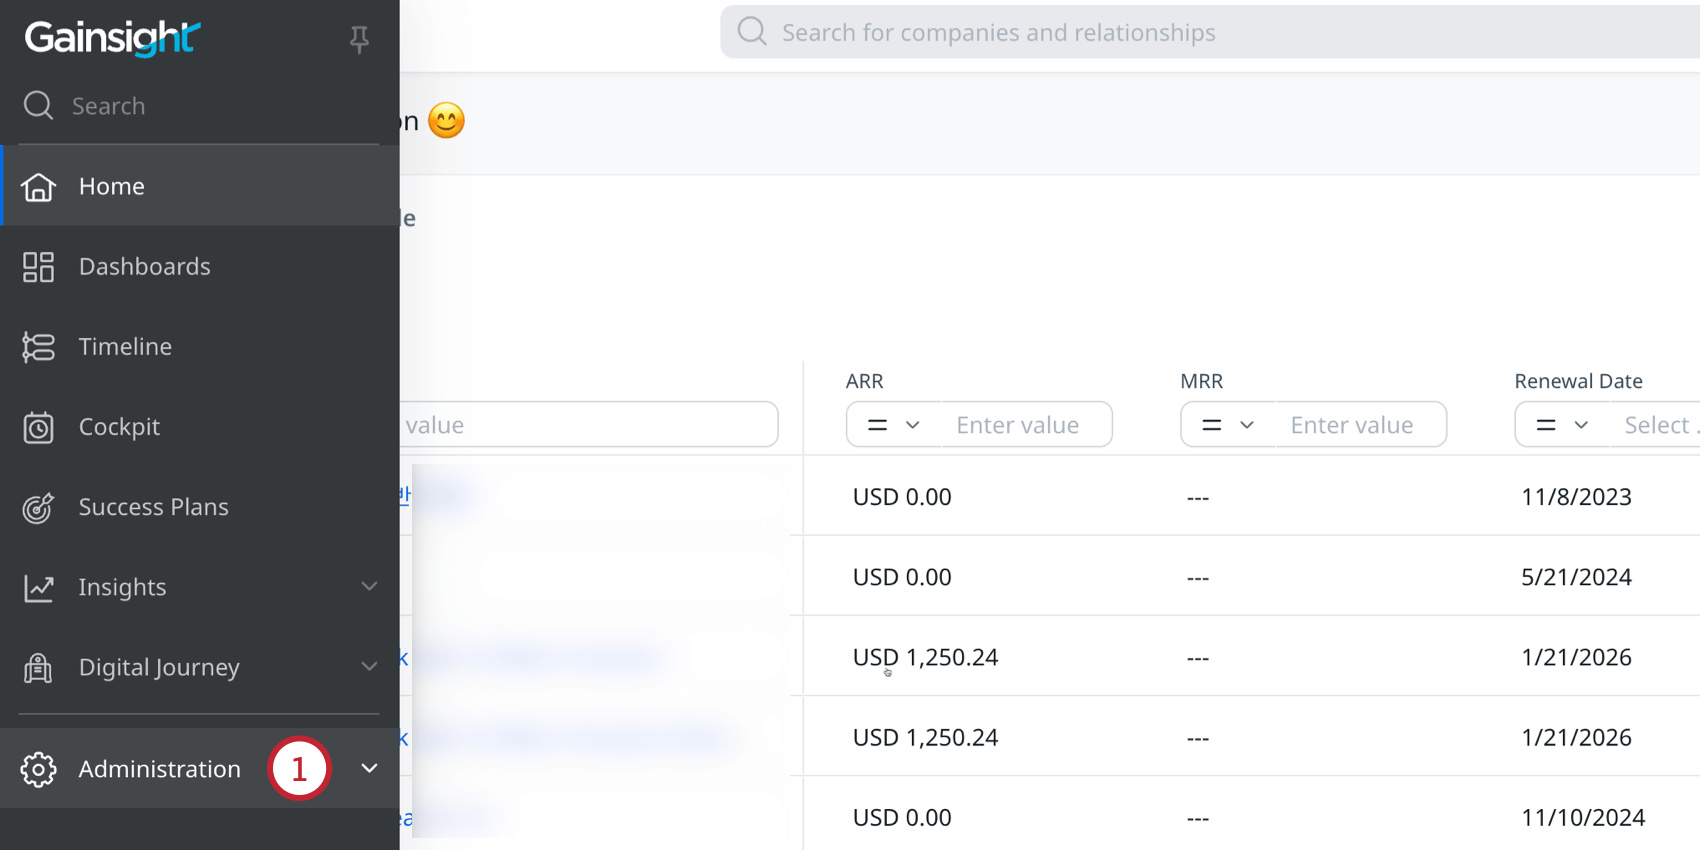
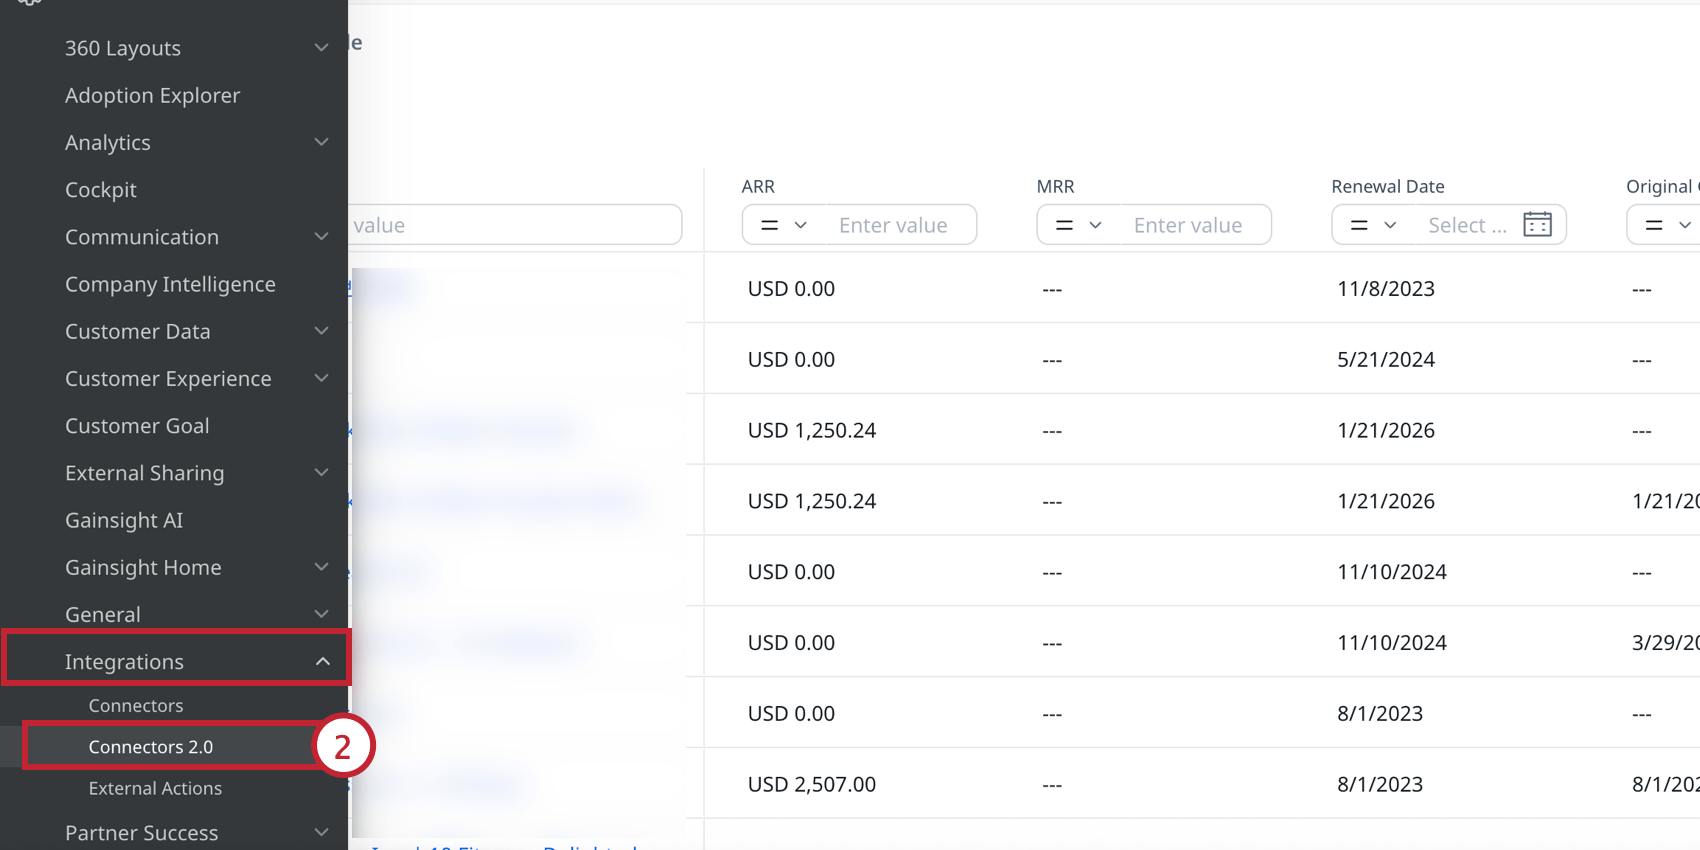
Step 3: Creating a Custom Gainsight Connector
Qtip: Custom connectors can’t be deleted once added. It is advised to conduct testing within a sandbox, especially if you are new to using Gainsight’s API capabilities. You must be a Super Admin within Gainsight to perform the steps in this section.
Next, you must create a new custom connector in Gainsight to connect with Qualtrics. This connector will store your authentication token from earlier, and will be used to send data to Qualtrics via External Actions in Gainsight.
You only need 1 connector for Qualtrics. If a custom connector for Qualtrics already exists, then skip to the next section about configuring an External Action in Gainsight.

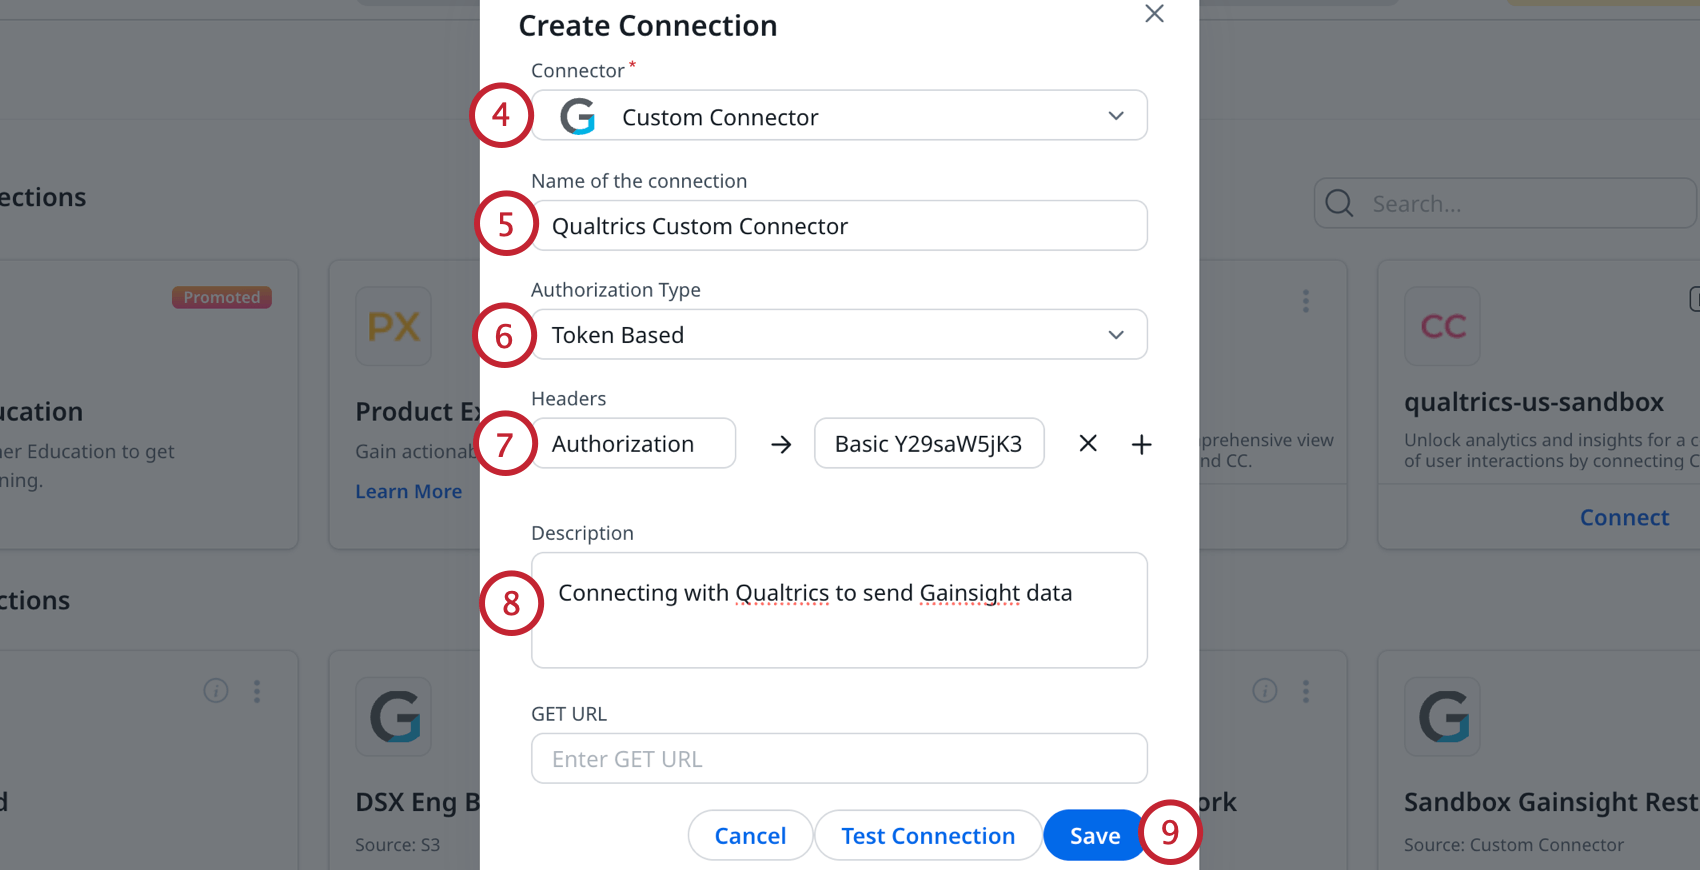
- Key: “Authorization”
- Value: “Basic {{encoded username and token value from earlier}}” Example: Your value will look something like this:

Basic ZGVtb0BxdWFsdHJpY3MuY29tOmY4Z0lLN0c2R0ZIOTg1WTQ=
Refer to the HTTP BASIC AUTH section of this support page for more information.
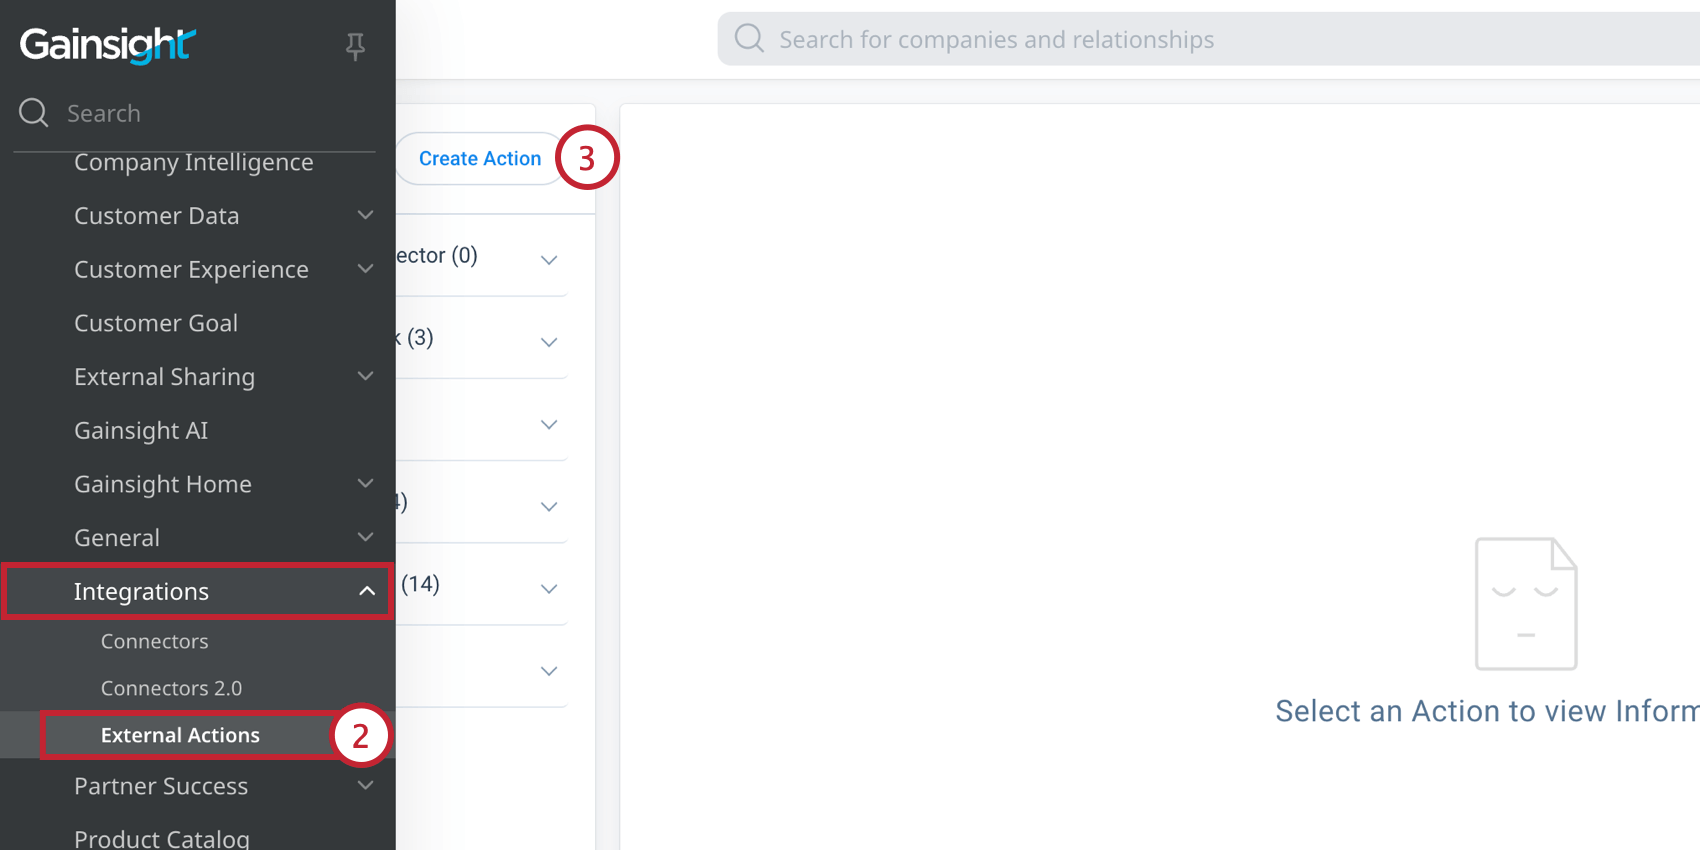
Step 4: Configuring Gainsight External Action
Qtip: External actions generally can’t be deleted once added. It is advised to conduct testing within a sandbox, especially if you are new to using Gainsight’s API capabilities. You must be a Super Admin within Gainsight to perform the steps in this section.
After creating the custom connector, you can configure an external action in Gainsight to send a request to your Qualtrics JSON event. If you’d like to create multiple workflows triggered by Gainsight, then you will need to create a separate external action for each workflow.
Remember, you only ever need 1 connector for Qualtrics. All external actions used to interact with Qualtrics should be under the same Qualtrics custom connector.
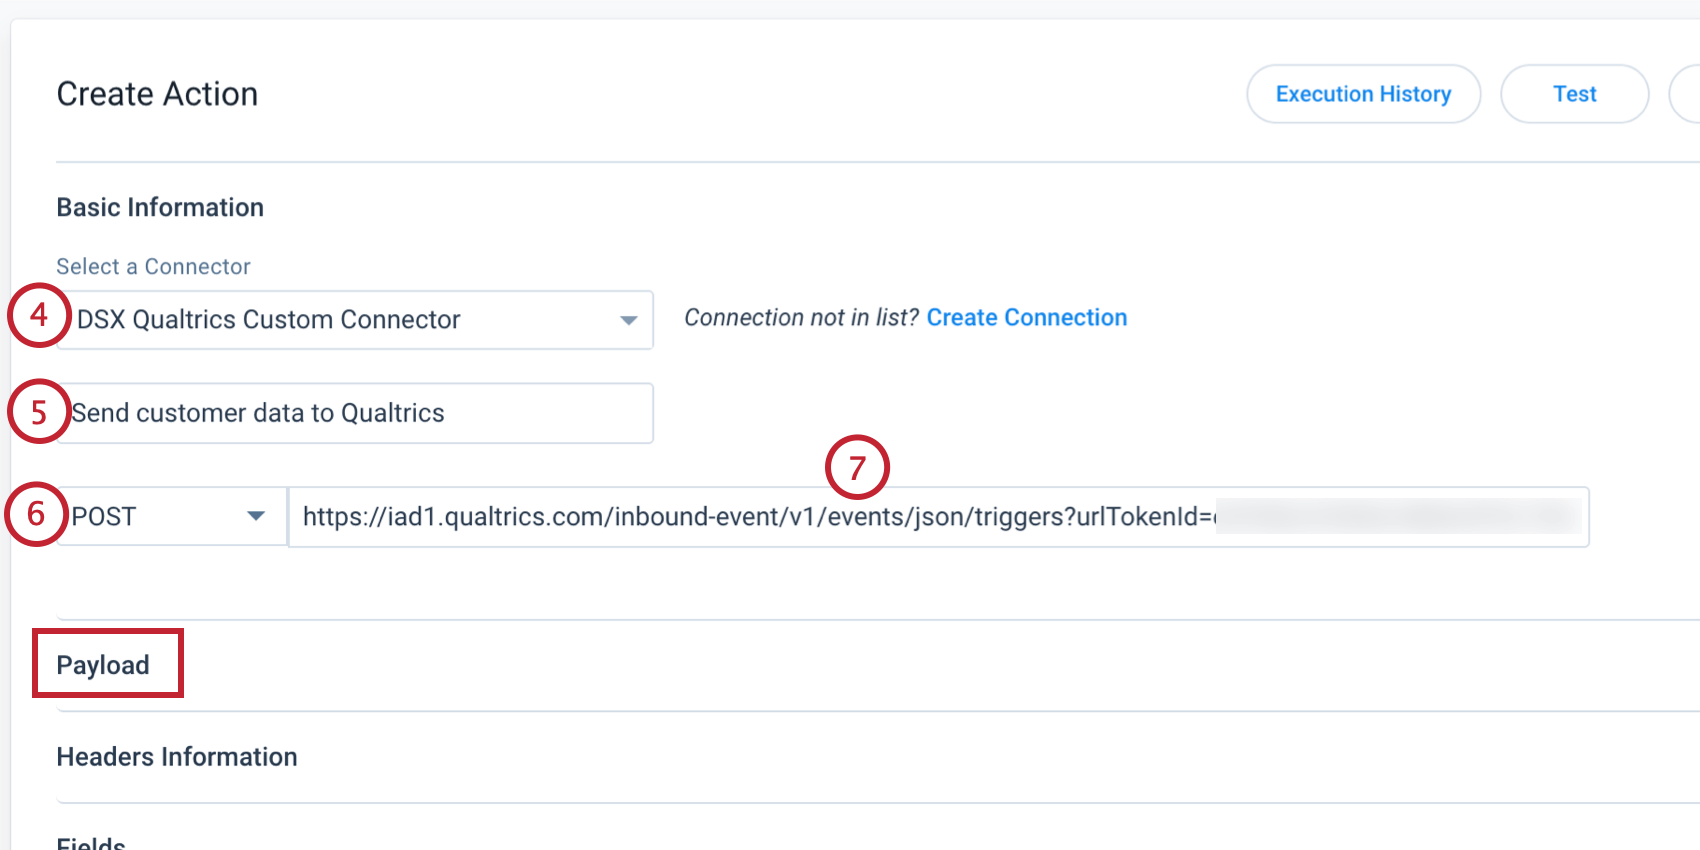
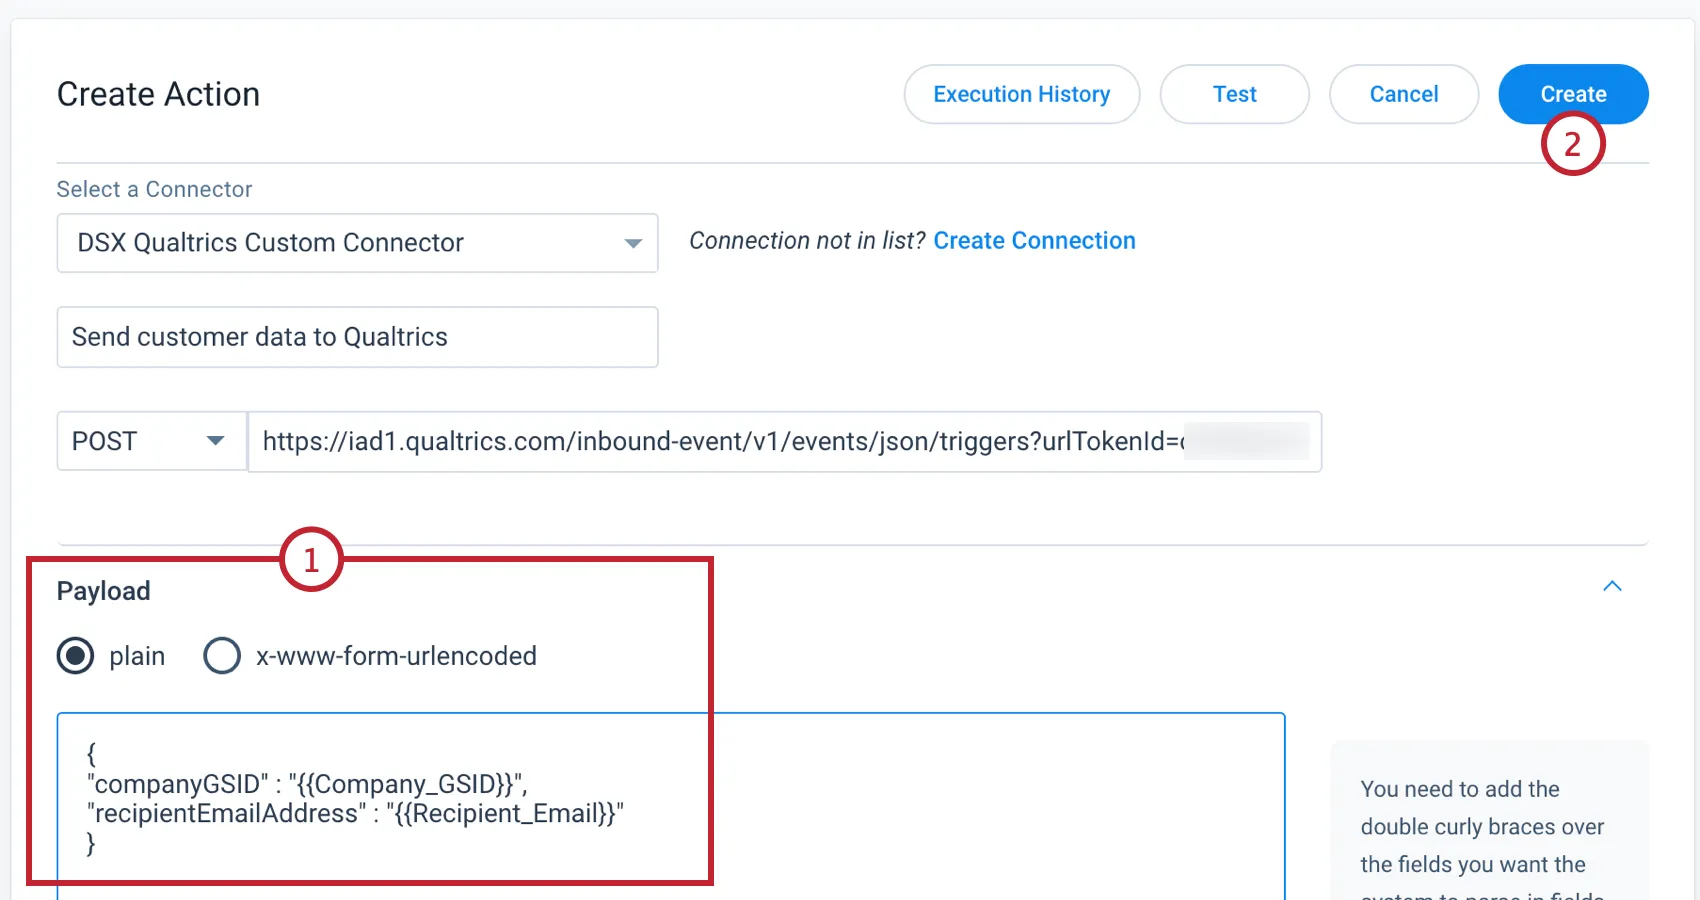
Next you will need to configure the payload of your request. If you plan on using this Gainsight external action solely as a trigger and do not need to send any additional data, then you only need to add an opening and closing curly bracket to the payload before saving, e.g. { }. Otherwise, if you intend to send additional data from Gainsight to Qualtrics, then you will need to add key-value pairs to the payload:
-
- Each key should exactly match the JSON field name from the JSON event in Qualtrics.
- Each value can be configured as a static value, or tokenized to accept input from other areas in Gainsight like the Rules Engine.
- Each key-value pair should be separated from the next by a comma. Example: Below is the JSON payload for the fields we configured earlier. Both key-value pairs in this example will accept parsed values input from a Rules Engine Action.
{

"companyGSID" : "{{Company_GSID}}",

"recipientEmailAddress" : "{{Recipient_Email}}"

}
Testing the Connection
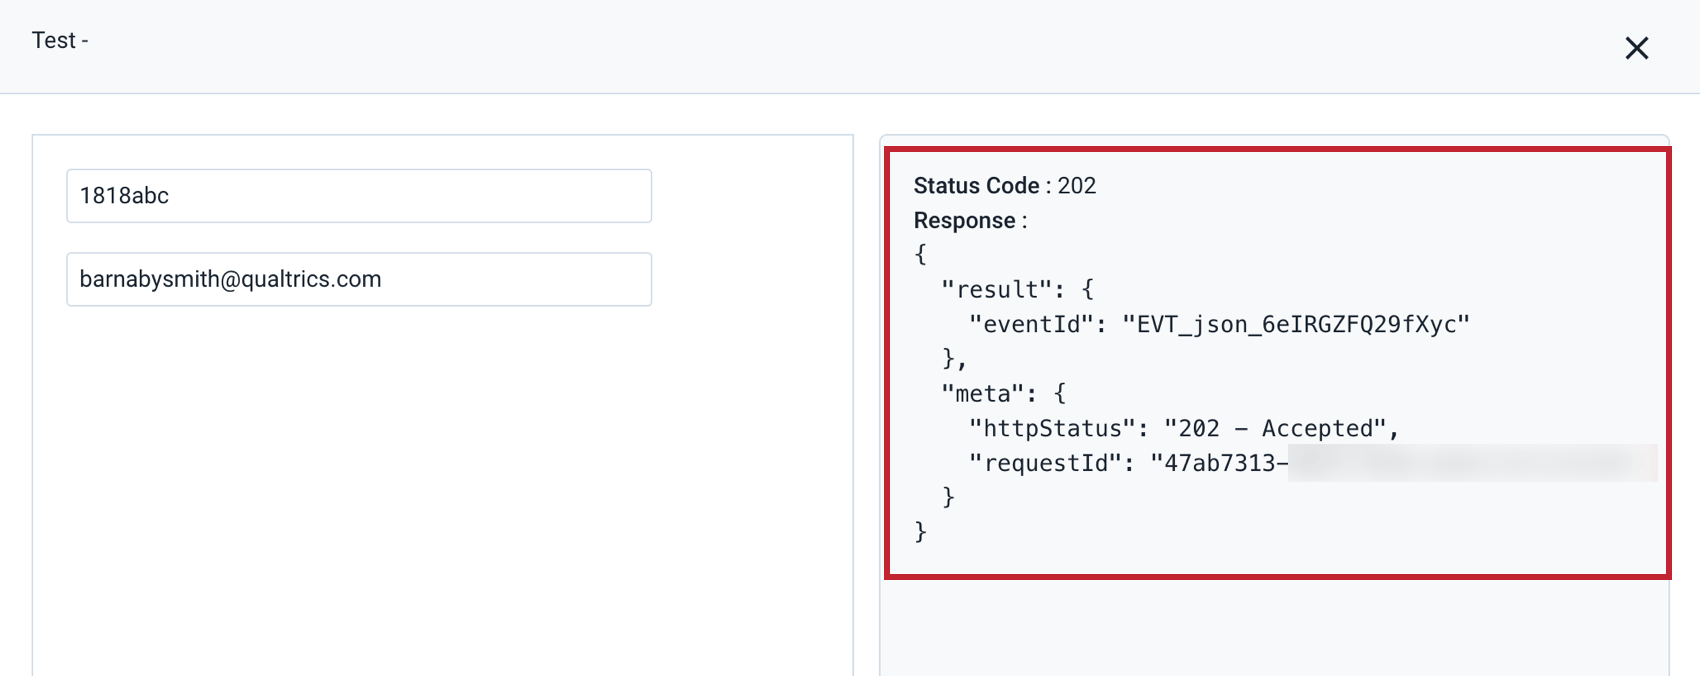
To test the connection:
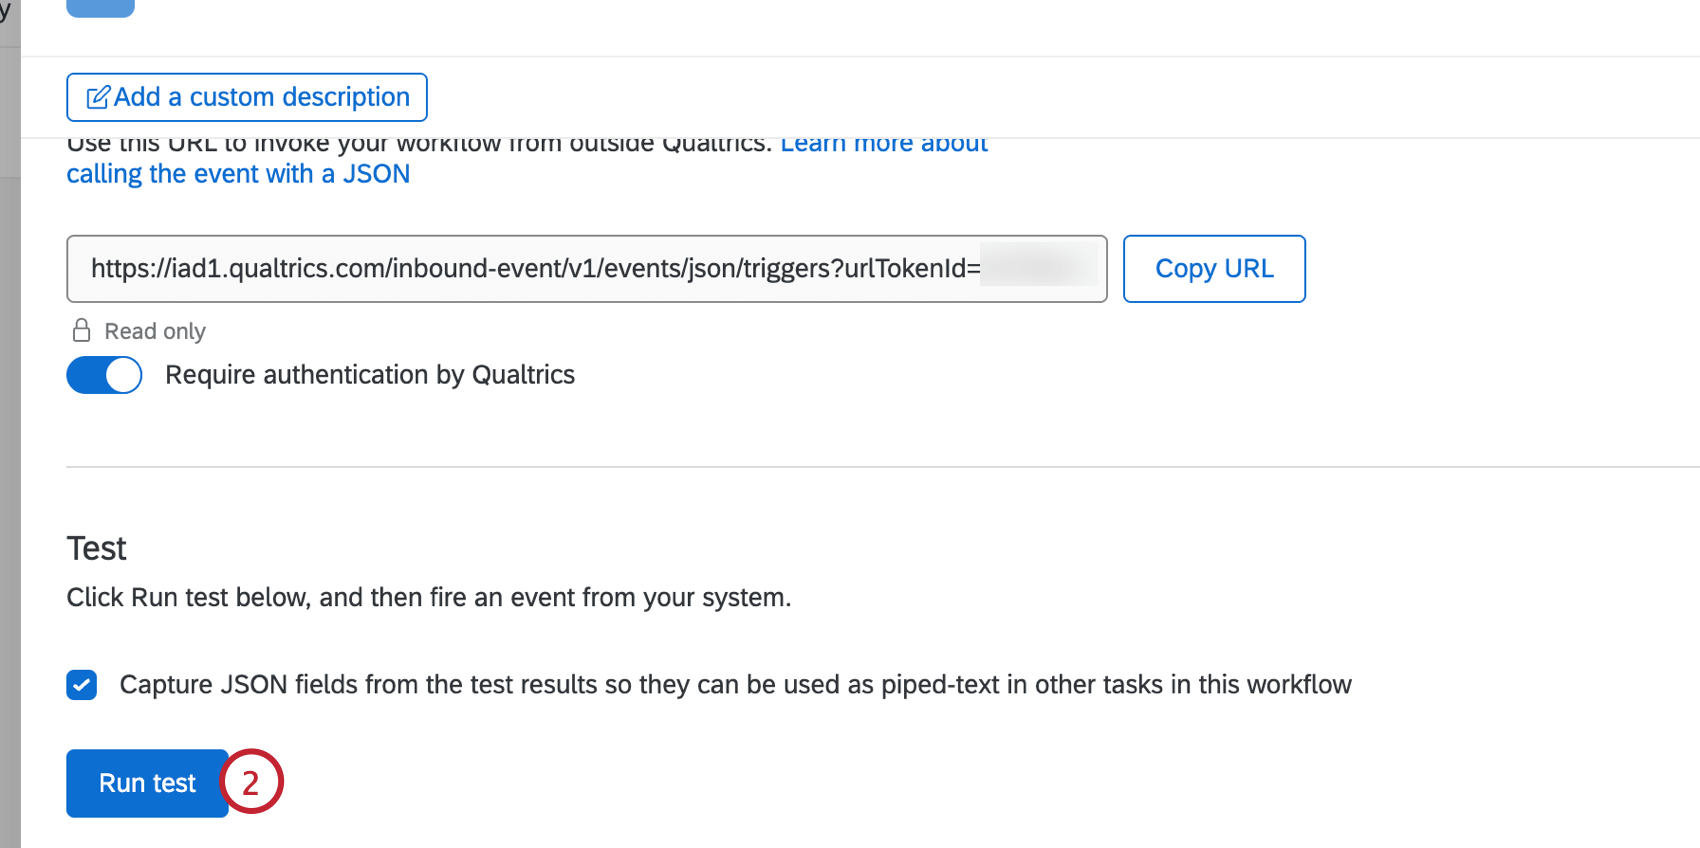


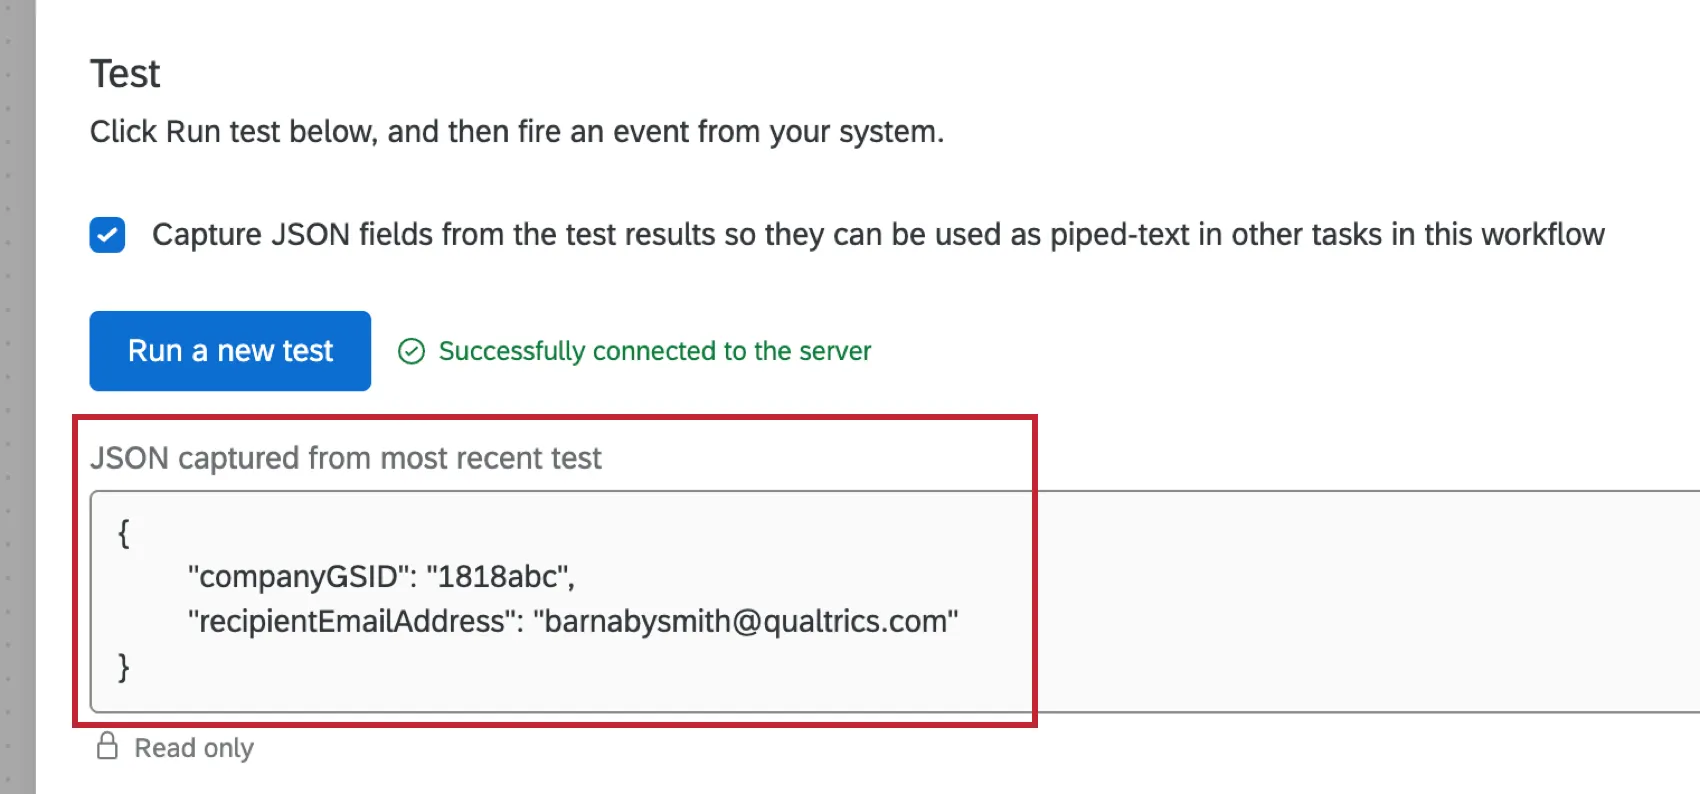
A successful test will return a Status Code 202, eventId, and requestId.

You will also see the test key-value pairs appear in the “JSON captured from most recent test” within Qualtrics.
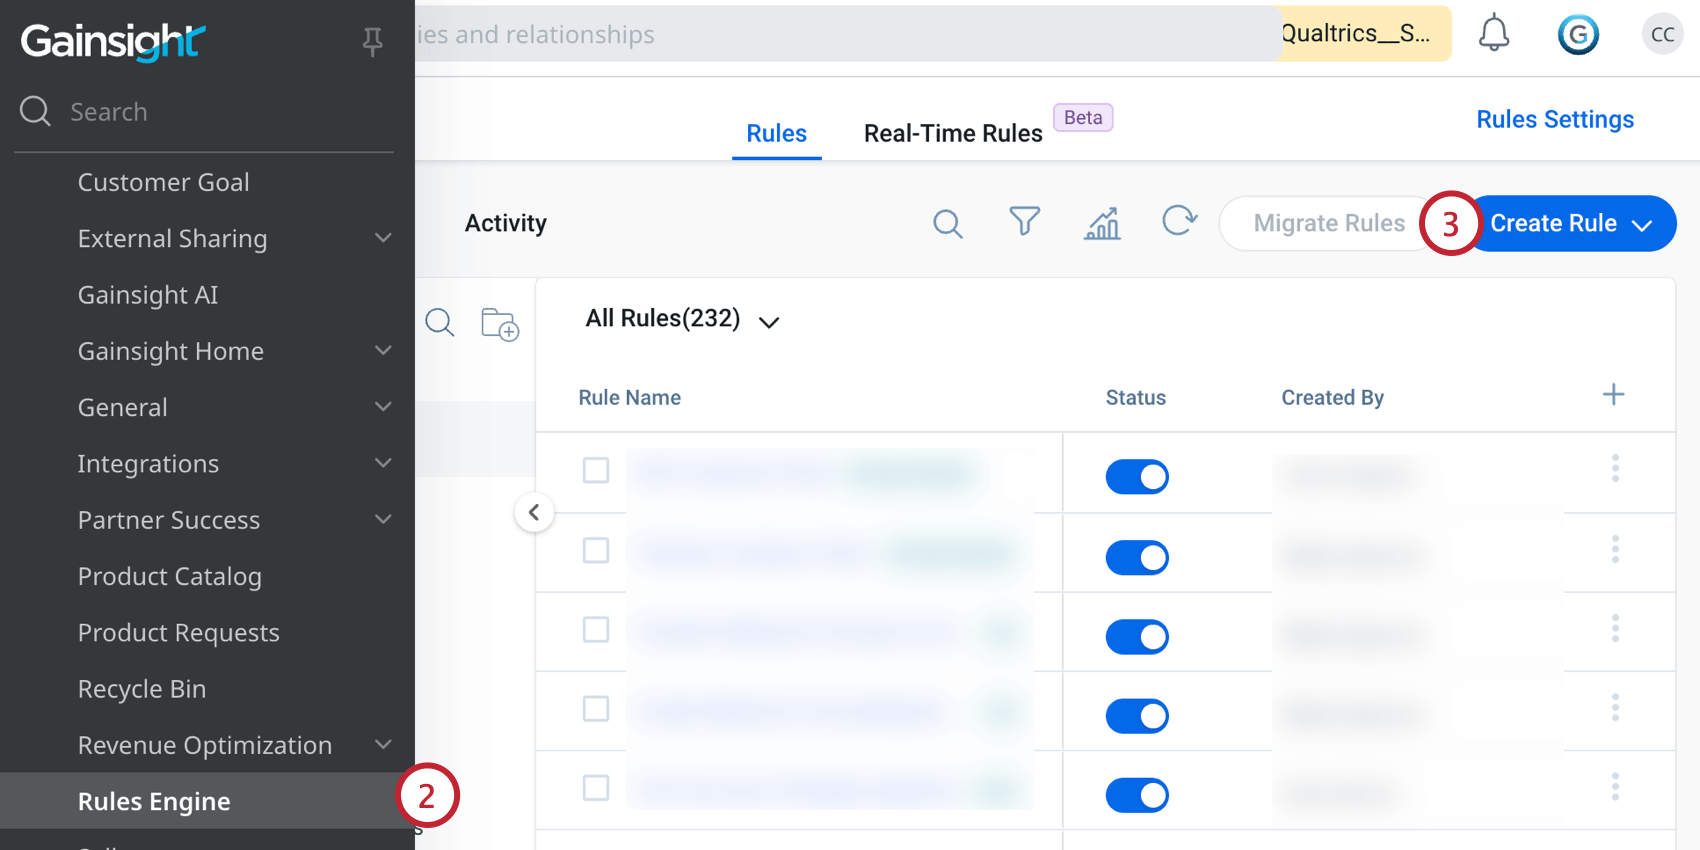
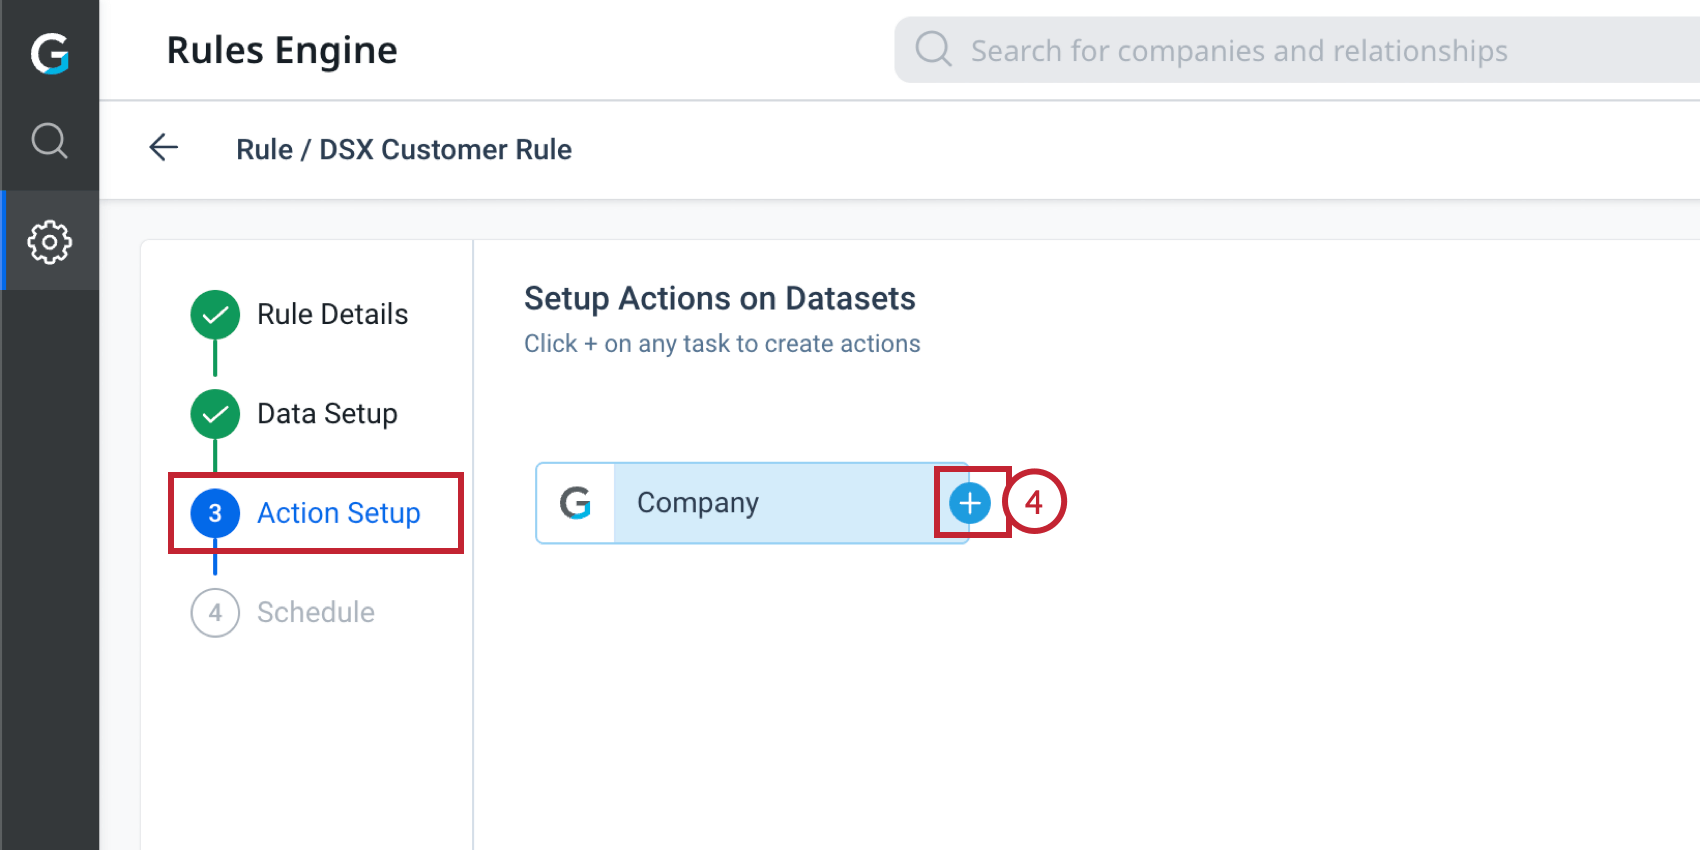
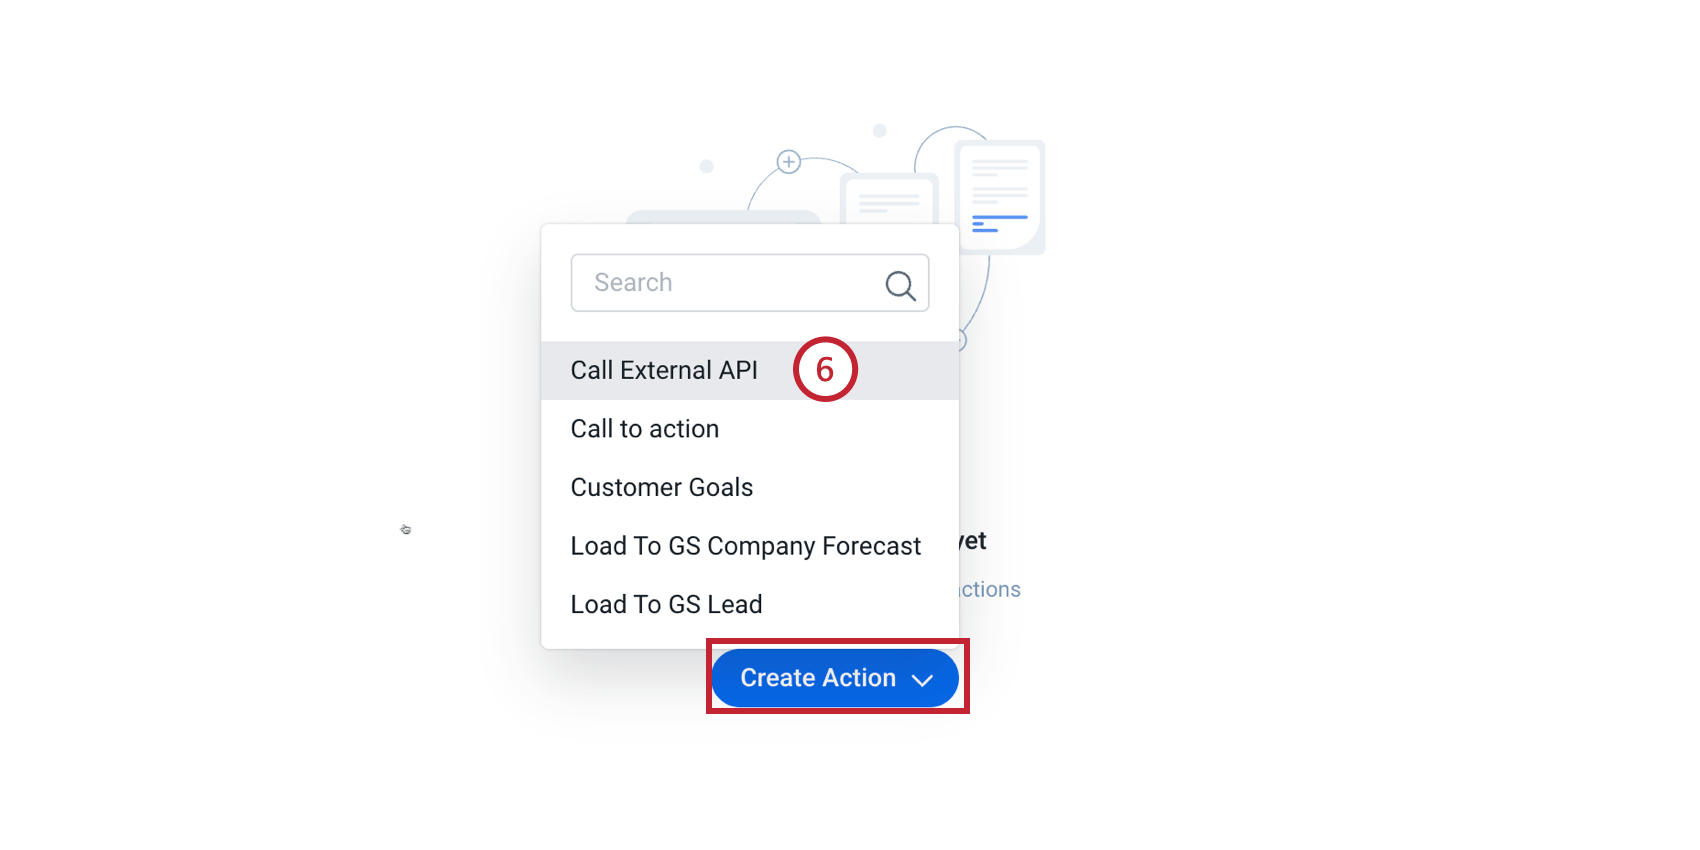
Step 5: Using Gainsight External Actions in the Rules Engine
In order to use your newly configured external action, you will need to use the “Call External API” action within the Rules Engine. Each row submitted to this action will execute independently, so a dataset of 100 records using the Call External API action will result in 100 separate API calls.
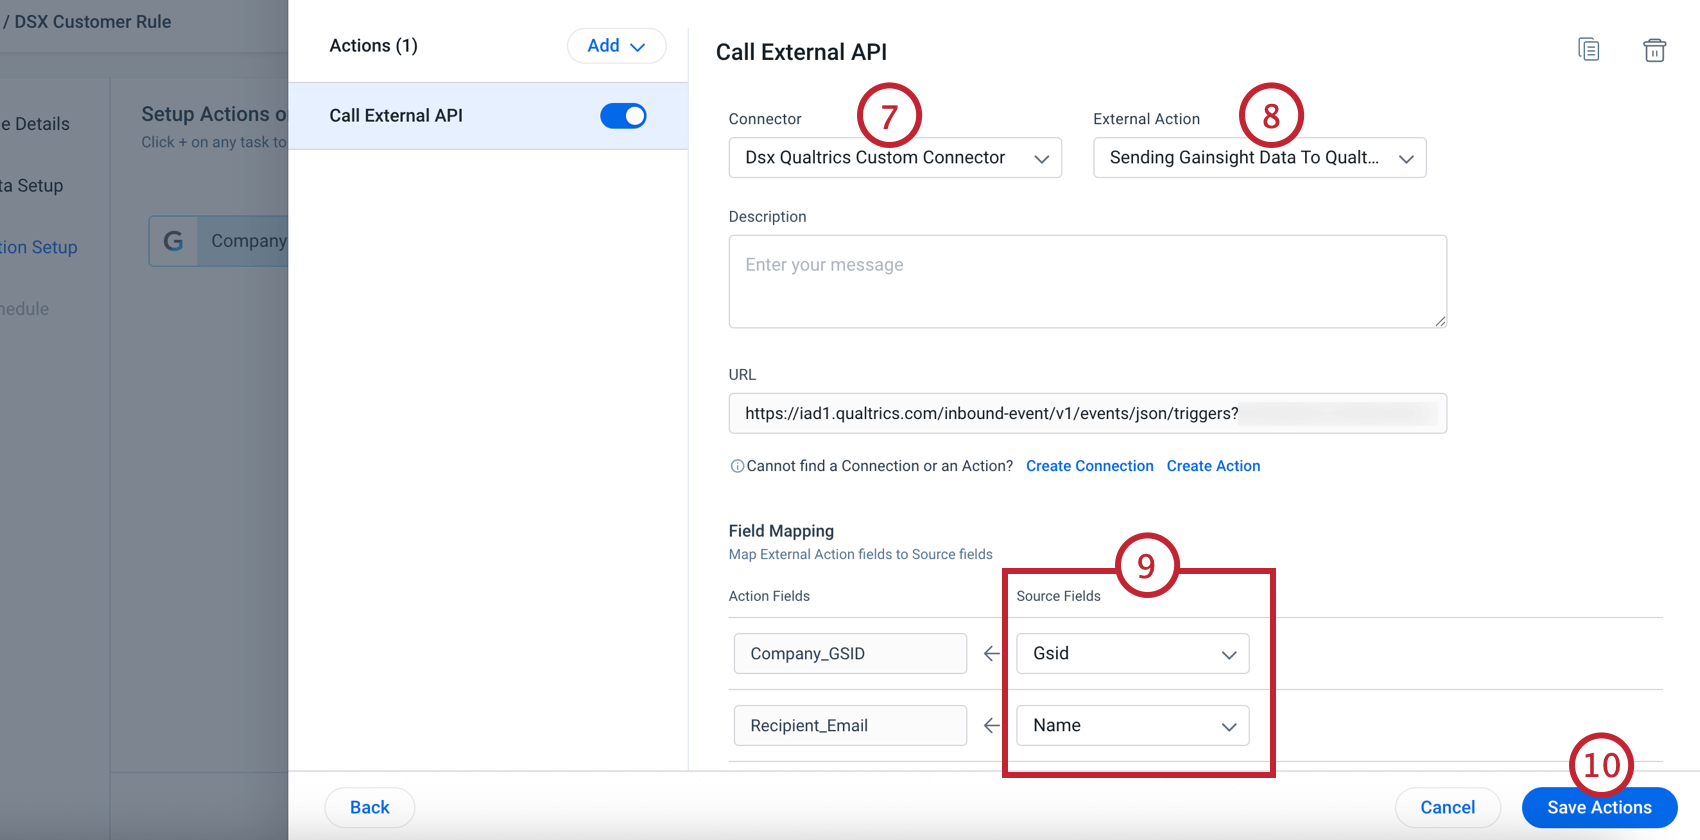
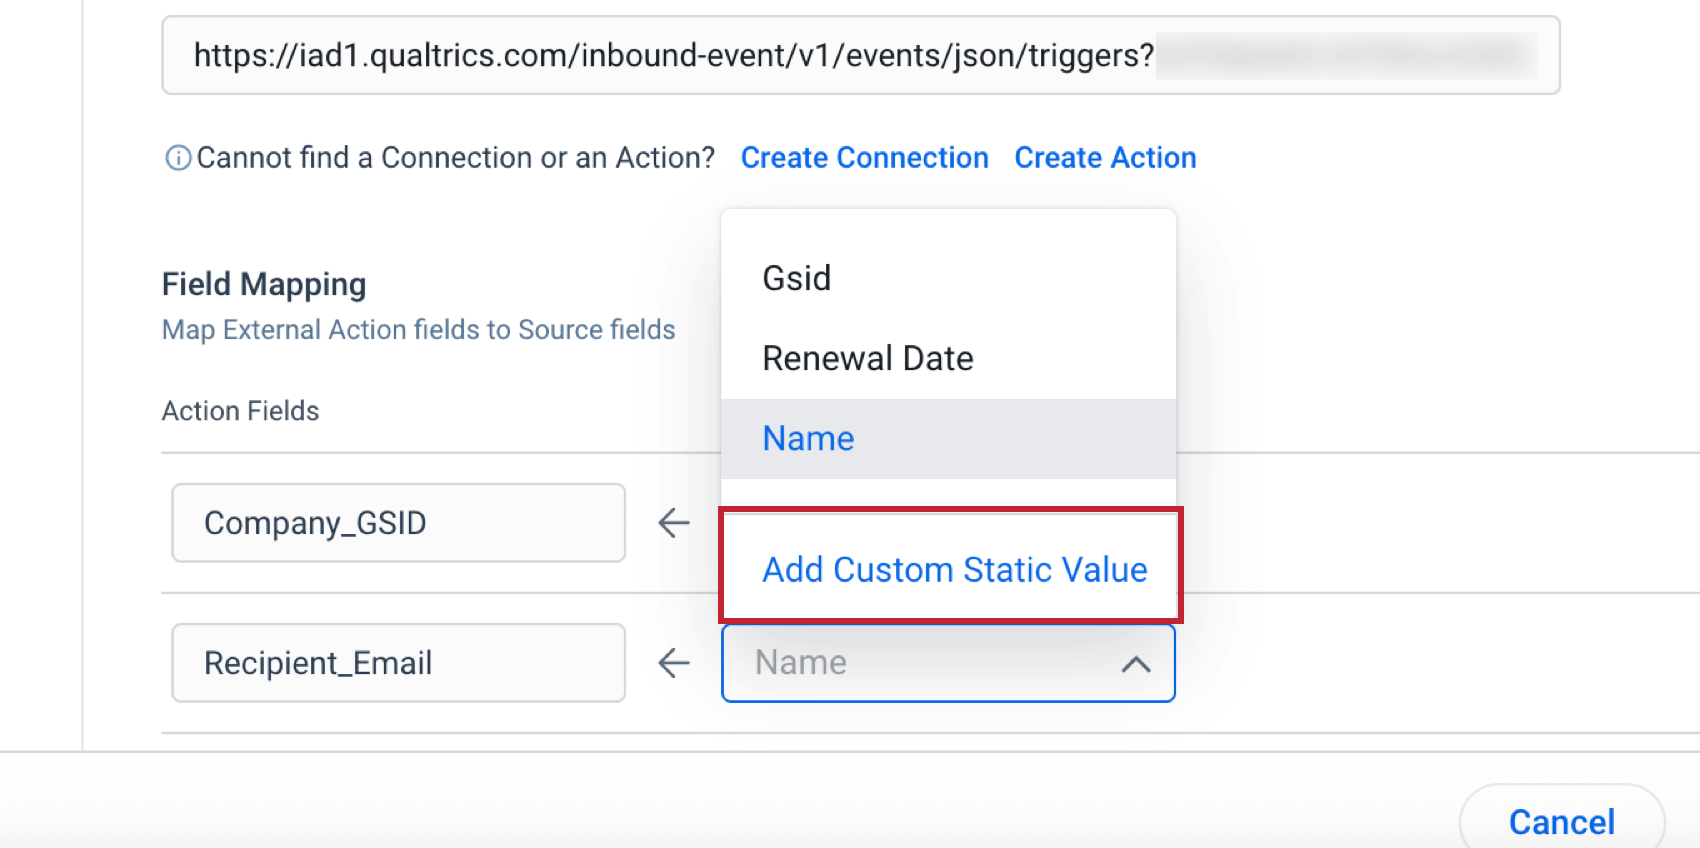
Qtip: You can set a static value as the source field instead of mapping a field from the dataset.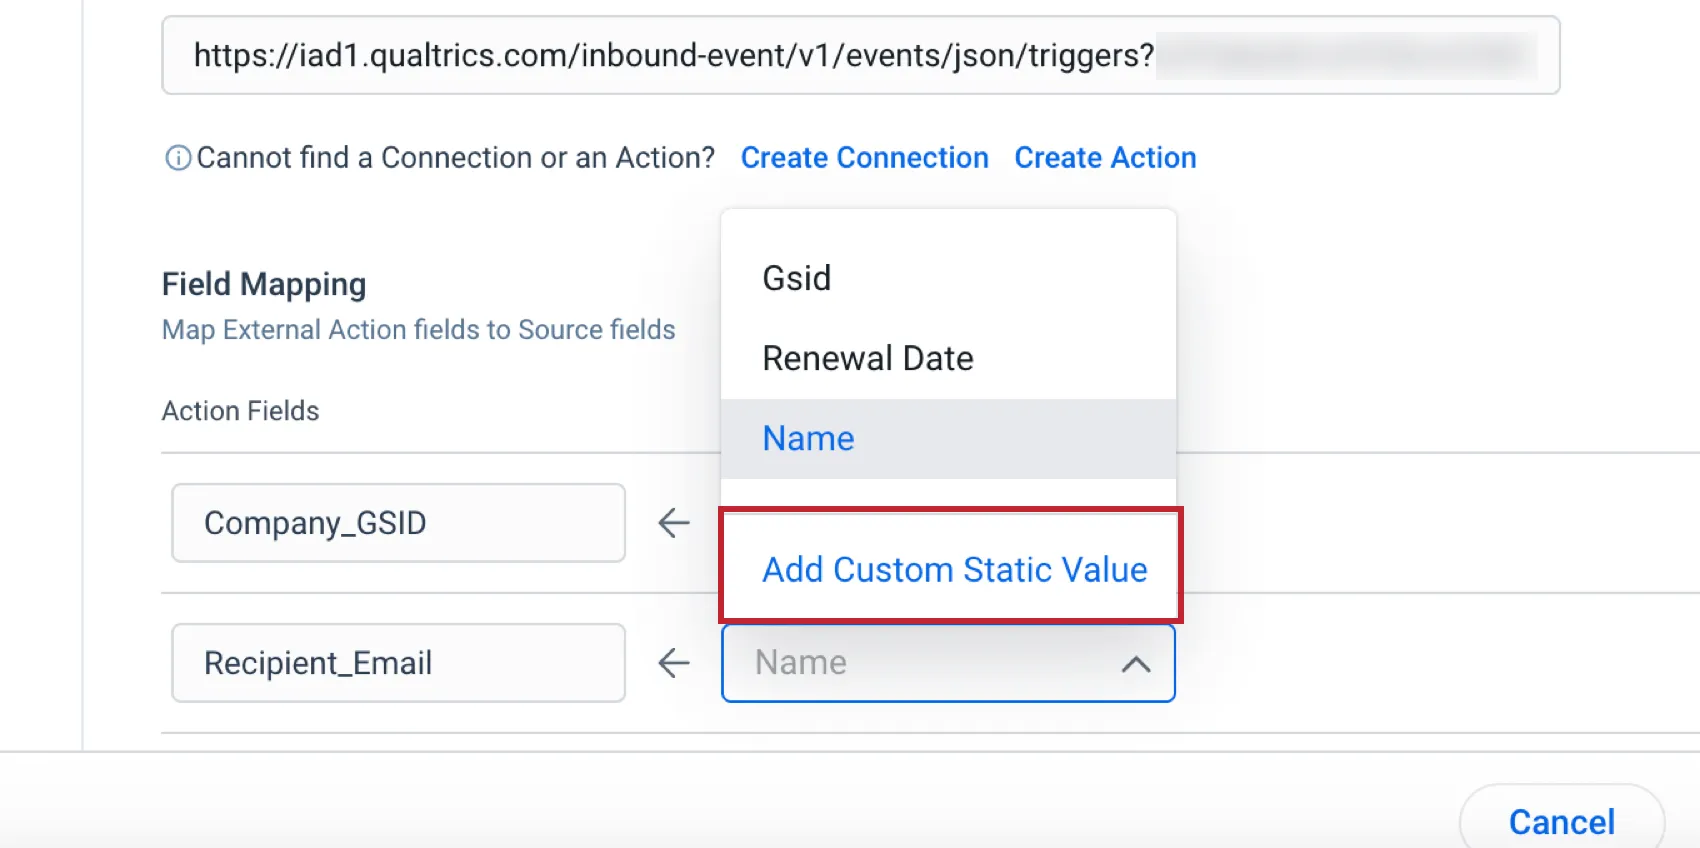
That's great! Thank you for your feedback!
Thank you for your feedback!