
Action Plans Dashboard Settings (EX)
What's on this page
Qtip: This page describes functionality available to Engagement, Pulse, and Lifecycle projects. For more details on each, see Types of Employee Experience Projects.
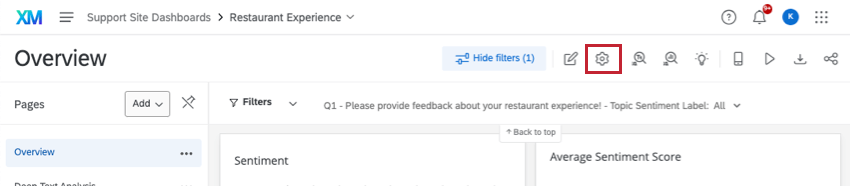
About Action Plans Dashboard Settings
When you’ve reviewed your dashboard data and noticed areas of your company that can use improvement, you can set up action plans to detail how you’ll improve these areas.
Inside the Action plans section of your dashboard’s Settings, you can customize which items in your dataset are available to make action plans for. You can also add additional information and fields that show up when your dashboard viewers are creating action plans.

Qtip: Changes made on this page are automatically saved.
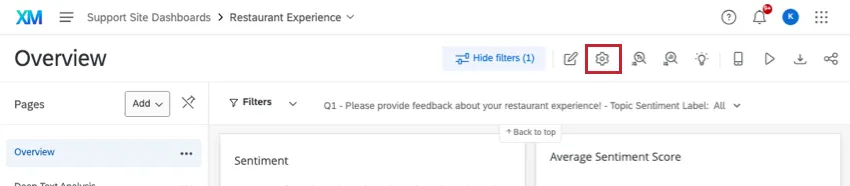
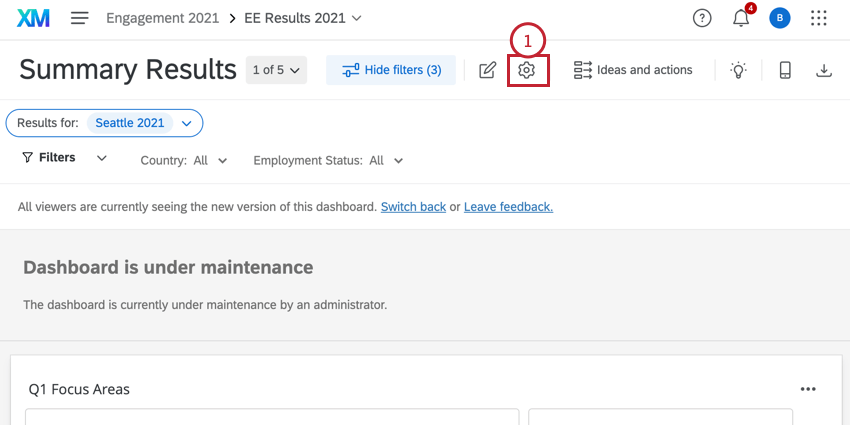
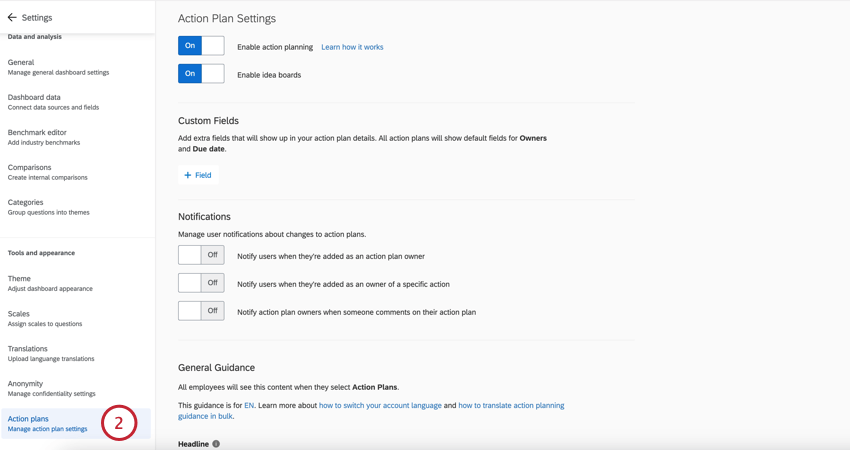
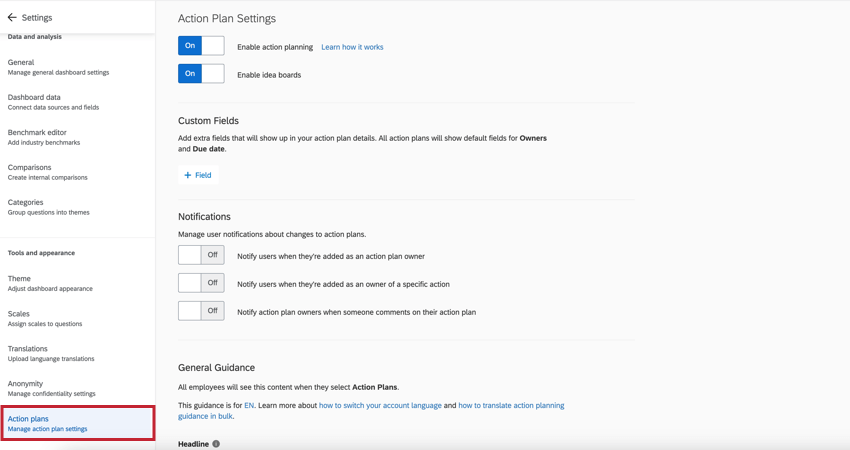
Action Plan Settings
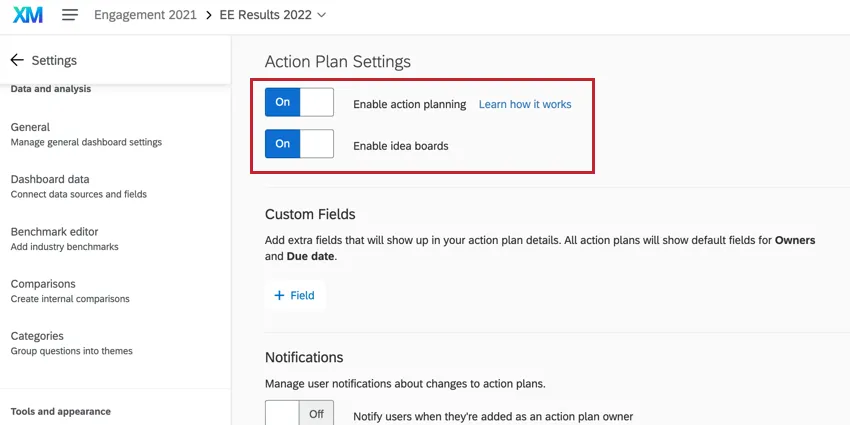
- Enable action planning: Turns on action planning functionality for the dashboard.
- Enable idea boards: Enables action idea boards. You do not need action planning enabled on your dashboard to use action idea boards, although it is recommended.
Available Fields
Qtip: Only those with editing access to a dashboard can decide what survey questions or categories can be used for action planning.
One of the major strengths of action planning is the ability to base it off of specific survey items and categories. As soon as you identify data points in your dashboard that could use improvement, you can create action plans to resolve these gaps.
Making Items Unavailable
If Available is unchecked, this means managers can’t generate recommendations or add an action plan to that category or question. You may want to do this when the survey item isn’t something a manager can take action on or is outside of the manager’s control.
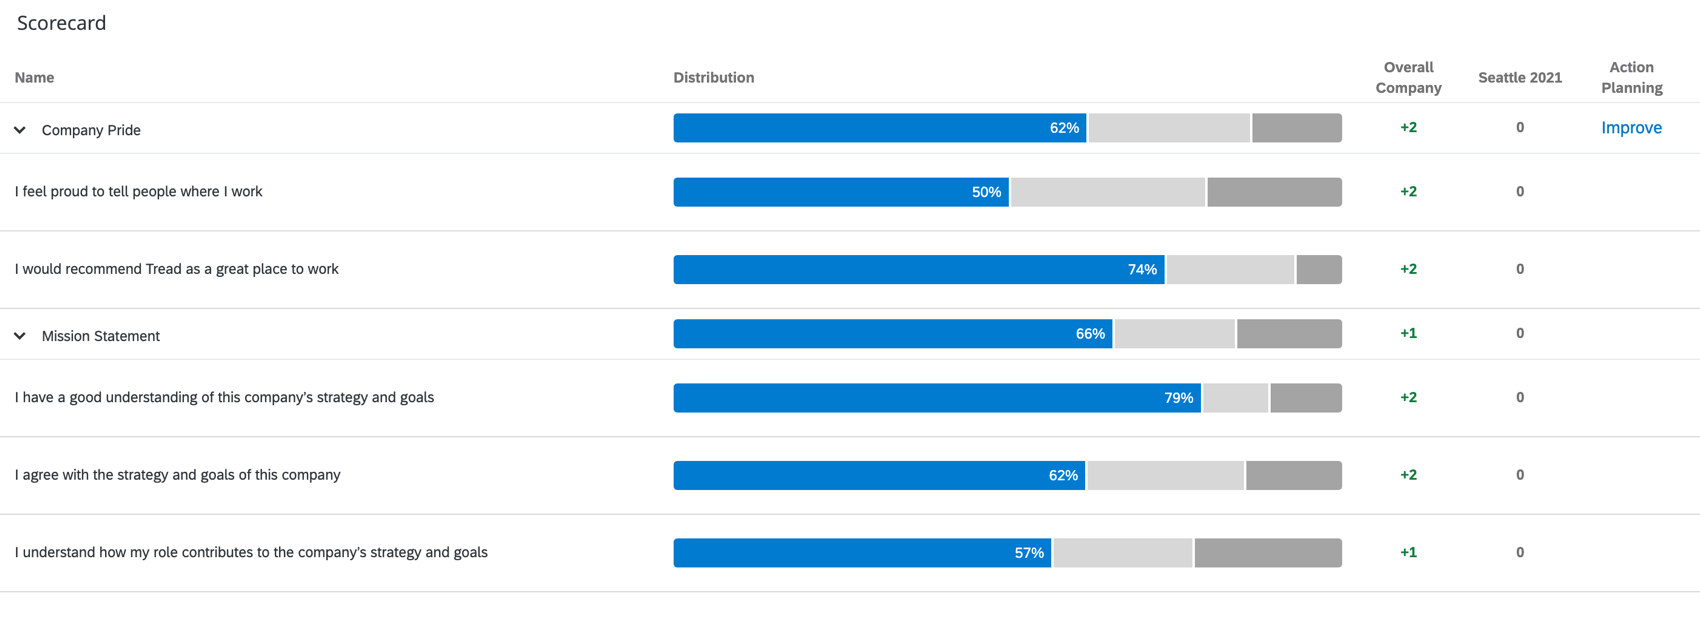
When an item is unavailable for action planning, the Improve button will disappear from the widget.

Additionally, when an item is unavailable for action planning, you won’t be able to select the item when creating an action plan.
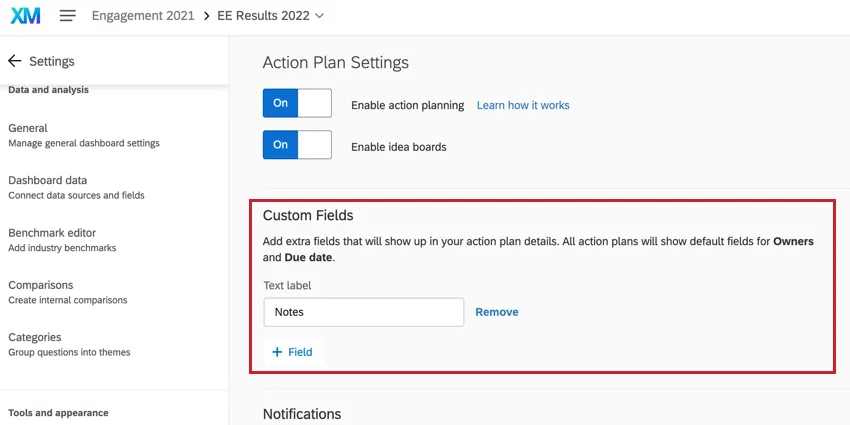
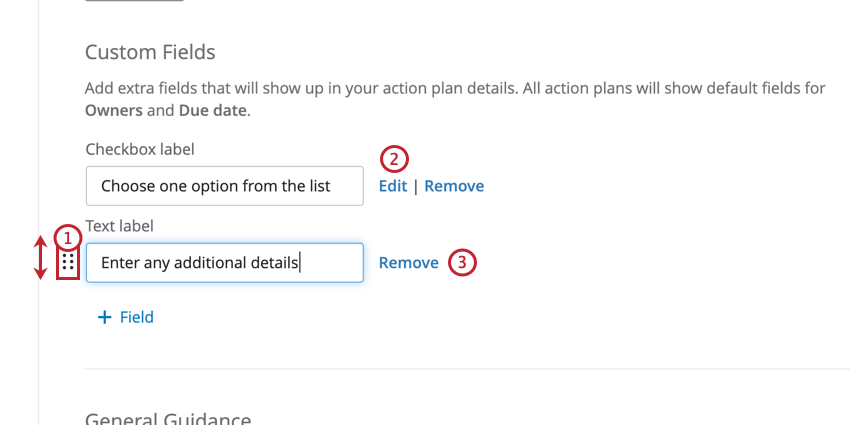
Creating Custom Fields
By default, all action plans have a field for owners and the plan’s due date. However, if you want to add extra fields that action plan users should fill out, you can make the following edits in the action plans section of your dashboard’s settings.
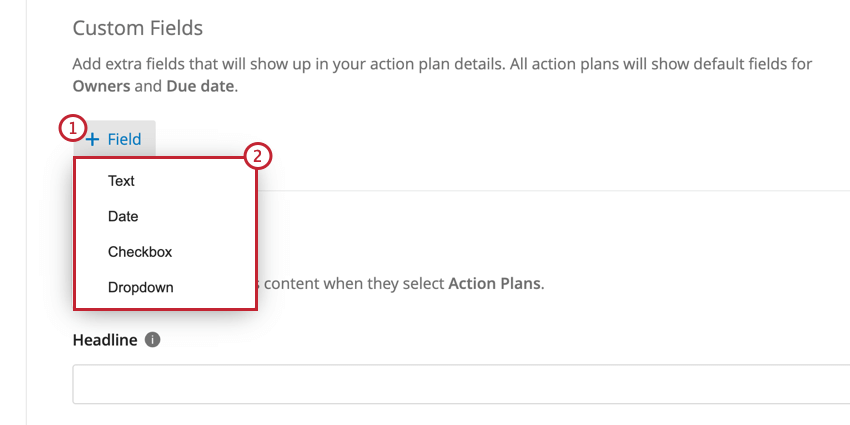
-
- Text: A field where the user can type an open-ended response. When used in action plan reporting, this acts like an Open Text field.
- Date: A field where the user can enter a date. When used in action plan reporting, this acts like a Date field.
- Checkbox: A field that functions like a multiple choice question where a user selects one or more options using checkboxes. When used in action plan reporting, this acts like a Text Set / Multi-Answer Text Set.
- Dropdown: A field that functions like a multiple choice question where a user selects one or more options using a dropdown menu. When used in action plan reporting, this acts like a Text Set / Multi-Answer Text Set.
Attention: For Text and Date fields, you need to specify a label for the field. This will be the name of the field users see when creating an action plan. To add a label for a field, enter it into the label box associated with the field.

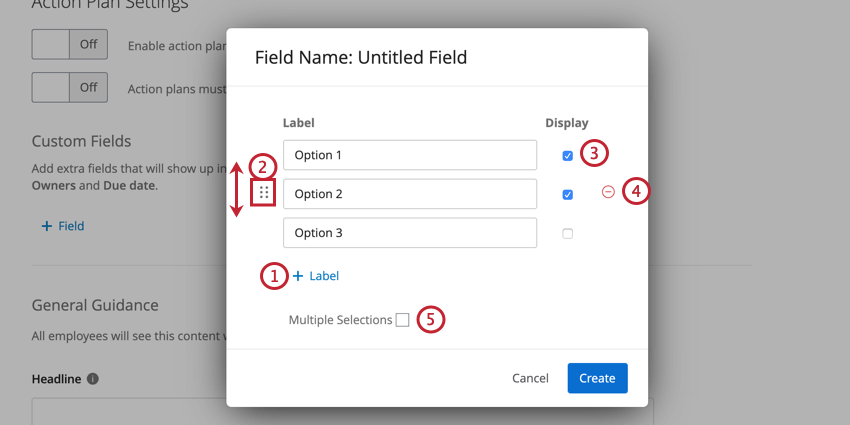
Checkbox and Dropdown Fields
Checkbox and Dropdown fields are set up in the same way. After adding one of these fields, you’ll see a second screen for customizing the field. Your customization options are as follow:
Managing Custom Fields
You can perform the following actions on your custom fields:

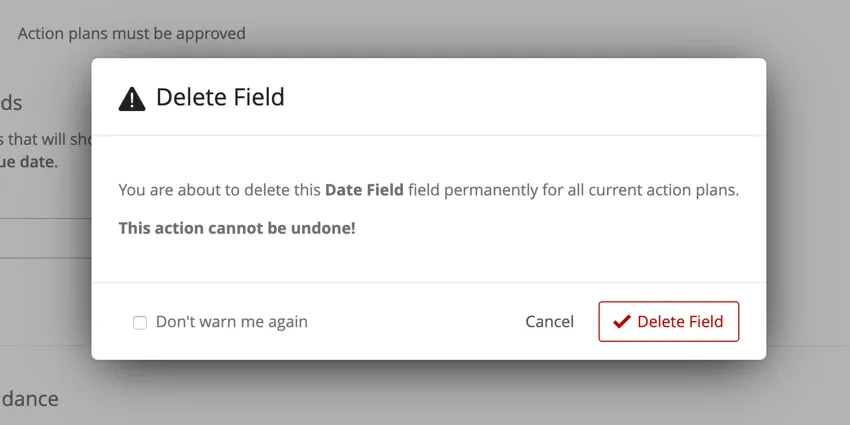
Qtip: After clicking Remove, you’ll be asked to confirm your decision. Once a field is deleted, any data associated with that field is also deleted and is irretrievable!
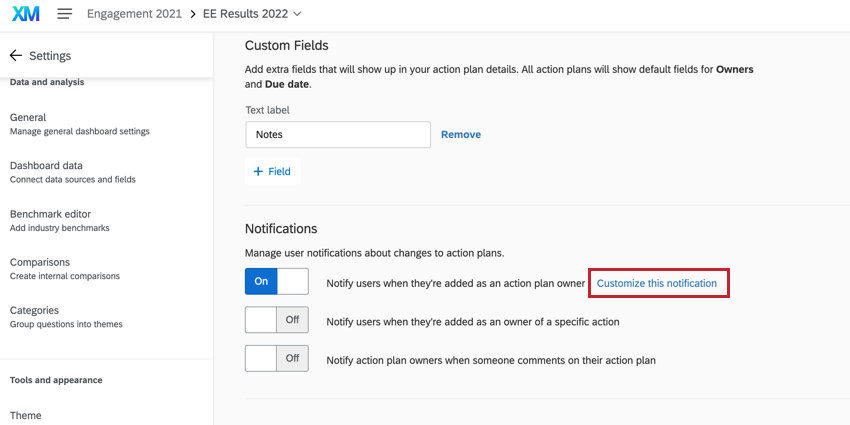
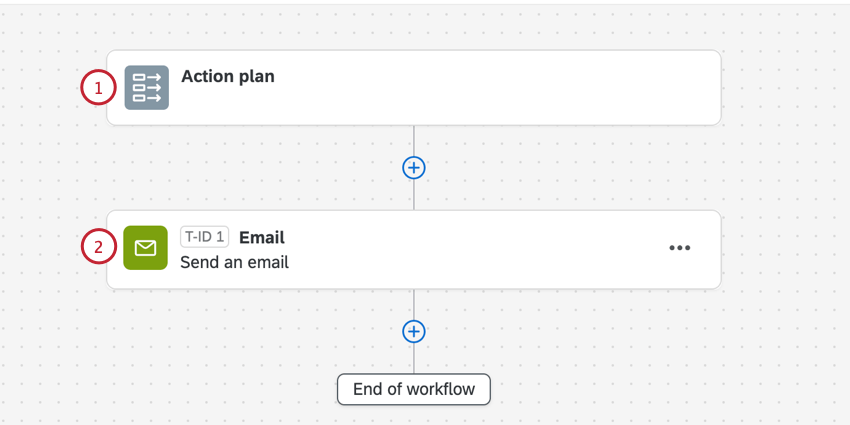
Notifications
Action plan notifications allow users to be notified via email when they are given ownership over actions or when they receive comments on their action plans. These notifications take the form of email task workflows in your global workflows manager. You can view and edit these workflows by clicking Customize this notification.
These workflows contain:

General Guidance
In the General Guidance section you can provide information to your organization about action planning overall. Your organization will see this at the bottom of the page when they click on action plans.
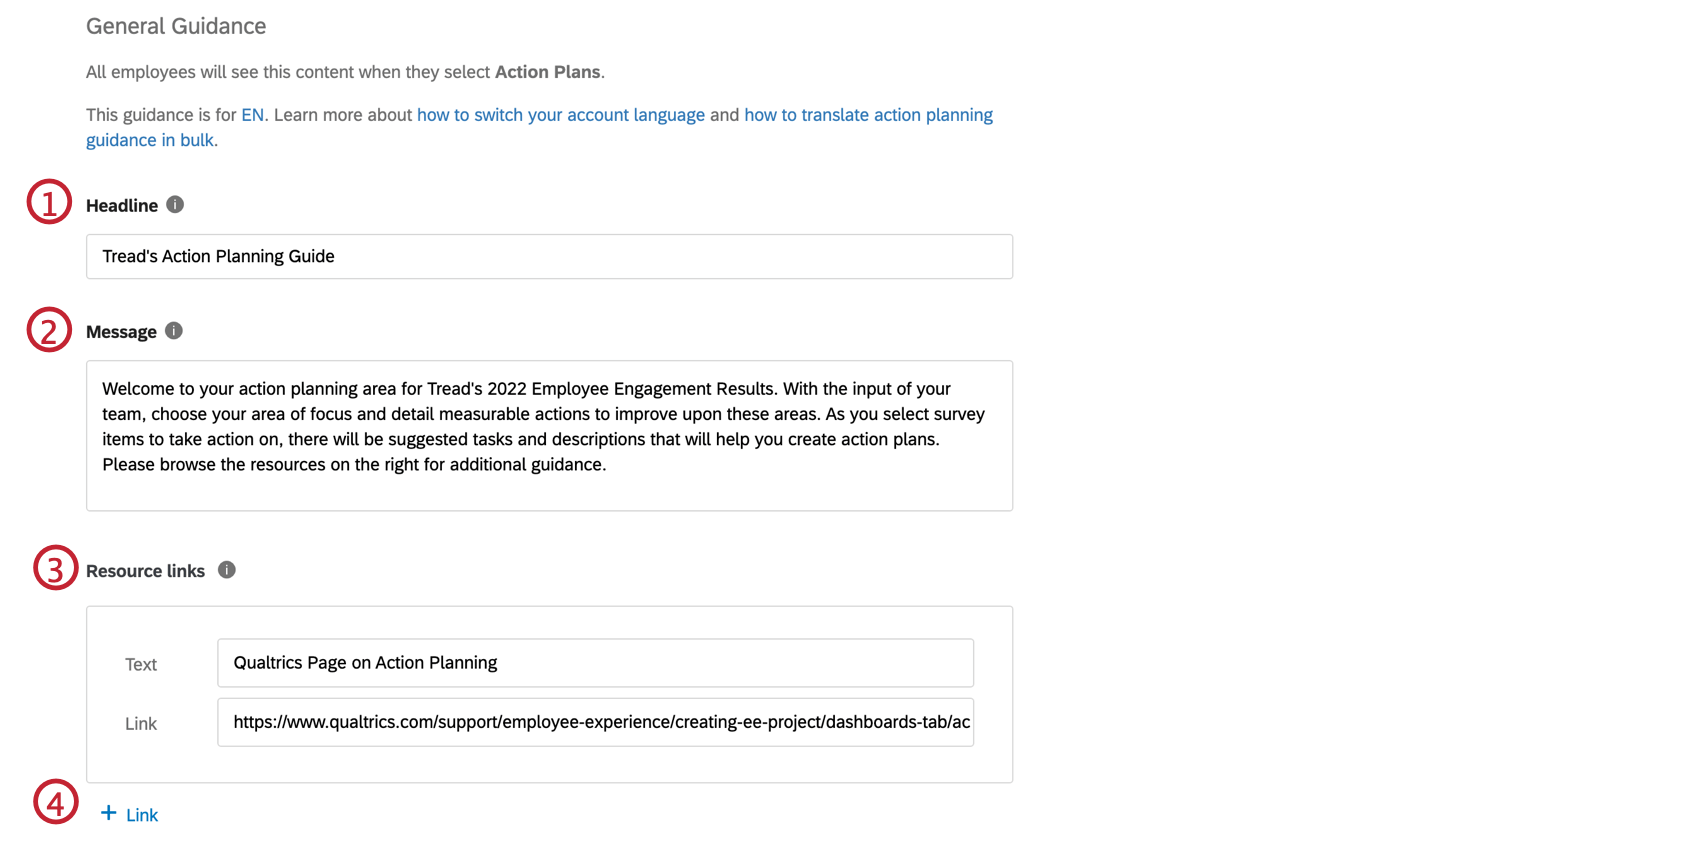
Qtip: This field does not obey line breaks, rich text, or HTML.
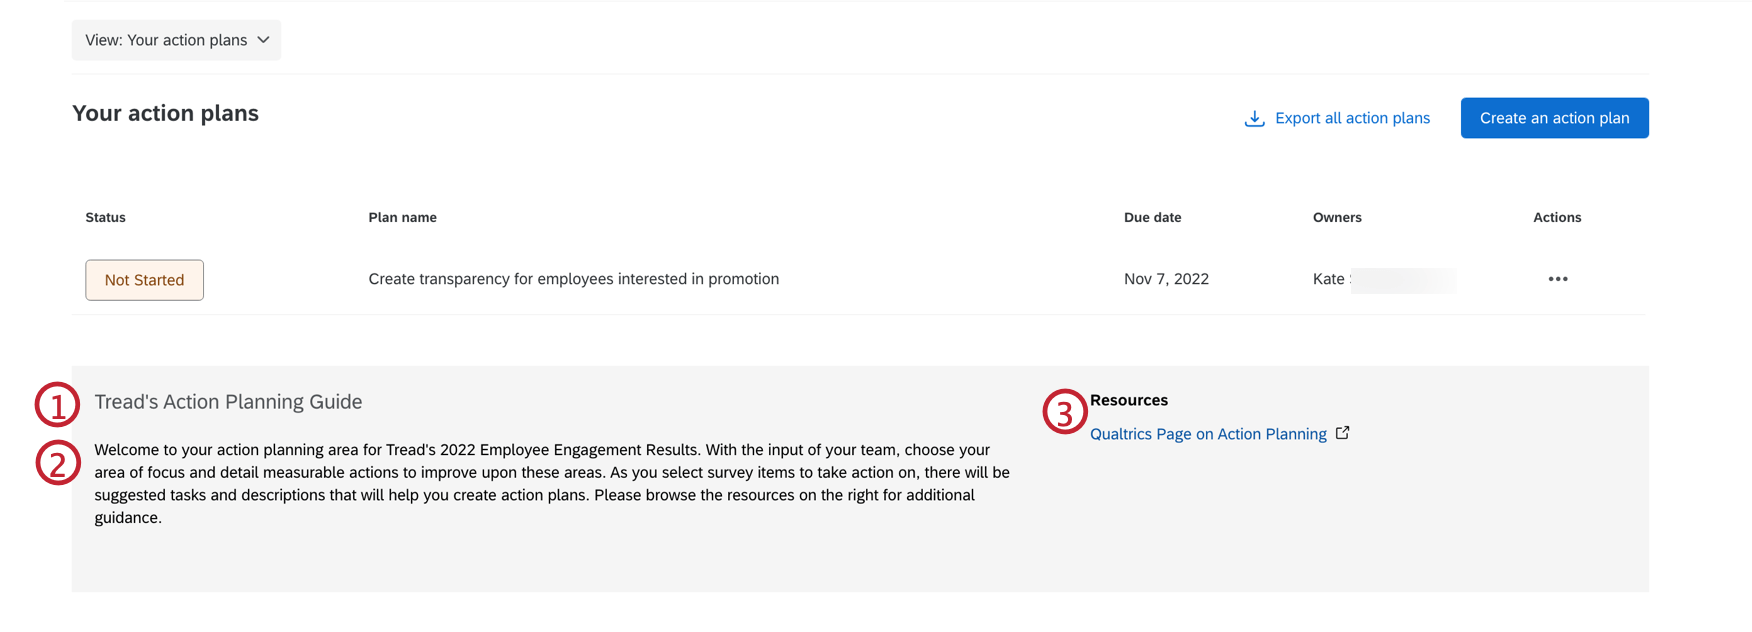
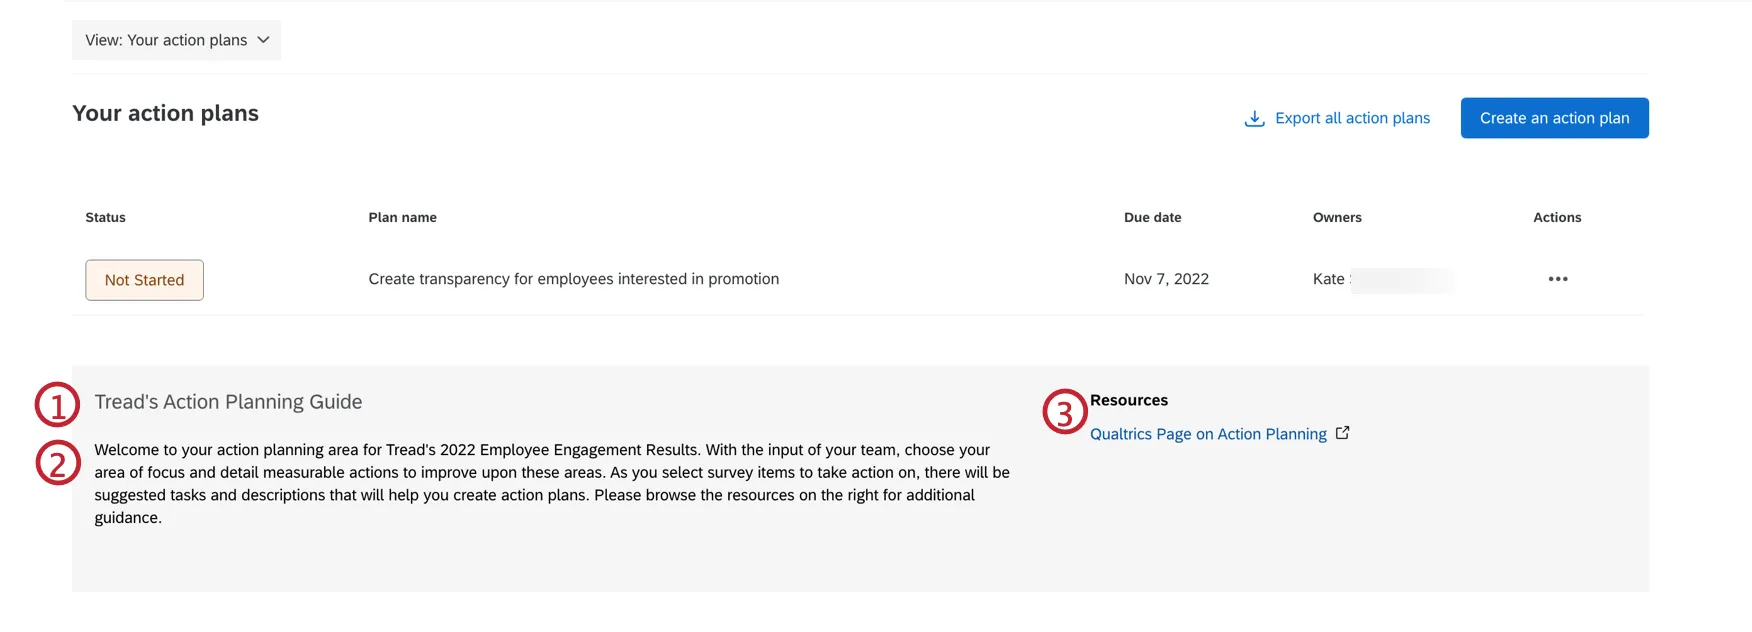
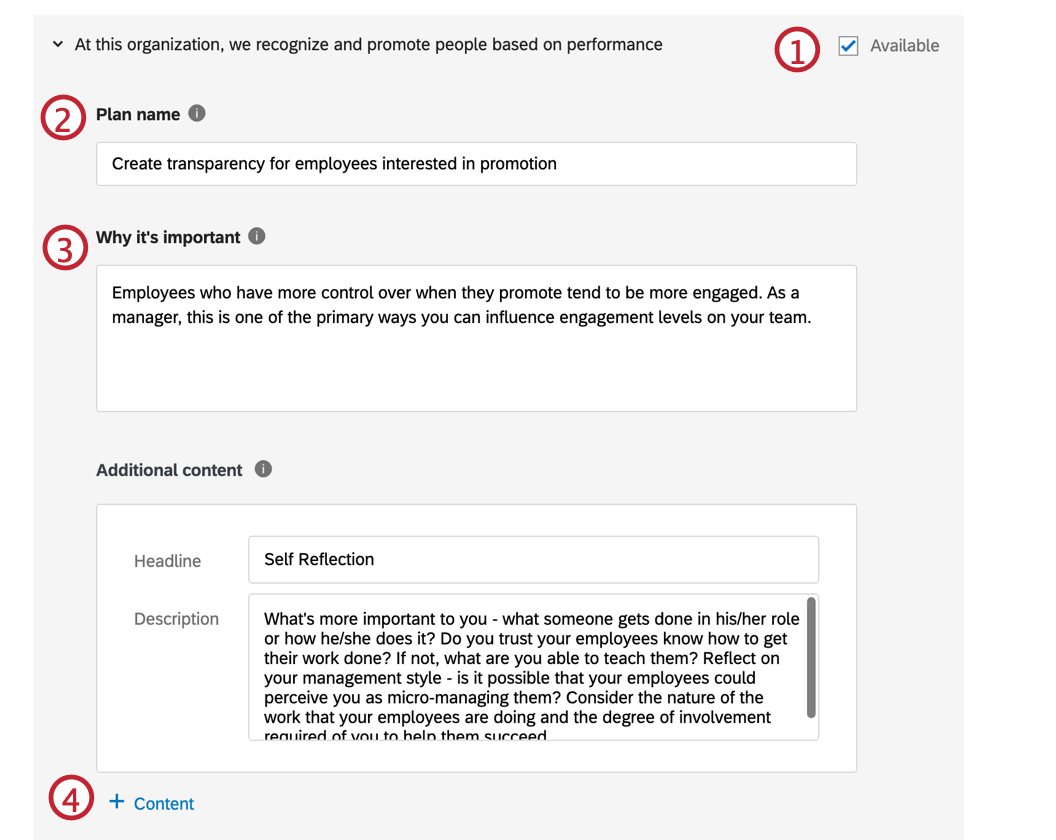
Here is what each of these fields looks like to your users, numbered the same as the steps they appear in.
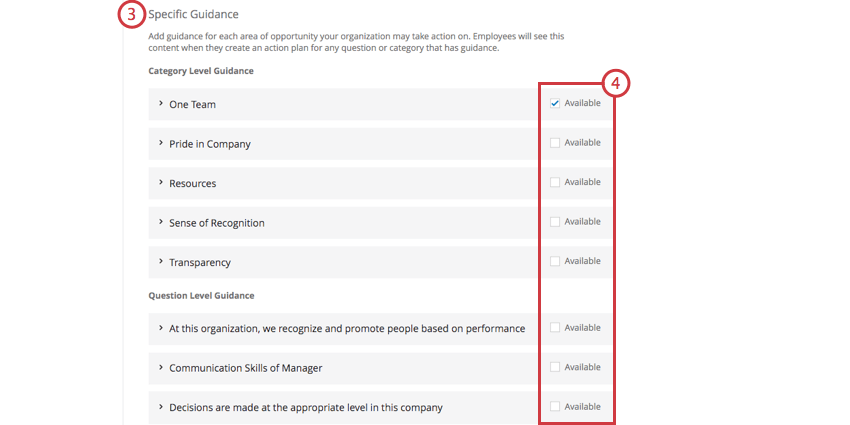
Specific Guidance
In the Specific Guidance section you can add guidance that the manager will see when they create their action plan. After the manager tags their action plan to a category or survey item, they will see the suggested actions, resource links, and other guidance you provide them in their action plan to help them create one. This section also allows you to manage what items from your survey data are available for action planning.
You can add specific guidance on the level of a category (Category Level Guidance) and/or survey questions (Question Level Guidance).
Qtip: Question Level Guidance can only be added for questions mapped as a Number Set field type.
Qtip: Each survey item can belong to multiple categories. If you choose to provide category-level guidance, you might want to make sure your survey items only have one category; otherwise, you’ll have to decide what guidance to provide on those survey items.
Qtip: If Available is unchecked, this means managers can’t add an action plan to that category or question. You may want to do this when the survey item isn’t something a manager can take action on or is outside of the manager’s control.
Qtip: This field is optional, but it will show when a manager adds an action plan from the Focus Areas widget, so we recommend adding one.
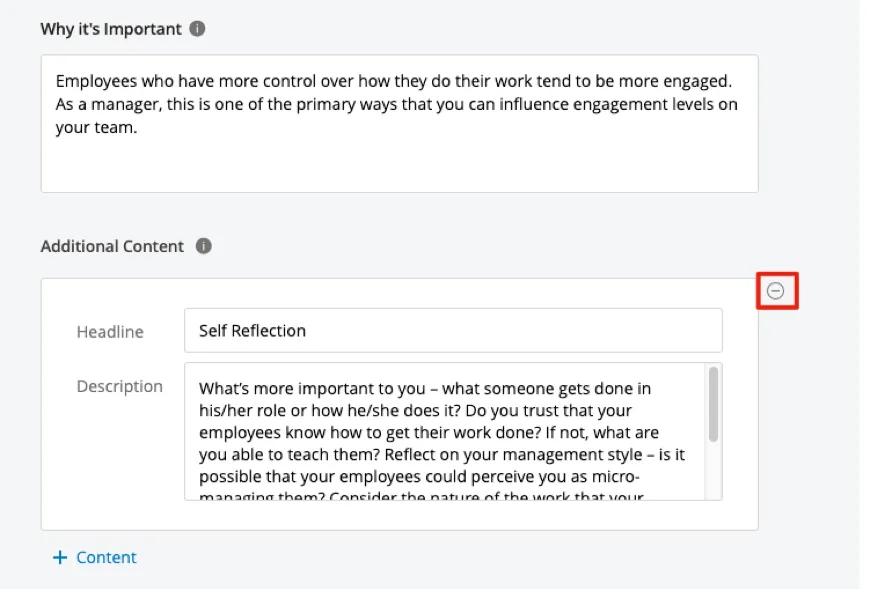
Qtip: After you create an action plan under this category / question, this content appears on the right under the importance you wrote in Step 3.
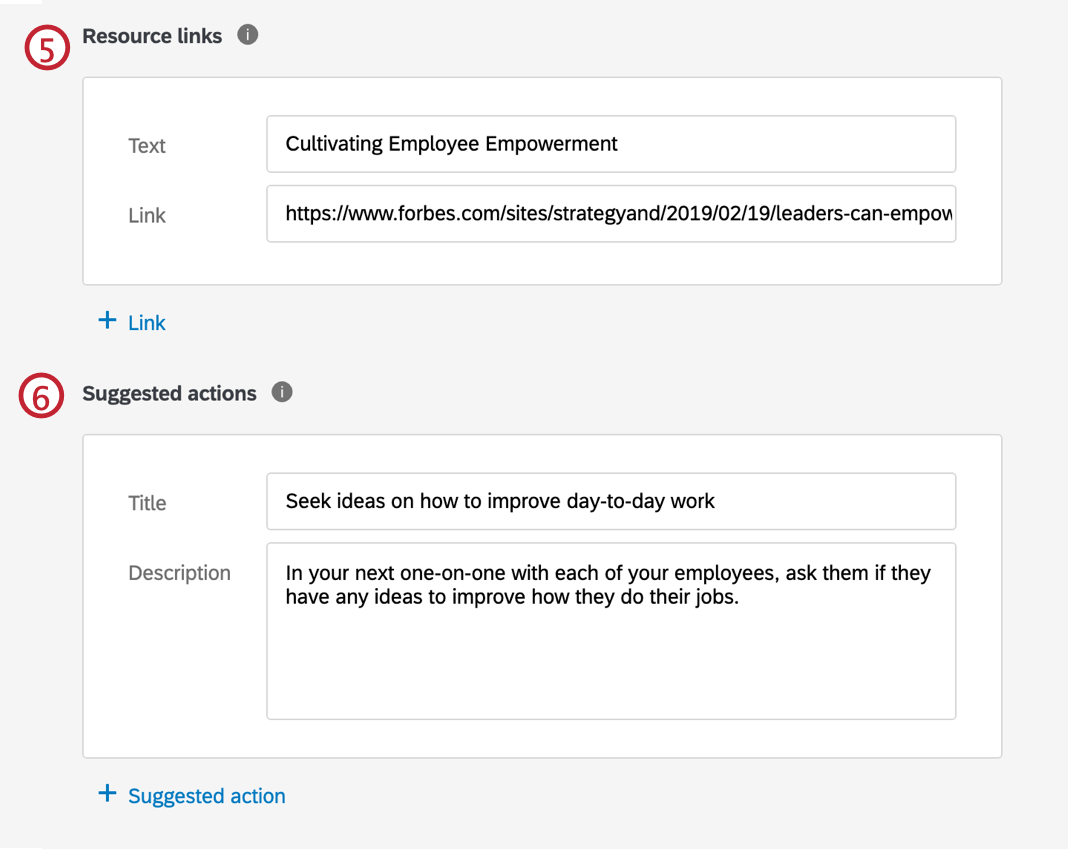
Qtip: Click + Link to add another link.
Qtip: Click Suggested action to add another suggested action.
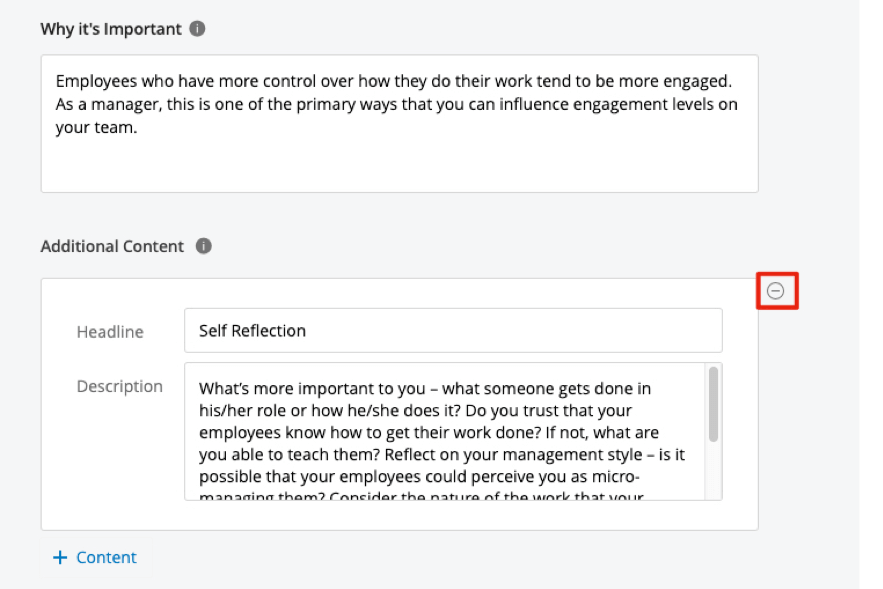
Qtip: Hover over any content, suggested action, or resource link and click the minus sign ( – ) to delete it.
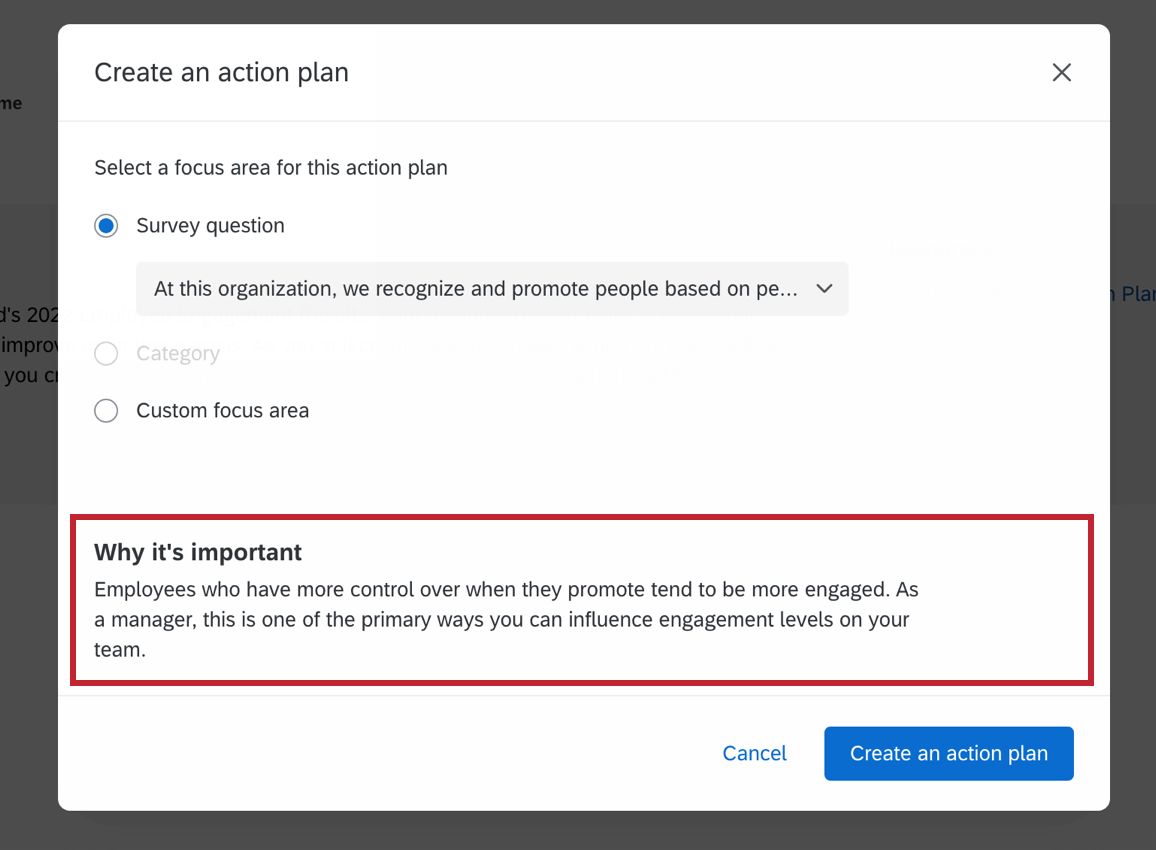
Here is what specific guidance looks like when you’re creating an action plan.
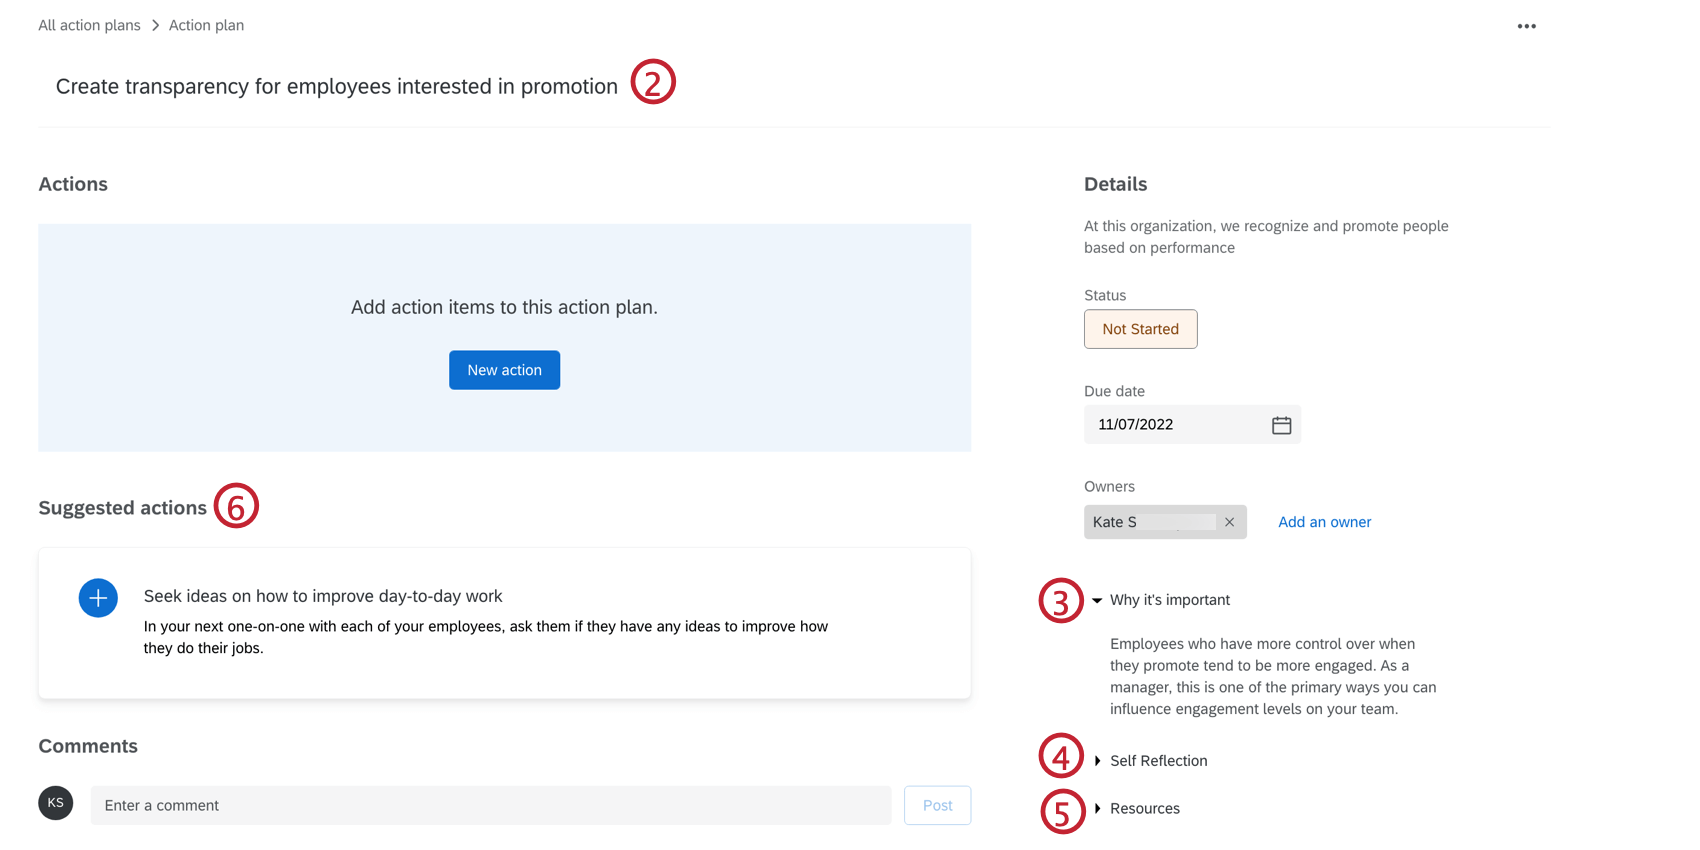
Here is what each of the fields look like after you have created an action plan, numbered the same as the steps they appear in.

That's great! Thank you for your feedback!
Thank you for your feedback!