Loading...
Skip to article
  • Qualtrics Platform
    Qualtrics Platform
  • Customer Journey Optimizer
    Customer Journey Optimizer
  • XM Discover
    XM Discover
  • Qualtrics Social Connect
    Qualtrics Social Connect

Dashboard AI Settings (EX)


Was this helpful?


This site is protected by reCAPTCHA and the Google Privacy Policy and Terms of Service apply.

The feedback you submit here is used only to help improve this page.

That’s great! Thank you for your feedback!

Thank you for your feedback!


About EX Dashboard AI Settings

Attention: This page describes functionality that is only available to the following Employee Experience projects: Engagement and Frequent Pulse projects.

The Dashboard AI section of your dashboard settings enables you to control the AI capabilities of your dashboard. Each feature can be individually enabled or disabled to customize the AI features available to your dashboard users.
The "Dashboard AI" section of dashboard settings

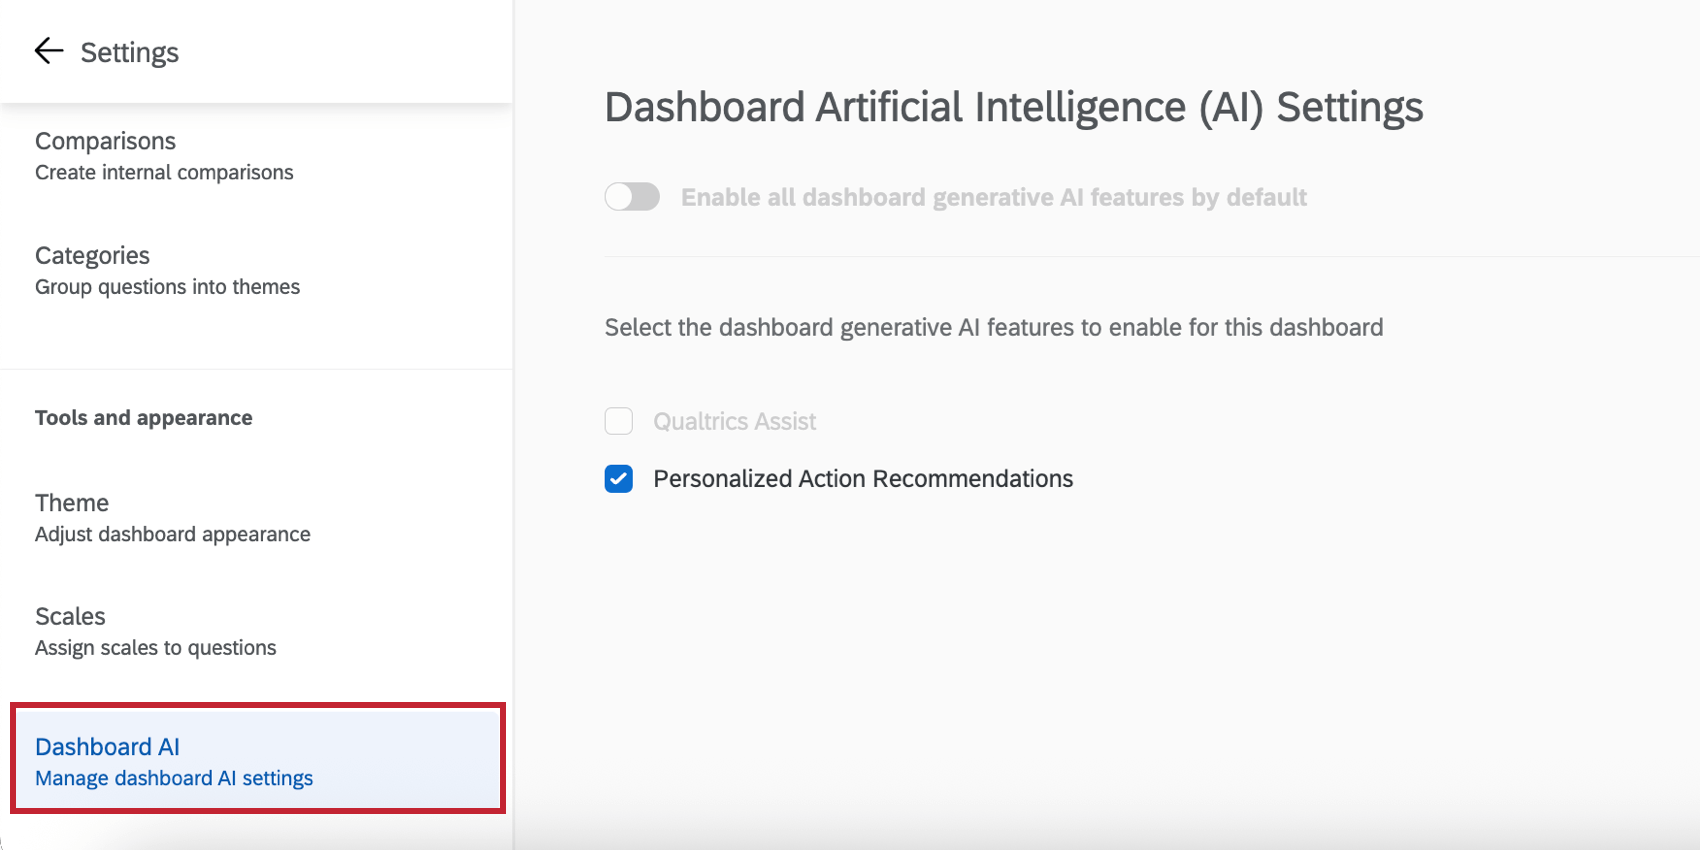
Enabling EX Dashboard AI Capabilities

You can enable and disable the following AI features in your dashboard:
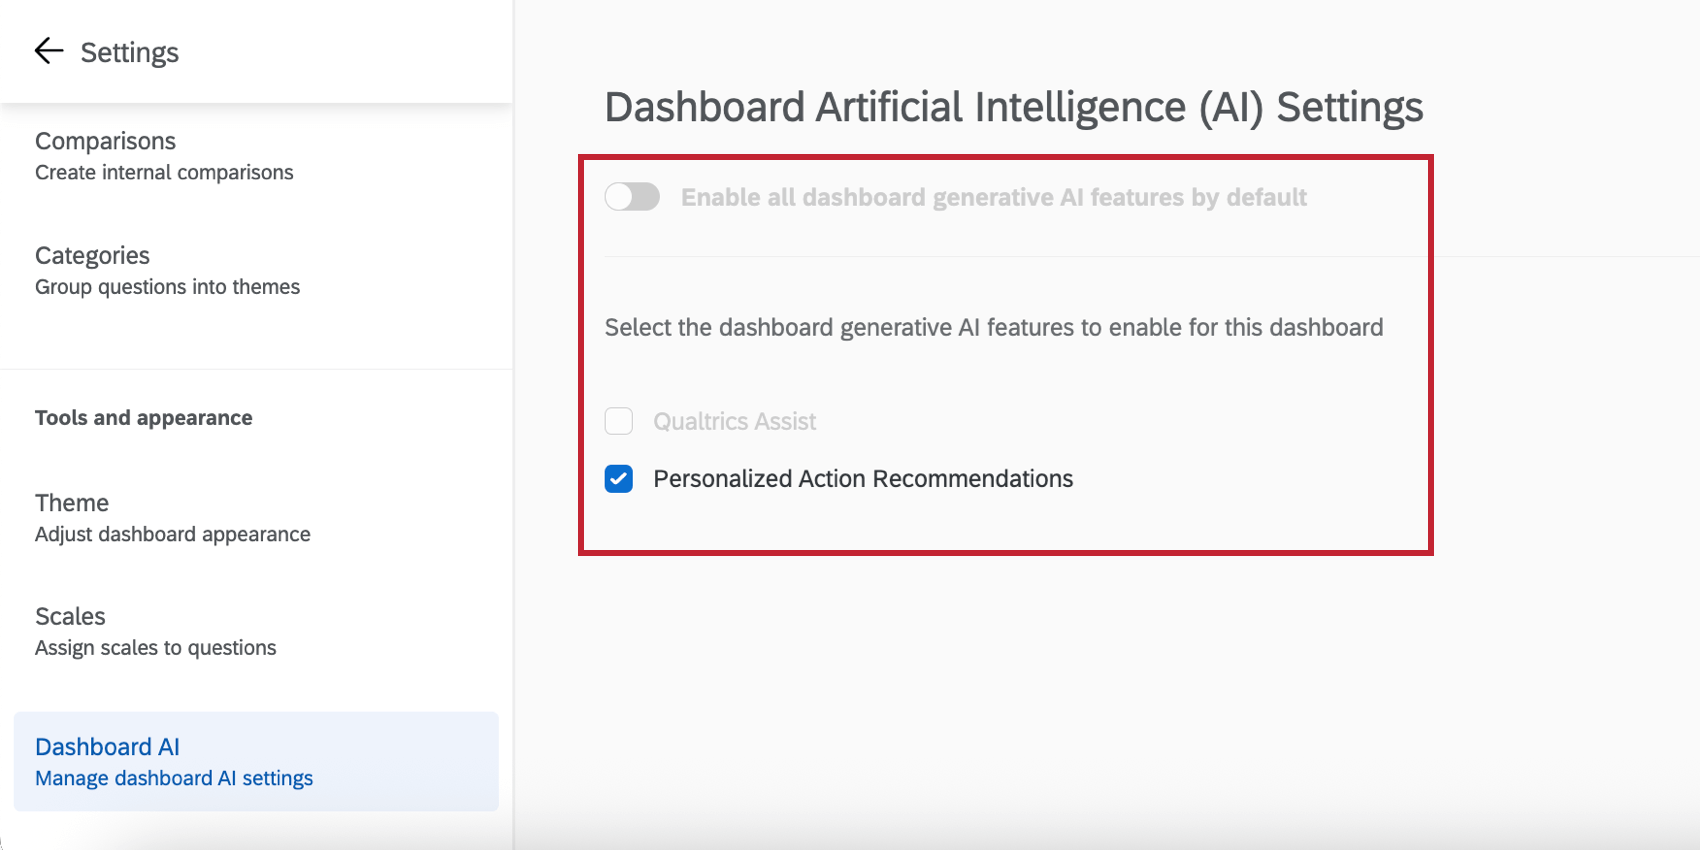
enabling and disabling different AI features in an EX dashboard

Qtip: If desired, you can turn on Enable all dashboard generative AI features by default. All features will be enabled and any future ones will be automatically enabled. You can only select this option if you have access to every AI feature listed here. If your user permission for a feature is disabled, then you will not be able to enable it here.
Qtip: Access to the AI-powered comment summaries widget is controlled at the organization-level instead of at the dashboard-level.

Qualtrics Assist

Qualtrics Assist is a dashboard assistant that uses AI to guide managers, HR analysts, and company leaders through every stage of results analysis.

See the Qualtrics Assist (EX) support page for in-depth information on how to use Qualtrics Assist in an EX dashboard.

Personalized Action Recommendations

Qtip: This section describes functionality that we intend to release starting July 23, 2025. Qualtrics may, in its sole discretion and without liability, change the timing of any product feature rollout, change the functionality for any in preview or in development product feature, or choose not to release a product feature or functionality for any reason or for no reason.

Have you ever received EX results and been unsure about how to make a meaningful impact? Personalized action recommendations use AI to help managers and leaders identify areas of improvement, take action, and understand the impact on their team. This is accomplished by  analyzing survey scores, open-text comments, and profile information to deliver data-driven suggestions specific to each team’s context. Additionally, personalized action recommendations leverage your organization’s established practices and resources already within your dashboard’s Guided Action Planning to provide highly relevant and tailored suggestions that align with your company’s strategy.

To use personalized action recommendations, your dashboard must have the following:

Follow these steps to use personalized action recommendations in your dashboard:

  1. Make sure the Personalized Action Recommendations option is enabled in the Dashboard AI settings.
  2. Navigate to the widget (scorecard, question list, or engagement headlines) that contains the opportunity area you’d like to base recommendations on.
  3. Click Generate recommendation.clicking "generate recommendations" in an engagement headlines widget
    Qtip: If this button says “Improve” instead, then personalized manager action recommendations is disabled in the dashboard settings. Contact the dashboard owner to request it be enabled.
  4. Click Get started.clicking "Get Started"
  5. Qualtrics will generate a personalized 4-question multiple-choice survey to help better understand your team context. This survey is generated based on your survey scores, open comment responses, and survey response count. You can select multiple answers for each question.filling out the survey to generate tailored recommendations
    Qtip: If desired, you can skip the survey by clicking View recommendations without personalizing, but this is strongly discouraged. The personalization questions help ensure your recommendations are as targeted as possible.
  6. Click Next to continue through and complete the survey. Your recommendations will generate, which may take a minute.
  7. Once the recommendations are generated, you’ll see an overview of your selected opportunity area, its benchmark scores, and an explanation of why the area is important.reviewing the selected area of opportunity
    Qtip: Recommendations are lost if you refresh or navigate away from this page. To save specific recommendations, either download them as a PDF or add them to your action planning or idea boards (covered in the following steps).
  8. Below this are 3 action recommendations designed to provide actionable steps to improve the opportunity area. Click Add next to any recommendations you’d like to use in an action plan or idea board.reviewing and selecting the recommendations you'd like to keep
    Qtip: To generate additional guidance for a recommendation, click Get more details to open a side panel with step-by step-instructions on how to implement this recommendation. Please note that these additional steps do not transfer to action plan or idea boards, so if you’d like to keep them, click the Download as PDF button at the top of the side panel.clicking "get more details" to learn more about a recommendation
  9. If desired, you can export your 3 recommendations by clicking Download as PDF.
  10. The What your team is saying section provides an overview of your team’s feedback regarding this opportunity area.
  11. The Resources from your company contains any resource links that were added as part of guided action planning, if they are available.
  12. You can give feedback about your recommendations by using the thumbs up/down icons at the bottom of the page.
  13. Click Add to action plan or idea board once you’ve selected the recommendation(s) you’d like to keep.
  14. Choose if you’d like to add the recommendations to an idea board or to create a new action plan. Depending on your user permissions and dashboard access, you may only have access to one of these.adding the recommendations to an idea board or action plan
  15. Click Add.
  16. You’ll see a confirmation message that your recommendations have been added. Click View action plan/View idea board to be brought to the recommendation. You can then edit and update it like any action plan or idea.the confirmation message after a recommendation has been successfully added
    See the following pages for additional guidance:

Qtip: If you see a “Something went wrong” error, then please try generating recommendations again later.