-

Qualtrics Platform -

Customer Journey Optimizer -

XM Discover -

Qualtrics Social Connect
Importing Responses (EX)
About Importing Responses
You can use the Import Data option in the Data & Analysis tab to upload test or example data, or to upload data collected externally.
Qtip: This page is for importing response data into Employee Experience projects.
- If you are importing response data for the purpose of mapping historical sources to your dashboard, make sure you also check out Uploading Historical Data.
- If you want to import anonymous responses, see the Importing Anonymous Responses section.
- If you are interested in learning how to import your list of participants, please visit our Adding Participants support page.
Preparing & Importing Your Data
You will need to make sure your data file is ready for import. Your data needs to be in a format Qualtrics will understand, and it needs to exactly match the format and content of the survey you’re importing the data into.
Getting a Template File
- Navigate to your Data & Analysis tab.
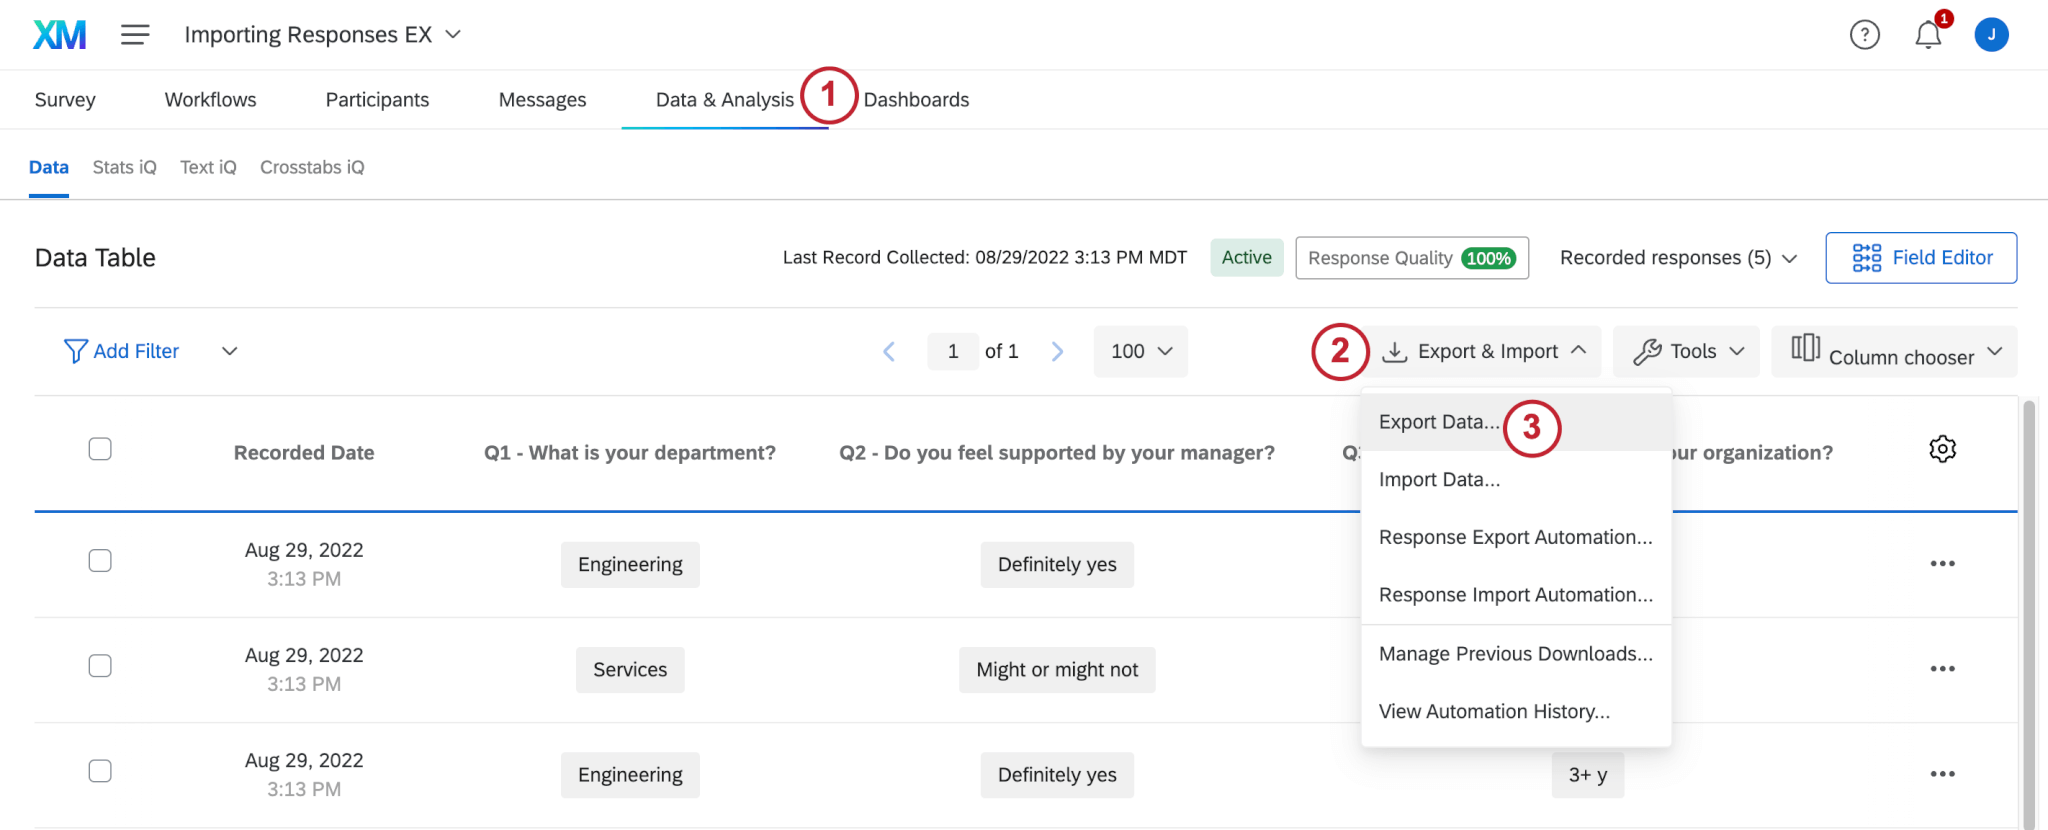
- Click Export & Import.
- Select Export Data.
- Make sure CSV or TSV is selected.
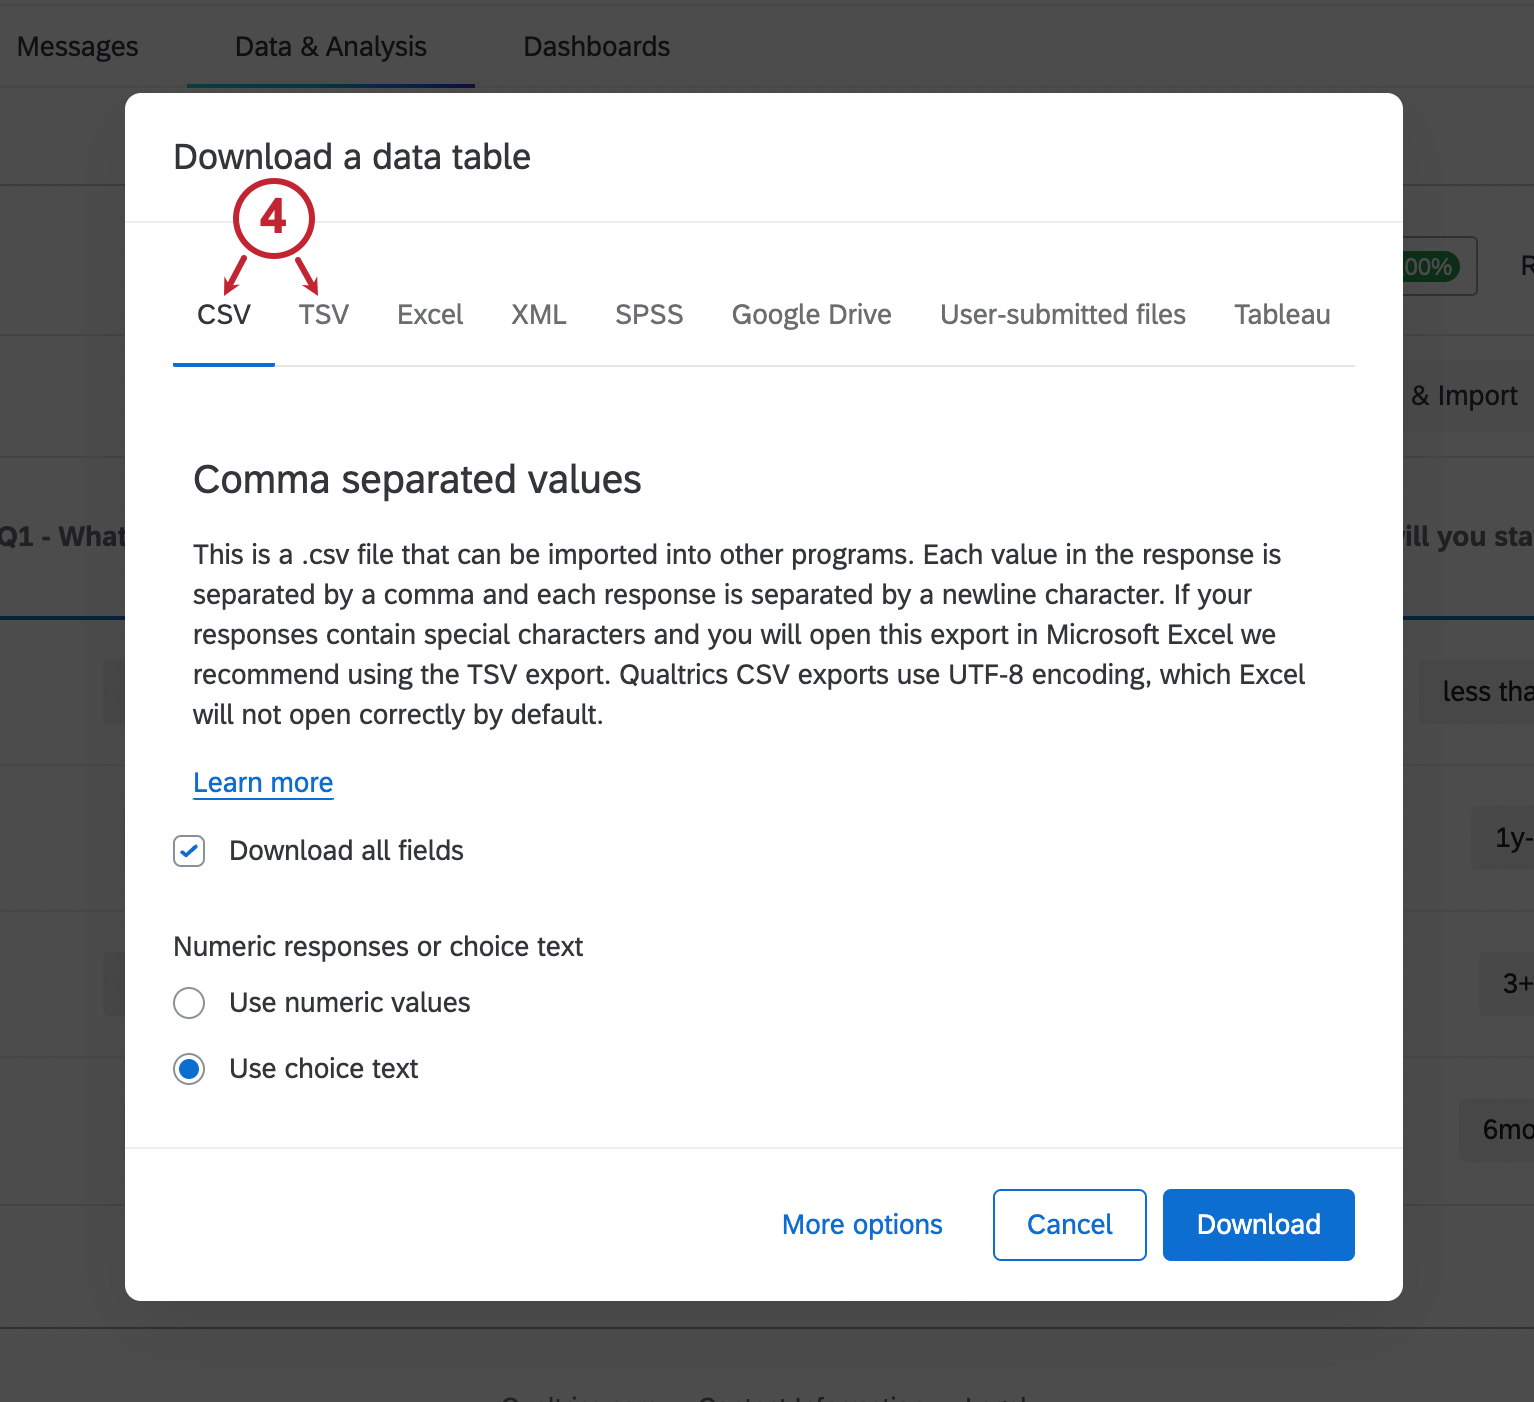
- Click Download.
File Requirements
For the import to work, the data file needs a special column that identifies the participant the response is from. You’ll notice that the file you exported has a column for the Participant’s Unique Identifier. As the name implies, you must include each respondent’s unique identifier in this column in order to pair the survey answers with the appropriate employee.
The inclusion of this column also makes it so you don’t need to include metadata in your import. The importer recognizes the participant’s unique identifier, and associates the appropriate participant metadata with the response. Any metadata you try to include in this file – manager ID, location, department, participant email, parent unit, etc. – will be ignored. Instead, all metadata for the participant will be imported from their entry in the employee directory.
Be sure to keep your file in CSV, TSV, or TXT format. The importer cannot read any other file types, even if they can also be read by Excel.
Note that the maximum file size is 100MB.
Importing Your Responses
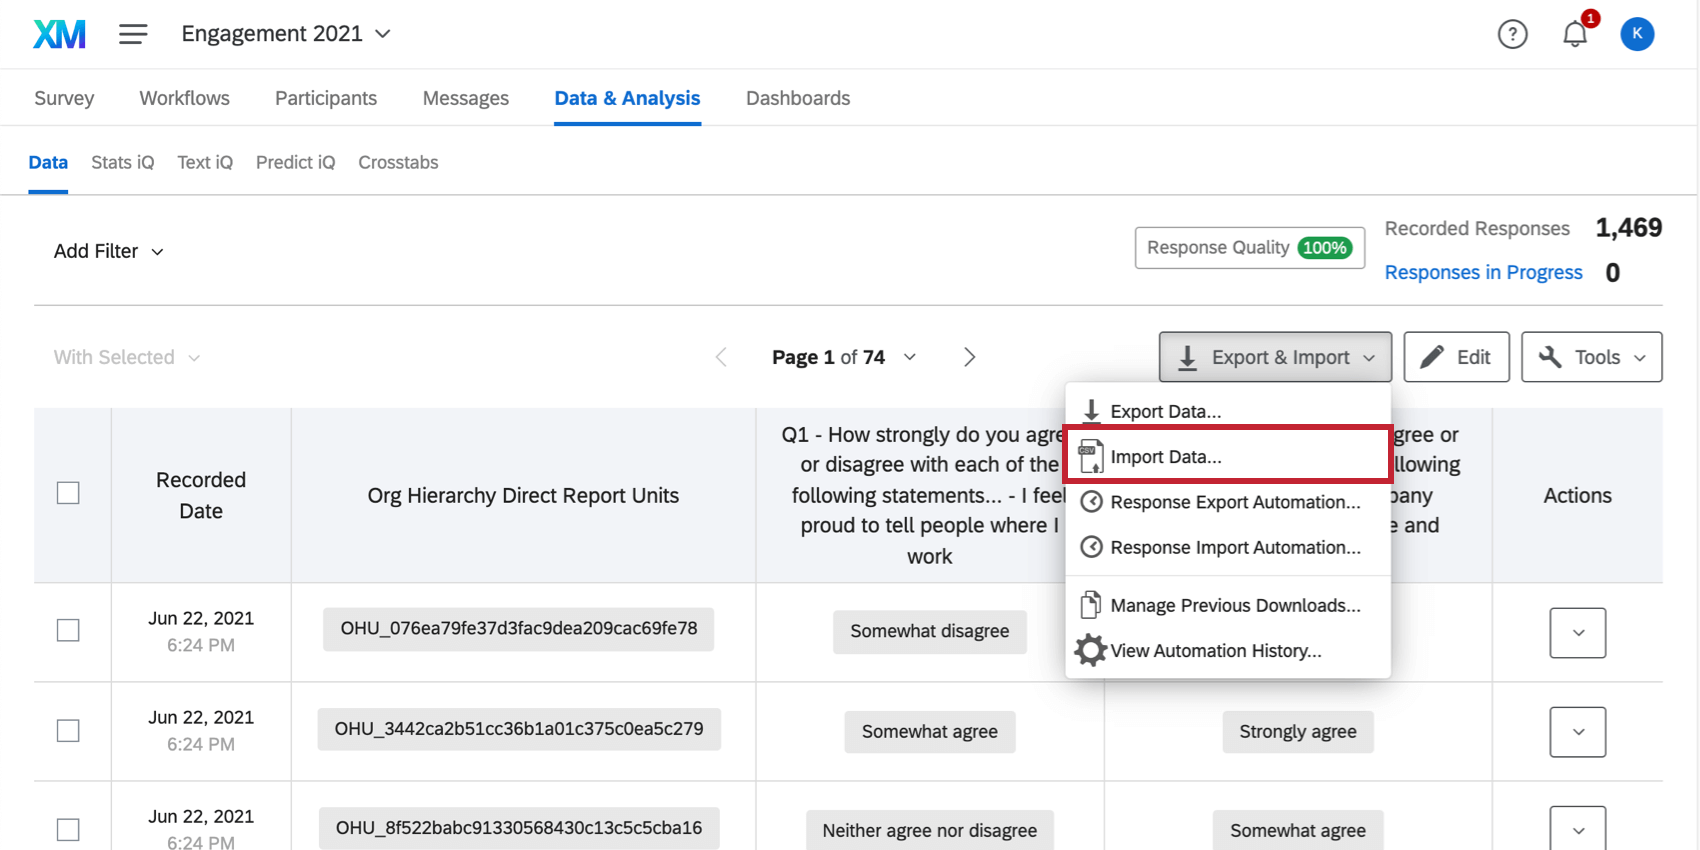
- Navigate to the Data & Analysis tab.
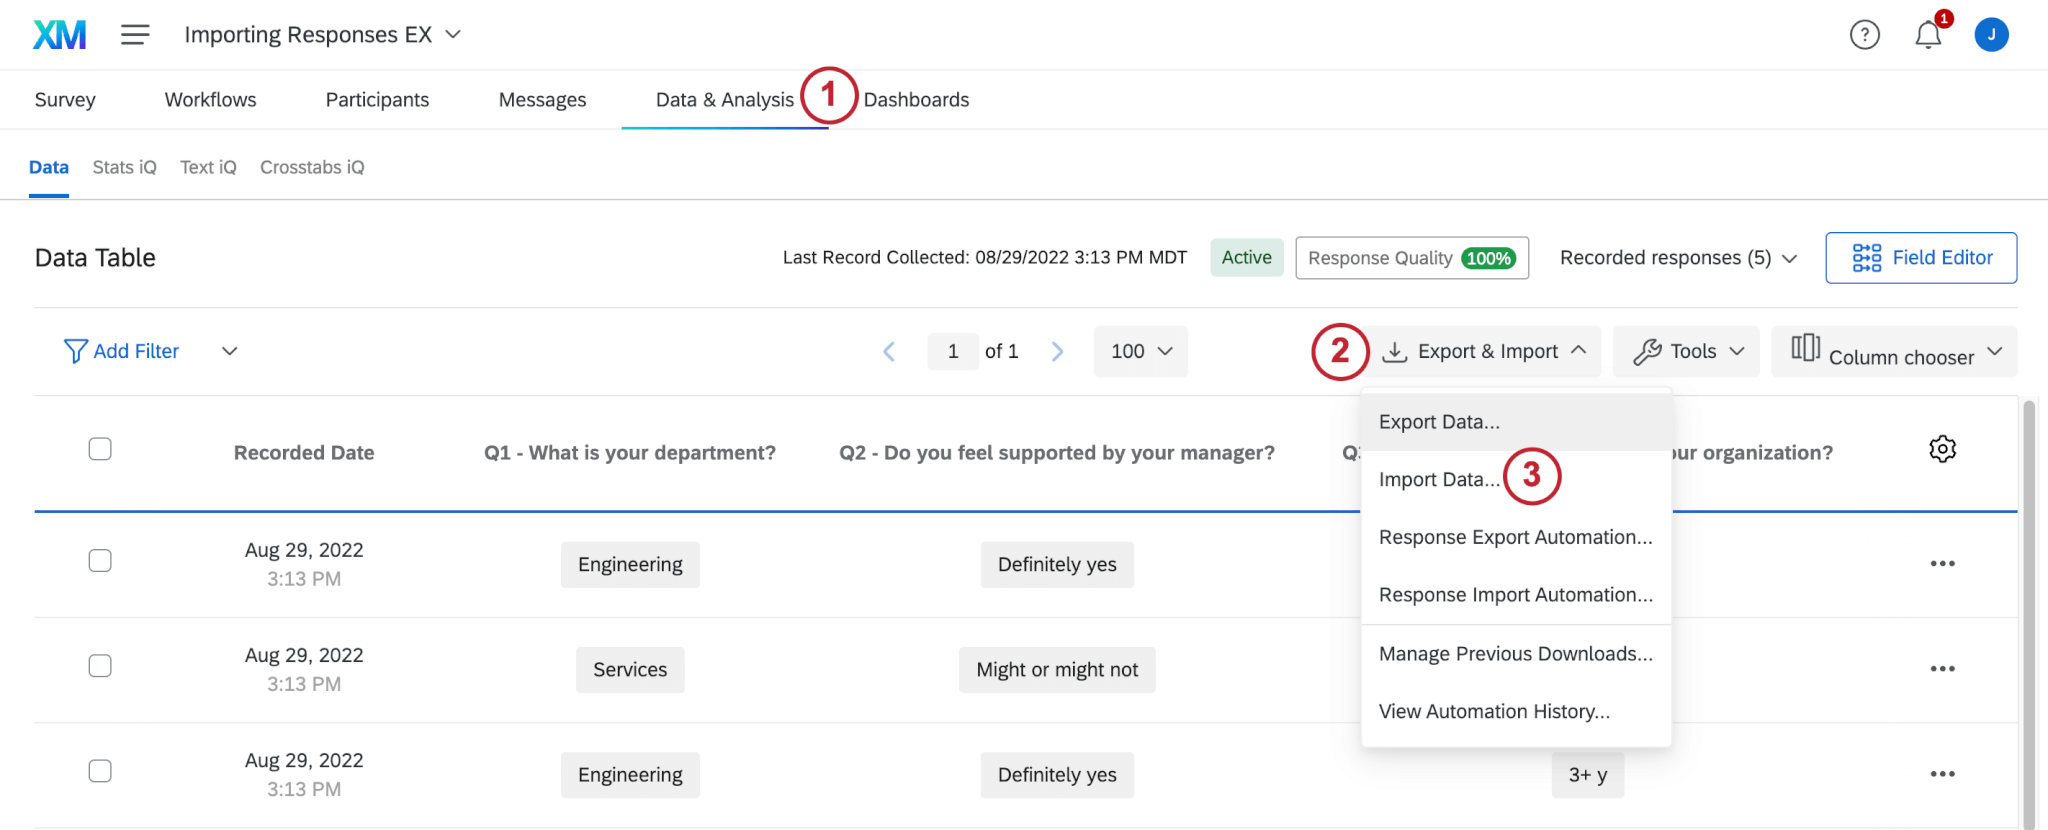
- Click on Export & Import.
- Select Import Data.
- Click Choose file and select the file you wish to upload. This can be in CSV or TSV format. Once a file is chosen, you will also be able to set the delimiter. This is usually comma for CSV and tab for TSV.
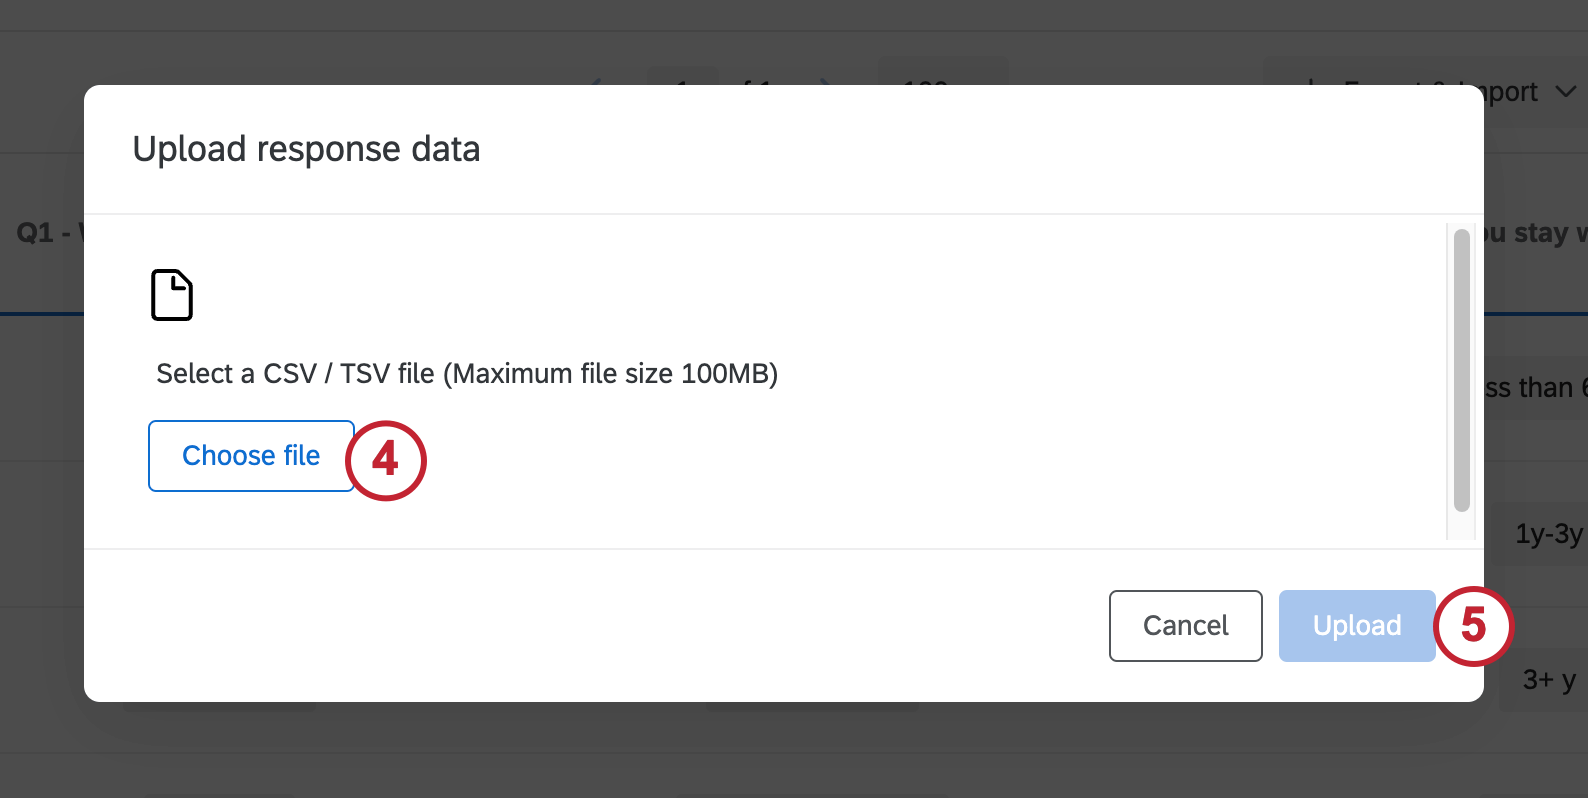
- Click Upload.
- On this window, you can check whether your fields are pulling in correctly and assign different values. See Configuring Your Import on the Survey Platform support pages for more information on this part of the process.
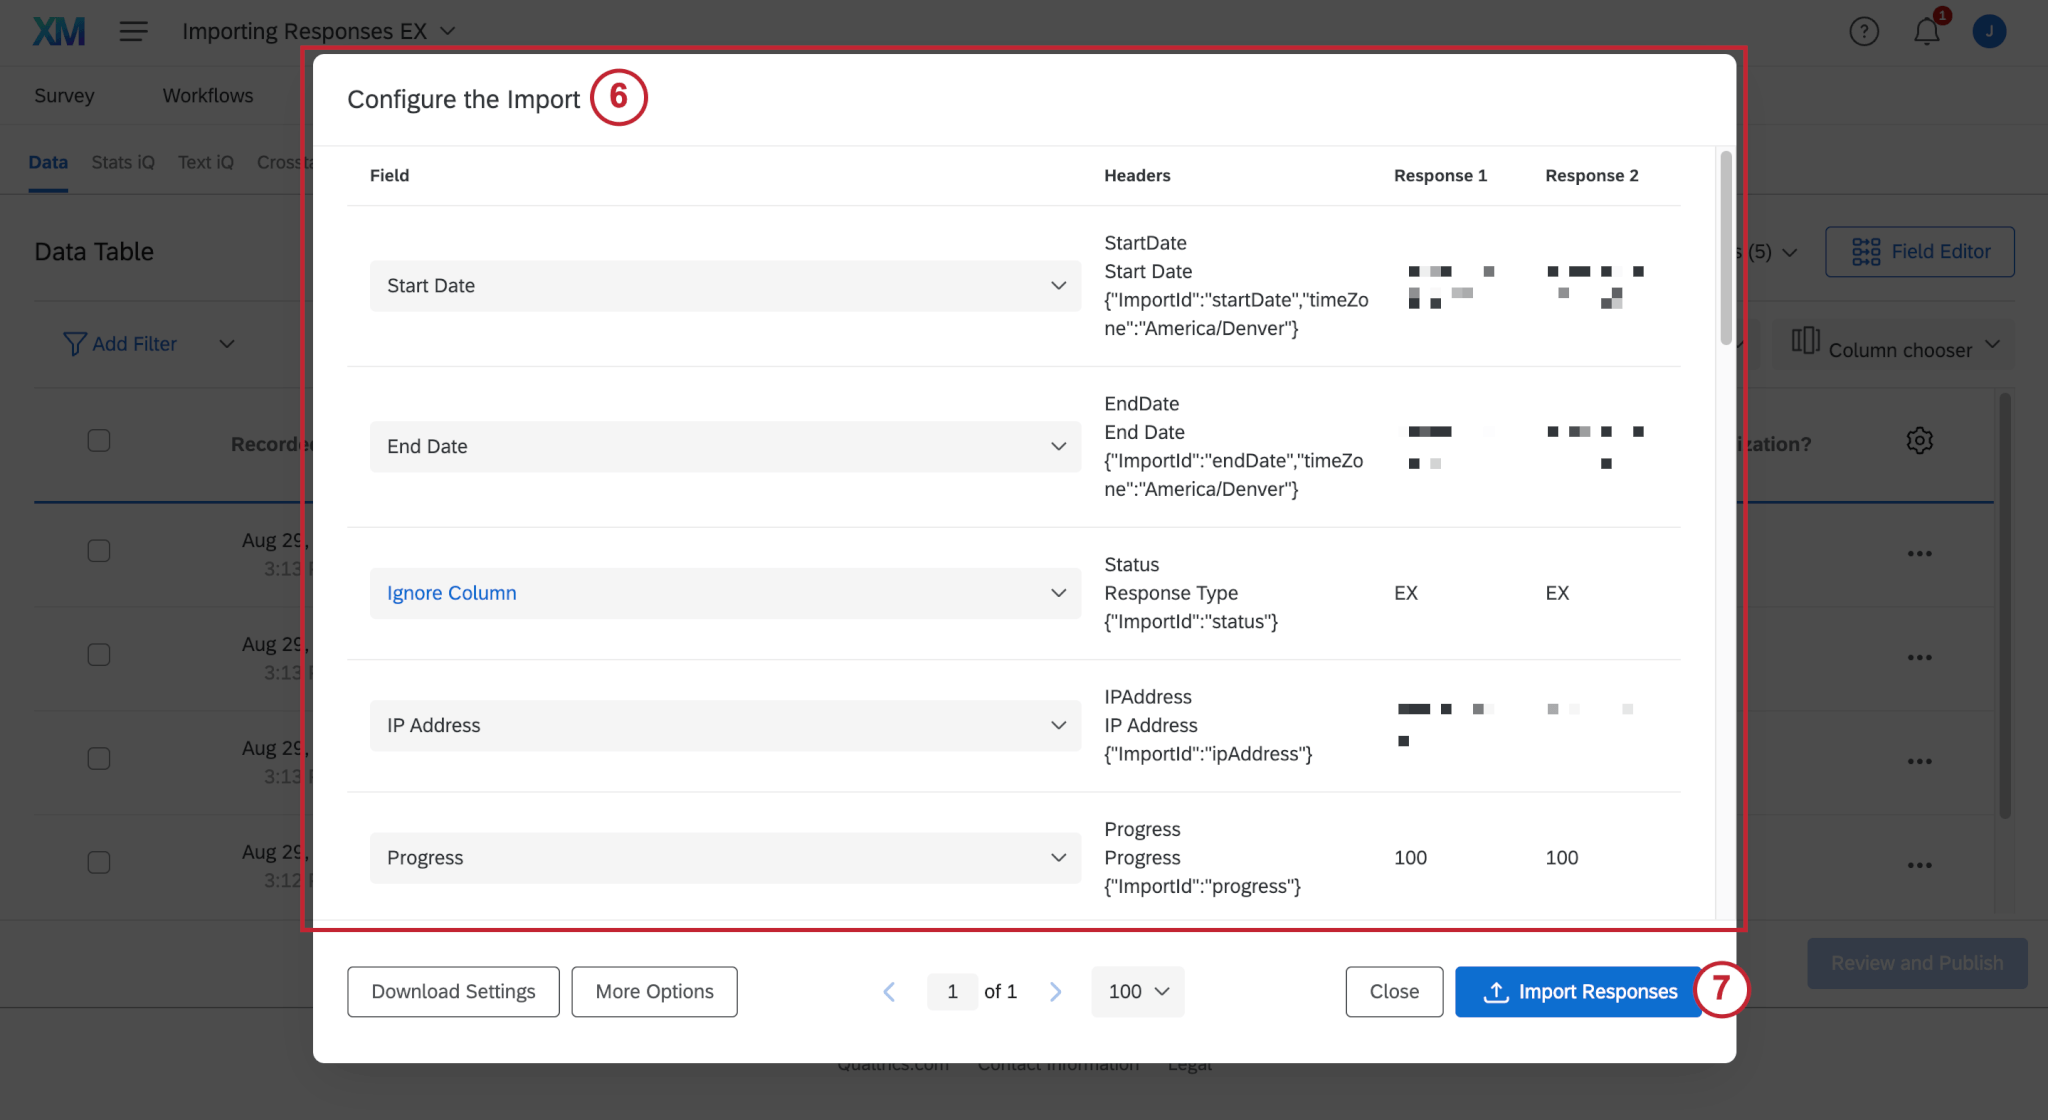
- Click Import Responses.
Importing Anonymous Responses Connected to a Hierarchy
You can import anonymous responses that have been collected outside of Qualtrics into your Engagement project. You can also link these responses to a given unit in your Engagement project’s hierarchy.
Anonymous responses are not counted towards response rates. Anonymous responses can only be imported into Engagement projects on brands where unique identifiers are enabled.
- Create your engagement project.
- Add participants and create a hierarchy. Ensure this hierarchy contains each unit you’d like to import anonymous responses to.
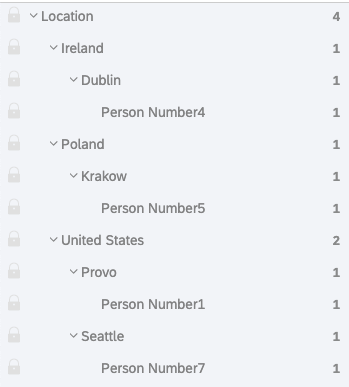
Attention: You must create a hierarchy before you can upload anonymous responses that are linked to that hierarchy. For projects with large numbers of anonymous participants, we recommend either basing a parent-child hierarchy on org unit IDs, or creating a level-based hierarchy.Example: We’ve populated our survey with just four participants, and created a level-based hierarchy that indicates their office location.
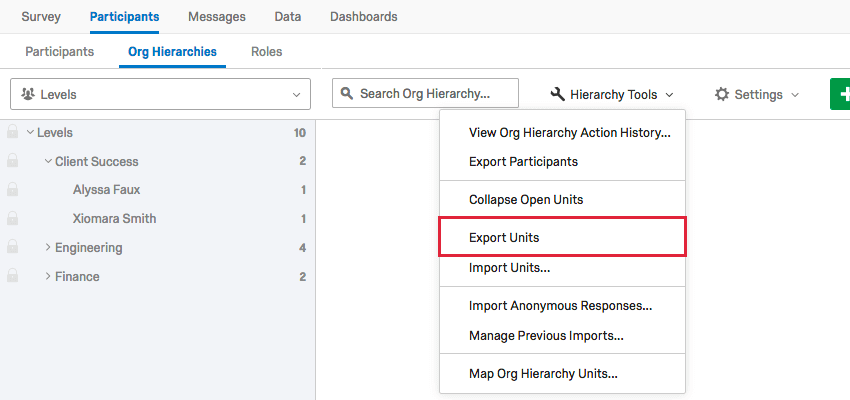
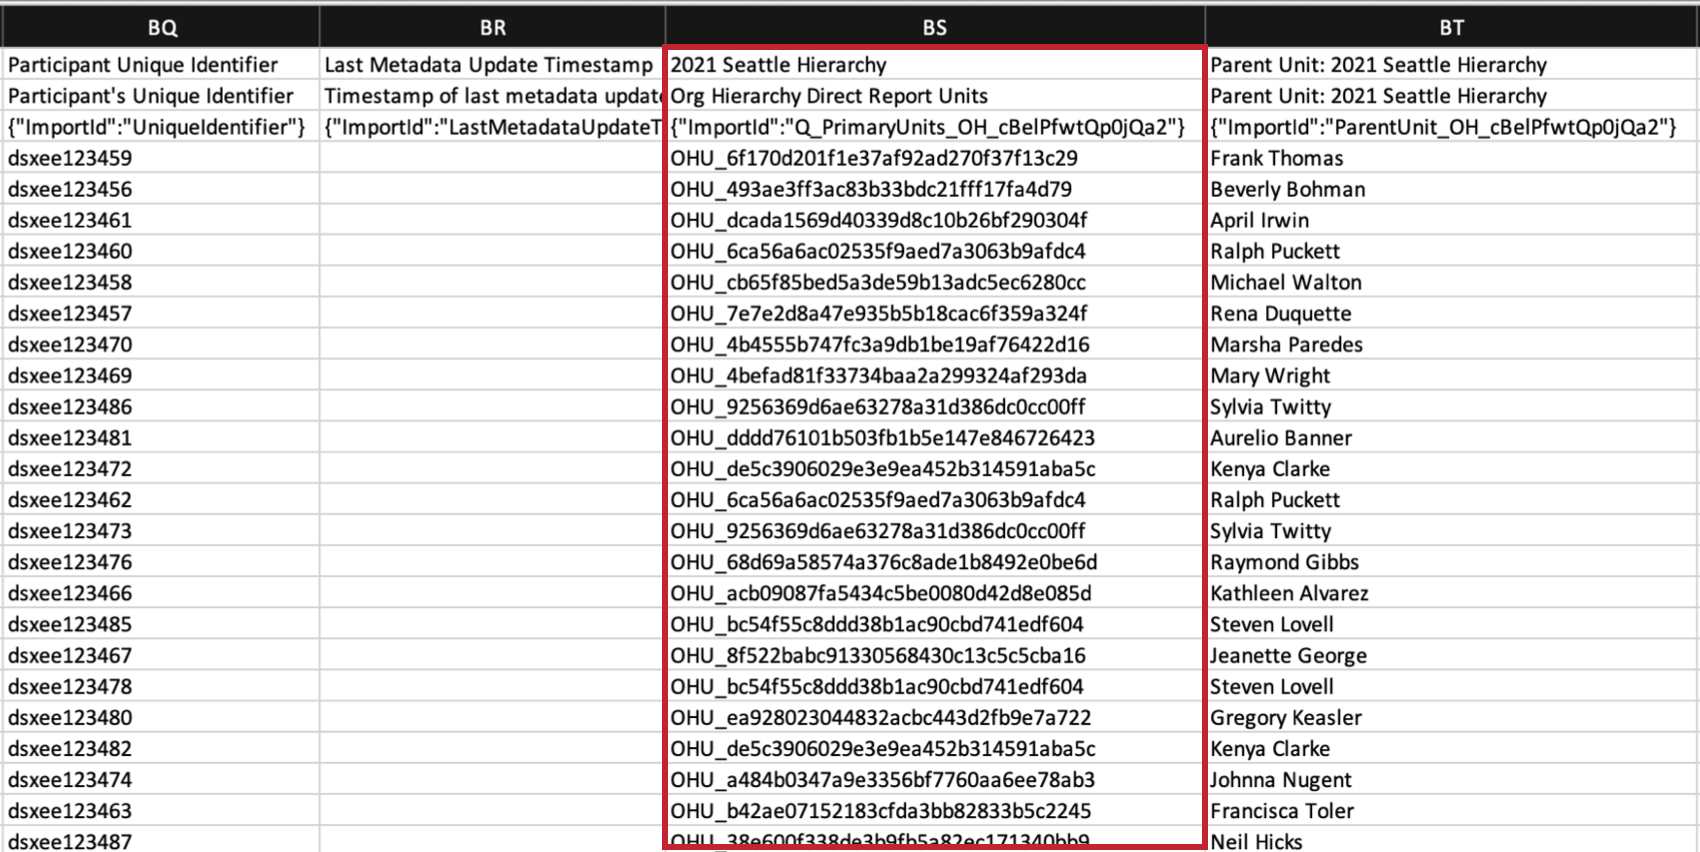
- Export your hierarchy’s units. This will serve as a reference when assigning hierarchy unit IDs to the anonymous responses.
- Go to Data & Analysis and export your engagement project’s data. This file will be the template file where you prepare responses for upload, not the file from Step 3.
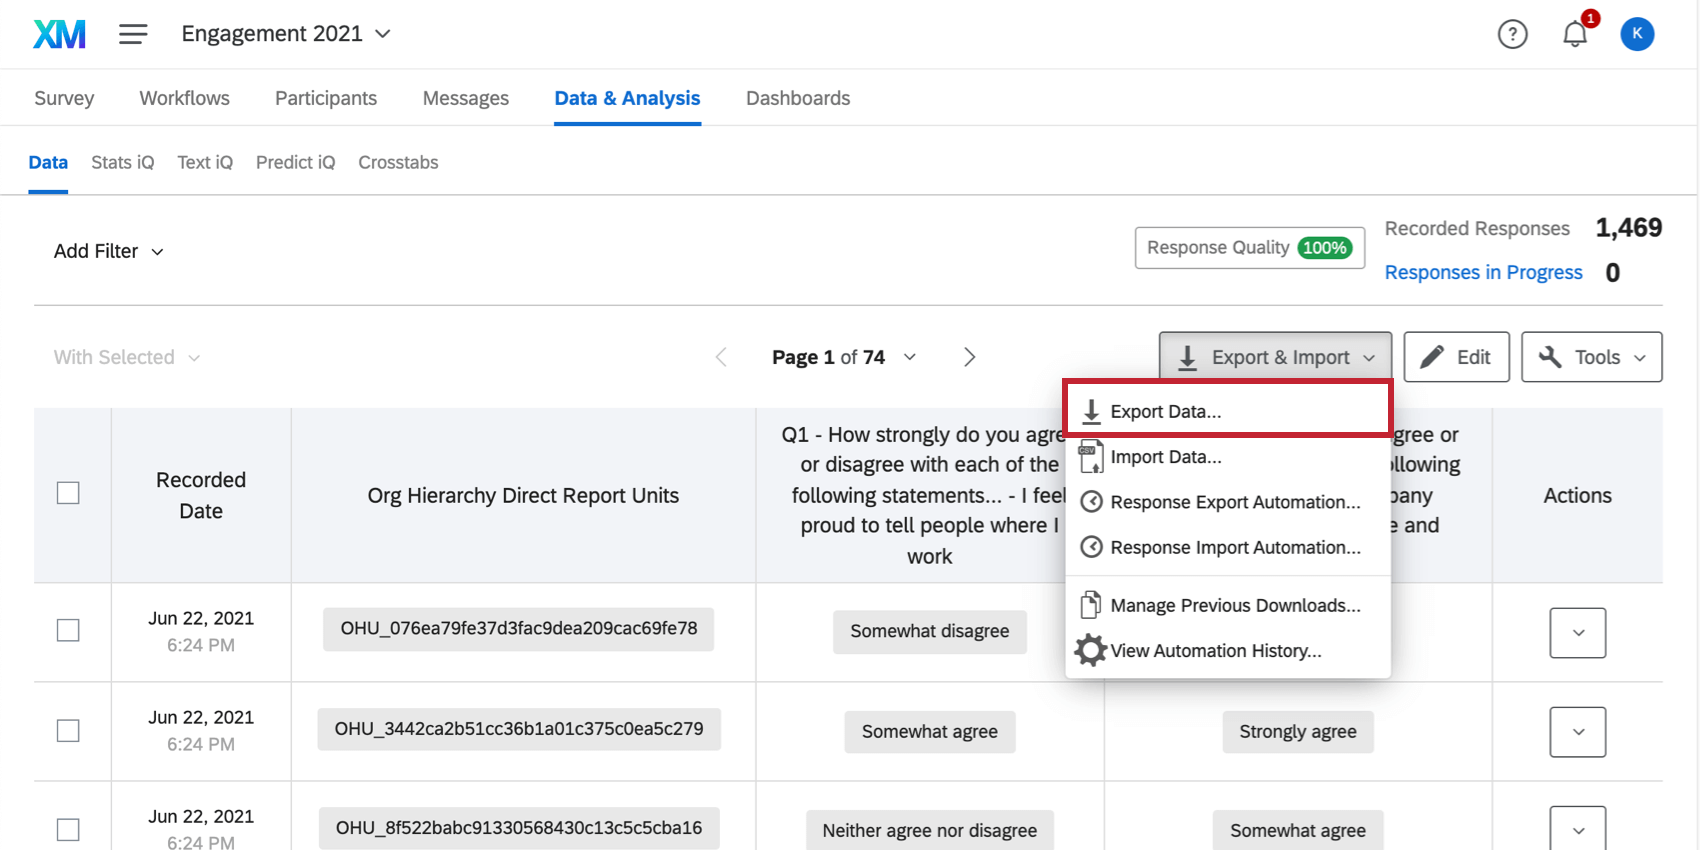
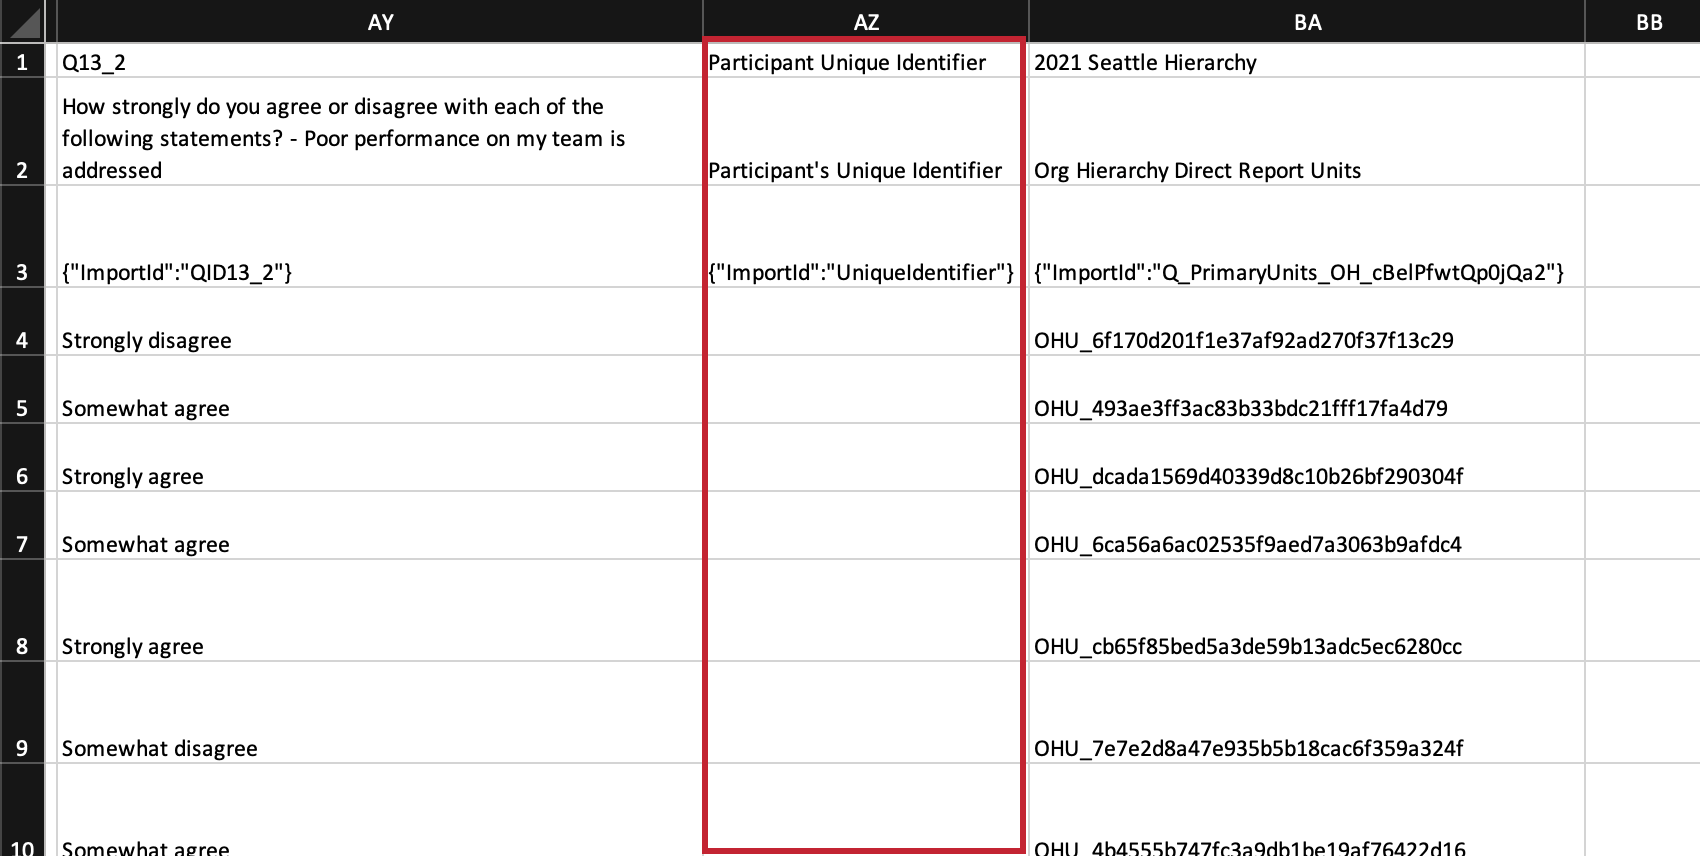
- Make sure the file you just downloaded from Data & Analysis has the column “Org Hierarchy Direct Report Units.” This name appears on the second row; the first row will display the name of your hierarchy.
 Qtip: Don’t see this column? No problem – just update responses with new metadata and export your file from Data & Analysis again.
 - In the “Org Hierarchy Direct Report Units” column, identify the participant’s unit by entering its internal ID. This will be in the style of OHU_XXXXXXX. If you’re unsure what a unit’s ID is, use the file from Step 3 as a reference point.
Qtip: Use unit IDs, not parent unit IDs.
- Keep the first three rows of your file. These will serve as your headers. Each row of the file after the headers corresponds to one anonymous response. Add each respondent’s answers to the corresponding columns of data.
- Fill out the org hierarchy direct report units for each respondent, but leave the Participant Unique Identifier column blank.
 Qtip: The way the importer works is that it either looks to the unique identifier or the org hierarchy unit identified. If the unique identifier has a value, the org hierarchy unit ID will be ignored.
 - Metadata columns can be excluded. Changes to metadata will be ignored.
- When you’re finished with your edits, save your file. You can only use CSV, TSV, or TXT format. CSV files must be UTF-8 encoded.
- Go to the Data & Analysis tab of your engagement project.
- Import your file.
Importing Completely Anonymous Responses
You can import anonymous responses that have been collected outside of Qualtrics into your project. Anonymous responses are not counted towards response rates.
To import anonymous responses to Lifecycle projects, Ad Hoc Employee Research projects, or Engagement projects with no hierarchy, follow the normal steps to import data. The only difference is that when you prepare your file, keep the Participant’s Unique Identifier field blank.