-

Qualtrics Platform -

Customer Journey Optimizer -

XM Discover -

Qualtrics Social Connect
SMS Distributions (EX)
About SMS Distributions for EX
Qualtrics SMS distributions for EX help you collect feedback from your employees via their mobile devices. This page will cover the steps to prepare your survey for an SMS distribution and provide some best practices advice on SMS surveys.
EX projects allow 1-way SMS surveys, where you send a survey link via SMS and the participant opens the survey in the mobile device’s web browser. You can send both survey invites and survey reminders via SMS.
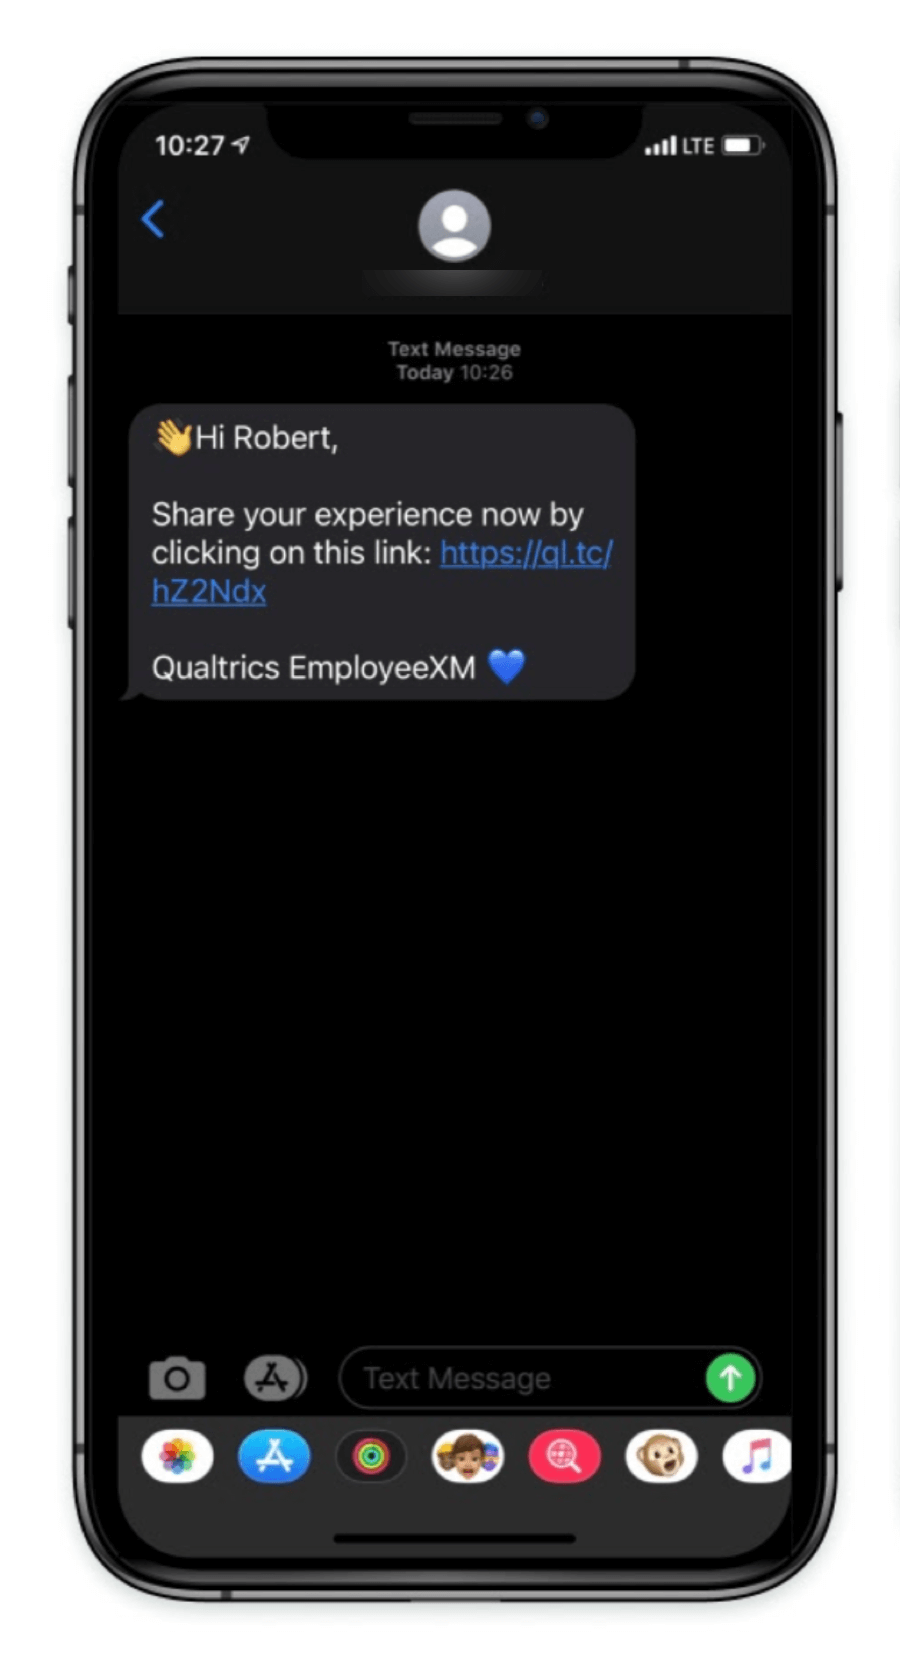
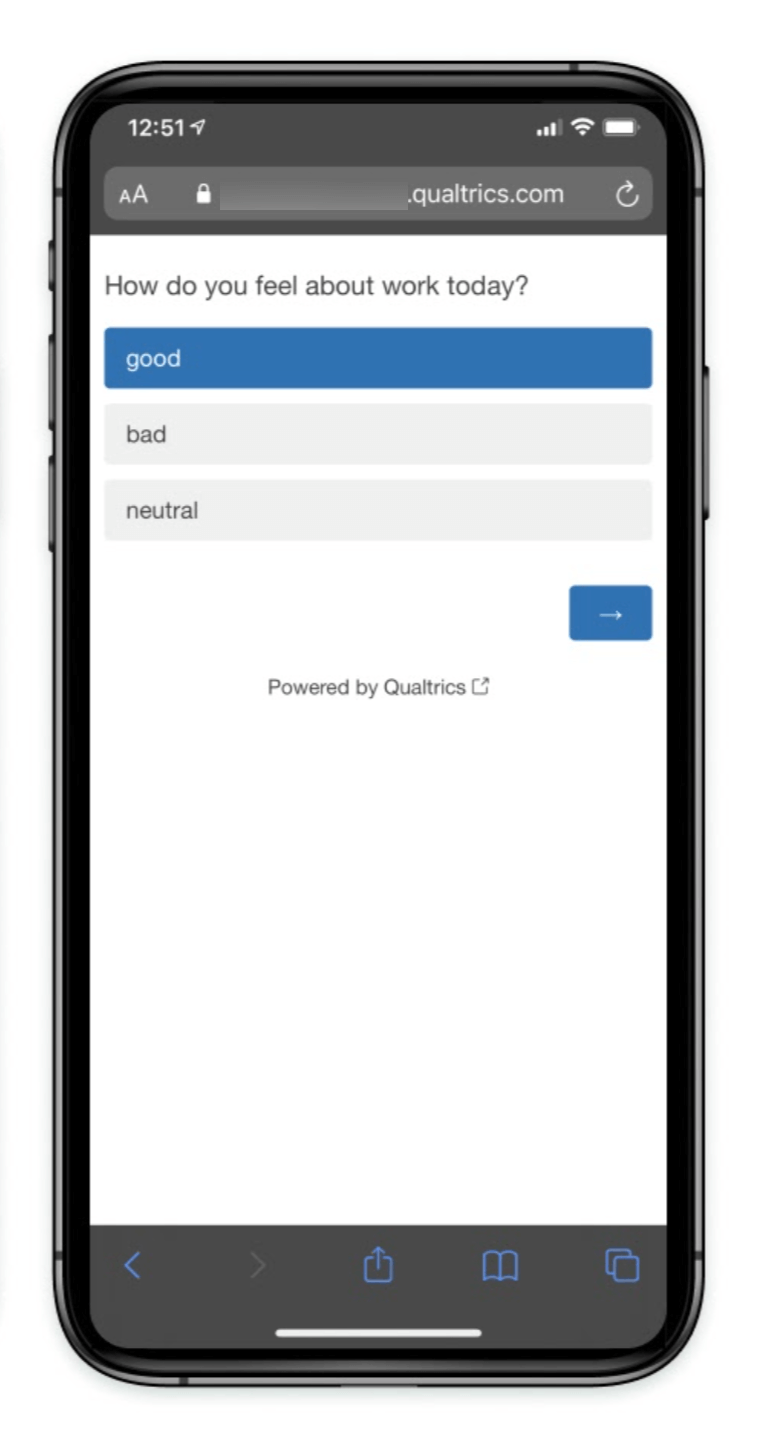
After clicking the link, the survey opens in the participant’s mobile browser.
Credits & Integration Models
SMS surveys an additional cost to send. Each message sent to a participant will cost a predetermined amount. Pricing and requirements for these models may differ, so make sure you talk to Account Services. For sending SMS surveys, you have two options:
- Sub-account model: The default model and our recommendation. Benefits of this model include assistance onboarding, maintaining, and troubleshooting the integration with help from your Account Services. In the sub-account model, you need to purchase SMS credits to send SMS surveys through Qualtrics. For information about SMS credits pricing, reach out to Account Services. Credit use depends on the recipient’s country/region.
- Self-service model: Recommended if your company has an existing relationship with a provider and a dedicated support team that can handle issues directly. This model affords your own control over onboarding, maintaining, and troubleshooting the integration with your provider. In the self-service model, SMS message distribution cost is handled directly by customers with their own provider. You can read more about setting up this integration on the Using Your Own SMS Provider support page.
Available Credits
There are multiple places where you can see how many credits you have remaining:
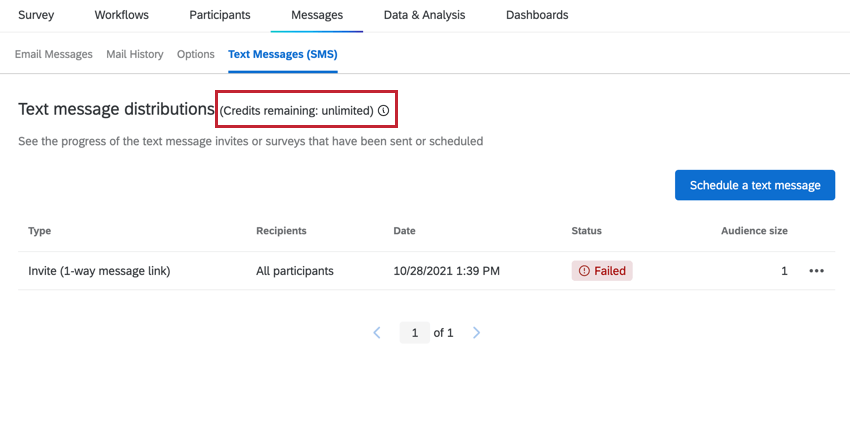
- Before scheduling a new text message, the number of available credits will be listed at the top of the page.
- Brand Administrators can look at the License Usage admin report to see how many credits have been consumed over a period of time and how many credits are remaining on the license.
See Credit Consumption for an overview of how credits will be spent for each SMS you send.
Adding Phone Numbers to Participants
Before you can distribute an SMS survey, you need to make sure your participants have either a Phone number or Phone metadata field. This field name is not case-sensitive.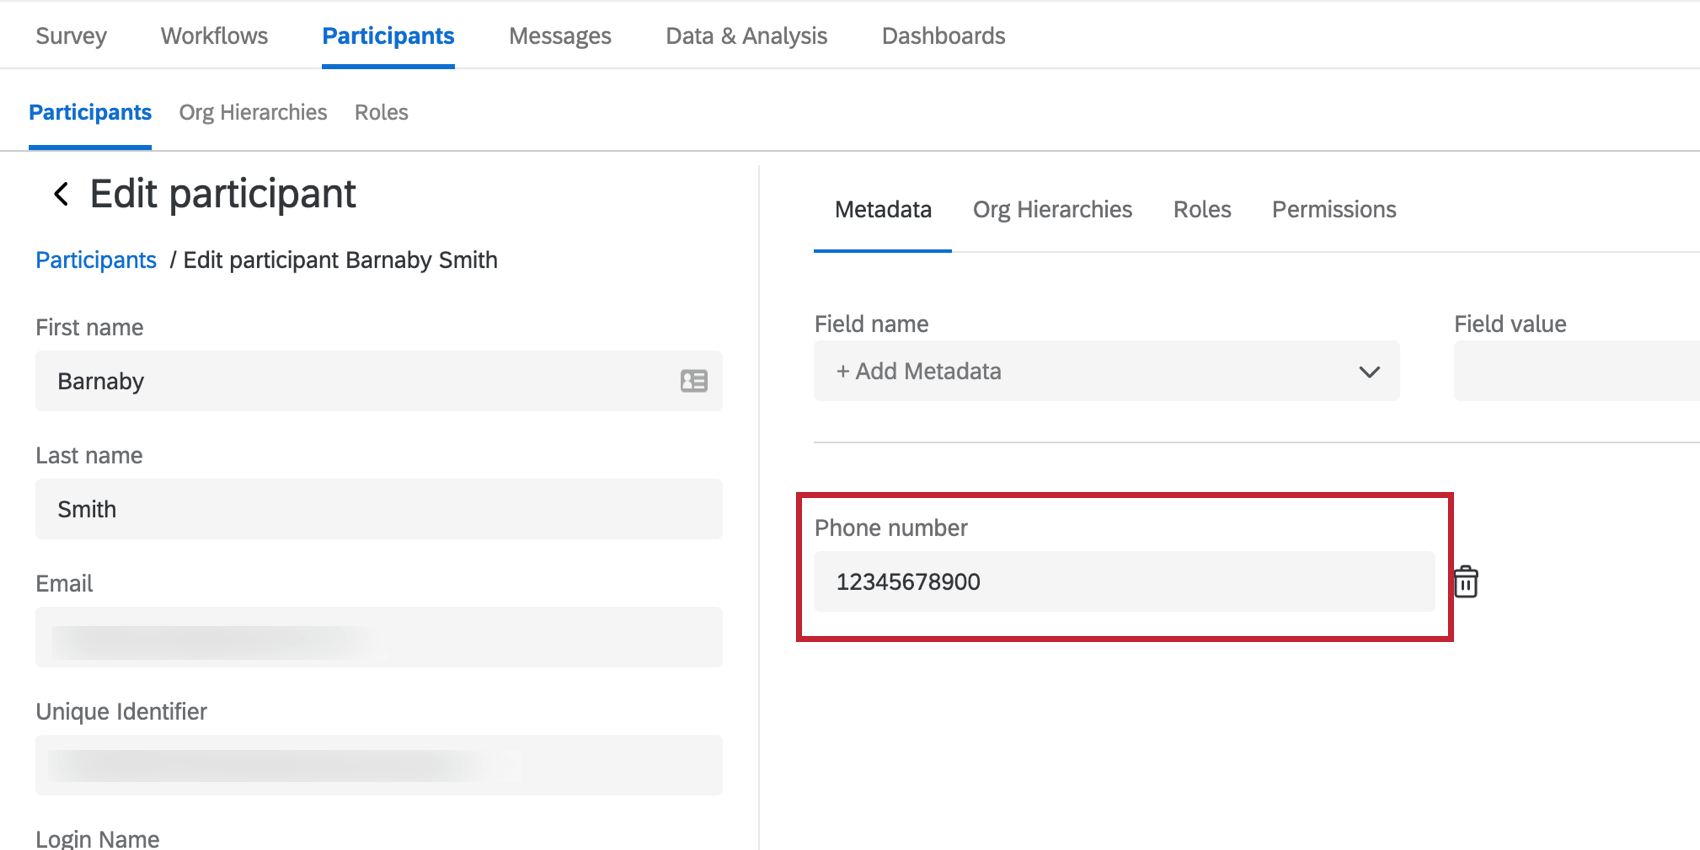
When sending an SMS, Qualtrics will look for either a Phone number or Phone field and distribute to the number saved in that field:
- Qualtrics will first look for a “Phone number” metadata field and will distribute to the number saved in that field if it is not empty.
- If the participant does not have a “Phone number” metadata field (or it is empty), Qualtrics will then look for a “Phone” metadata field and distribute to the number saved in that field.
- If a participant does not have “Phone number” or “Phone” metadata fields (or they are empty), then Qualtrics will not send an SMS to the participant.
For formatting phone numbers, see Importing Phone Numbers. Note that there are different ways to format phone numbers based on the recipient’s country.
To update your project’s participants with their Phone number, see Updating Participants. We recommend updating your participants with a file upload instead of updating them manually unless you only have a few to update.
Sending a 1-way Survey via SMS
This section will cover how to send both invites and reminders. The steps are largely the same except for choosing the type of distribution.
- If you haven’t already, add your participants’ Phone number as a metadata field.
- In the Messages tab, select Text Messages (SMS).
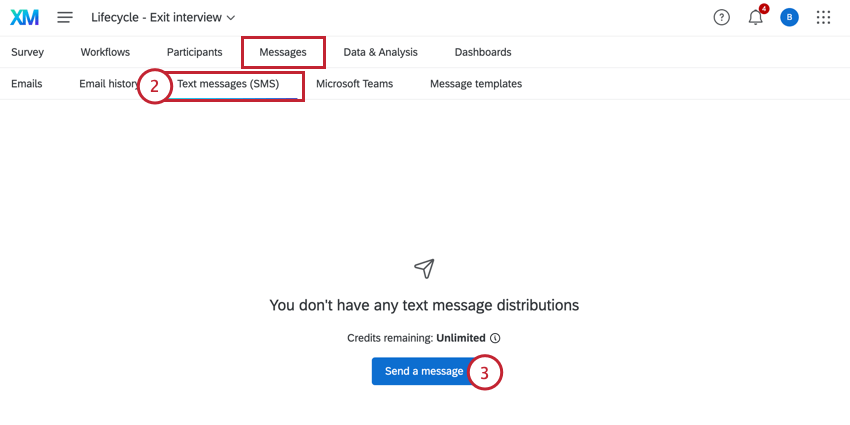
- Click Send a message.
- Choose whether you’d like to send a Survey invite or a Stand-alone reminder. Regardless of your choice, the remaining steps are the same.
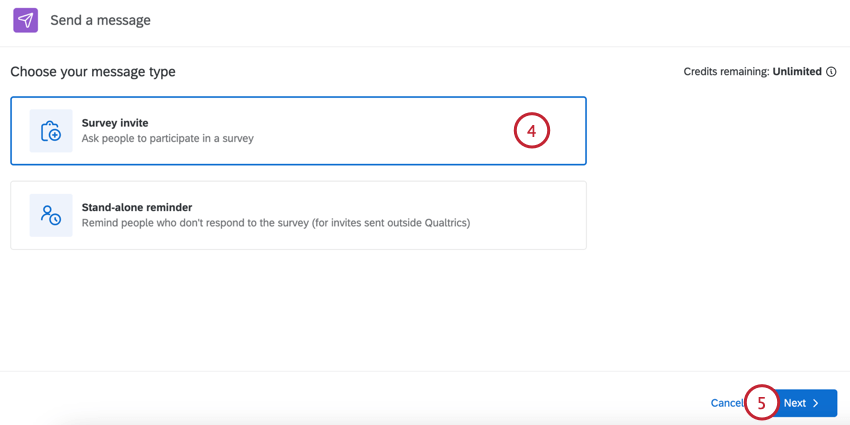
- Click Next.
- Choose who you want to send your text message to:
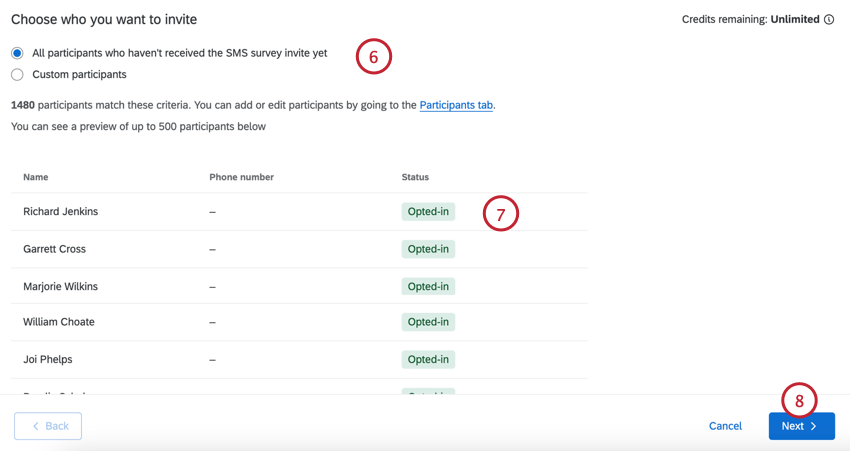
- All participants who haven’t received the SMS survey invite yet: Every participant who has not yet been invited.
- Custom participants: A limited set of participants based on criteria you set. See Limiting Who Receives Text Messages for more information.
- Review the participants who will receive the text. If you want to change who will receive your message, then adjust your conditions in the previous step.
- Click Next.
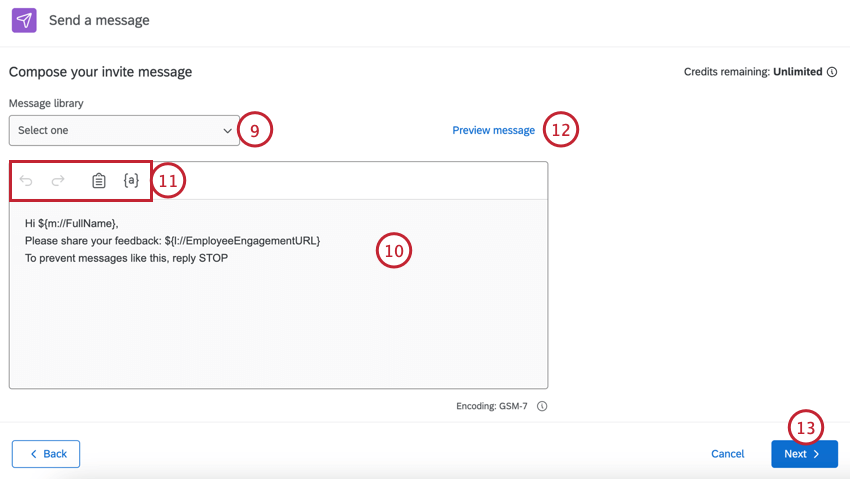
- Begin creating your text message. If you have a premade library message, you can load it using the dropdown above the message editor.
 Qtip: Library messages allow you to add translations for multi-language distributions.
 - Edit your message by typing in the box.
- Use the tools at the top of the message editor to help you create your message. These tools are:
- Backward Arrow: Undos the previous edit.
- Forward Arrow: Redos the previous undo.
- Clipboard: Inserts your survey link. By default, your survey link will already be in the message.
- {a}: Inserts piped text. You can pipe in your participant’s personal information and any metadata they have in the project.
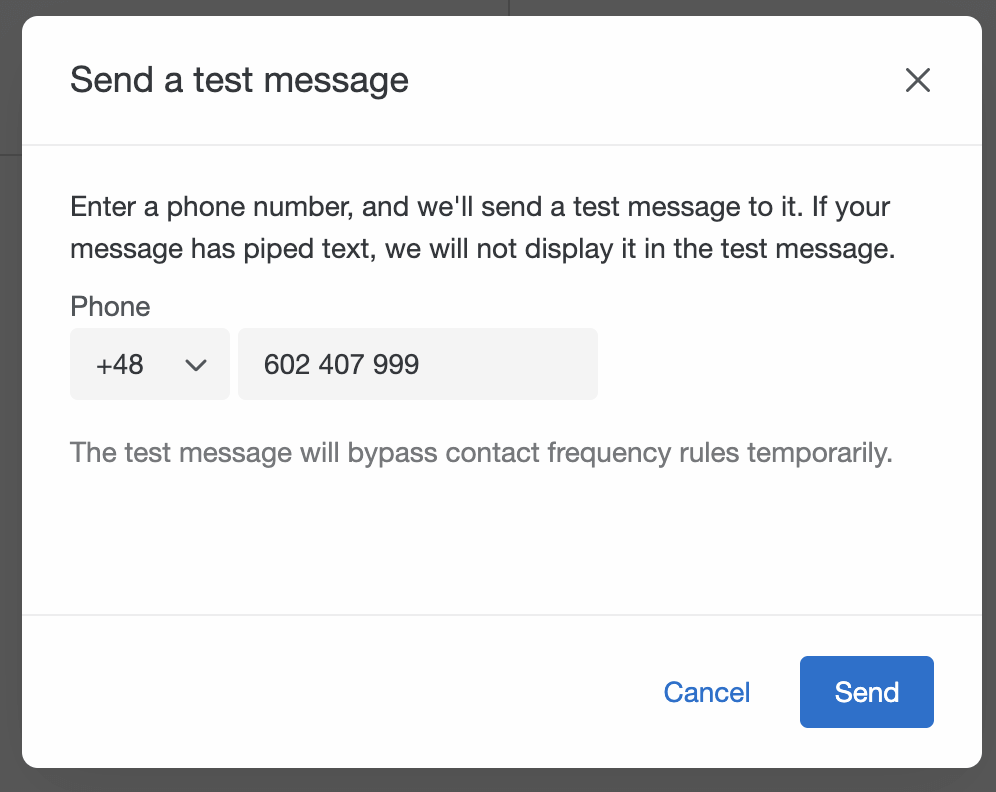
- To test your message before sending it officially, click Preview message.
Qtip: To send the test, choose the country code and enter the phone number before clicking Send.
- Click Next.
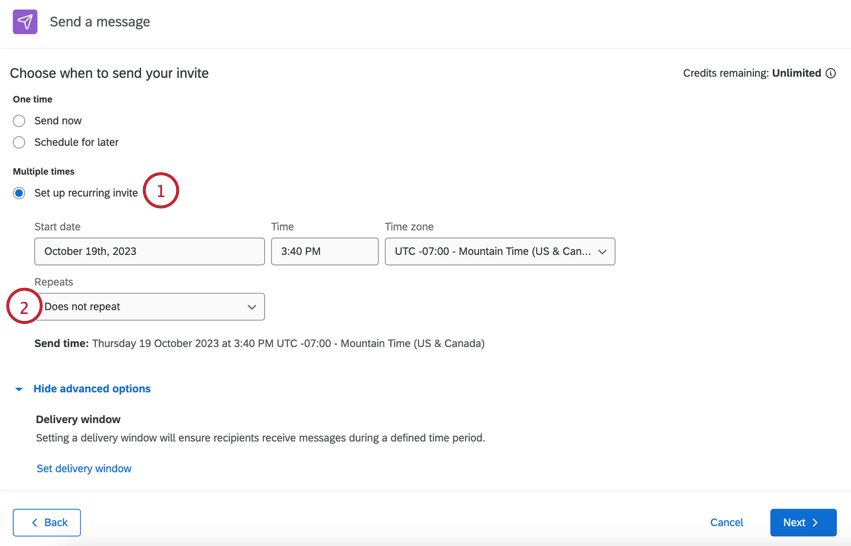
- Choose when you want to send your message, either Send now, or Schedule for later.
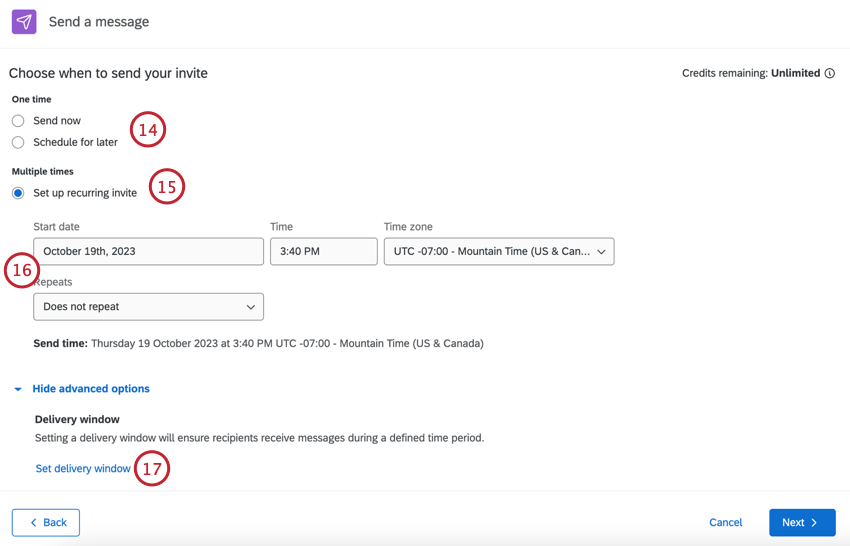
- If you’re in a Lifecycle project, you’ll see the option to Set up recurring invite to automatically invite new participants. To learn more about recurring messages, see Recurring SMS Messages for Lifecycle.
- If scheduling your message for later, choose the Start date, Time, and Time zone. Additionally, if setting up a recurring invite, choose your Repeats schedule.
- Click Set delivery window to set up a delivery window for your message. This determines when contacts will receive your messages.
- Select Don’t set delivery window or Set custom delivery window.
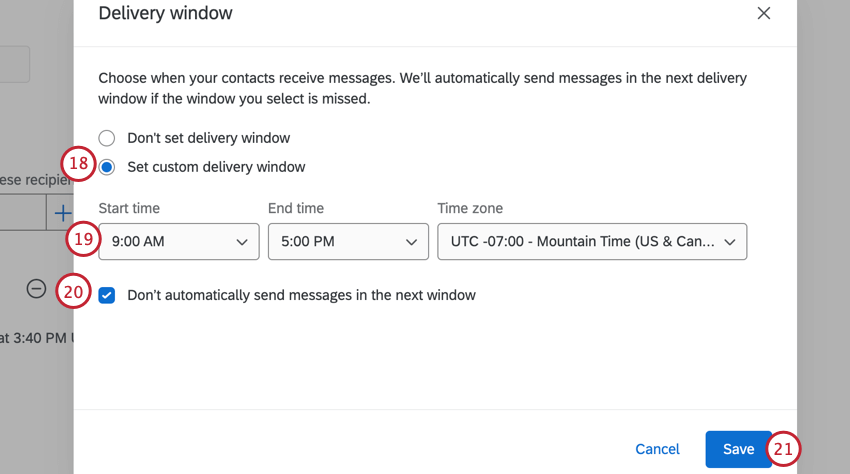
- If setting a custom delivery window, choose the Start time, End time, and Time zone.
Attention: Qualtrics does not store any information about SMS recipients’ time zone, so make sure the time zone you select fits your desired recipients.
- Choose how you want to handle SMS scheduled outside of the delivery window. Check Don’t automatically send SMS distributions in next window if you don’t want to send SMS distributions during the next delivery window. If the box is unchecked, any distributions that were scheduled to be sent outside of the delivery window will be saved and sent in the next delivery window.
Attention: When this option is unchecked, the distribution status within the distribution history will be In Progress until all distributions are sent. When this option is checked, the distribution status will be Failed if all distributions were not sent in the given time window.
- Click Save.
- Click Next.
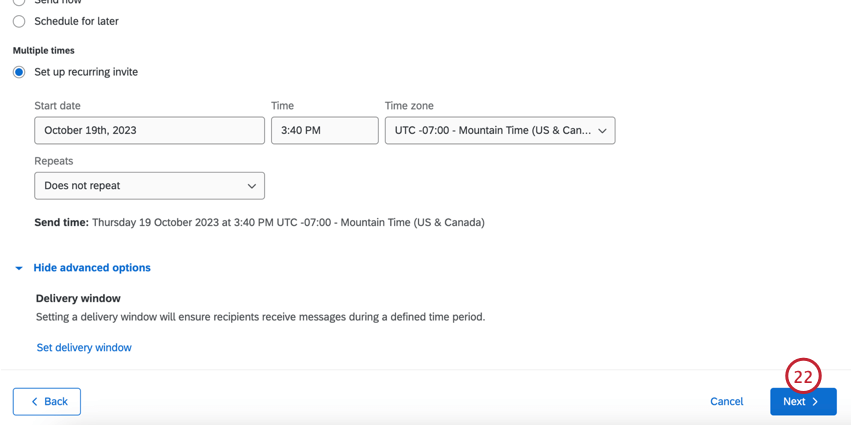
- Review your distribution to make sure it is correct.
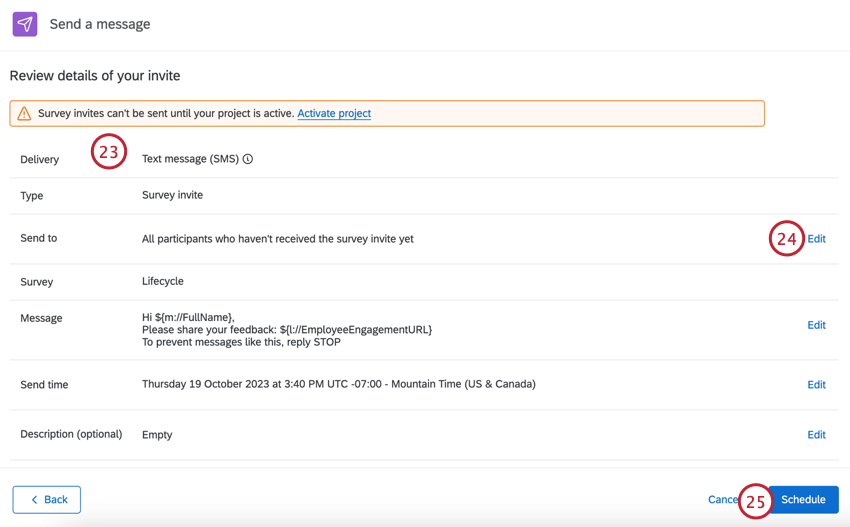
- If you need to edit any settings, click Edit to be brought to those settings.
- When you’re finished, click Schedule.
Recurring SMS Messages for Lifecycle
If you’re using a Lifecycle project, you can send recurring SMS messages on a schedule of your choosing.
- Follow the steps to send a 1-way survey via SMS, and select Set up recurring invite.
- You’ll see an additional dropdown for Repeats. Choose when your SMS messages repeat.
- Does not repeat (does not set up a message automation)
- Daily
- Weekly
- Monthly
- Annually
- Under Ends, choose when the recurring messages should stop being sent. You can choose between the following:

- Never: SMS messages will continue to send until you manually stop them.
- On: Choose a specific date for the SMS messages to stop.
- After X Occurrences: Set a limited number of times the messages should be sent before they stop.
- In the field, enter email addresses that should be notified whenever an SMS message is sent. Type each email address separately and click the plus sign ( + ) to add it to the list. You can add up to 10.
- When you’re finished, click to see the advanced options, or click Next to continue setting up the SMS automation.
Limiting Who Receives Text Messages
When creating your distribution, you have the option to limit which participants receive the distribution based on criteria you set.
After choosing to send to a limited number of participants, choose the conditions your participants must meet. You can limit your participants based on the following fields:
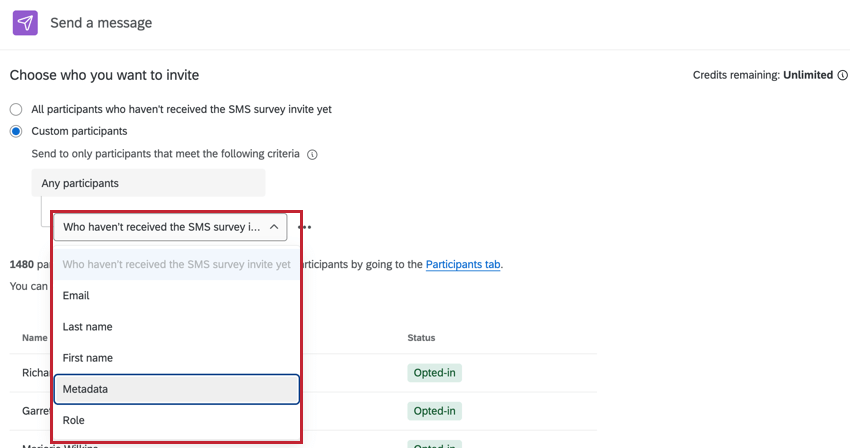
- Name or email: Based the condition on the participant’s first name, last name, or email address.
- Last name: Base the condition on the participant’s last name.
- First name: Base the condition on the participant’s first name.
- Metadata: Base the condition on the participant’s metadata values.
- Role: Base the condition on the participant’s project role.
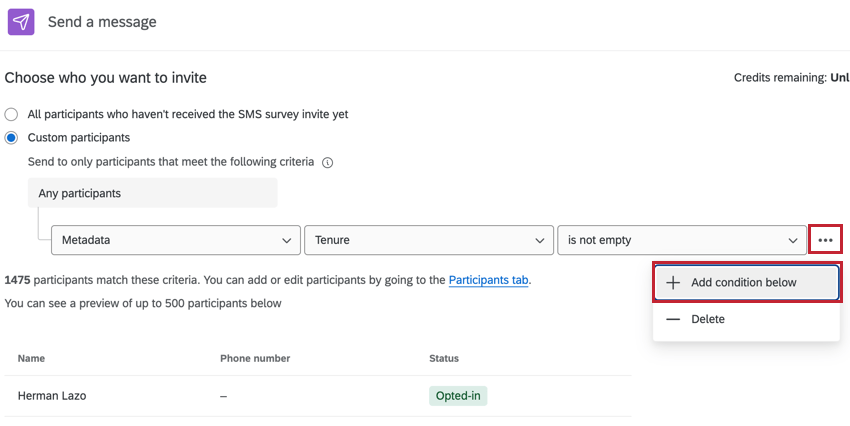
You can add multiple conditions to your distribution by clicking the three dots next to a condition and selecting Add condition below.
Please note the following fields can only be used one time each in a condition set:
- Name or email
- Last name
- First name
When using multiple conditions, be aware of how they will interact:
- If criteria are different (for example, two different metadata fields), they’re joined by “and,” meaning both conditions must be true for a participant to receive the survey.
- If criteria are the same (for example, the same metadata field, just different values for the field), they’re joined by “or,” meaning only one condition must be true for a participant to receive the survey.
Sending a Reminder to an SMS Invite
After you send an initial SMS invite, you may want to send one or more reminders to recipients who didn’t respond.
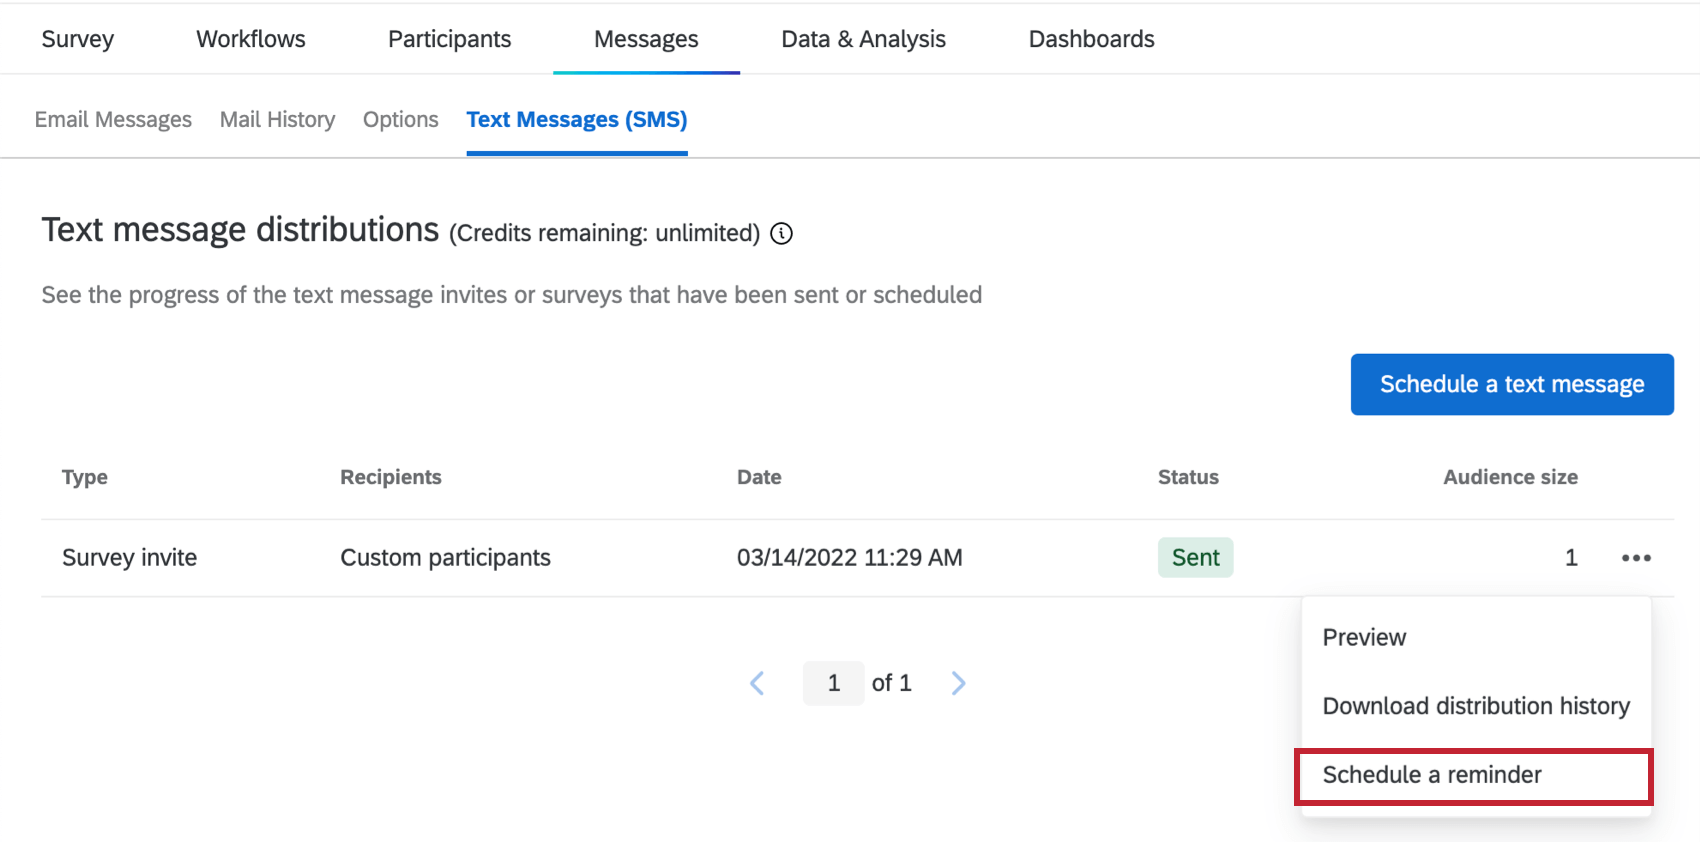
To send a reminder, find the survey invitation you sent and click the dropdown on the right. Select Schedule a reminder.
You will then configure the same details you would for an SMS invite, such as the body of the message and when it should send. You will not have to choose recipients, since the reminder will target anyone from the selected SMS distribution who hasn’t responded yet.
Once the SMS reminder is sent, you will be able to view its information and download its history, just as you would with an SMS invite.
Viewing Distribution Information & Downloading Histories
Your SMS distributions will appear in the Text Messages (SMS) tab. Click on a specific distribution to learn more.
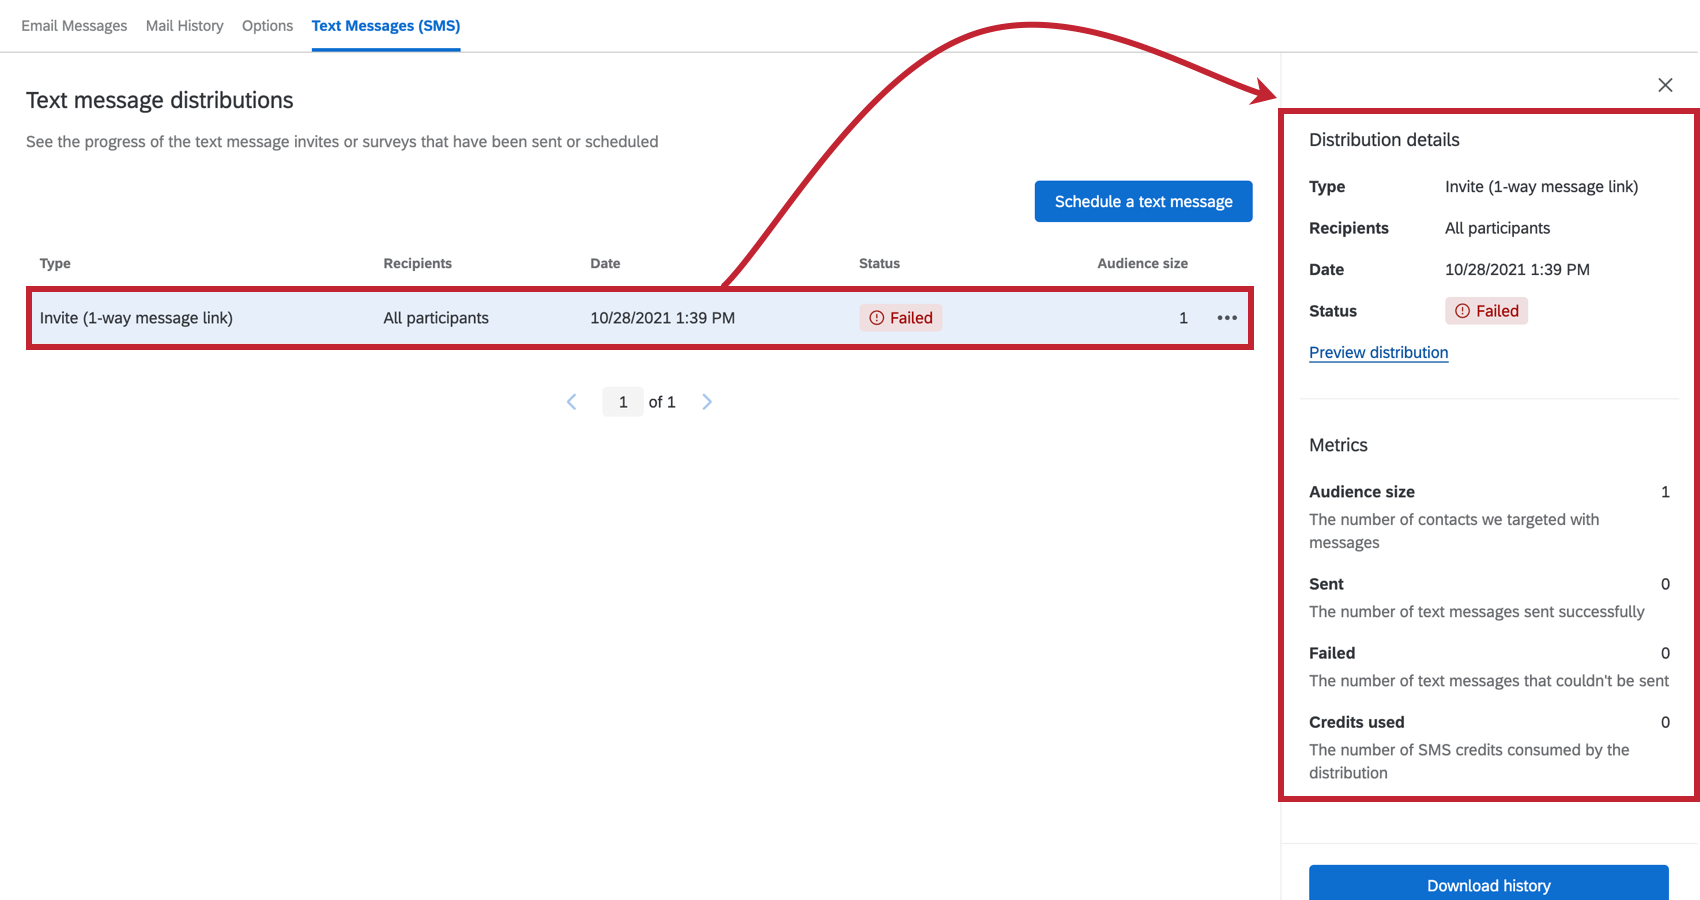
The Distribution details section contains information about the type of distribution, who received it, the date it was sent, and the distribution’s status. If the distribution has already been sent, click Preview distribution to see the distribution’s settings. If your distribution is scheduled to send, click Edit distribution to see and change the distribution’s settings.
The Metrics section contains specific information about how many messages were sent. This includes the number of participants who were included in the distribution, the number of messages that were sent, the number of messages that failed, and the amount of credits consumed.
The Related Distributions section includes information on linked invitations and reminders. For example, if you send a reminder to an invitation, these distributions will show up under each other’s detail panes. You’ll be able to see date and time the related distributions were sent and click to view a preview of additional distribution details.
Distribution Statuses
The status column will help you monitor each message’s current status – whether it failed or sent successfully.
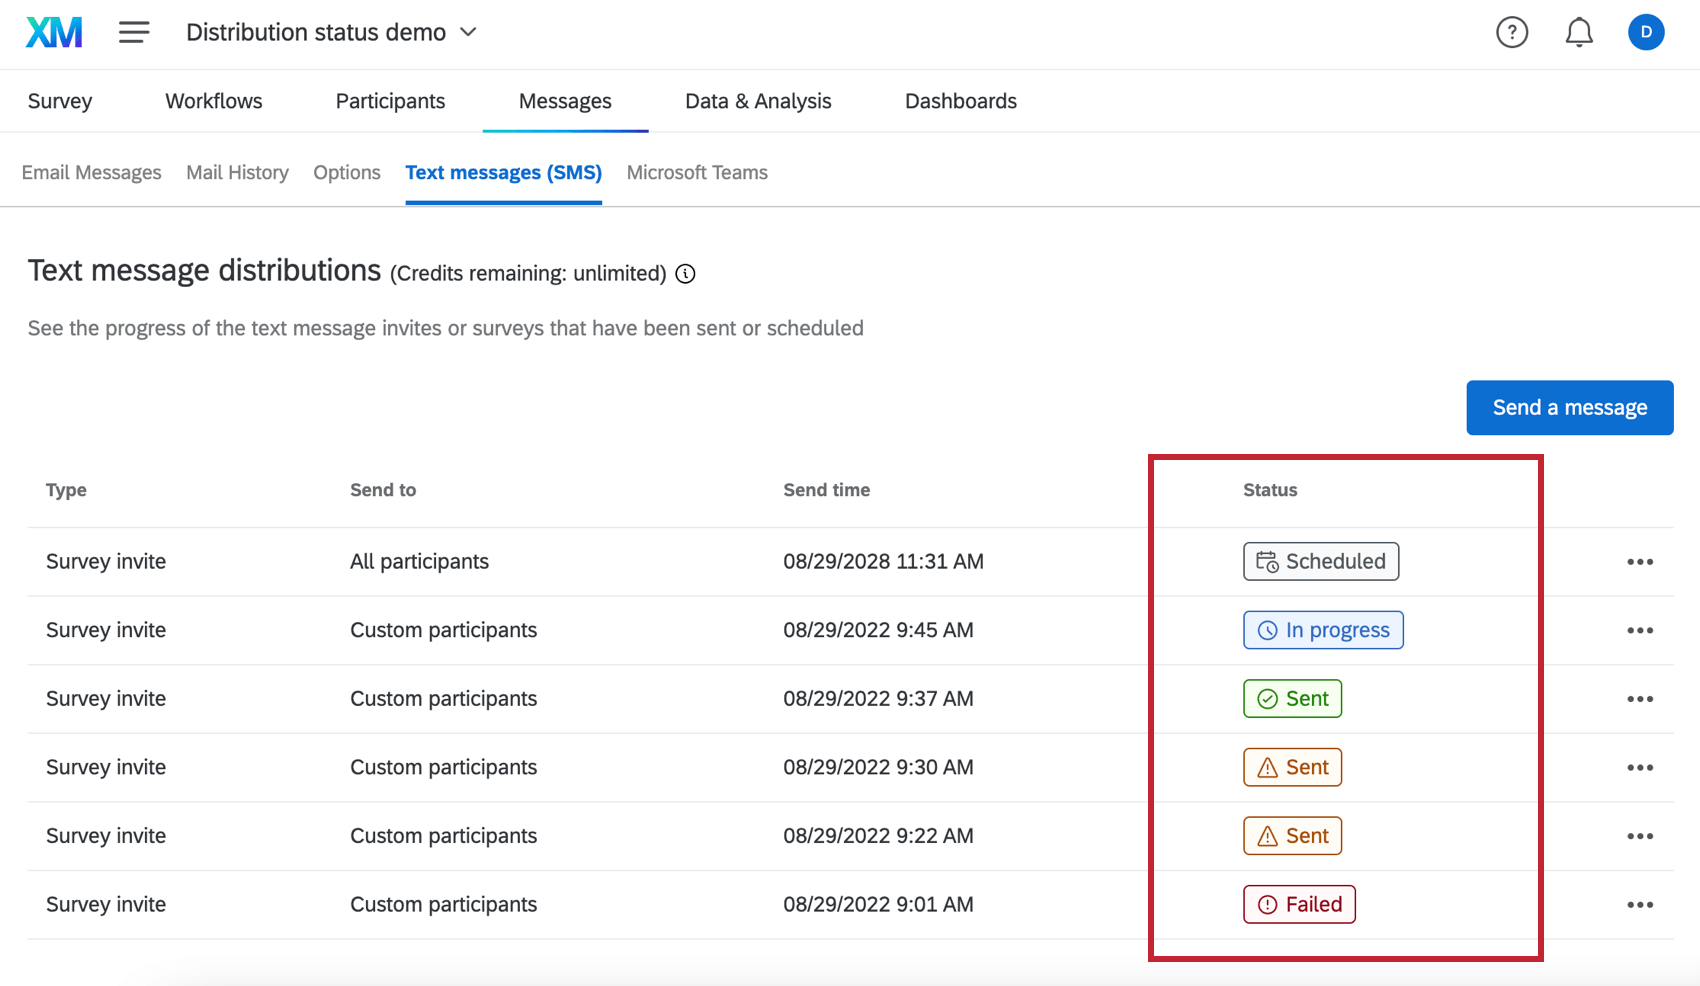
Below is a descriptive list of possible status conditions.
- Scheduled: The distribution is scheduled.
- In progress: The distribution is currently being processed during the scheduled time frame.
Qtip: The status may be in progress for longer than normal if there are distribution delays due to network issues or delivery errors. If the status is in progress for longer than 7 days, reach out to Qualtrics Support.
- Sent: The distribution has been successfully processed and the messages were sent from Qualtrics to the SMS provider for delivery to recipients.
Qtip: If your distribution contains any issues, a tooltip will appear next to your status. See Downloading the Distribution History for more information.
- Failed: The distribution was not sent.
Qtip: A failed distribution is typically the result of the survey not being configured correctly. Check your configuration and try to send the distribution again in a few minutes.
- Interrupted: The distribution was not sent or was sent partially. Review the distribution history for more information.
Downloading Distribution History
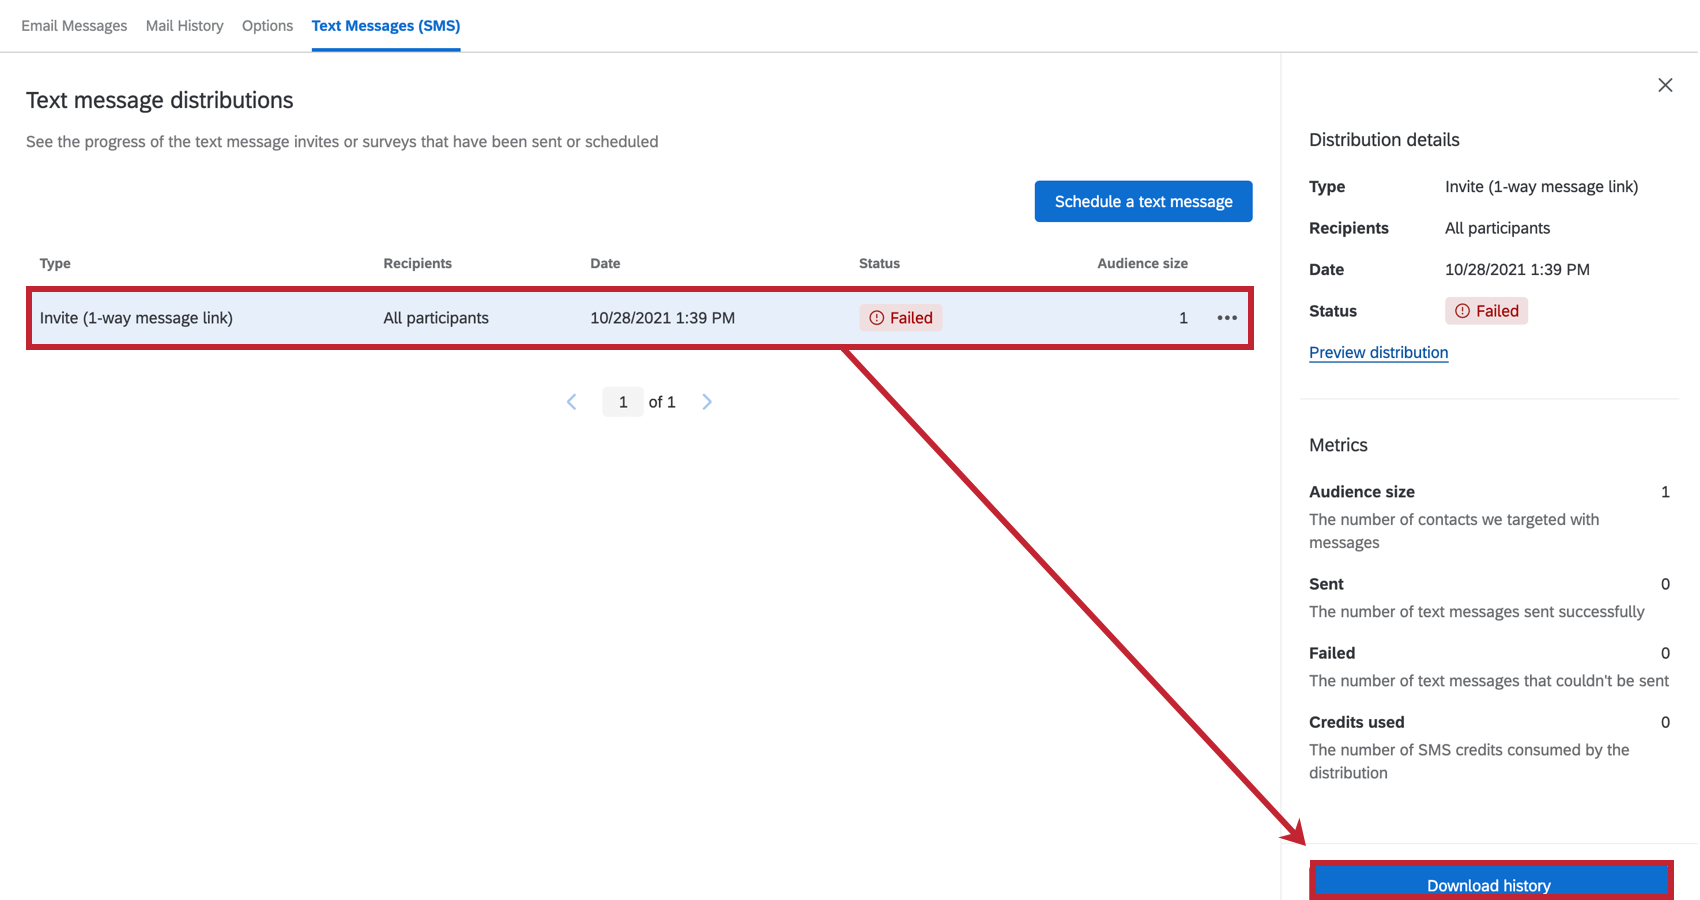
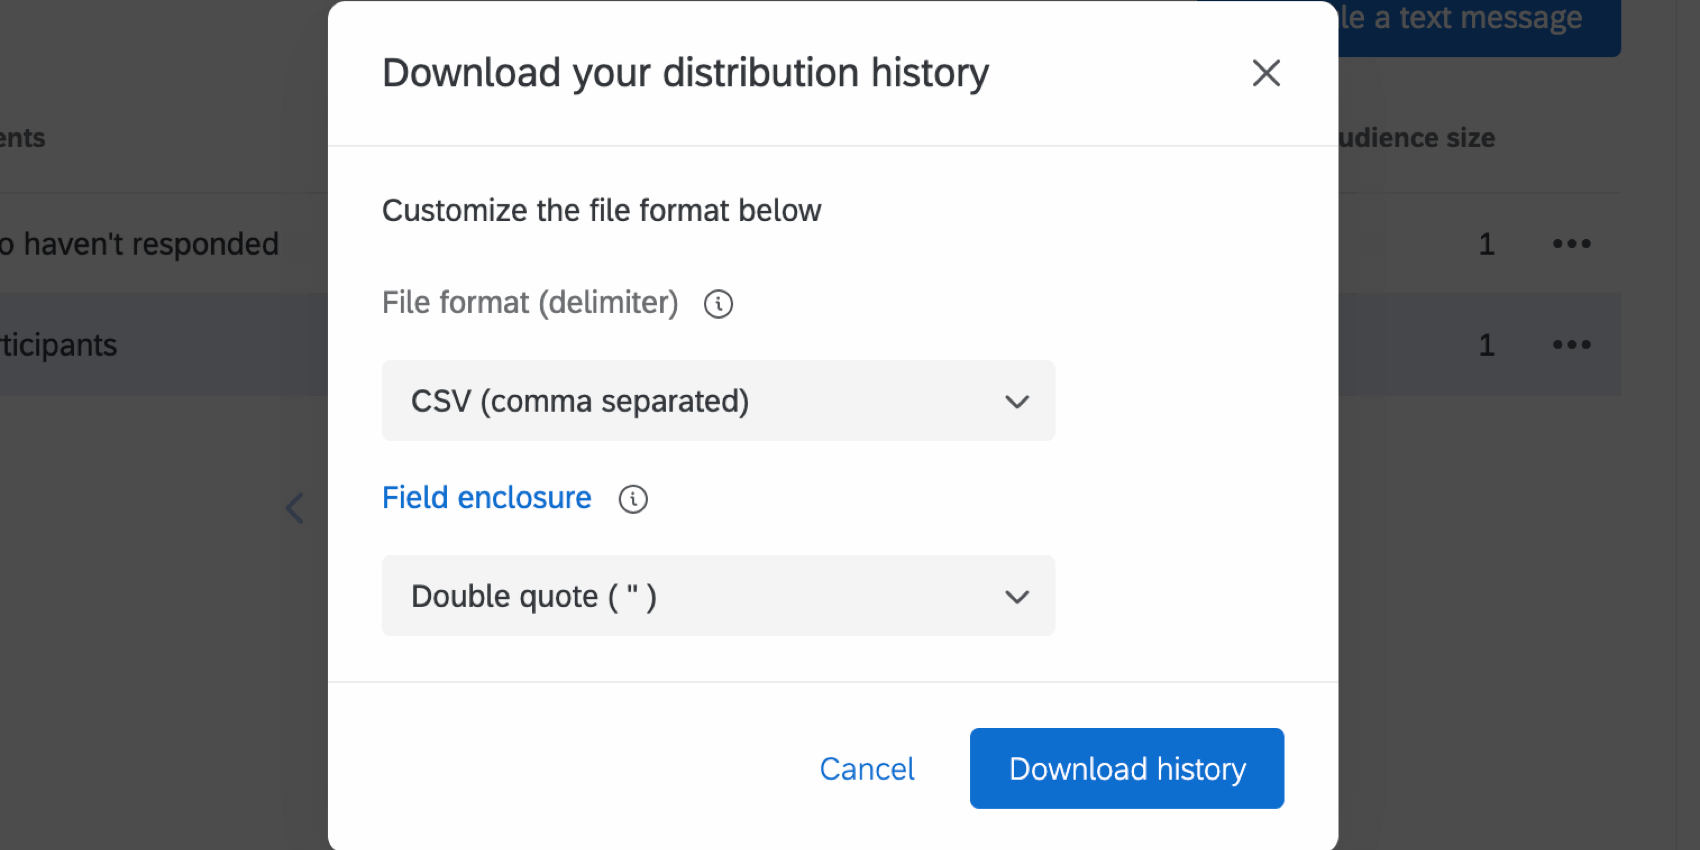
You can download the distribution history for messages that are in the progress of sending or that have already been sent. To download the history, select the distribution and click Download history.
Then, choose the desired delimiter and field enclosure settings for your download file. Once finished, click Download history. You can open this file on any spreadsheet editor on your computer.
Your file will contain the following information:
- PersonID: The participant’s PersonID.
- First name: The participant’s first name.
- Last name: The participant’s last name.
- Phone number: The participant’s phone number.
- User name: The participant’s login name.
- Respondent: Indicates if the participant is a respondent or not. Possible values are Yes and No.
- Status: Indicates if the participant’s survey status. Possible values include: Sent, Delivered, Opened, Failed, Bounced, Blocked, Duplicated, Skipped, and Skipped (opt-out). See Distribution Statuses for more information.
- Timestamp: The timestamp of when the participant’s Status changed. Displayed in ISO 8601 format.
Opting-Out of SMS Surveys
Participants are able to opt-out of SMS surveys at any time. We recommend beginning with an opt-in message to make sure your survey is legally compliant and that participants know how to opt-out if needed. See Step 11 in Sending a 1-way Survey via SMS for instructions.
To opt-out, a participant can also respond “STOP” to any message. For a list of STOP words in different languages, see Opting Out of an SMS Distribution. Once a participant is opted-out, they will not receive future messages and they will be marked as opted-out in your employee directory.
When a participant is opted-out by replying “STOP,” a metadata field will be added to the participant in both the employee directory and project. They will be given the field Opted out with a value of “Yes.”
Opting-In
To opt-in a participant after they’ve opted out, you must perform the following steps:
- The participant must reply with either “START” or “UNSTOP” to their previous STOP message
- Change the Opted out metadata field value to “No” or remove the field from the participant entirely.