
Step 6: Using Feedback to Drive Change
What's on this page
About Using Feedback to Drive Change
Now that you’ve begun to collect feedback requests, it’s time to action on those requests. This page will guide you through using feedback requests to enact change at your organization. Usually, this is done by program and product managers who have owner or moderator access to the project.
We’ll walk through voting & commenting on feedback requests, using collections & comparisons to visualize and organize feedback requests, and tracking updates on requests through status changes. In the future, you’ll be able to use the Frontline Feedback dashboard to analyze how well your organization is engaging with feedback. You’ll even be able to pair this data with your other CX data to see how actioning feedback has impacted your customers’ experiences.
Searching Existing Feedback
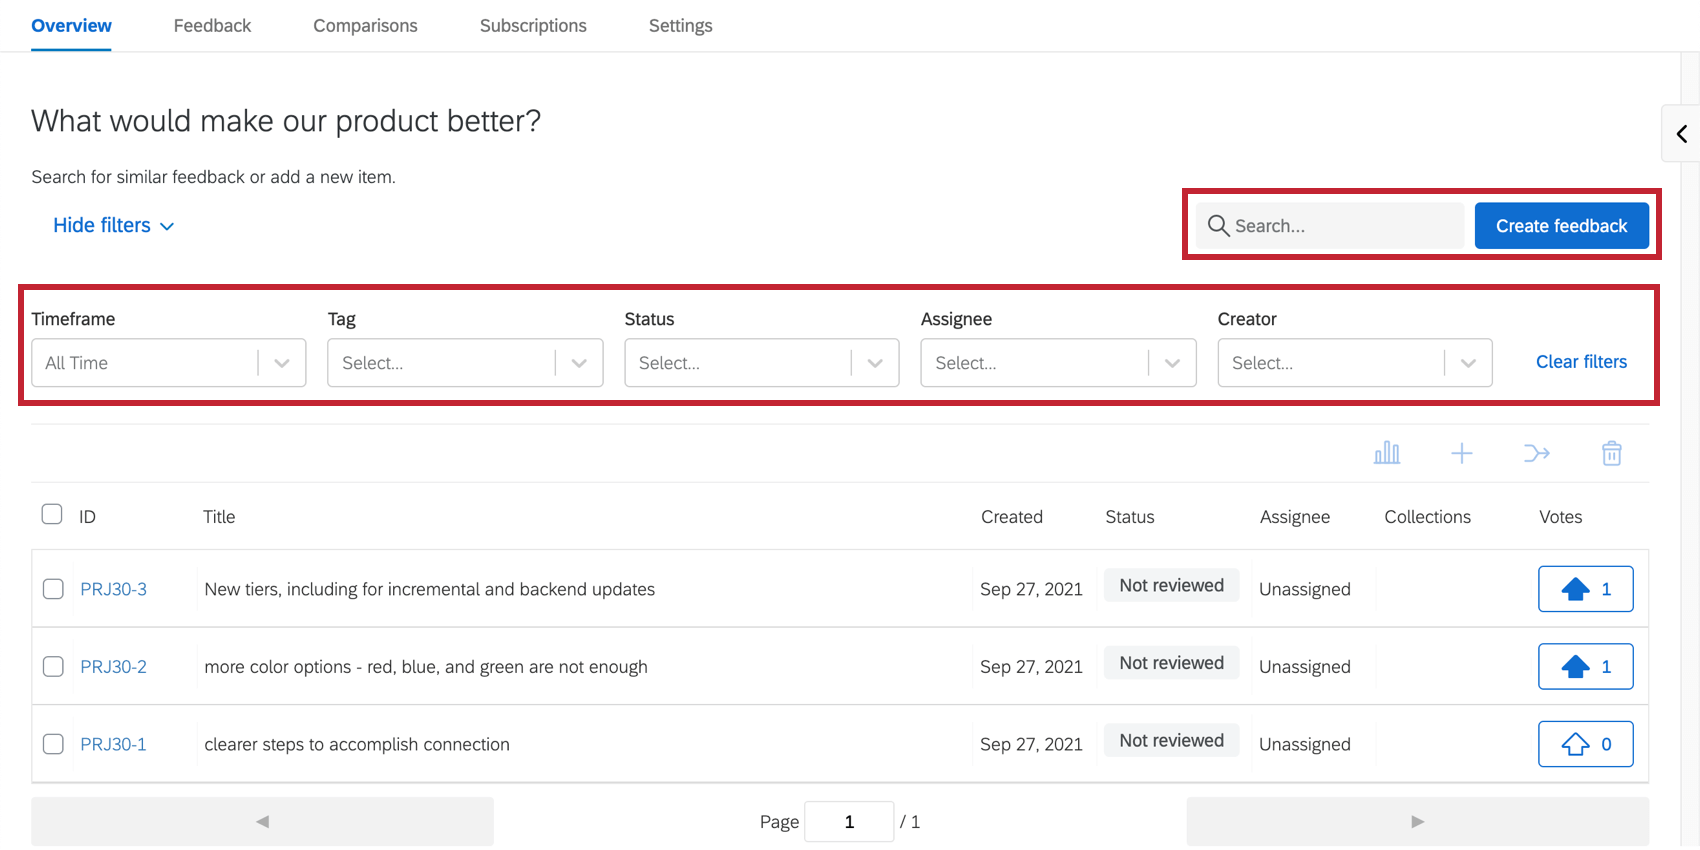
After your employees have submitted feedback, you can begin to action it. To get started, head to the Overview tab of your project.
To search for feedback, type key words in the search box. You can also filter your feedback based on other properties, such as assignee, tags, and status.
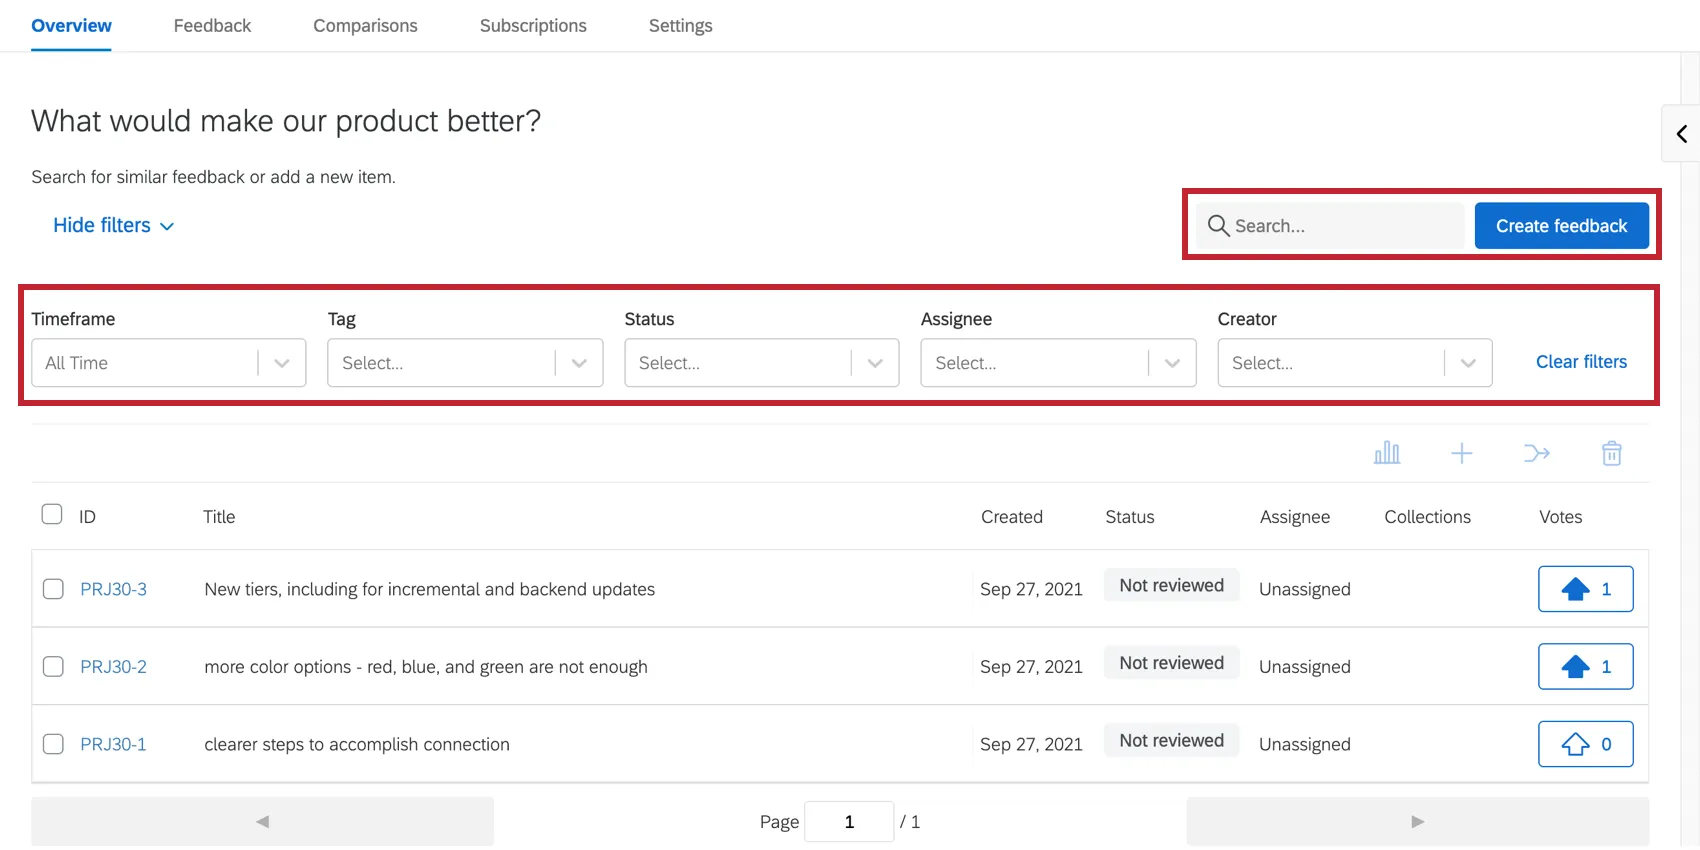
As you build searches and change filters, the feedback below will start to only show relevant results. Once you find the feedback you’re interested in, click on it to begin adding tags, assignees, and collections.
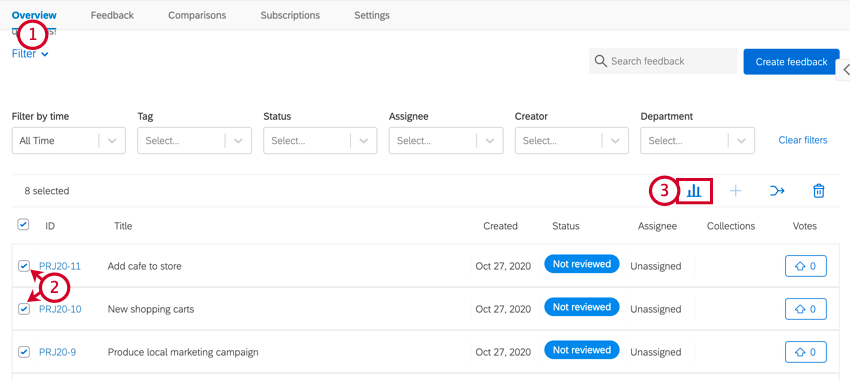
Using Collections & Comparisons
As you collect feedback requests, you will begin to see patterns in the types of requests that come through. You should use these patterns to create comparisons and collections to group related feedback requests. This will help you organize your feedback requests, increase visibility across your organization, and keep you on track to implementing feedback requests.
Check out our page on Comparisons & Collections for information on how to set them up. The remainder of this section will focus on tips for organizing your comparisons and collections.
Collections
Collections are used to group similar or related feedback requests together. Here are a couple suggestions for structuring collections:
- Create collections based on target implementation dates. For example, Ambrosia Grocery has created four collections, one for each quarter of the fiscal year. Feedback requests are then added to the respective collection when they get a target date. This lets employees know approximately when their feedback requests will be implemented.
- If you are using Frontline Feedback to improve a specific product, create collections for each aspect of your product. For example, if Ambrosia Grocery is collecting feedback on their produce specifically, they can create collections such as suppliers, quality, and price.
- If you have feedback requests that are relevant to certain store locations and not others, create a collection for each location. This way, all of the requests pertinent to a certain location can be grouped together.
Comparisons
Comparisons are used to visualize your collections next to each other. They can help you get an overview of your feedback requests and how they relate to each other. You can use the comparisons page to easily navigate between your different groups of feedback requests. Here’s some tips for making your comparisons:
- The structure of your comparisons largely depends on the structure of your collections. You should create your comparisons after you’ve made your collections.
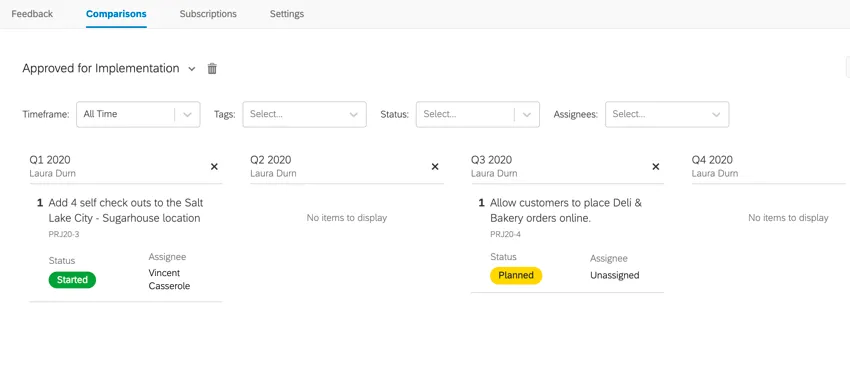
- If you’ve created collections based on target implementation dates, create a comparison for approved requests and add your collections here. This way, you’ve created a timeline for requests that employees can easily track. Below is an example of this comparison.
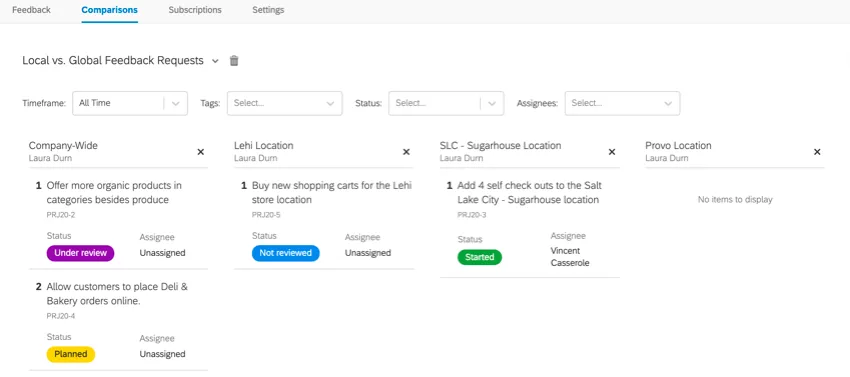
- If you have collections based on where the request should be implemented, such as different store locations, you can create a comparison for store location. You can see your different stores side-by-side, encouraging cross-store collaboration between employees. Setting up your comparison this way can also help share ideas across stores and increase transparency across your organization. Below is an example of this comparison.

Prioritizing Feedback with MaxDiff Analysis
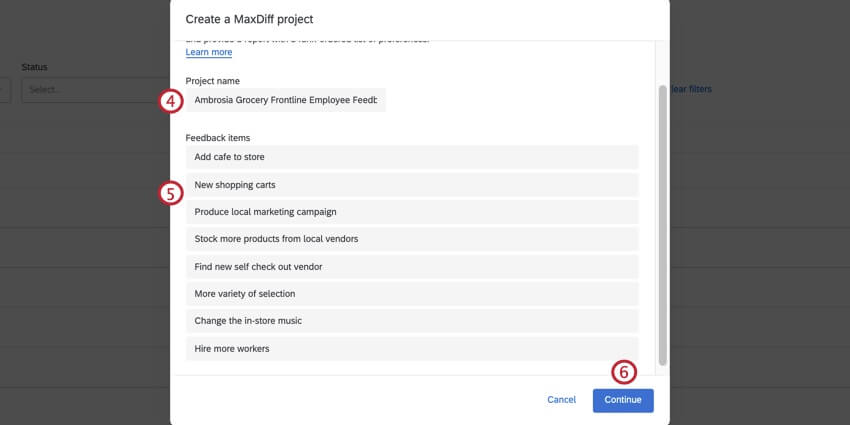
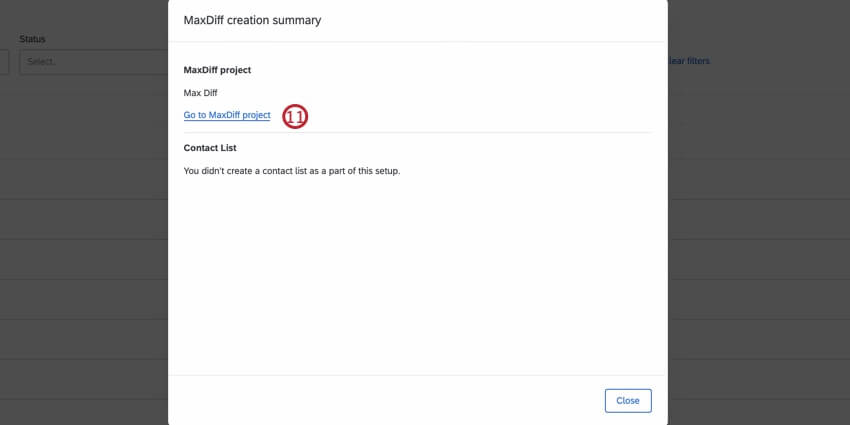
Once you’ve collected feedback, it can be difficult to determine which requests to prioritize. Frontline Feedback projects allow you to perform MaxDiff analysis on your feedback requests to determine what requests are the most preferable to action.
Qtip: To analyze your feedback using MaxDiff, you must have at least 5 different requests you want to analyze. There is a maximum of 30 requests for MaxDiff analysis.
Attention: Analyzing feedback requests with MaxDiff will create a survey project that counts towards your license’s survey limit. Contact Account Services if you have questions about what’s included in your license.
Qtip: If you don’t see the MaxDiff icon, then your account does not have permission to use MaxDiff projects. Contact your Brand Administrator and request they enable the MaxDiff user permission for your account. Your license must also have the Allow JavaScript permission enabled to create MaxDiff projects.
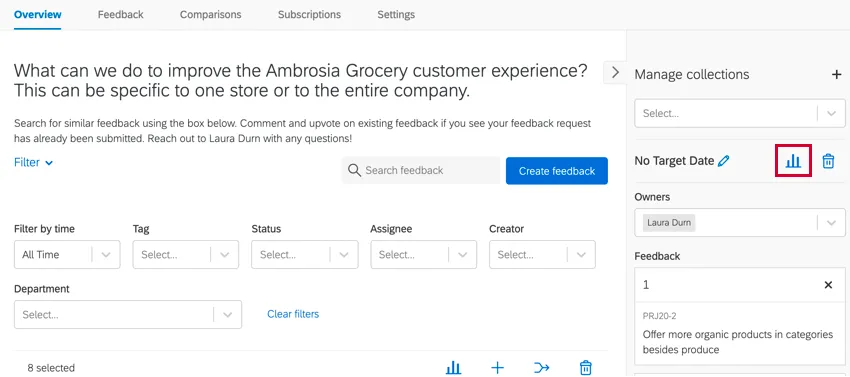
Qtip: You can also create a MaxDiff project from the collections window by clicking the MaxDiff icon in the collections window, which will automatically use the requests in the active collection for the MaxDiff project. This is useful if you are targeting requests that are difficult to gather on one table page.
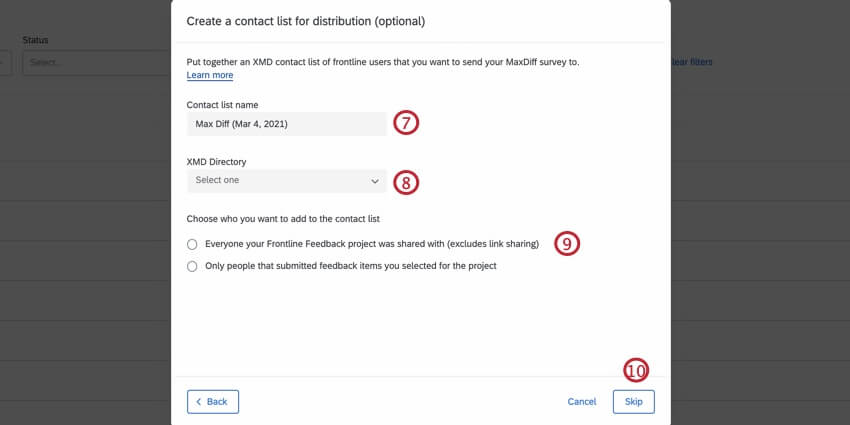
Qtip: You can only create a contact list if you have access to XM Directory.
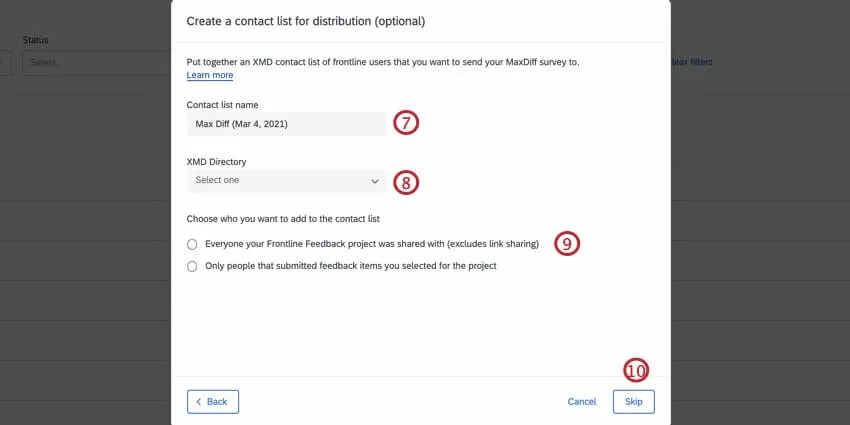
Qtip: For most licenses, you will only have one directory. However, some may have multiple.
- Everyone your Frontline Feedback project was shared with
- Only people that submitted feedback items you selected for the project
Tracking Feedback Through Status Changes
As feedback requests move through the implementation timeline, it’s important to update their statuses accordingly. This will help employees track their requests, improve visibility into requests, and also help find requests easier through filtering.
Frontline Feedback comes with seven pre-configured statuses for you to use. However, you can edit these statuses as you see fit as well as create your own! For information on managing your statuses, check out this support page.
Setting Up Feedback Statuses
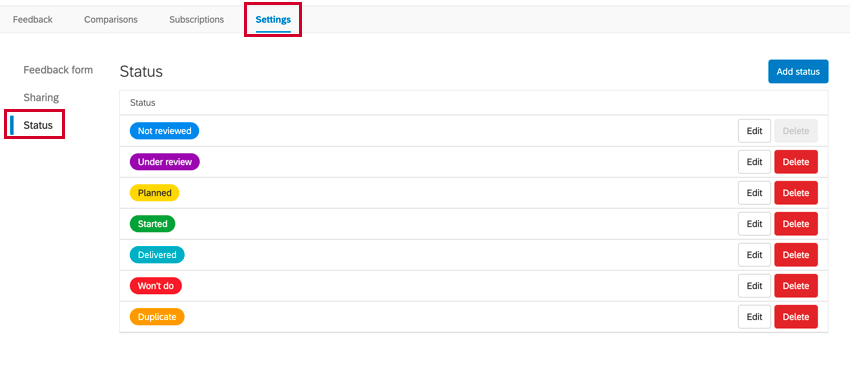
To access your statuses, go to the Status section of the Settings tab.
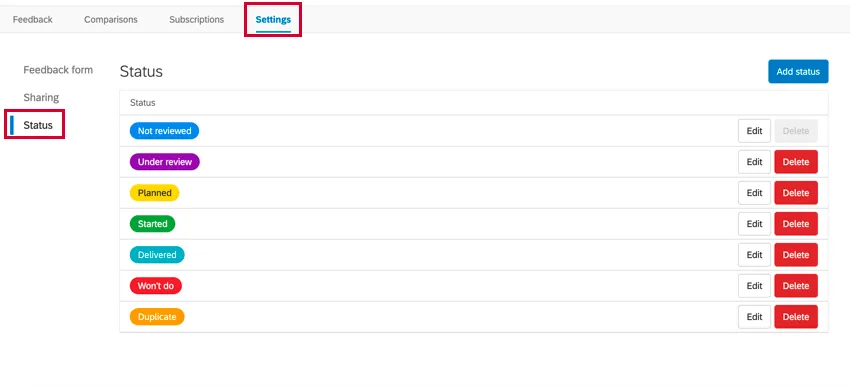
Before editing existing statuses and creating your own, let’s review what’s included by default. The following statuses are pre-configured for you to use:
- Not Reviewed
- Under Review
- Planned
- Started
- Delivered
- Won’t Do
- Duplicate
The first status in the list, Not Reviewed, is the default status. This status will be applied to all new feedback requests. Note, you cannot delete the default status, but you can edit it.
Ambrosia Grocery
Ambrosia Grocery has created a new custom status, Piloting, for initiatives that are being tested with a small group of customers before launching to all customers. This status can be used by store managers to add their store to the pilot program, as well as allow all employees to track where the initiative is in the implementation pipeline.

Analyzing Frontline Feedback Data in CX Dashboards
Your Frontline Feedback data is available to be mapped into CX dashboards. This allows you to monitor the impact of your Frontline Feedback program and see changes in your CX metrics in real time. Visit this support page for more information.
FAQs
How can I stay up to date on new Qualtrics features?
How can I stay up to date on new Qualtrics features?
To access these release notes, you need an XM Community account. These accounts are free for any users with a Qualtrics account. This support page contains information for how to register an XM Community account.
Once you're logged into the XM Community, head over to the Weekly Product Updates Introduction Post. This post contains all the information you need to get started with subscribing to product updates!
That's great! Thank you for your feedback!
Thank you for your feedback!