
Jira Task
What's on this page
About the Jira Task
Qualtrics allows you to create or update issues in Jira based on events that happen in Qualtrics. For example, whenever a customer submits a negative product rating to your feedback survey, you can create a Jira issue based on it.
For information on working with Jira issues after they’re created or updated, see Atlassian’s documentation.
Qtip: The Jira integration only works with cloud-based implementations of Jira, and will not work with on-premises deployments.
Qtip: If you have questions about retrieving the IDs listed on this page (or have questions about other Jira-specific fields and functionalities), please visit the Atlassian community.
Connecting Jira Credentials to Qualtrics
Qtip: These steps can only be completed by a Brand Administrator.
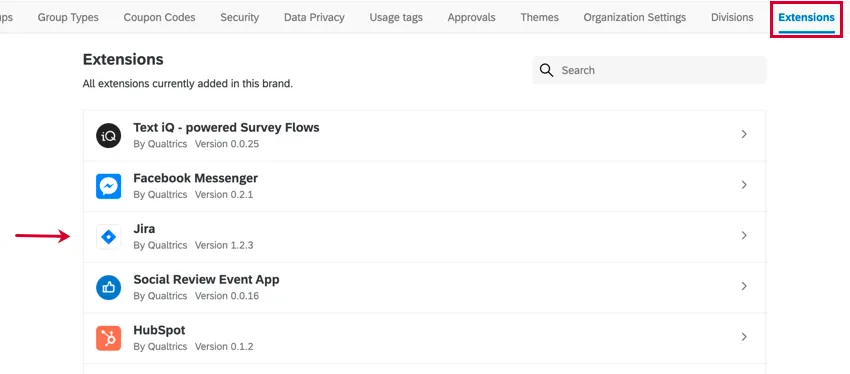
Before you let users on the brand use the Jira task, you can specify a Jira account that can be used brand-wide. Go to the Extensions tab of the Admin page, and select Jira to get started.
You can then connect via 2 different authentication methods:
- OAuth: Log directly into your Jira account to provide access without entering credentials in Qualtrics.
Basic: Connect to Jira by providing the following Jira credentials:
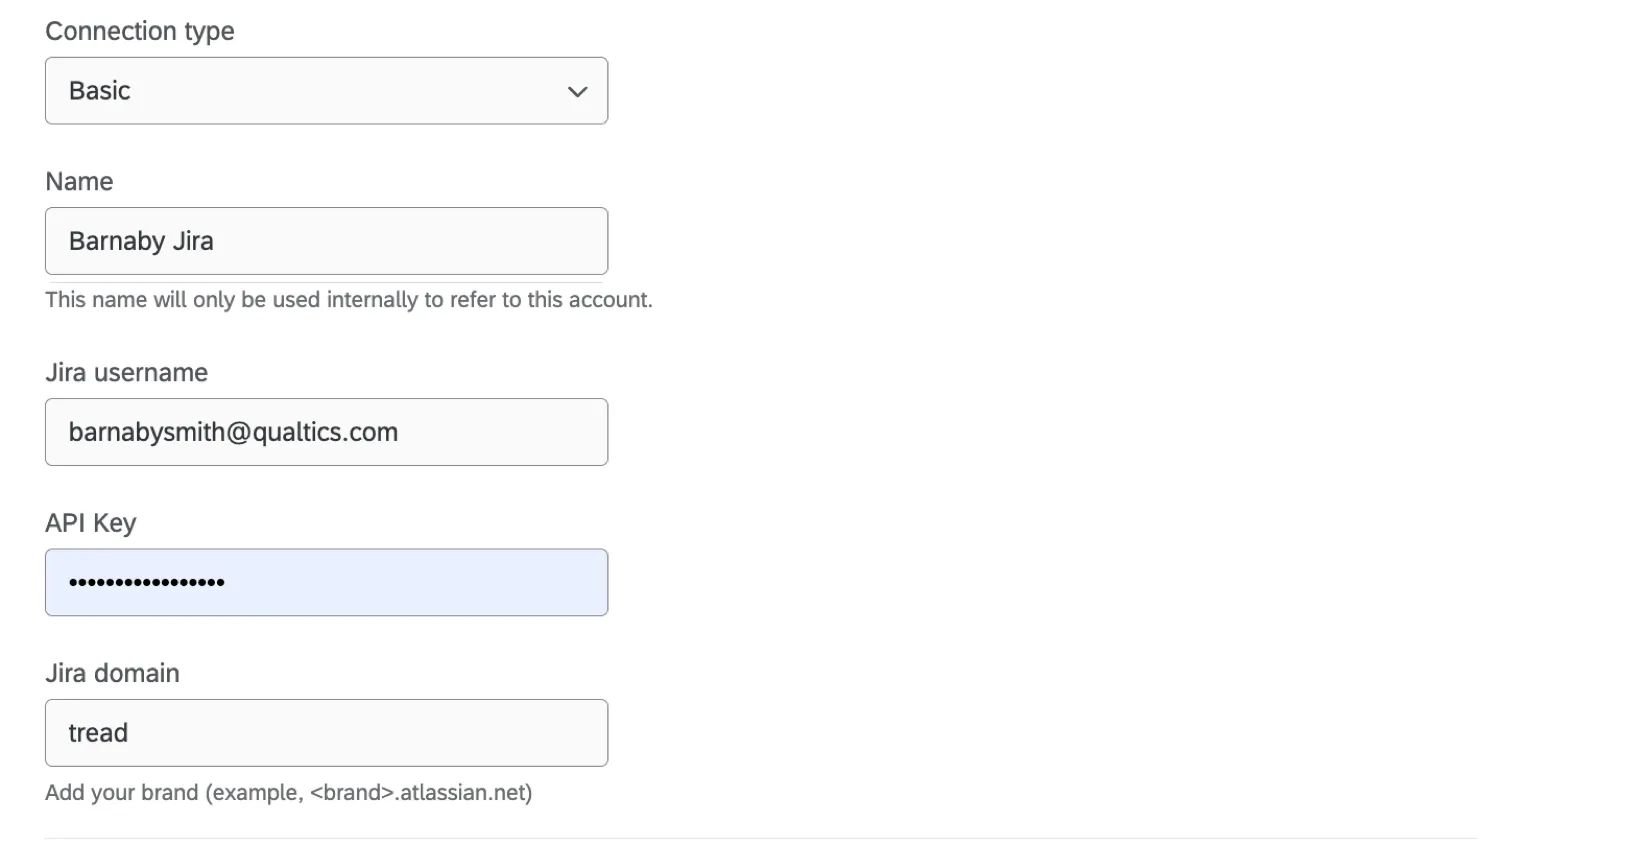
- Jira username: The email address associated with your Jira account.
- API Key: A Jira API token. Only classic API tokens can be used. See Atlassian’s documentation for instructions on how to create a new classic API token. Scoped (Granular) API tokens will not work.
- Jira domain: The domain for your Jira instance, which can usually be found in your browser URL when using Jira.
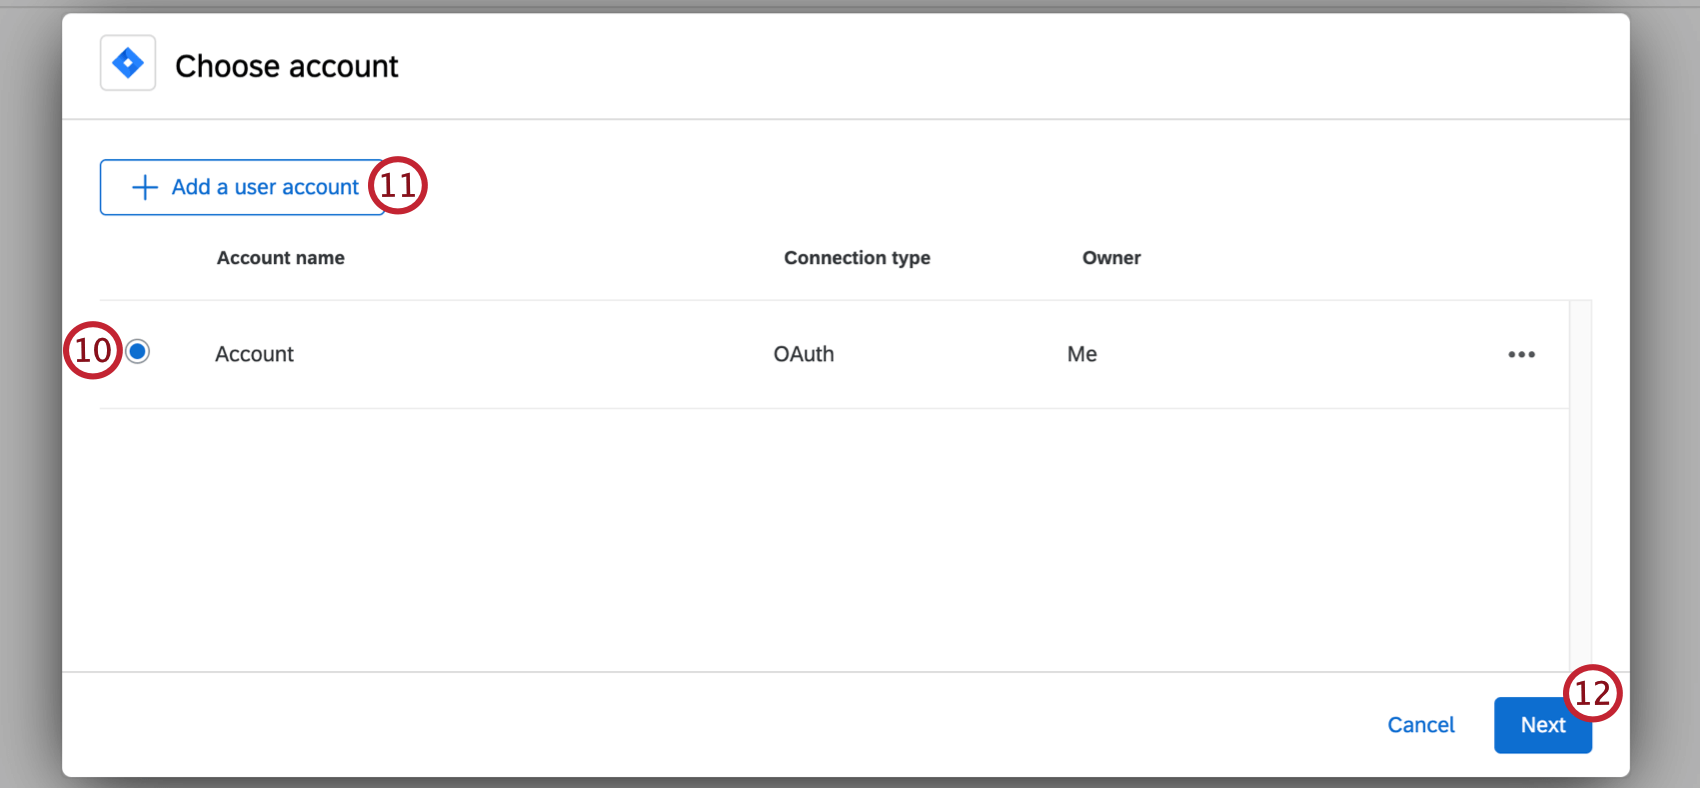
Once credentials are added here, anyone with access to the account will be able to use it in a Jira task.
If you do not add brand-wide credentials, then users creating Jira tasks will still have the opportunity to add their own Jira account, which will only be available to them.
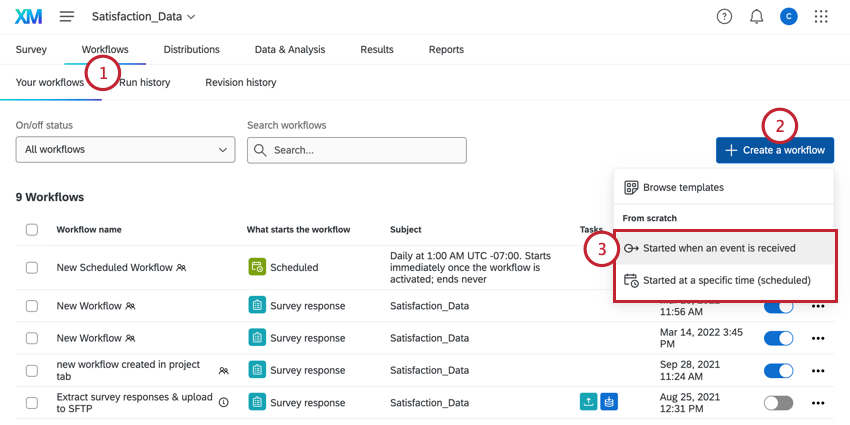
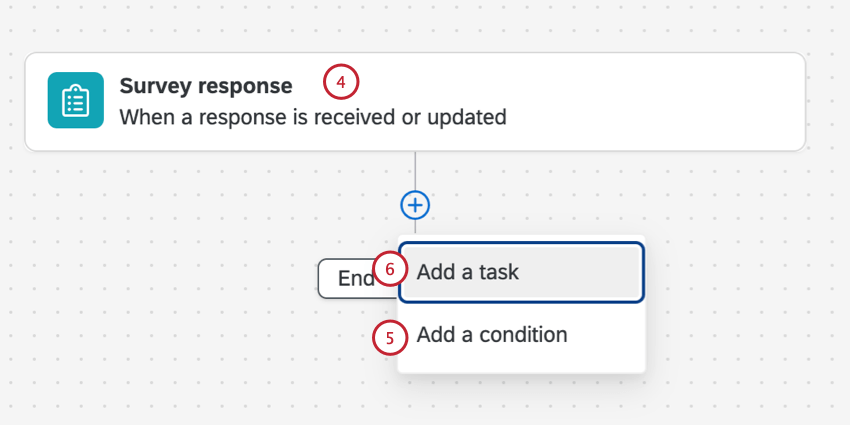
Setting up a Jira Task
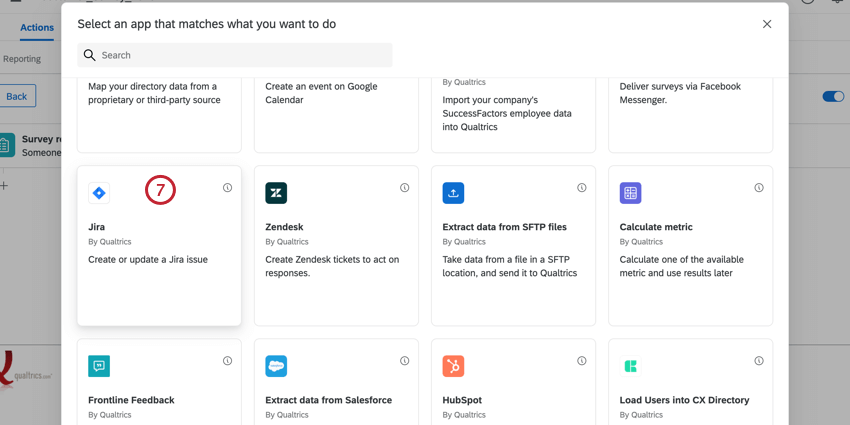
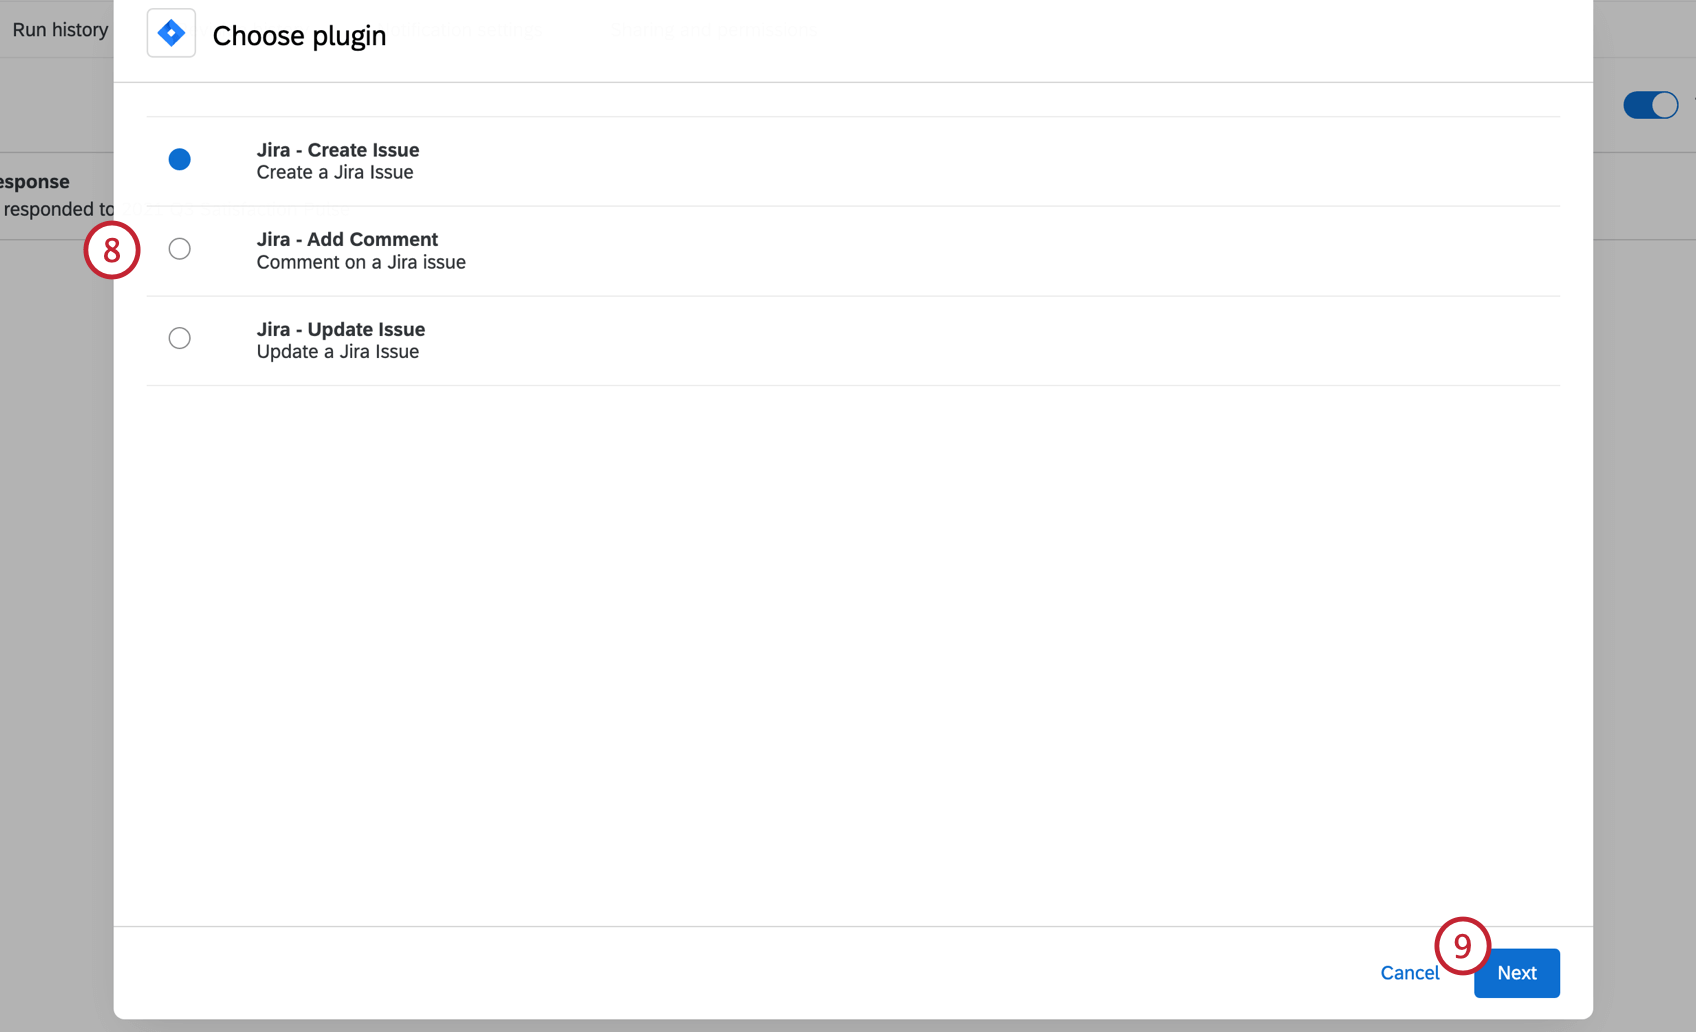
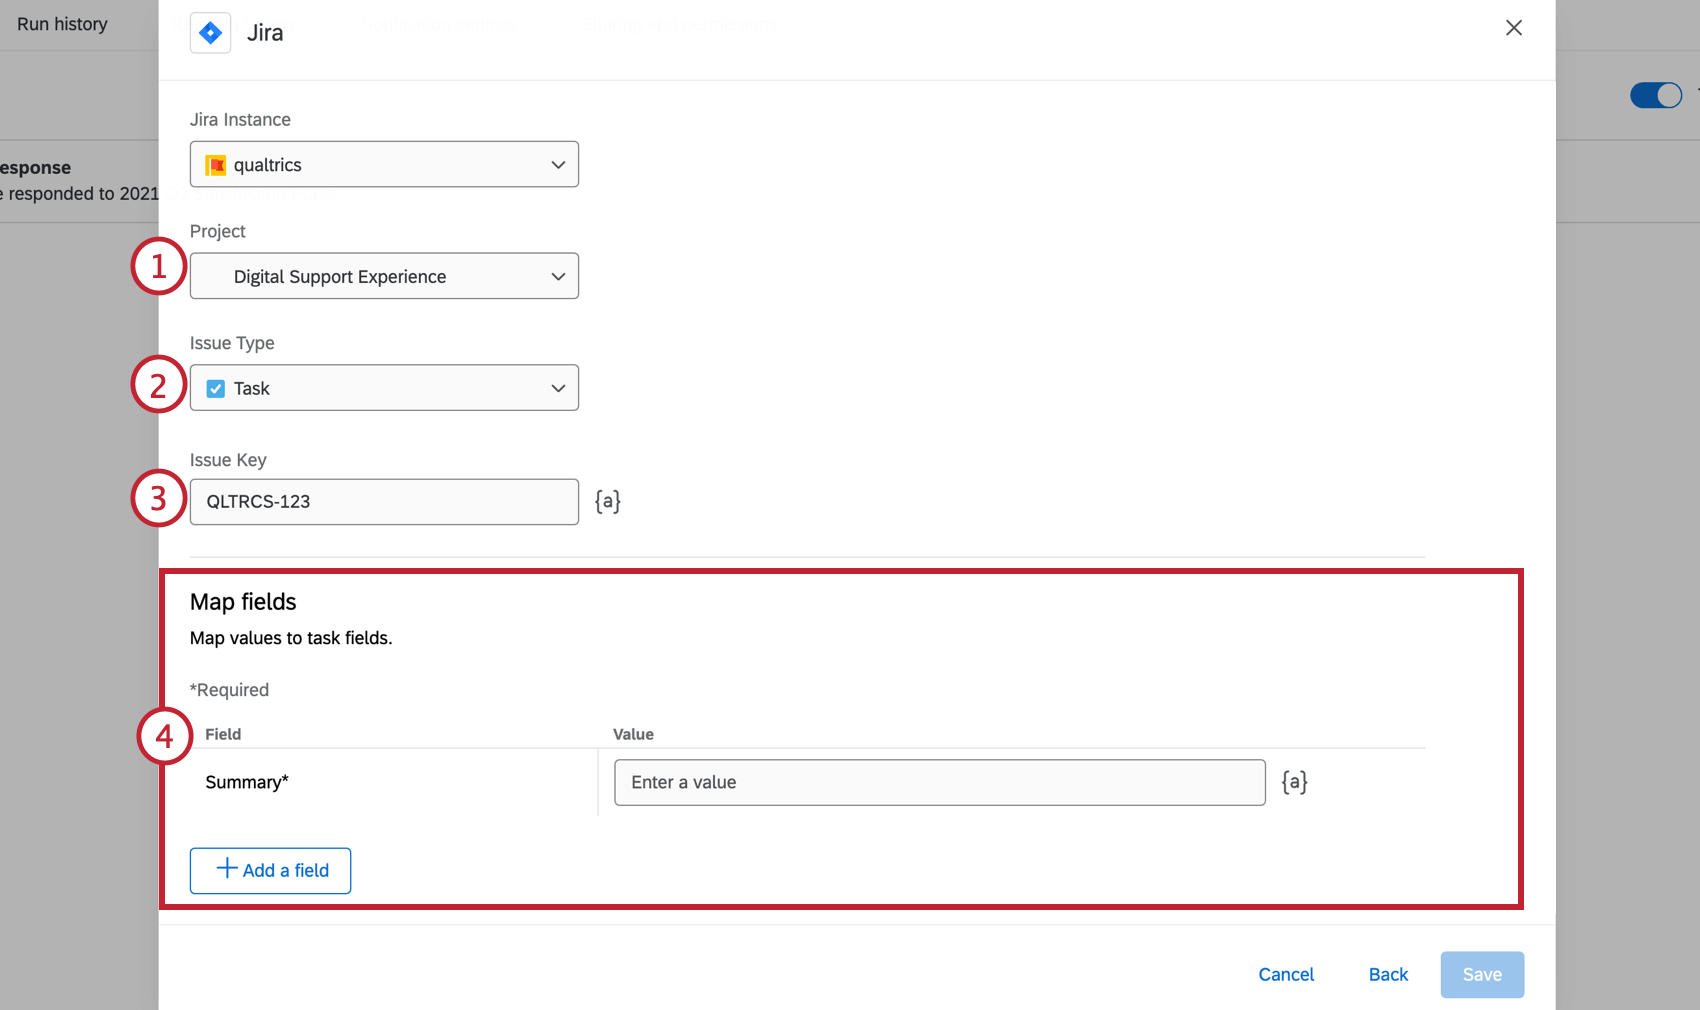
CREATE ISSUE
ADD COMMENT
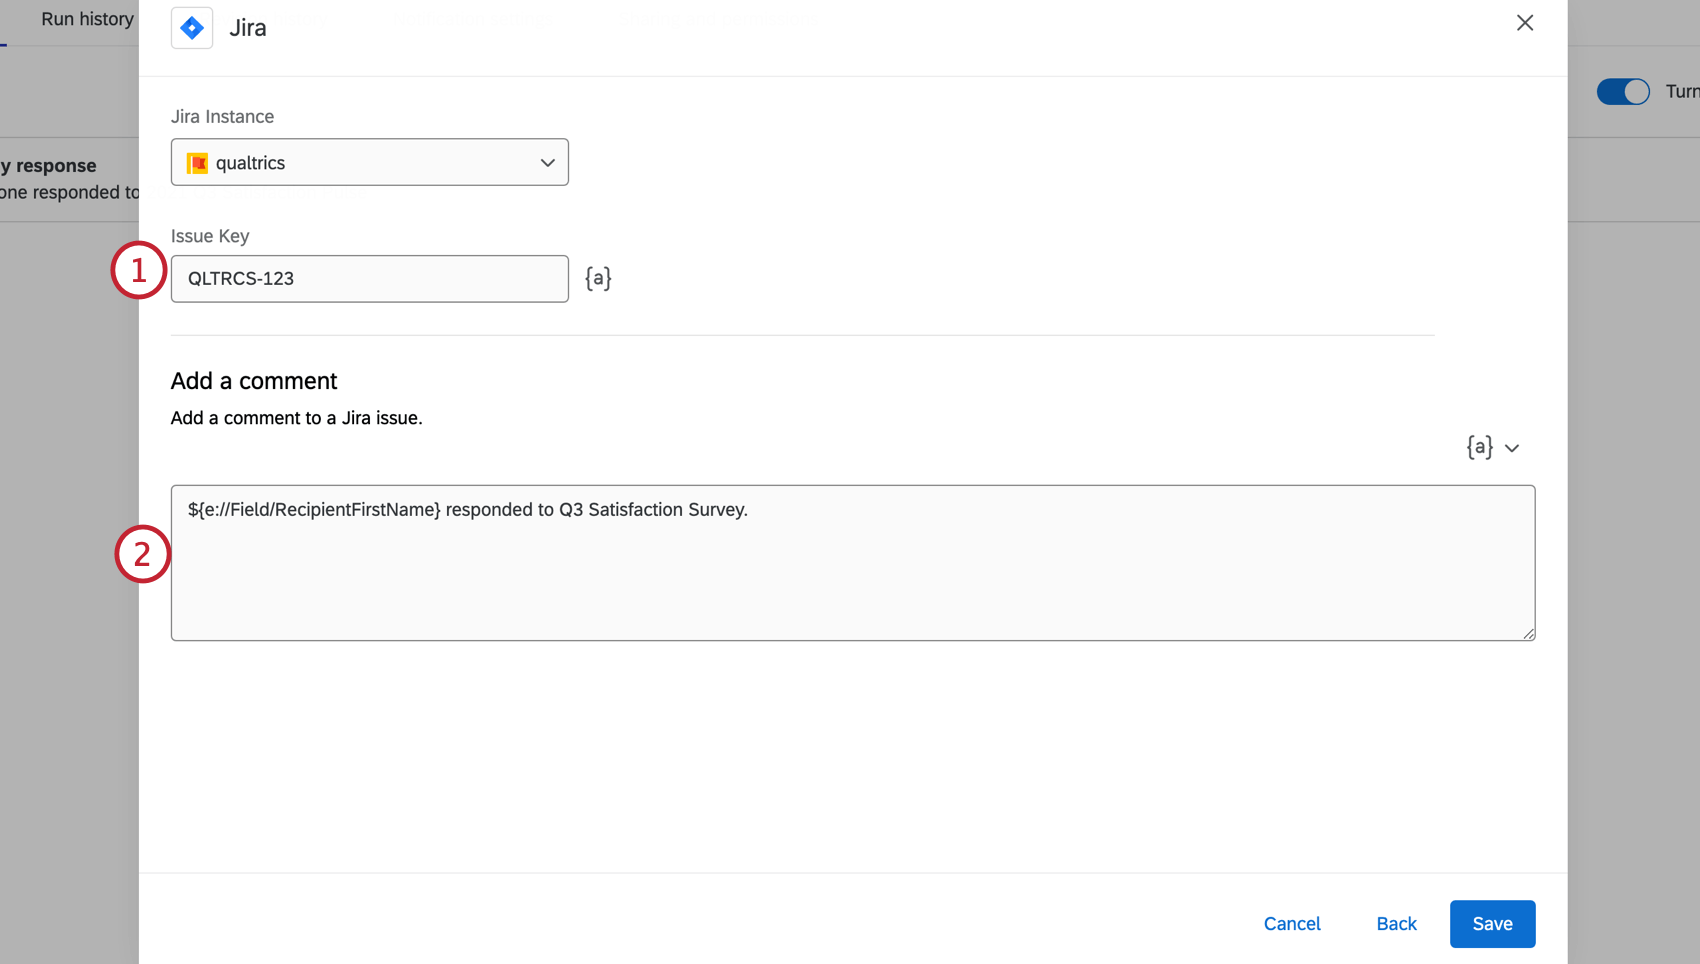
Qtip: If the issue key is being saved in the response as survey data, you can also use Piped Text ( {a} ) to retrieve the key.
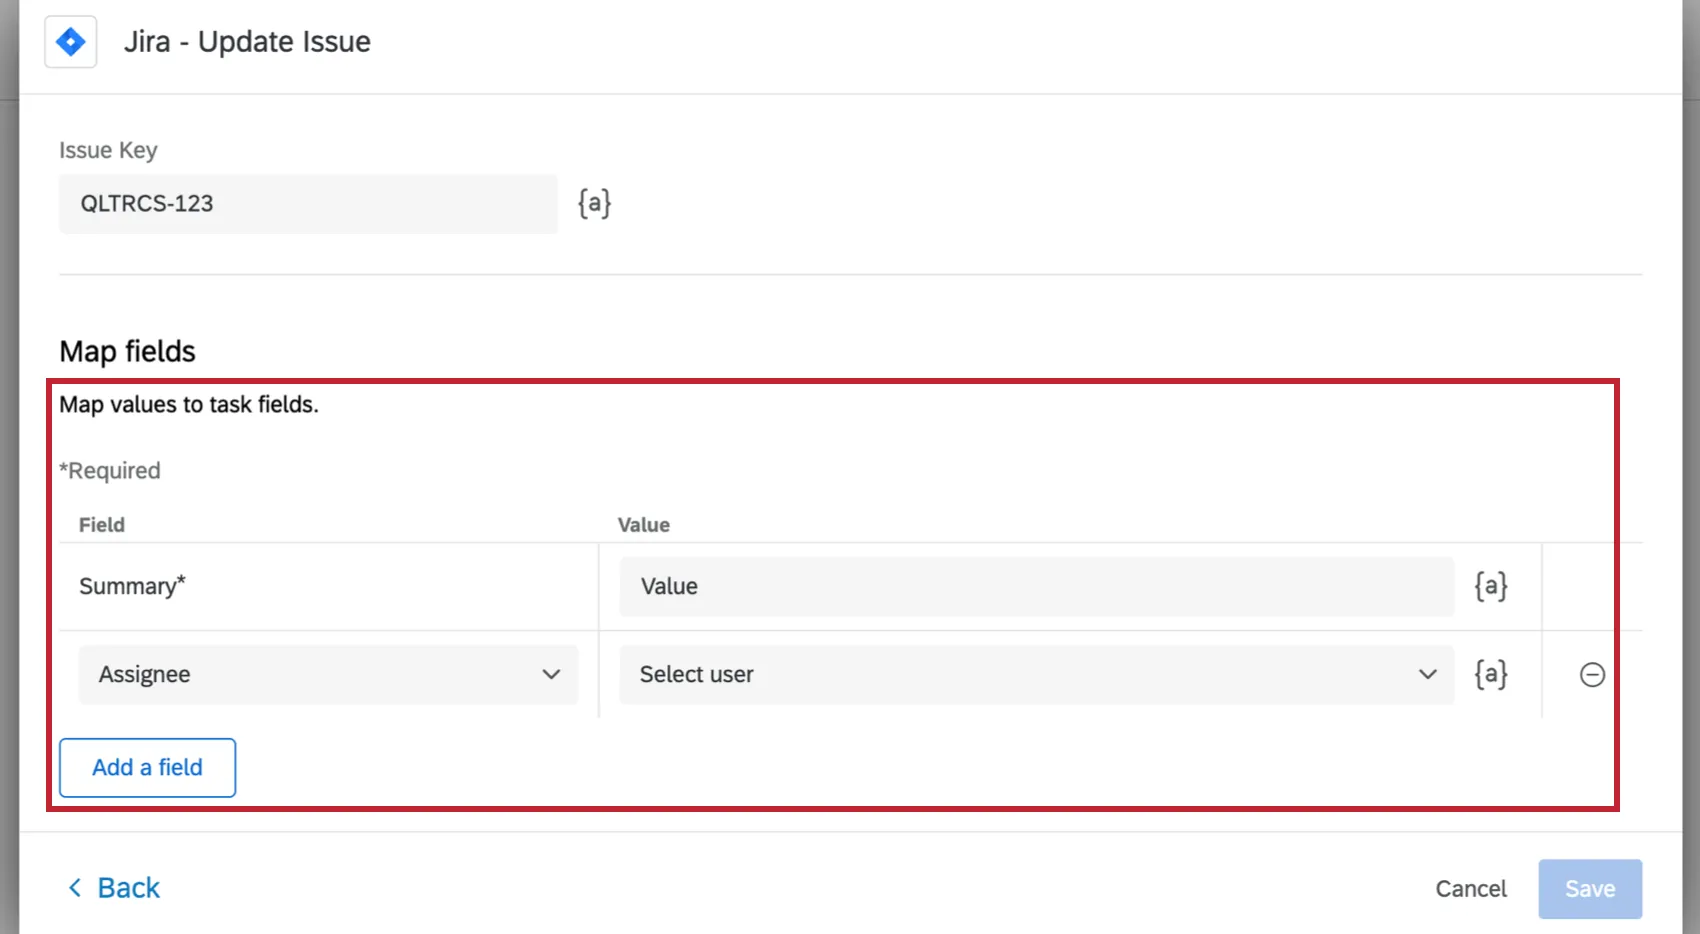
UPDATE ISSUE
Qtip: If the issue key is being saved in the response as survey data, you can also use Piped Text ( {a} ) to retrieve the key.
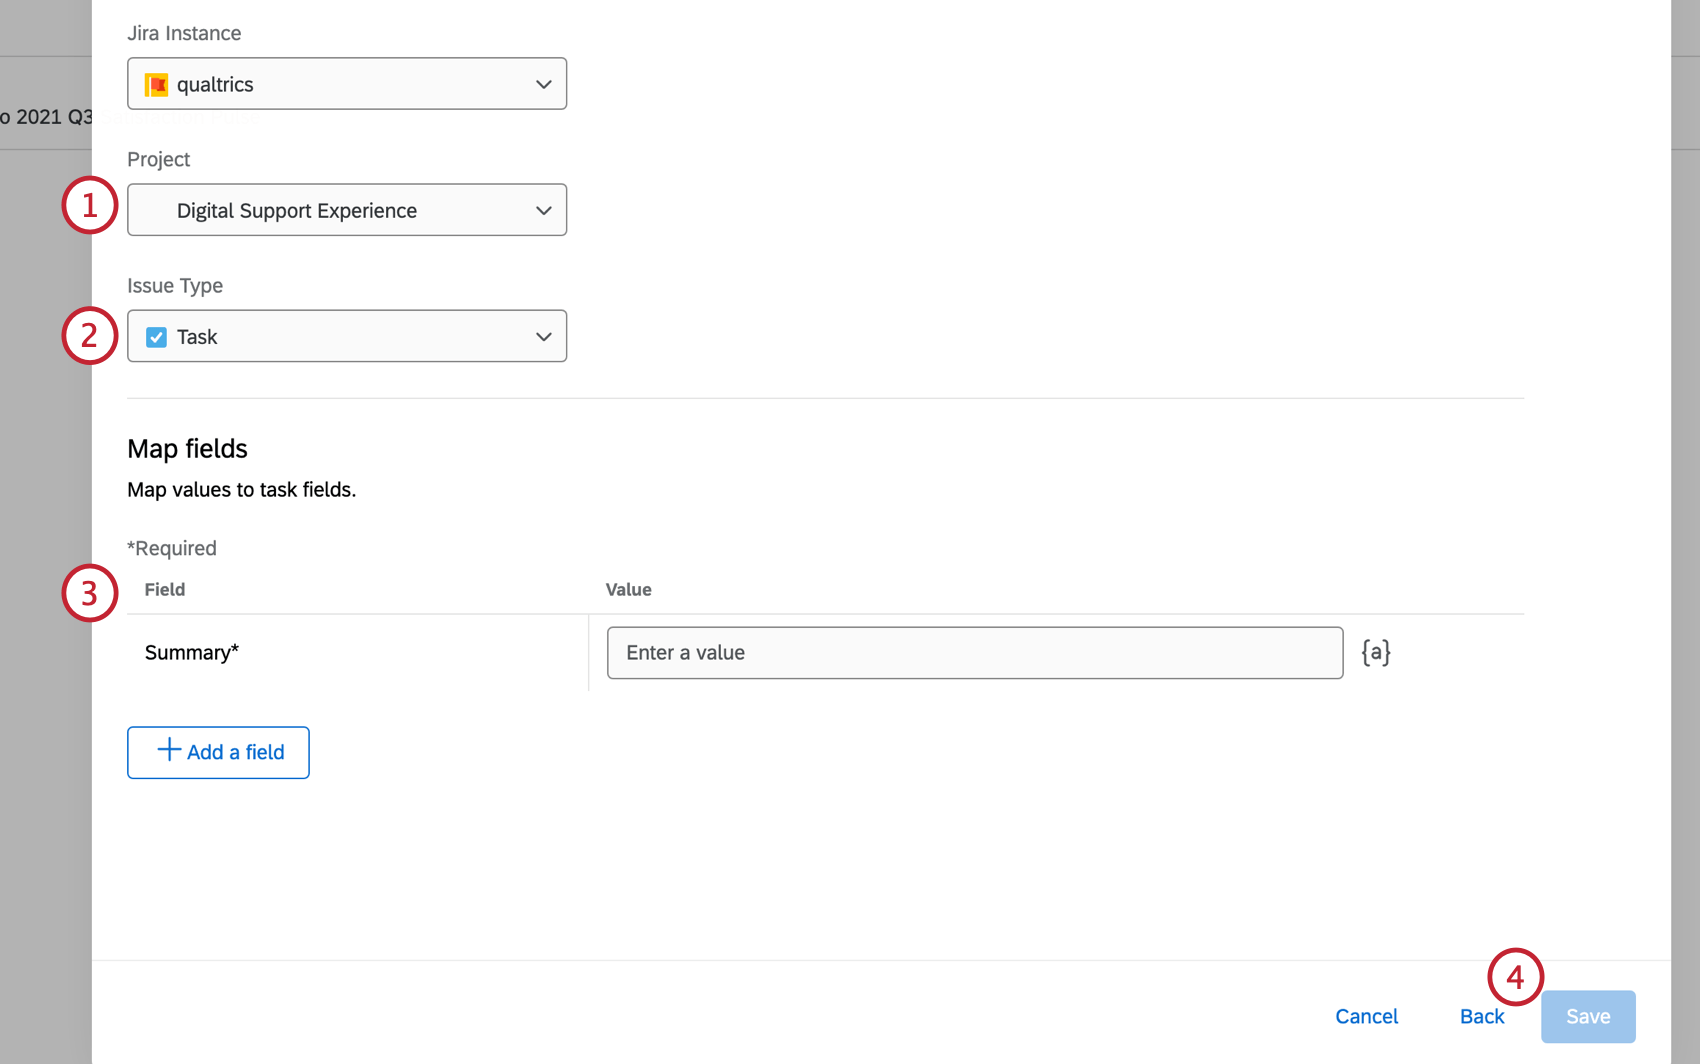
Mapping Issue Fields and Values
Qtip: If you would like more information about fields in Jira, please visit this Jira support page.
Required fields are marked with a red asterisk ( * ). If you do not fill out a required field, you cannot create the Jira task.
- Fields Required When Creating Issues: All issue types require a Summary, which is the name of the issue, or a brief title that explains what you will accomplish. Sub-Tasks also require you add a Parent. This is the issue ID (not issue key) of the task you want to add your sub-tasks to.
- Fields Required When Updating Issues: You must add at least one field with a value of your choosing in order to be able to update an issue.
After the required fields are filled out, you can add any fields you want to the issue. Additional fields you can map vary by instance and project. Examples of common fields provided by Jira include:
- Epic Link: The epic link you want to add to an issue.
- Assignee: The Jira user you want to assign the issue to. You can search a user by their name and select them from the dropdown. Alternatively, you can paste in the user’s account ID (accountId), a 24-digit unique identifier.
- Description: Write a general description of the issue, such as the work involved and the actions that will be taken to resolve it.
Linked issues: Link the issue to another issue in Jira to keep track of related work. Select what type of link you would like to relate the issues by, then select which issue to link to.

Qtip: When using piped text to reference Jira IDs created within the workflow, the piped text for Issue Key must be used.
Qtip: Custom fields of any format (multi-answer, date picker, checkboxes, etc.) are compatible with this extension.
Adding Fields
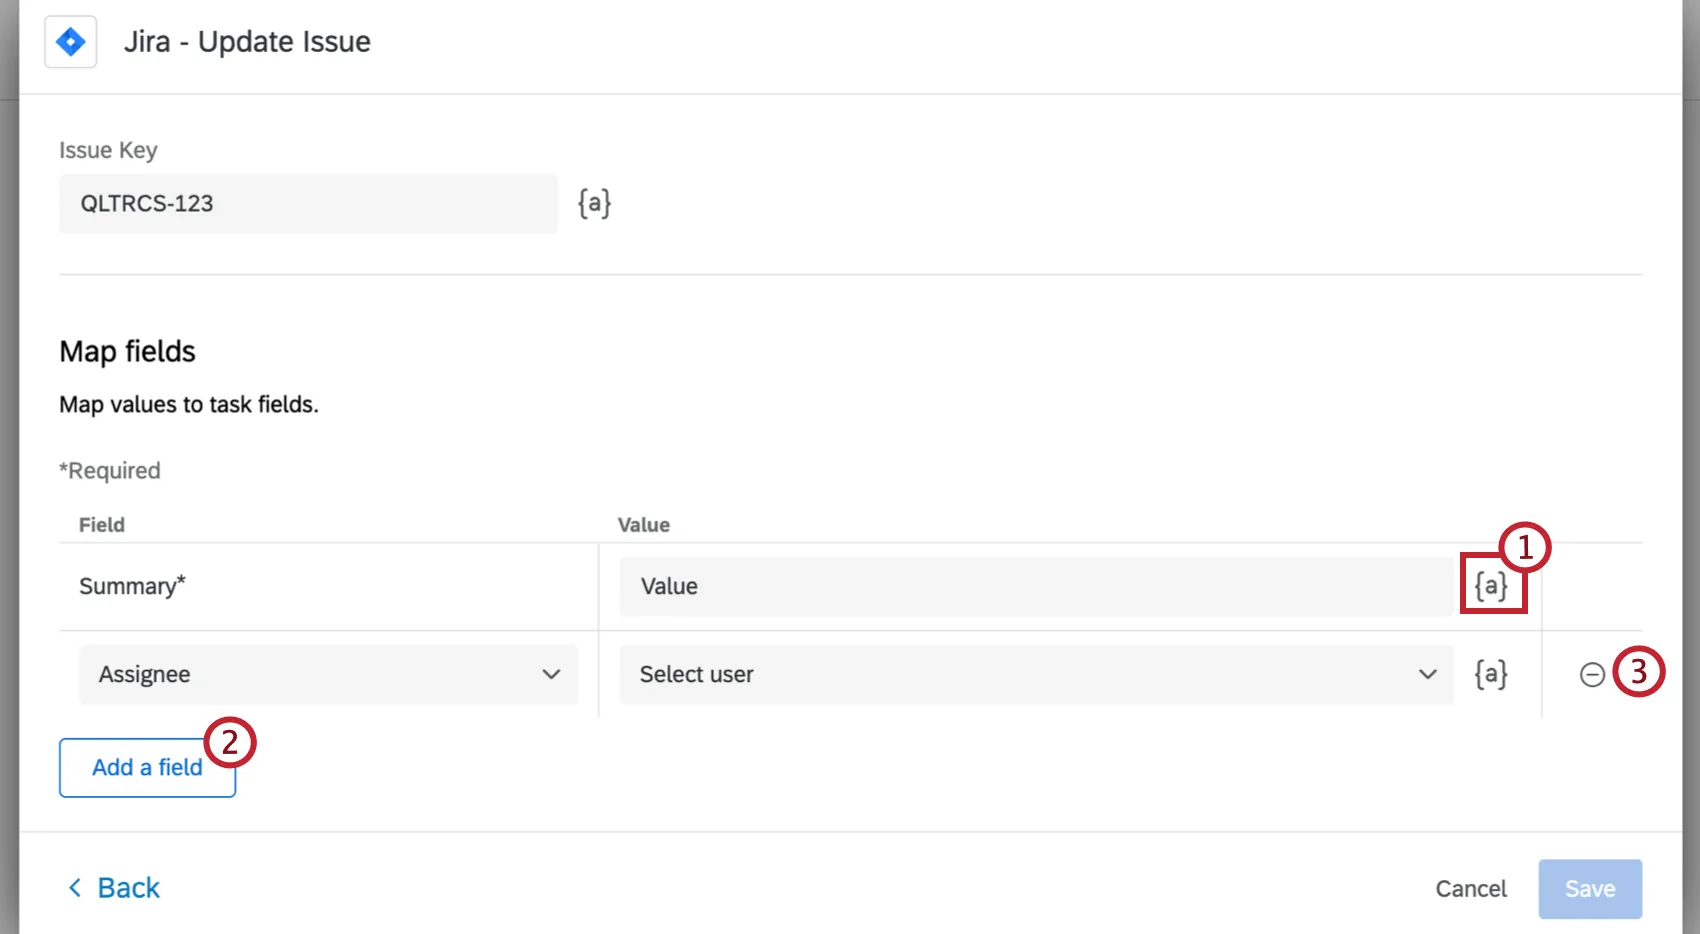
Qtip: If the workflow’s event is not based on survey responses, the piped text fields will be based on the source of your event, e.g., ticket data fields for ticket update events.
Click Save to finish setting up your Jira task.
FAQs
Do I have access to all extensions available through the Workflows templates?
Do I have access to all extensions available through the Workflows templates?
Is there a link to all Workflows events and tasks?
Is there a link to all Workflows events and tasks?
What are Workflows templates?
What are Workflows templates?
What are workflows? / Where are actions?
What are workflows? / Where are actions?
There are no changes to workflow functionality as part of this update.
How can I tell the difference between first party and third party extensions? Where do I go for support for either kind?
How can I tell the difference between first party and third party extensions? Where do I go for support for either kind?
How do I add or remove an extension from my Qualtrics account?
How do I add or remove an extension from my Qualtrics account?
That's great! Thank you for your feedback!
Thank you for your feedback!