-

Qualtrics Platform -

Customer Journey Optimizer -

XM Discover -

Qualtrics Social Connect
Workflows in Global Navigation
About Workflows in Global Navigation
The global workflows page provides a centralized hub for you to view information about all of your workflows, such as your workflows’ run statuses and where they’re located in your account. To navigate to the global workflows page, click the navigation menu in the top-left corner and select Workflows. 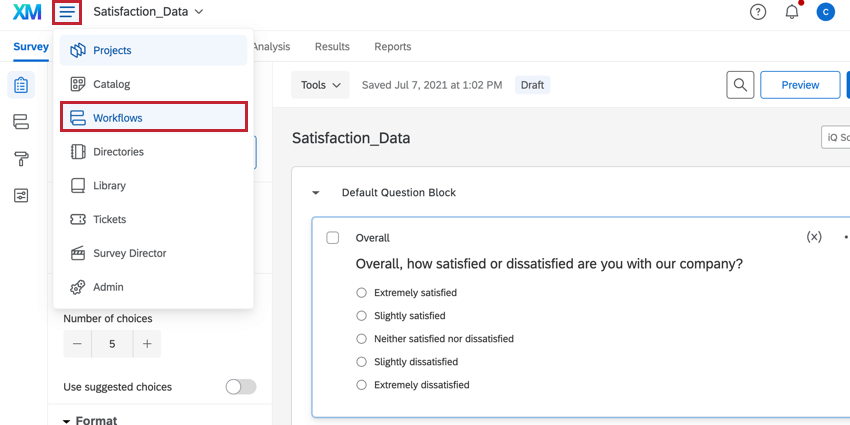
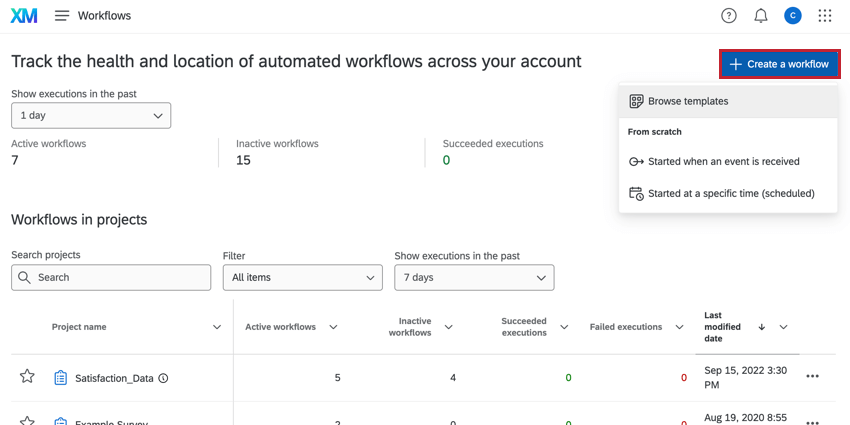
You can also create a workflow that is not associated with a specific project by clicking the Create a workflow button that appears on the global Workflows page.
Using the Workflows Dashboard
The workflows dashboard gives you insight into key metrics about all workflows across your account. This dashboard shows you all workflows you have access to, including workflows you’ve created yourself and workflows that have been shared with you.
At the top of the dashboard, you will see the following performance metrics: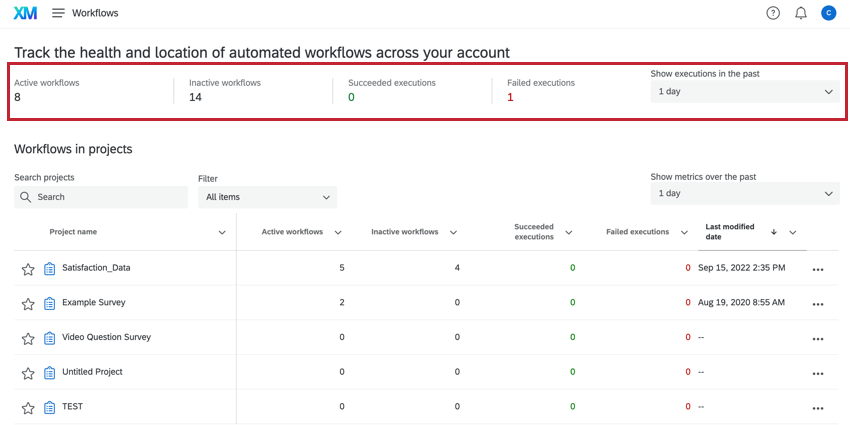
- Active workflows: The number of workflows in your account that are active. An active workflow is a workflow that is turned on in the workflow editor.
- Inactive workflows: The number of workflows in your account that are inactive. An inactive workflow is a workflow that is turned off in the workflow editor.
- Succeeded executions: The number of times your workflows successfully ran within the selected time period.
- Failed executions: The number of times your workflows failed to run within the selected time period.
You can change the time period for these metrics by using the Show executions in the past dropdown. The selected time period is saved for your account, meaning that if you navigate away from global workflows and then come back, your time period selection will be saved.
Workflows in Projects
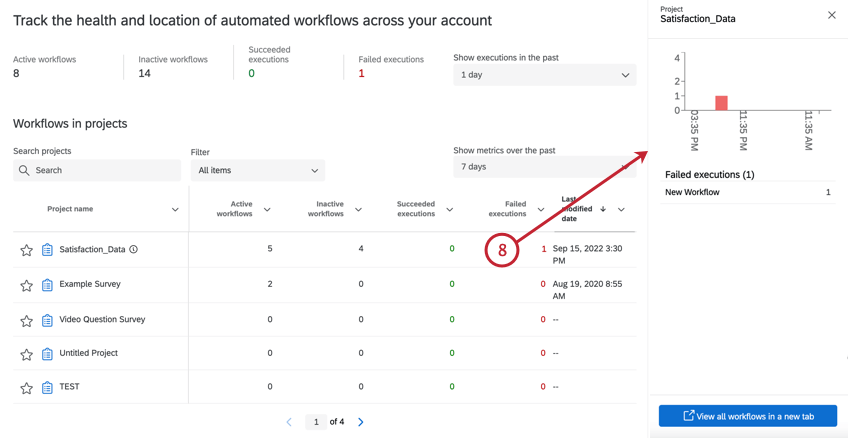
The Workflows in projects section displays all the workflows you have that are associated with a project (i.e., the workflow was created in the “Workflows” tab of the project). In this table, you can: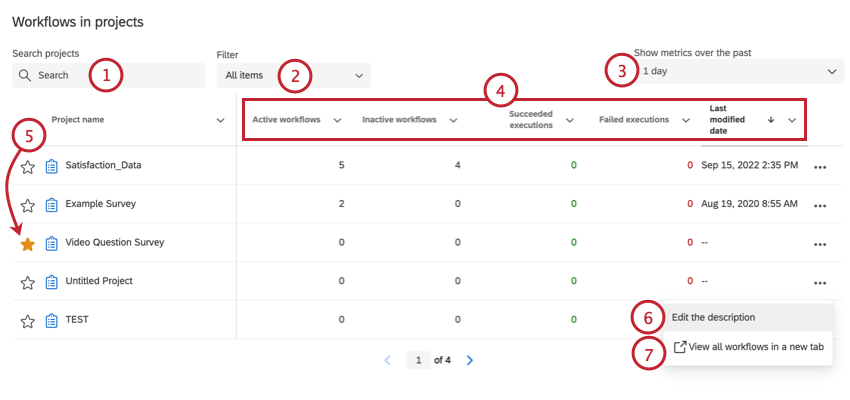
- Search for a specific project by typing in the box.
- Filter your projects. You can filter by Starred items and Items that have workflows.
- Use the Show metrics over the past option to choose the time period for the data that is displayed in the table. Your selection will be saved, even if you navigate away from this page.
- Click a field at the top of the table to sort by that field. By default, the table is sorted by Last modified date. The table displays the following information about your workflows:
- Active workflows: The number of workflows in your account that are active. An active workflow is a workflow that is turned on in the workflow editor.
- Inactive workflows: The number of workflows in your account that are “inactive.” An inactive workflow is a workflow that is turned off in the workflow editor.
- Succeeded executions: The number of times your workflows successfully ran within the selected time period.
- Failed executions: The number of times your workflows failed to run within the selected time period.
- Last modified date: The date and time of the most recent change to the project’s workflows.
- Click the Star next to a project to favorite it. You can filter this table by your starred selections.
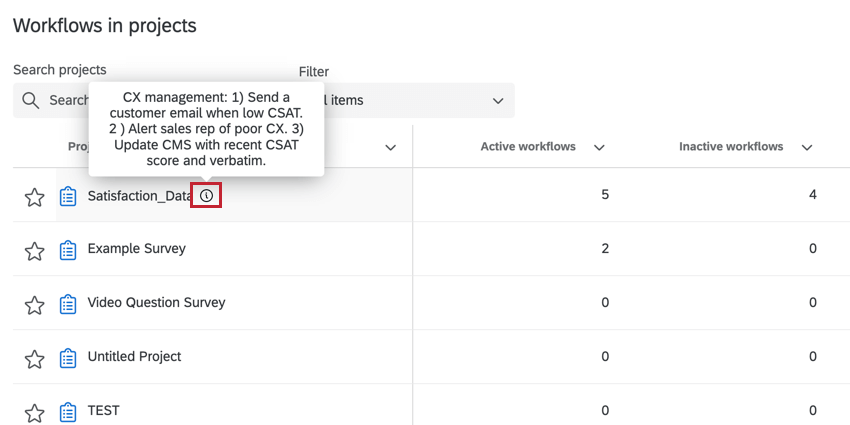
- Click the three dots next to a project and then Edit the description to add a description to your project. This description should provide a summary about the workflows in the project. The description will be displayed in the table as a tooltip and will not be shown to other users who have access to the project.
- Click View all workflows in a new tab to open the Workflows tab of that project in a separate tab in your browser. You can also click the project name in the table to open your workflows in a new tab.
- If you’d like to see more information about the failed executions in a project, click on its data in the table. A side panel will open up with information about the failures, including when they happened and for which workflows in the project. You can click on a workflow’s name to be brought directly to it, or click the View all workflows in a new tab button to open the Workflows tab of that project in a separate tab in your browser.
Stand-Alone Workflows
The Stand-alone workflows section displays workflows that are not linked to a project. The table in this section functions the same as the “workflows in projects” table. See the above section for more details.
You can view all of your stand-alone workflows using 2 different options: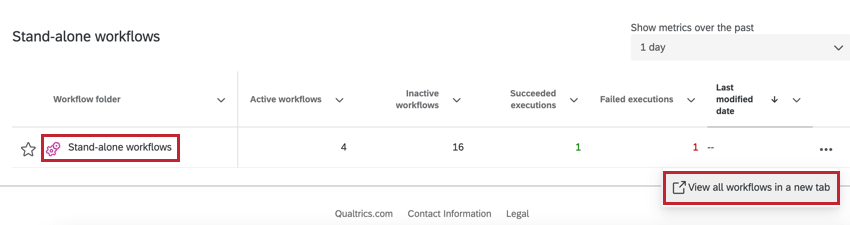
- Click Stand-alone workflows in the table
- Click the three dots in the table and then View all workflows in a new tab.
After choosing one of these options, you will be directed to a page that lists all stand-alone workflows you have access to. You can select a workflow to edit it and view more information about the workflow.
For more information on building and managing workflows, see Workflows Basic Overview.