
Load B2B Account Data into XM Directory Task
What's on this page
Attention: This task is on the path to deprecation and new tasks can no longer be created. Please use the Add Contacts and Transactions to XMD task instead. B2B tasks that are enabled and have a successful run within the past month will be automatically migrated to the “Add Contacts and Transactions to XMD” task.
About the Load B2B Account Data into XM Directory Task
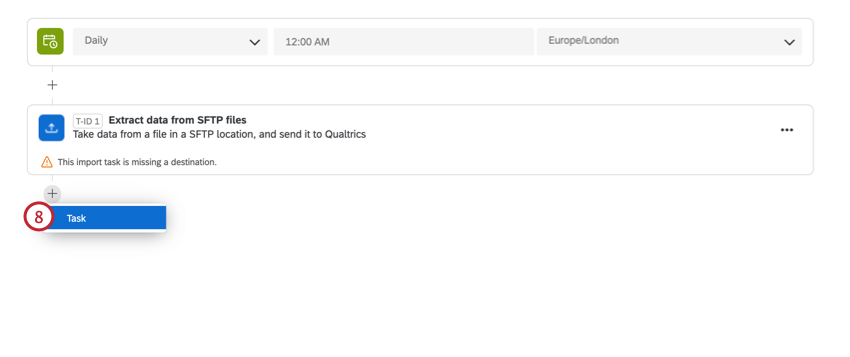
The Load B2B account data into XM Directory task allows you to map data imported into Qualtrics to your XM Directory. For example, you can use an Extract data from SFTP files task to import data into Qualtrics and then map that data to your directory.
Qtip: For more information on using data loading and extracting tasks, see using Workflows tasks to build ETL workflows.
Qtip: For information on general limits that apply to ETL workflows, see Workflow Limits. For any task-specific limits, refer to the information on this page.
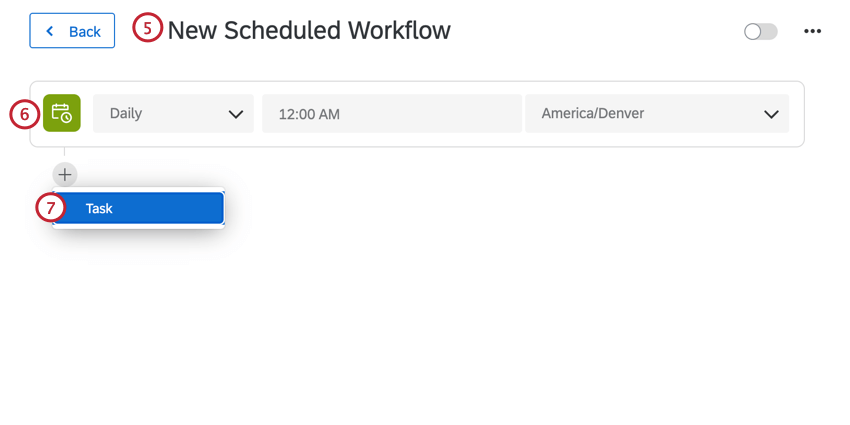
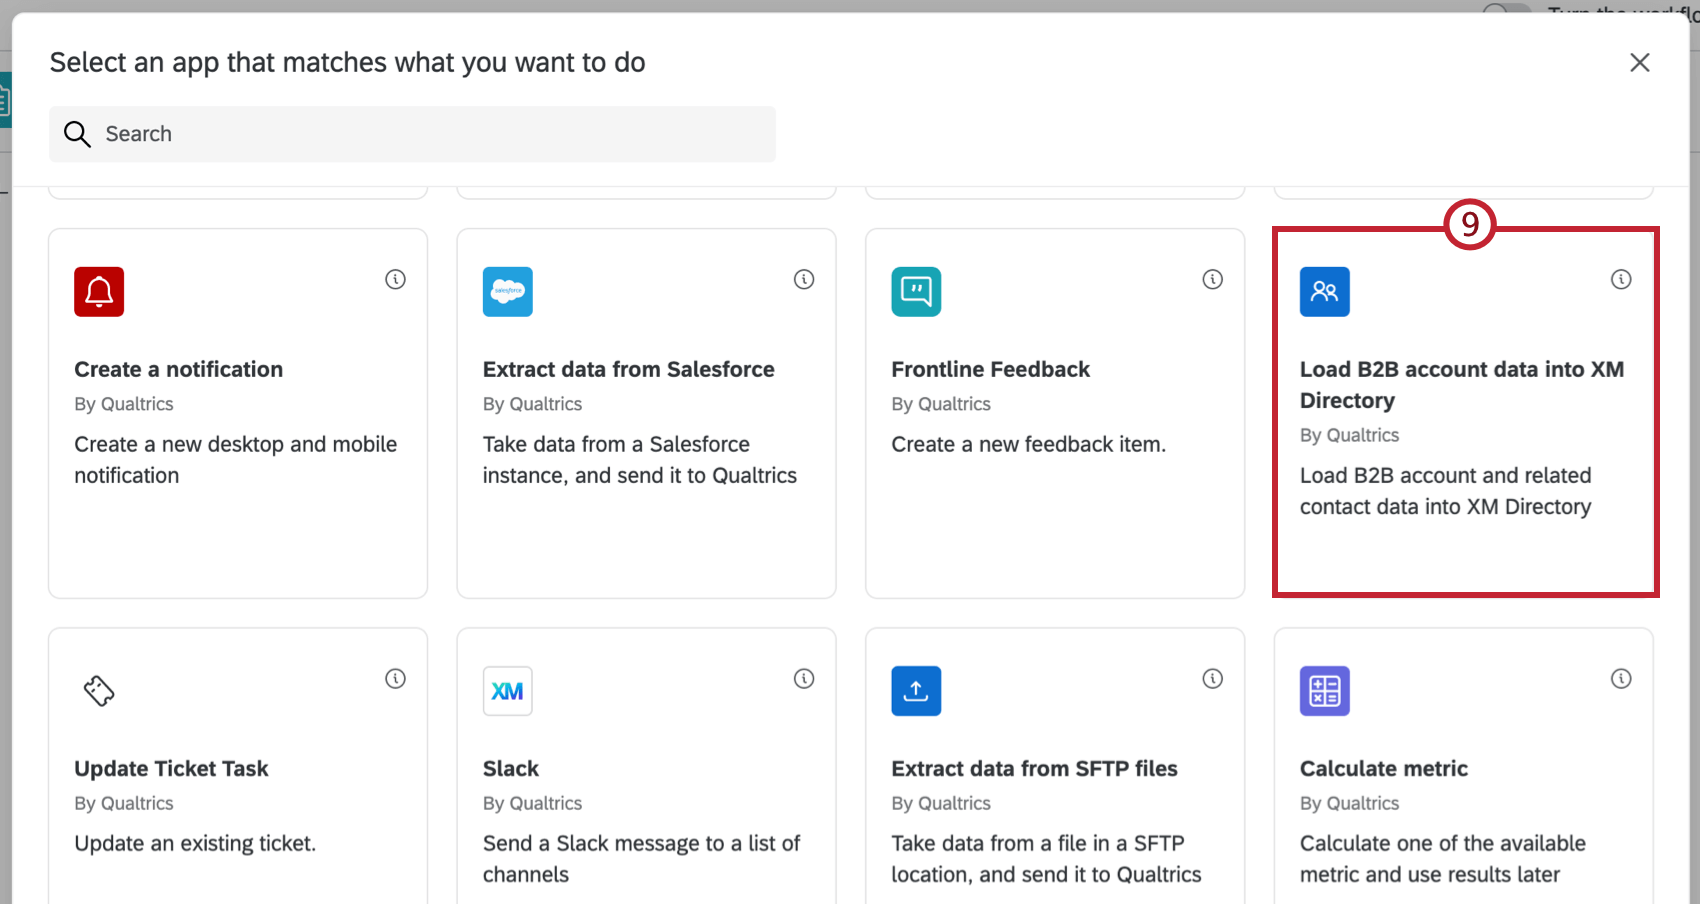
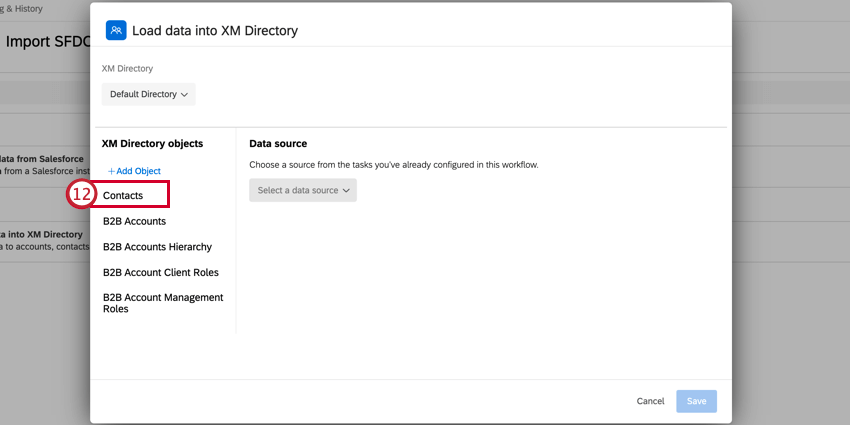
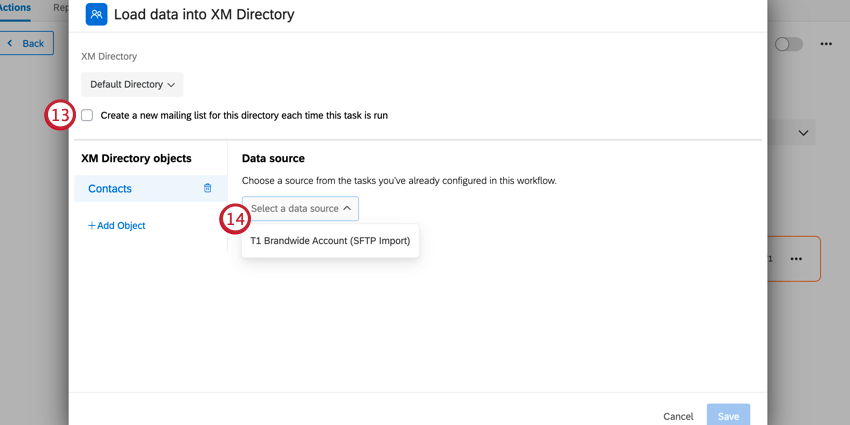
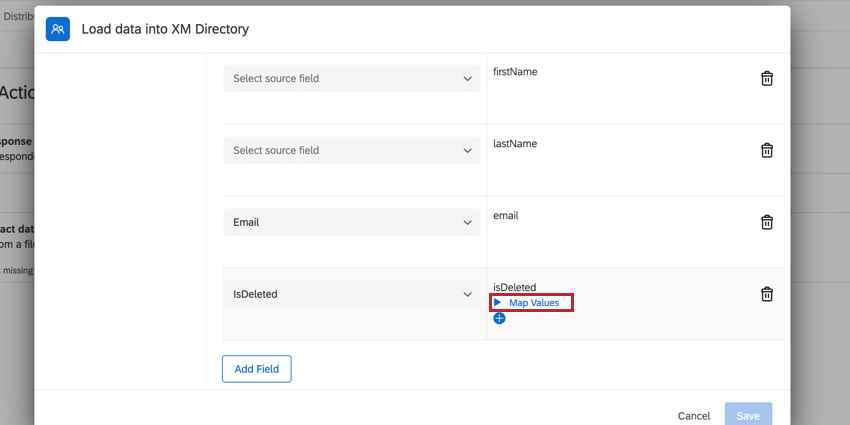
Setting Up a Load B2B Account Data into XM Directory Task
Qtip: Since this task is being deprecated, new tasks cannot be created. Use the Add Contacts and Transactions to XMD task instead.

Qtip: Usually, you’ll use a scheduled workflow so that your data is regularly up to date.
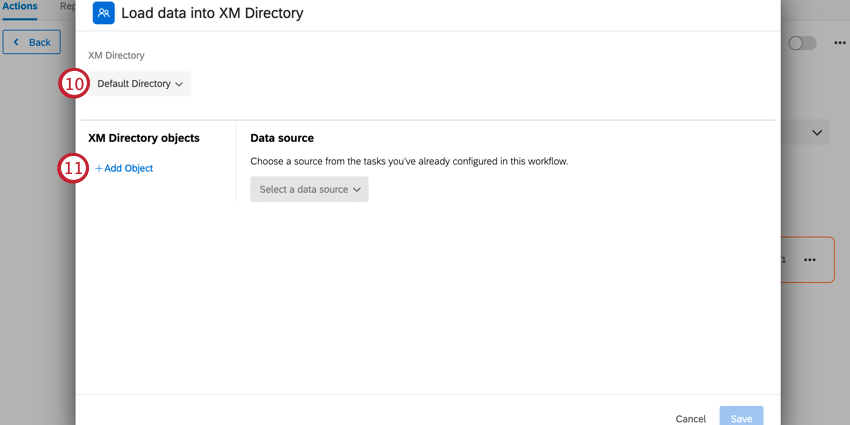
Qtip: Most licenses only have a default directory, but some may have multiple.
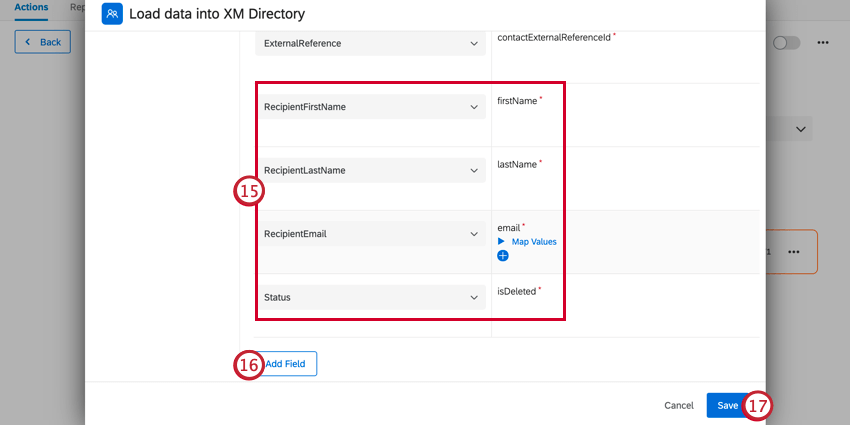
Qtip: You can also map individual field values. See Mapping Field Values for more information.
Qtip: This task obeys your directory’s contact deduplication rules.
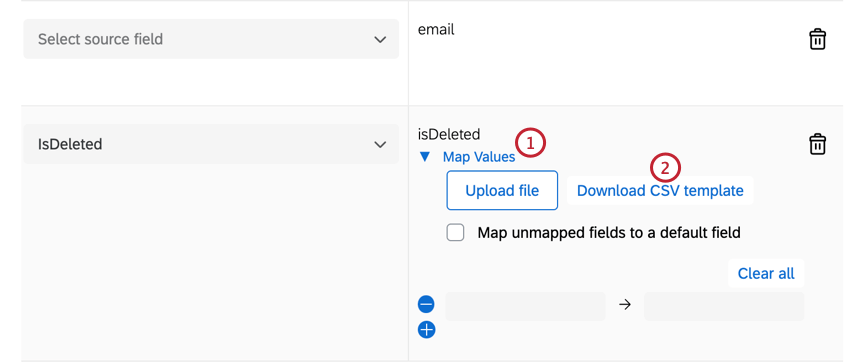
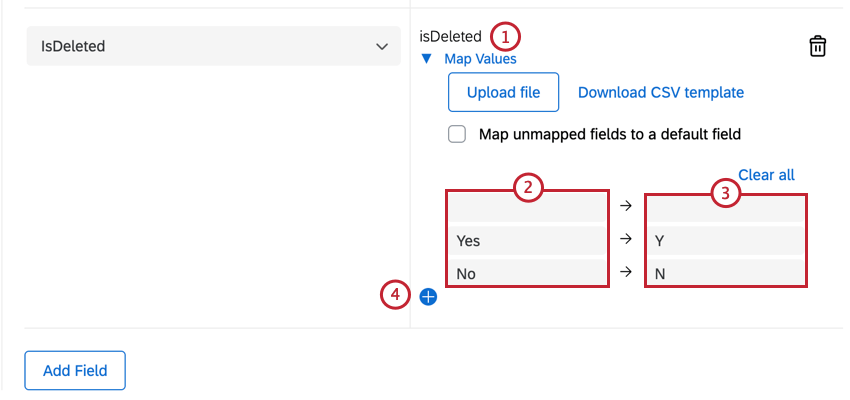
Mapping Field Values
You can map individual field values to save into Qualtrics. You have the option of mapping fields manually, or uploading a file containing your mappings. Additionally, you can determine what happens to unmapped fields.
Example: Let’s say I’m importing a field with source values of “Yes” and “No.” In Qualtrics, I want these saved as “Y” and “N.” I can map my values so they are saved with my desired format in Qualtrics.
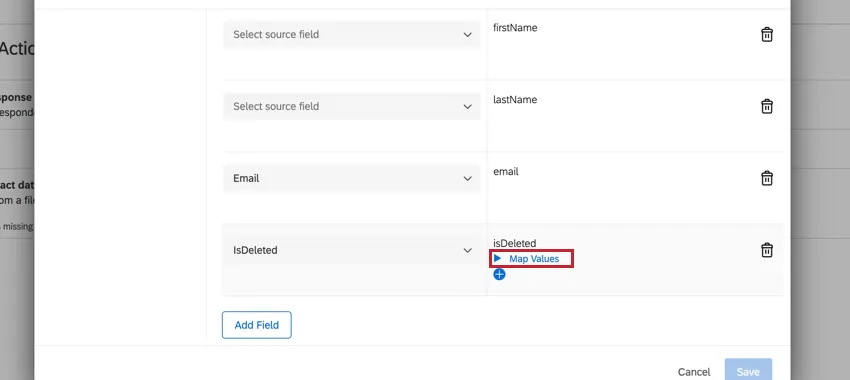
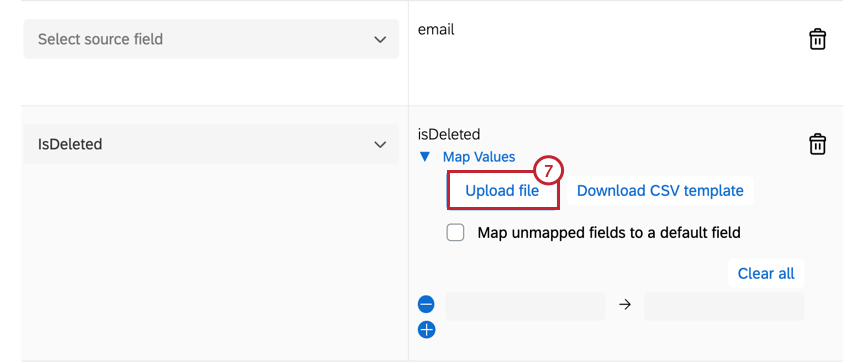
To start mapping field values, click Map Values under the desired field.
Mapping Values with a File Upload
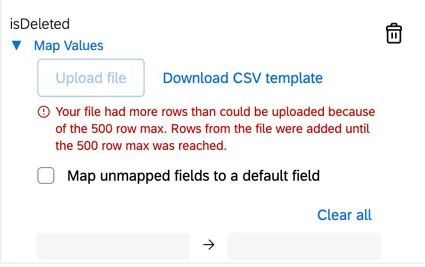
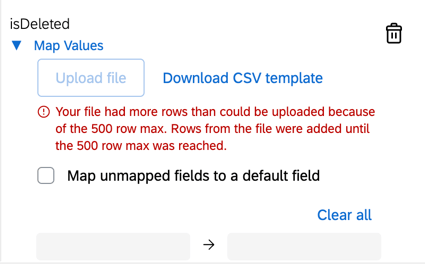
You have the option of uploading a CSV or TSV file containing your mapping. This is recommended if you have many values to map. If you have already mapped some values, uploading a file will not replace those mappings. Your newly added mappings will be added beneath the already mapped values.

- You may have up to 500 mapping pairs. If your file contains more than 500 mappings, then you will receive an error message and only the first 500 rows will be uploaded.
- Make sure your file contains the “from” and “to” headers. If these headers are not detected, then Qualtrics will assume the first column is “from” and the second column is “to.”
Manually Mapping Values
You can manually map field values. This is recommended only if you have a few values to map.
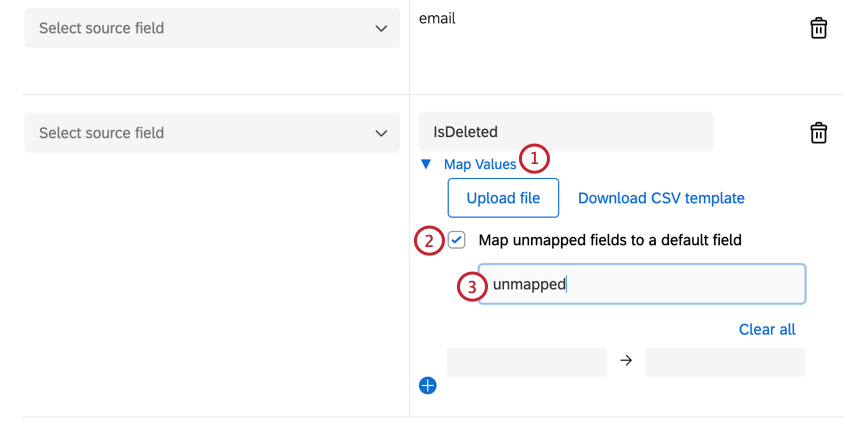
Handling Unmapped Fields
By default, if a field value is not mapped, then the field will be imported into Qualtrics using its source value. However, you can choose to map all unmapped values to a default field value.
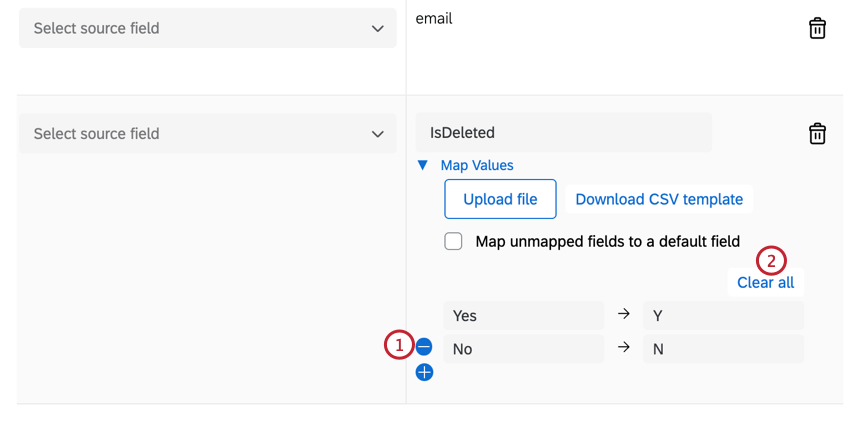
Deleting Mappings
Troubleshooting Tips
- When investigating what went wrong with a workflow task, check out Workflows reporting for any errors and correct them before retrying your task.
- Contact deduplication allows you to retry your task without creating duplicate contacts. Make sure to set up contact deduplication rules when testing and retrying this task.
FAQs
Do I have access to all extensions available through the Workflows templates?
Do I have access to all extensions available through the Workflows templates?
Is there a link to all Workflows events and tasks?
Is there a link to all Workflows events and tasks?
What are Workflows templates?
What are Workflows templates?
What are workflows? / Where are actions?
What are workflows? / Where are actions?
There are no changes to workflow functionality as part of this update.
That's great! Thank you for your feedback!
Thank you for your feedback!